|
It seems that I may be the only shop
in Oregon willing to make these sort of custom flashing kits for
chimneys, and perhaps the only shop throughout the USA. Other shops will not understand these sort of requirements
needed for such a kit, or do not want to
bother dealing with Homeowners on such small $ orders like this.
Wehre I have personally reflashed dozens of chimneys, so I have a
much better undertanding of what this requires. I also make these
kits using a thicker copper than other shops.
This is
where I come in
Why is this such a
problem that I would need your service?
This is a huge problem
within all States,
because chimney flashing has clearly been the #1 most
neglected area of a roof done by even the most professional Roofers when reroofing
your house. It is very rare they will
even bother to replace the counter-flashing at all, let alone use a
rust free flashing in aluminum, stainless steel, or copper. Any other metal than steel,
so that is
sure to not rust away over time.
Believe
it or not using a
cheaper steel flashing in stead of a thicker aluminum around your chimney saves them
less than the
cost of a burger, but they don't seem to care. Painted steel is
use over 95% of the time, even though they know it will not even last as long as just
a low life 25 year shingle.
From what I've seen Most Roofers will not even
bother to replace that old flashing at all. No matter how rusty it is.
As you can imagine steel flashing should never be reused even if it
had not yet started to rust. It should always be replaced when
reroofing a house, unless it is a better solid copper flashing, since
steel could not possibly hold up for the next
several decades like the new roofing should. It is just plain simple
logic, but seems to escape so many Roofers.
I just came back from the
Nation MetalCon in Denver 2014 and saw how 90% of what they were
pushing was painted steel for exterior applications. It sickened me
to see such horrible standards being shamelessly represented there.
I kept saying to those reps at each booth: 'You know iron is a 4
letter word, right?'. I would often go as far as to exclaim how I
believe 'steel' needs to be made illegal for any roofing
applications! They looked at me as if I had just insulted their
Wife. Sadly I doubt I had made much of an impact on how they will
continue to do business. I go into this in more detail on my web
page about Roofing.
If your flashing is not
yet showing signs of rust you can do a simple magnet test to
tell if you have steel flashing, since only steel with iron will attract a magnet, out of all the
many other different types of metal: aluminum, zinc, magnesium, brass,
copper, bronze, good stainless steel, titanium, silver, gold,
platinum, and several others not mentioned here. These metals may
oxidize, but they will not rust within a decade of exposure; causing unsightly stains and
developed holes soon after that. Steel is a cheap sturdy metal
that handles heat well, but mostly used for it's planned
obsolescence than any other reason. The fact it does not last long just helps
their profit margin for repeat business, yet how much will you and
your house suffer after the leaks start showing from inside before you have
a chance to find a
reliable Contractor, then wait for them to fit you into their
schedule.
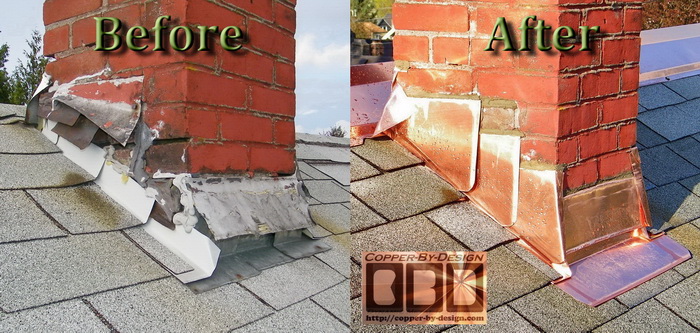
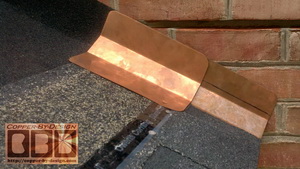
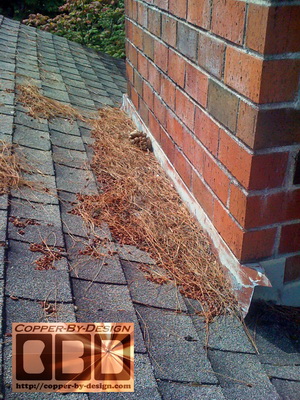
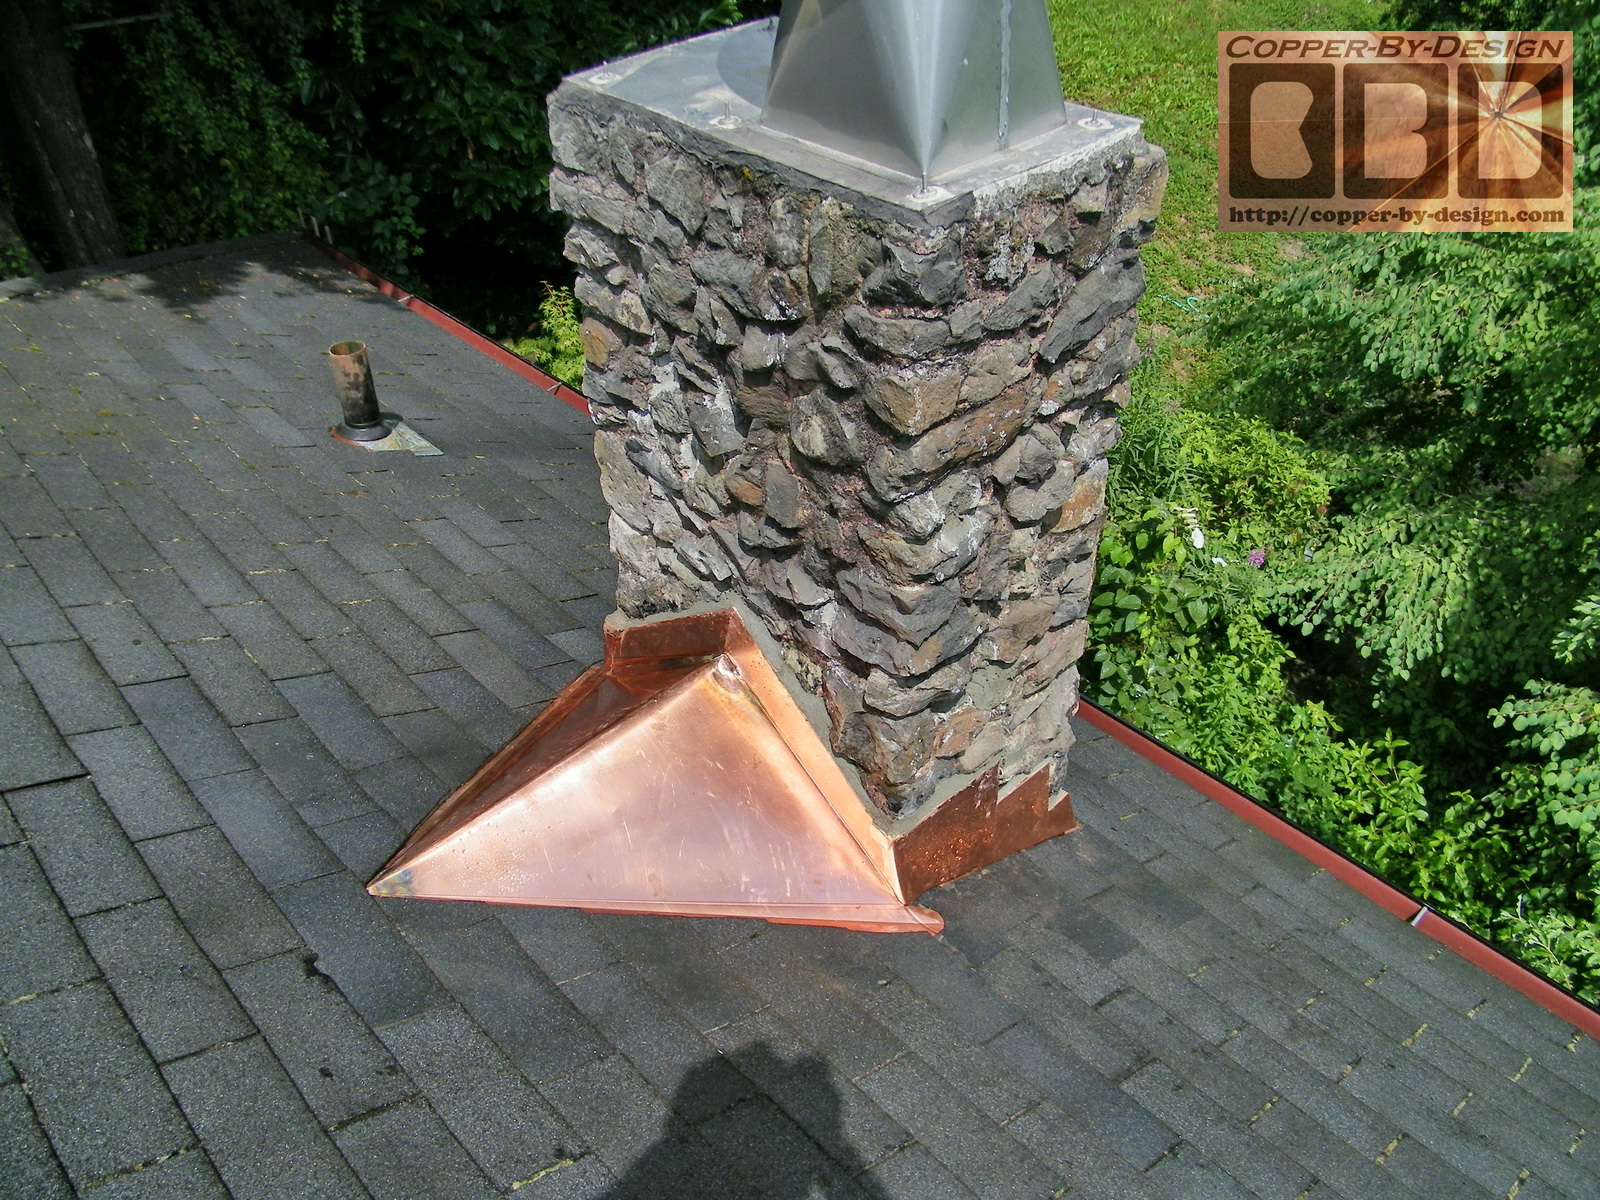
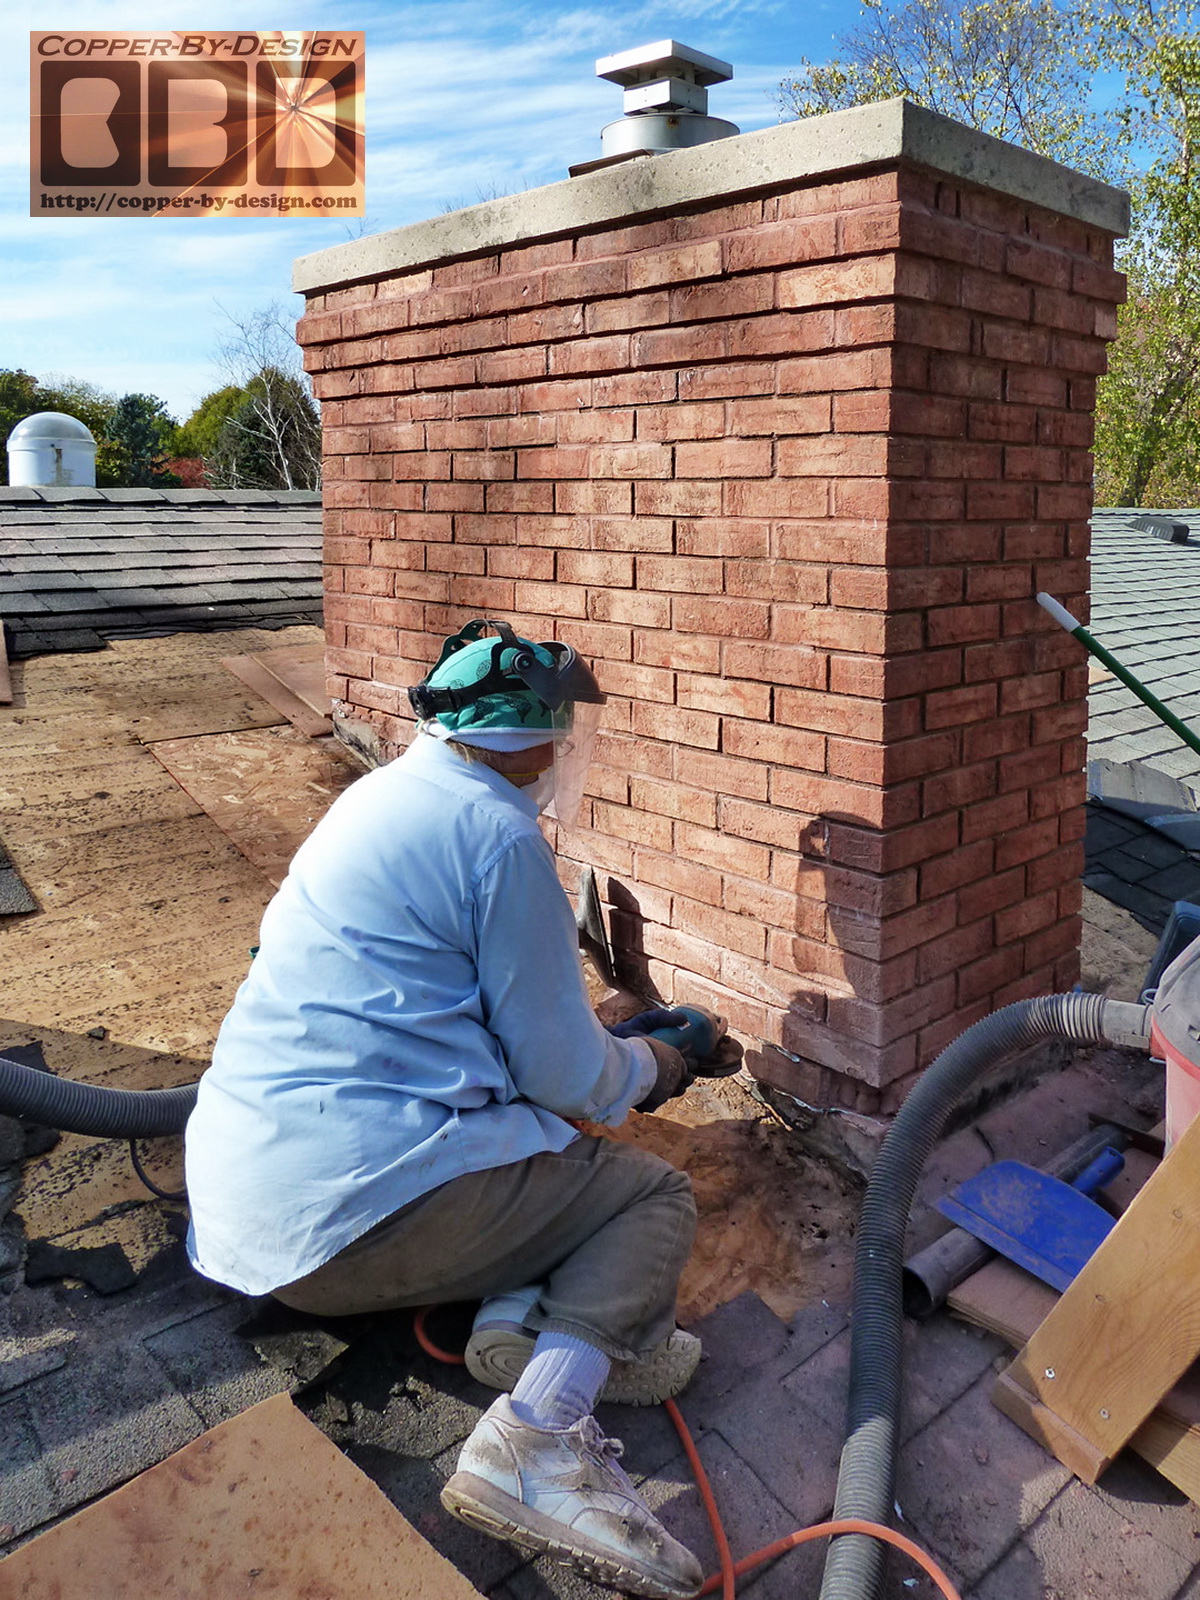
Ironically before those
same Roofers had mess with your original
chimney flashing there in front of them is a good example of how
flashing is suppose to look, yet most Roofers
will be quick to say it cannot be done that way ever again w/o rebuilding the chimney, but I have personally re-flashed hundreds of
chimneys in this manner, proving that is simply not true. They're
just too lazy to do it the right way. In many cases they will just
smear some tar around the chimney to get them past the 1 year
minimum warranty
they're obligated to provide,
but that certainly will not last more than half a decade at best. Here is a
common example of this sort of shoddy workmanship before I
replaced the flashing seen on the right.
With my vast experience
and unusually high mechanical comprehension I have a pretty good understanding
of what it takes to do the job right w/o the need for messy caulk. These flashing kits I make
have
become a very popular item with clients across the Nation here in
the States, since
no one else seems to be offering this sort of personalized service
to Homeowners, or Contractors. I may not get it perfectly right each
time, but I do my best.
I resist pushing more
parts than what people may need, and wind up having some whole
pieces left over when they're done. So, if you do want me to add
extra flashing pieces in order to make sure you will have enough,
and perhaps be able to replace a piece that may get damaged in the
process let me know.
What do you base
the cost on with these irregular pieces?
The cost of these kits are based on the final weight to determine
exactly how much copper went into it priced at that $25 rate per
pound, so
you will not be paying for any cut-off waste, let alone an inflated quote
you're likely to get from other sheet metal shops. That's one
heck of an honest deal that you're not likely to find elsewhere.
It's also
a detail you can double check when your kit arrives to verify just
how honest I was.
For me it's a great way to use up
some of my
smaller cut-off scraps of the 20oz, 24oz, & 32oz copper sheet metal I have left
over from larger custom copper projects I build, like
chimney caps,
fire-pit covers, and
turret roof caps, so I am able to sell these kits for lower cost
that my other custom work. That's a good 30% less than most of my
other custom copper work, at my base price of $35 per pound.
Although, the more complex sealed
crickets I make run the whole $40 pound
for the copper and $15 sq' for the wood support under them. Plus the
crate, packaging, and freight also goes up substantially given their larger size than just
a basic flashing kit that can usually stack inside a compact box. This can add over twice the cost to a kit, but it
is well worth the functional advantages.
Why not just
aluminum to save money?
I can make
these kits in sturdy painted aluminum if you want, such as these:
Alum.htm
But
the disadvantages are not really worth the minimal savings. I appreciate
your concern about keeping costs down, but aluminum would be more fragile,
the paint and
mildew issues decades later making them not reusable the next time
your house is reroofed. Also, copper may cost me
5X more than aluminum, but when 80% of your final cost is the wood
support under a saddle, design, fabrication labor, a custom
crate, freight, and then labor to install this after it
arrives, so it would be unwise to use a cheaper metal. I trust you
can agree it is best to do this with copper and have it
done with the piece of mind you're not going to have with other
cheaper metals.
As much as 30 years
ago I've seen Masons charge upwards of $750 to re-flash a single
flue chimney with just cheap painted steel. With inflation imagine
how that would cost you 3X today. They
had saved less than $75 back then by using steel in stead of the
standard 16oz copper at
just $3.25#, where it is over $8# these days (2022). If done with
copper you should not need to redo it again the next time roofing is
required. Or perhaps even the next several times.
Aluminum would easily last several decades, but the paint would
flake off over time and begin to look terrible, so it is not
as reusable as copper or help against mildew stains. It would also crack more
easily when your next Roofer has to bend it up to fit the new step-flashing
in under it as they re-roof your house, since copper is much more malleable. Another
clear advantage
is how it will retard the growth of mildew and moss on the roofing
around it. Copper will patina to a satin brown color within a few
months of exposure as well, making it the best possible choice.
Isn't
this going to be too complicated for me to do?
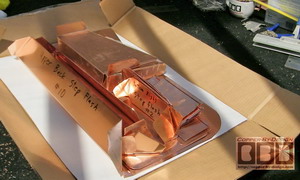
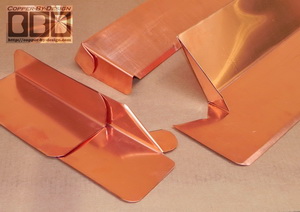
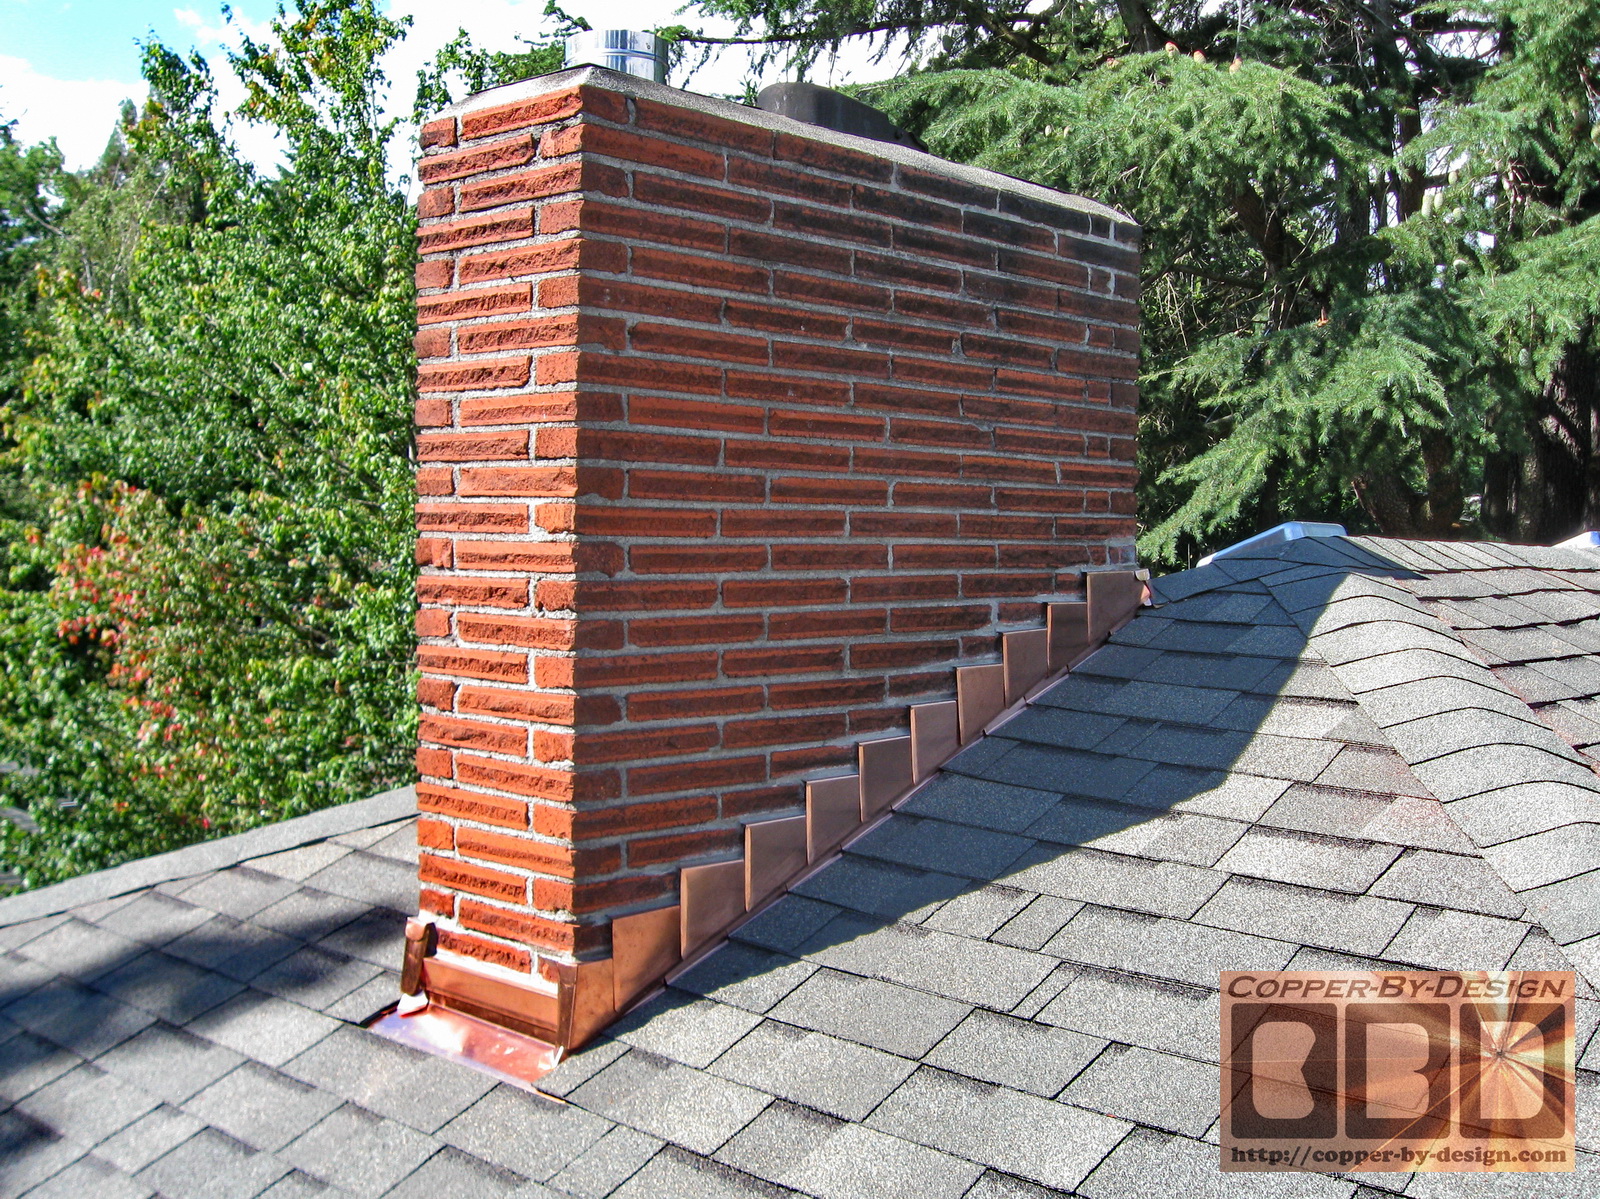
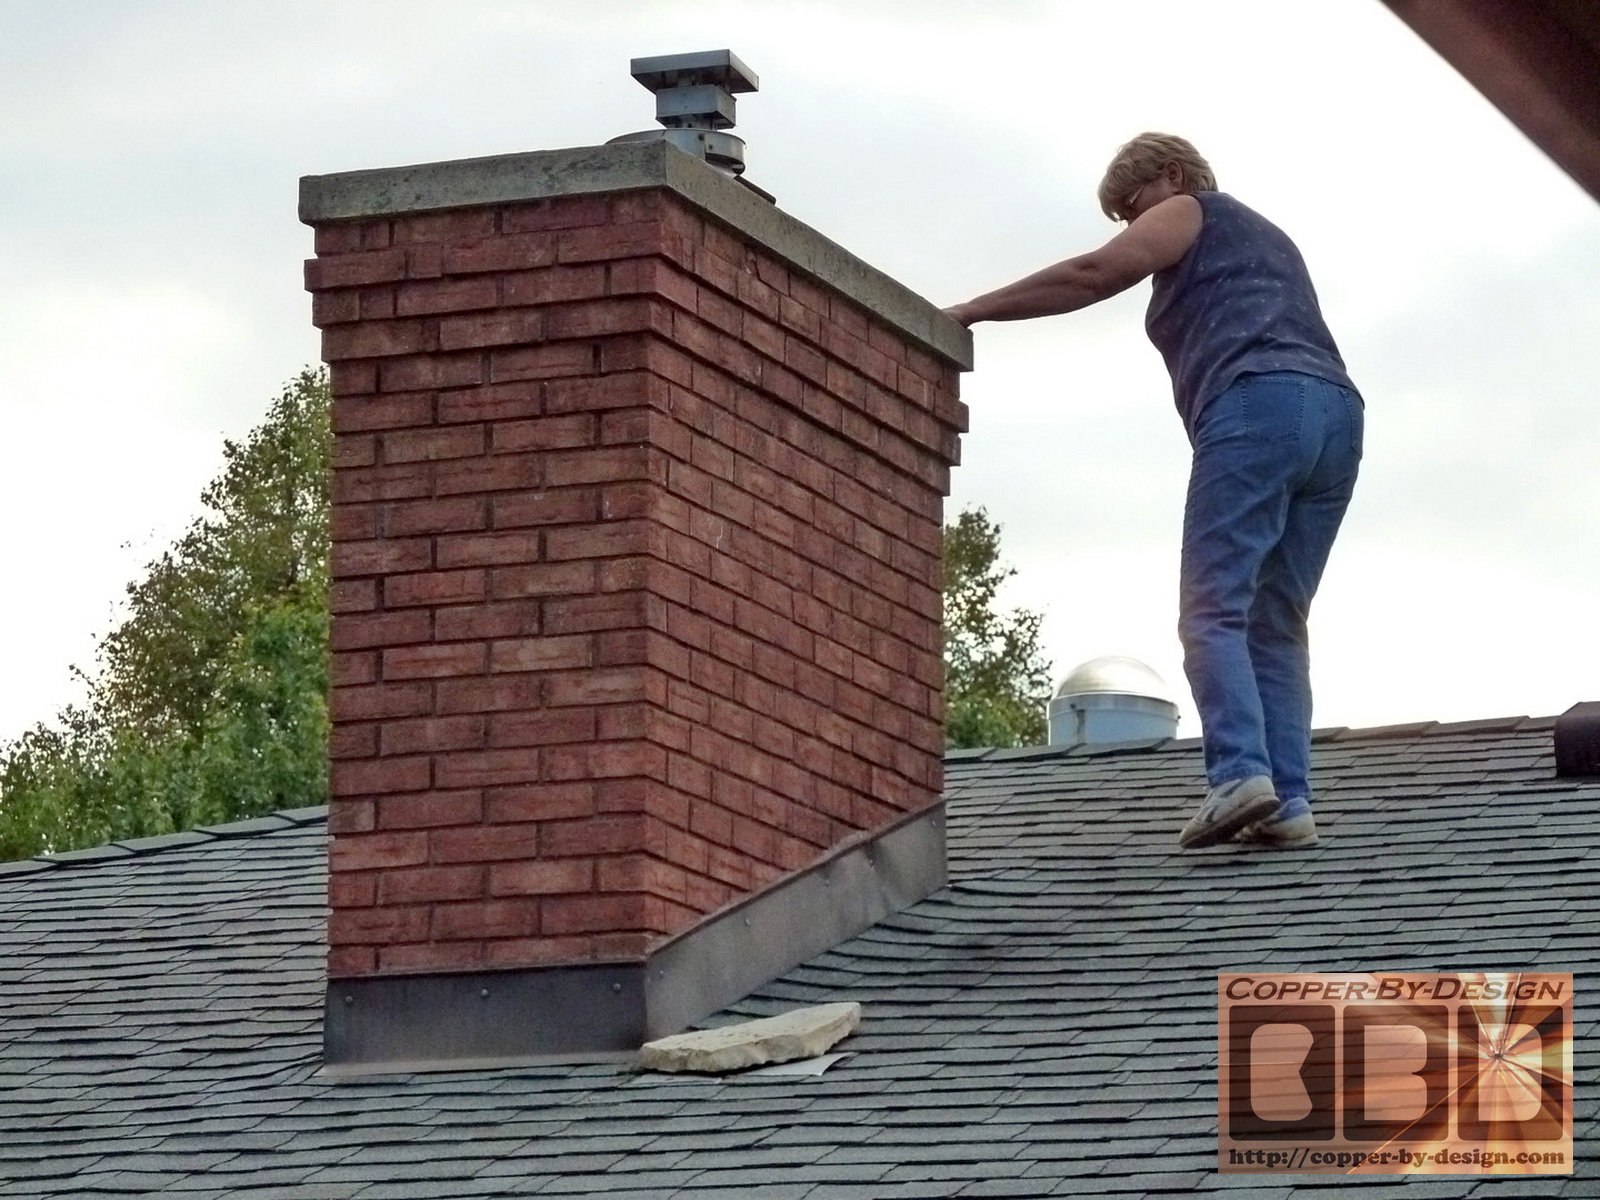
Believing you can do this may be your most
difficult hurdle. Below are
several photos of these chimney flashing kits installed by Homeowners
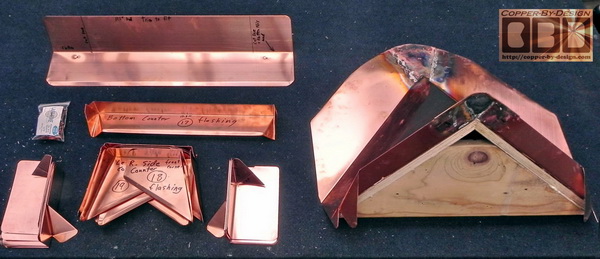
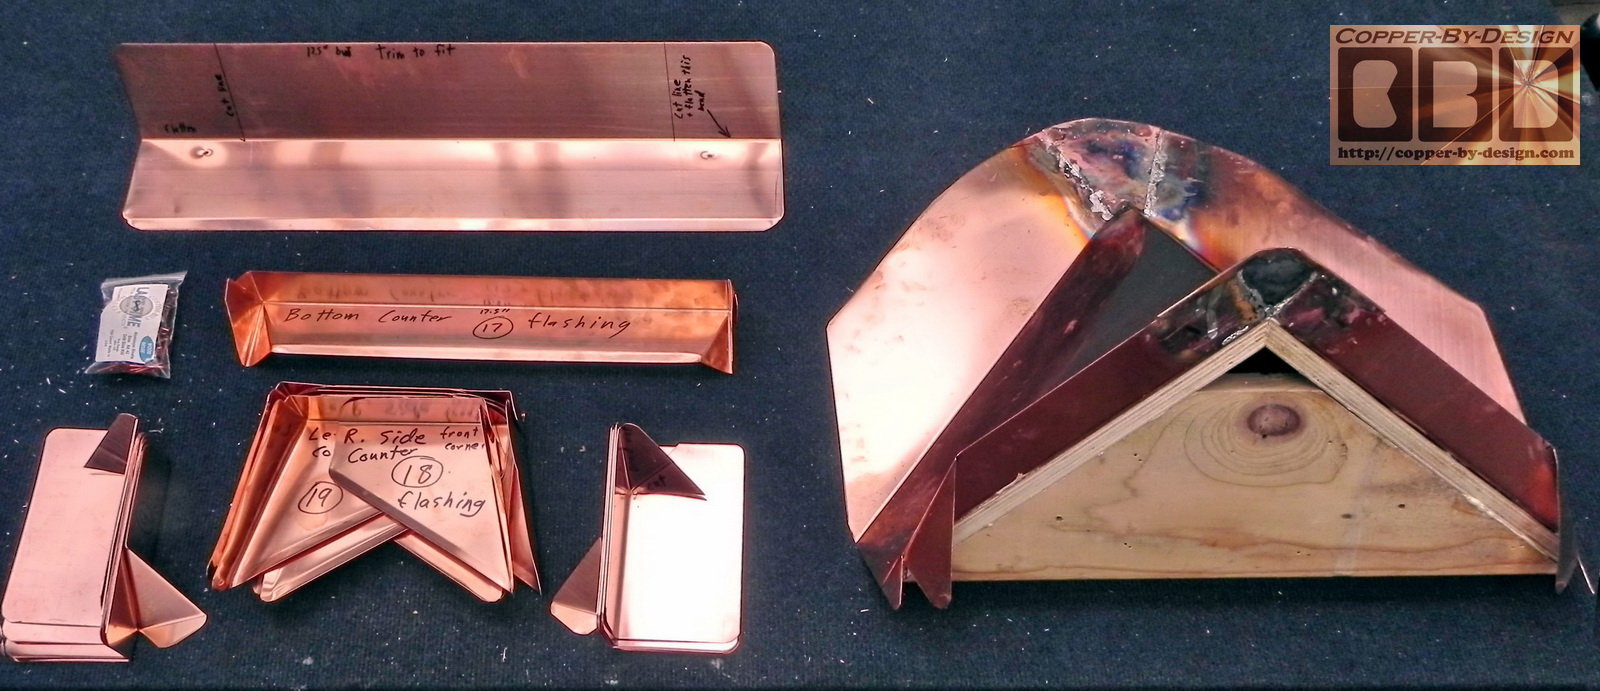
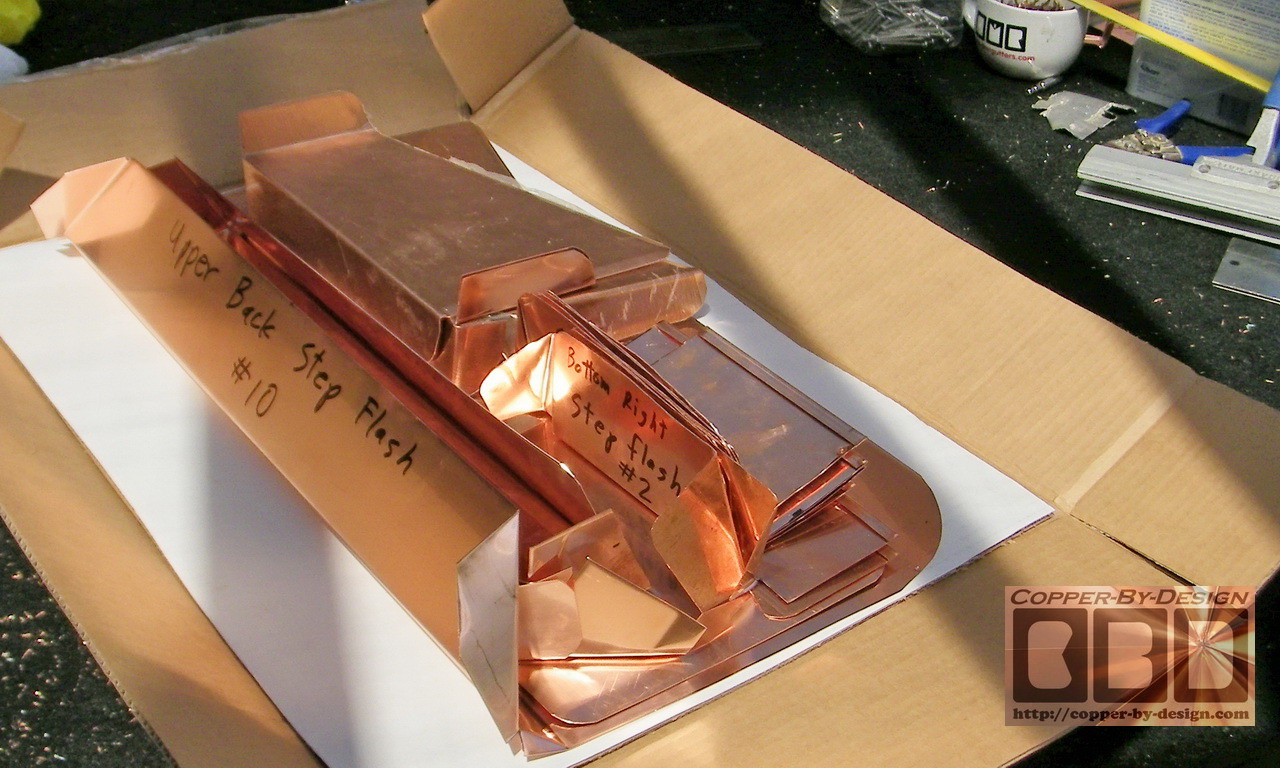
just like you. Each piece in
these kits are labeled and numbered as to where they go and in what
order they are to be installed. We also round off the
sharp corners, so there's less chance of getting cut while handling
them. We also include the copper roofing nails you'll need, so
all you should have to pick up locally is the mortar and some hand tools, as described in the
instructions 'PDF'
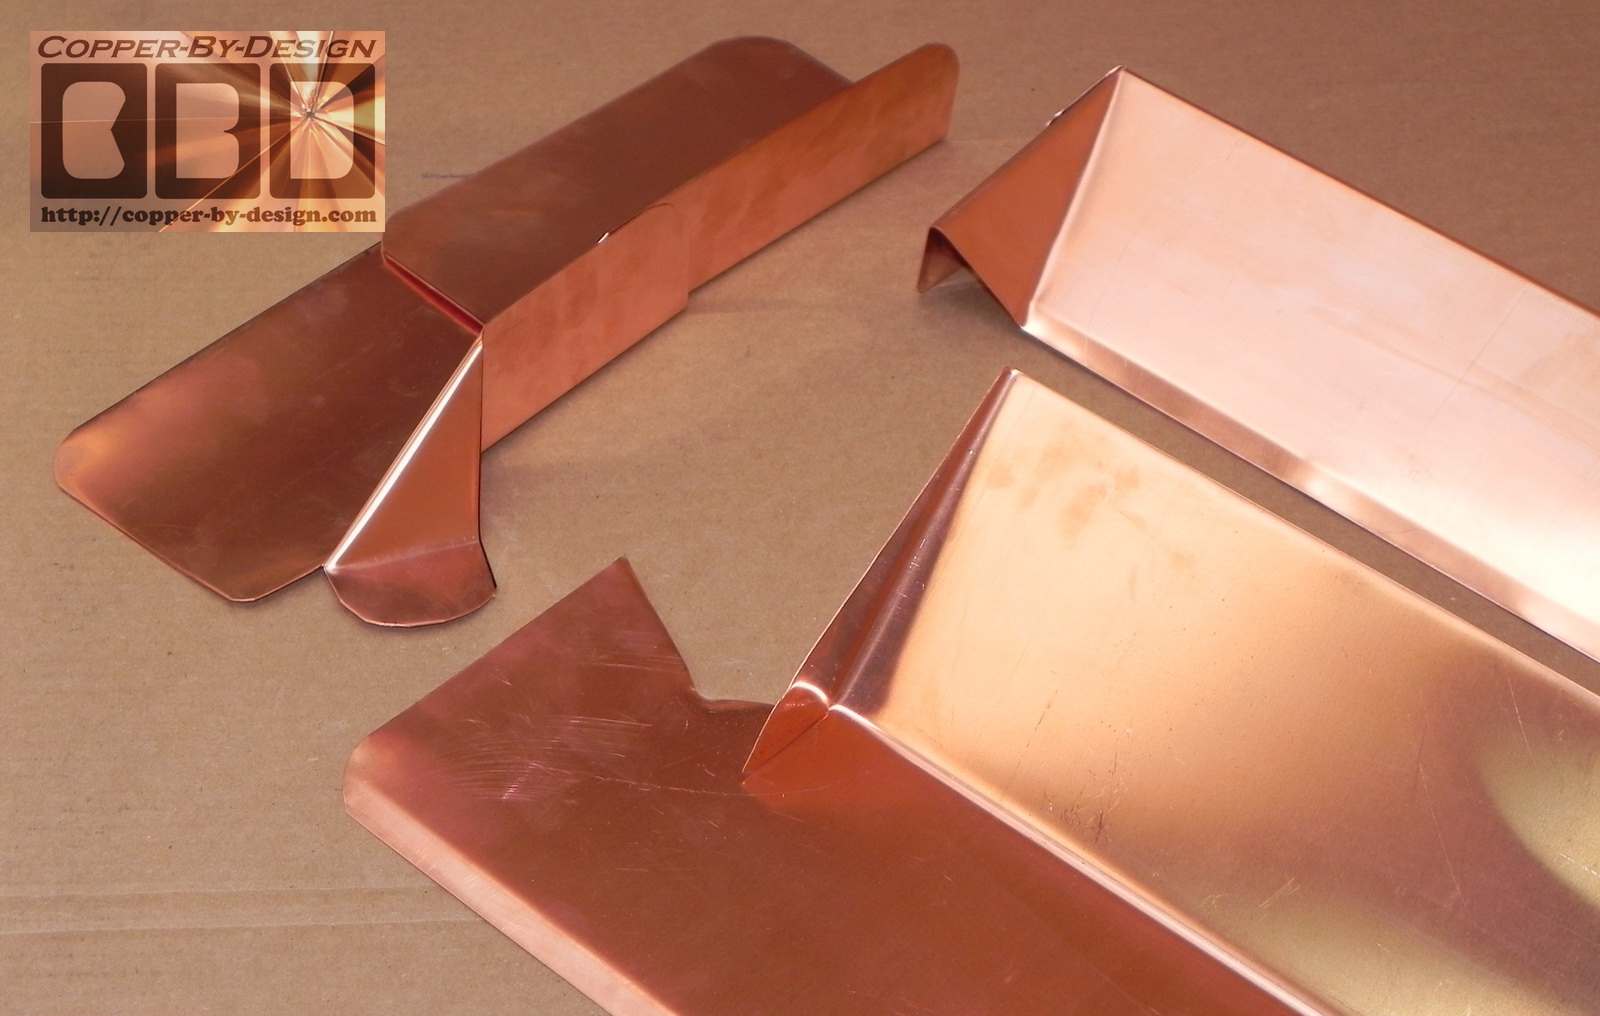
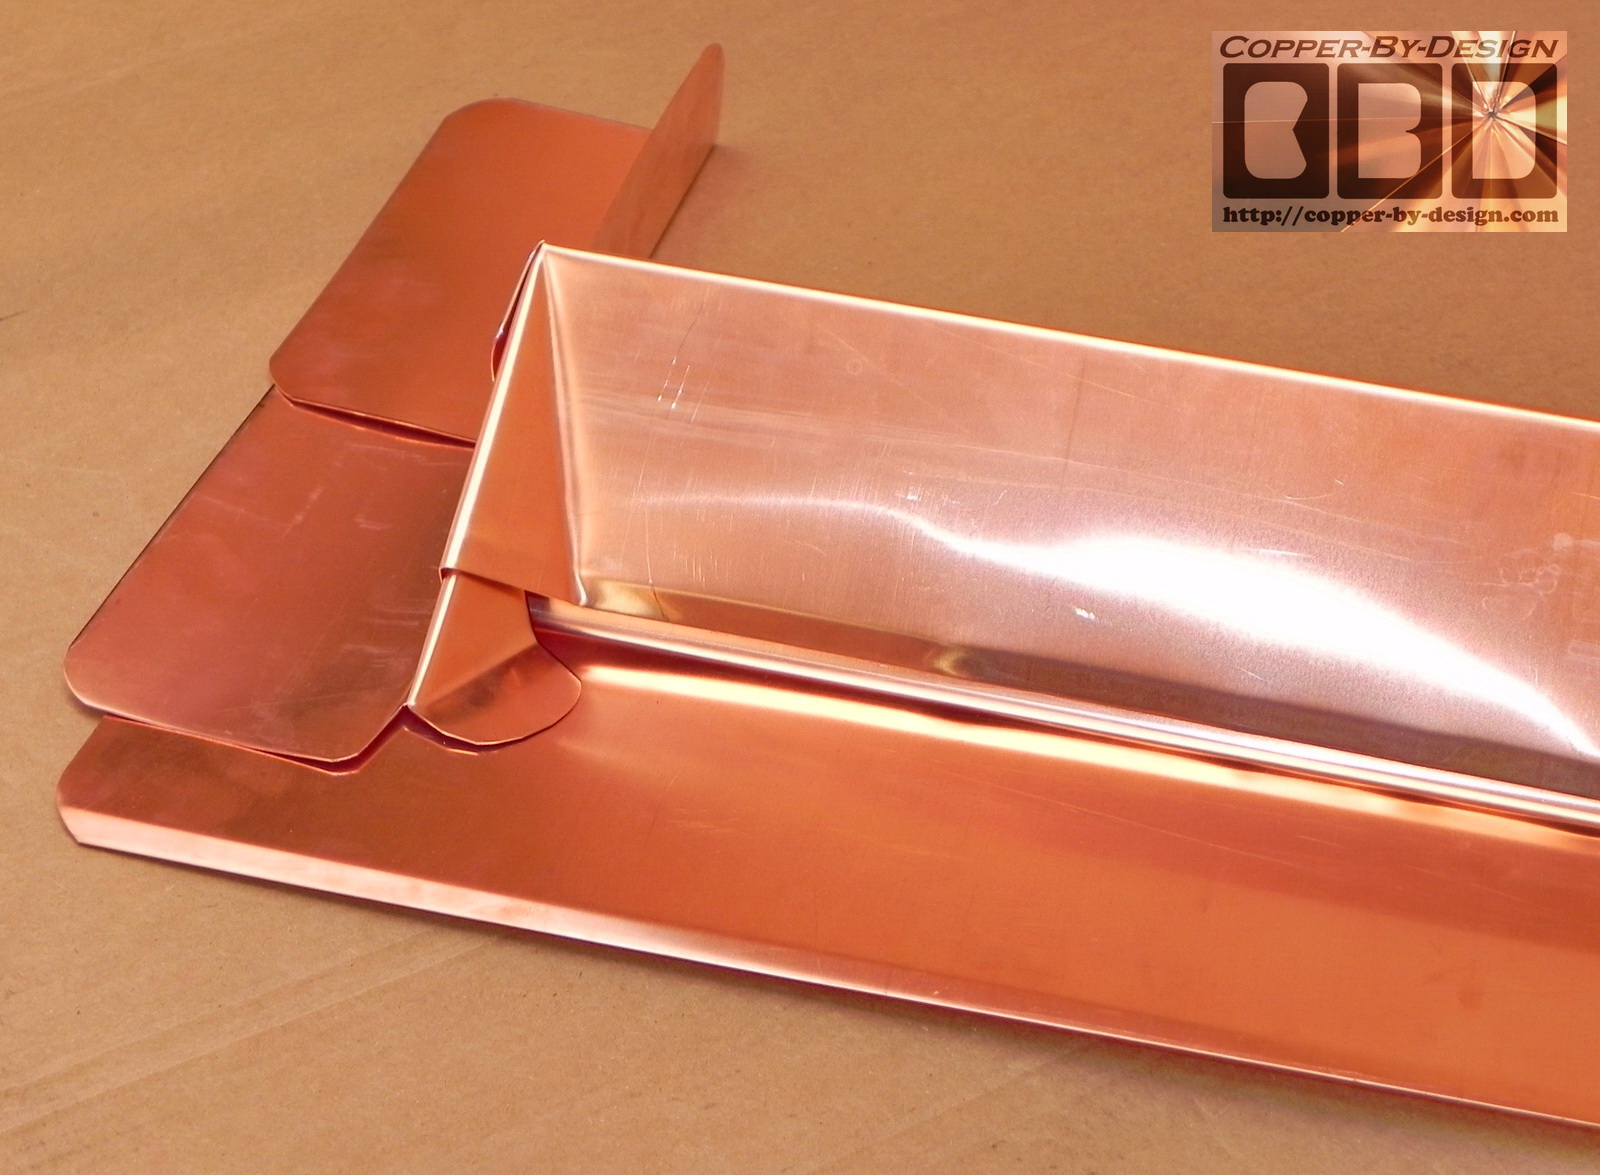
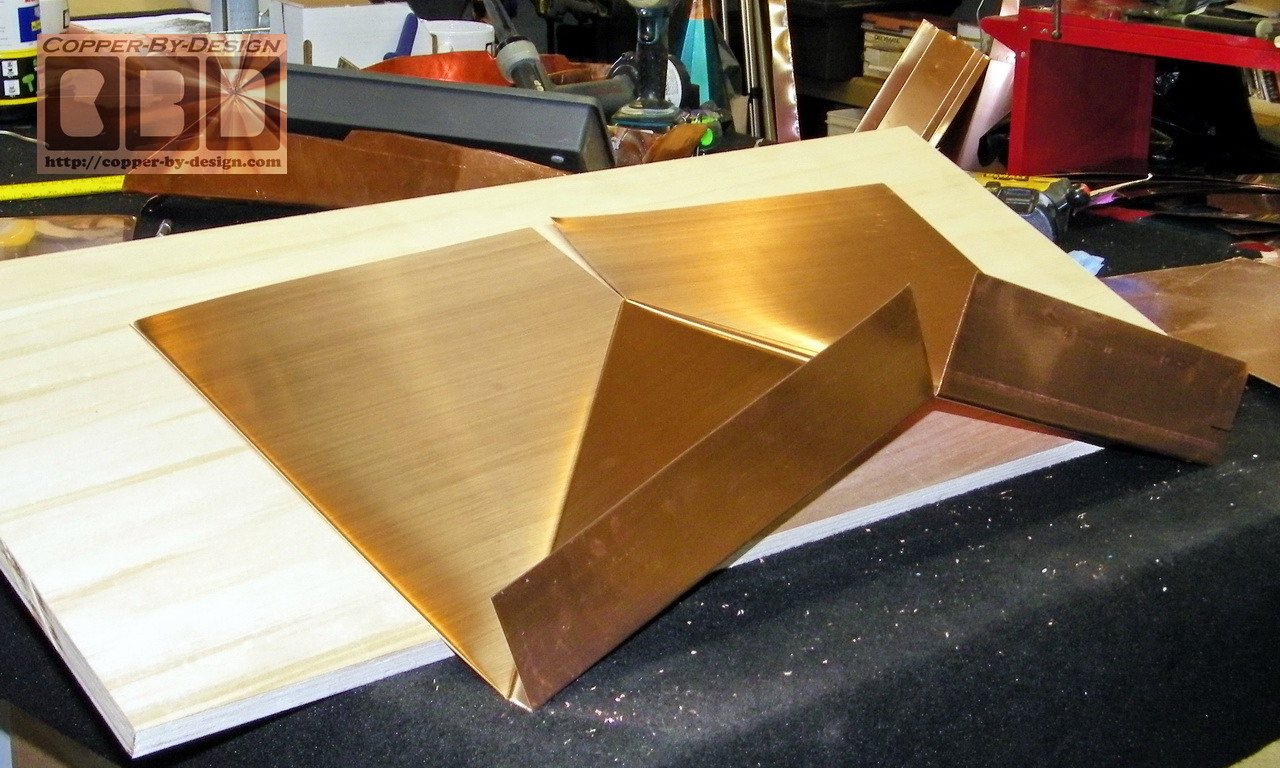
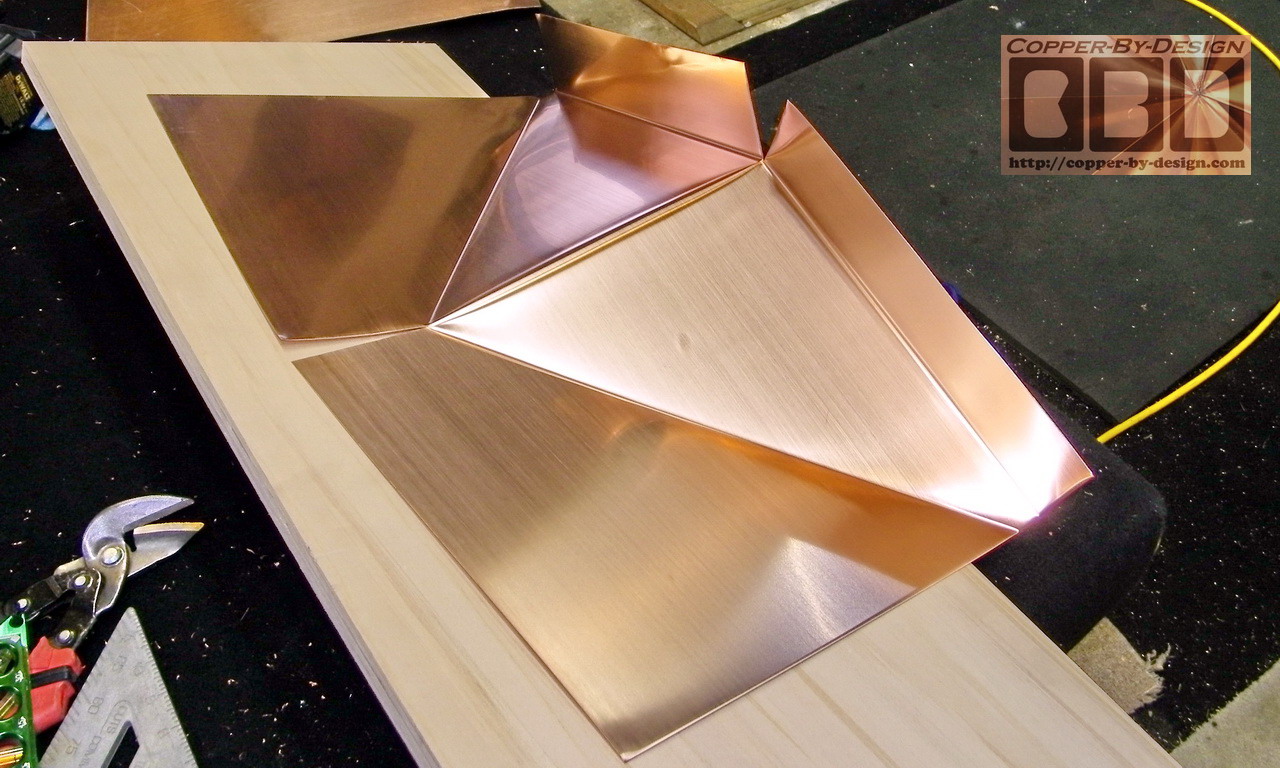
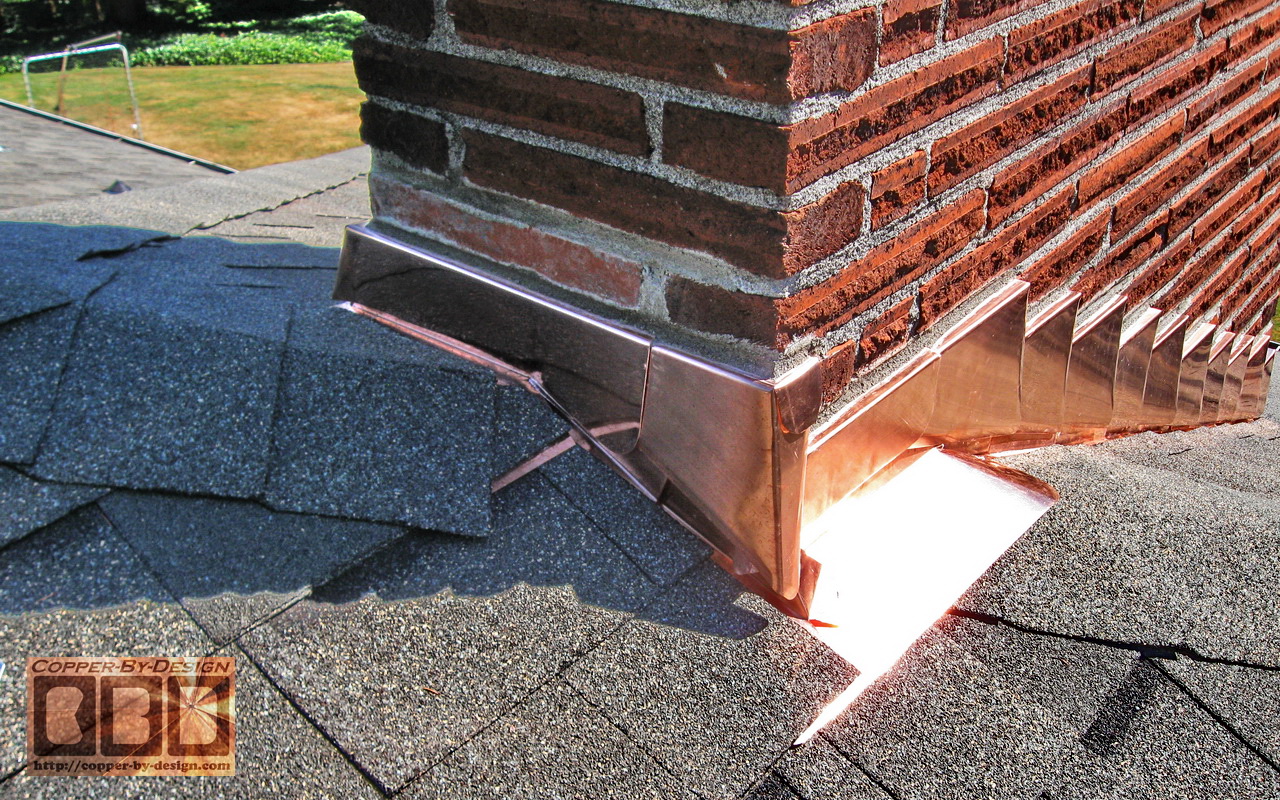
file I provided. These 8 photos show how these pieces are fitted
together around the lower corner to seal w/o the need for caulk, while
allowing for movement from expansion and contraction of the wood
structure against the clay flue as the
temperature changes.
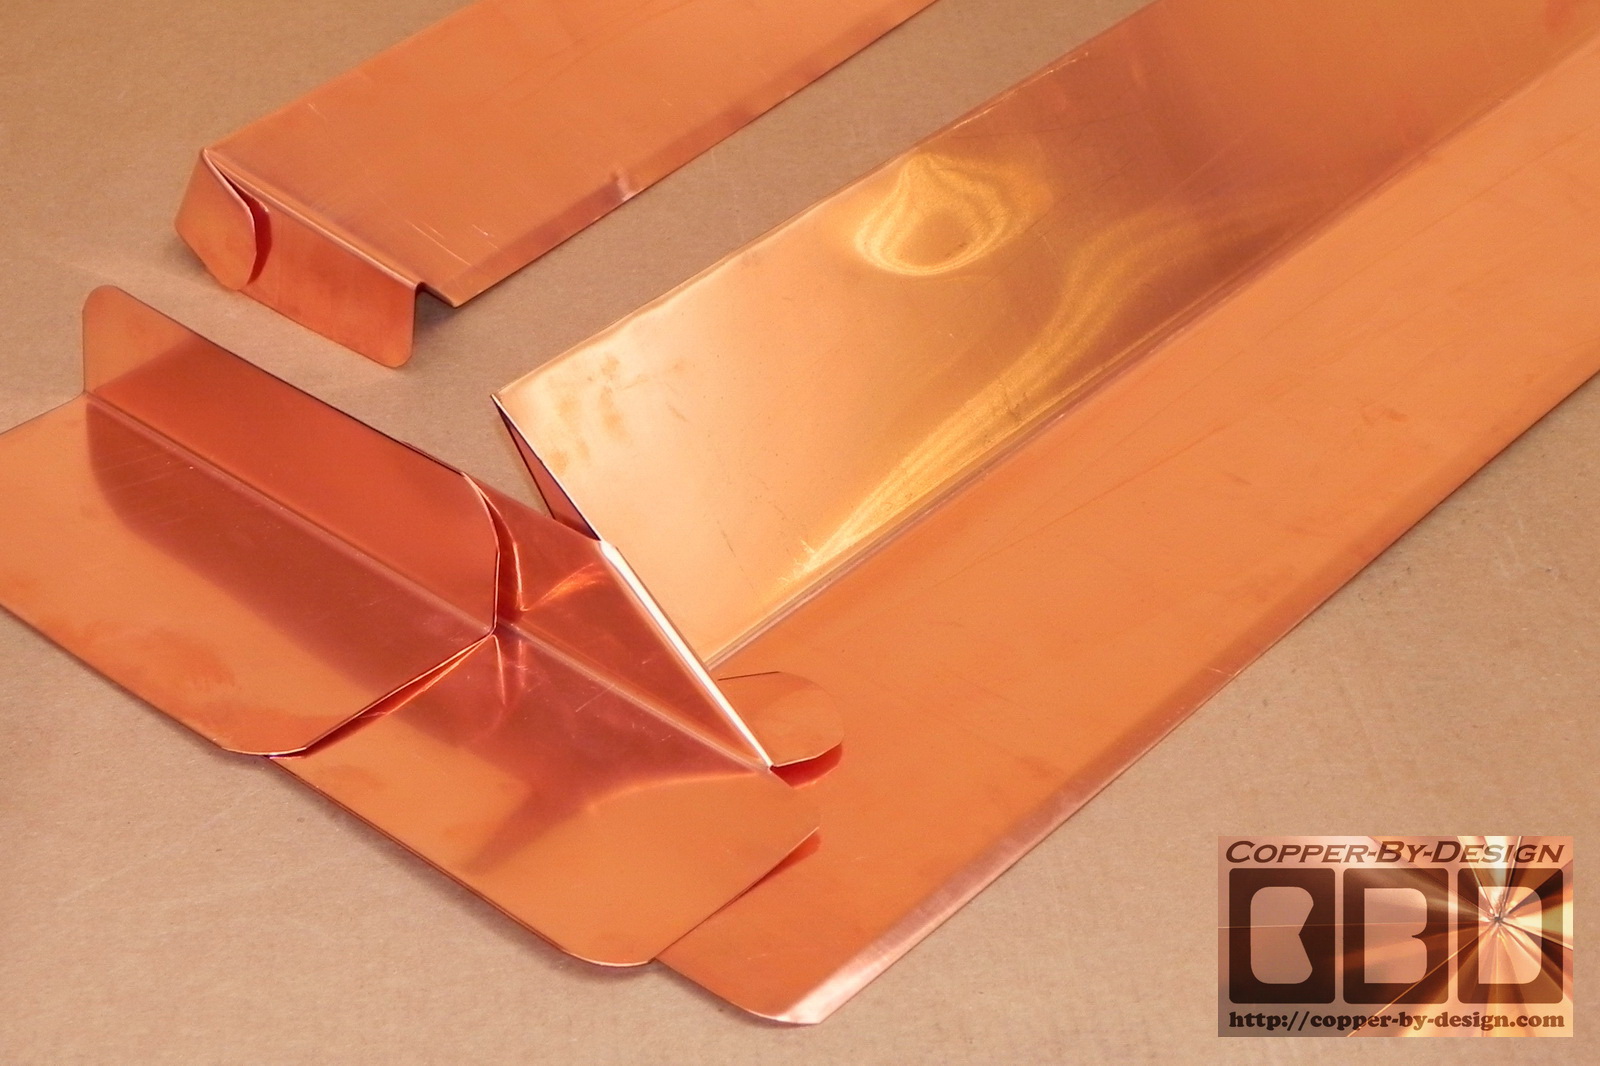
Side diagonal step-flashing is set
against the horizontal base piece to overlap and fold over.
 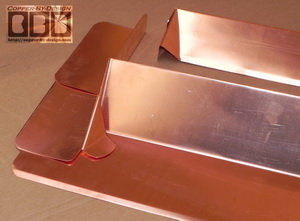
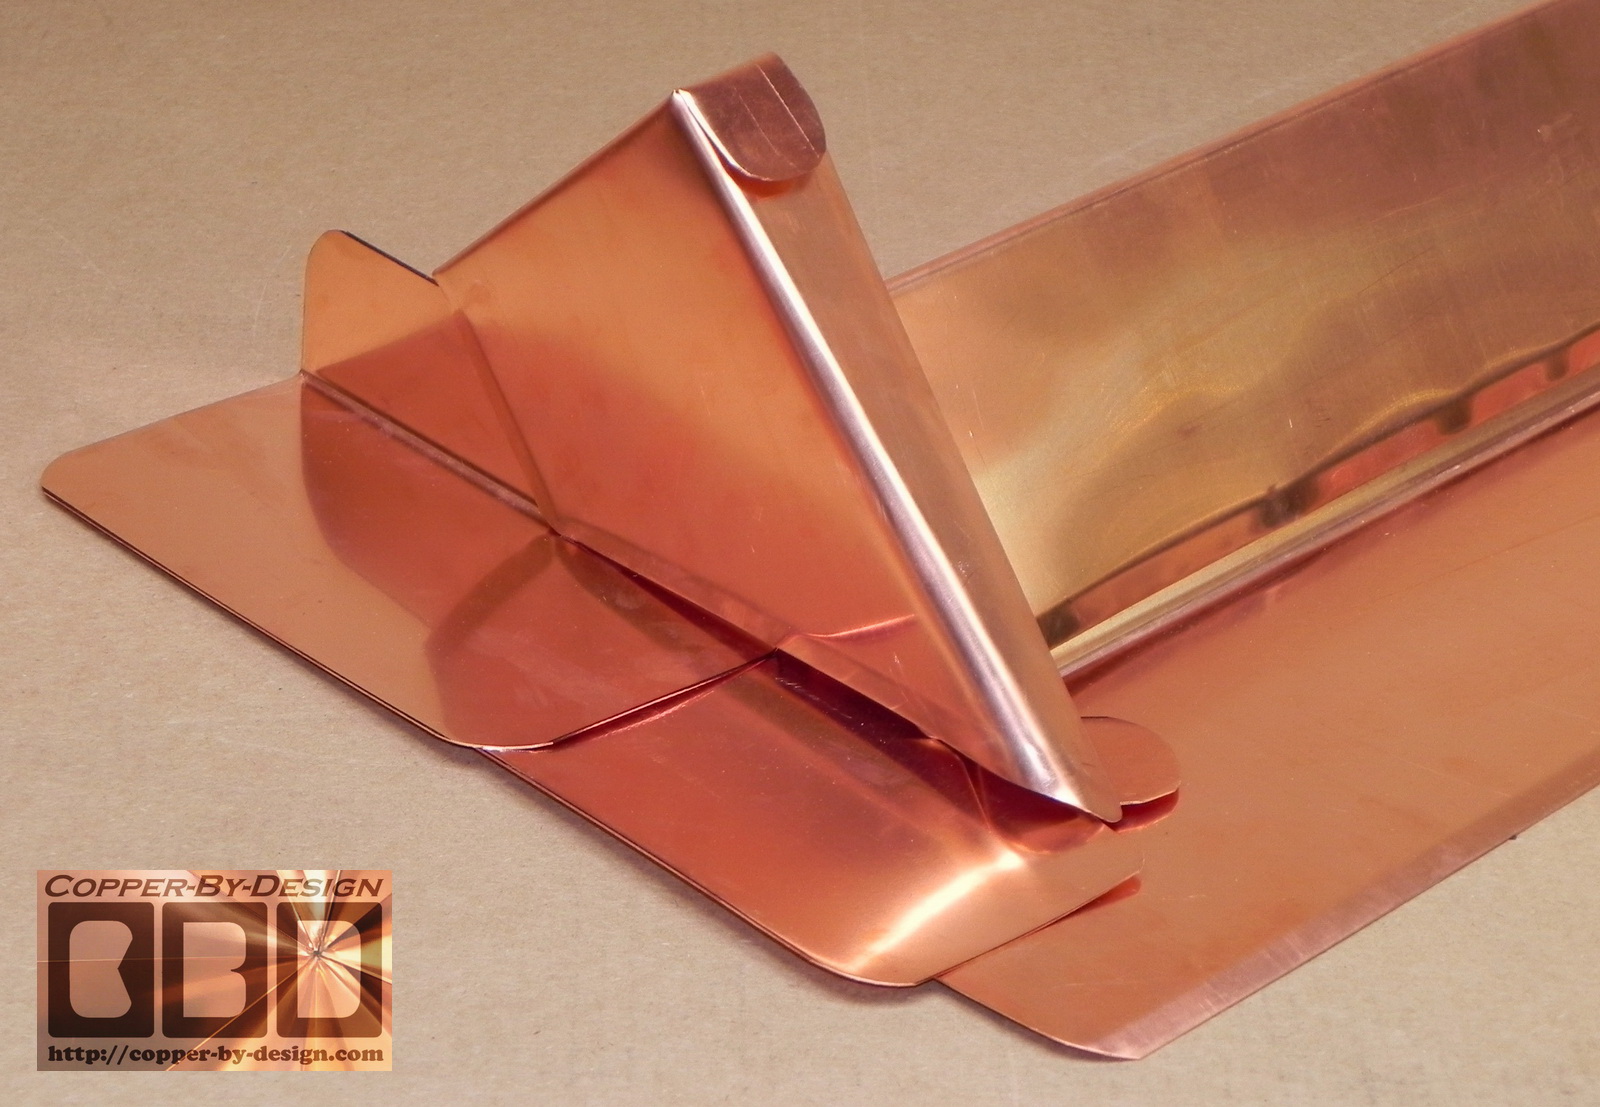
The horizontal counter-flashing piece
overlaps over both of them and folds around the corner.
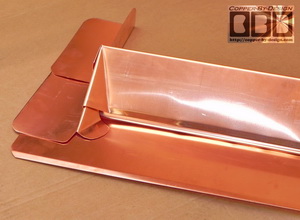 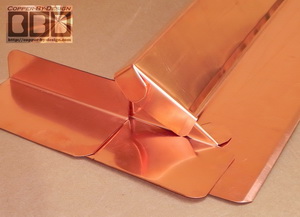
Then the side counter-flashing piece
overlaps those 3 pieces up in the next course of brick above that folded
around the corner to help keep this corner sealed even in a wind
storm.
Here is a link
to an educational video showing an amazing looking copper flashing job that
is far more complicated than the kits I supply:
http://vimeo.com/30283585
Although, you would do well to consider how it would be far too
expensive to be practical, when it would cost several thousand,
which is almost as much as a whole reroofing project of your house.
If that's not enough of a deterrent the
worst part is how this will be near impossible to reroof around it
without destroying all that beautiful work he did, since there's no
way to remove the step-flashing around this chimney. I also have a
problem with how low he made the side counter-flashing that touches
the shingles, which will not allow for any expansion of the house;
which will differ from the masonry. Soon after the counter flashing
will be crushed from below and destroyed. That is why there needs to
be this 2 part flashing system to allow for this movement and
maintain a good seal.
Also, the reverse hem of the counter-flashing that
penetrates the chimney may seem like a good idea, but that means you
have to install it before it gets mortared in, which means the
bottom is not attached and the 1/2 that does touch the upper bricks
will probably crack apart and fall out of that grove within a year
or two, just like with most all tuck pointing work that fails within
a few years.
Can CBD make us a reliable custom copper
chimney flashing kit?
My base rate for our custom work is $35#
for this copper. Although, I've made up hundreds of these custom
chimney flashing kits for as little as $25# for 20oz & 24oz copper flashing, as indicated by the final weight, plus
freight if you are not local to us. A single flue chimney flashing
kit runs about $400 w/o freight.
What about for ice & other severe weather
condition areas?
For a bit extra I can
make these flashing kits with a taller 3" to 4" vertical flange if you want.
You may feel it is needed there in your area, due to the more
extreme weather conditions you may have; like ice dams forming to
back up water under the shingles. Please, mention this when
requesting a quote through
e-mail, or I may not offer it. I try to refrain from up-selling my
clients.
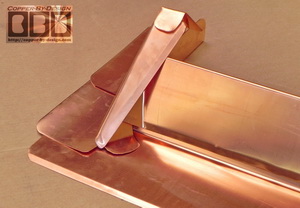
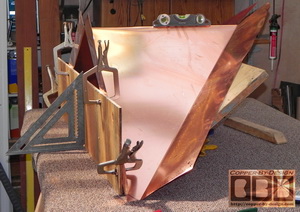
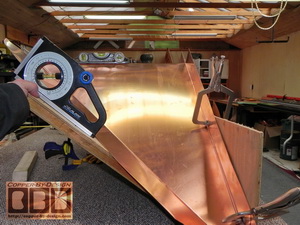
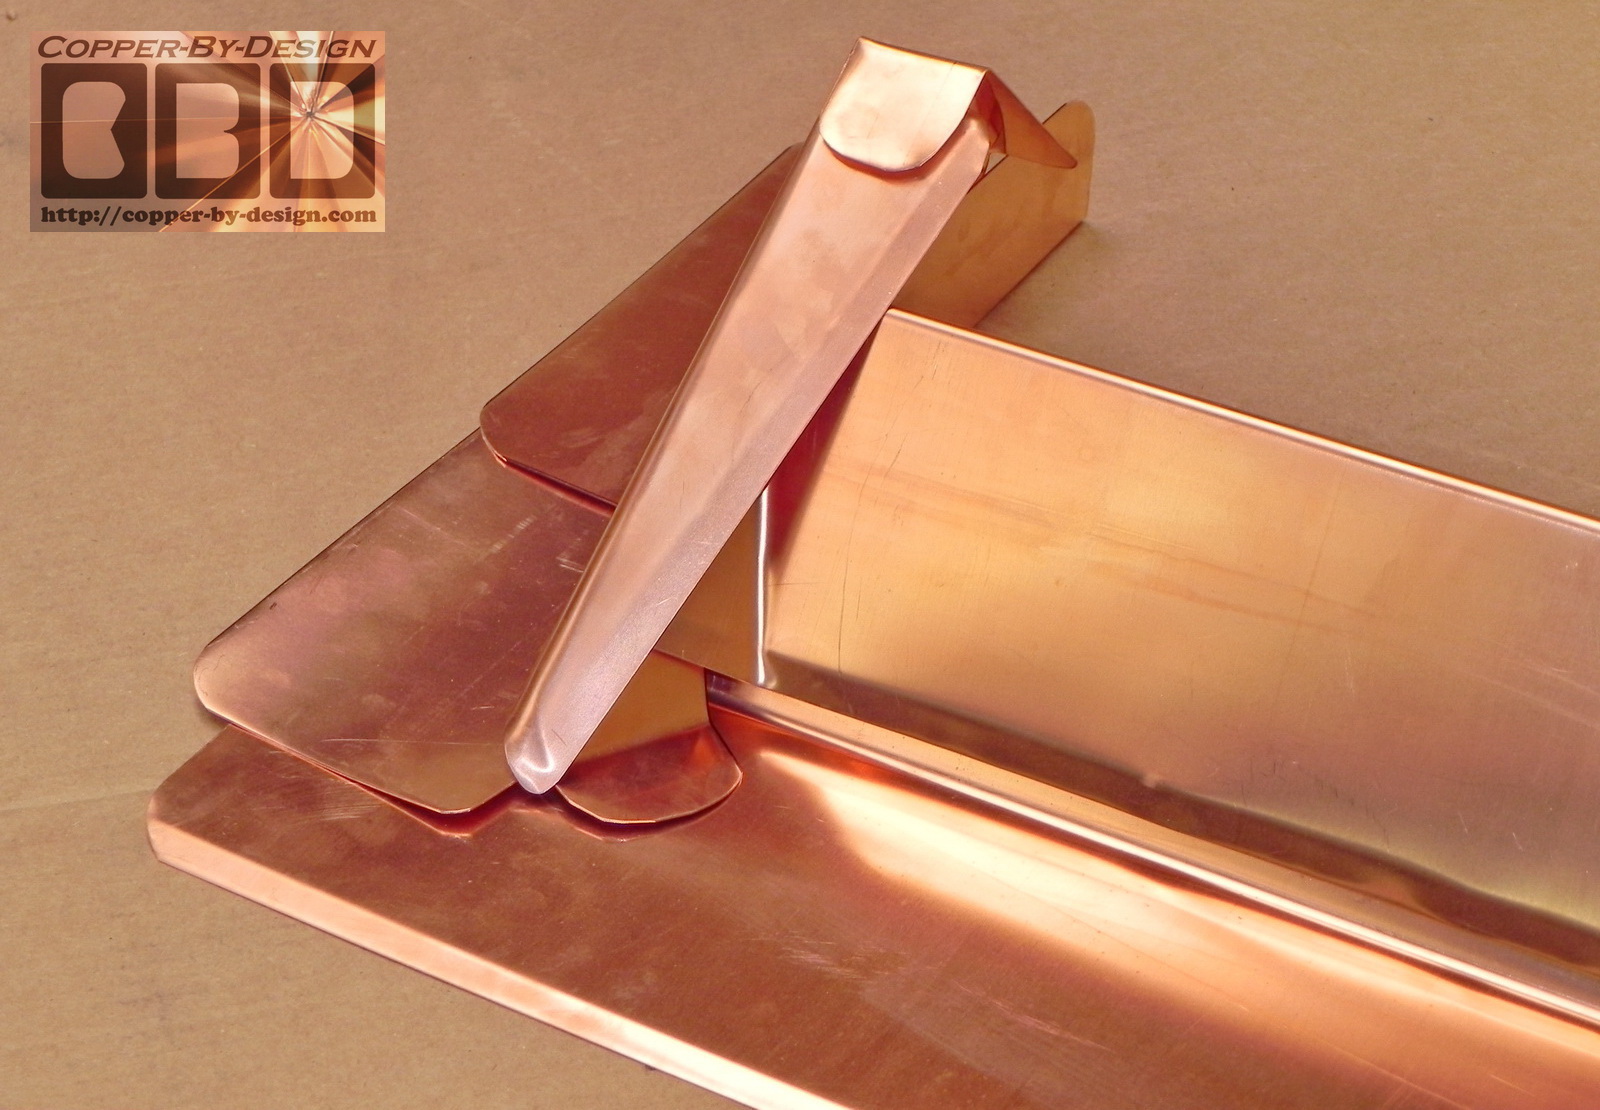
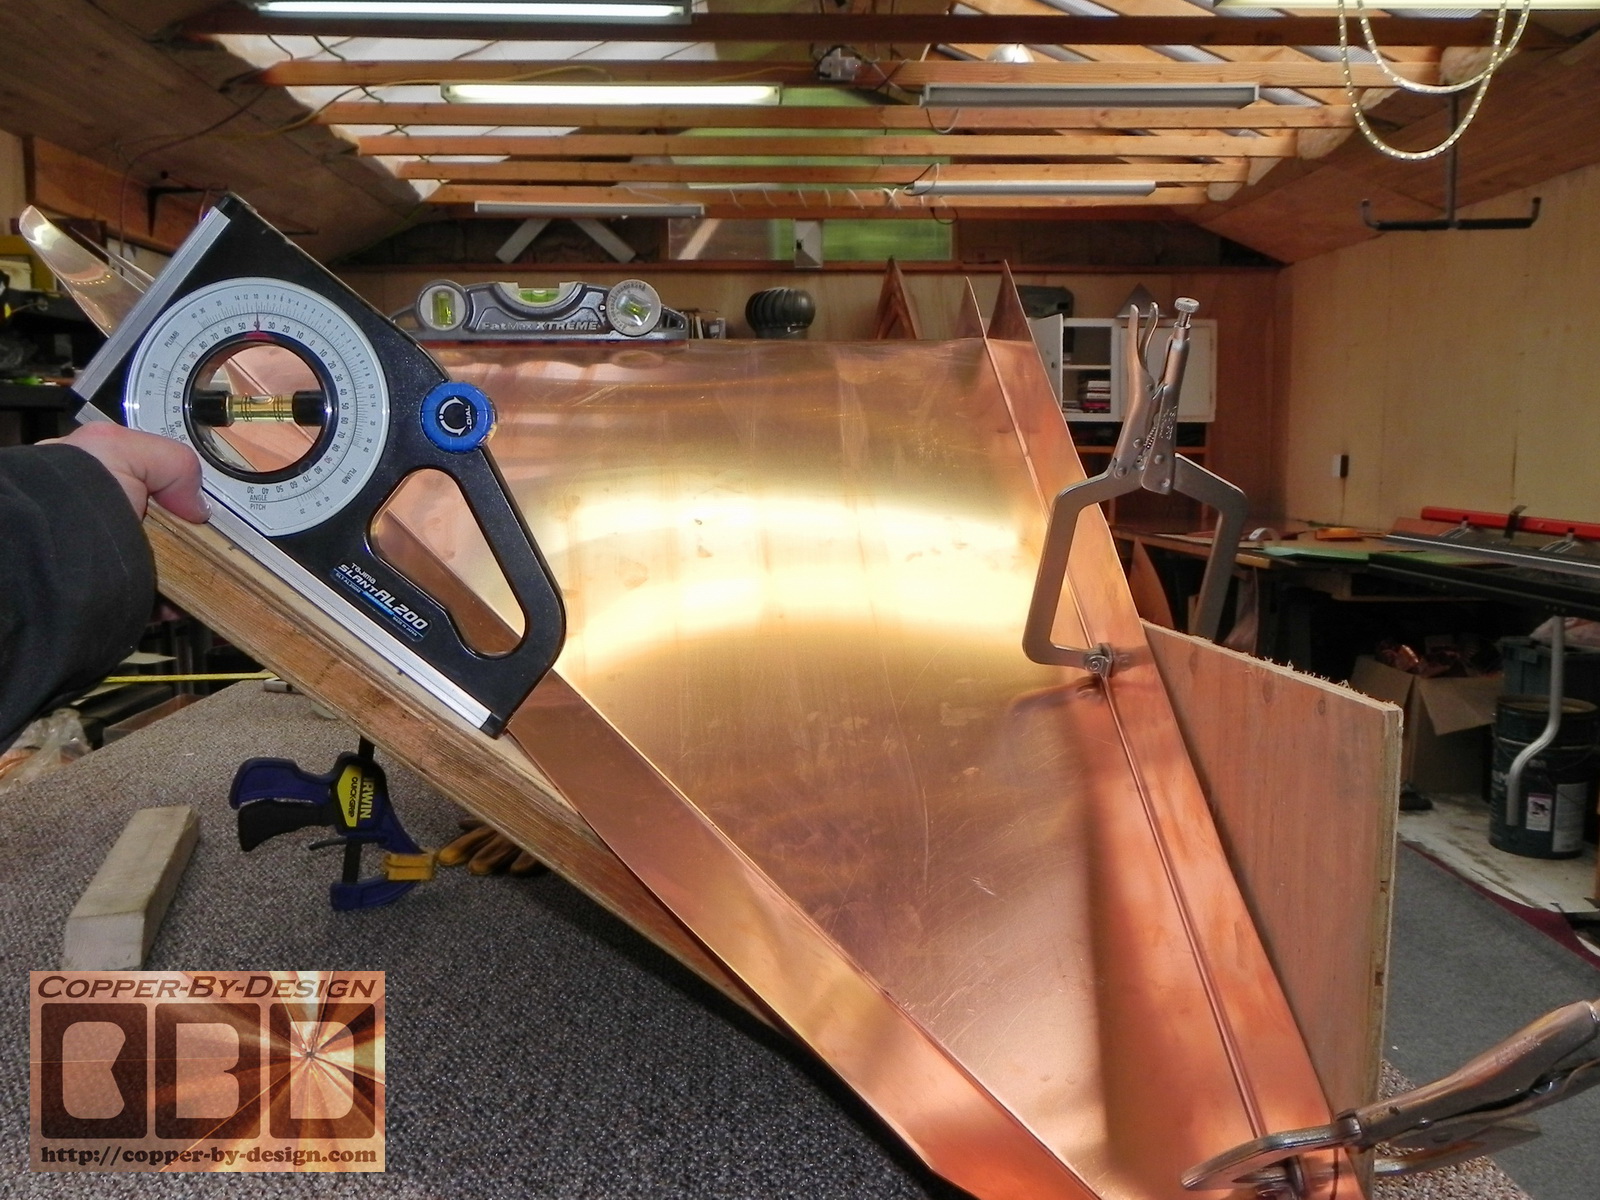
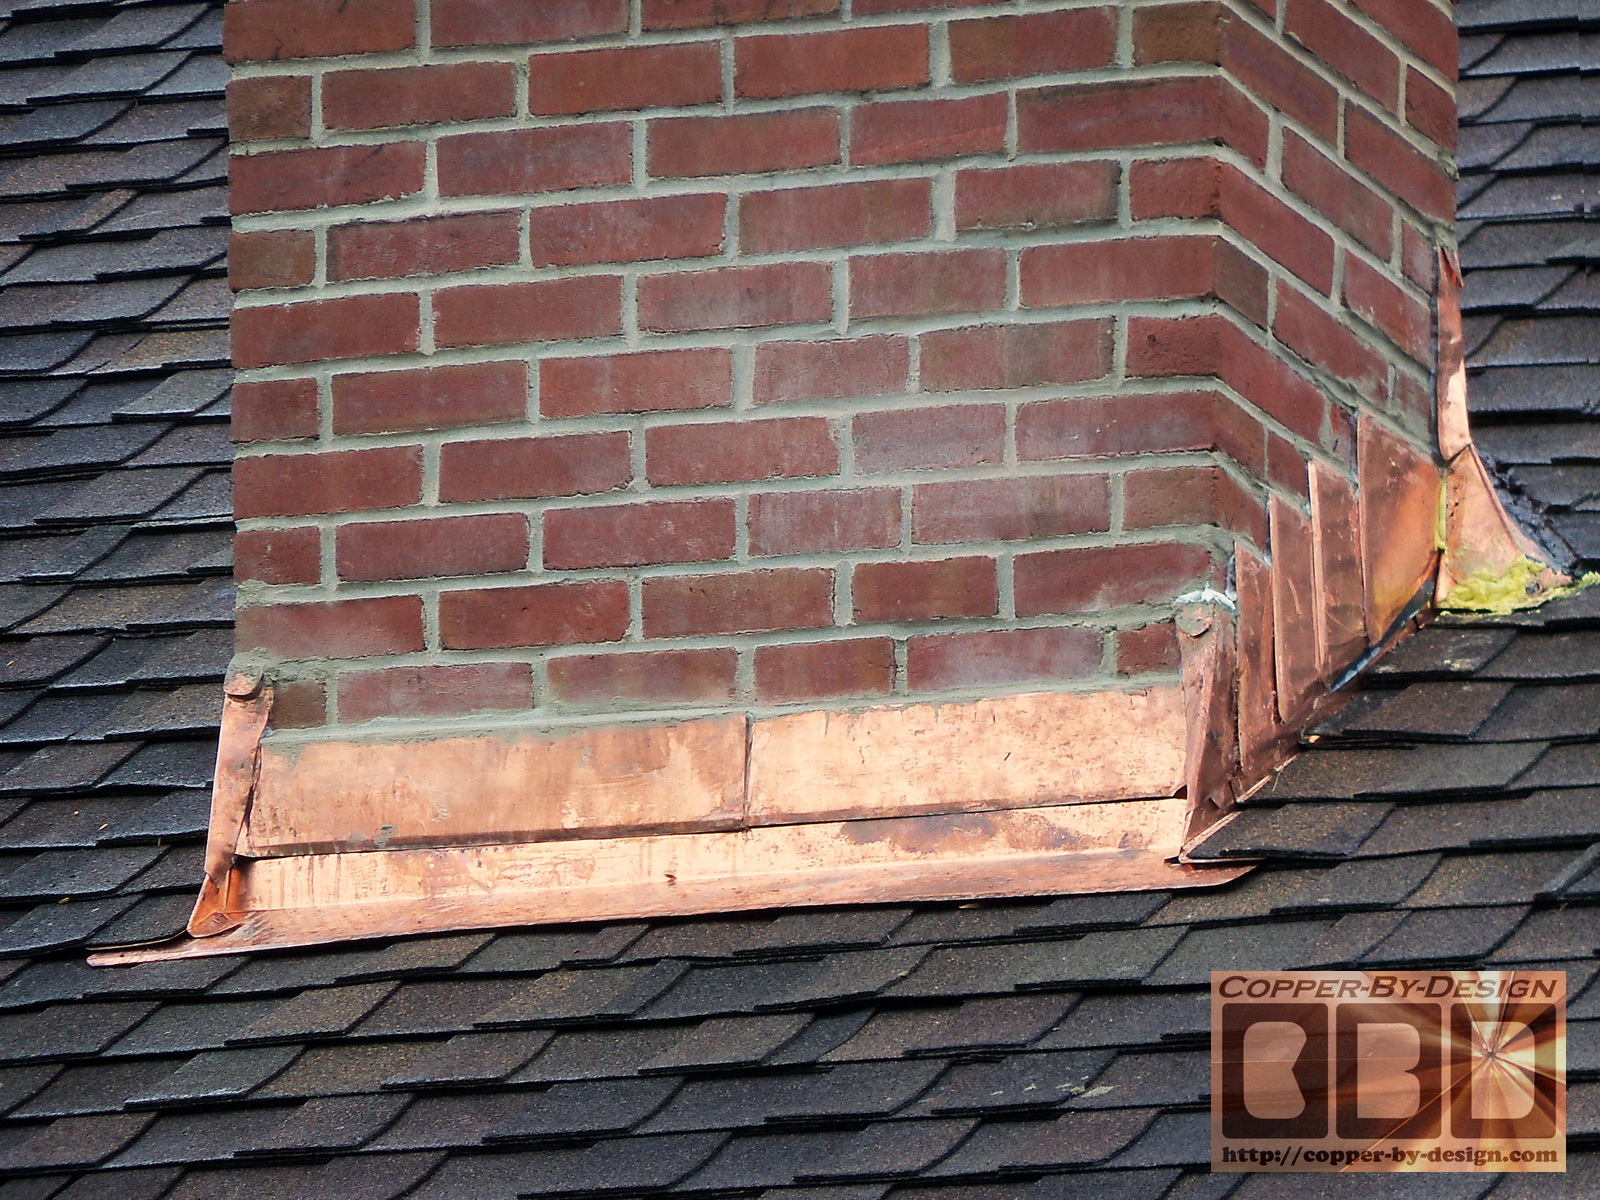
In my effort to seek a better product for my
clients I have designed a special type of
step-flashing with a pair of 45 degree bends, in stead of just a
simple 90
degree bend, which is an improvement over the standard right angle
bend configuration normally used. This has several advantages, yet
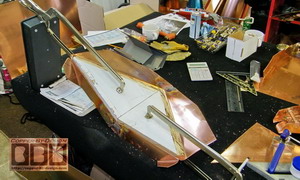
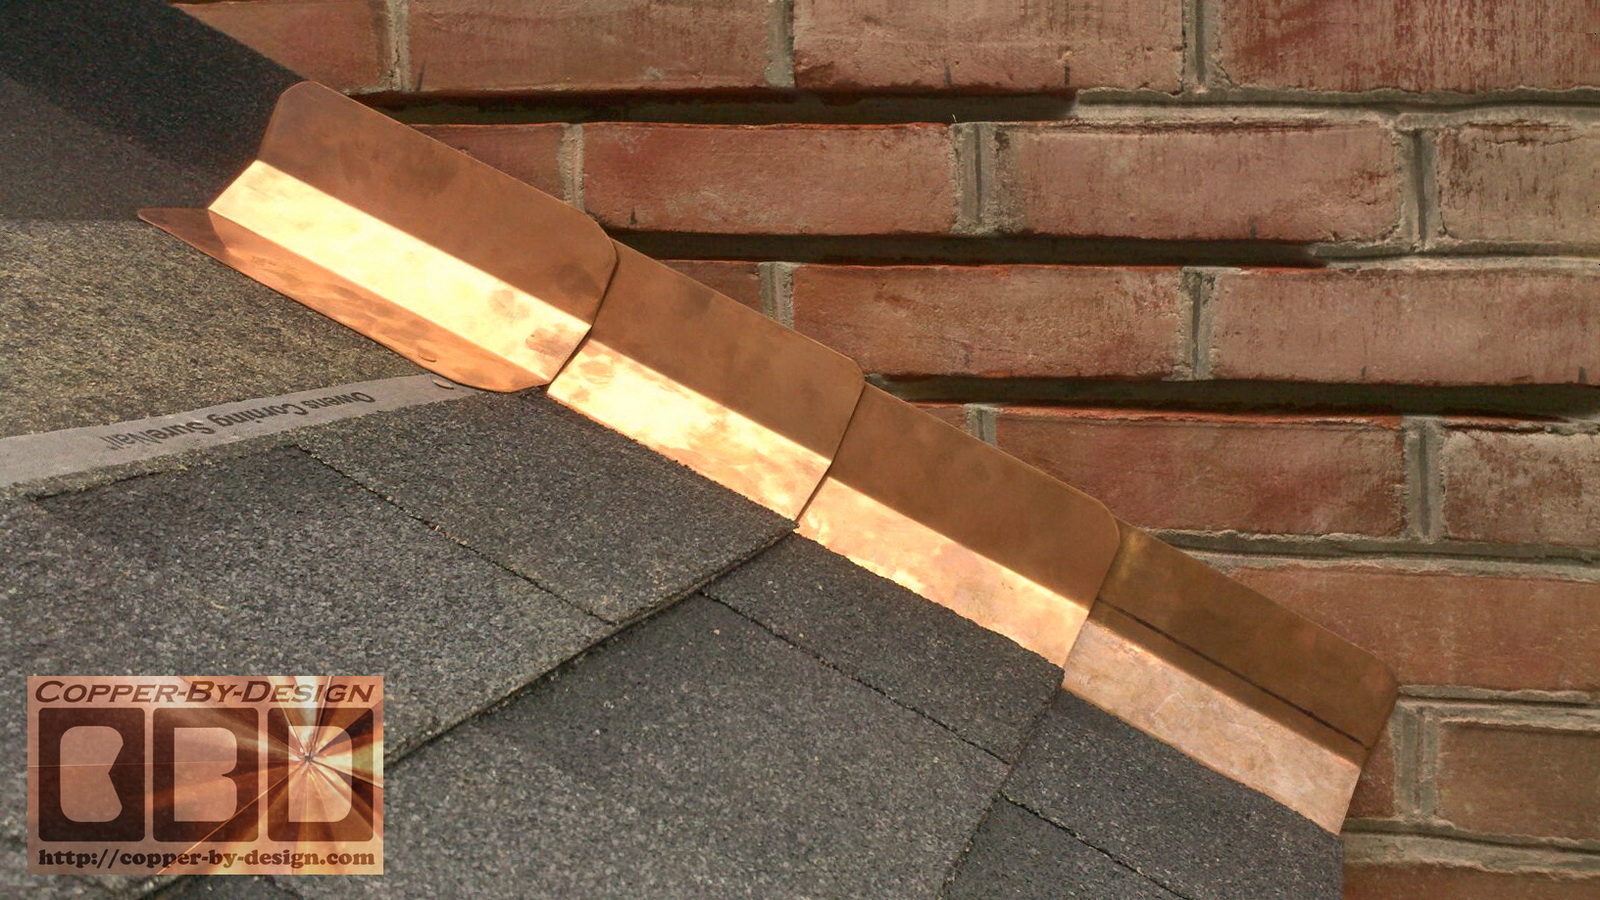
may be difficult to fit into some situations or types of roofing. Here are a few photos of this
alternative flashing being
installed by one of our clients:
 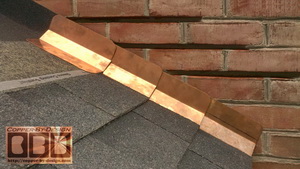
Sealing around the corners of a chimney has always
presented a problem to make sure it's water tight without the use of
a caulk, which could fail sooner than the life span of the roof. It
needs to maintain a seal even in the harshest wind storms. I have
found this alternative shape helps in several other ways as well:
(a) navigates the rain water out away
from the corners of the chimney a bit better.
(b) slows the water down and reduces
upward splattering under the counter flashing.
(c) helps to be able to
trim off the commonly compromised and damaged shingles nearest the
chimney when replacing the flashing without a full re-roofing
project, thus reducing the shingles needing replaced around the chimney.
(d) helps reduce scraping needed
where the chimney meets the roof: old caulk or sloppy mortar work.
(e) makes it easier to cut the new
grooves without needing to grind so close the the roof.
(f) application of an underlayment resting
up against the chimney for added protection is also made possible;
without such risk of cracking that membrane needed with conventional
flashing.
To see more photos of this installation
follow this link:
http://copper-by-design.com/rf/Druschel.htm
Let me know if you need any special
configuration and we'll customize your kit.
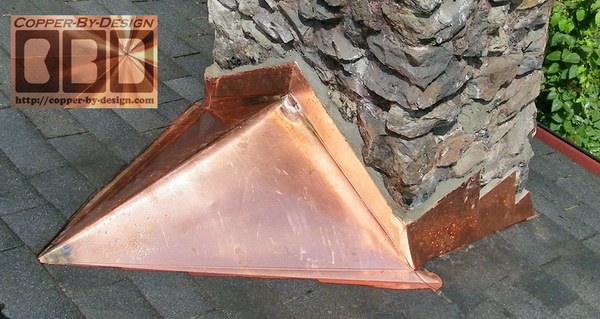
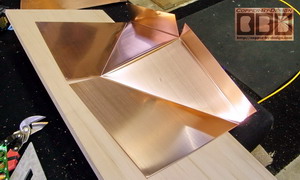
What about a cricket or saddle?
They are very helpful to divert the
rain water and debris off to the sides. I build these custom saddles to match your roof angle with
wood support attached underneath
for a sturdy simple one piece installation, in stead
of just the normal horizontal tray that traps lots of debris. They
run about $45 sq' + freight. Wide saddles over 36" would need to go
truck freight, which can be several hundred depending on the size
and weight.
This can be one of the most important details
of a new flashing kit. The upper side should have a saddle, but it's not required with a flashing kit order. It is
just highly
recommended in order to help divert the rain water and debris off to the sides of
the chimney. As opposed to just a simple straight horizontal tray, like you
probably have now. Especially if your chimney is wider across the upper
edge.
Those common horizontal
trays catch a lot of debris, so they're if not cleaned out frequently that
debris compacts and decomposes, holding moisture against the metal
between rain storms. I design these saddles to drain the water 2" out past the
side flashing. Also made with a wider outlet than any others I've seen,
so debris is less likely to damn up. If you are interested in one of
these custom saddles please be sure to mention this in your e-mail, or I
may not offer it. I try to refrain from up-selling my clients.
With your measurements we
make the careful calculations and form this to fit just right and
sealed water tight. If you could get some larger sheets of paper to
hold up against the sides of your chimney to trace the roof angle
and the mortar groves between the bricks that would assure a better
more precise kit preformed for you in advance, so little
customization is needed by you. Then fold those up and mail them to
me. I do not require this. I've made most of our kits from just a
few measurements and digital photos to reference. That is just a
sure way to make sure this would fit as well as possible.
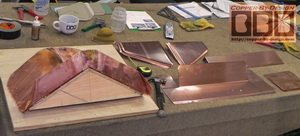
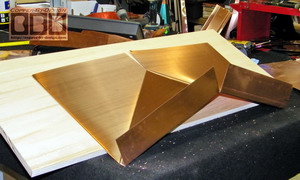
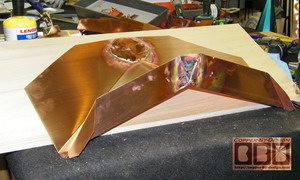
These photos show duel sided discharge
chimney saddle to replace the straight horizontal tray may have.
I make it as seamless as possible and sealed with a cover piece over
the splits soldered in place. You could make the plywood
support for under the saddle, but there is a strong likelihood my
copper saddle will not fit perfectly over it, so it's highly
recommended to have us fit it in and bond it to the wood, so it has
an air tight seal and condensation will not form under the copper
to make it all nasty. Otherwise you'll need to use an expensive
high temp Water & Ice Shield underlayment, like I use on other
projects:
http://copper-by-design.com/cw/Edwards.html
A
little personal history:
I originally built a sheet metal shop in my basement to
custom fabricate my own aluminum drip edge flashing for the gutters
I install. A couple years later I paid the 5X cost for
roofers liability insurance for several years and replaced many
roofs, but with no
employees I could not do the volume of work it took to afford that
expensive insurance. Over the
last 2 decades my little sheet metal shop has grown
and evolve to building many different custom aluminum, stainless
steel, and now mostly copper rain management
products that can be seen on this web site.
I use to be very intimidated by the
high cost
of copper even before it had doubled in cost back in 2006, so I used a
clay red pre-painted aluminum flashing for chimneys, knowing it is a lot better than
just the
cheap steel
that is normally used. I stopped using aluminum all together for
chimney flashing around a decade ago. The
cost difference between using a cheaper metal was not worth it's
disadvantages.
Especially considering the
amount of labor this type of project requires.
There needs to be this 2 part flashing: the
step-flashing is integrated with the roofing and sets up flush against
the side of the chimney. Then the counter-flashing is mortared in between
the bricks in horizontal lines only to overlap the step-flashing.
This 2 part system allows for the movement that is caused with the expansion
and contraction of these 2 very different types of structures: wood
and brick, while
maintaining this seal. Of course the bricks will expand with temperature
changes differently than the wood structure of the house. Even 1/4"
movement would be enough to rip open any other system used to seal the
chimney to the roofing. This is not a new method by any stretch. It
is a time tested technique used for centuries, and I have yet to see
a better technique for this purpose. Elastic rubber membranes will
remain flexible for only so long, and will not outlast even steel
flashing.
What
info do you need from me to make a good custom kit?
(a) Good clear photos. Fortunately most people now
days have a digital camera and know how to send picture through
e-mail. I've successfully worked with thousands of client this way
over the last decade. Most of my clients have been back East on the other side of the country. It's important for me to
see what your situation is up there, so I'll need some fairly
close-up photos showing the sides of the chimney where it meets with
the roof, as well as whole shots.
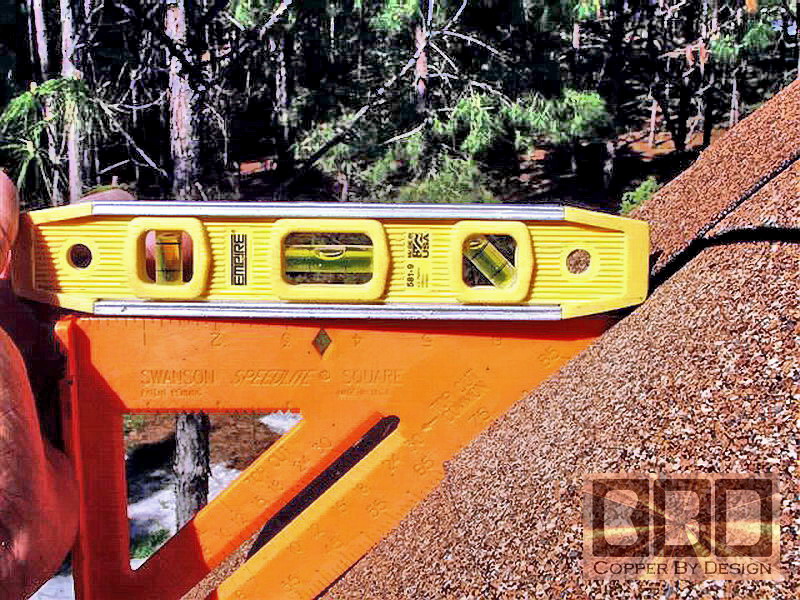
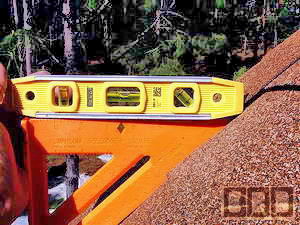 (b)
The roof angle is important, so I can cut the counter-flashing at just
the right angle, minimizing the copper you'll have to pay for and
less cutting copper pieces there up on the roof to fit. The roof angle is based on how
far the roof drops for every 12" straight out. It's best to
have a level to make sure the 12" is horizontal, then just how far
straight down from the end. You can use a board laid flat on the
roofing to get a better idea of the real slope of the roof, as
shingles can be lumpy. (b)
The roof angle is important, so I can cut the counter-flashing at just
the right angle, minimizing the copper you'll have to pay for and
less cutting copper pieces there up on the roof to fit. The roof angle is based on how
far the roof drops for every 12" straight out. It's best to
have a level to make sure the 12" is horizontal, then just how far
straight down from the end. You can use a board laid flat on the
roofing to get a better idea of the real slope of the roof, as
shingles can be lumpy.
(c) The measurements of the
chimney at the point where it meets with the roof of course. These
measurements should be as accurate as possible, so I can do as much
cutting and bending for you as possible, so you will not have to do much
customizing yourself up there up on your roof.
(c) As I said
above it would greatly help if you could get some larger sheets of
paper to hold up against the sides of your chimney to trace the roof
angle and the mortar groves between the bricks. That would assure a
better more precise kit preformed for you in advance, so little
customization is needed by you. Then fold those up and mail them to
me. I do not require this. I've made most of our kits from just a
few measurements and digital photos to reference. That is just a
sure way to make sure this would fit as well as possible.
|


