|
Common Problems
With Roof Flashing Work I've Seen:
Clearly the #1
cause of roof failure is rusted steel roof flashing and improperly
installed flashing, or lack there of. In my 20+ years experience from crawling up on several thousand roofs
I've personally seen in
most cases the Roofing Contractors will not re-flash
many of these problem areas they were hired to fix in the first
place, let alone flashed the right way. Homeowner very often cheated
when the worse problem areas of their roof were not solved.
I've done several tear-offs where I removed 2 layers of composite shingles and
the bottom layer of wood shakes, where the only flashing I found
around the dormer was under the wood shakes, and of course it was
very rusty and deteriorated. That means the last 2 reroofings they
had done had not bother to reflash the dormers at all. I have yet to see evidence of a decent roofer
in this area. No joke.
One of the problems stem from these workers come more from a hammer and nail mind-set. Not from a
sheet metal worker's perspective like me, so these area of roofing escapes
their private logic.
Sadly ethical responsibility seems
to be a thing of the past. I understand this is not just a local
issue either, Improper roof flashing using
just cheap
steel is the standard across the Country. This thin steel flashing will not even last as
long as the most inexpensive 20 year roofing shingles. Even if it does not
rust all the way through it will cause unsightly rust stains down the
roofing.
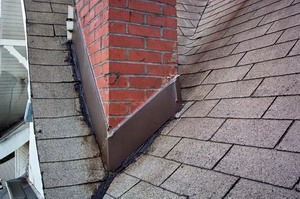
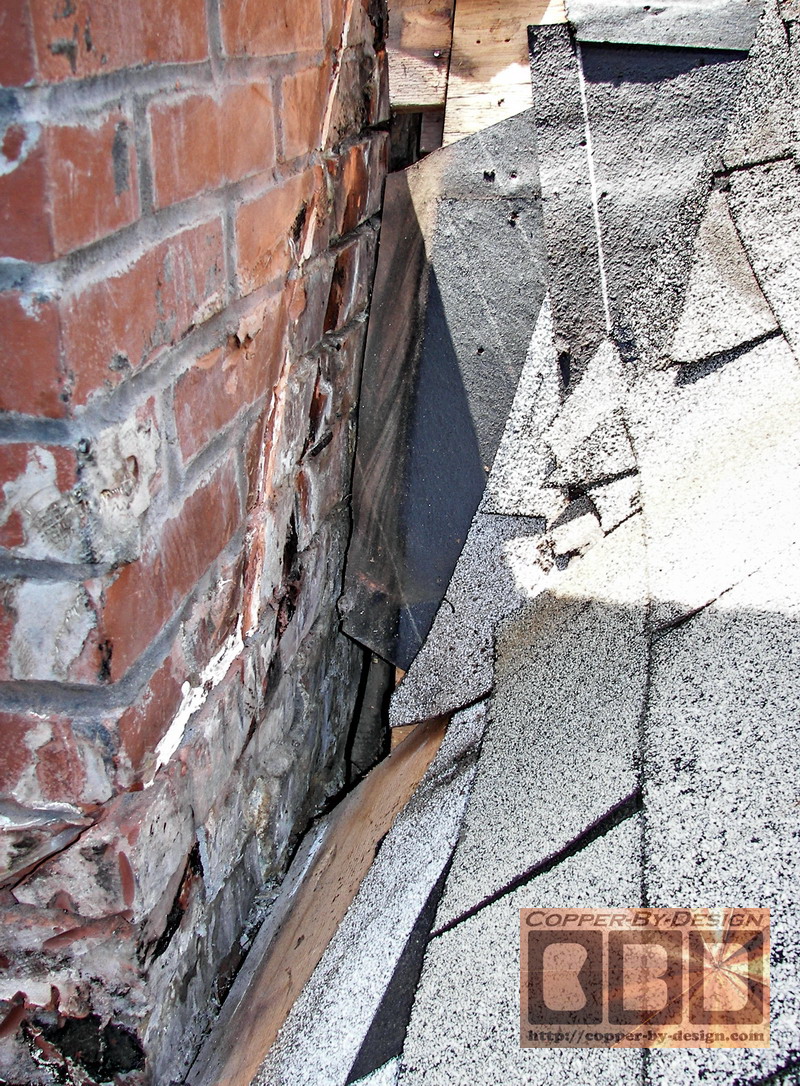
From what I have seen
chimney flashing is the most neglected area of the roof,
if re-flashed at all.
More times than not it was never re-flashed during the last re-roof. I have personally seen thousands of
examples of this close-up. In most cases they will just bend the
old counter-flashing out and slip the new step-flashing under and
just bend that rusty counter-flashing back down over it. Even if it were not rusty at all it is not
going to last through the life of the new roof. Even though they
were not willing to replace the old flashing
they are not likely to bother notifying you the Homeowner of these rust
issues that still need fixed, so you don't have a clue that the
roofing job was never finished until you notice a leak, which means
damage has already occurred.
Worse
yet is how many homeowners are conned into paying to fully re-roofing
their house because of these flashing leaks, instead of just
replacing that flashing. These fancy talking salesman are much more
motivated to sell a whole re-roofing package to unsuspecting Homeowners
to make that big ticket sale, where in most cases even if they do
actually replace that flashing they again will do this new work without the benefit
of using rust-free metal like aluminum or copper. In many cases not
even bothering to re-flash the problem areas as they had promised, and failing to solve the
actual problem. This is one of the main reasons liability insurance
for roofers is very hard to get and extremely costly these days,
being around 500% more than any other type of construction work.
That is very telling in it's self demonstrating irrefutable proof of what I'm
saying here.
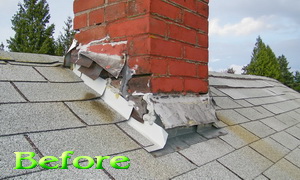
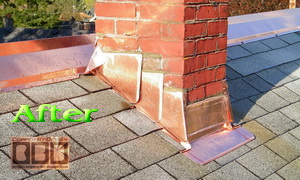
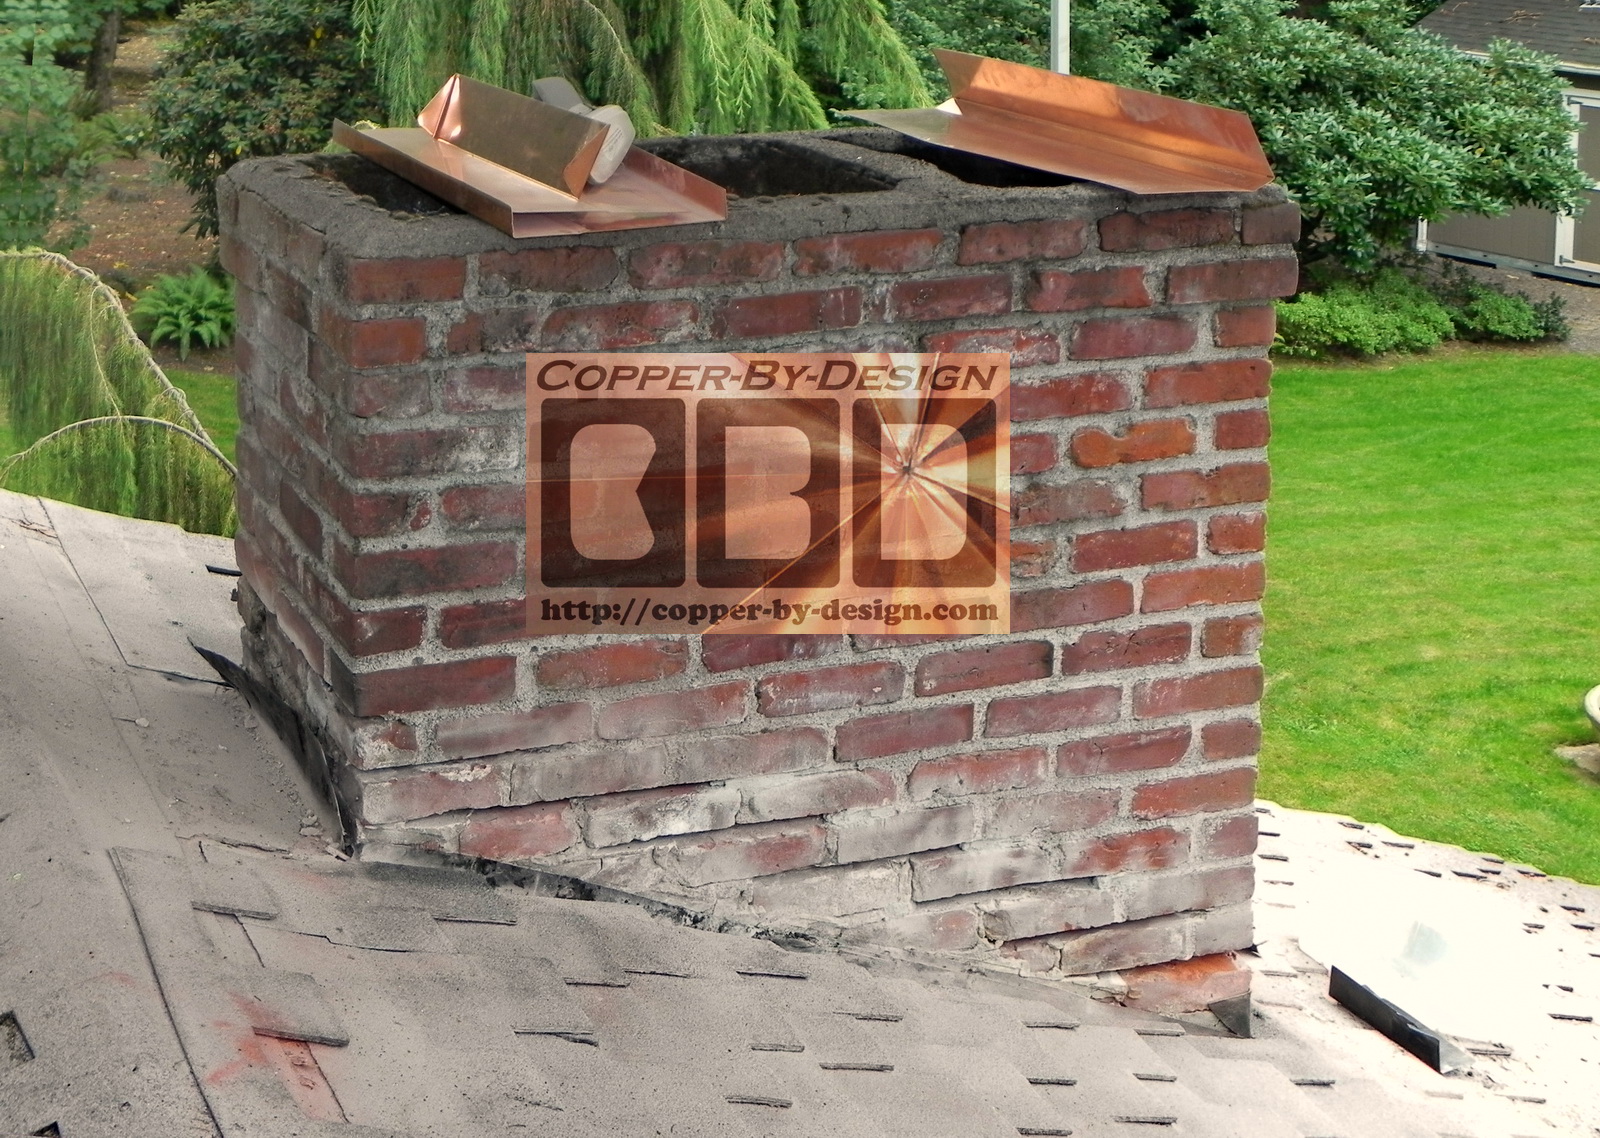
Most of roof flashing can be replaced without
re-roofing the whole house (as seen above), but of course that is far less profitable
for a Roofing Contractor, so that is rarely offered as an option for
your consideration. These roofers know better, but they still
do the same kind of roofing with this cheap steel flashing that they
just tore off of your house. They know will fail in short
order, but they just don't care. It is said how this is the definition of insanity: doing the
same thing and expecting different results. Sadder yet is how they
are only saving around $200 on the average reroofing by not using
aluminum that is about twice as thick and will not rust even if all
the paint were to flake off decades later, still protecting your
roof.
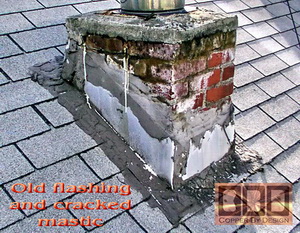
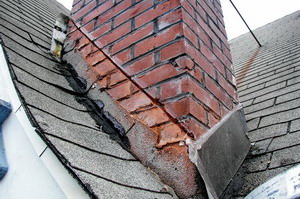
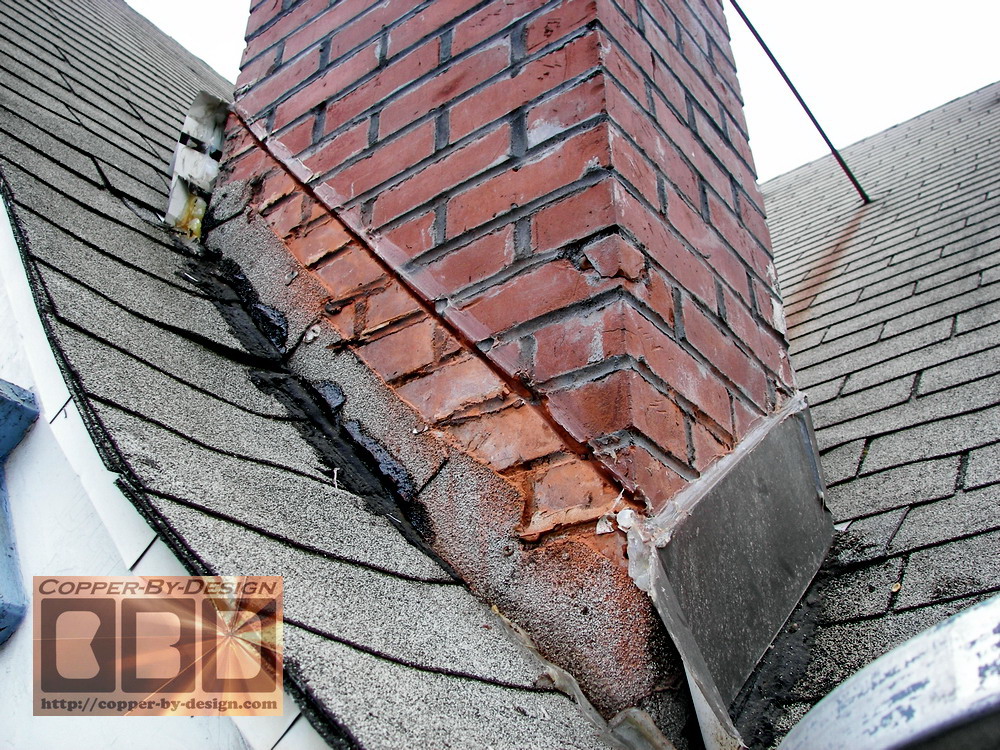
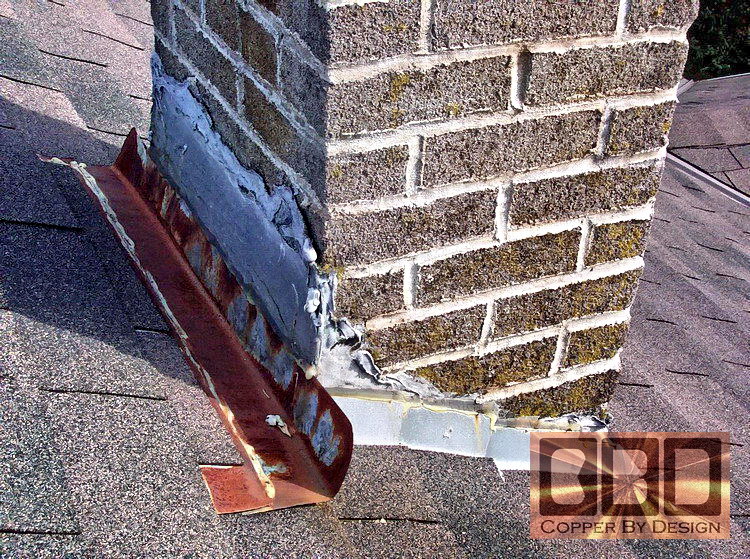
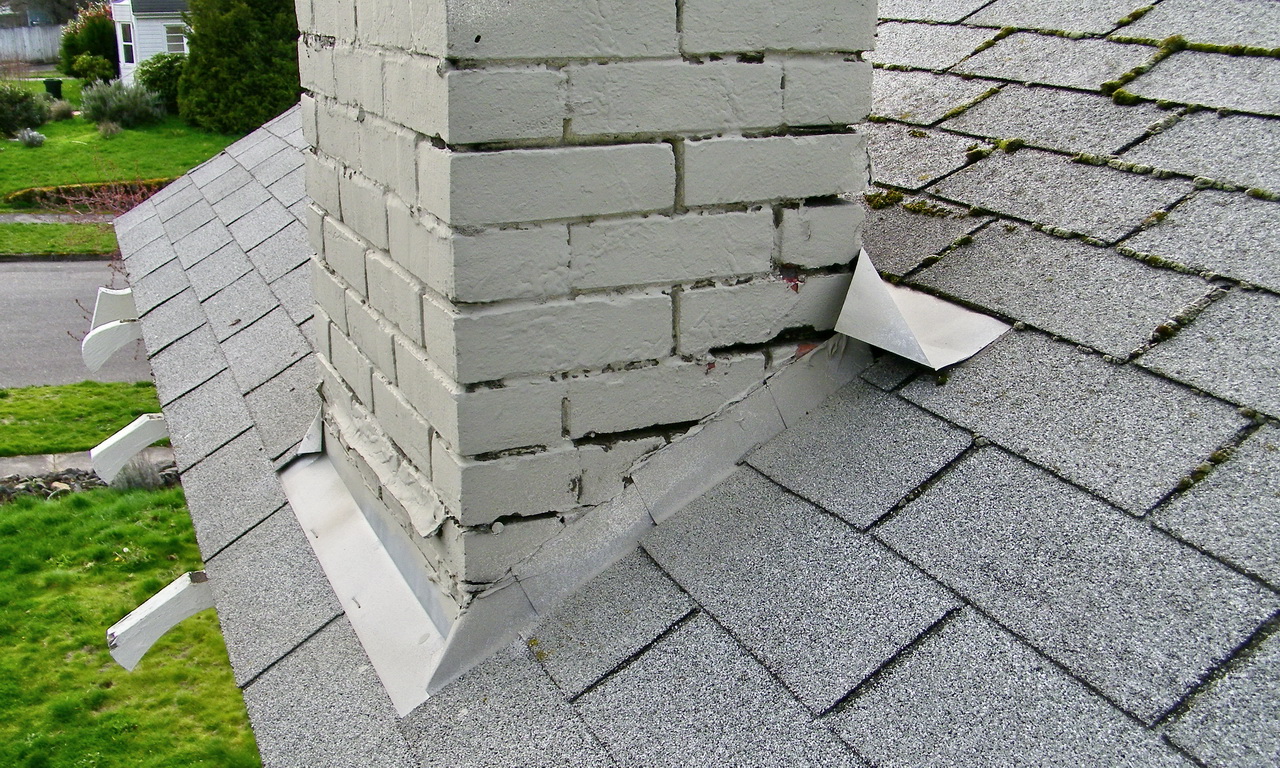
If that were not bad enough; Instead of flashing
areas with metal; they will often use the cheapest caulking sold; called mastic.
They just smear it around those problem areas. Mastic is just fibered tar with
no UV protection. This will usually get the roof past their minimum
required 1 year warranty that the Construction Contractors Boards require
of any contractor, but not much more. This mastic tar will become brittle,
crack, and peal away within a few years. If their work were to be inspected
by a State Code Enforcement Inspector, it would not be approved. They
are not to use mastic anywhere on a roof. That is a clear sign it was
not properly flashed. Mastic is only to be used as an emergency patch to pacify
the leak until a proper fix can be made, but it makes for a very messy
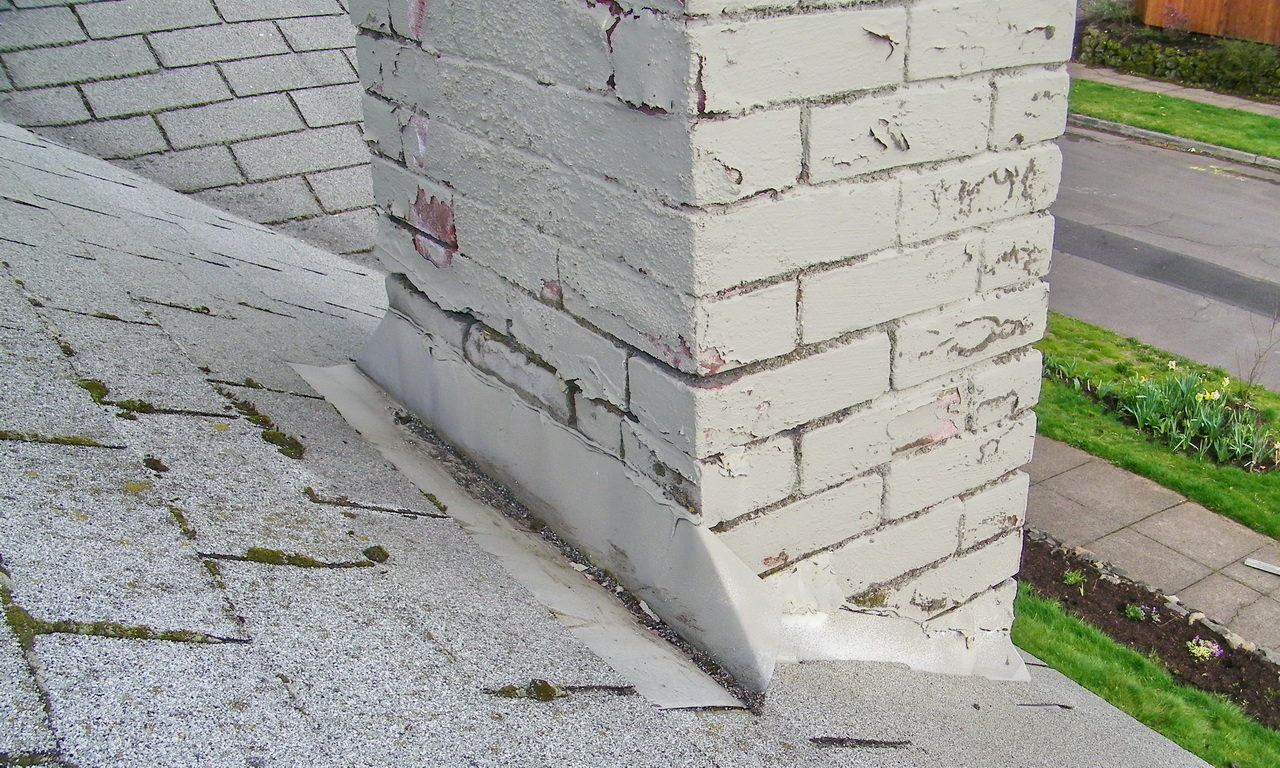
clean-up. The roofing needs to be replace after a mastic attack, as
seen in these photos:
We know this to be a very common intentional crime of
Roofing Contractors, since pretty much any roofer has seen the
evidence of these
common issues when doing a tear-off of an old roof;
i.e. very rusty steel flashing on the roof and mastic failure. When they tear into
a bad roof for replacement it tells a story of why this roof failed.
They would have to be complete morons to not see this clear evidence in front
of their eyes. Yet, they continue to ignore this evidence and do
the same shoddy work, since in most cases they are not required to file for a
building permit to replace your roof year after year, and have not had to worry
about an inspector double checking their work.
What about Lead Flashing?
Some clients have asked about using lead for this chimney flashing.
It is some times use as the chimney is being first built, but I do
not know how you could be able to get it in if the mortar when the
more rigid thinner copper flashing is this difficult to quickly
install before the mortar sets. I do not believe it's very good for
the environment as well.
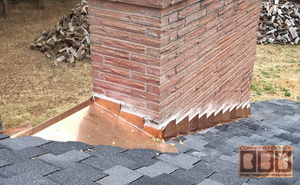
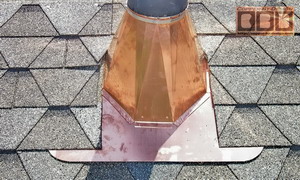
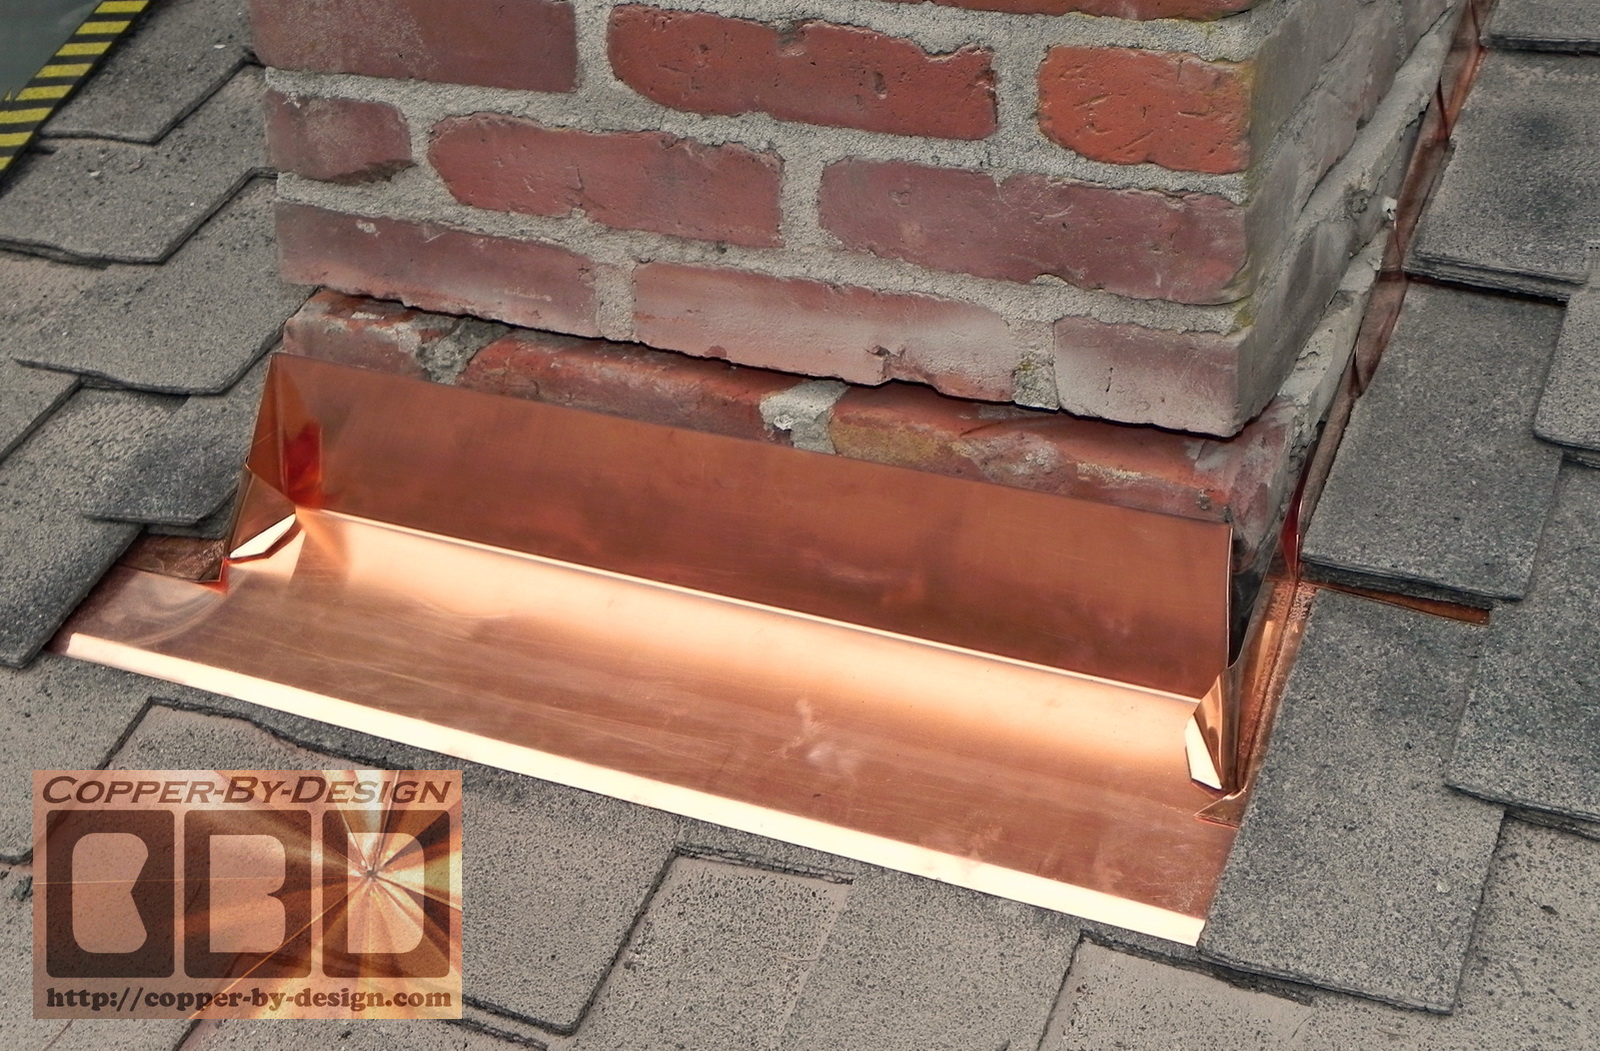
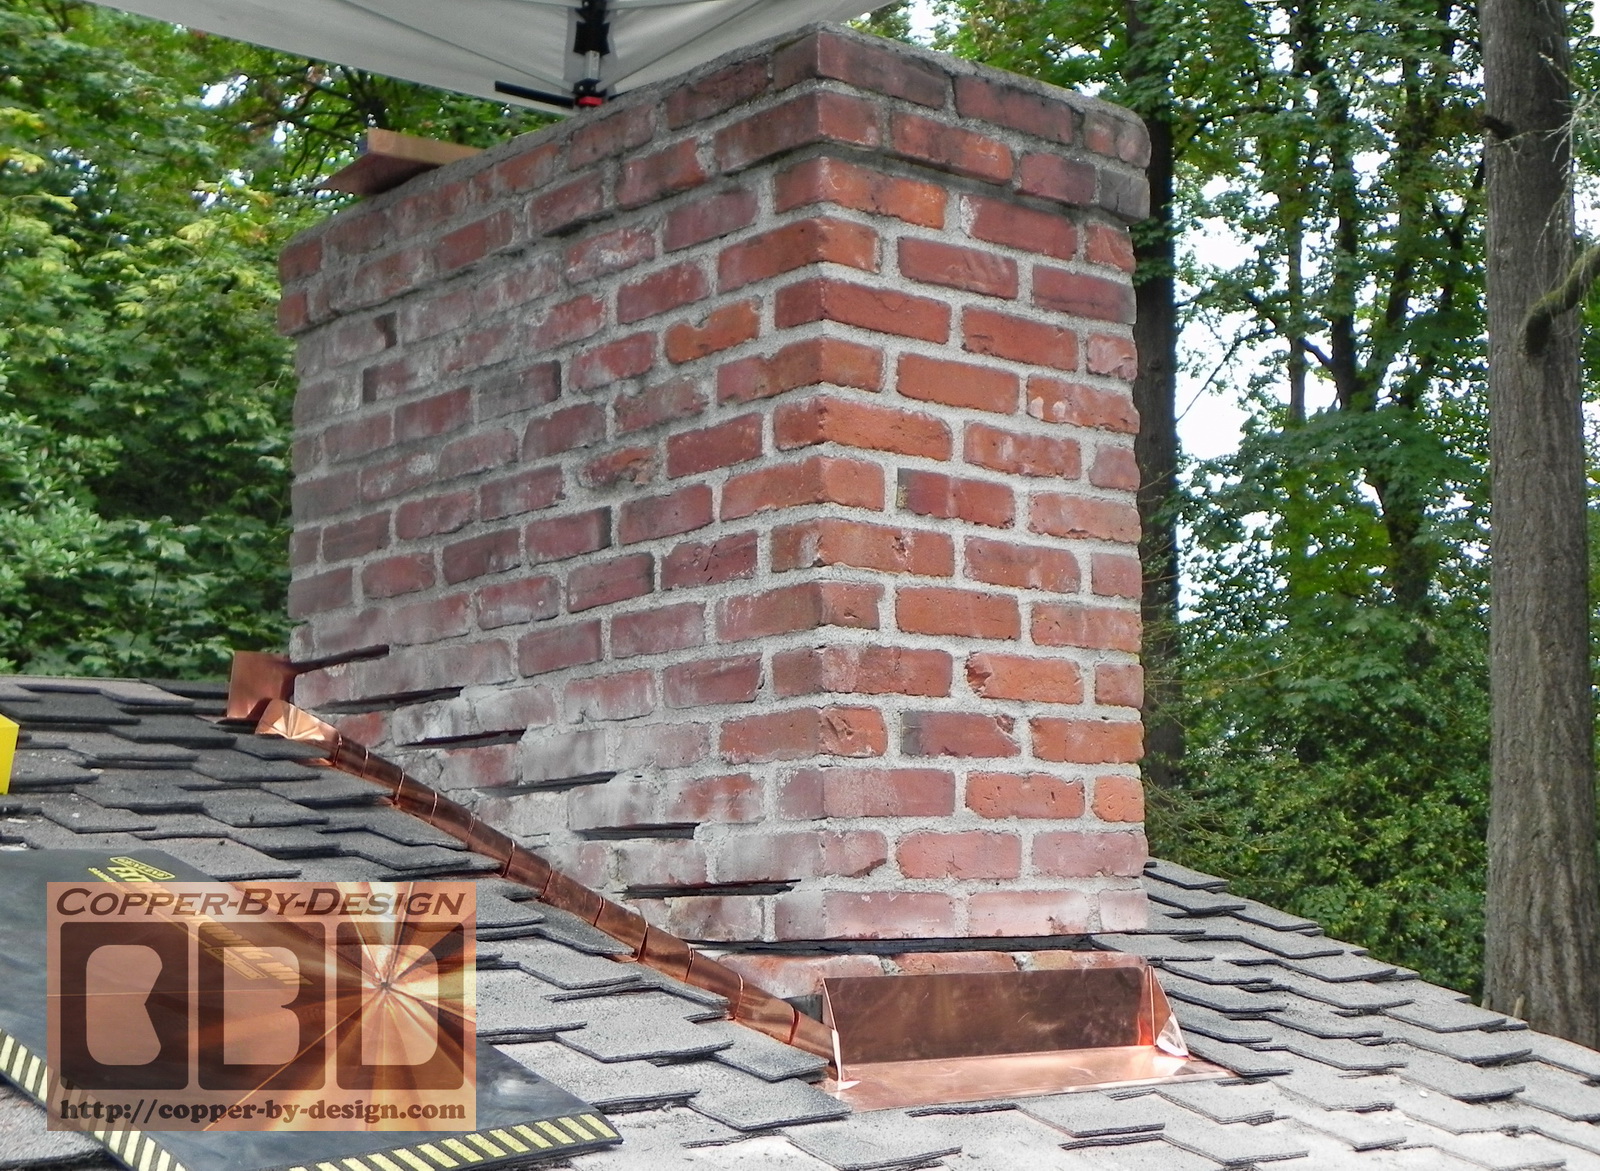
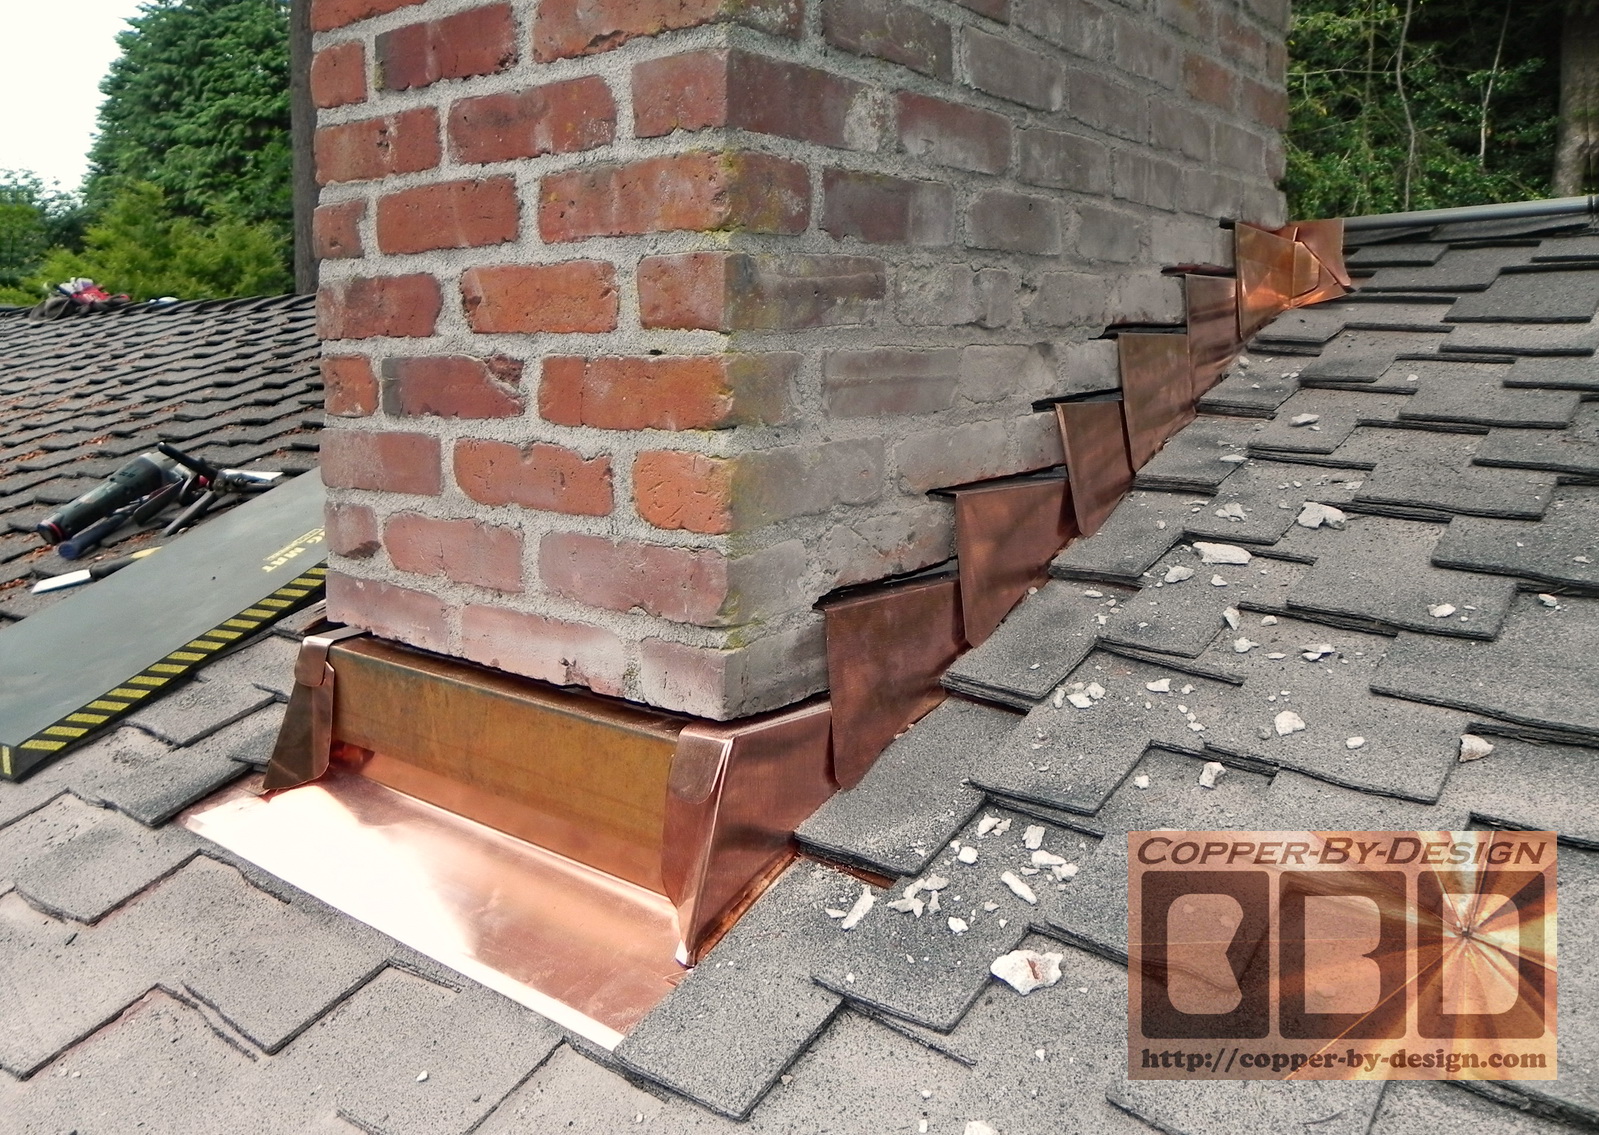
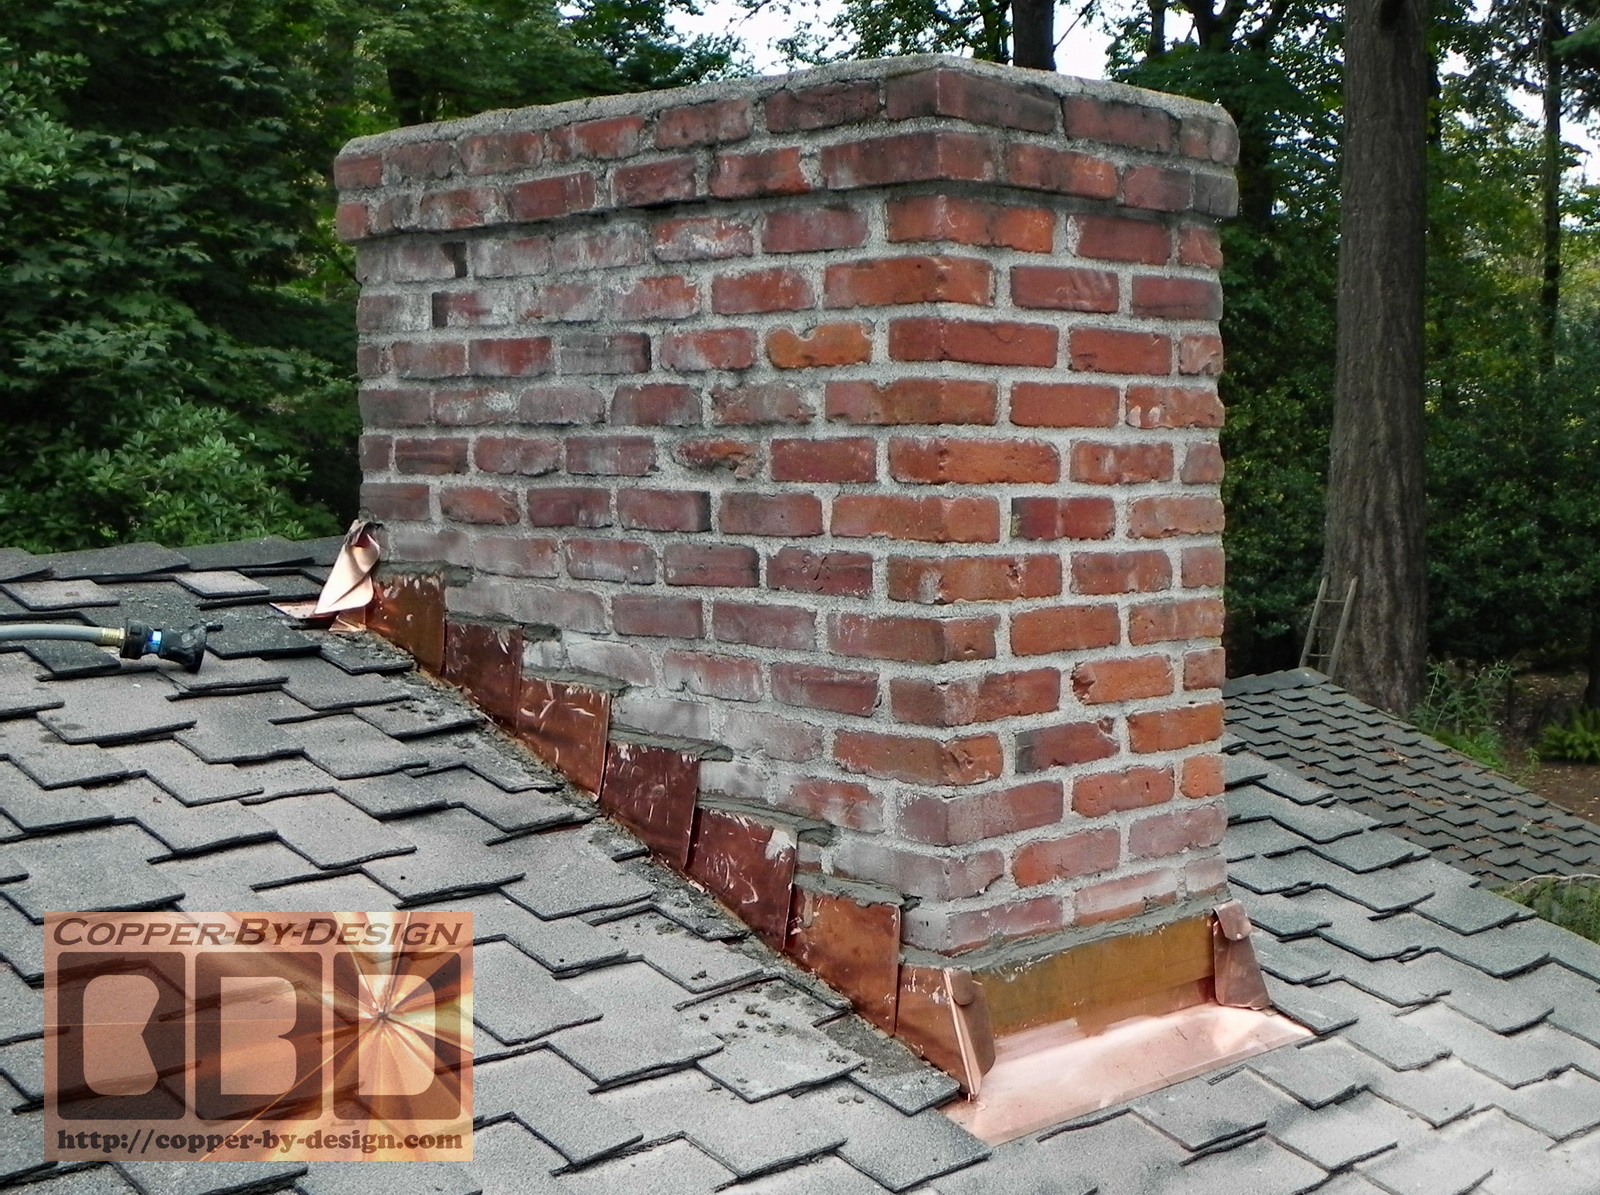
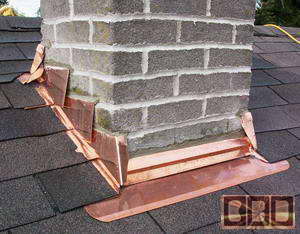
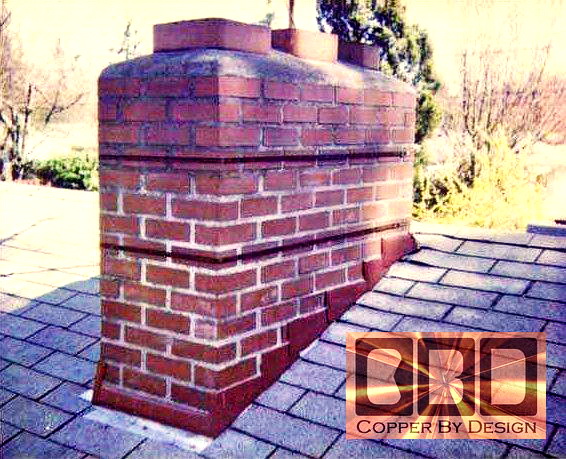
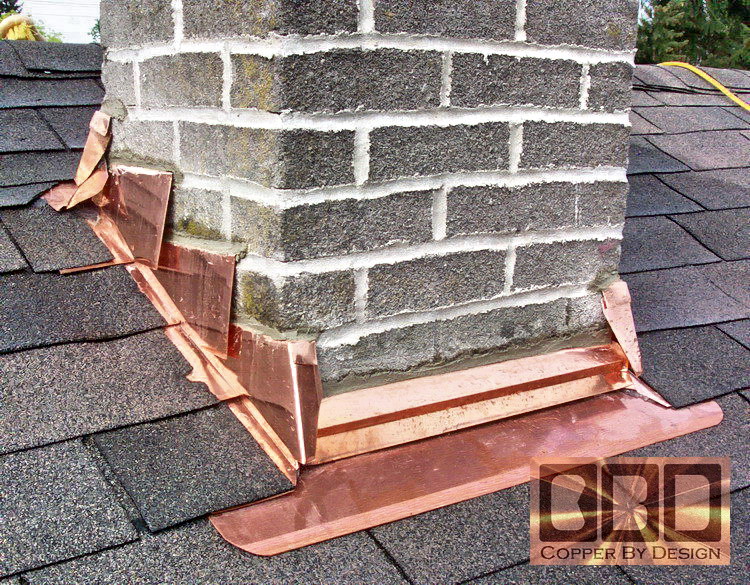
Here is an example
of a Client installed chimney flashing kit I made for them:
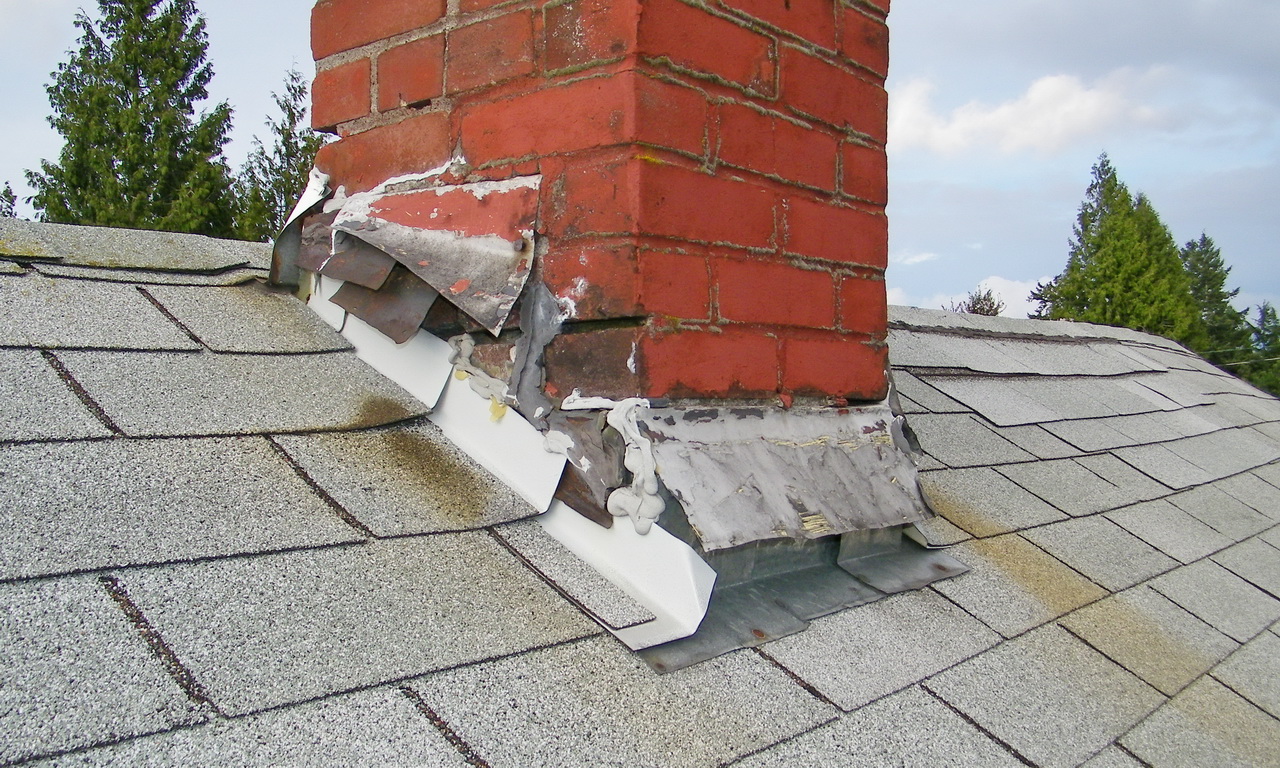
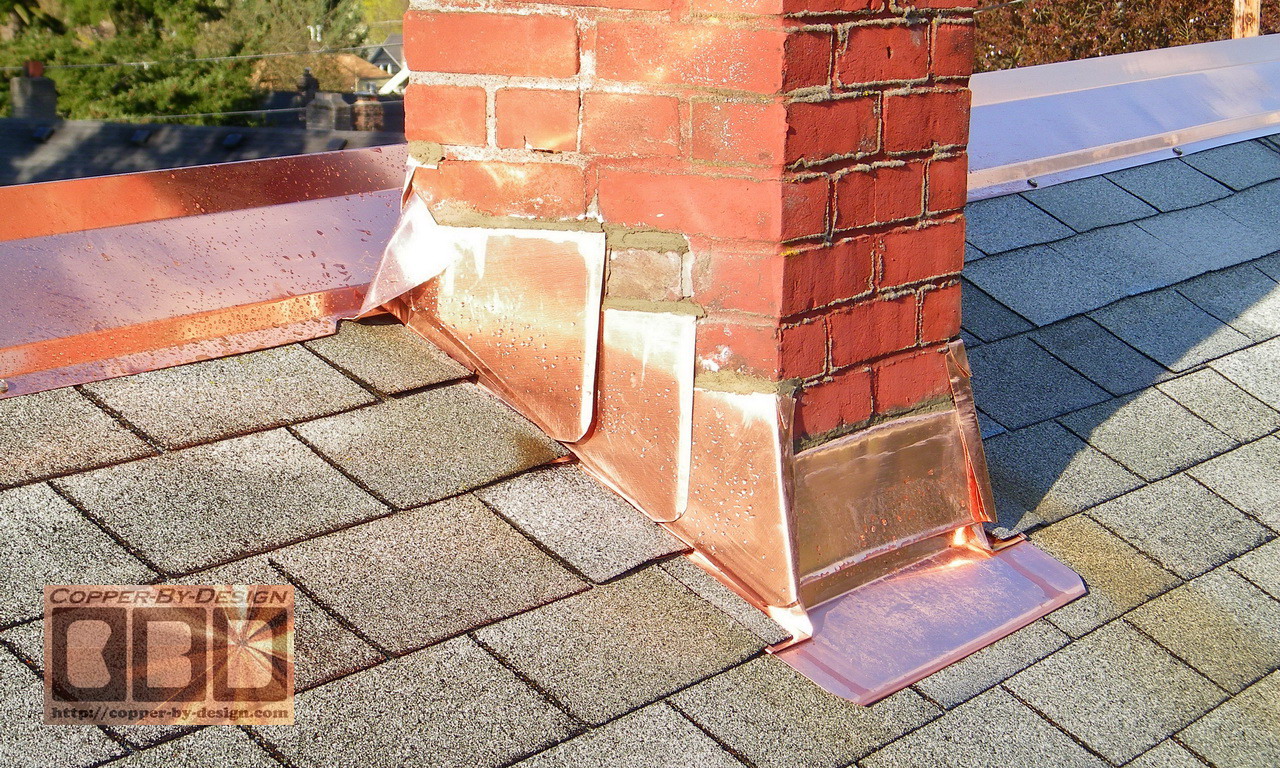
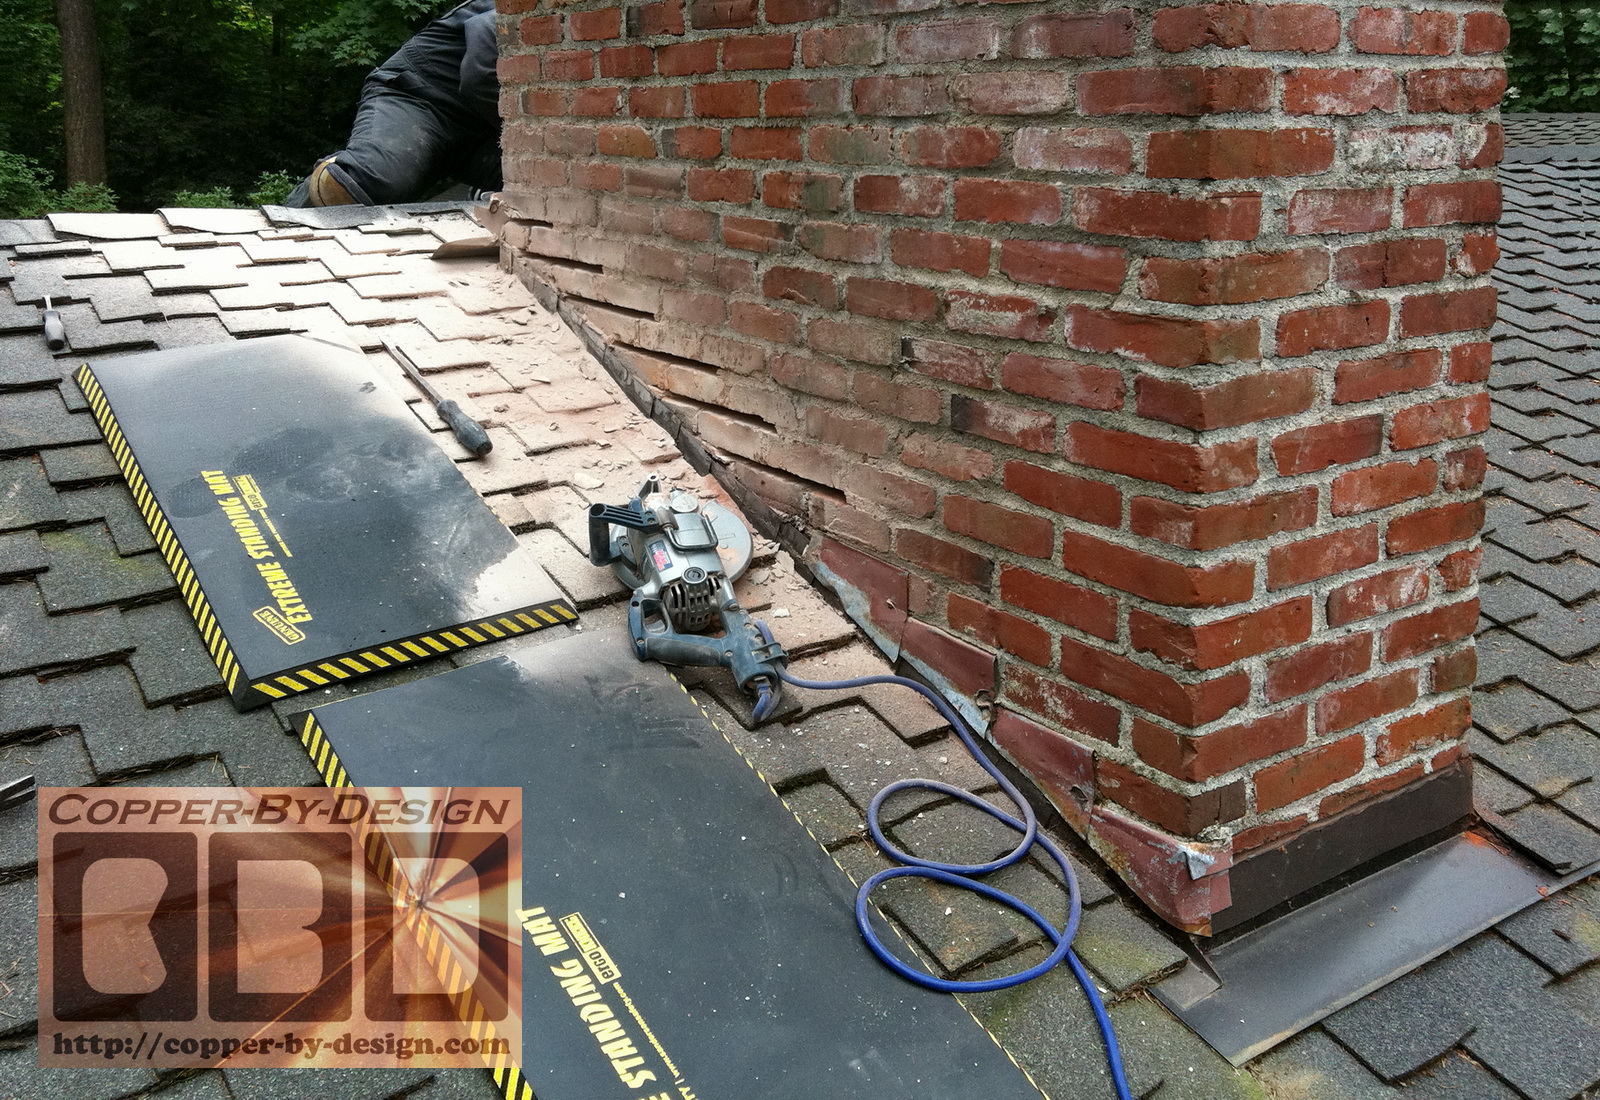
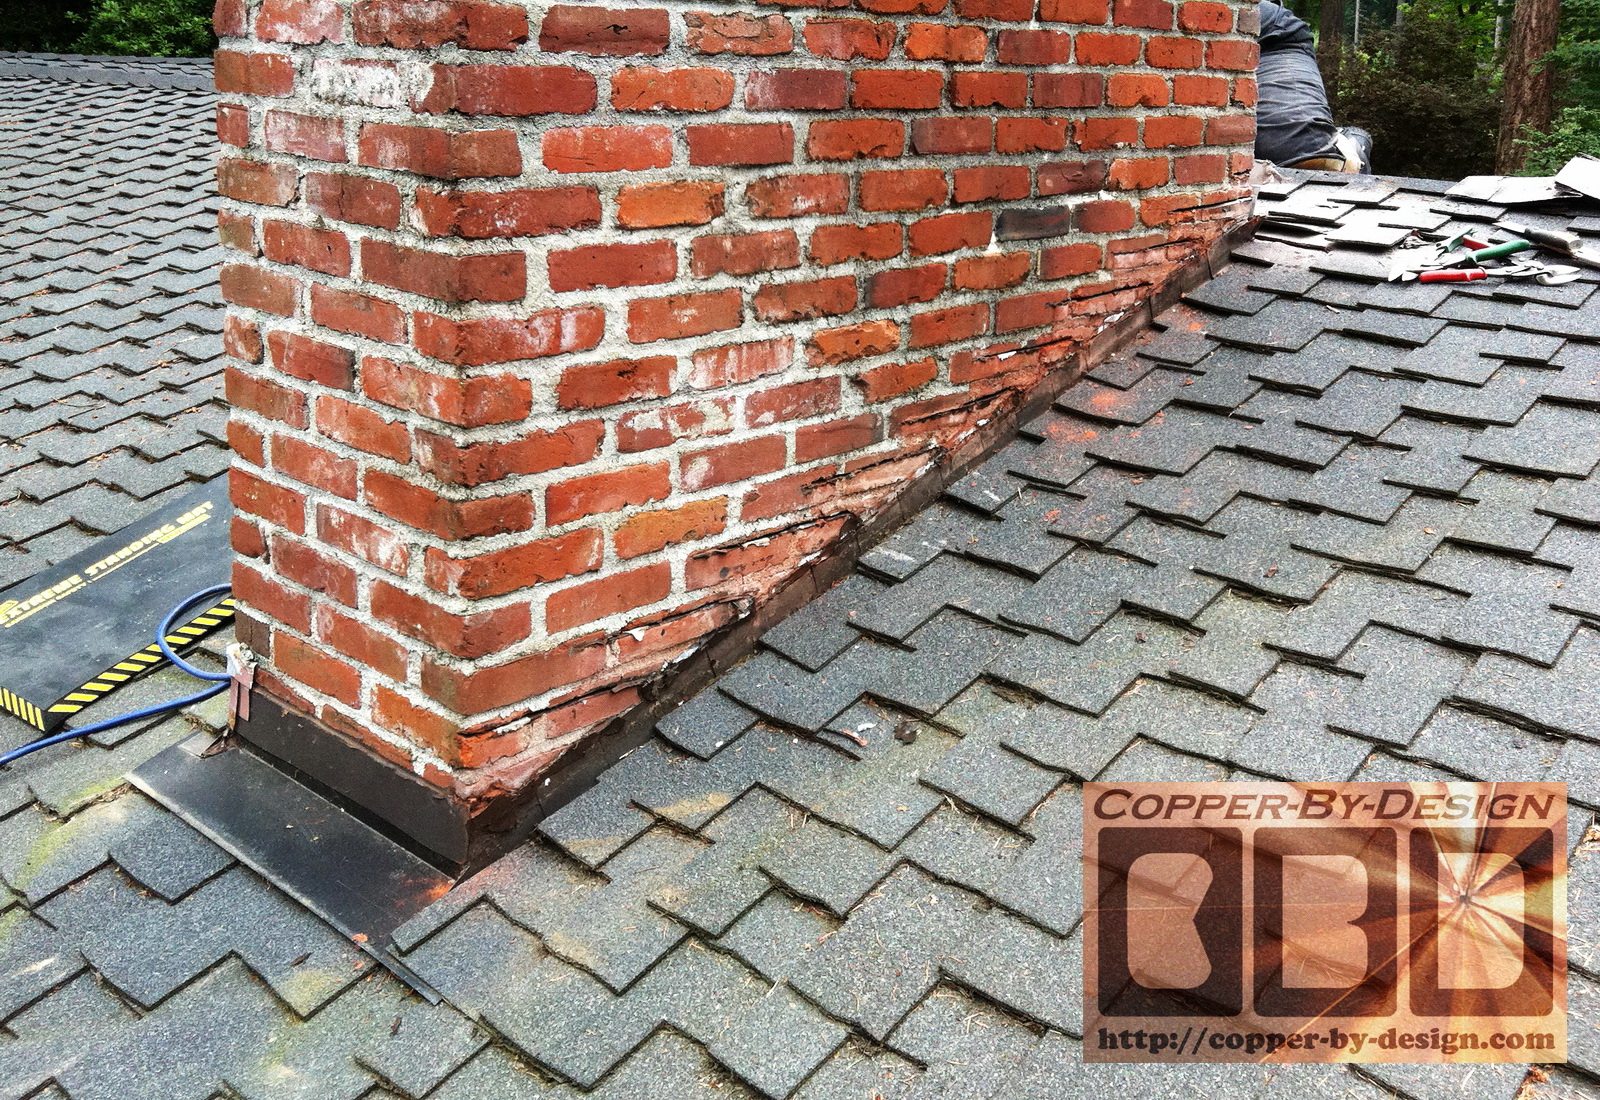
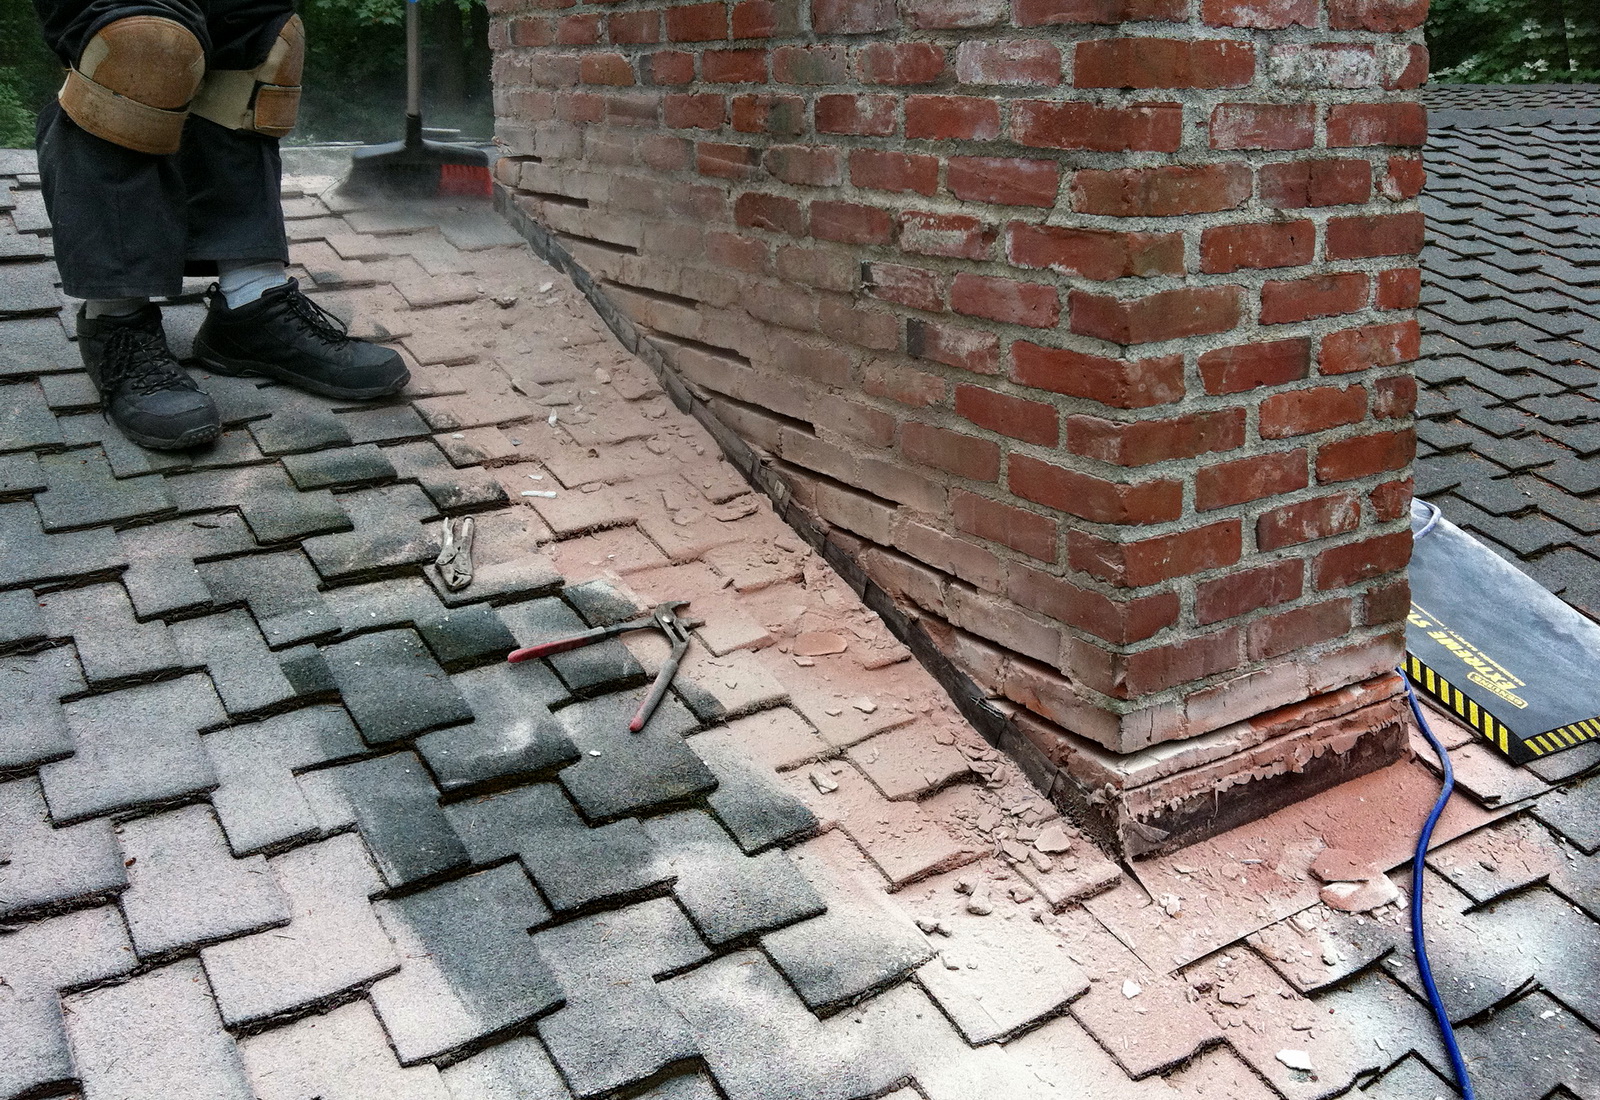
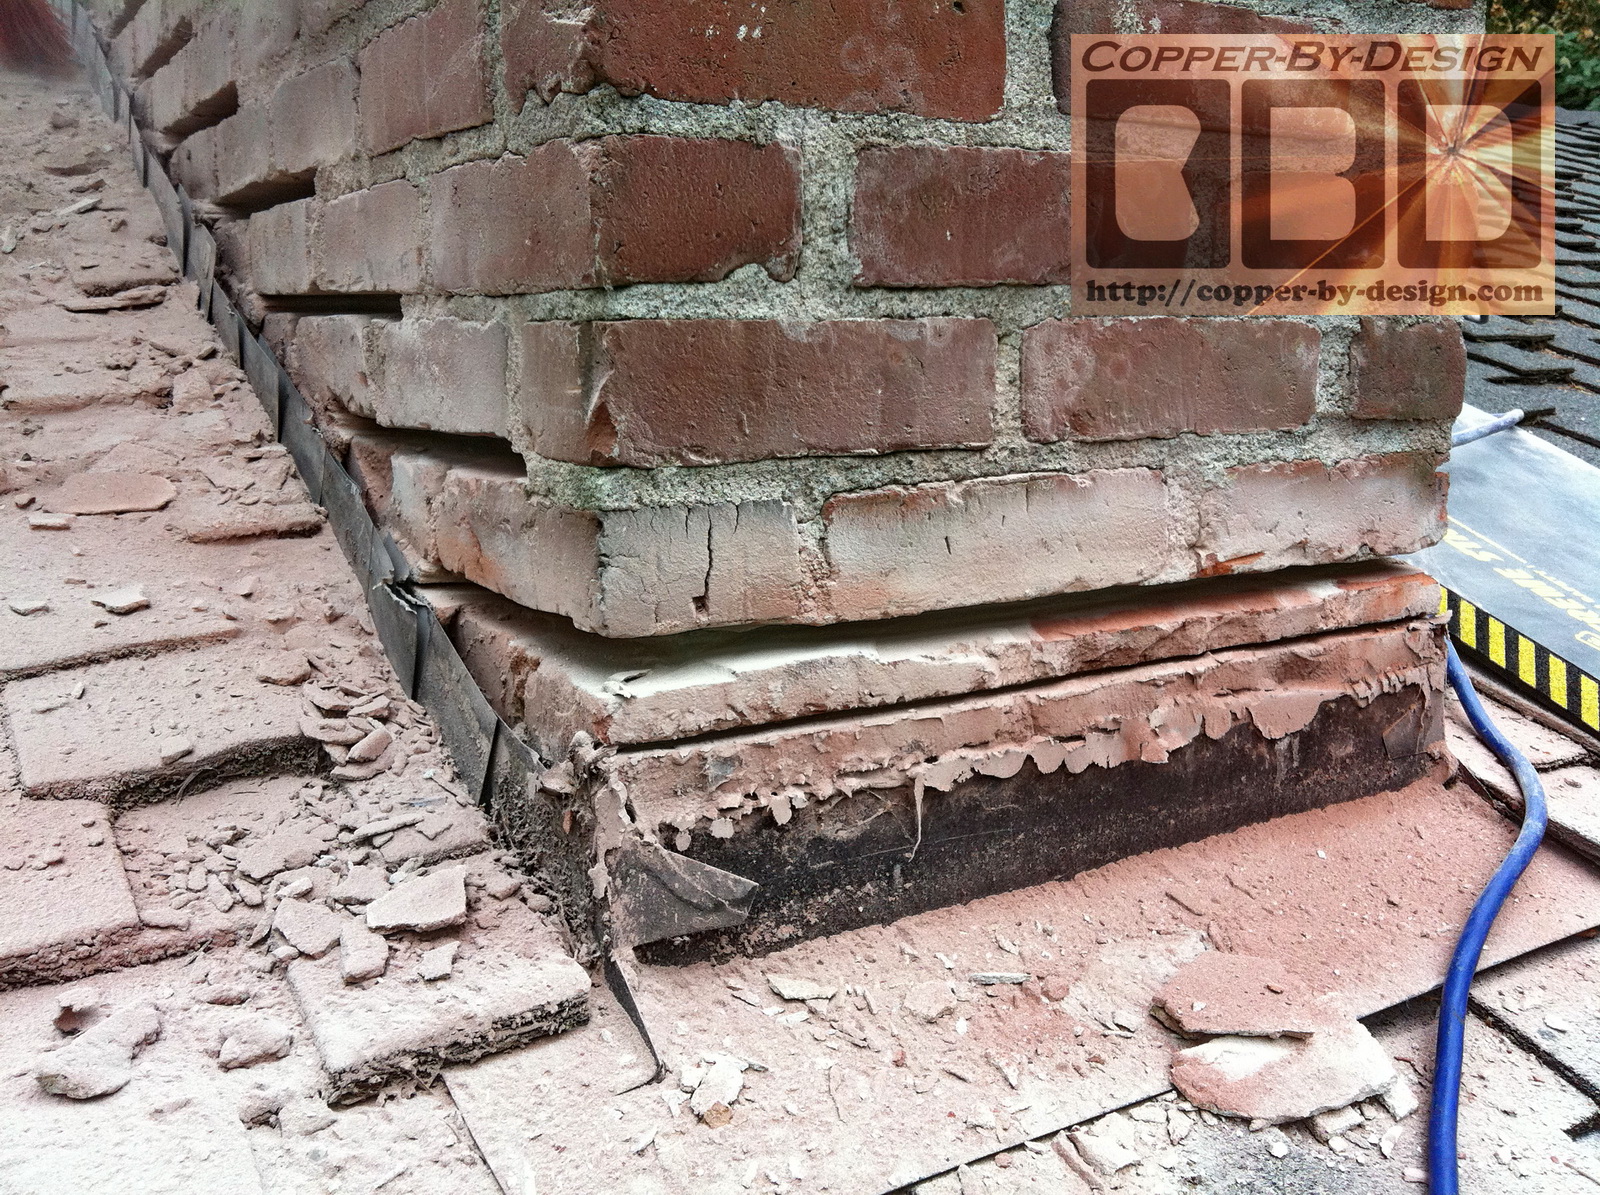
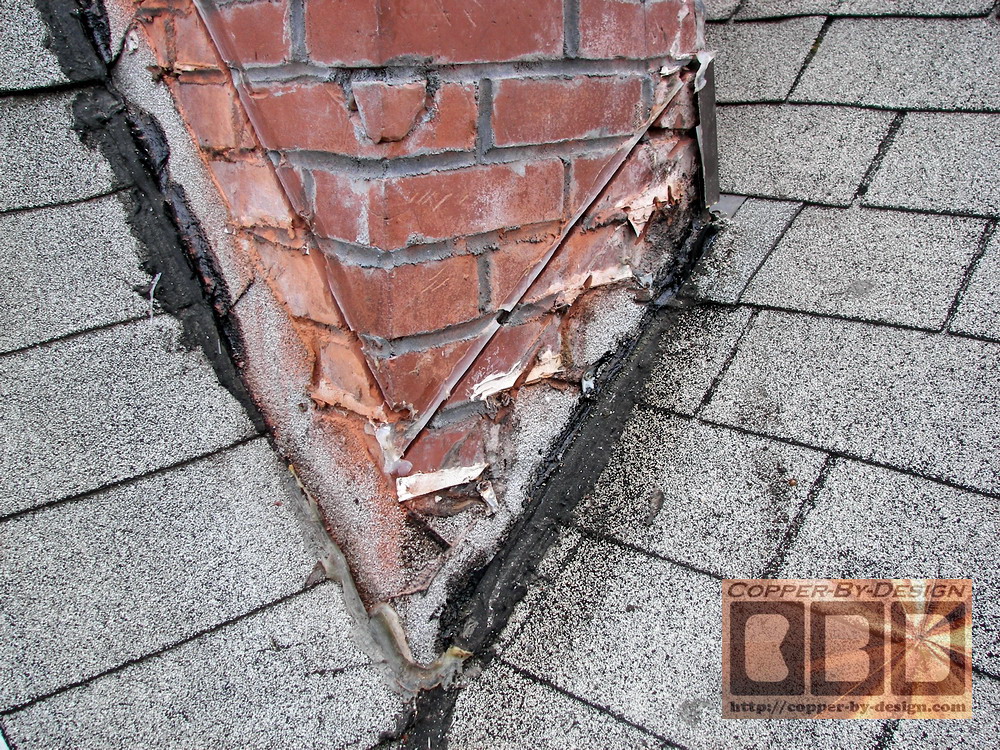
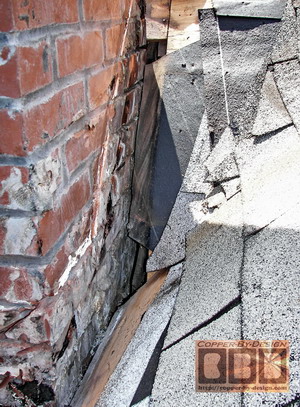
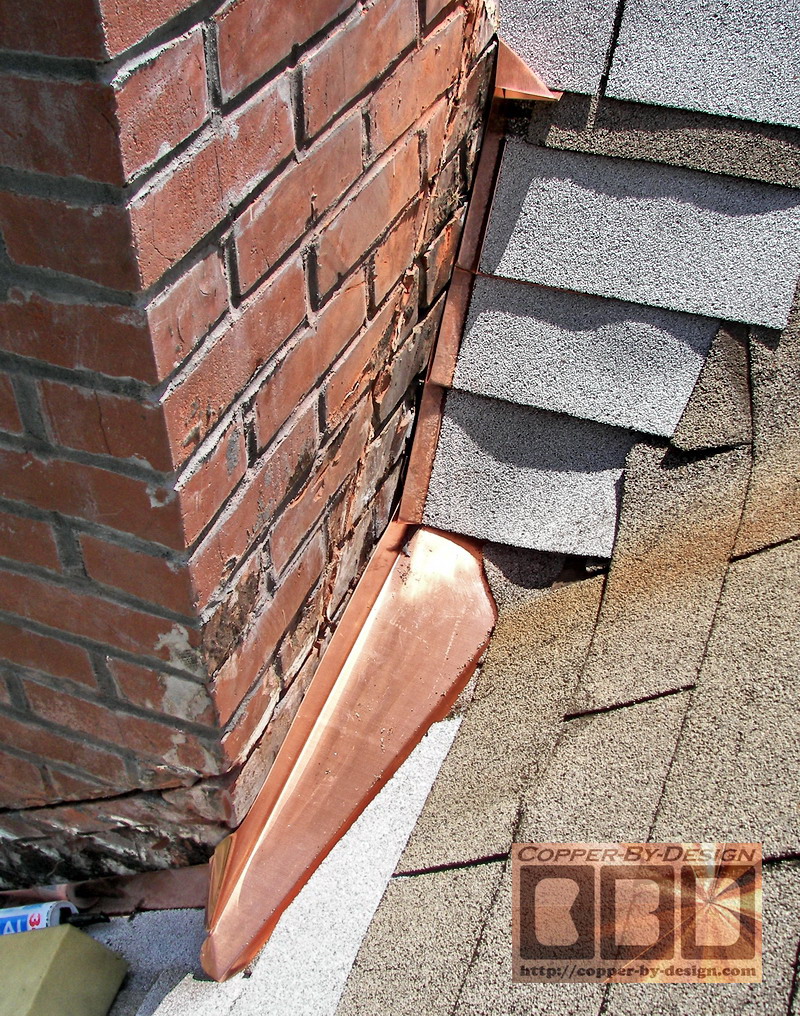
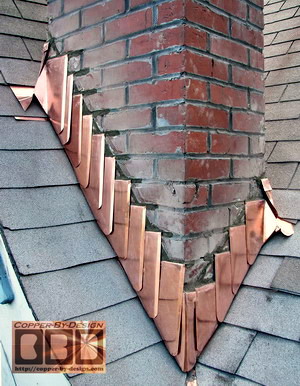
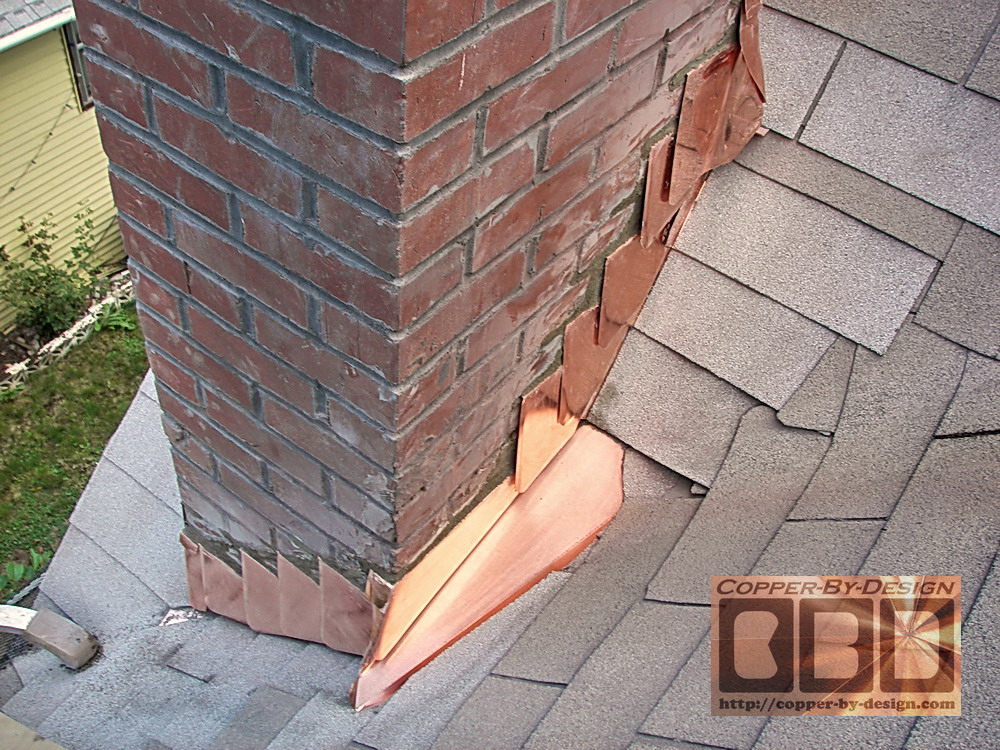
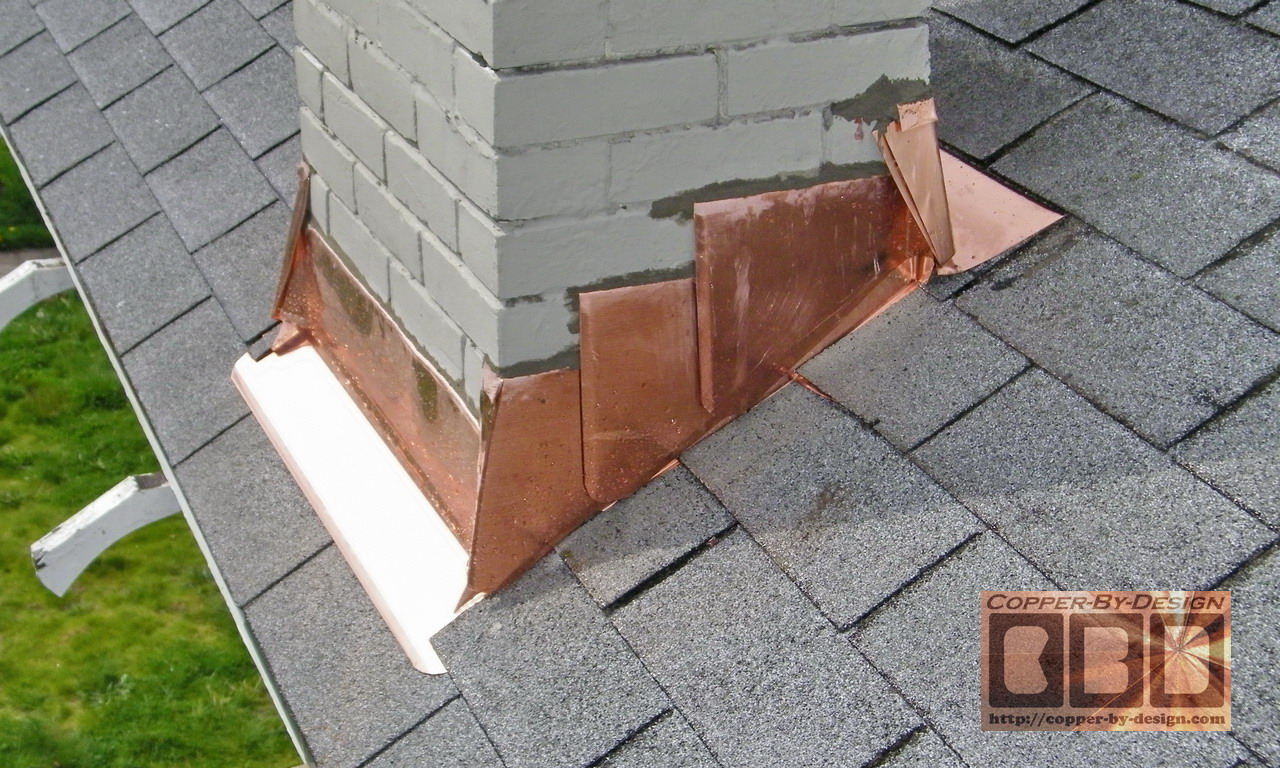
Common signs of shoddy workmanship:
The most common mistake I see roofers do
when they do bother to re-flash a chimney is to cut a shallow grove
along the diagonal sides of the chimney to caulk a straight piece of
flashing in, but these will not remain attached for long to the crumbly bricks and
old mortar. Although that is not the worst problem; this sets up a
fracture point for the chimney to crack and possible collapse in an
Earth tremor. I have seen lots of evidence of this happening. So,
keep in mind how if
they do this to your chimney they have permanently damaged the
chimney, where the only solution would be to rebuild the chimney
down to the roof line with new bricks. If this has not yet been done
to your chimney, you need to warn your roofer that you will require
them to rebuild your chimney if they do this.
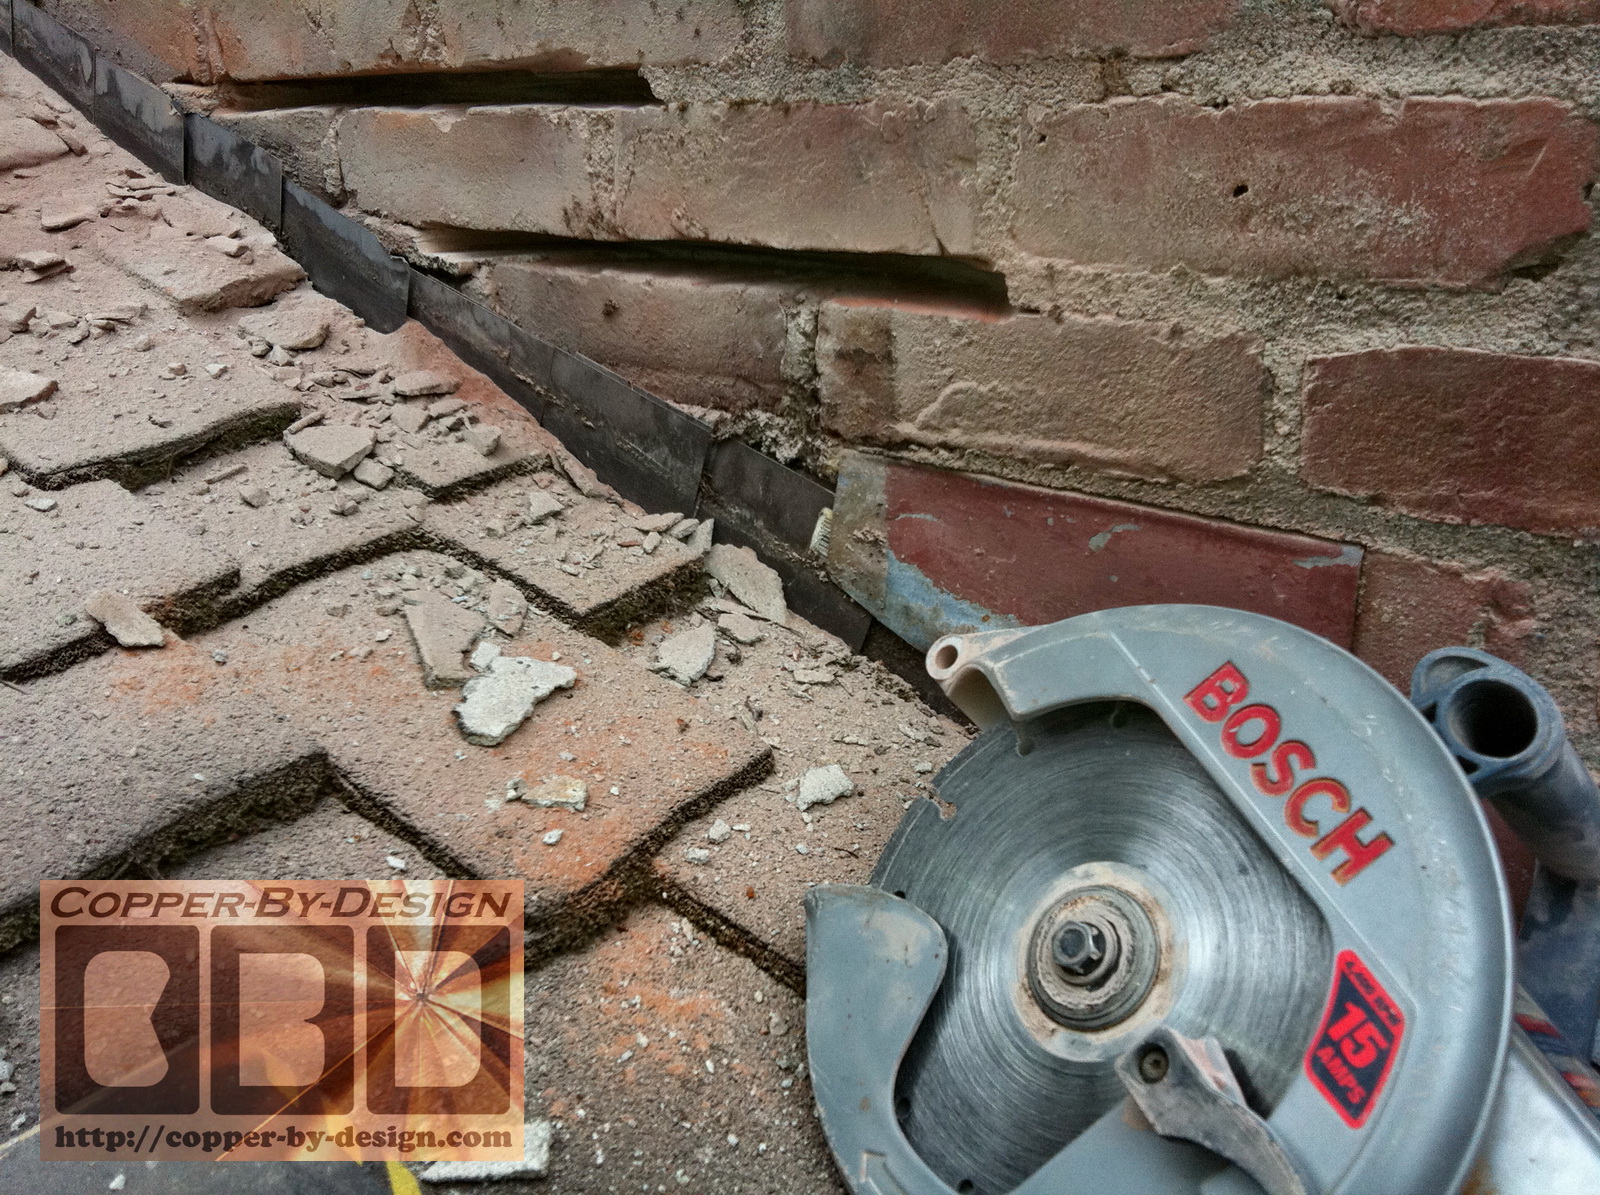
Even high quality silicone caulk should never be used to
attach counter-flashing, because it is just rubbery and adds no structural
strength to your compromised chimney. Just as with the useless effort of tuck-pointing
a chimney to make the mortar grooves look nice again; the new
granulated caulk
in such a shallow groove has only the old crumbling mortar to stick
to, so it will simply fall out within a few years. These groves
need to be ground out a lot deeper than just 1/2" in order to
have the upper and lower brick surface to adhere to, and only be filled back in with
real mortar. The groove
needs to be at least 1.5" to 2" deep. Anything short of that
is a waste of time and money.
Over the last several decades so many roofing
contractors were too cheap to
spend a few extra dollars on aluminum flashing that all
the suppliers in our area decided not stock
aluminum flashing any more. It can be special ordered
from a fabrication shop like mine, but of course that makes it just
that much more expensive than mass produced stock.
My Roofing web page at:
http://dmr-gutters.com/rf/roofs.htm
goes into more detail about these terrible issue. So don't
leave without reading it over. It will help to save yourself a great deal of
wasted cost and anguish
down the road.
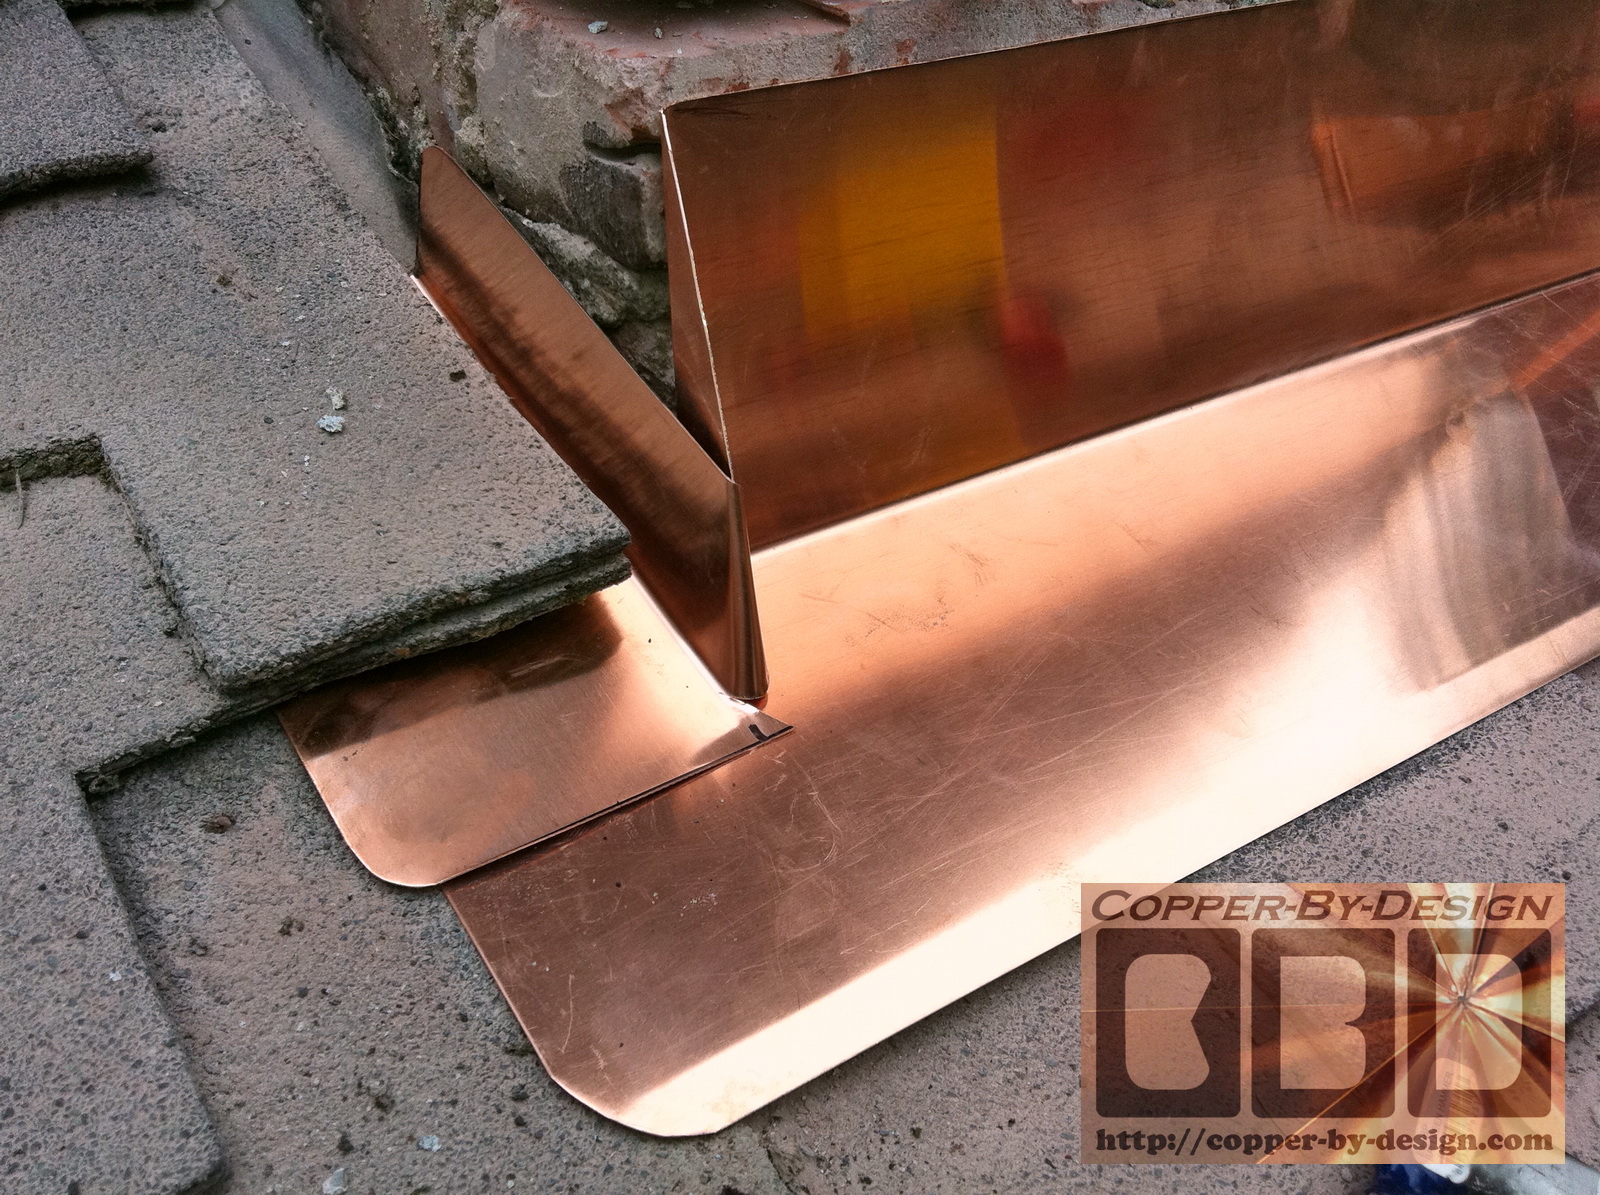
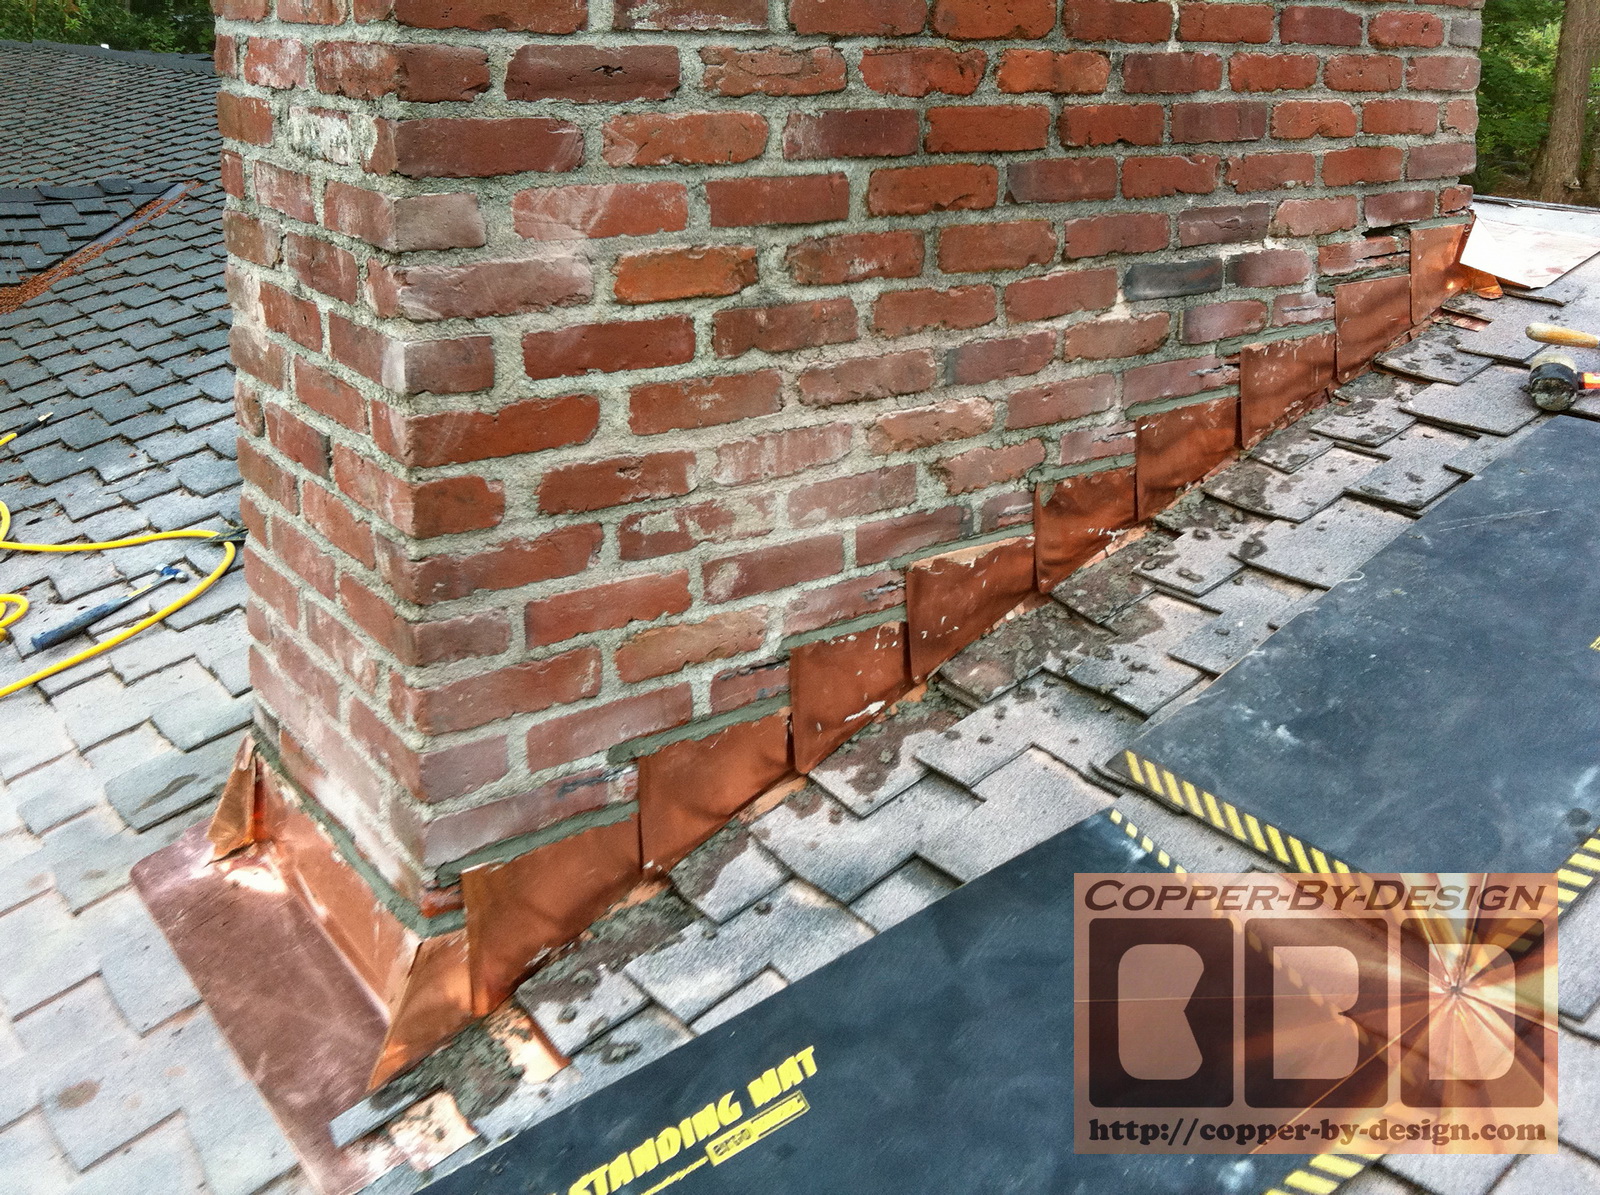
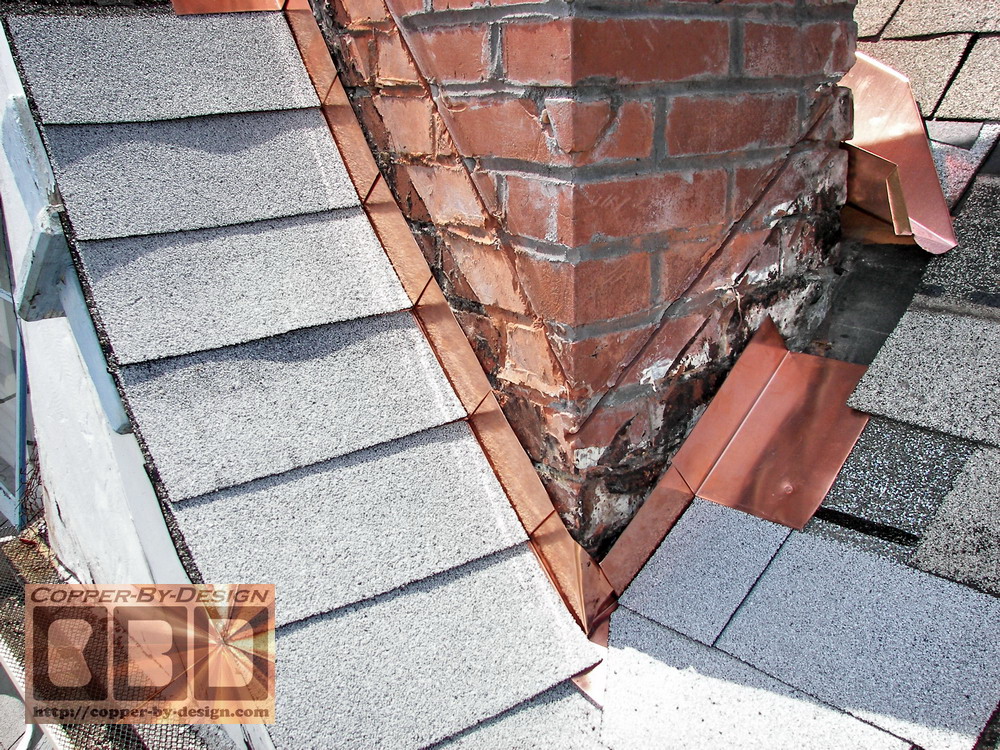
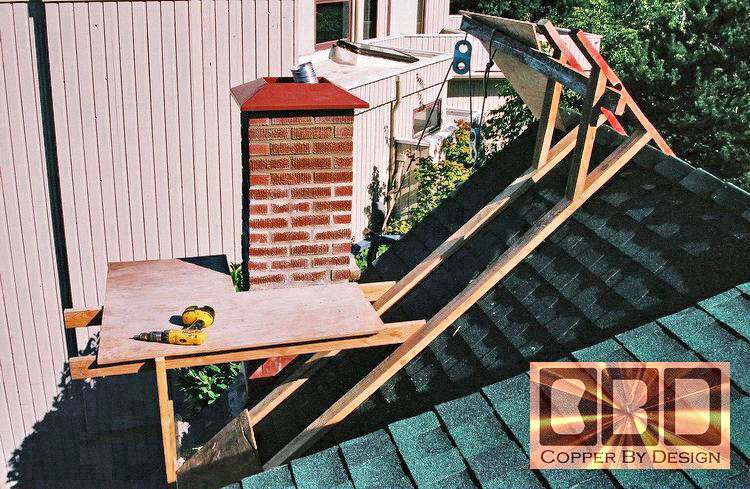
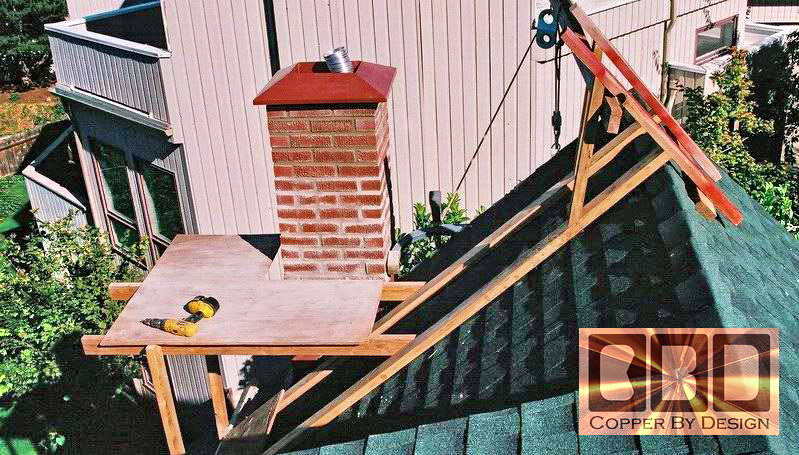
Can you make us a custom copper chimney flashing kit?
Yes, I seem to be the only shop willing to spend the time to work
with Homeowners through e-mail to figure out these custom kits for
them or their local installer to use. They are labeled and numbered
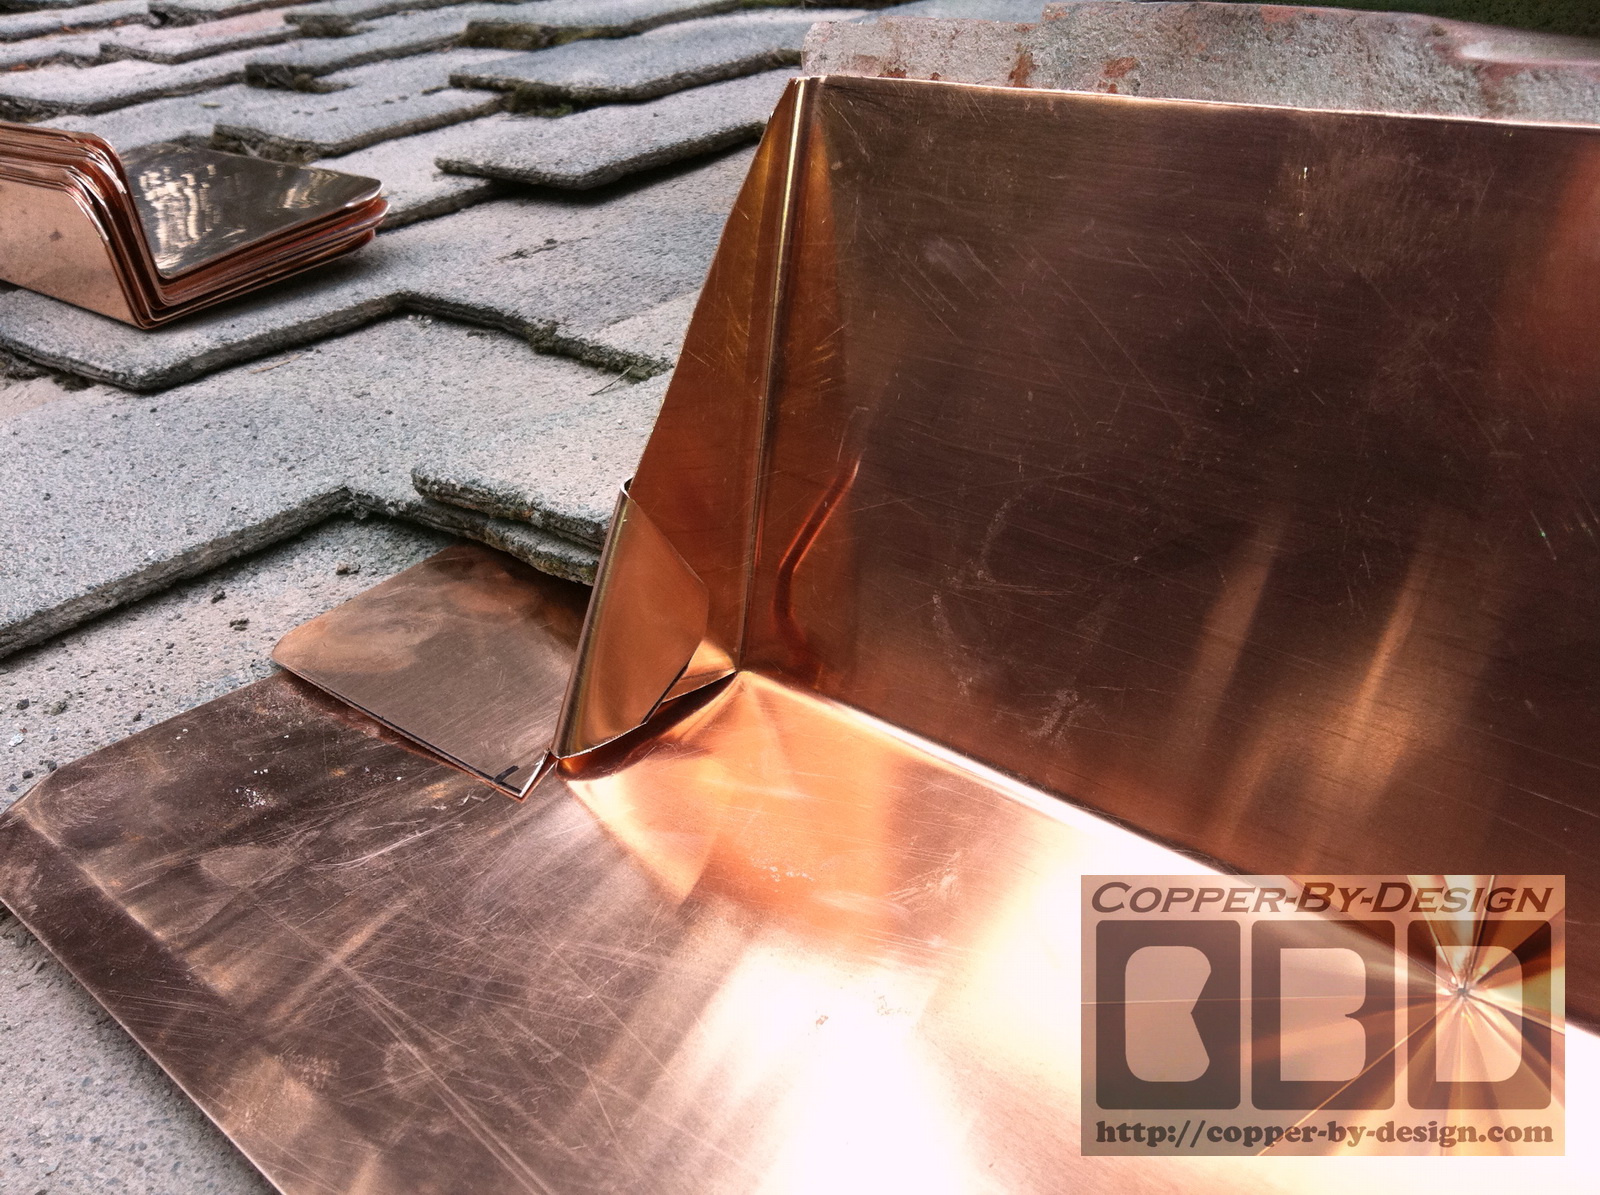
in order of installation, and precut and bent to minimize
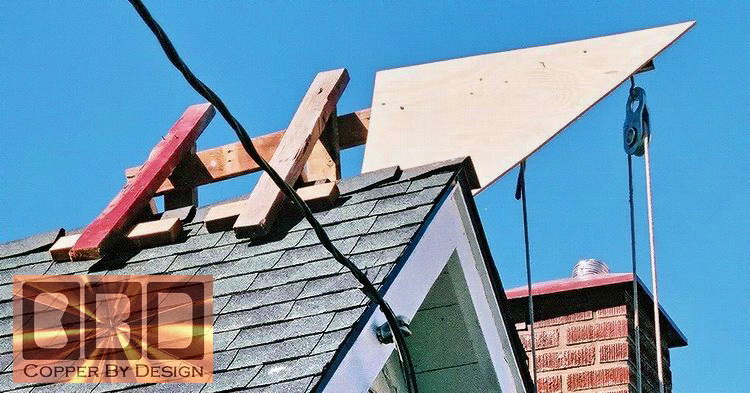
customization needed at the job site. Below is some instruction and
detailed photos to help give you a good idea of how to do this
propperly.

For more information regarding custom
chimney flashing kits I make for clients across the Country go to my Flashing
Kits web page for
more details:
http://copper-by-design.com/cc/cf-kits.htm
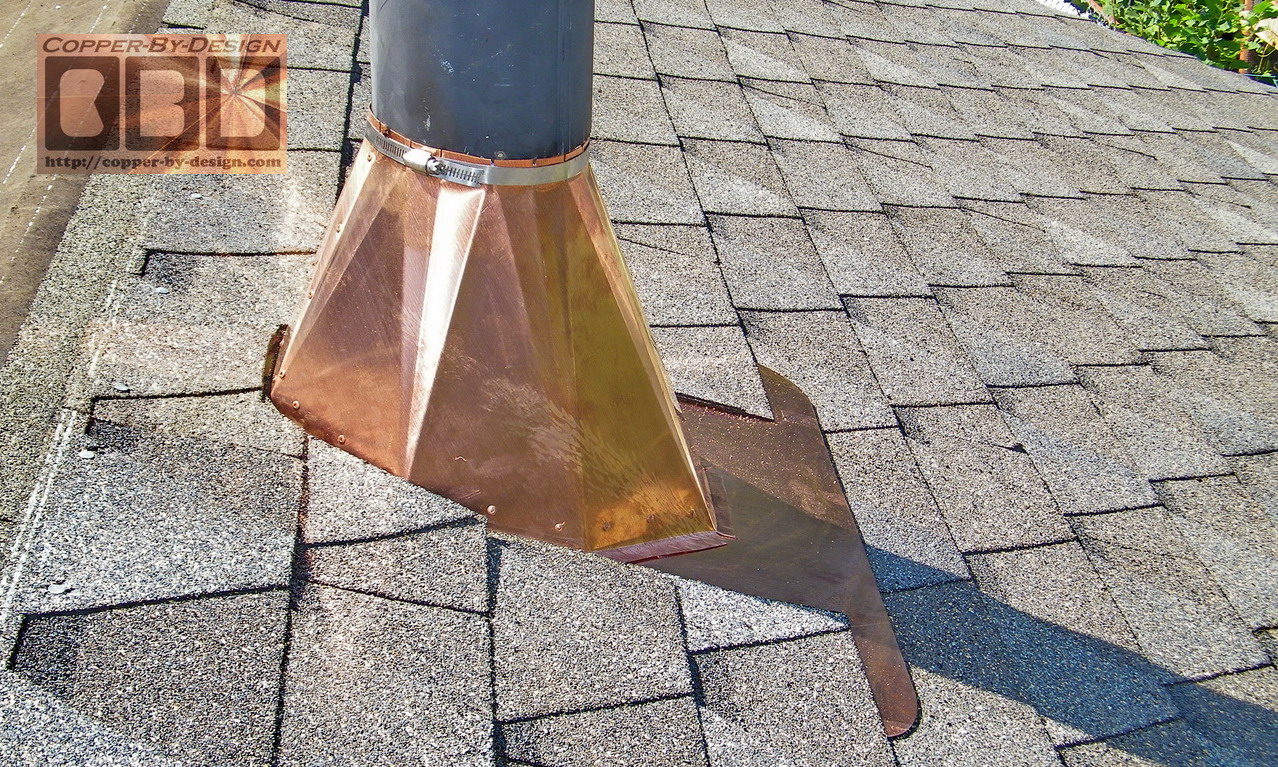
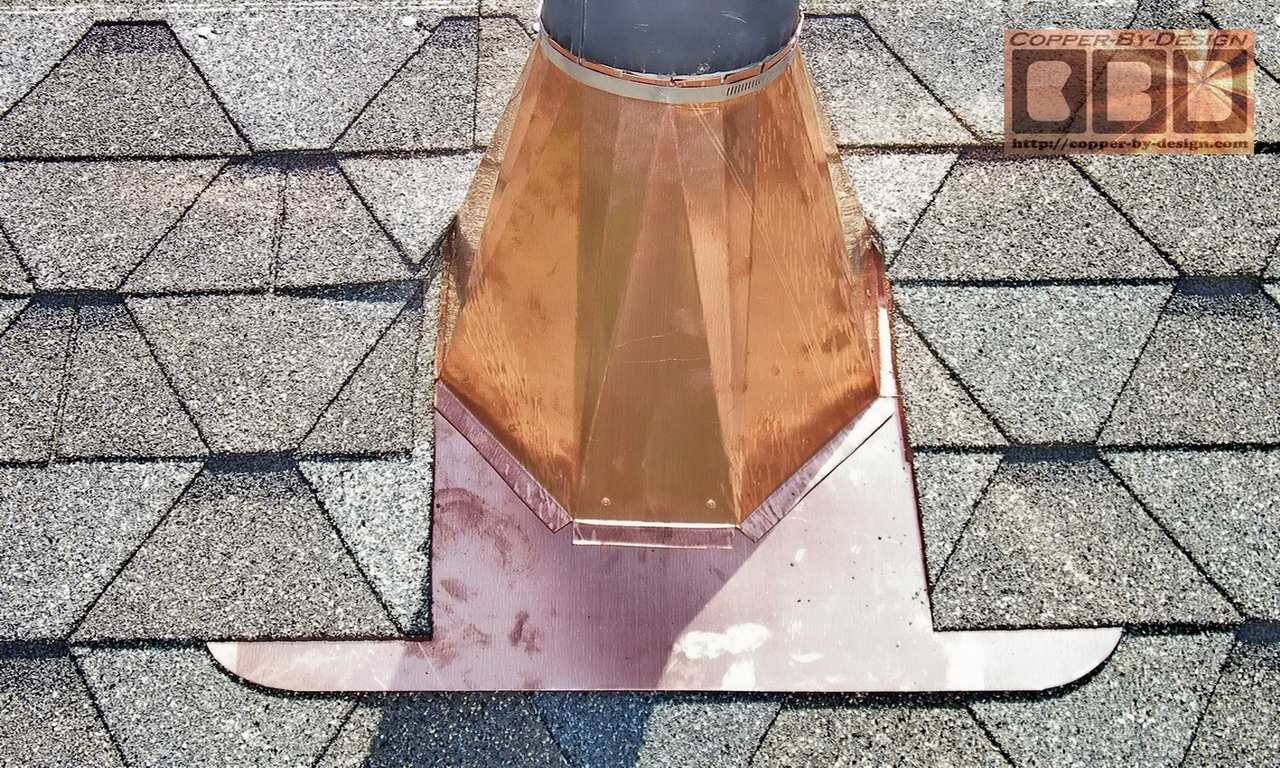
What about chimney flue pipe flange and
other flashing?
As you can see from our web
site I can also help with many other custom flashing needs. Although
you may need to consider the physical contact of the copper flashing
with steel pipes and the detrimental effect it will have on the
steel through electrolysis. The steel will not harm the copper, but
the copper will accelerate the deterioration of the steel. Stainless
steel is compatible with copper. This chimney pipe for the wood
stove in my wood shop corroded within a year and became unusable.
What If
I Already Have This Kind Of Shoddy Workmanship On My House?
If you are are a victim of this all too common unethical business practice
you can show your Contractor this web site. Then you should be able
to deduct the cost of repairing your chimney and it's flashing even
if you are going to do it yourself, plus the cost of cleaning off
that black tar. I would encourage you to insist he has that tar
removed and cleaned off by his workers as if it were never there.
That ought to teach him a lesson. It is messy work
and solvents on the roofing will damage the shingles and cause a terrible
staining mess. If the contractor uses a solvent he'll then need to replace
all the damaged and stained shingles at the same time.
Do not let them talk you into any other
alternative, trying to minimize their damage. They will try to
discredit me and say I do not know what I am talking about, but it
is simple logic they cannot BS their way out of if you stand your ground. Roofers will
claim that it can only be done this way when the chimney was first built
by the brick mason, but I prove here that is simply not true.
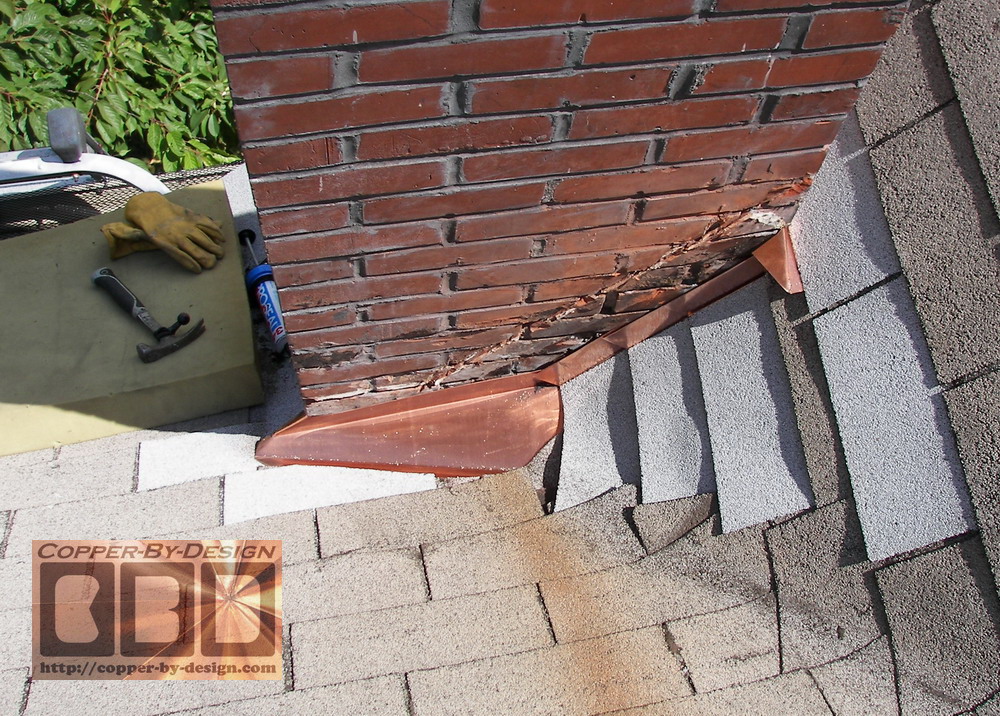
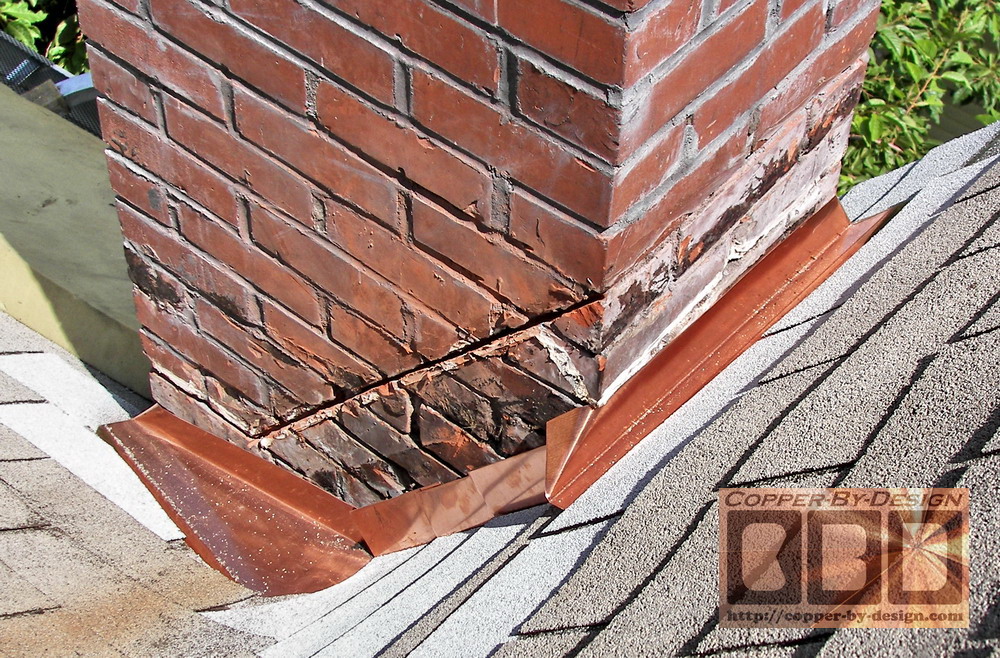
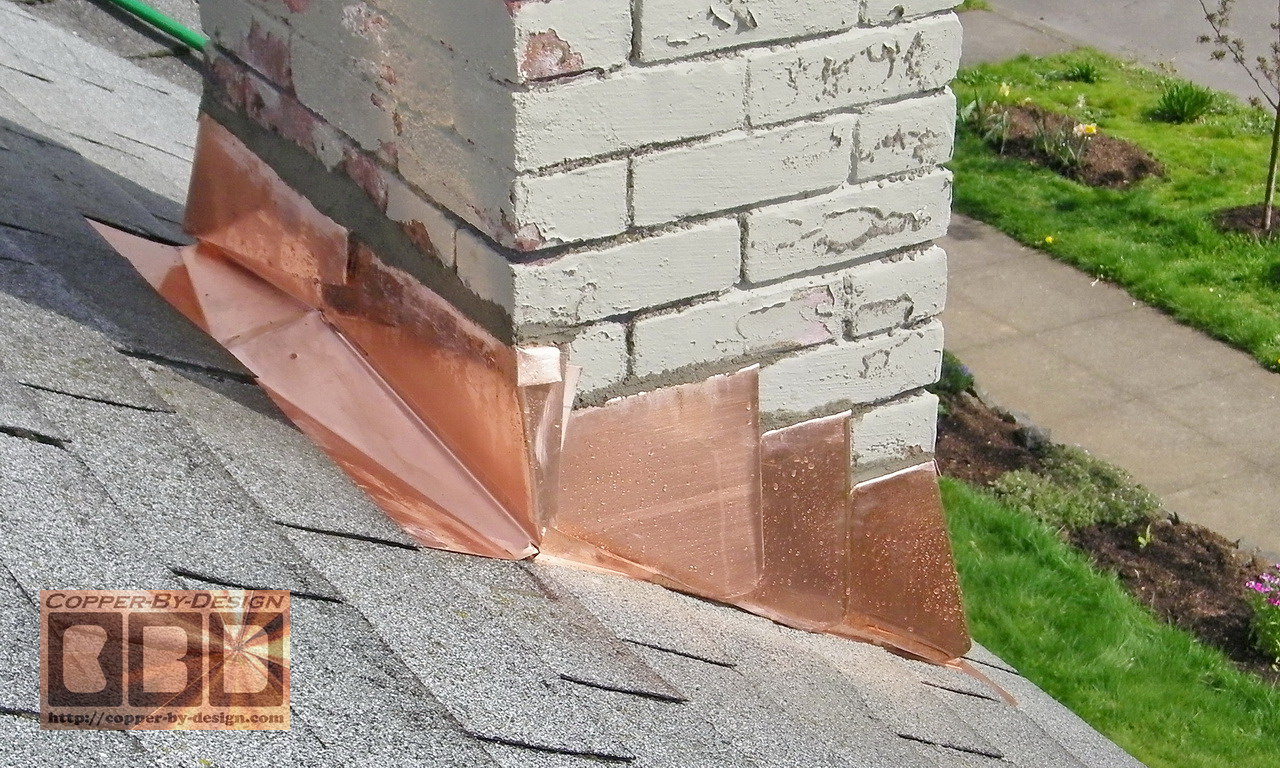
Below are examples of jobs I've worked
on that show these shoddy practices I've worked to repair.
|


