|
Updated 4/23 |
My first Copper-clad Curved Roof Awning Wood Frame Photo & Description Page (done back in 2002) |
|
Updated 4/23 |
My first Copper-clad Curved Roof Awning Wood Frame Photo & Description Page (done back in 2002) |

|
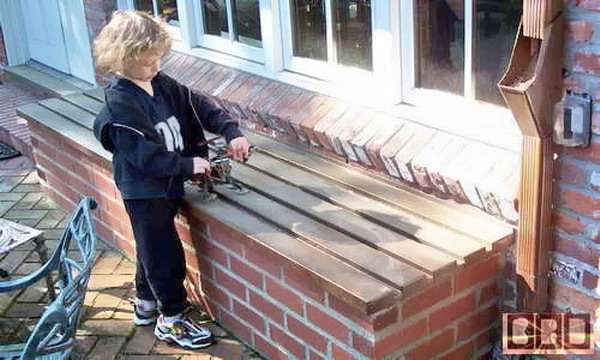
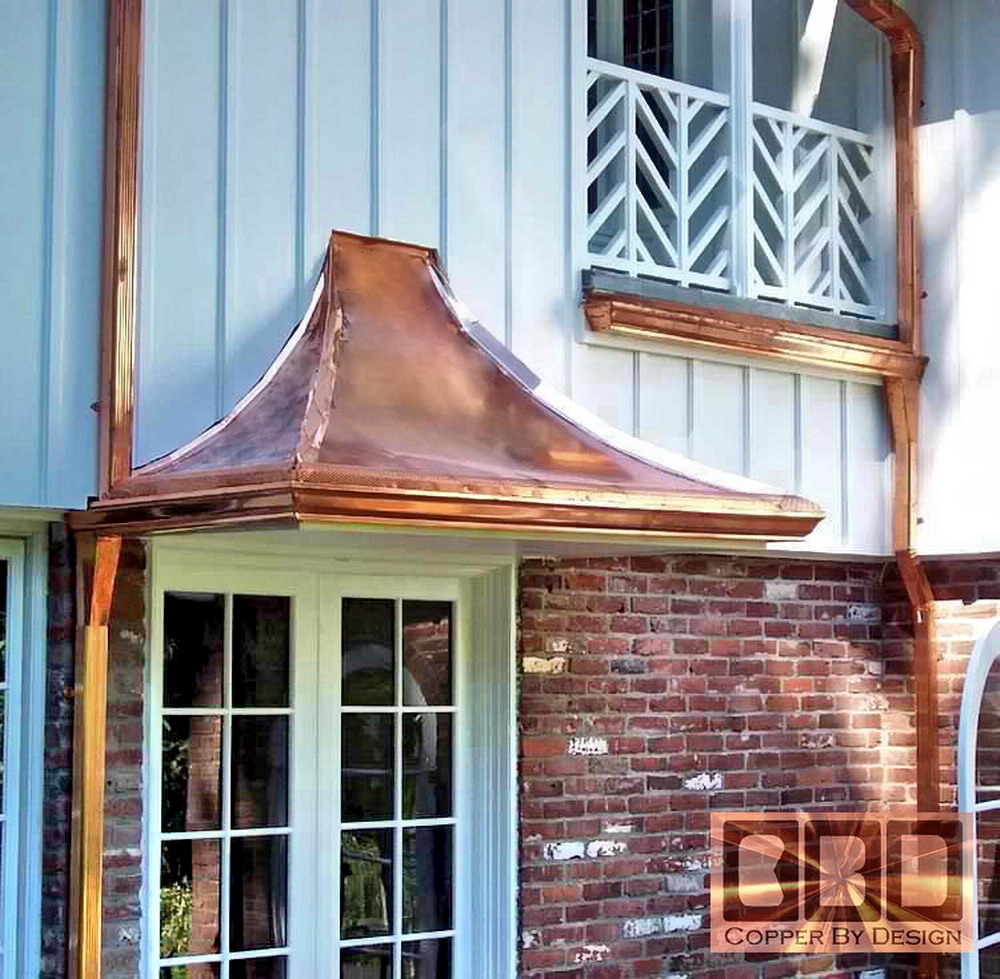
Over 20 years ago I was contracted by Mr. Yocum to replace their copper gutters, and asked if I could build a copper clad awning in back. Since then I have made numerous improvements to my work: I use a thicker copper, impliment curved copper pipes for the seam covers, a hight temp underlayment, which was not available at that time, and many more details. Here is a copper-clad bench seat I also made for
them, after a couple years of patina. Click on the picture if you want
to see more. The pictures below are linked to larger pictures of the same photo for a closer inspection. Just click on the pictures |
.
|
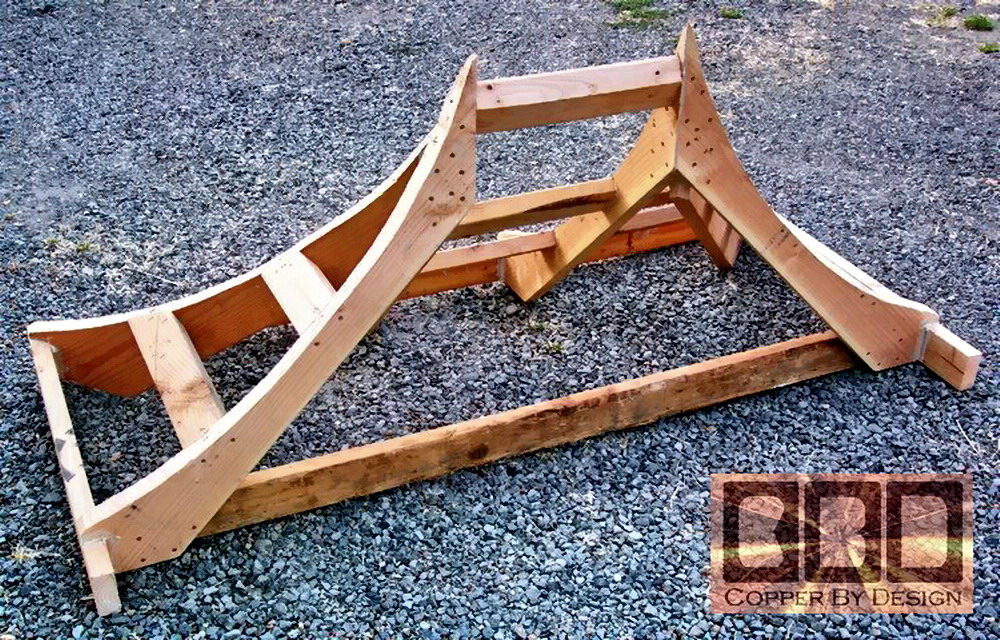
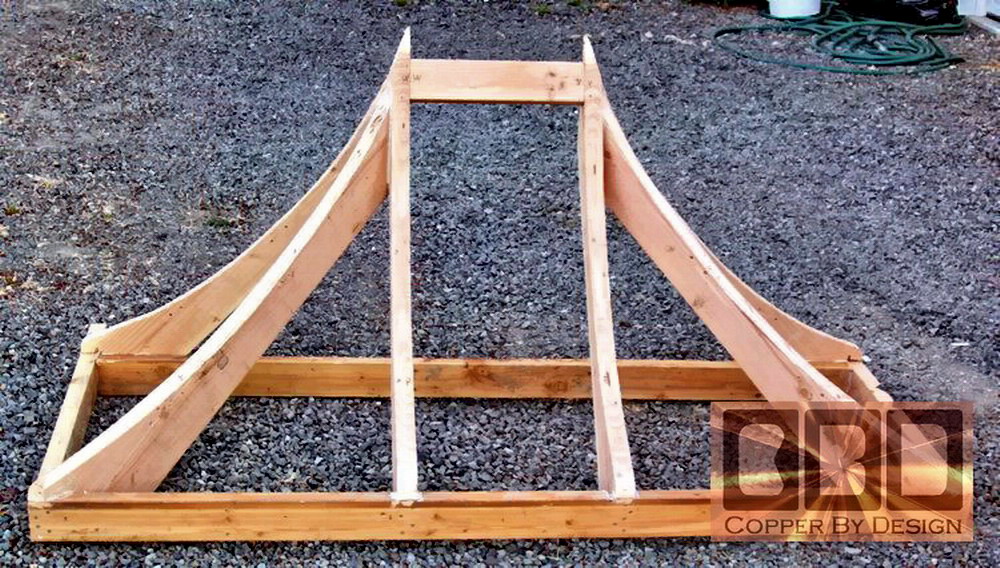
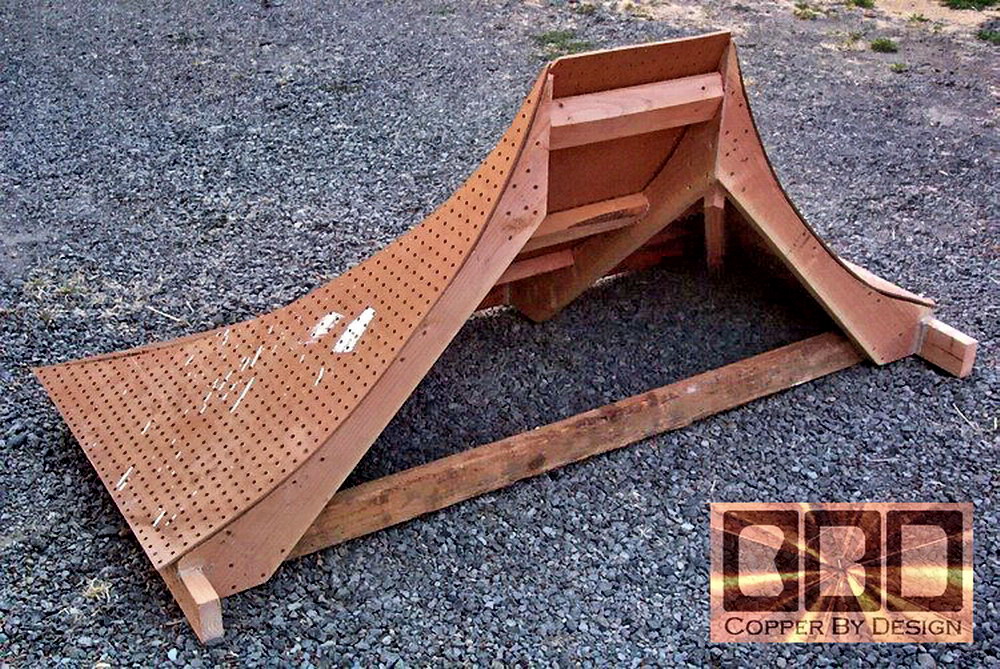
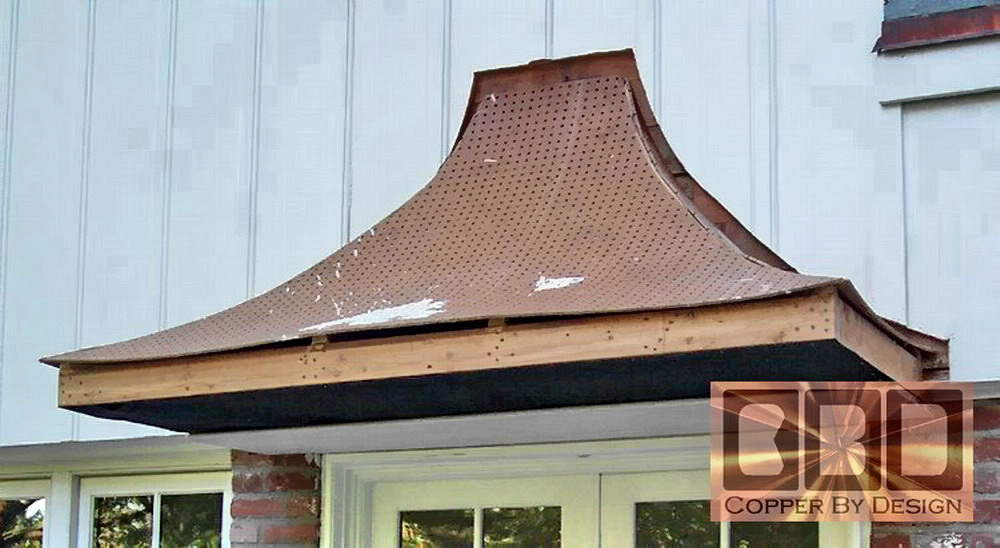
| These pictures shows the basic wood frame without the cross braces. I cut the curve in 2x10s for the corners, and 2x6s for the straight rafters. This gives me the gradual curve that I need for the roof attachment. These boards are all attached together with construction adhesive wood glue and pre-drilled holes for the wood screws onto a 2x4 lower frame. |
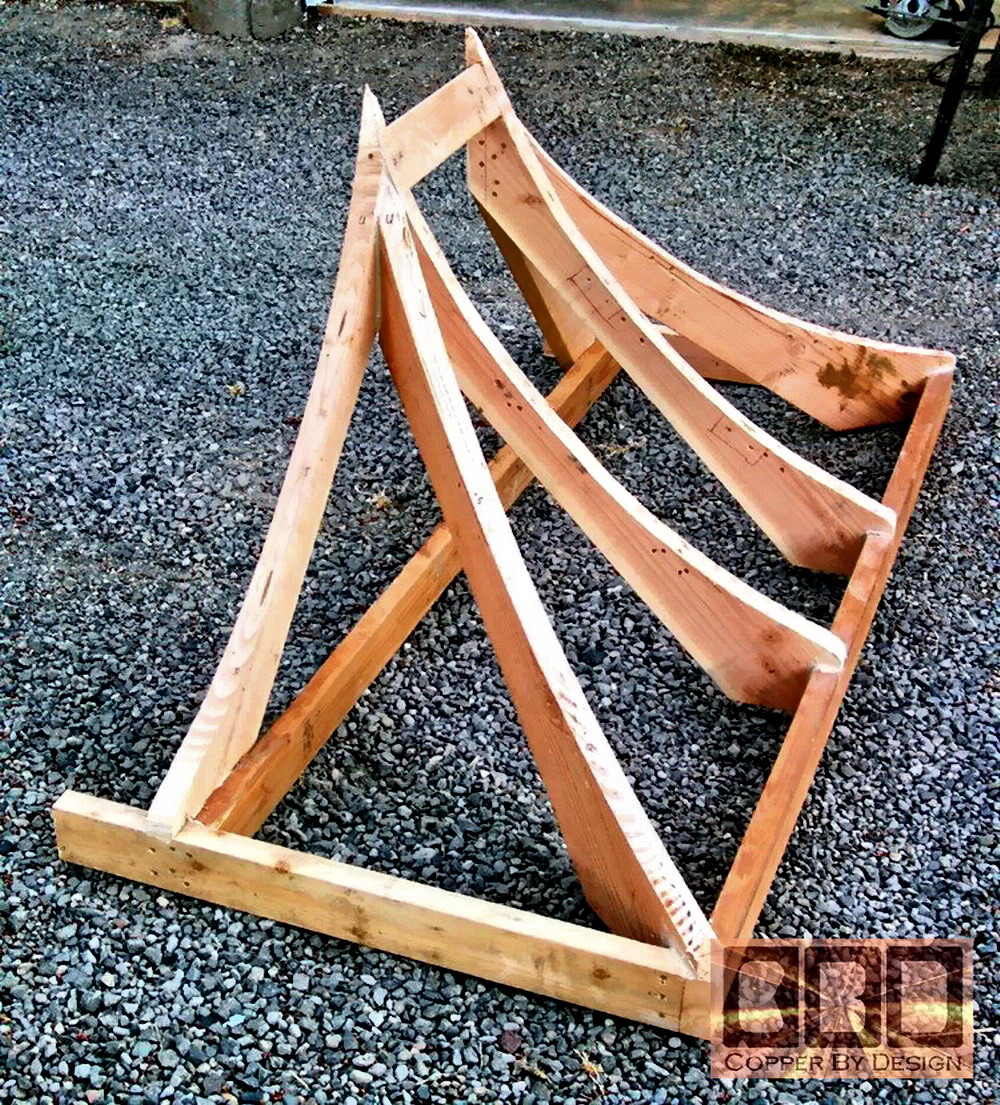 This picture shows the holes drilled for the screws
and the markings for the cross braces. By clicking on any of these
pictures, you can see a larger view for better details. This picture shows the holes drilled for the screws
and the markings for the cross braces. By clicking on any of these
pictures, you can see a larger view for better details.The design of this frame had to be built strong enough to be able to install on the outer wall above the back door. It also has to be able to support the weight of the fascia board, the tongue and groove soffit, the roof, the copper sheet metal roof cover, and the copper gutters. All without any additional supports under this frame. |
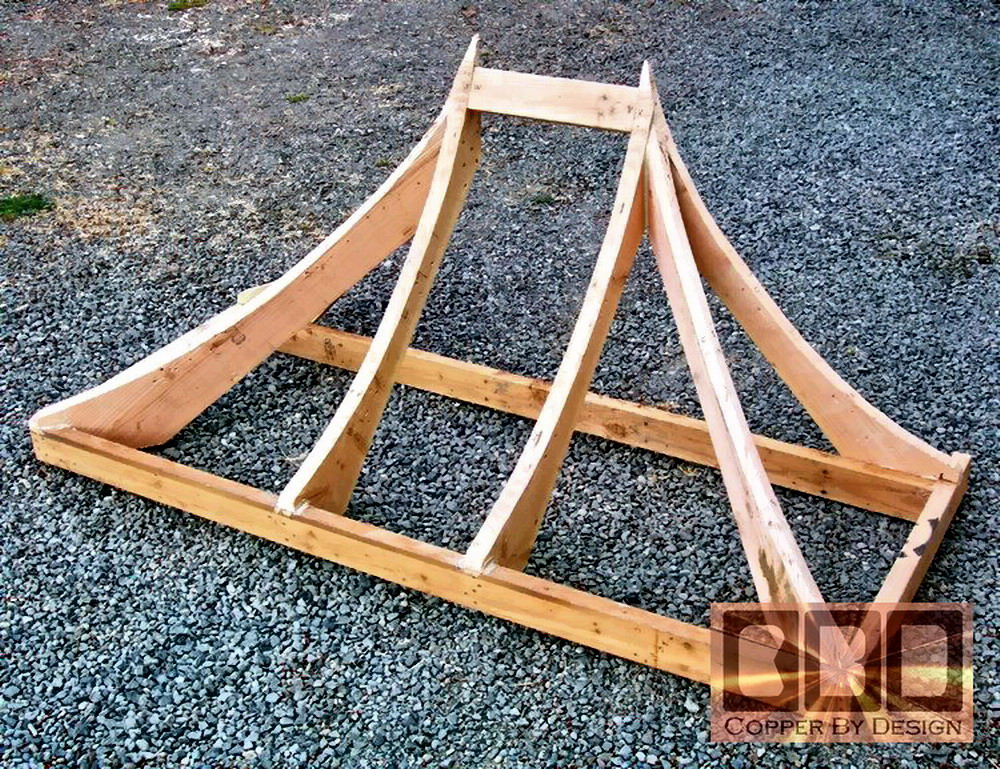
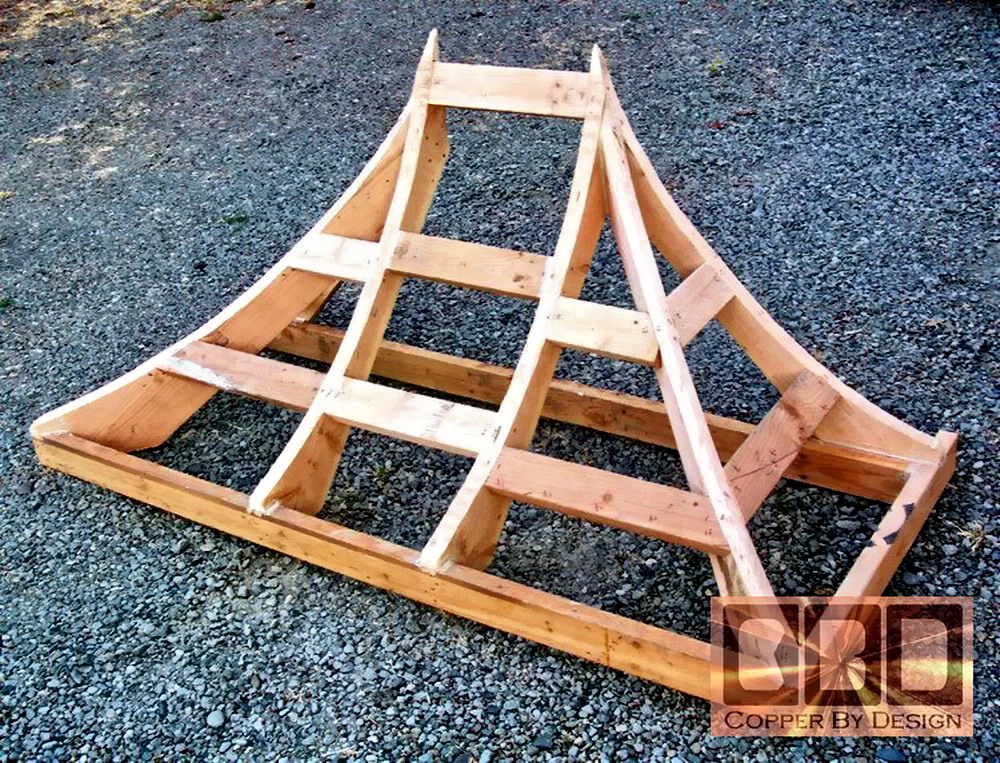 Here
are the cross braced installed. Here
are the cross braced installed.
|
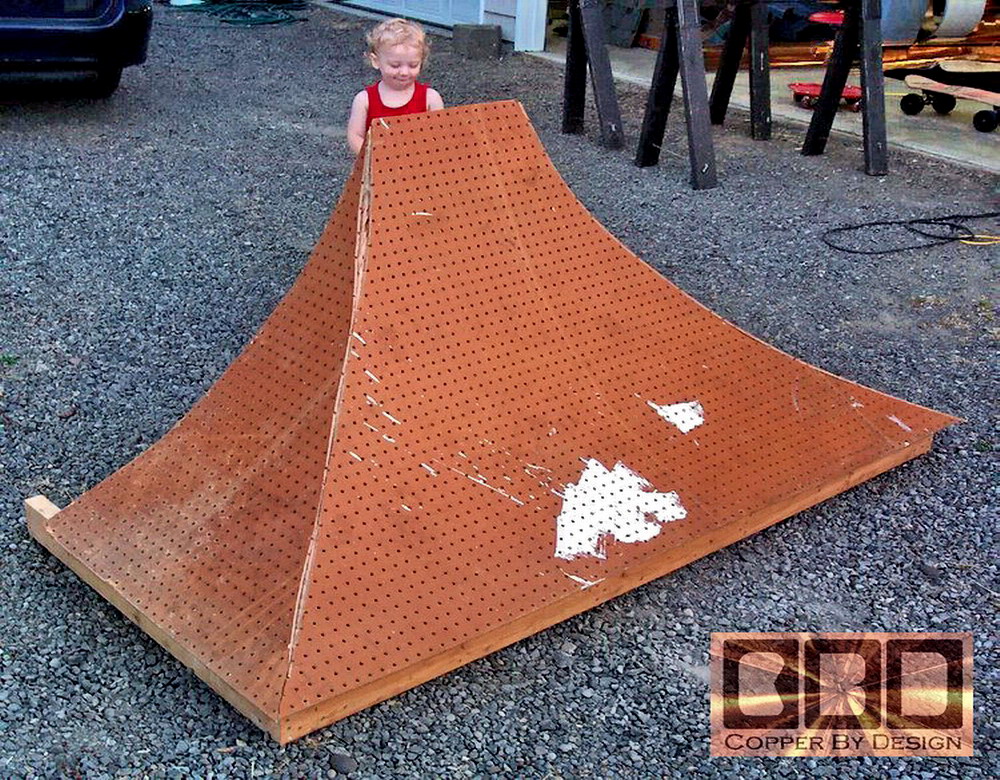 This
shows the 1/4" hardboard I screwed onto
the wood frame to cut and test fit the panels. This
shows the 1/4" hardboard I screwed onto
the wood frame to cut and test fit the panels.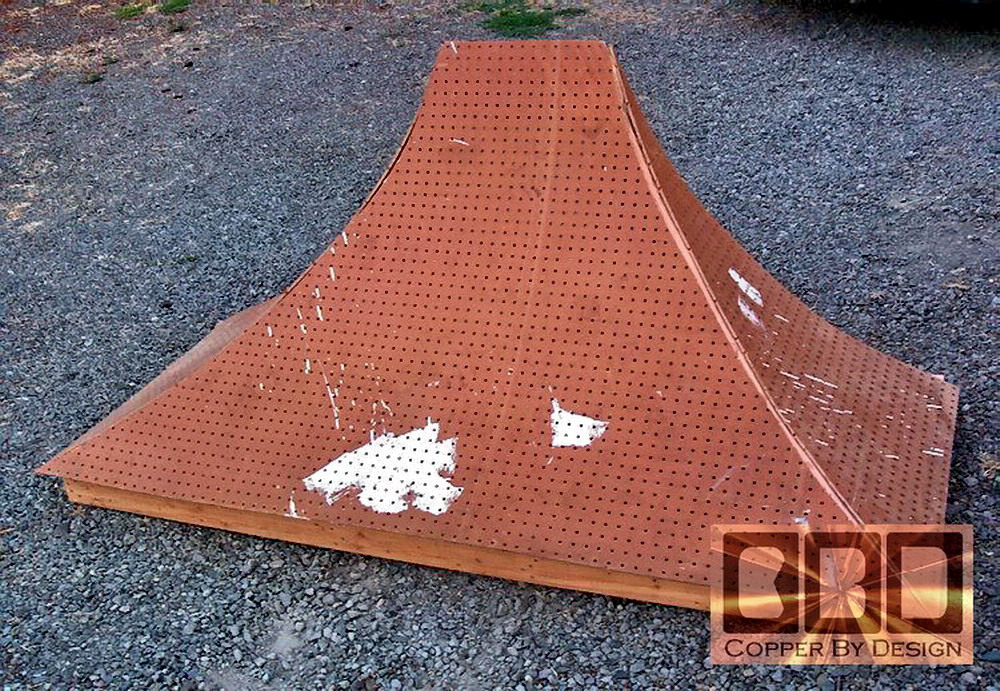 |
 The
1/4" hardboard with peg holes will allow the wood to
ventilate. The
1/4" hardboard with peg holes will allow the wood to
ventilate. |
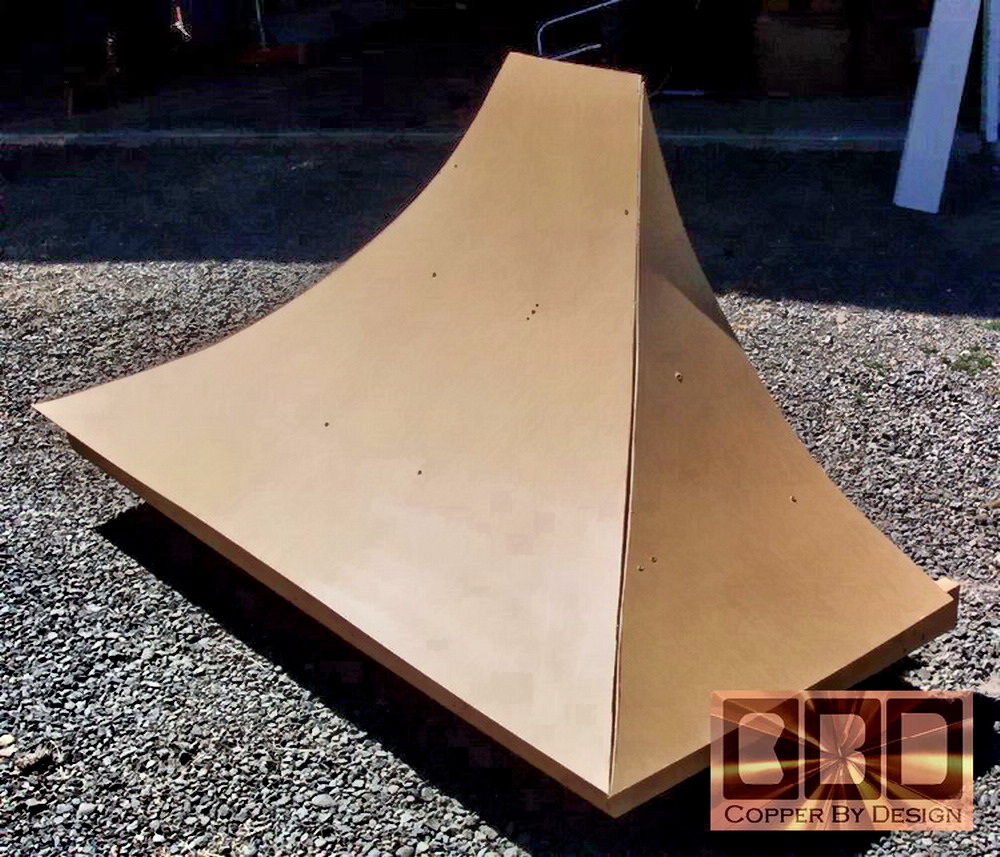 Here
is the second layer of 1/4" hardboard to
make up the 1/2" thick roof needed for this project. Here
is the second layer of 1/4" hardboard to
make up the 1/2" thick roof needed for this project.

|
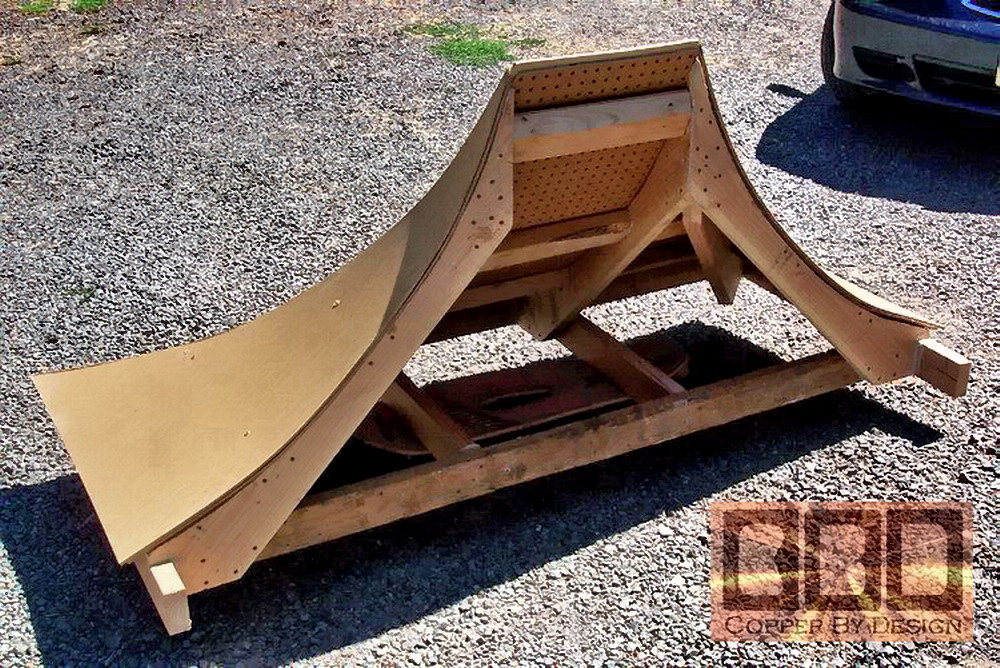 Here
is the back side with the lower cross braces installed. Here
is the back side with the lower cross braces installed.
I needed to be able to remove the roof panels to allow for installation as it would have been to heavy otherwise. |
 Here
I had to cut into the siding to fit the awning frame solidly in place, as
well as to fit the copper sheet metal roof flashing up under the
siding, so it is sealed from the rain. Here
I had to cut into the siding to fit the awning frame solidly in place, as
well as to fit the copper sheet metal roof flashing up under the
siding, so it is sealed from the rain. |
 Here
you
can see the sag of the roof panels. When I install the 5/4x6 fascia
boards on top of the 2x4s, it will push up the roof at the lower
edge. Here
you
can see the sag of the roof panels. When I install the 5/4x6 fascia
boards on top of the 2x4s, it will push up the roof at the lower
edge. |
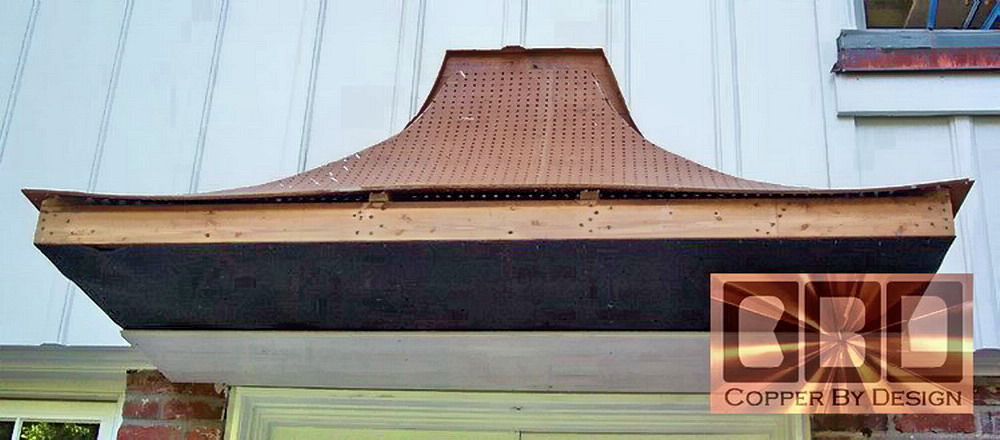 Here is the back half of the tongue-and-groove soffit going on after I stapled on the 30lb roofing felt under the roof frame. |
|
|
 Seen
left is the second layer of roof panels installed. The drip edge has also been installed
here. Seen
left is the second layer of roof panels installed. The drip edge has also been installed
here.
Below shows the Water & Ice Shield I stick to the
roof surface as an underlayment for the copper,
which ensures the screws
will not be touching the copper. |
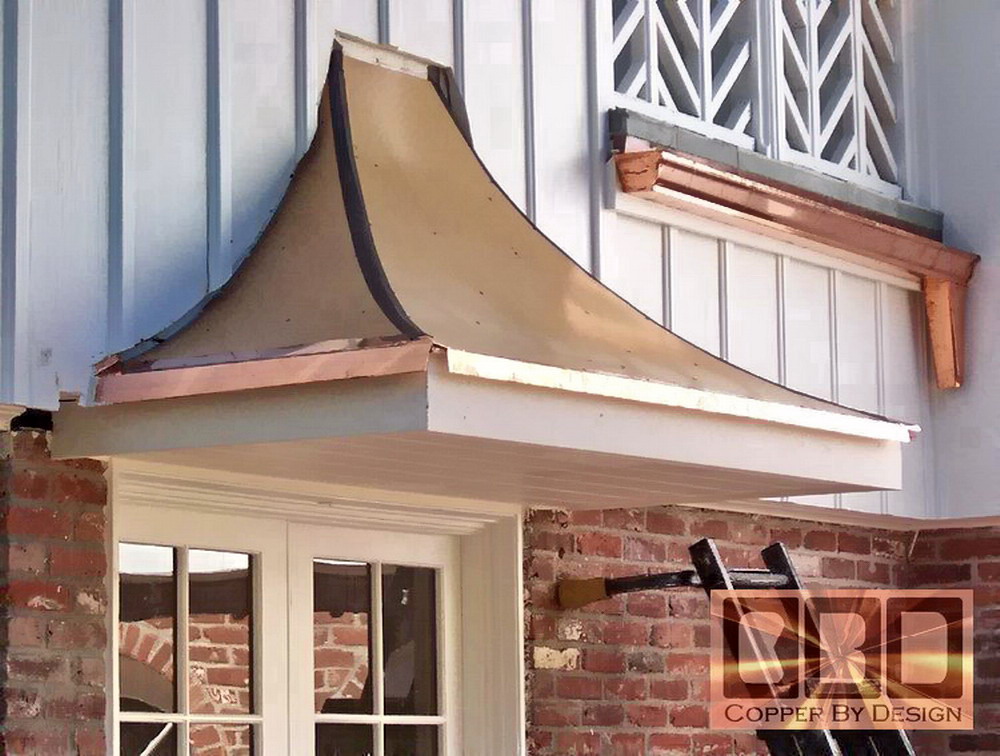
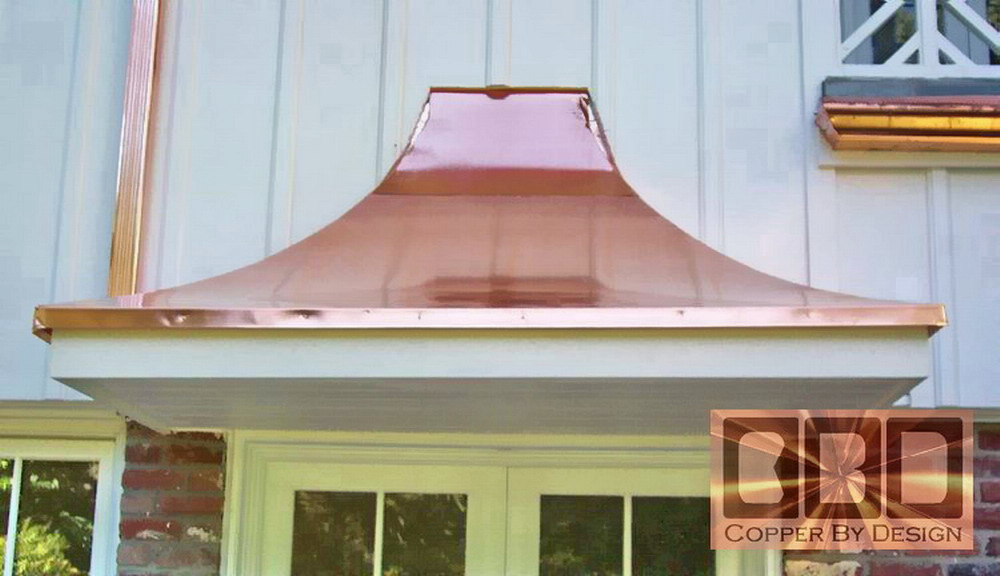 Here
is the copper sheet metal installed to seal the roof from the weather. Here
is the copper sheet metal installed to seal the roof from the weather.
|
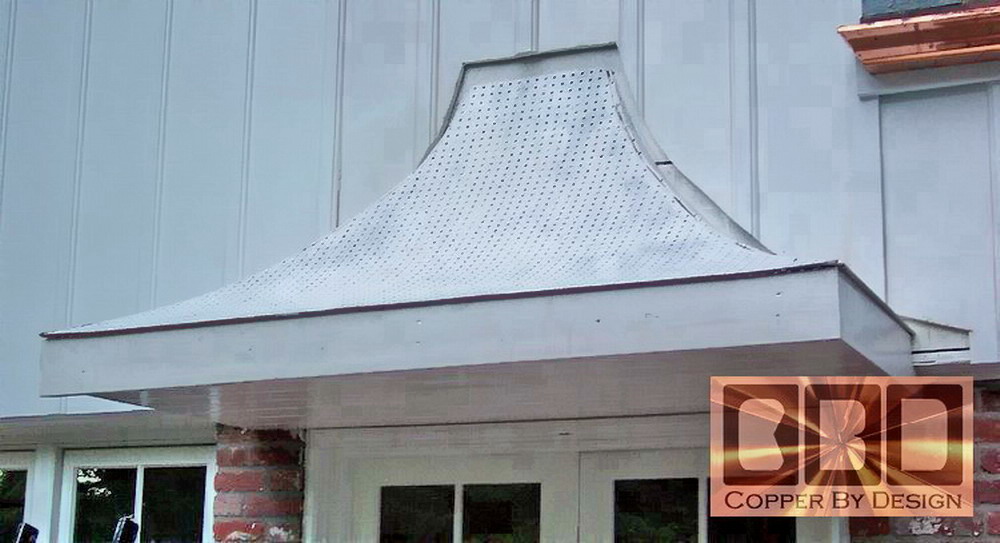
 I decided
to make a raised edge metal
which would give the roof a little
more dynamic look. I decided
to make a raised edge metal
which would give the roof a little
more dynamic look.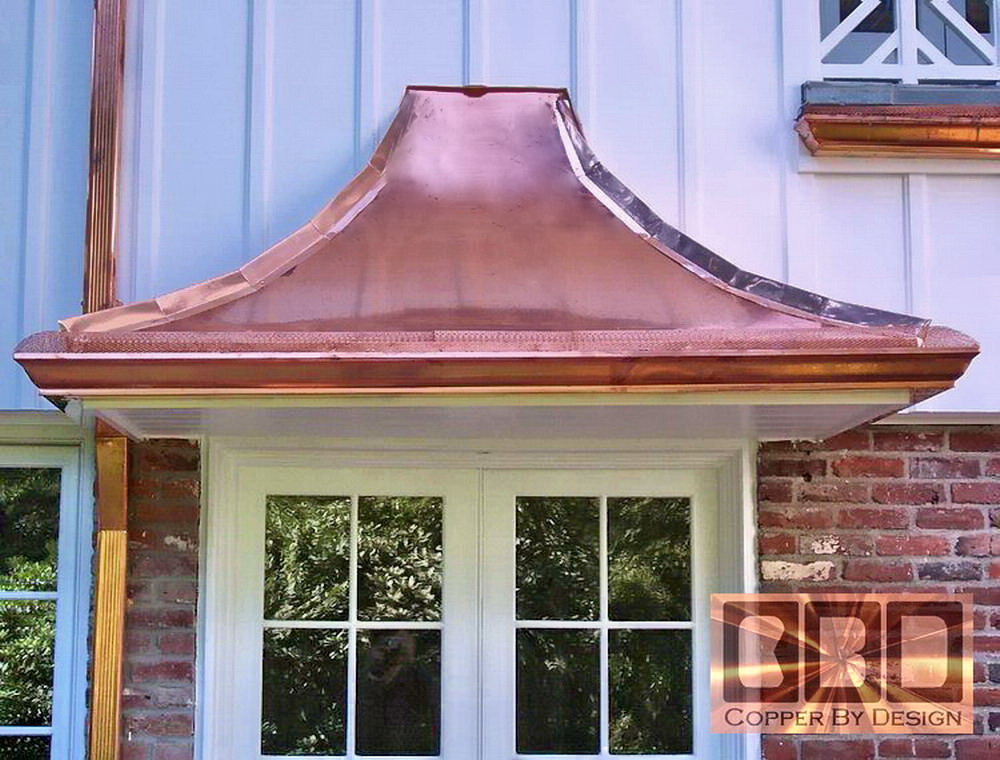 |
 Here
is the back side of the house with all
of the gutters installed. Here
is the back side of the house with all
of the gutters installed. |
.
|
Below is a photo of our |
|
|
|
We were also a 1997 & 2018 finalist for this same award. See our referral web page to see how we managed to be honored with this special award |
.
 Homepage |
.
|
|
Company Profile |
|
Roof Caps |
|
Chimney Caps |
|
Scuppers |
|
Gutters |
|
Shipping |
|
Contact Info |
.
.
.
.
.
.
.
.
.
.