|
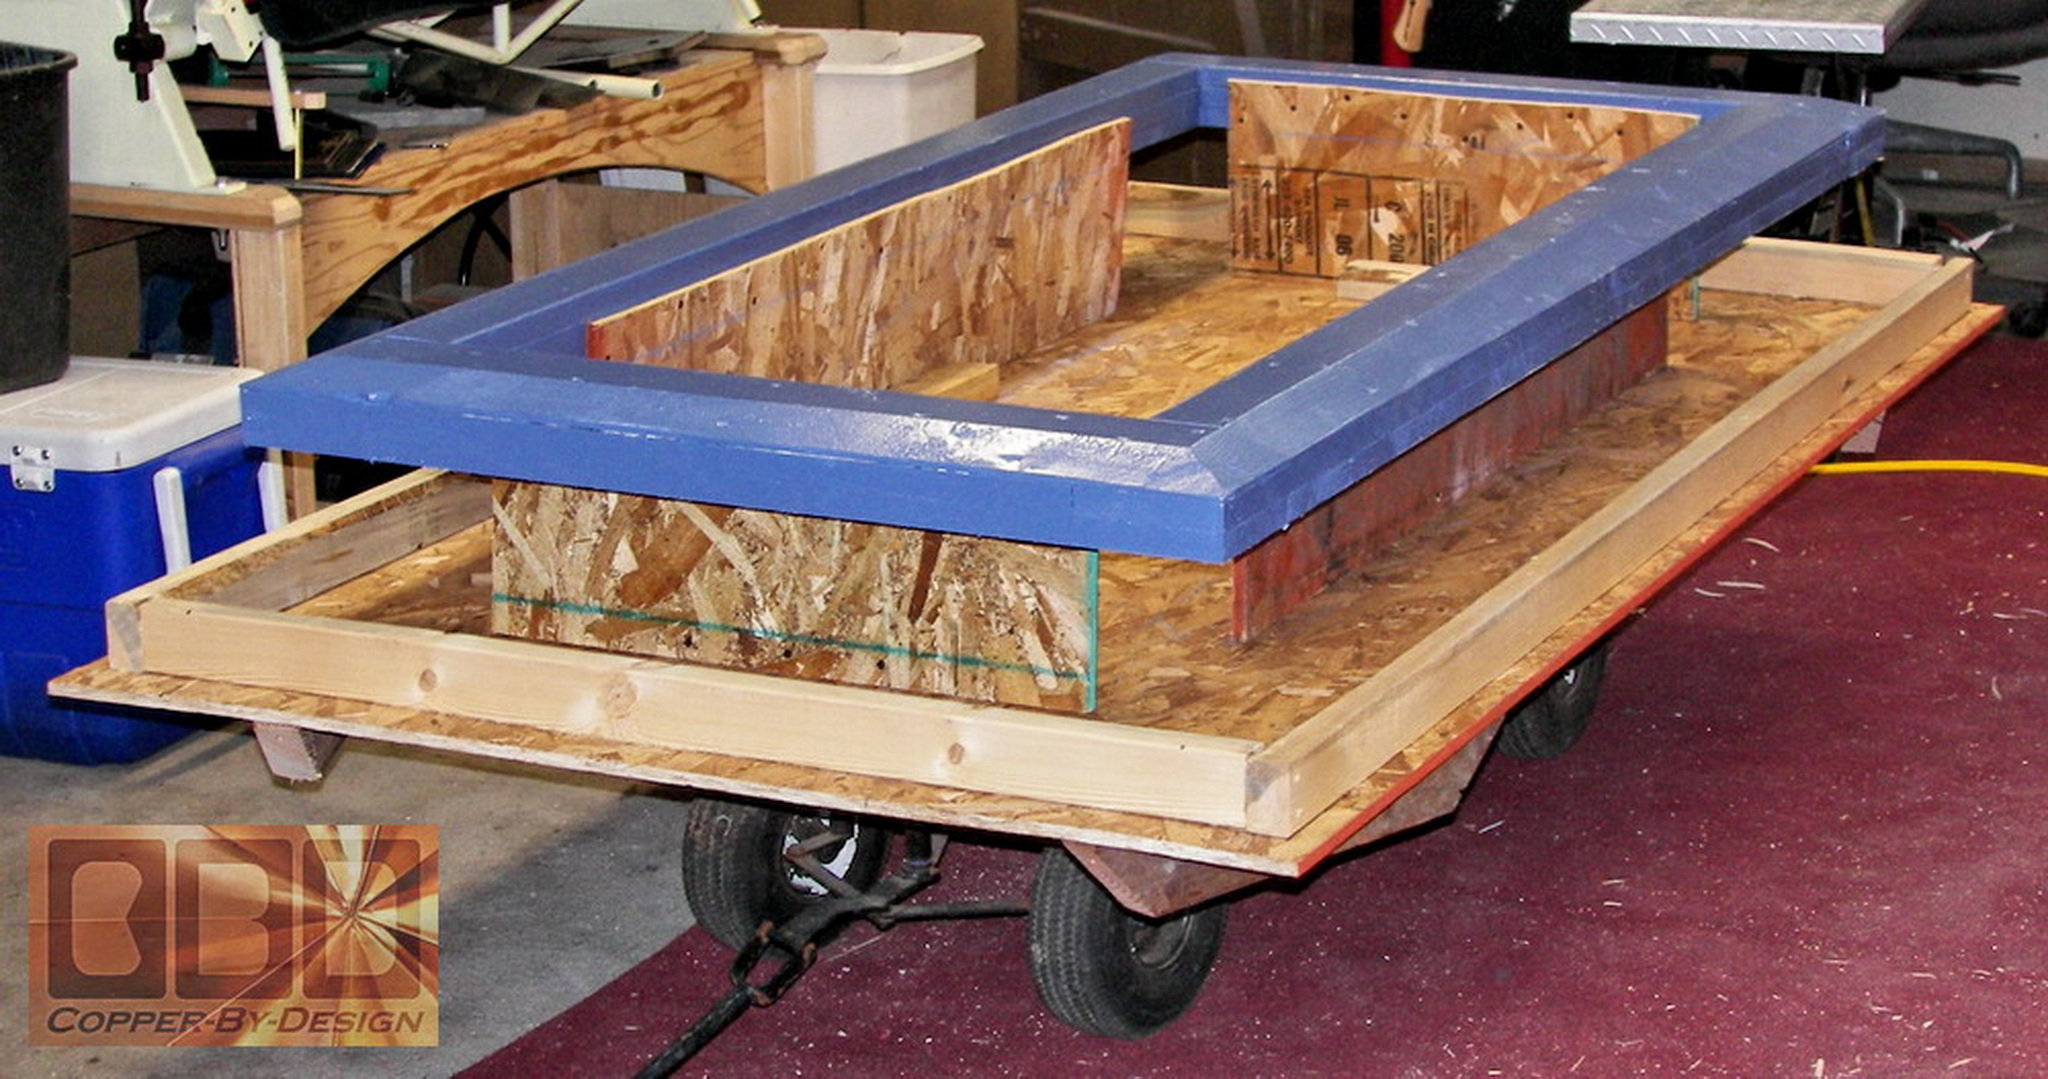
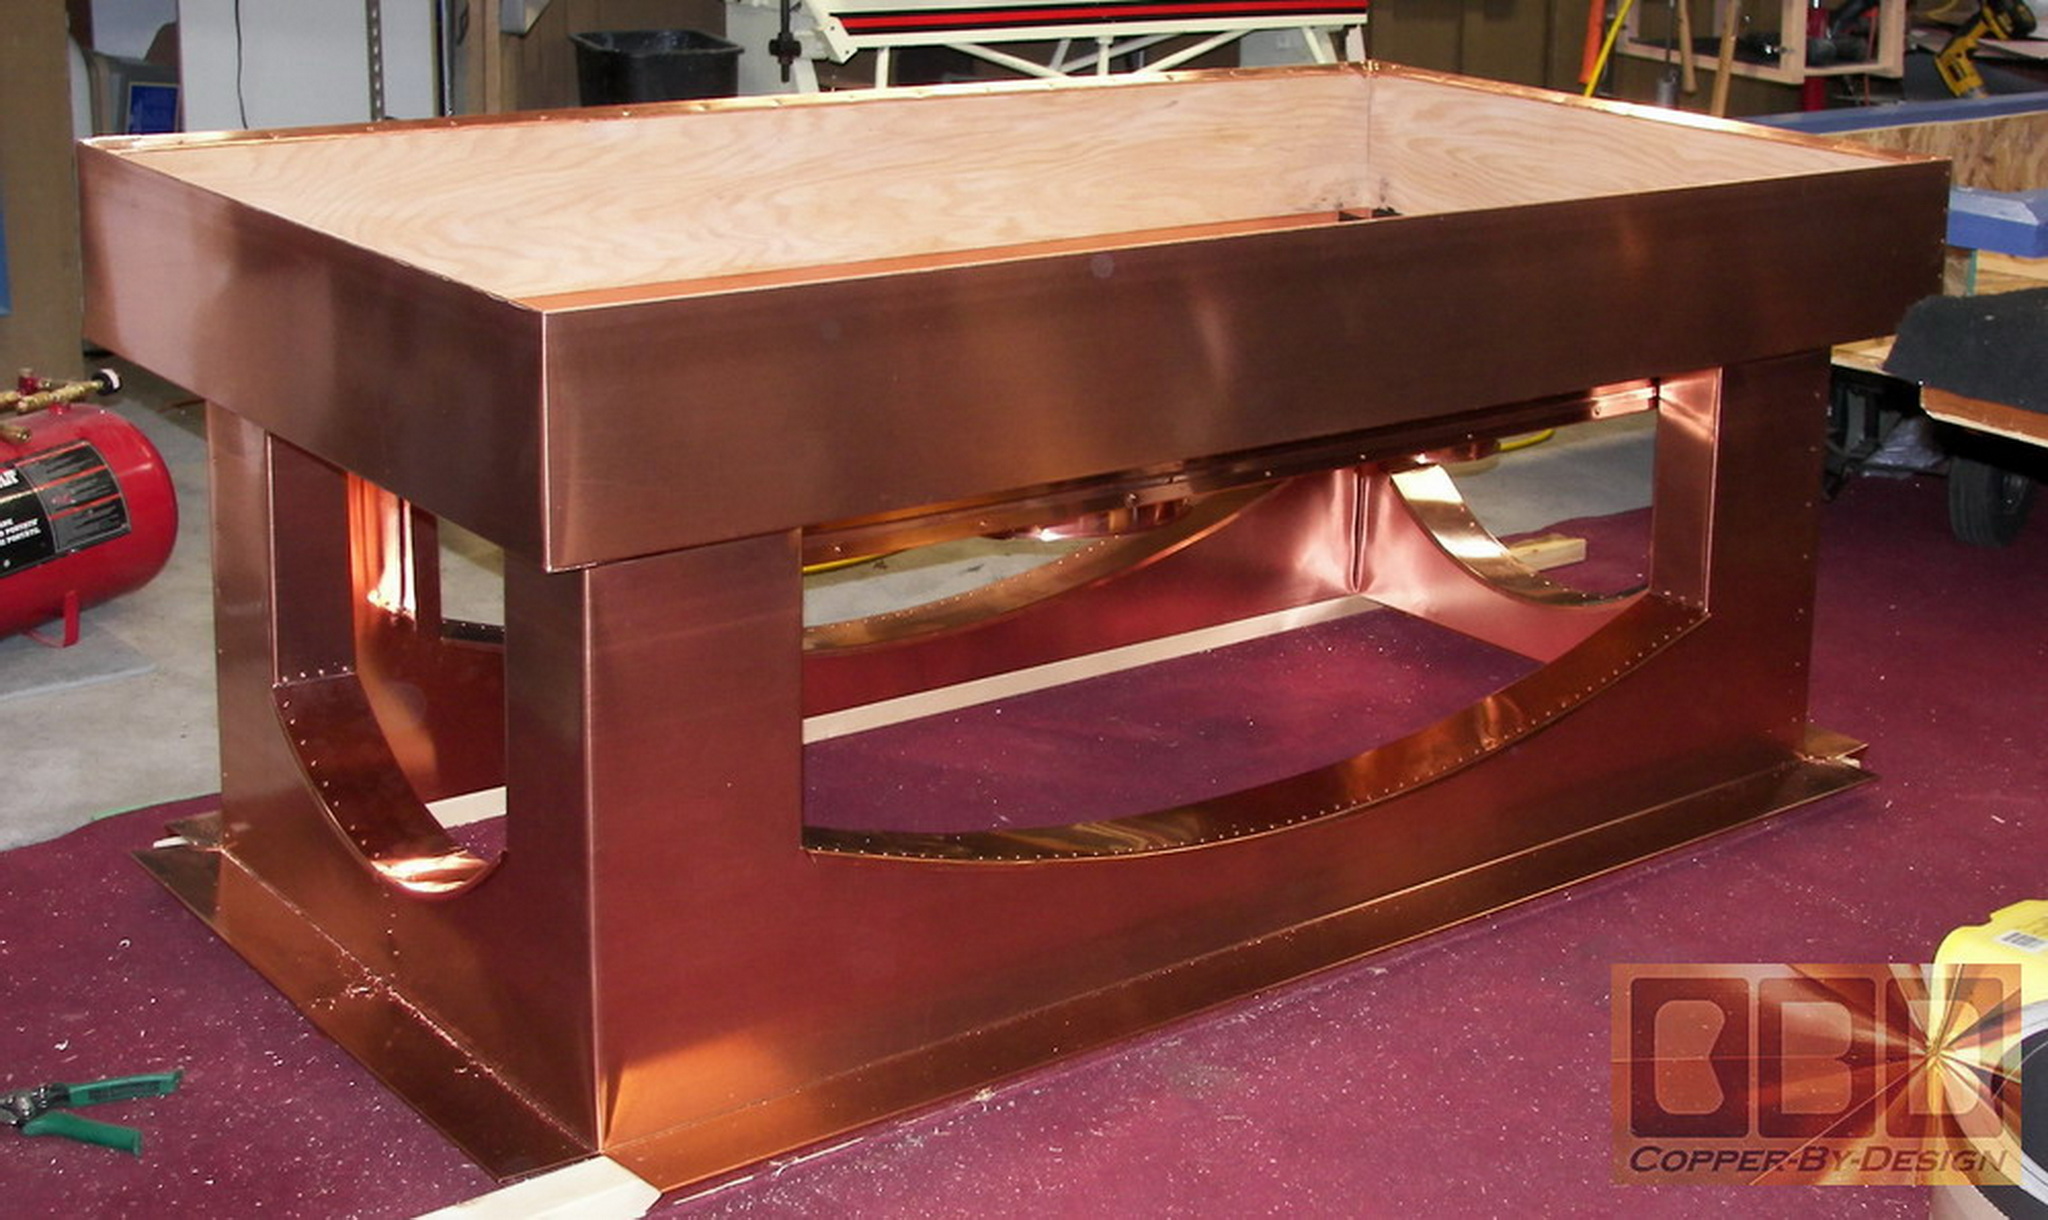
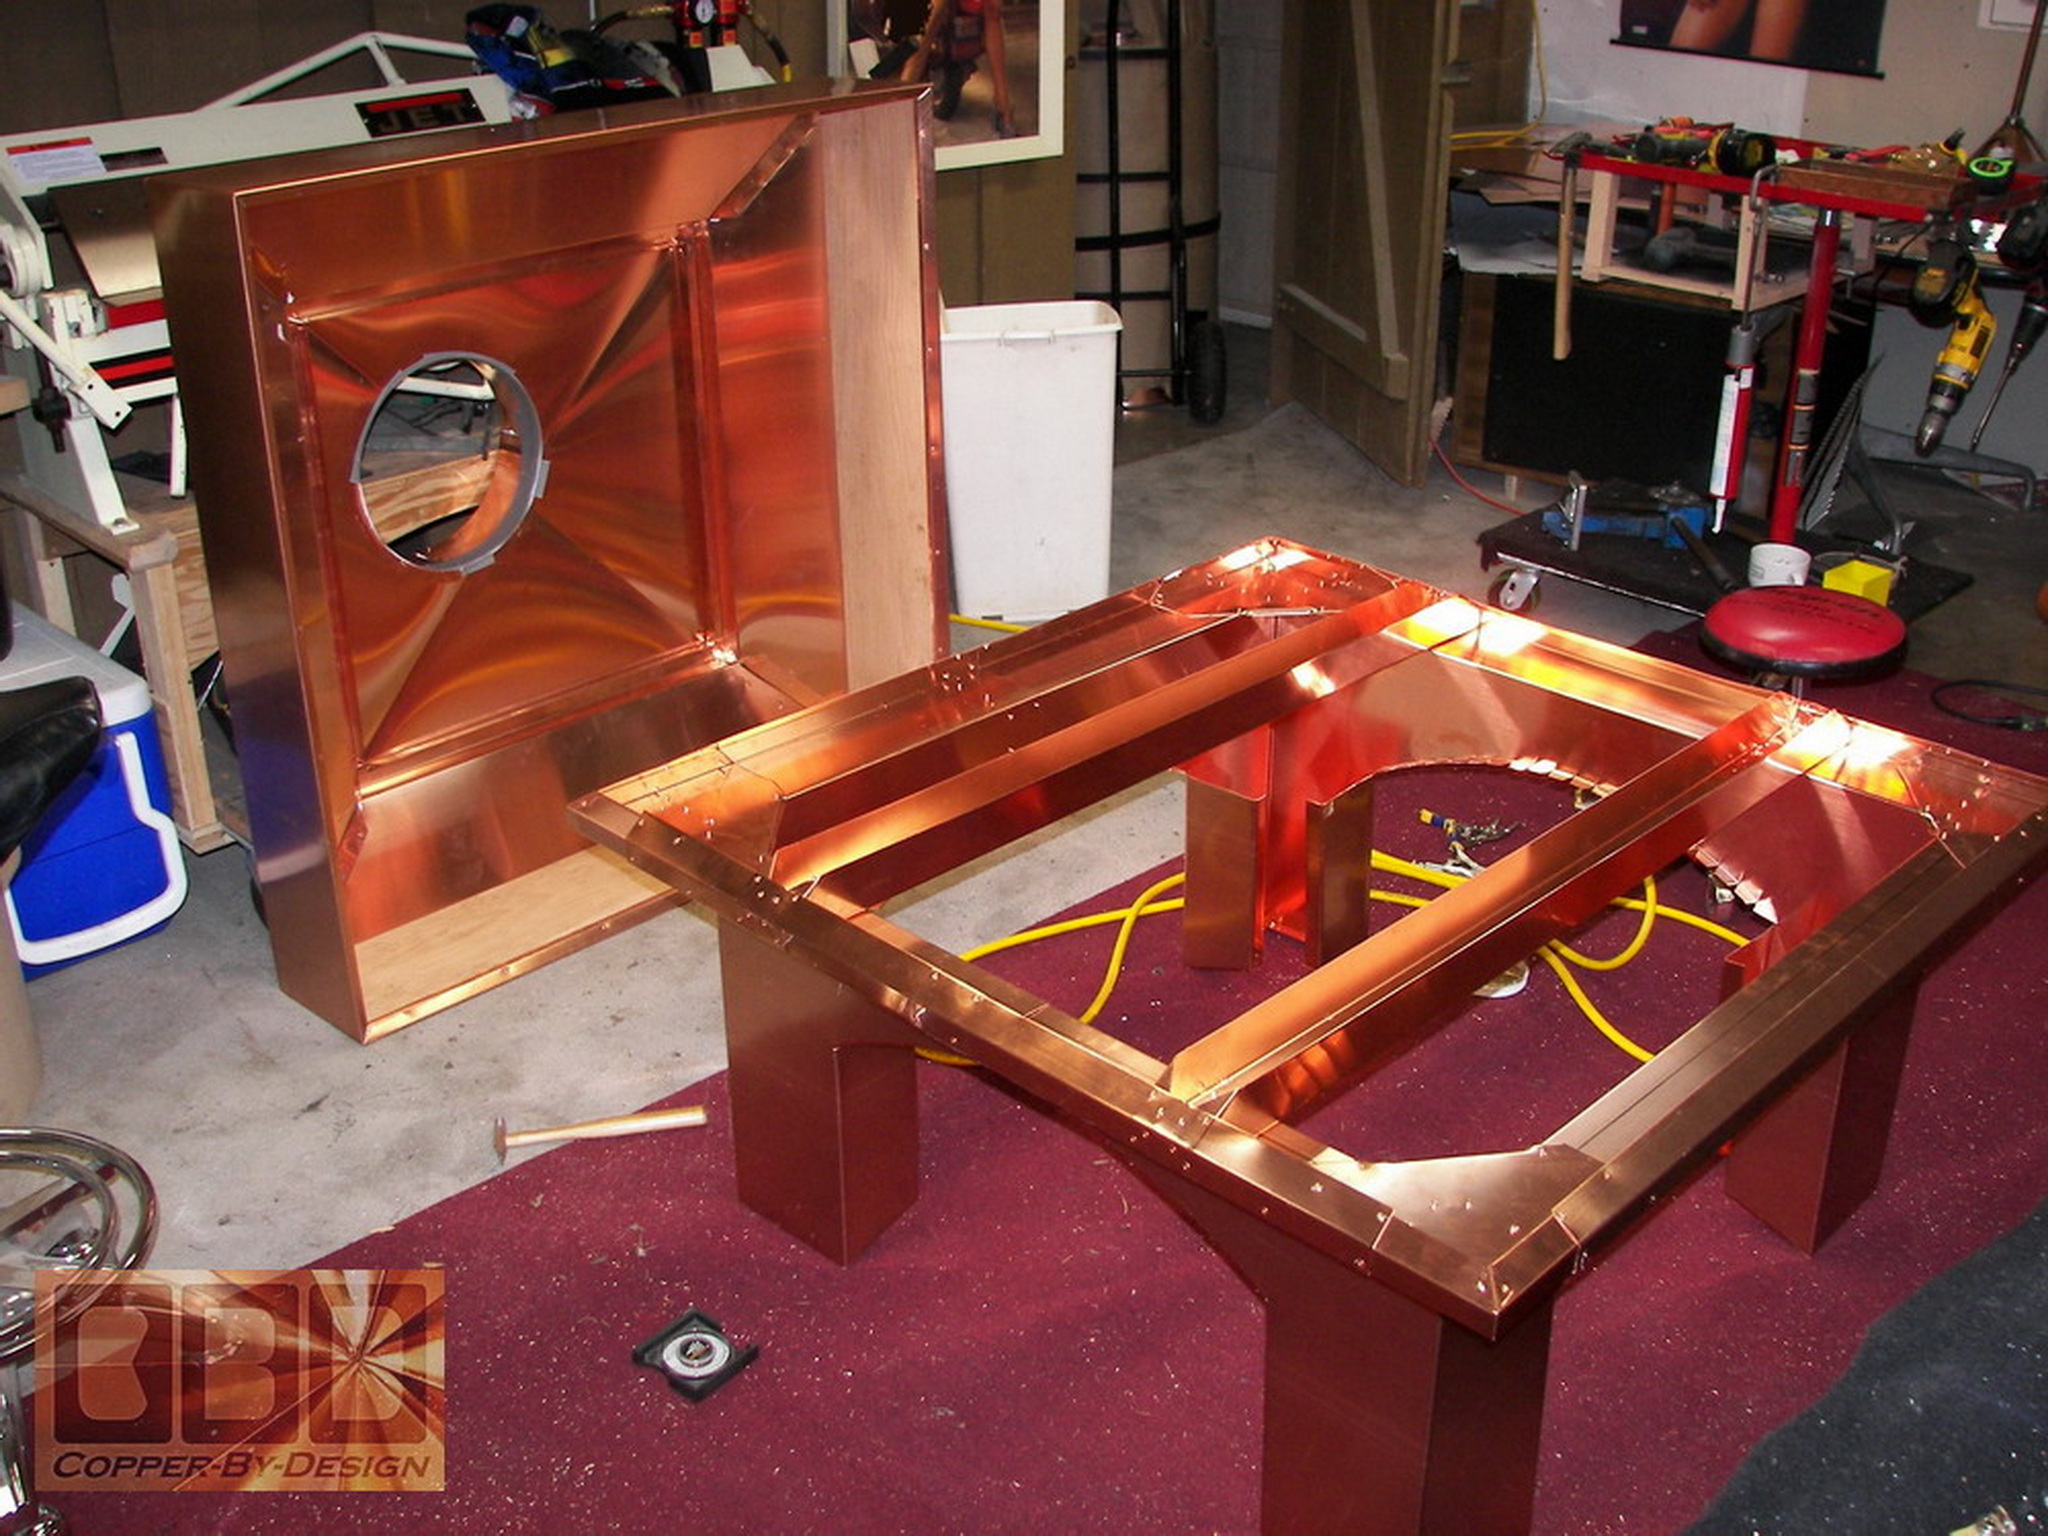
Here below is the square
Sister to the one above. Built in the same manner, but to a little
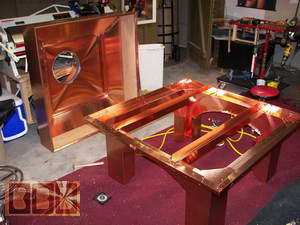
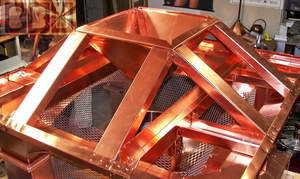
different scale. It is wider, but not as long. The first photo shows
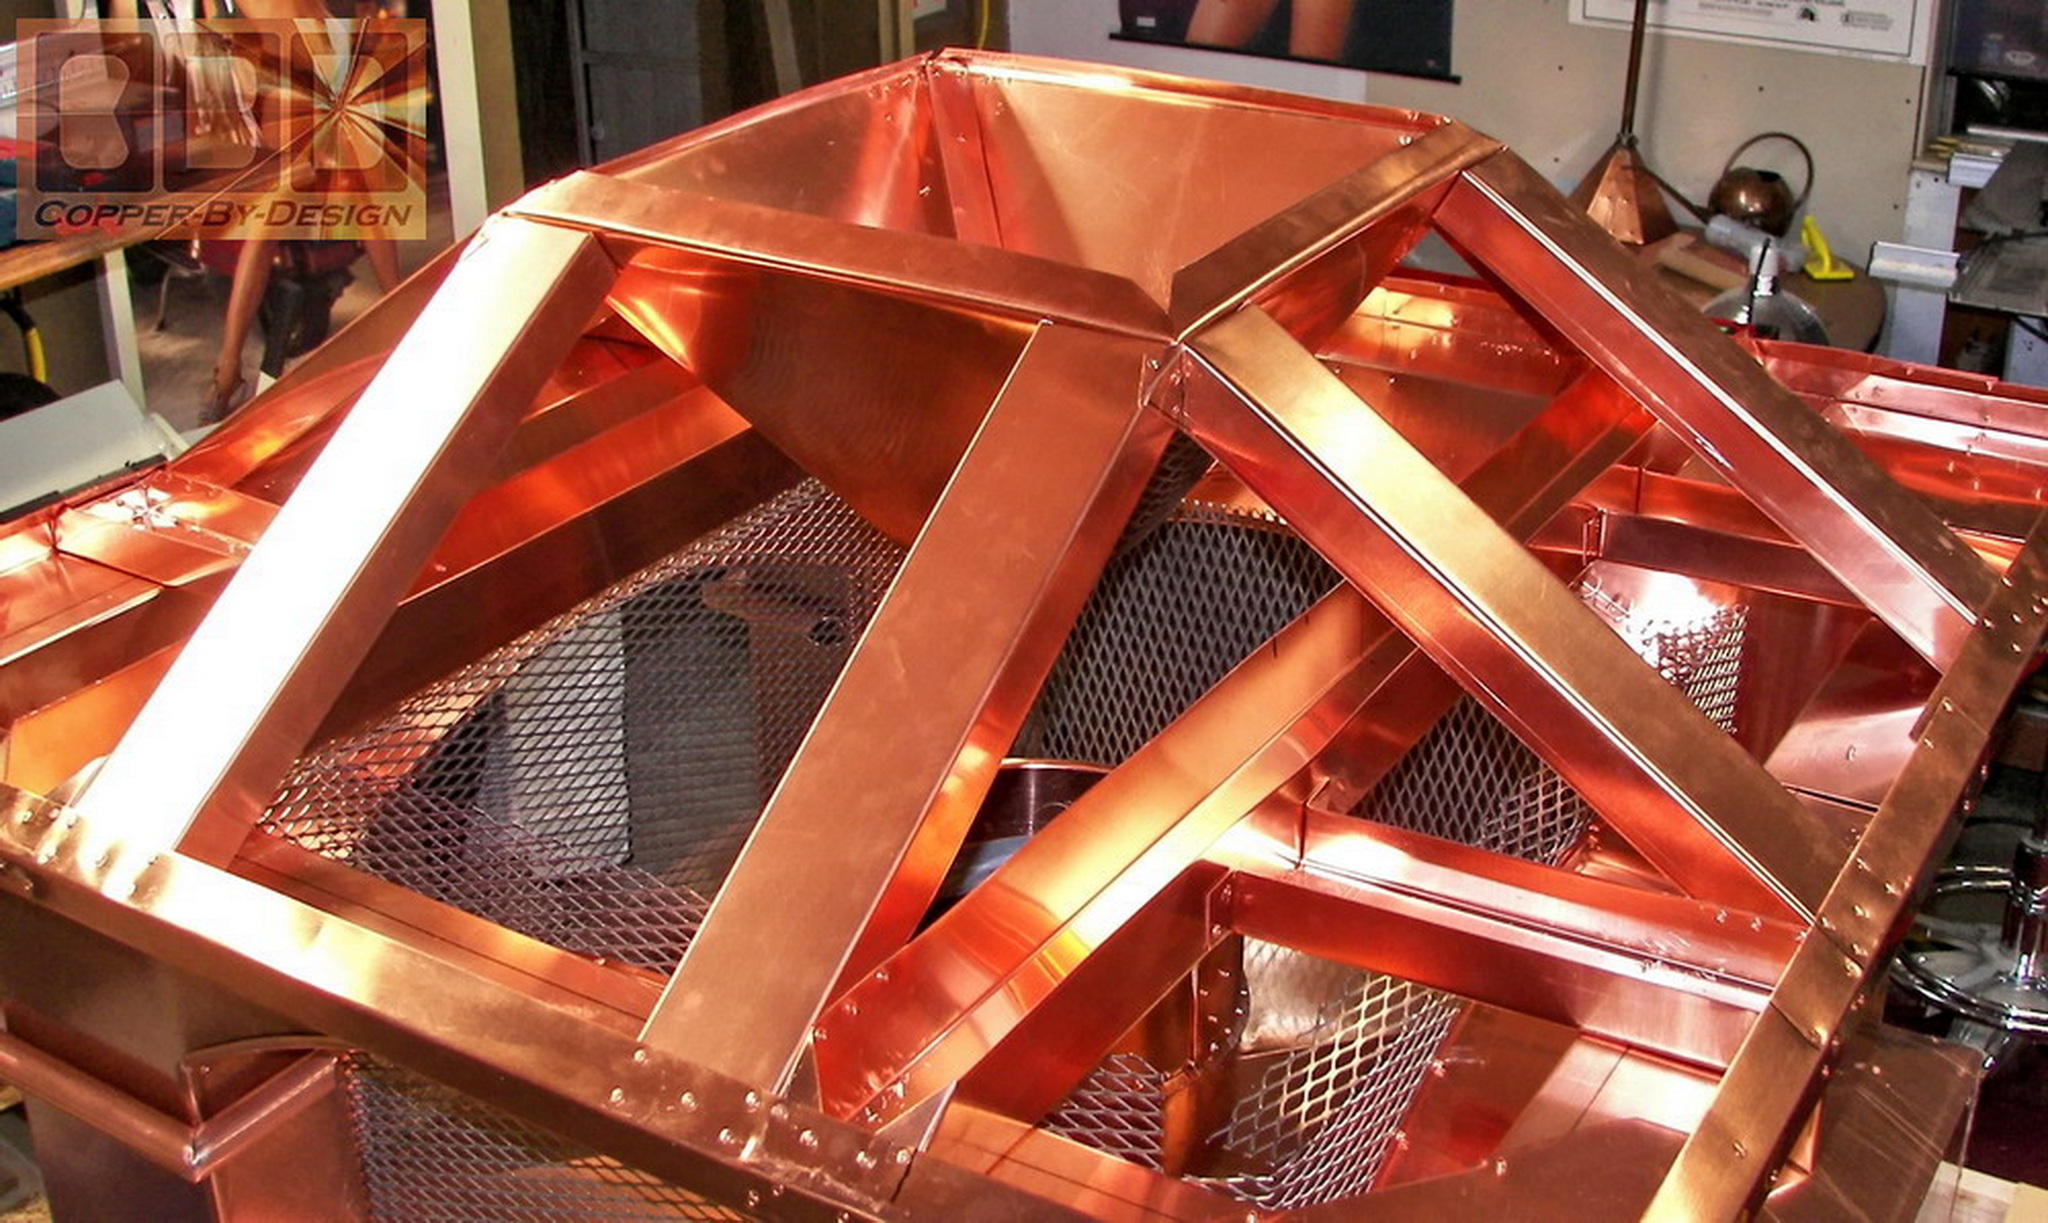
the base on it's side and the mid-section arched column set. This
is the first one of this style I have made with all 4 column corners
seamless to better hide the rivets holding it together over the
center of the arch instead. I only wish I had thought of this sooner.
There are nearly 1,000 rivets that hold this chimney cap together,
but very few of them will be seen from the outside. Just like with
the auto makers, where they go to extremes to hid the fasteners
for aesthetics, yet still be just as strong.
 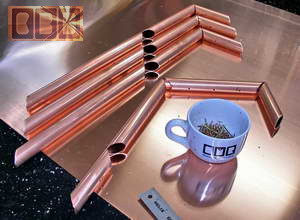
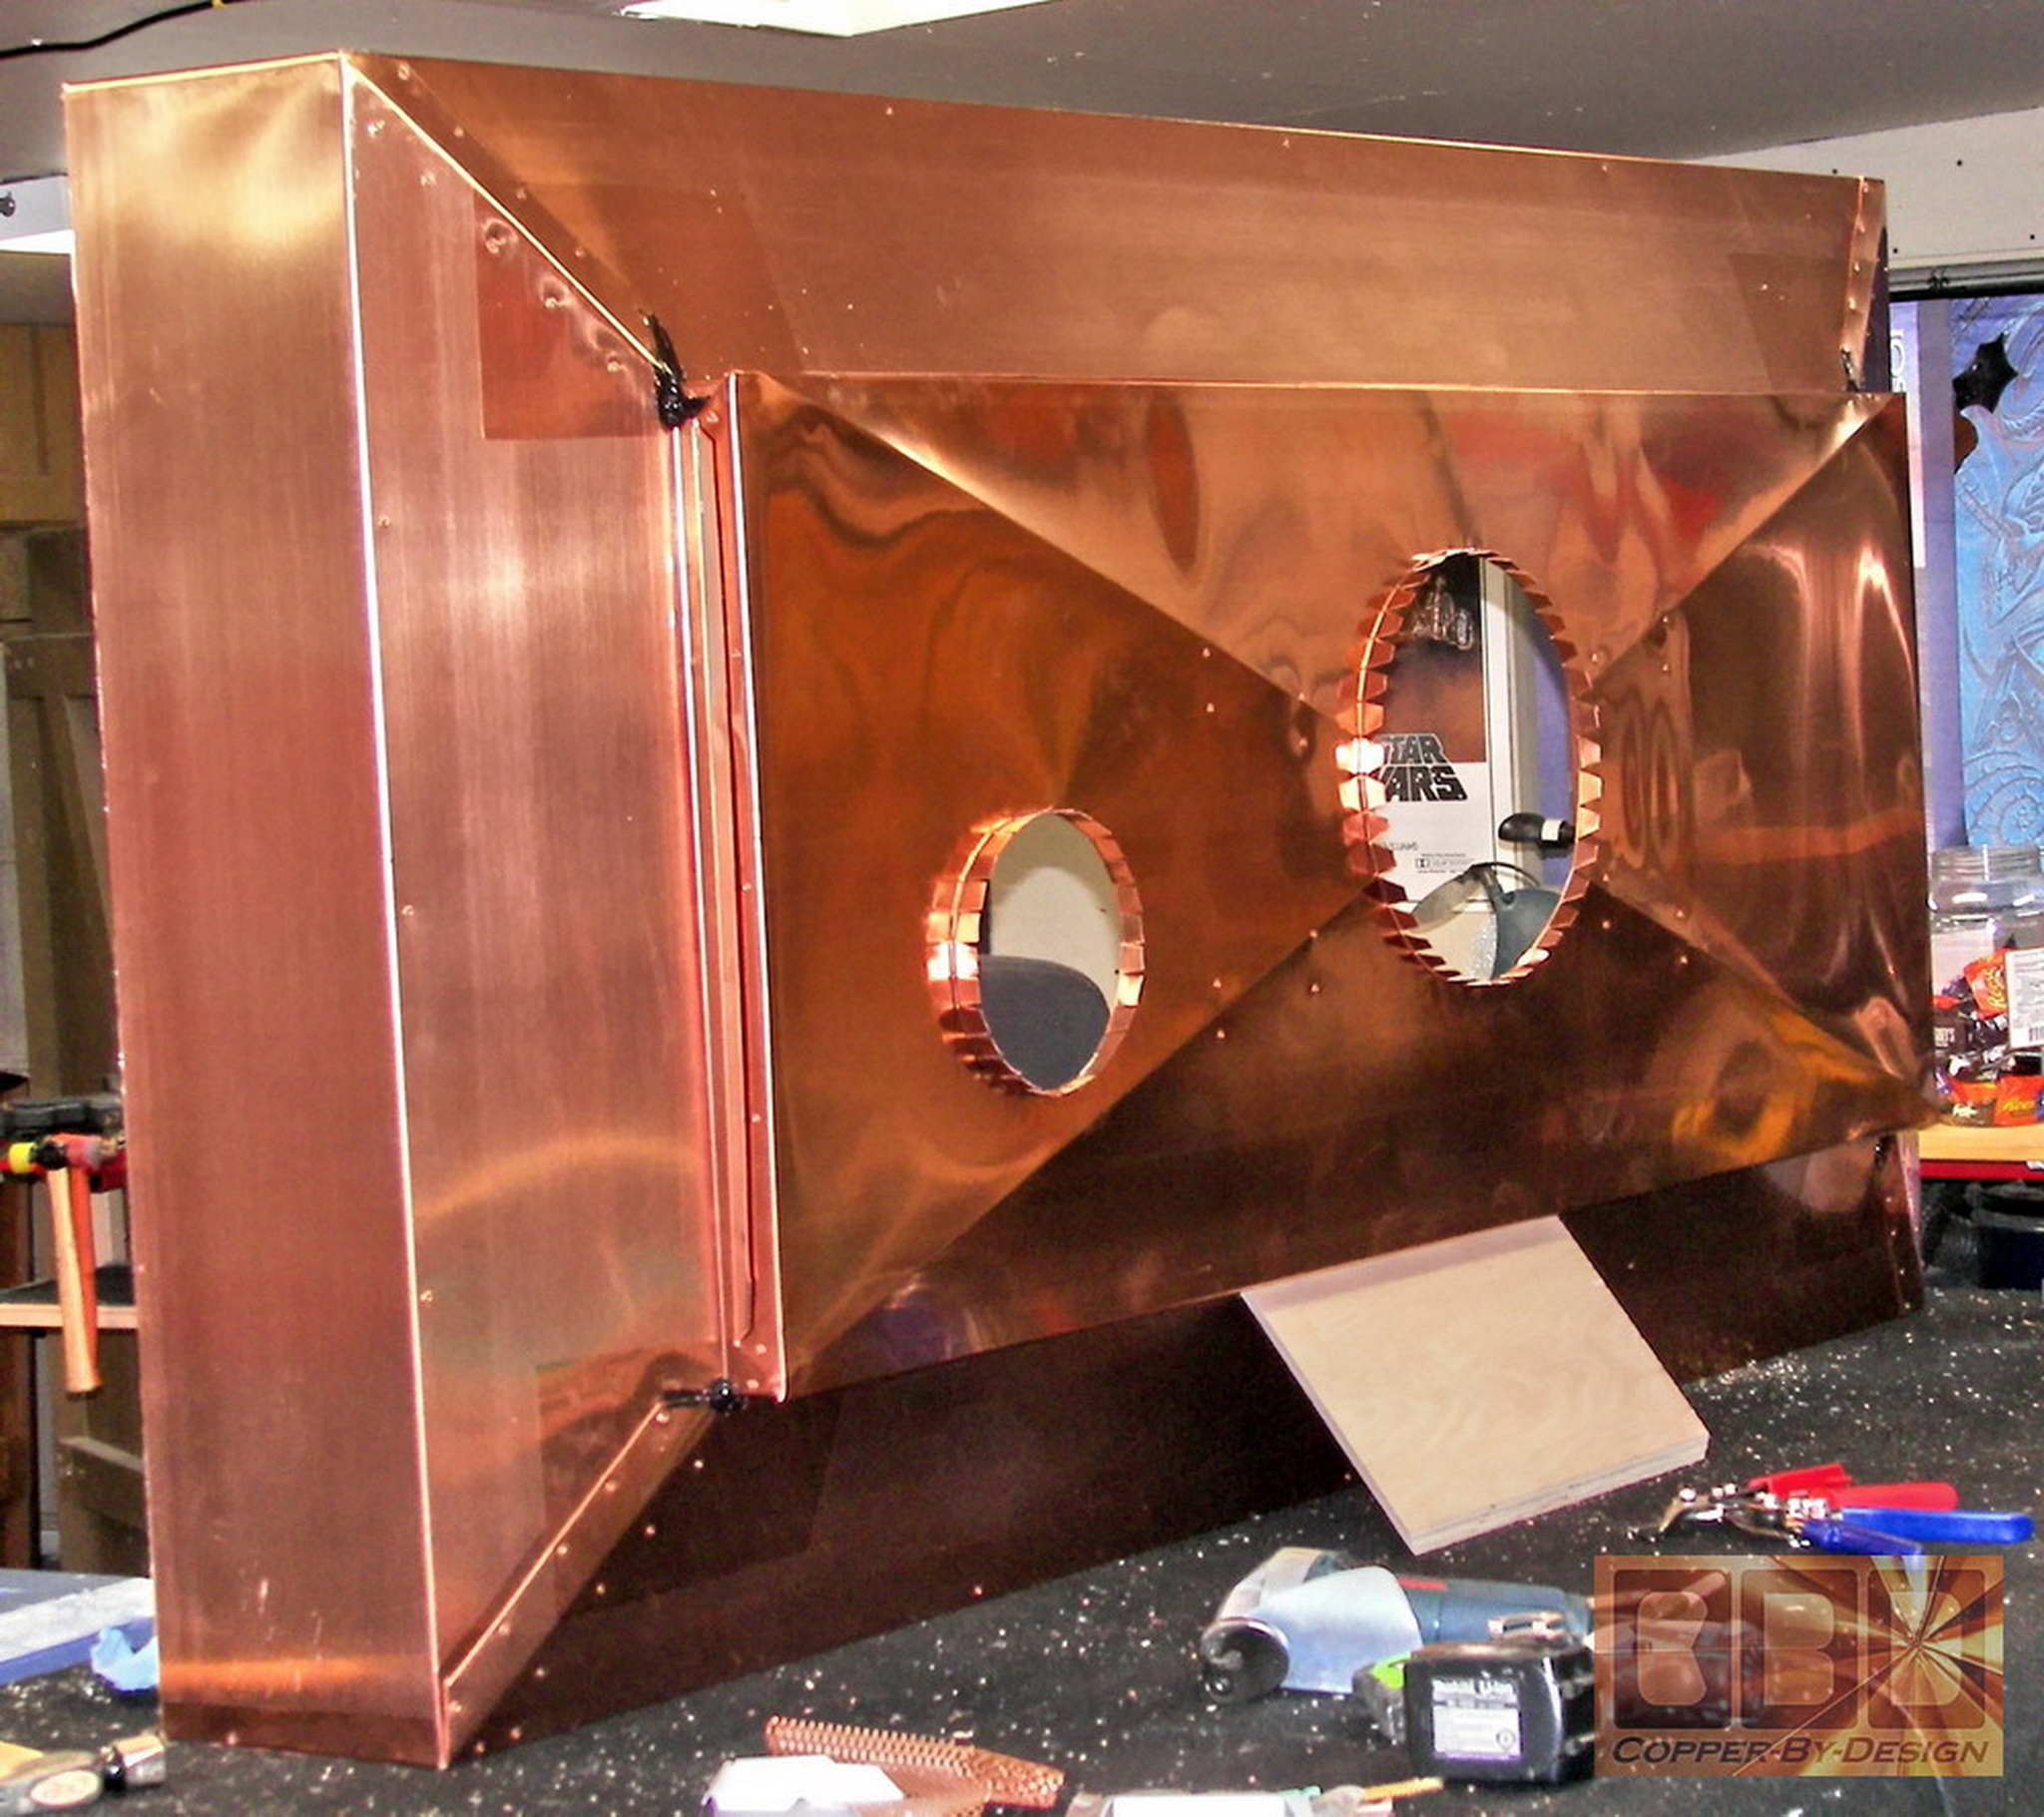
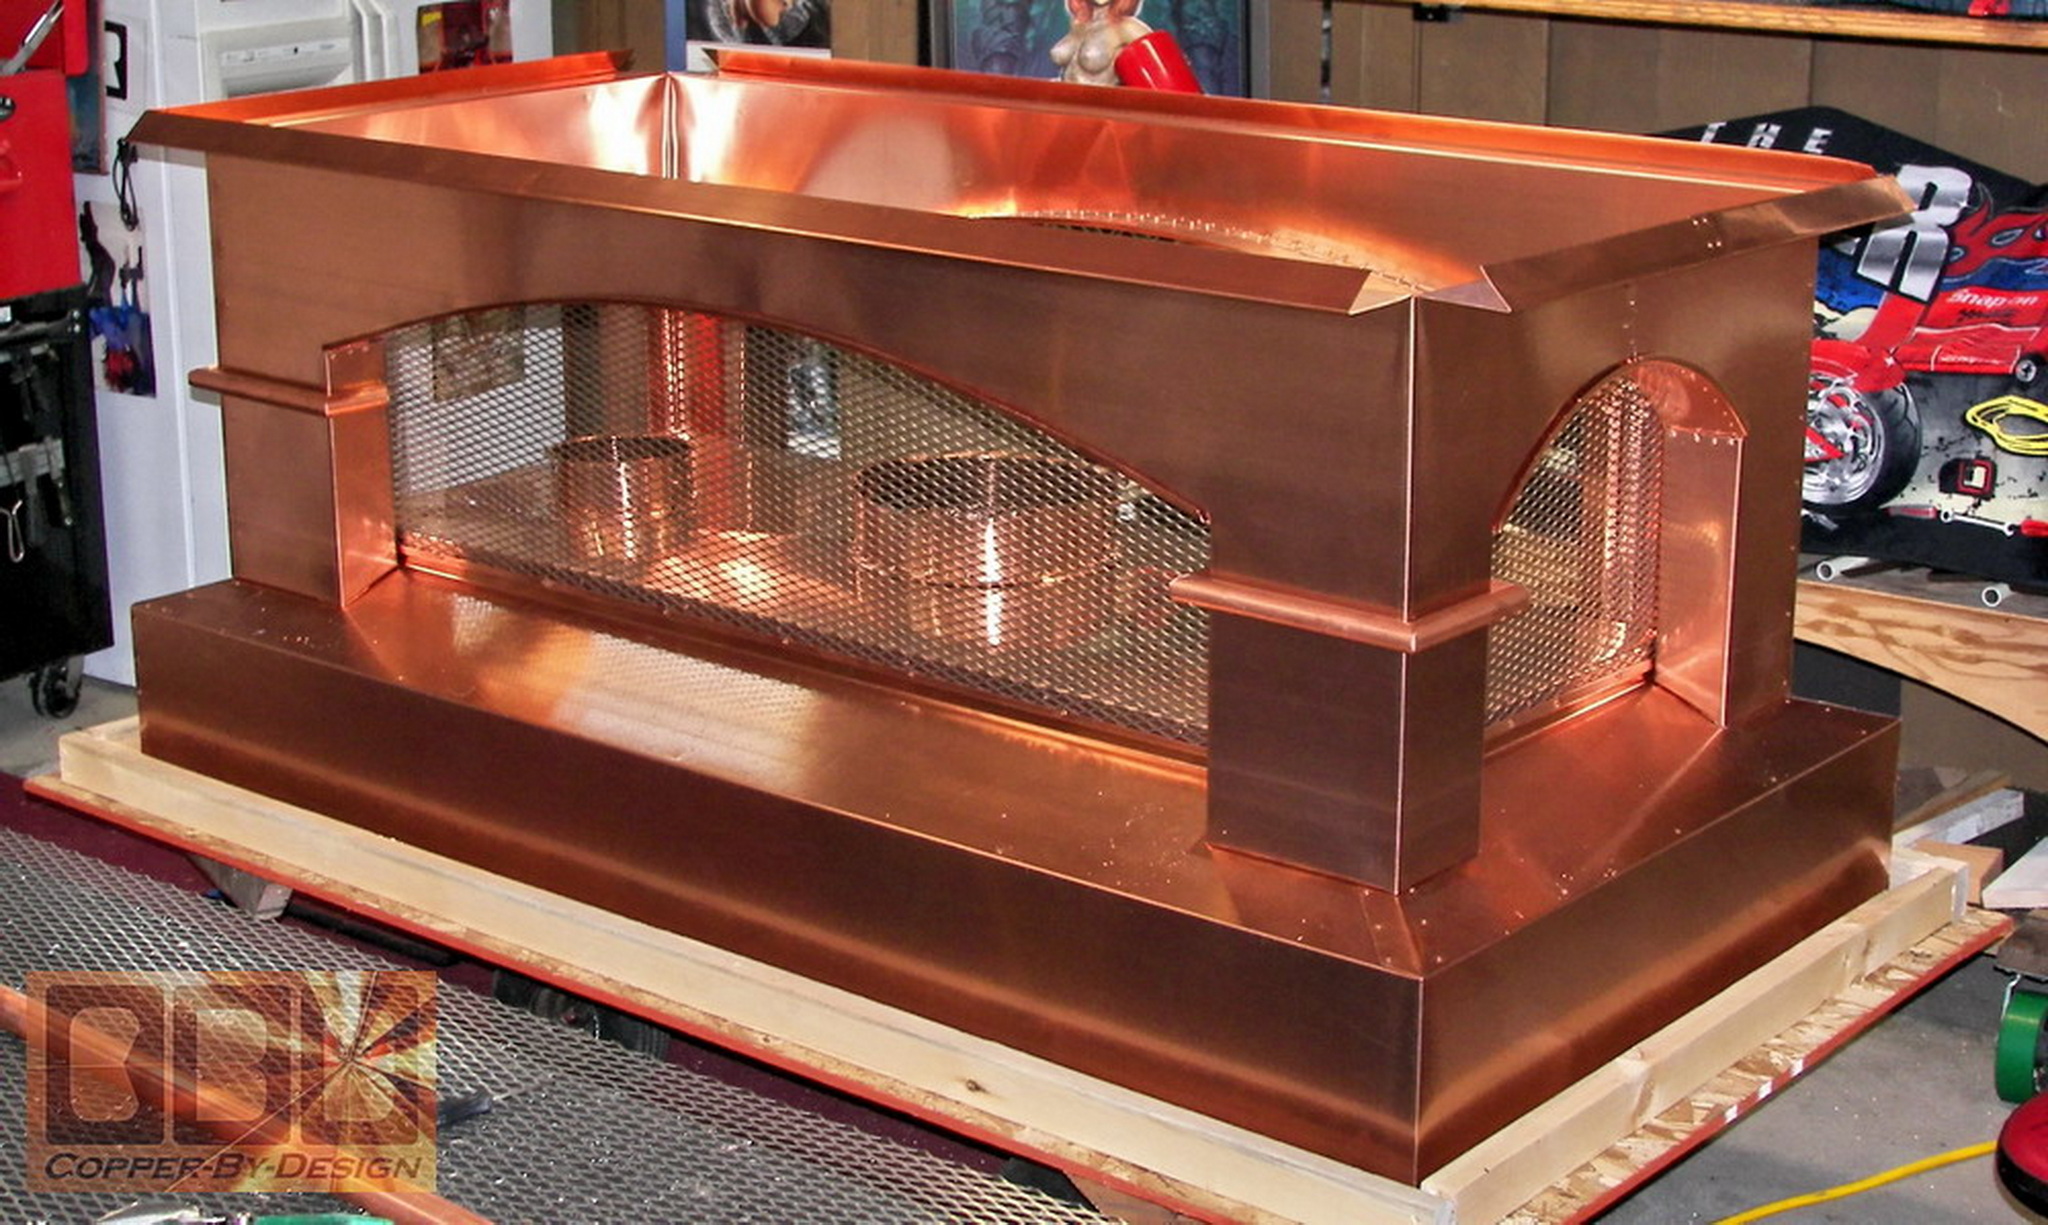
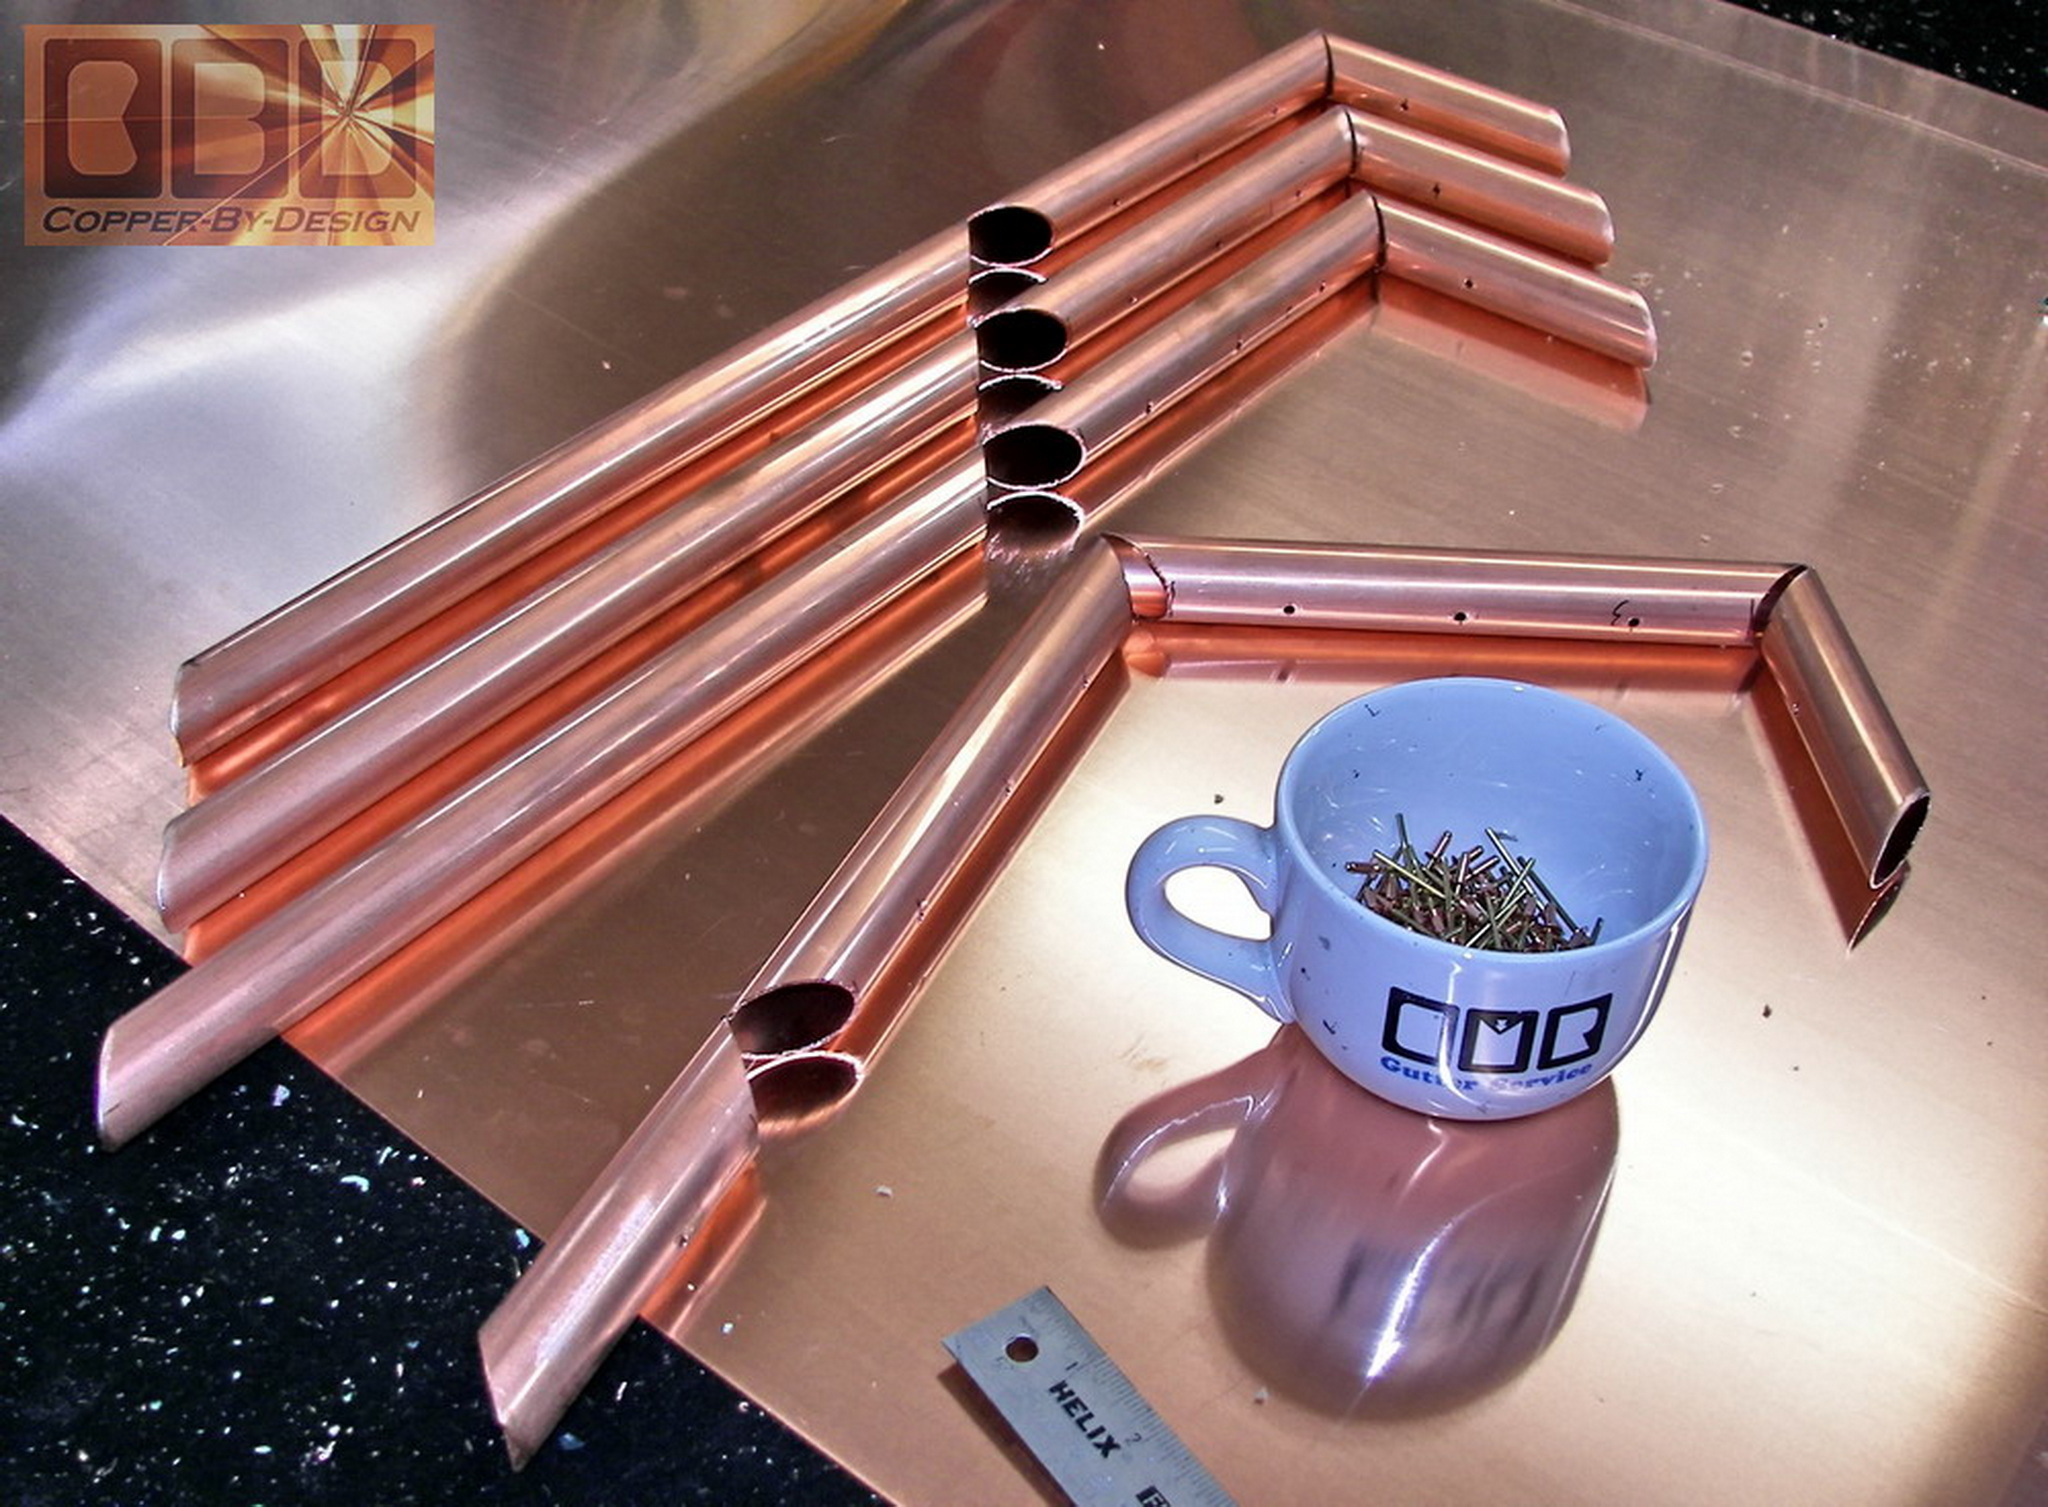
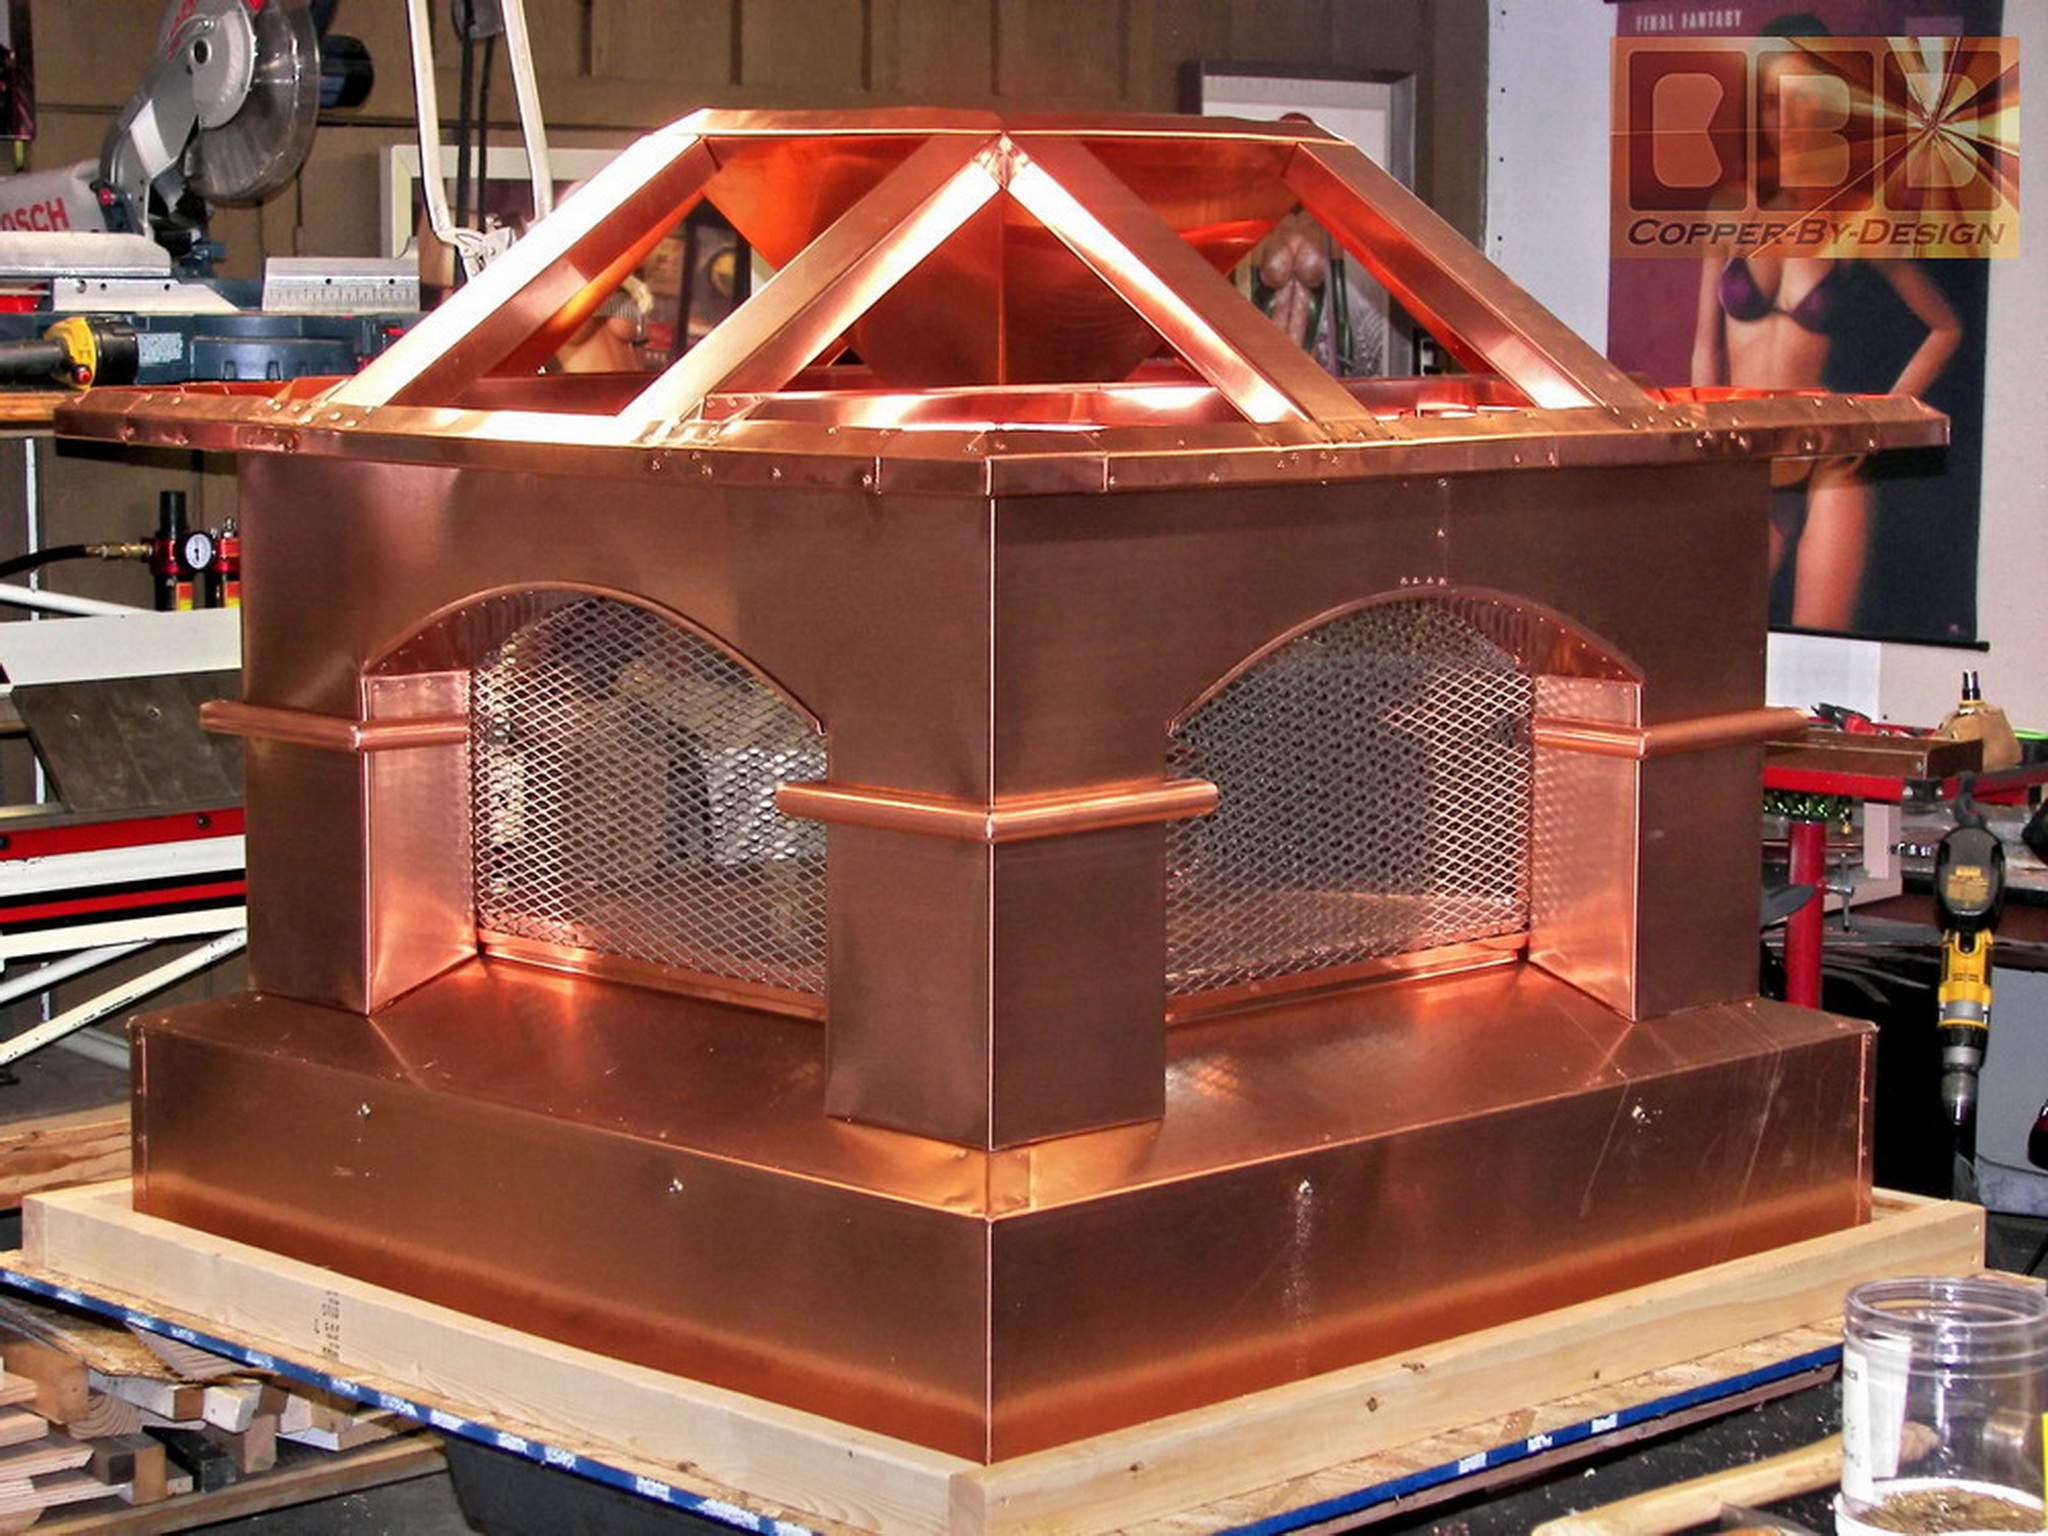
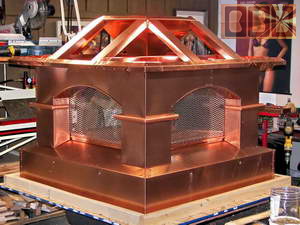
These pipes shown in the second photo are
pretty much just decorative, but take me nearly a full days work
to measure each of the 16 sides, cut, fold, and attach these pipes
in a single piece to each of the 4 columns with the 14 rivets from
inside the columns. Alignment of the holes is very tricky.
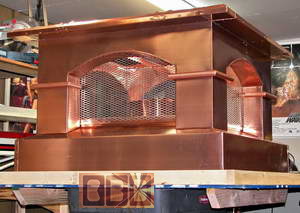 
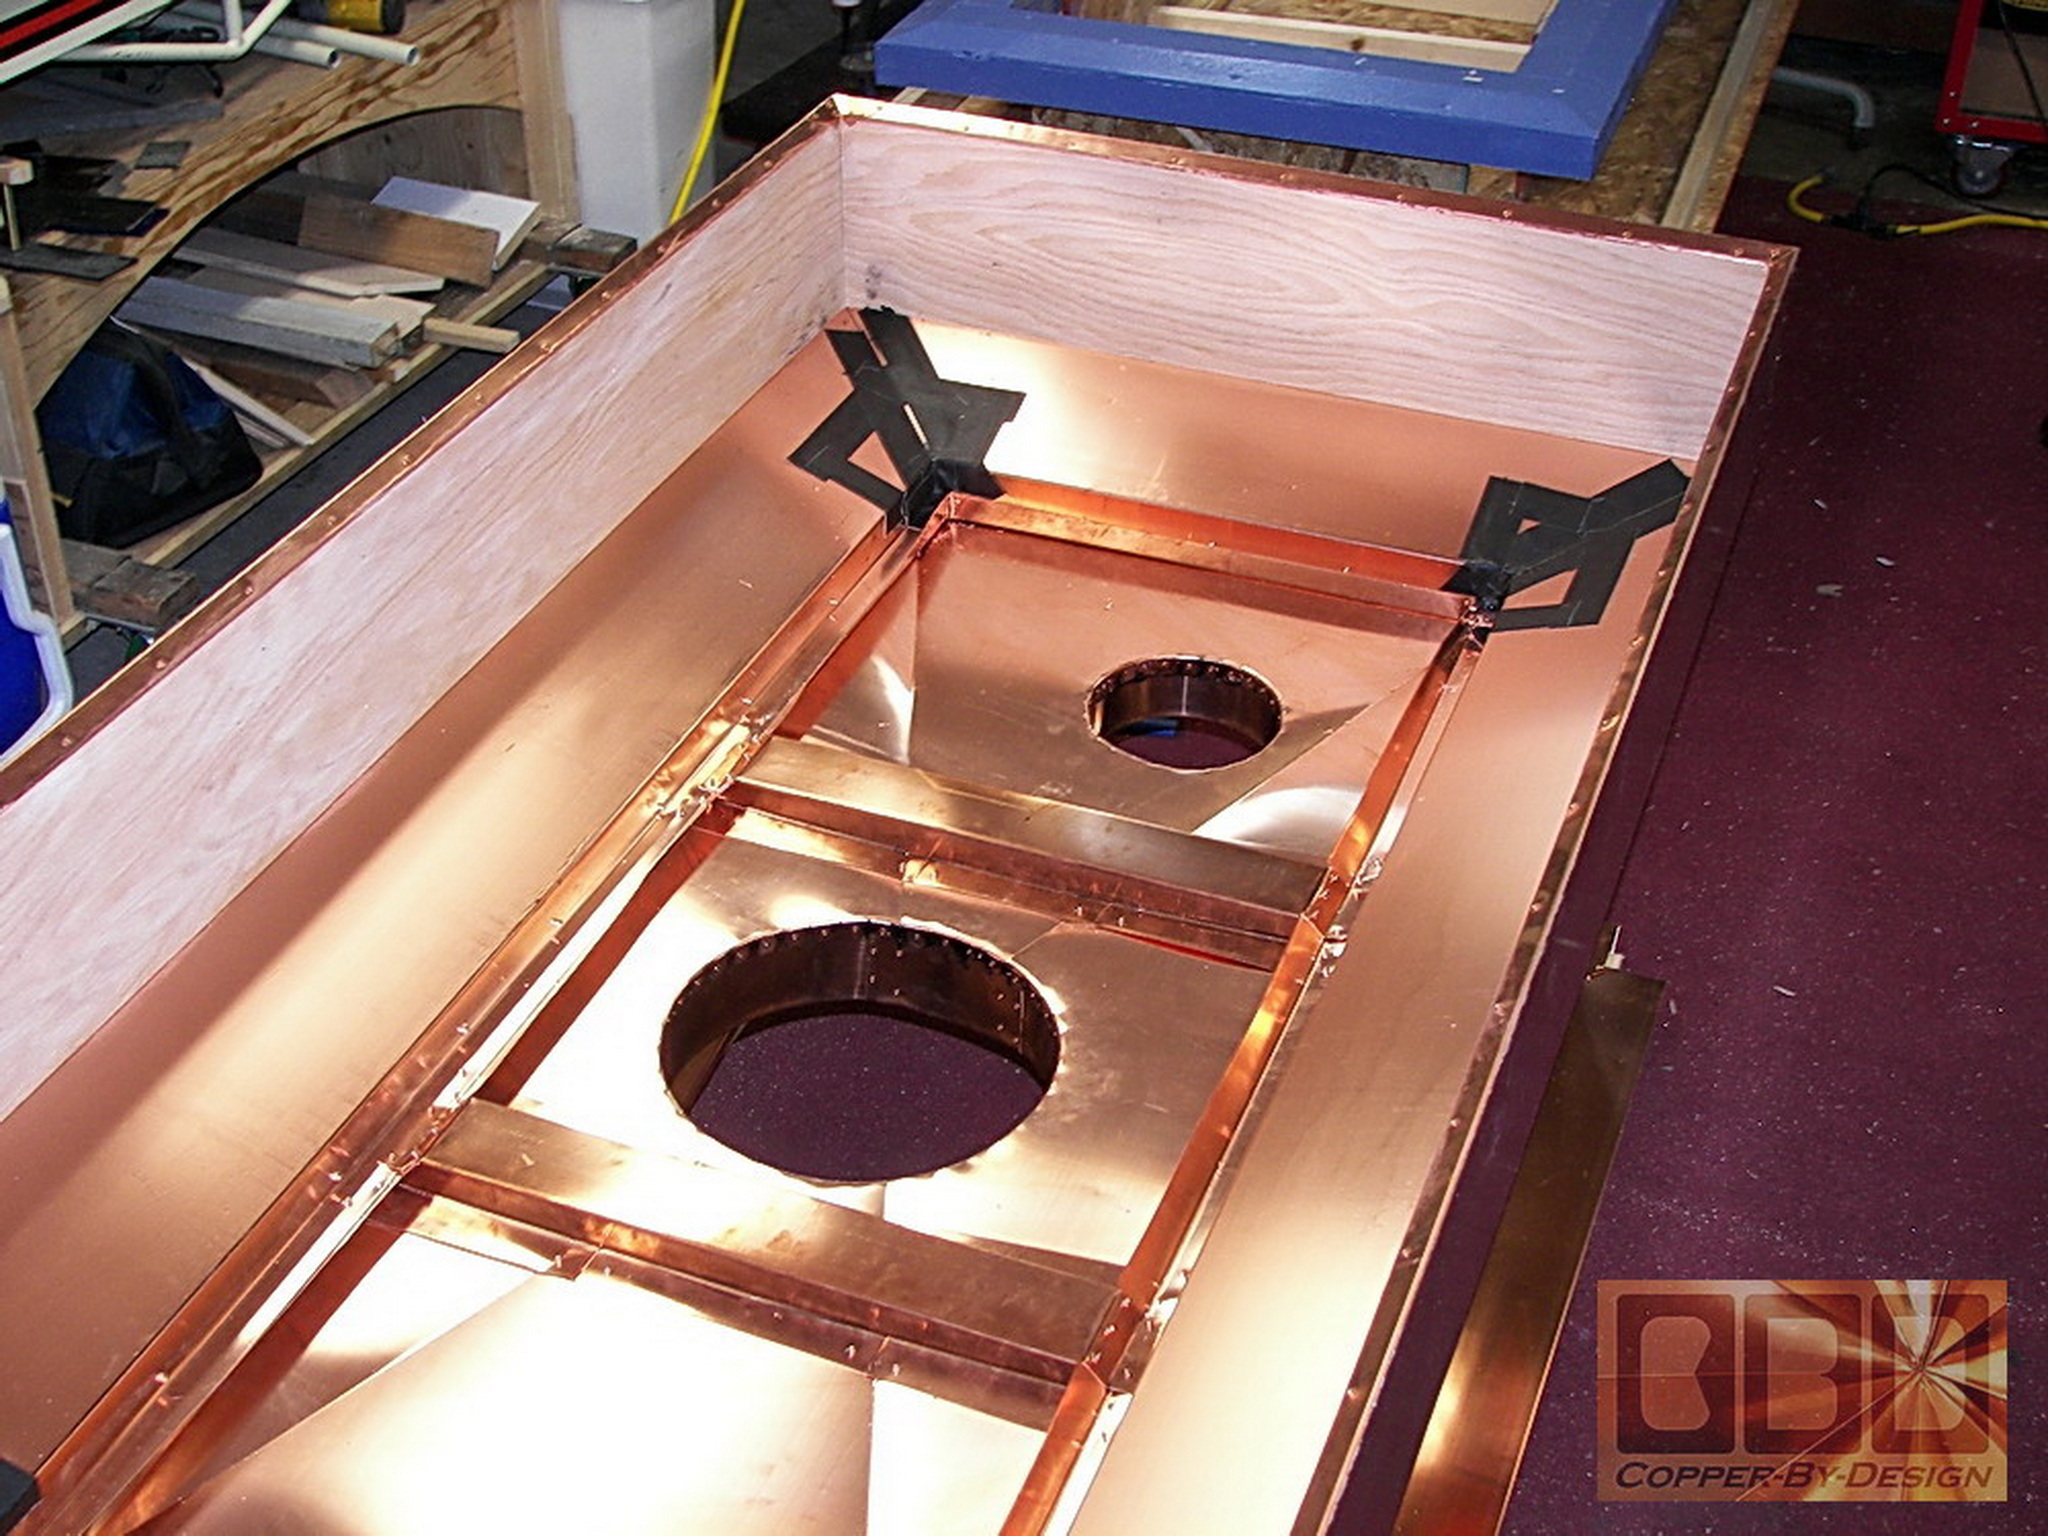
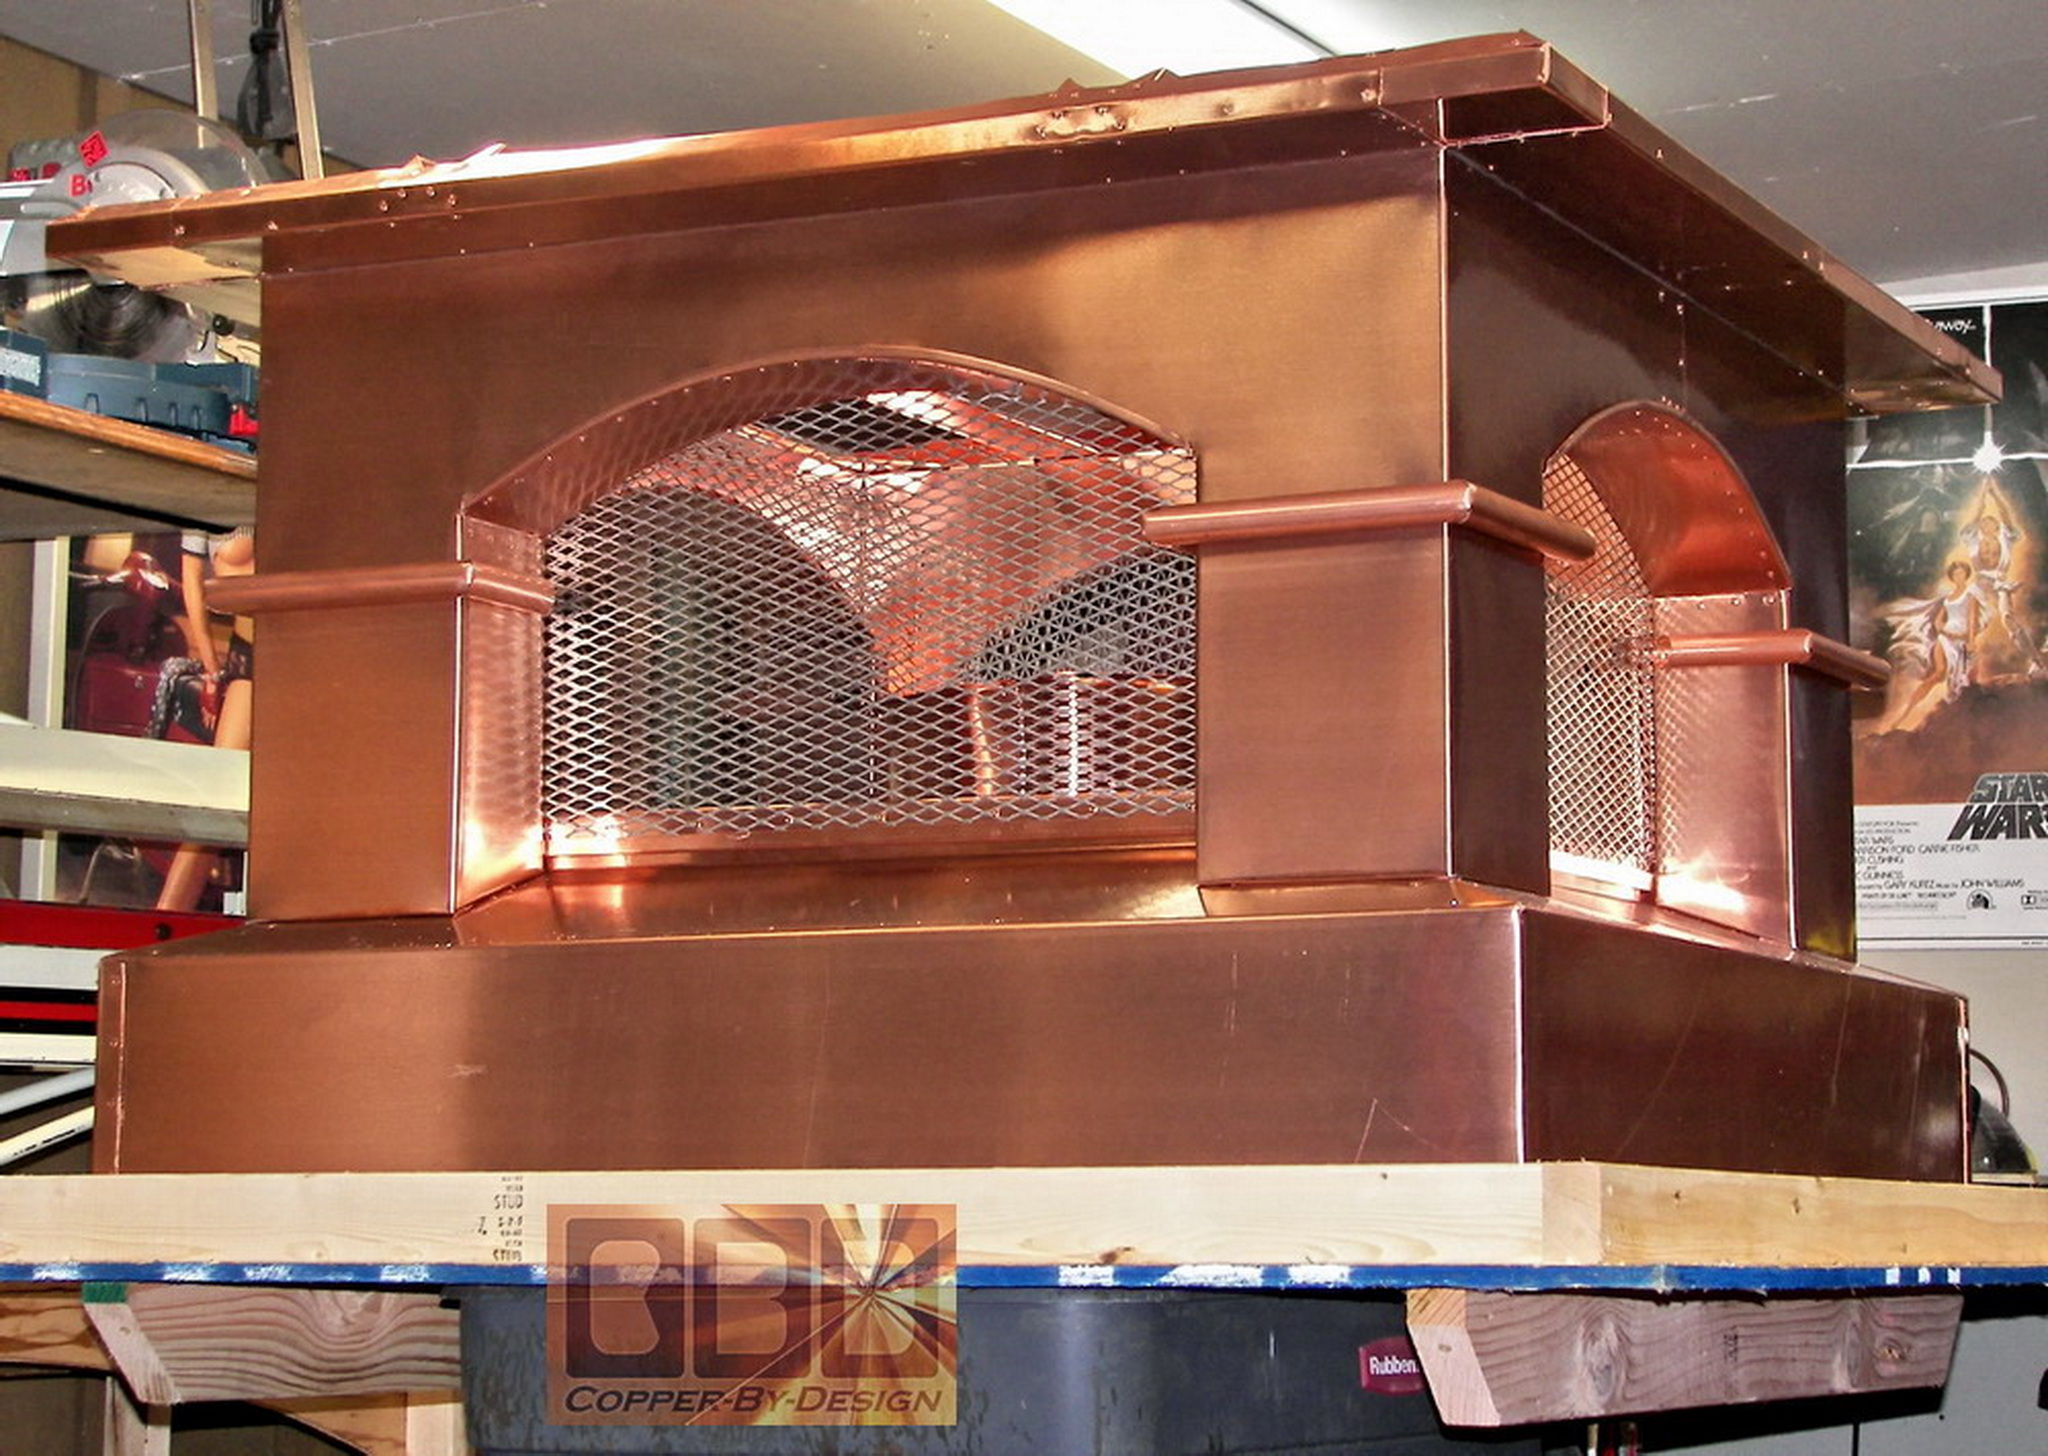
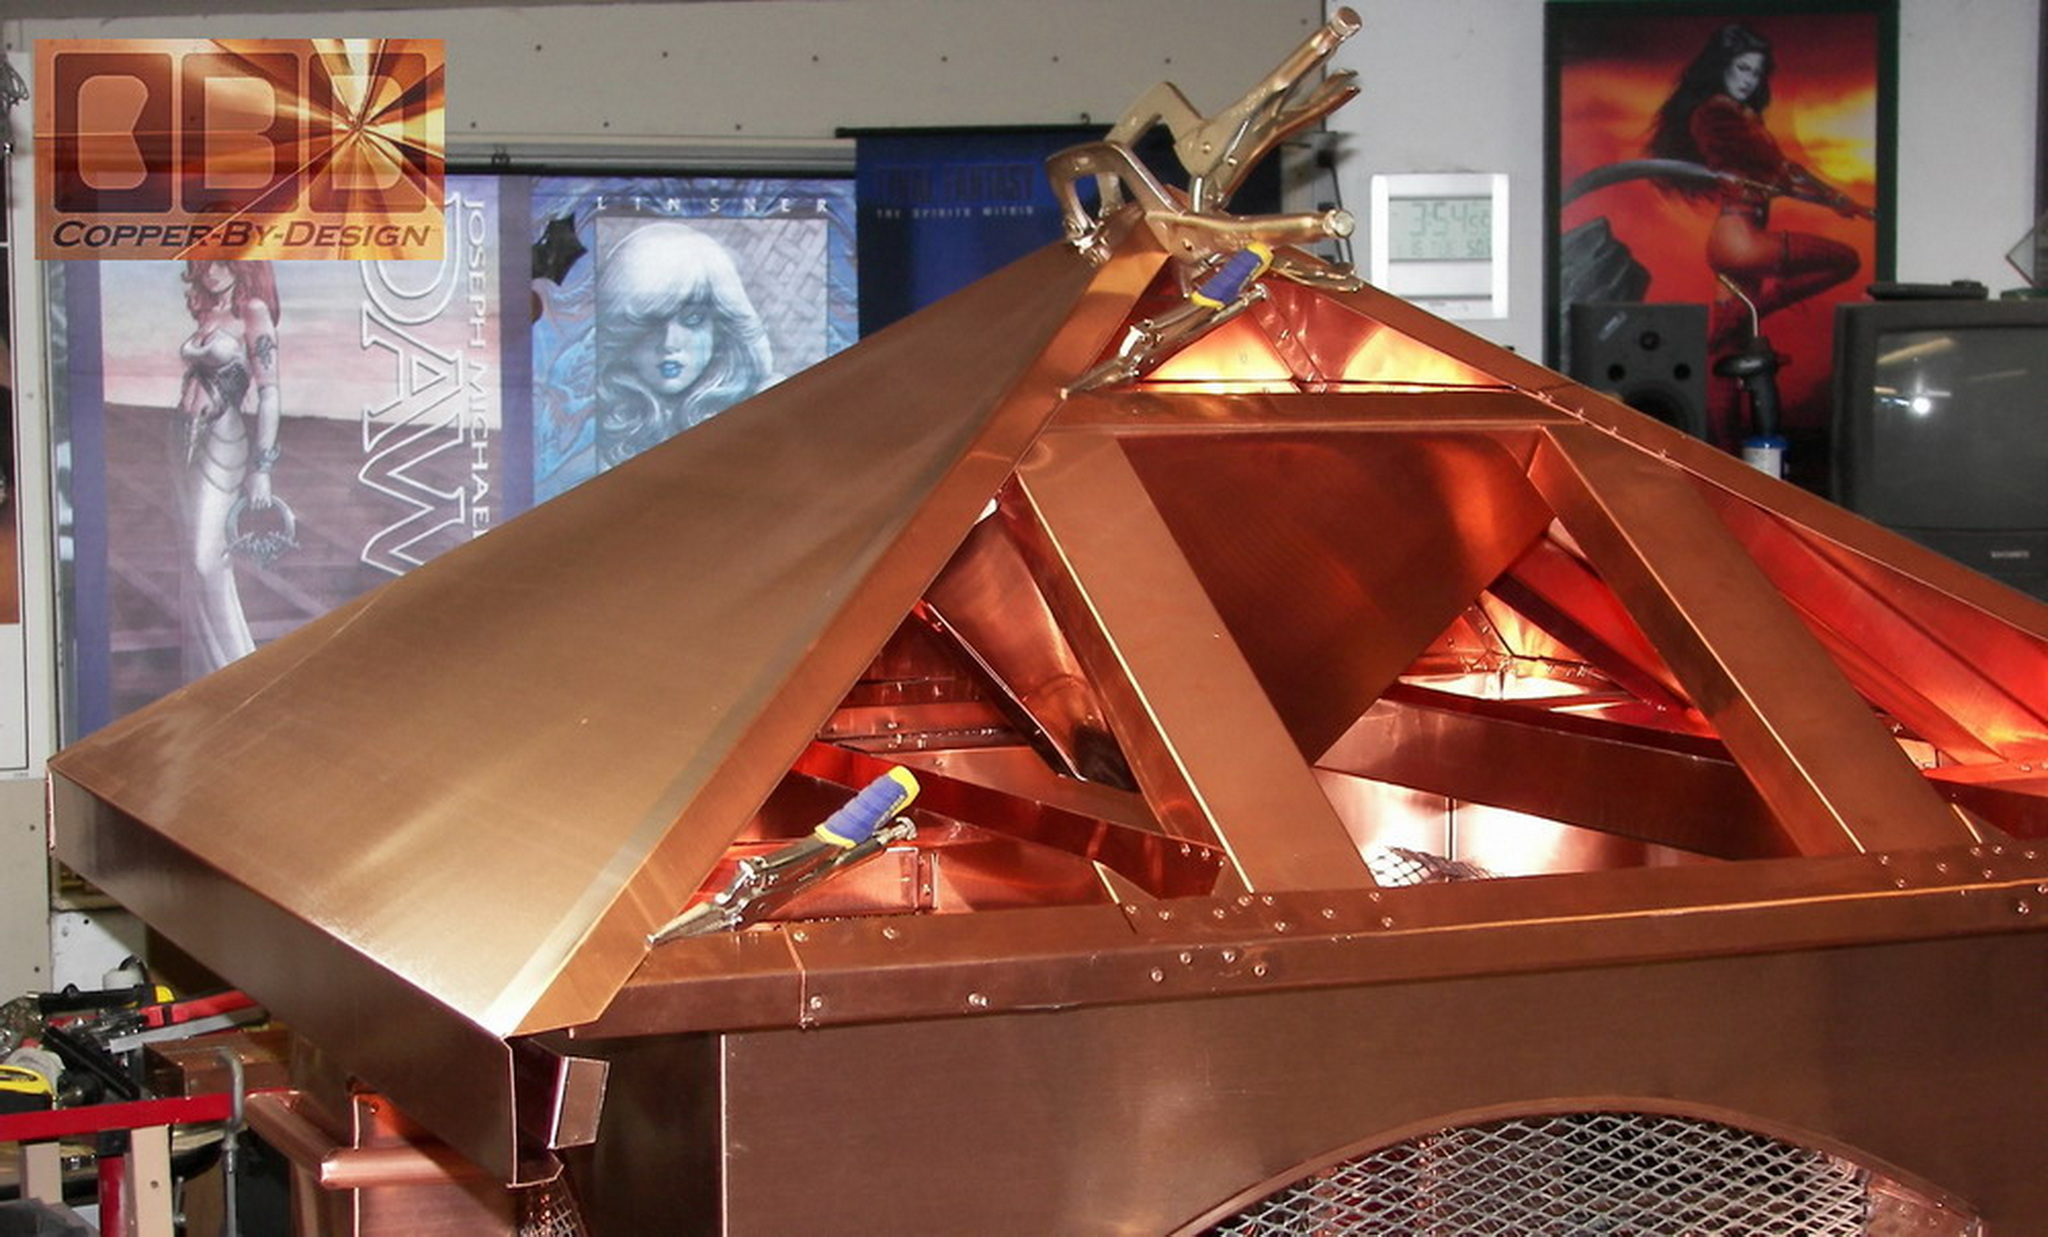
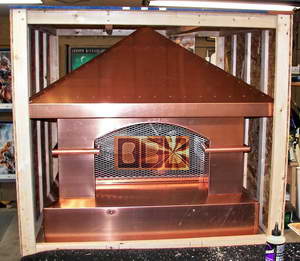
Being perfectly square
there is no ridge across the top. I have to make the hipped roof
meet in a single point in the center. Making the roof skin over
this is easy enough, but the best placement of the internal bracing
is more tricky. I have done it before on the Eastaff caps with just
4 braces, but it is too hard to bring all these 8 roof braces up
to the center point at an odd angle to connect just right in the
middle.
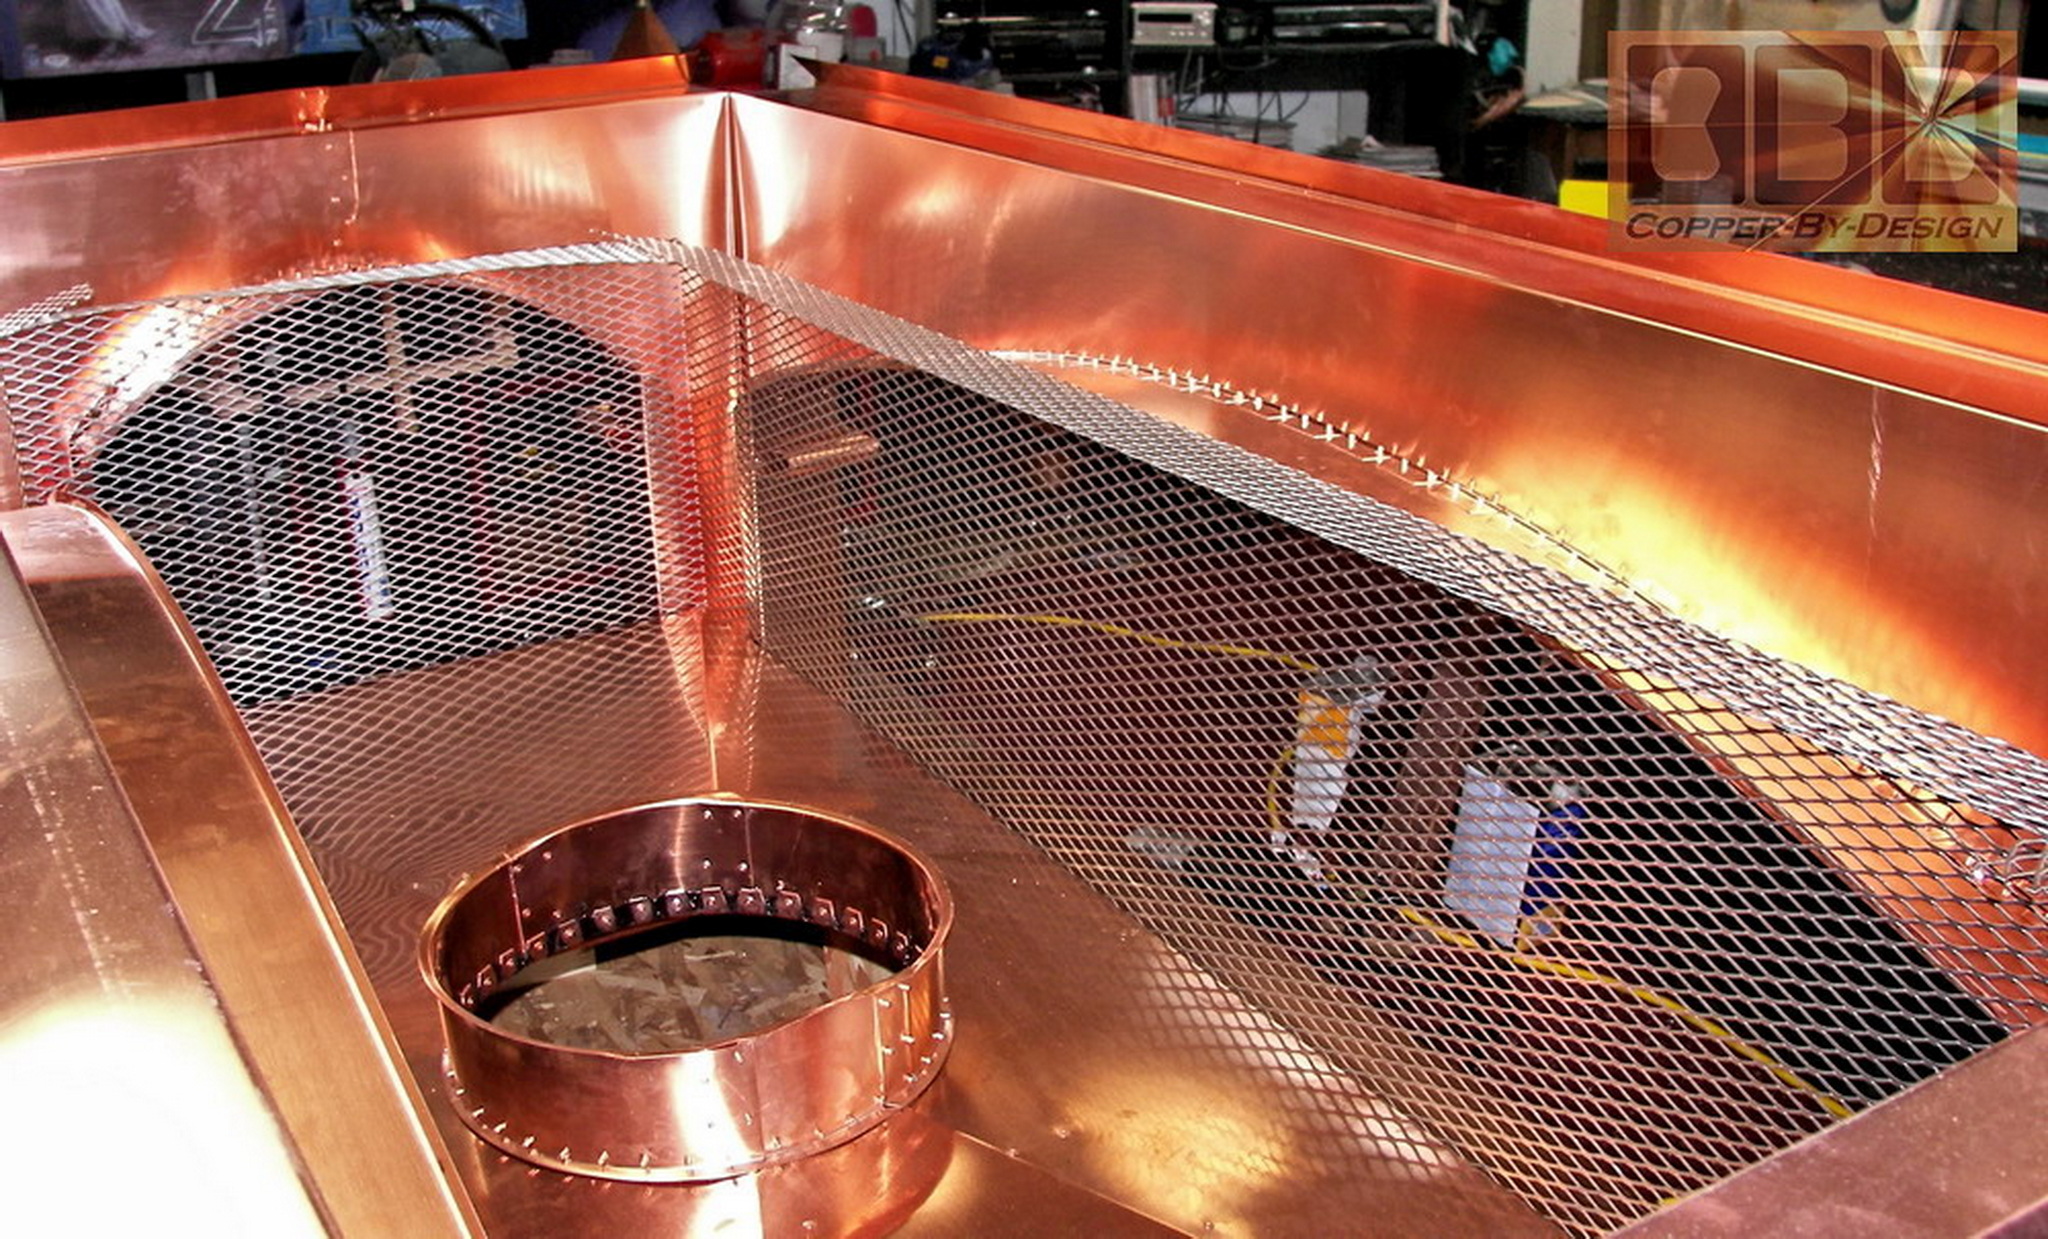
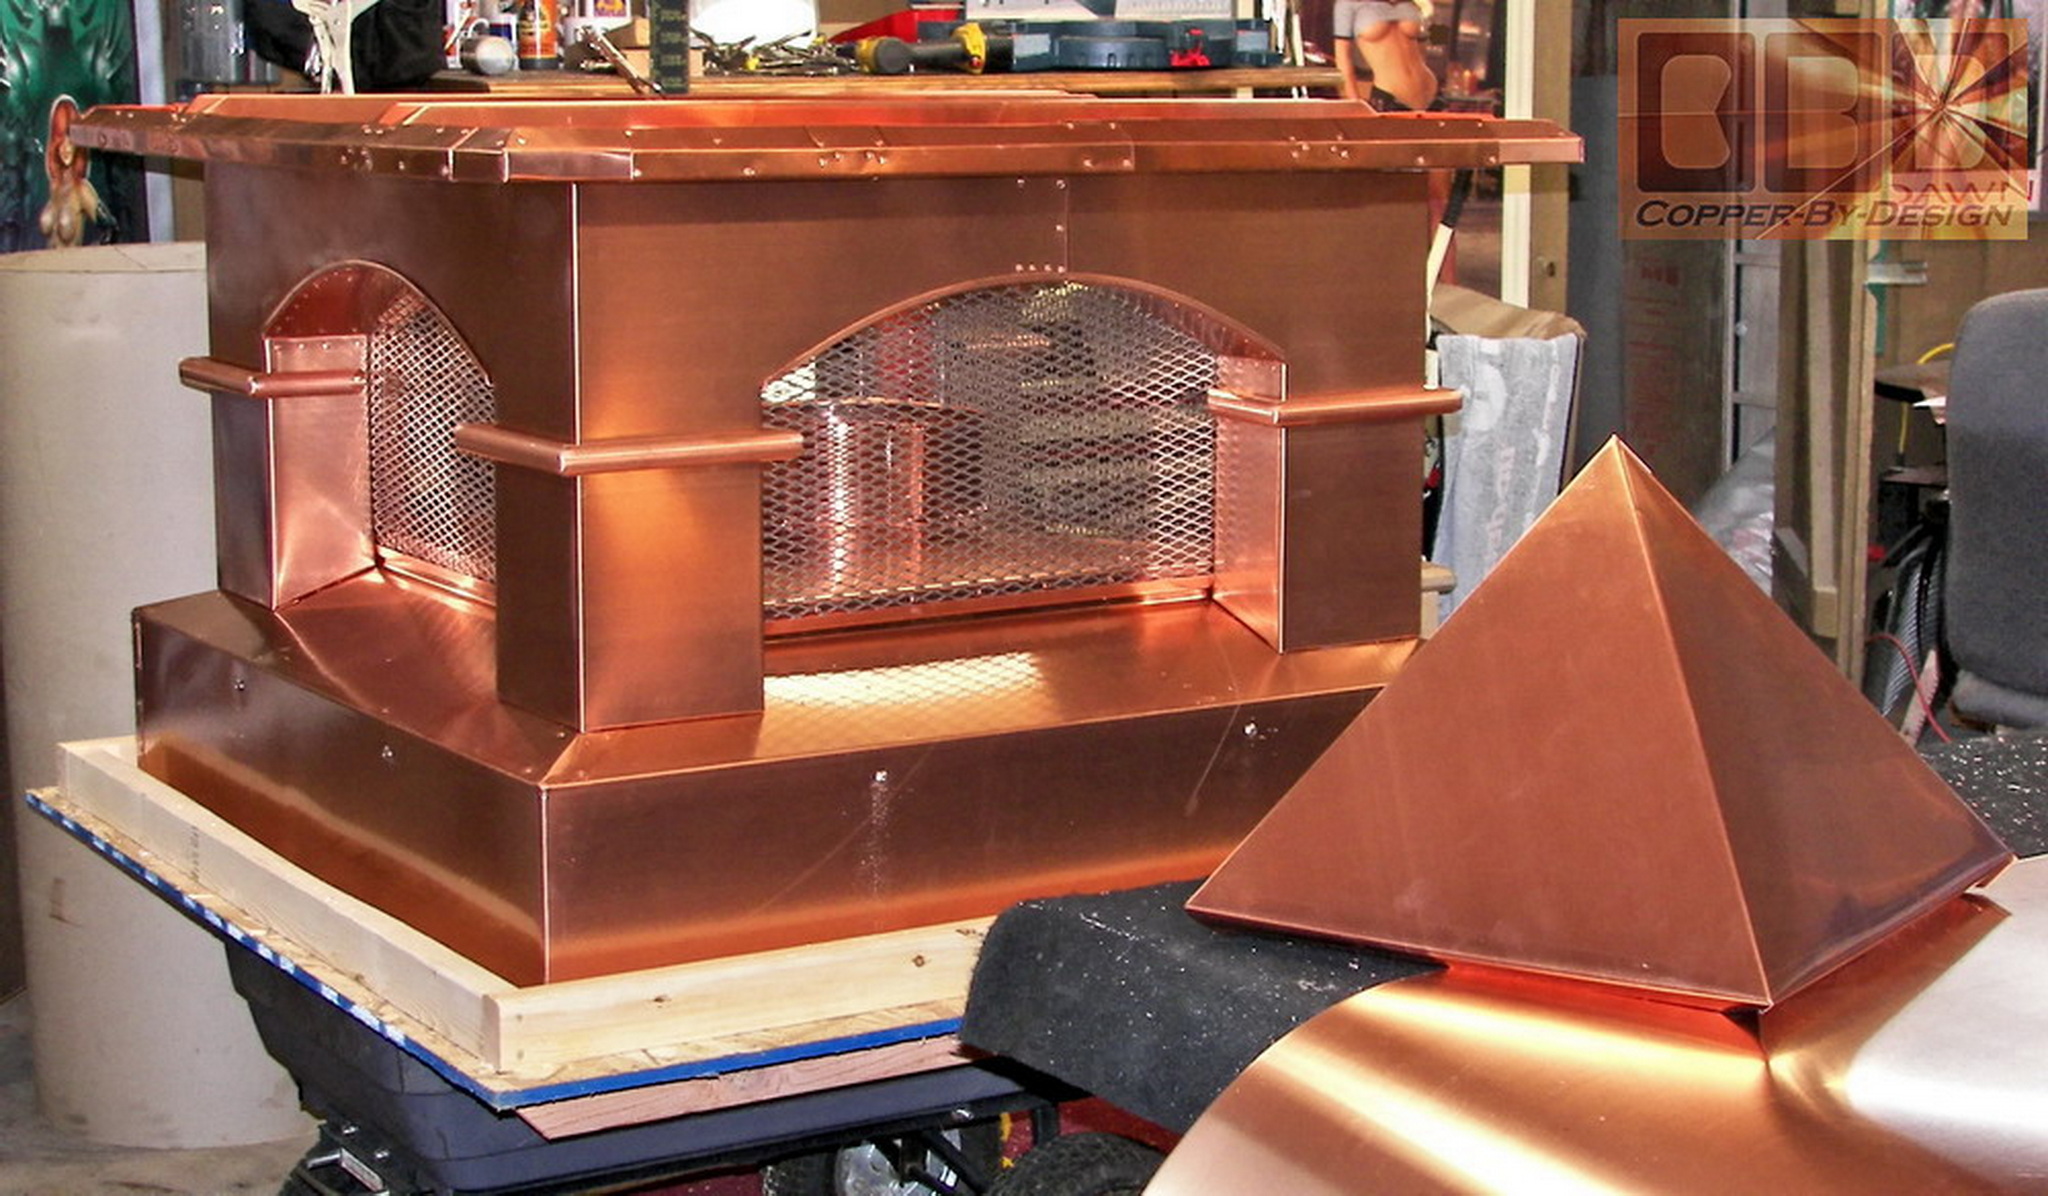
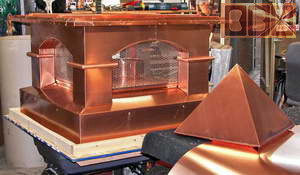
Unlike a house roof
with 24" centers, I do not want this to have any more than 12" between
braces or hips. I made this equilateral pyramid to suspend in the
roof bracing upside down, like the female chalice in the movie The
DaVinci Code. This had just the right angle for the 8/12 pitch roof
it needs to have. This will give a very good support to the copper
roof skin over them.
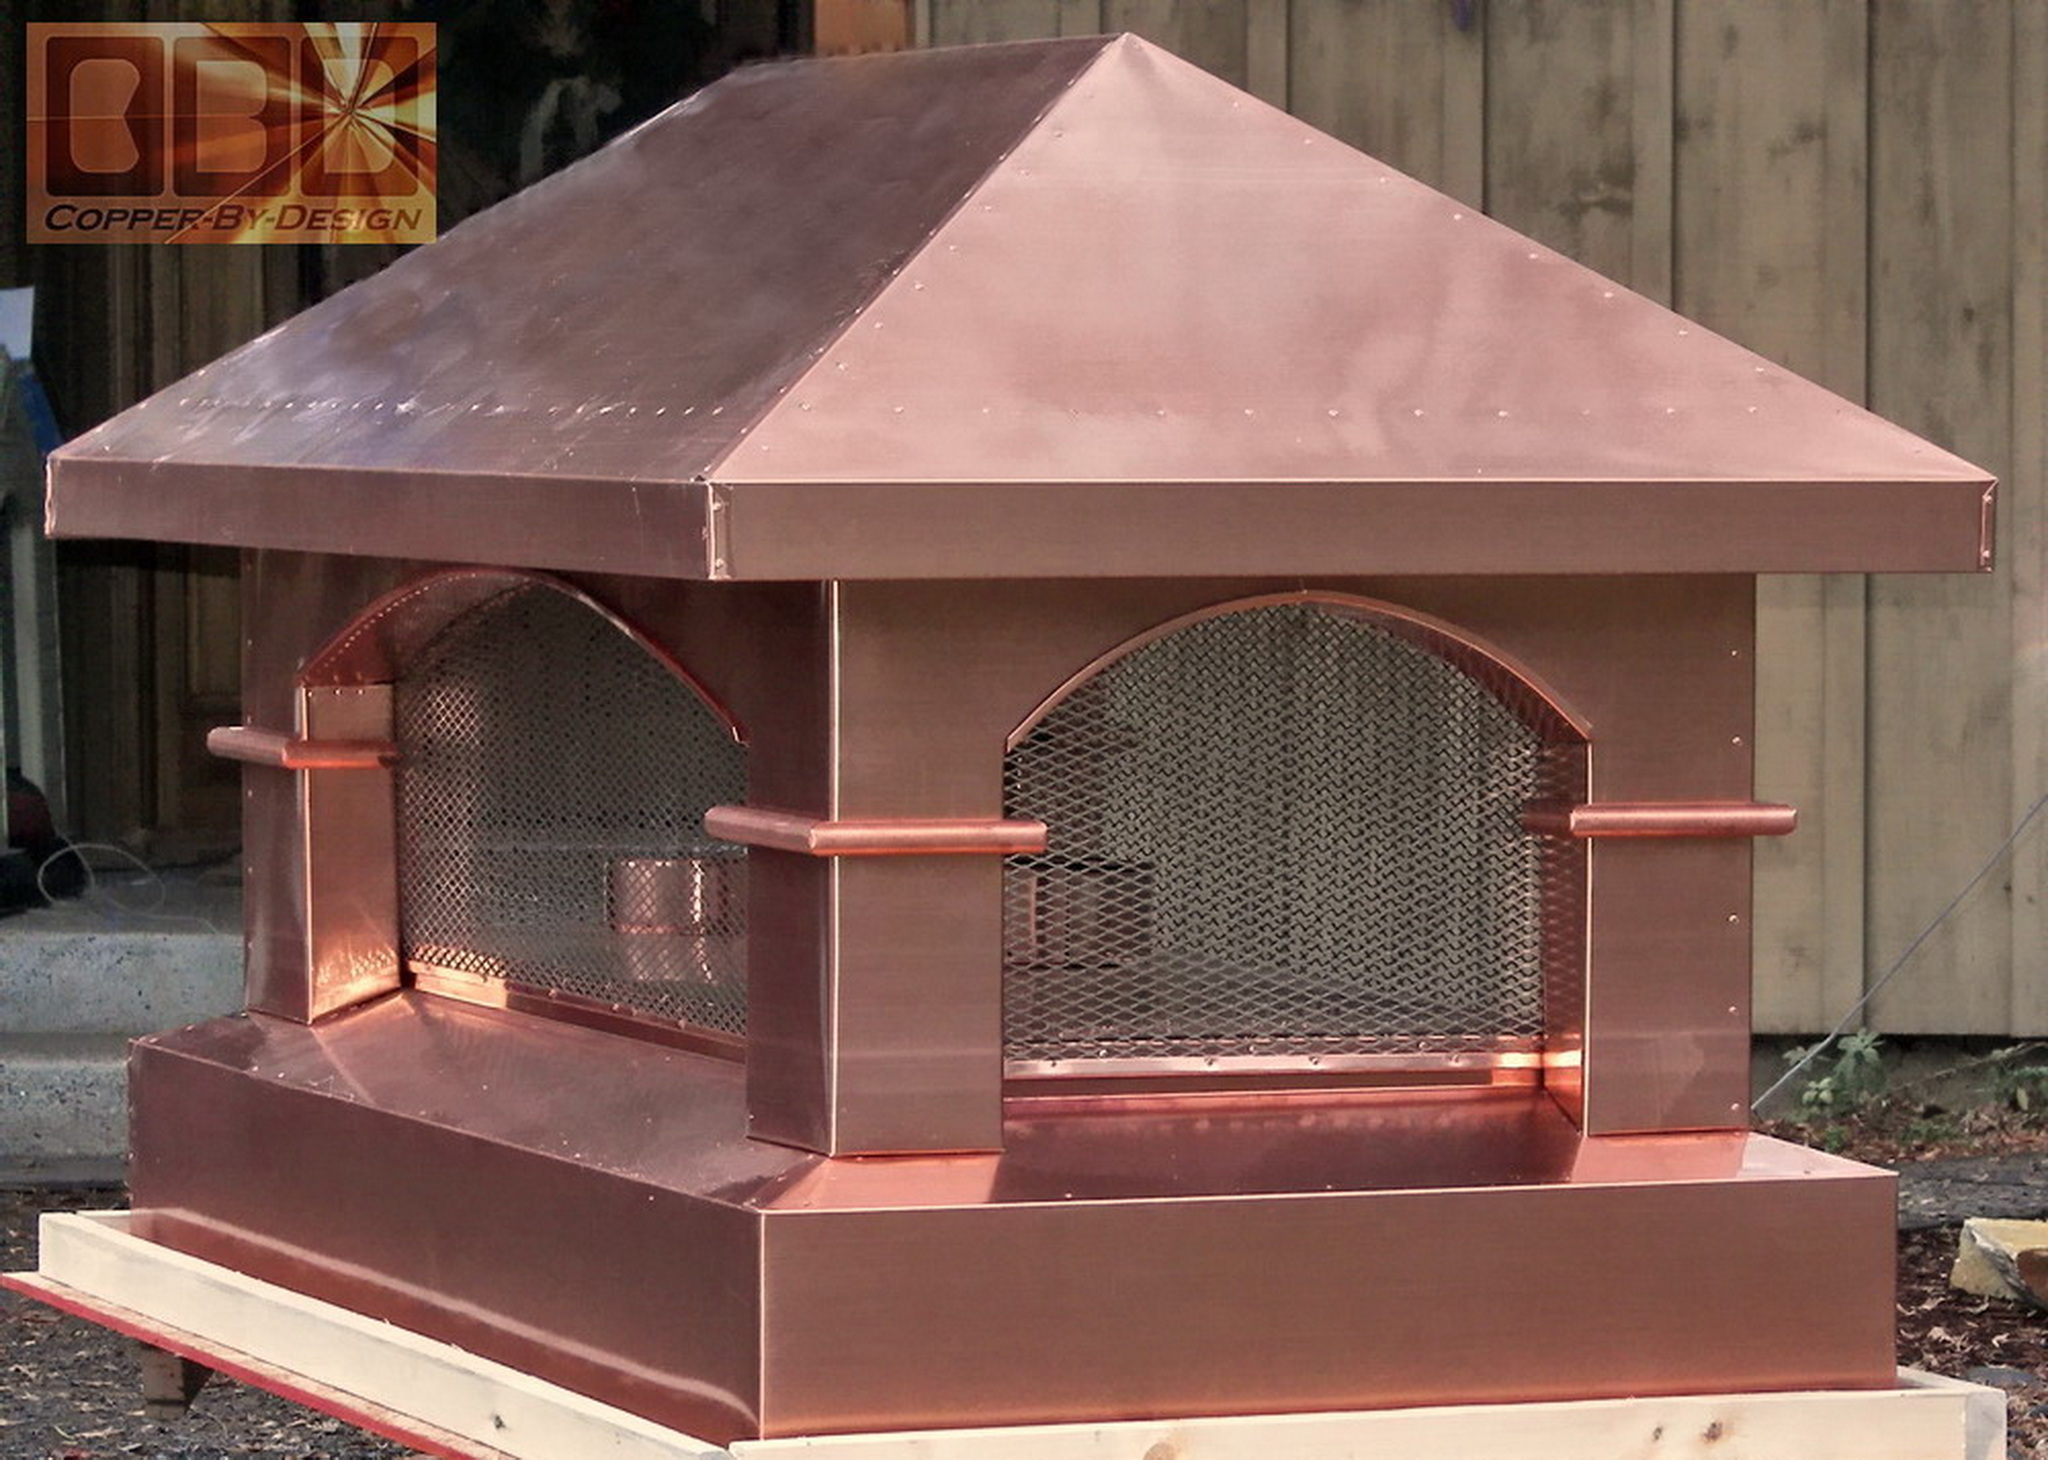
These chimney caps have 4 important firsts
for our design and fabrication process: stronger copper base skirt
with the oak plywood behind it, an opening screen on the rear side,
seamless columns, and the chalice roof support
inside the roof of the Sister cap. It is amazing seeing our
work evolve.
The final measure for both of these chimney
caps was 332.95 square feet, which was 95.84 square feet over the
estimated amount. The shipping was $500 less, but with the added
oak plywood inside the base they still wound up getting $2,190.45
in free fabrication work. For both this and the Matovich chimney
cap bids (shown below) I had based the estimate on the copper used
in the Silbernagel cap and multiplied that by how much larger or
smaller these caps were to be. My mistake was how I did not take
into consideration: (a) the extra height they would need to be,
to be in the same proportions. (b) the steeper roof pitch. (c) and
the need for cross bracing under the roof skin for such large caps.
I had no bracing inside the Silbernagel cap since it was small and
had not heat exhaust issue. I also offered a substantial contractors
discount, but that was a huge mistake, since he was more difficult
to work with that most any homeowner I have dealt with over the
last decade. This reminds me why I do not like to work with contractors.
My aim is to please the homeowner who is really buying our work,
but I was not able to contact them at all.
The wife of the couple getting these caps
on their home finally contacted me to relay the zip code for the
contractor for the shipping label. I was greatly relieved to find
out the contractor had forwarded the digital photos and they were
very pleased with the results (whew.....).
$5,066.25 - rectangular chimney cap 202.65 sq' x $25 per sq'
$3,257.50 - square chimney cap 130.3 sq' x $25 per sq'
$ 494.45 - both wood base frames 89.9 board' x $5.5'
$ 350.00 - oak plywood inside base 9" x 35' x $10'
$ 500.00 - large crate
$ 400.00 - smaller crate
$ 600.00 - shipping
$10,668.20 grand total
Total cost for
this 2 unit project: $8,477.75
$2,190.45 savings
(I plan to
get better at these estimates)
|