|
|
The
Kercheval
Turret Caps Photos & Details Page Updated 8-25-2007 |

|
|
Company Profile |
|
Roof Caps |
|
Chimney Caps |
|
Scuppers |
|
Gutters |
|
Shipping |
|
Contact Info |
|
|
The
Kercheval
Turret Caps Photos & Details Page Updated 8-25-2007 |
|
|
Company Profile |
|
Roof Caps |
|
Chimney Caps |
|
Scuppers |
|
Gutters |
|
Shipping |
|
Contact Info |

|
(8/07) It is amazing reviewing our early work for clients not local to the Portland Oregon area over 3 years later as I work to update our web site pages. To see what I was doing then for construction of these and even the crating, and how I do things better now. |
|
The day after I had updated our web site with the Huffmon Copper Roof Cap, Brad Kercheval, a Homeowner in Arlington, Virginia contacted us on 12-17-03. He inquiry regarded the cost of building a pair of simple eight sided copper caps for the two roof peaks on his house, that just happen to have the same pitch as this cap. He also wanted just soft scalloped bottom edges and 30" wide at the base instead of only 20". Which in this case also means it will be 30" tall as well. We wrote: OK, 30" tall and wide, that should take about 16 square feet of copper each, which makes the cost, at the low rate of $25 per square foot = $400 each, p&h paid. Since you need caps that I am recently familiar with, and you are ordering two of them at the same time, we will give you a 15% discount, for a total of only $680 for both caps. This is still including the cost of a wood frame package and the shipping cost. Even though these two caps could easily stack together, we had not shipped anything this large before. We were concerned about the dimensional size, because of cost of shipping a crate that size with such a tight budget. We offered to make these two caps in 3 separate sections each, with scalloped bottom edges on each of the three sections, so they could be stack neatly into a much smaller crate. It would also make installation a little easier when it comes to lifting them up to the roof peaks, which most likely is a good 3 stories high. A few days latter, on the 19th, we came up with the idea that if we make these copper caps to have a spacer between each section, the scallops would be much more noticeable, giving them a dimensional and distinct look. Here is the final diagram we sent to him over e-mail, attached as a scanned digital image:
We offered to do this at no
additional charge, even though: We were willing to do this for the value of using these photos for our web site. We did not want to loose the chance to do something so interesting. We thrive on challenge (unlike others who may focus more on chasing that fast buck). These negotiations took 16 e-mail and 3 diagrams over the course of 25 days by the time Brad had accepted our proposal on 1-11-04. |
| Day 1 of the Design & Fabrication (1-13-04) |
|
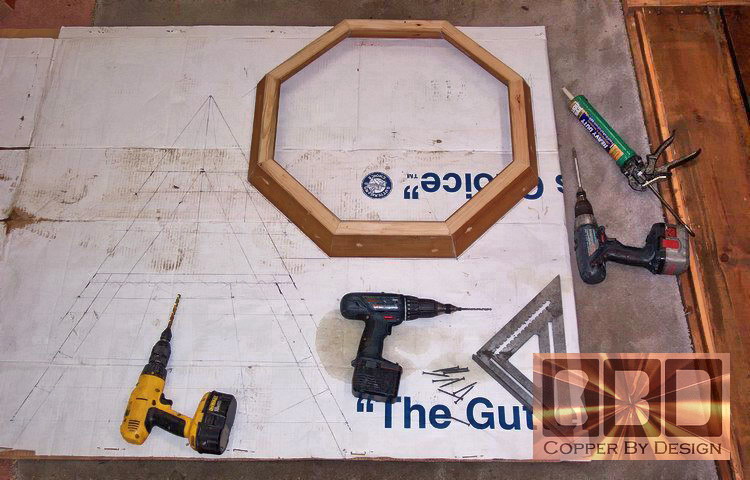
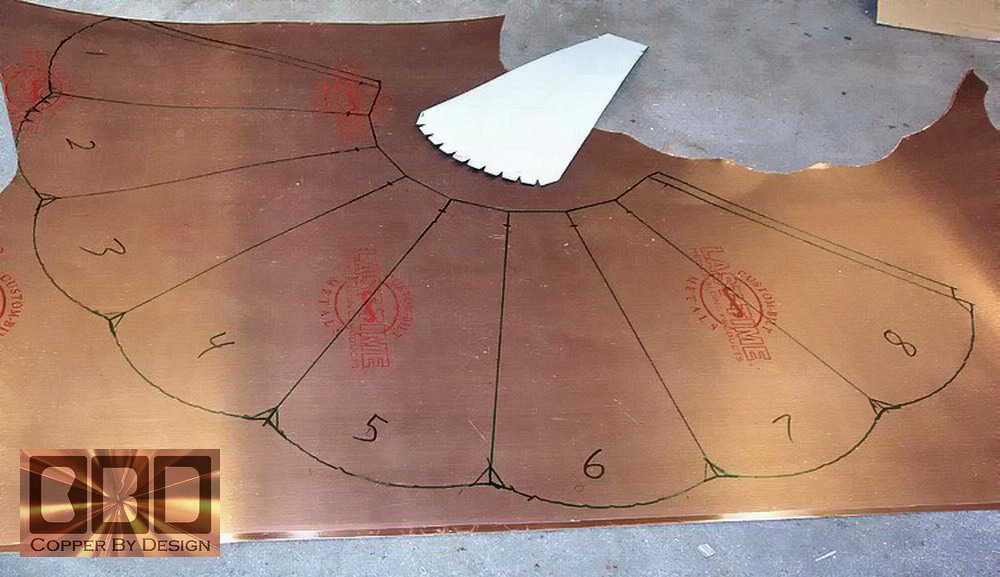
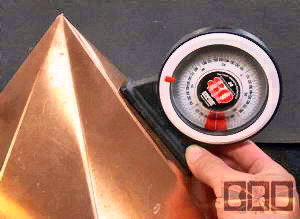
The photo below shows how we drew out a life size diagram on cardboard to make sure of the measurements and angles needed. This takes several hours. From there we can design the templates to cut out in aluminum sheet metal to trace around onto the copper sheet metal.
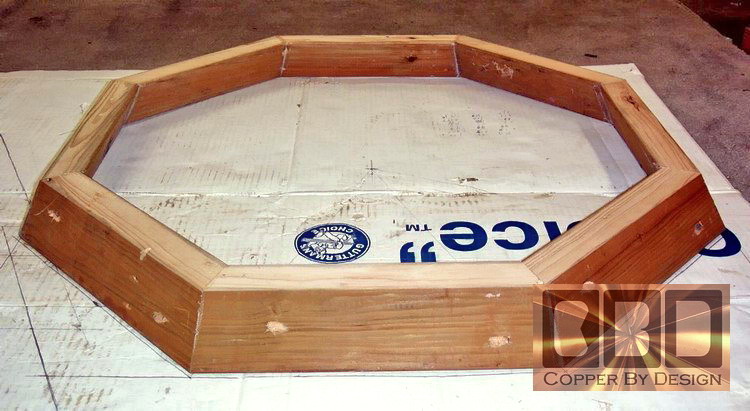
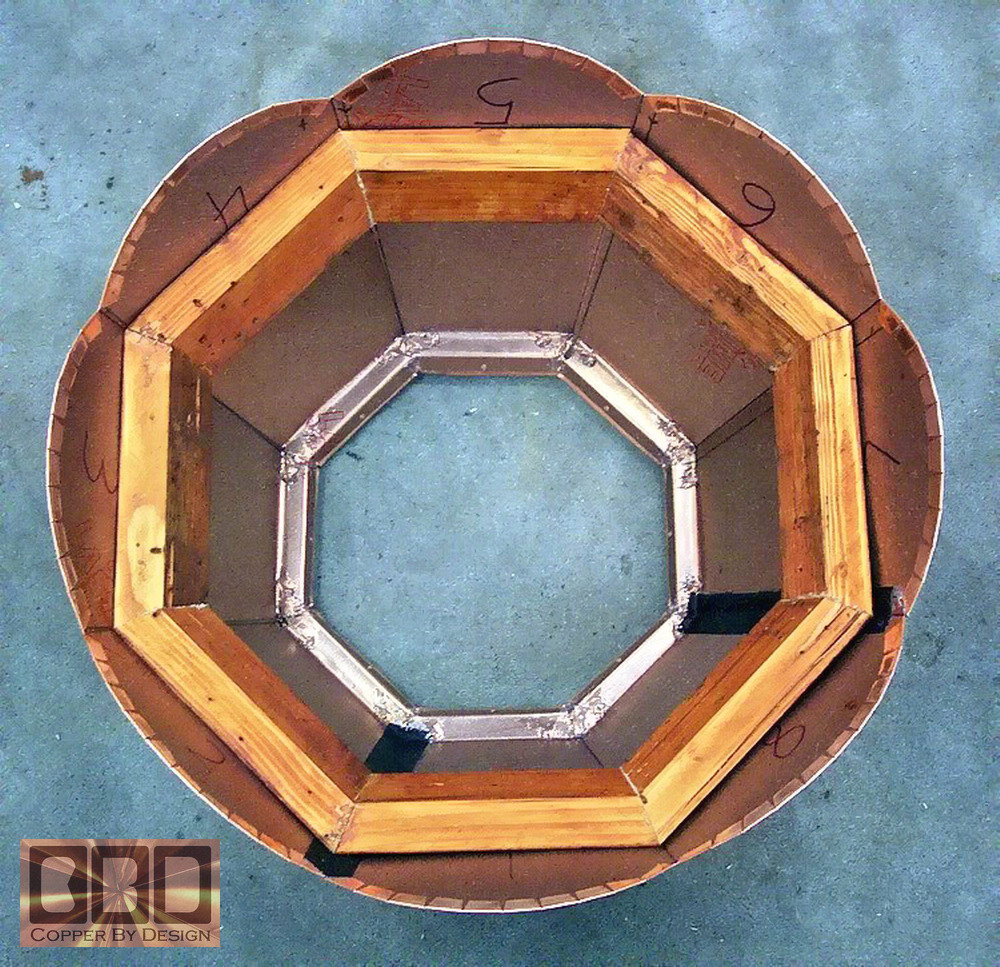
Here is the 2x4 wood spacer support frame cut and assembled to support the lower base of the cap on the roof. We determined how long each side needs to be, cut all 16 boards out, shave the angles on the table saw so that the top and bottom side will be flat, so that a level can be set on it for proper installation. We then had to carefully figure out the angle cut for the ends, so that they will all fit together tightly. |
|
|
|
|
|
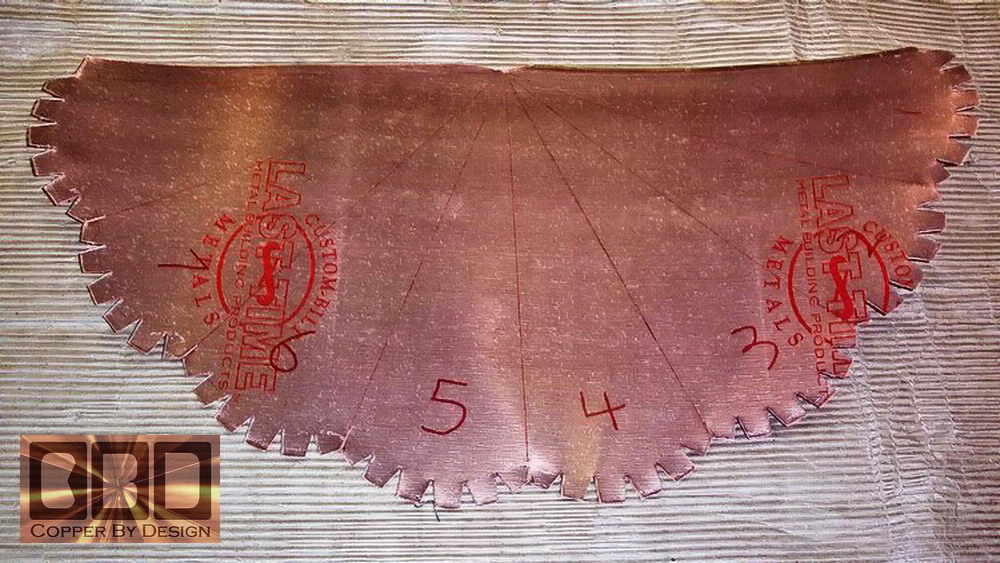
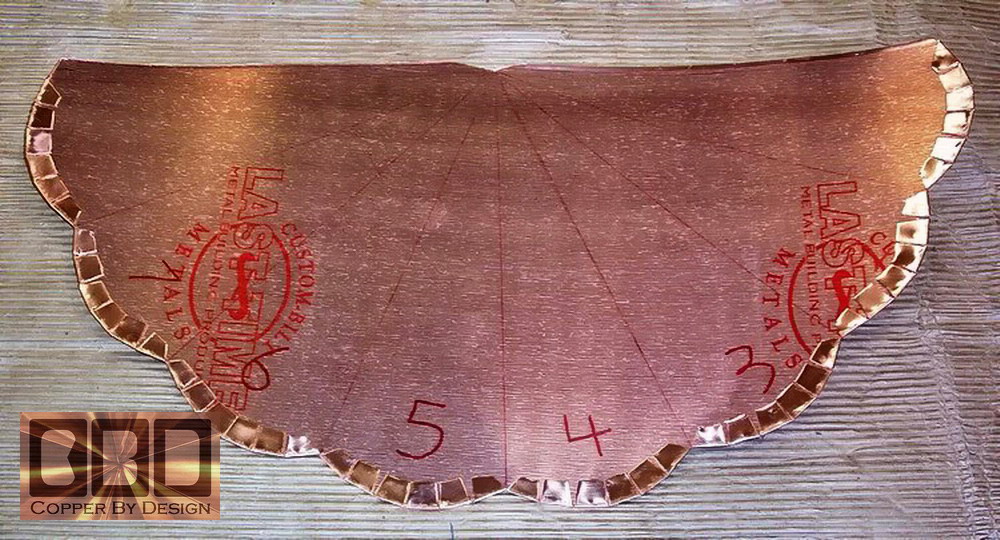
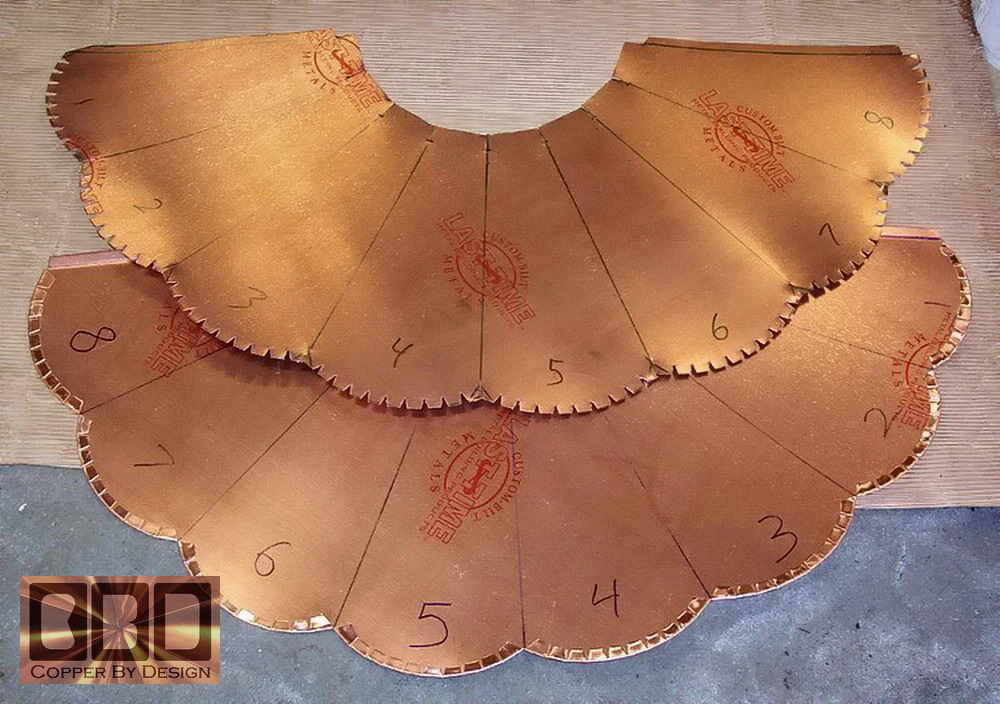
Beside the mark we made to draw this out, the red markings you see in these photos are printed on the plastic film they cover one side of the copper sheet metal with. It is the manufacturer's logo. This film is removable, but I see no reason to take it off, as it is on the inside. The clients are free to remove it if they would like. |
|
These sheets of copper are now ready to fold the corners. We use our 10' wide Tapco Pro III break, shown below.
|
|
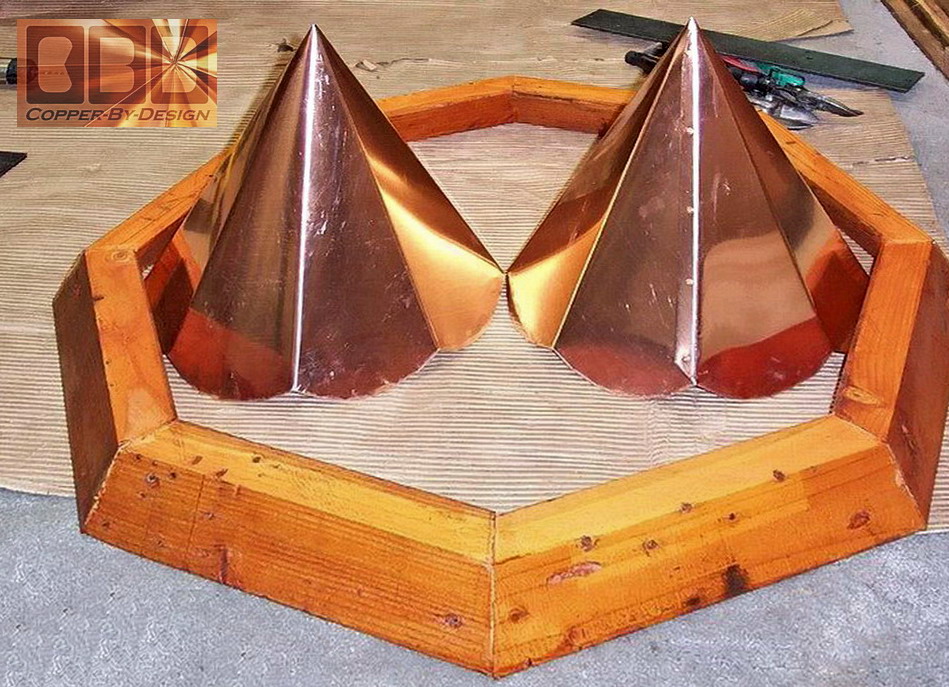
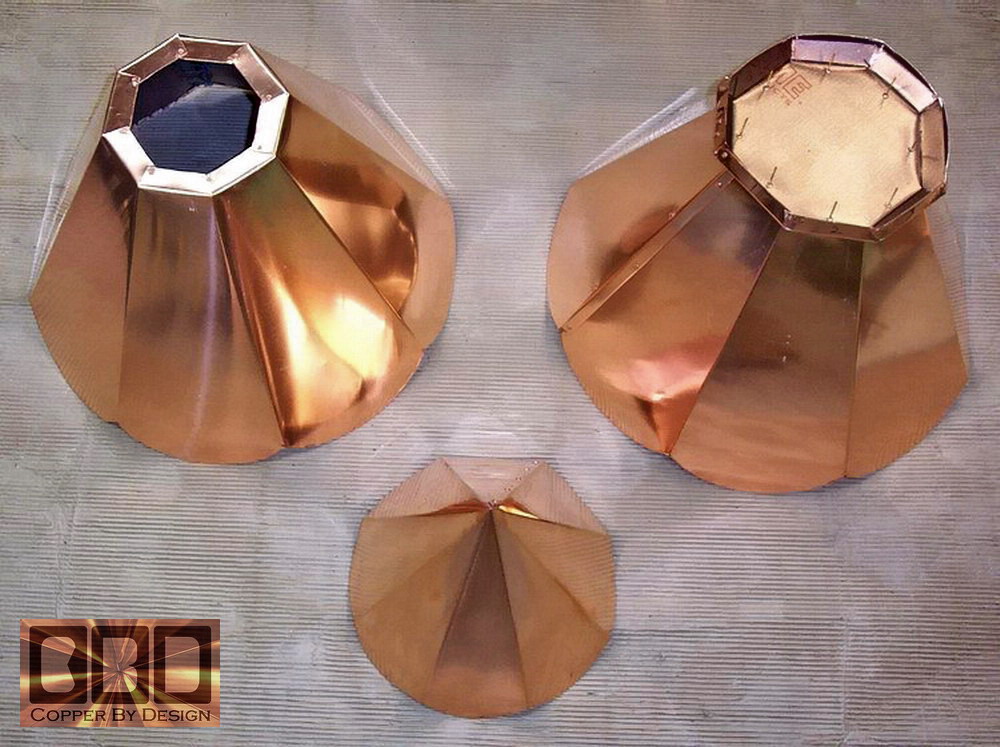
Here is the small cap bent into shape, showing the over-lap tabs on each end before we seal that single seam and rivet it together. We use the most expensive caulk we have found to seal these seams, running a bead of this caulk between the seam before riveting it together. It is called PRO-SEAL 34 out of Redmond WA (1-800-349-7325). With their M-34 Polycarbonate sealant technology, this caulk is rated at 350% expansion, compared to others at 25 to 50% expansion. It does not seem to become brittle over time (we've used it since 1997), like most common gutter seals do.
Long before they had developed the refined silicone caulks like we have today, the best way to seal sheet metal was to solder them, and some craftsmen still do. That system still works best with copper plumbing that is under high pressure, but it leaves a messy gray lead area near the seam that will not patina with the copper. Also with the change of temperatures causes expansion and contraction. Soldered seams have been known to pop open. The caulk we use is flexible, while retaining it's seal. Here is both top caps with one of the two wood spacer rings we made that day. The right cap shows the sealed seam and copper rivets. As with most of our web pages, you can click on each of these images here to get a closer look. |
| Day 2: The Middle Sections (1-14-04) |
|
|
|
We can do a more ornate scrolled bottom edge, but maybe not with this safety hem bent edge, depending on how intricate it is. |
|
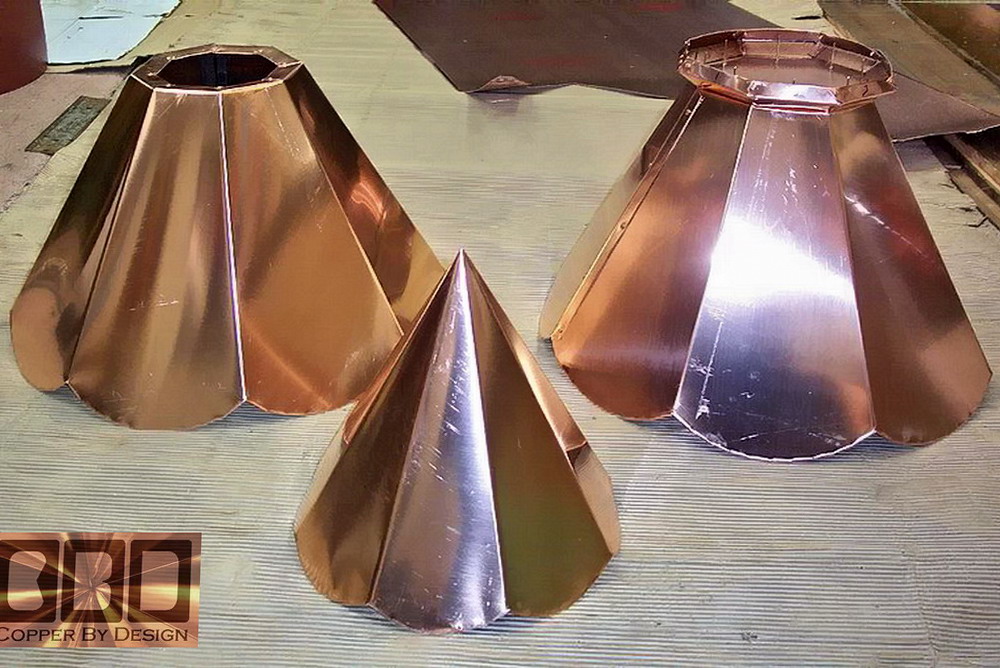
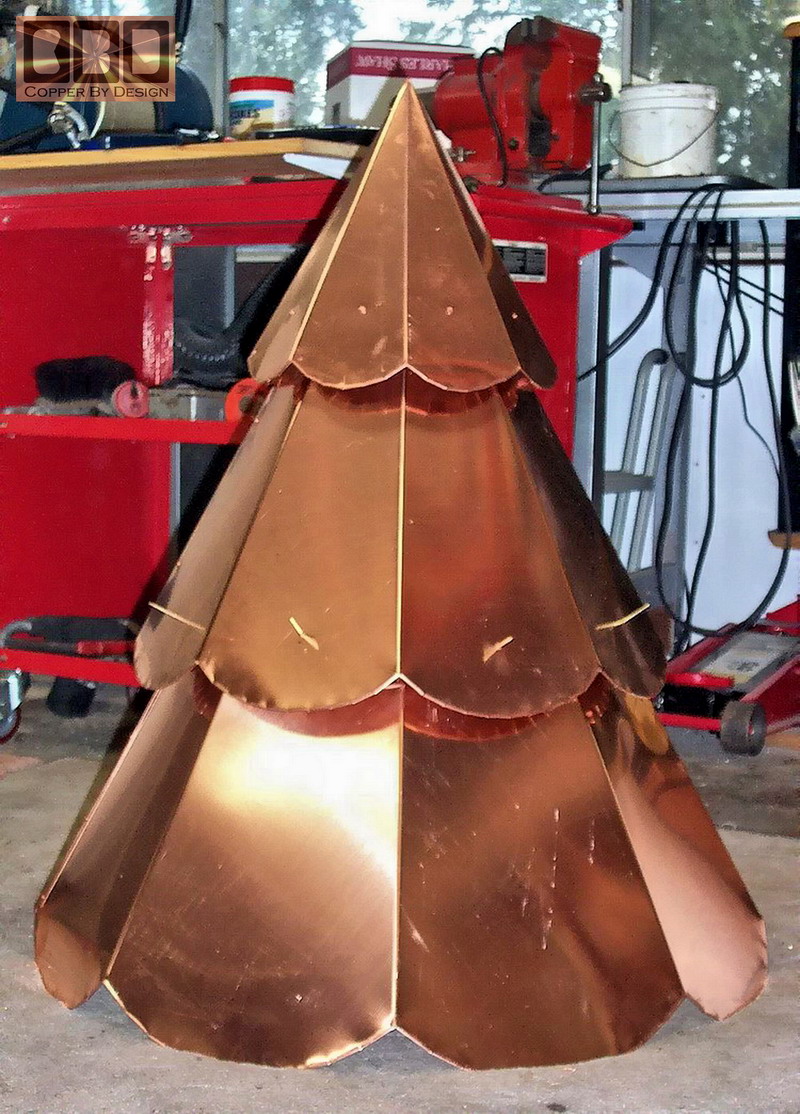
As you can see here, these cap sections are formed and sealed. I have the small top cap here to show difference in size. We bent the top edge inward and riveted these tabs together for strength. The mid-section cap on the right has the spacer on top to support the upper small cap. We sent these daily digital photos to Brad, so he could see our progress.
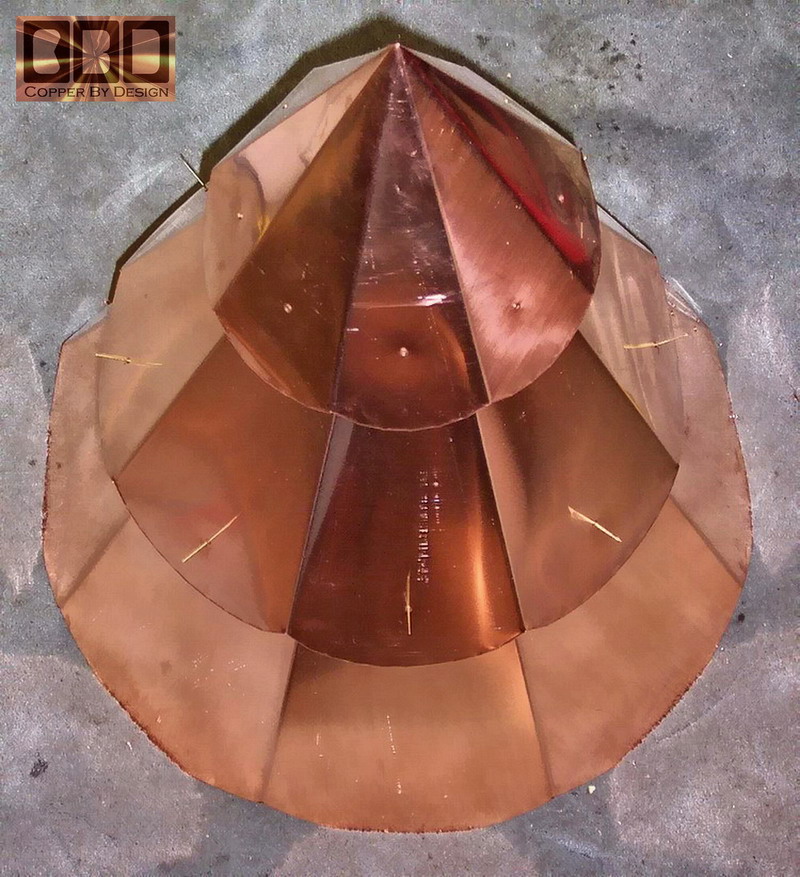
To the right is more of a top view for a little different angle to properly show these. We rivet these together with copper rivets that have brass mandrels. Other copper rivets have a copper plated steel mandrel that can rust through over time. We then flatten some of the rivets from the inside with a hammer over an anvil. Abead of caulk is then run on the inside of the cap and rivets. We press the caulk into the seam with our finger tip to make sure we did not miss a spot and cover it over with cloth gaffer's tape on the inside. Any excess caulk can be cleaned away on the outside with paint thinner, so there is nothing to interfere with the outside patina of the copper. |
| Once it has darkened
(which usually only takes a couple months),
the rivets will hardly be noticeable. It is still a good idea
to install the cap with the riveted seam facing the least visible side
of the roof.
The rivets seen in the above photo were not locked in. I just pre-drilled the holes and use the rivets for alignment. Here is a close-up side view of the spacer we made from a single sheet of copper sheet metal.
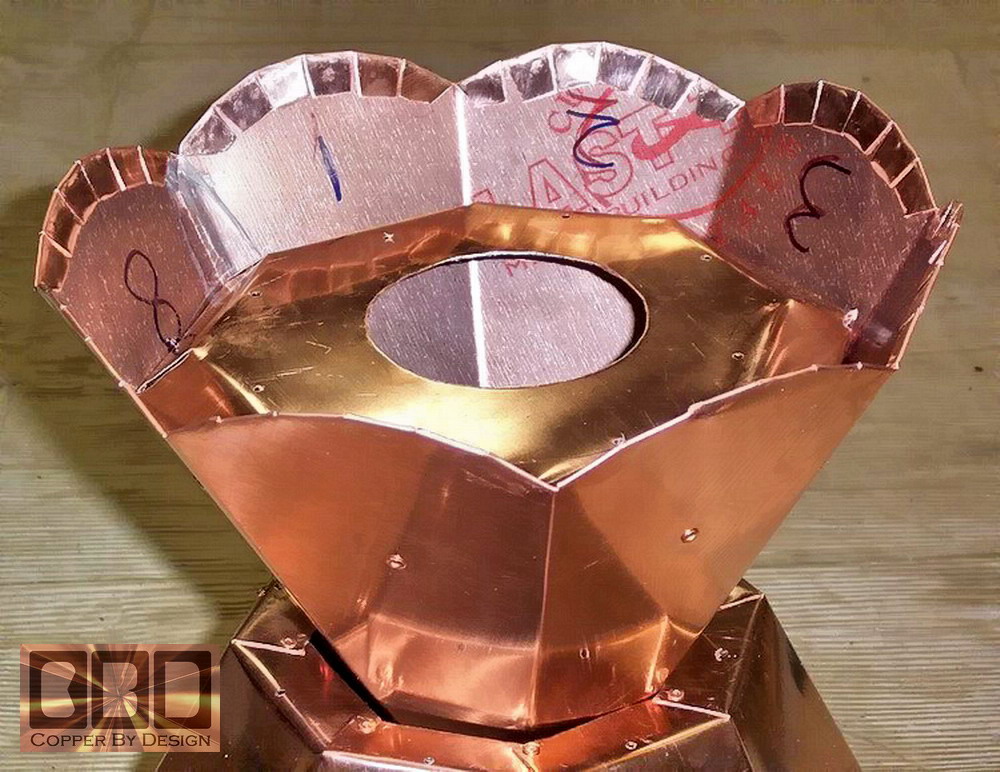
Here is the top two sections set together before riveting them together, in order to see the dimensional relationship we have created. We gave this spacer about a 1.17" space off the mid-section, and planned to set the mid-section about 1.34" space off the bottom section. and of course we made that 2x4 wood frame spacer ring to set it off 1.5" from the shingles.
|
| Here is the small top cap
set loosely inside the mid-section upside down to show the spacer after
I riveted it into that small cap. We used a 4" hole saw to cut
out the center, since it is not needed and allowed the needed access
to make sure the rivets seated tightly before locking them in place.
We also used this hole to cut slits to the 8 corners of the top hole
in the mid-section and fold the copper sheet metal down inside that
hole. We also riveted these two sections together.
|
| Day 3: The Bottom Section (1-15-04) |
|
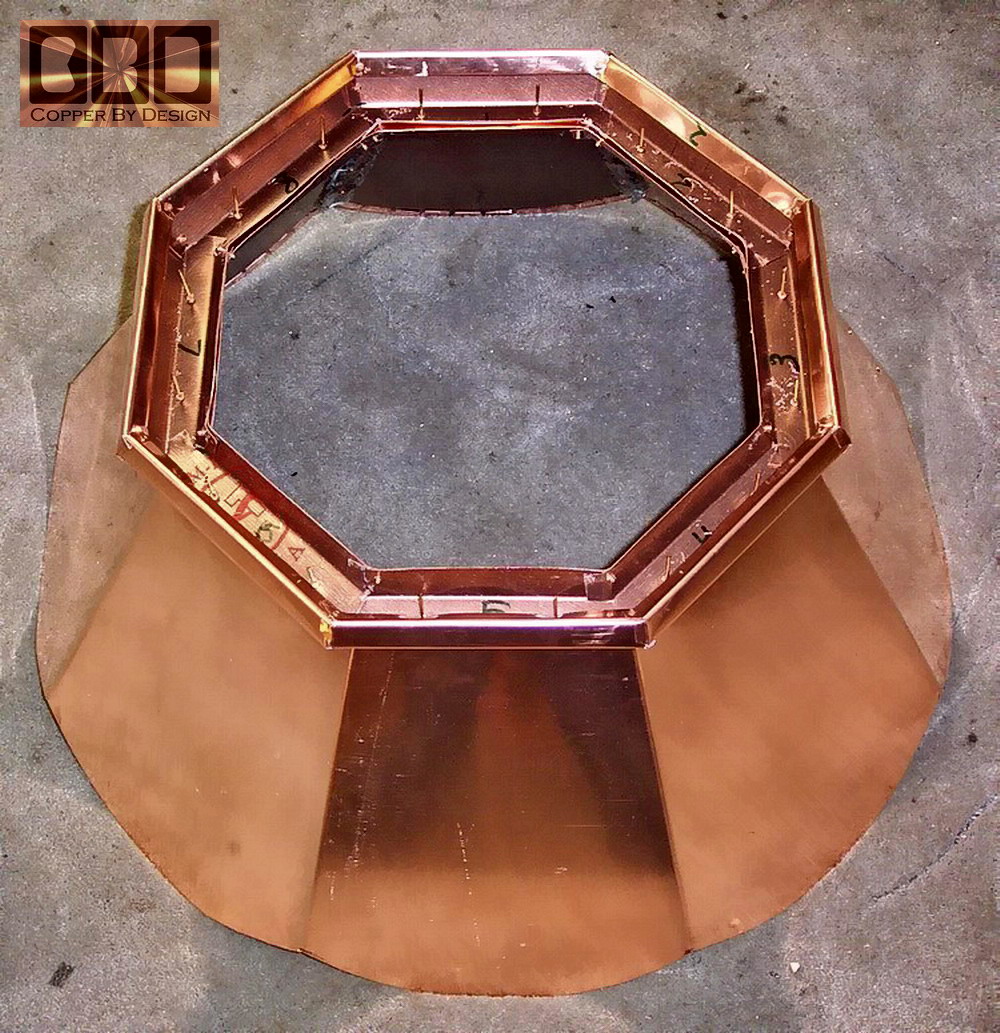
Here is one of the bottom sections with the 1.34" spacer ring built and set in place. We were able to make both bottom sections and this one spacer ring, not yet riveted down. We first needed to seal the spaces between the support ring and the lip on the cap with the clear caulk we use. It took a couple hours to just design and make the template for one side of these bottom sections. It was hard to figure out the best way to draw this section out on the copper and best utilize this sheet metal. Given the size, I was not able to do all 8 sides in one piece. Instead of making it in two equal halves, I decided it would be best to make one part with 6 sides, and the other in two sides, so that the installer can better set the cap to hide the seams on the back side of the roof.
I then set the mid-section on the bottom section to set the level and pre-drill the 8 holes for the installers to rivet the mid-section to the support ring of the bottom section. This shows the rivets setting in the holes I drilled. We do this work in our work shop that has carpet pad and a light gray carpet on the concrete floor, so this sheet metal will not get scratched-up or dented if dropped. The photos below shows the top cap section riveted onto the mid-section, with these set on the bottom section. |
|
|
| Day 4: Finishing up the Assembly (1-16-04) |
|
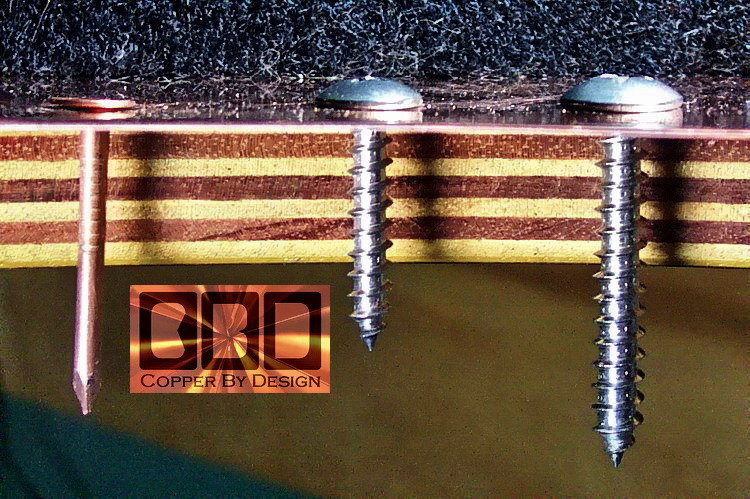
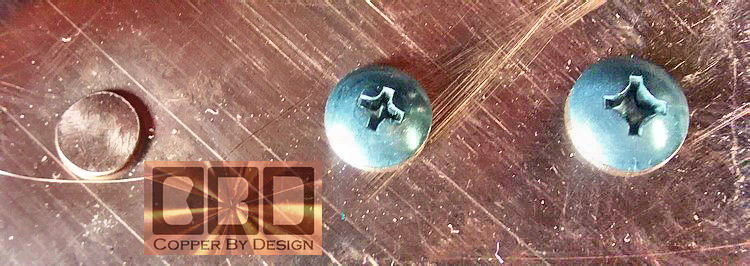
I gave my clients the choice of 1.5" copper nails, 1.25" stainless steel rounded head #2 Philips screws, or larger 1.5" #3 Philips screw for each hole. |
|
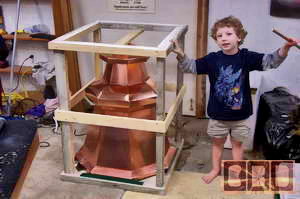
 Here
is the upper caps set on the bottom section again, with the wood frame
support ring inside the bottom section. The stainless steel screws
are in place holding the wood support ring up. Here
is the upper caps set on the bottom section again, with the wood frame
support ring inside the bottom section. The stainless steel screws
are in place holding the wood support ring up.
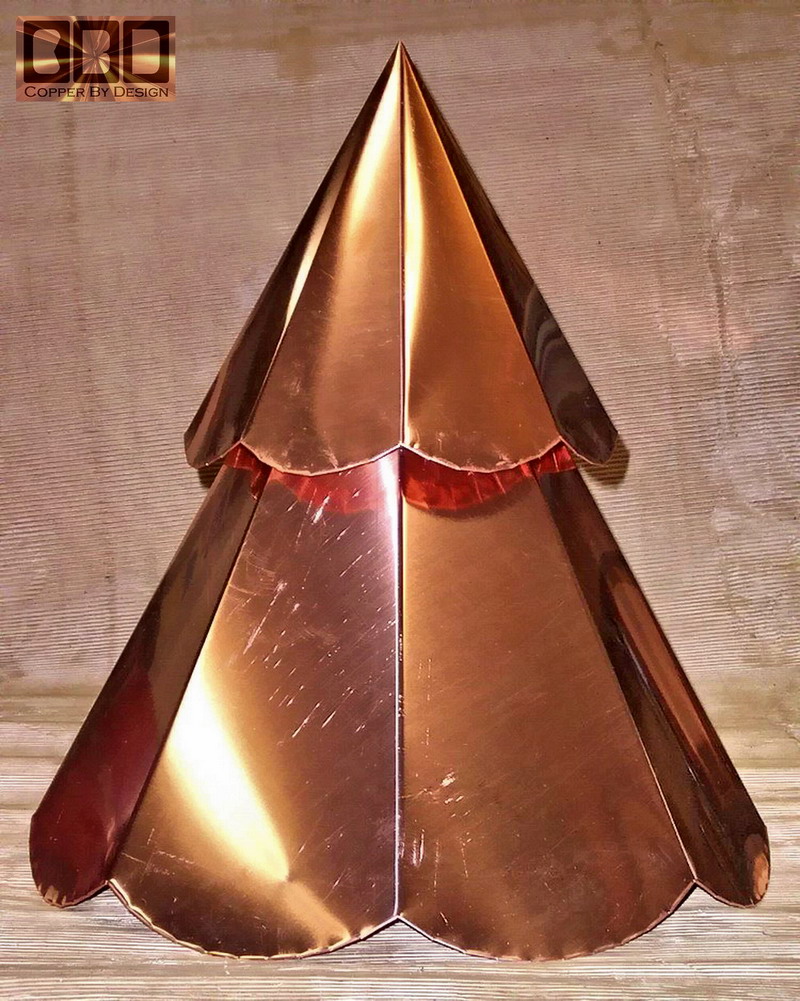
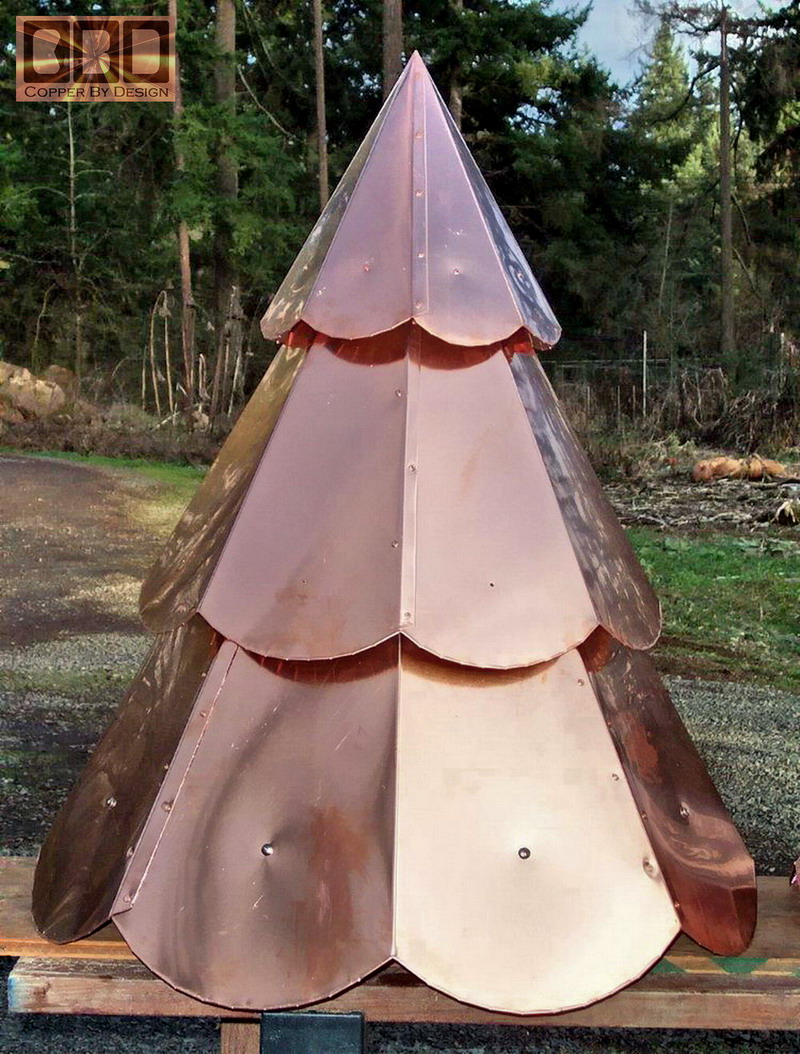
This photo also shows the seams on the back side of the assembly. As you can see, they are fairly inconspicuous. As it darkens in the first 6 months to a brown, they should be even less visible. These seams will also be placed on the back side of the roof peak, so they are not seen from the most common viewing area. It is plenty sturdy. You could lift the whole assembly up off the ground from just grabbing the top cap. |
|
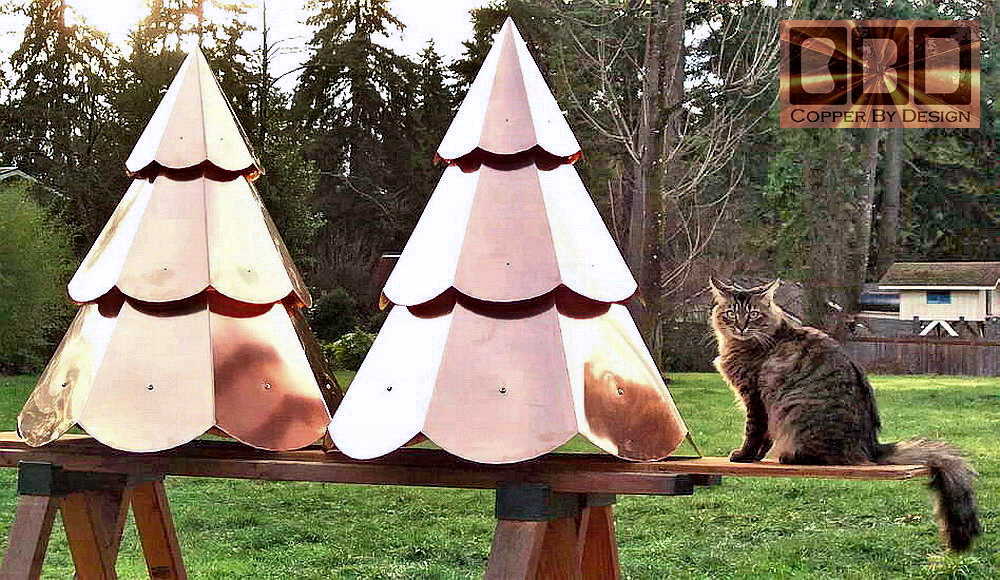
Below is the two caps side by side ready for packaging. Even though they weigh a good 35lb each, you can clearly see they are made of a sturdy 20oz copper, where the bottom curved edges stay straight, even under all the weight of the 2x4 wood ring inside, and the assembly on top.
|
| Day 5: The Bottom Section (1-19-04) |
|
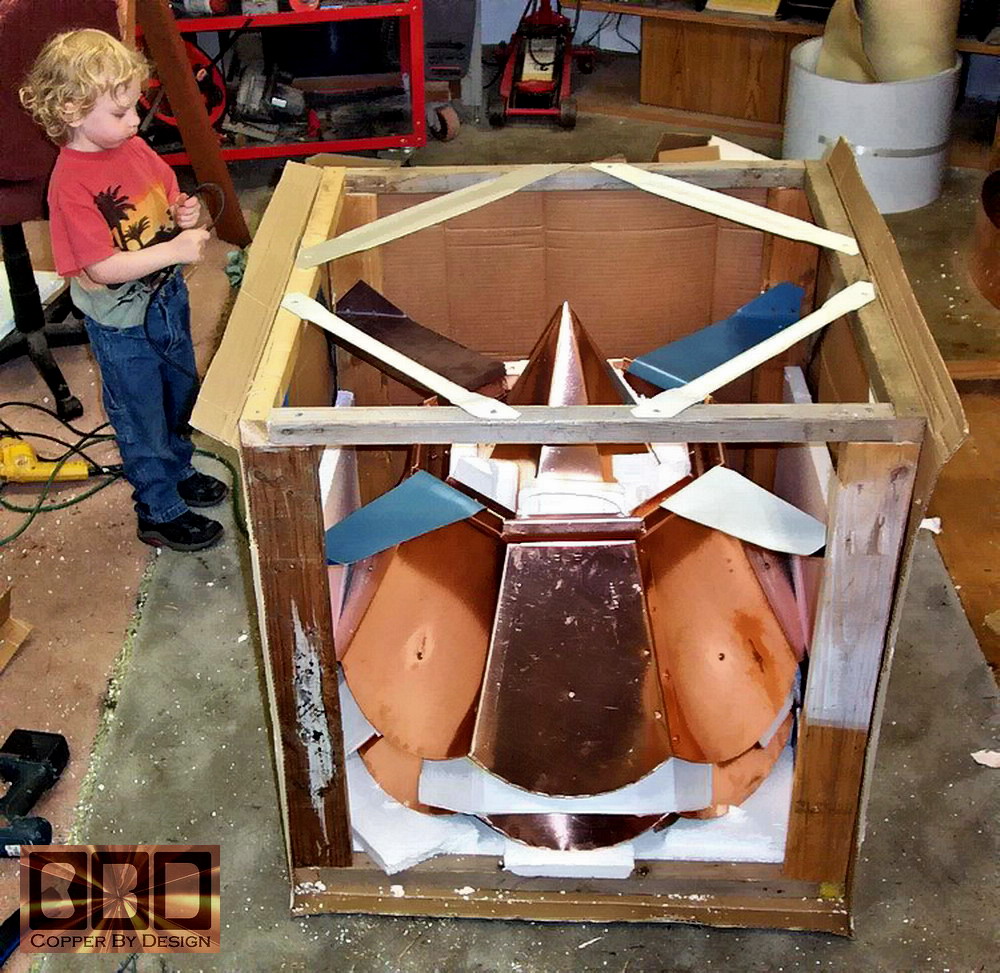
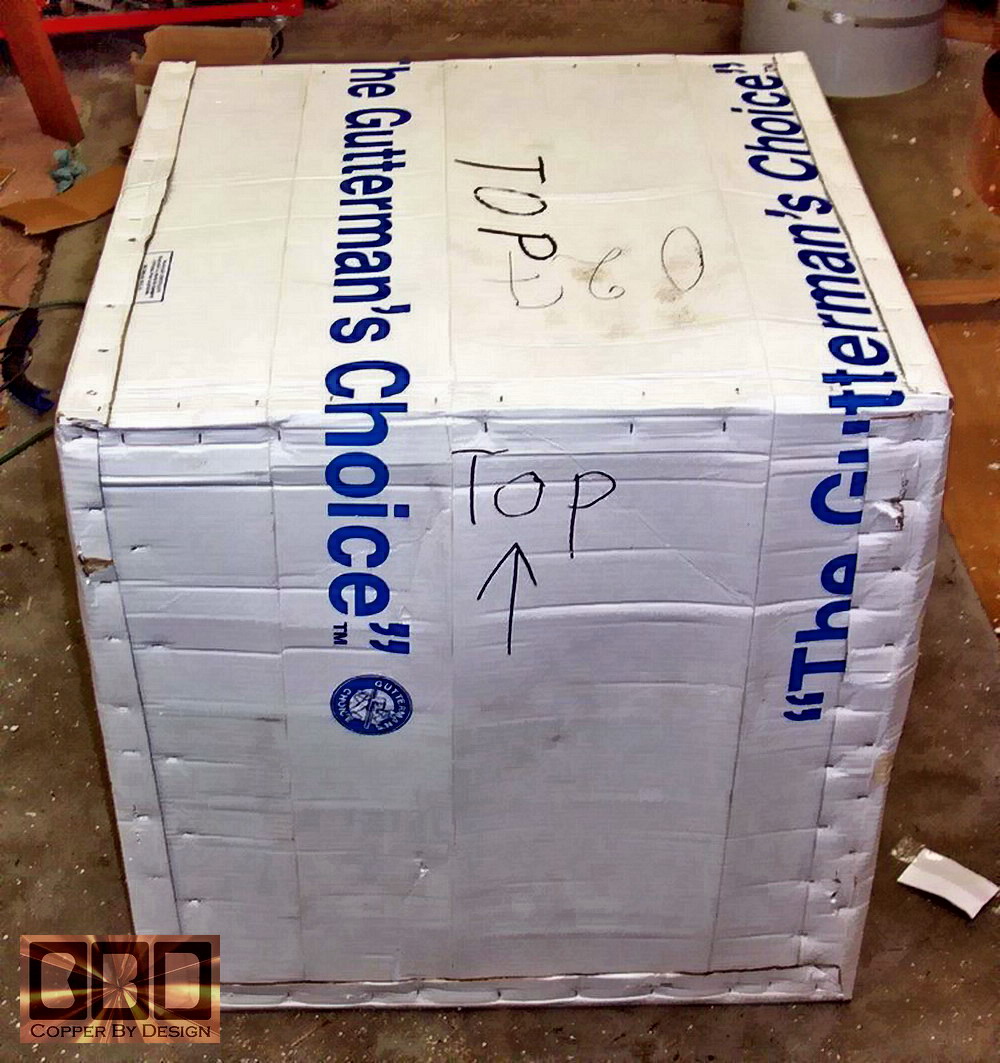
This is a form of packaging I have used. I spend a couple hours more to custom make an aluminum cross brace supported wood frame box like this one shown here, to house the caps in, for a safer trip. I then use an electric stapler to attach the cardboard to the frame, and fill it with Styrofoam. This one has 4 aluminum support braces to hold the top of the bottom section in place. This is framed with pine boards: 2x2s screwed together onto the 2x4s in the 4 corners, to make these custom sized boxes to best fit the items to be shipped. It is filled with 1" sheets of Styrofoam, with smaller pieces filling in the gaps. |
|
|
.
| Click this
photo to go back to the Custom Copper Roof Cap main page.
|
.
|
Click here to go back to the Custom Copper Roof Cap main web page to see many of the different caps we have created over the years. |
|
Below is a
photo of our |
|
|
|
We were also a 1997 finalist for this same award. See our referral web page to see how we managed to be honored with this special award |
 Homepage |
|
|
Company Profile |
|
Roof Caps |
|
Chimney Caps |
|
Scuppers |
|
Gutters |
|
Shipping |
|
Contact Info |
.
.
.
.
.
.
.
.
.
.