|
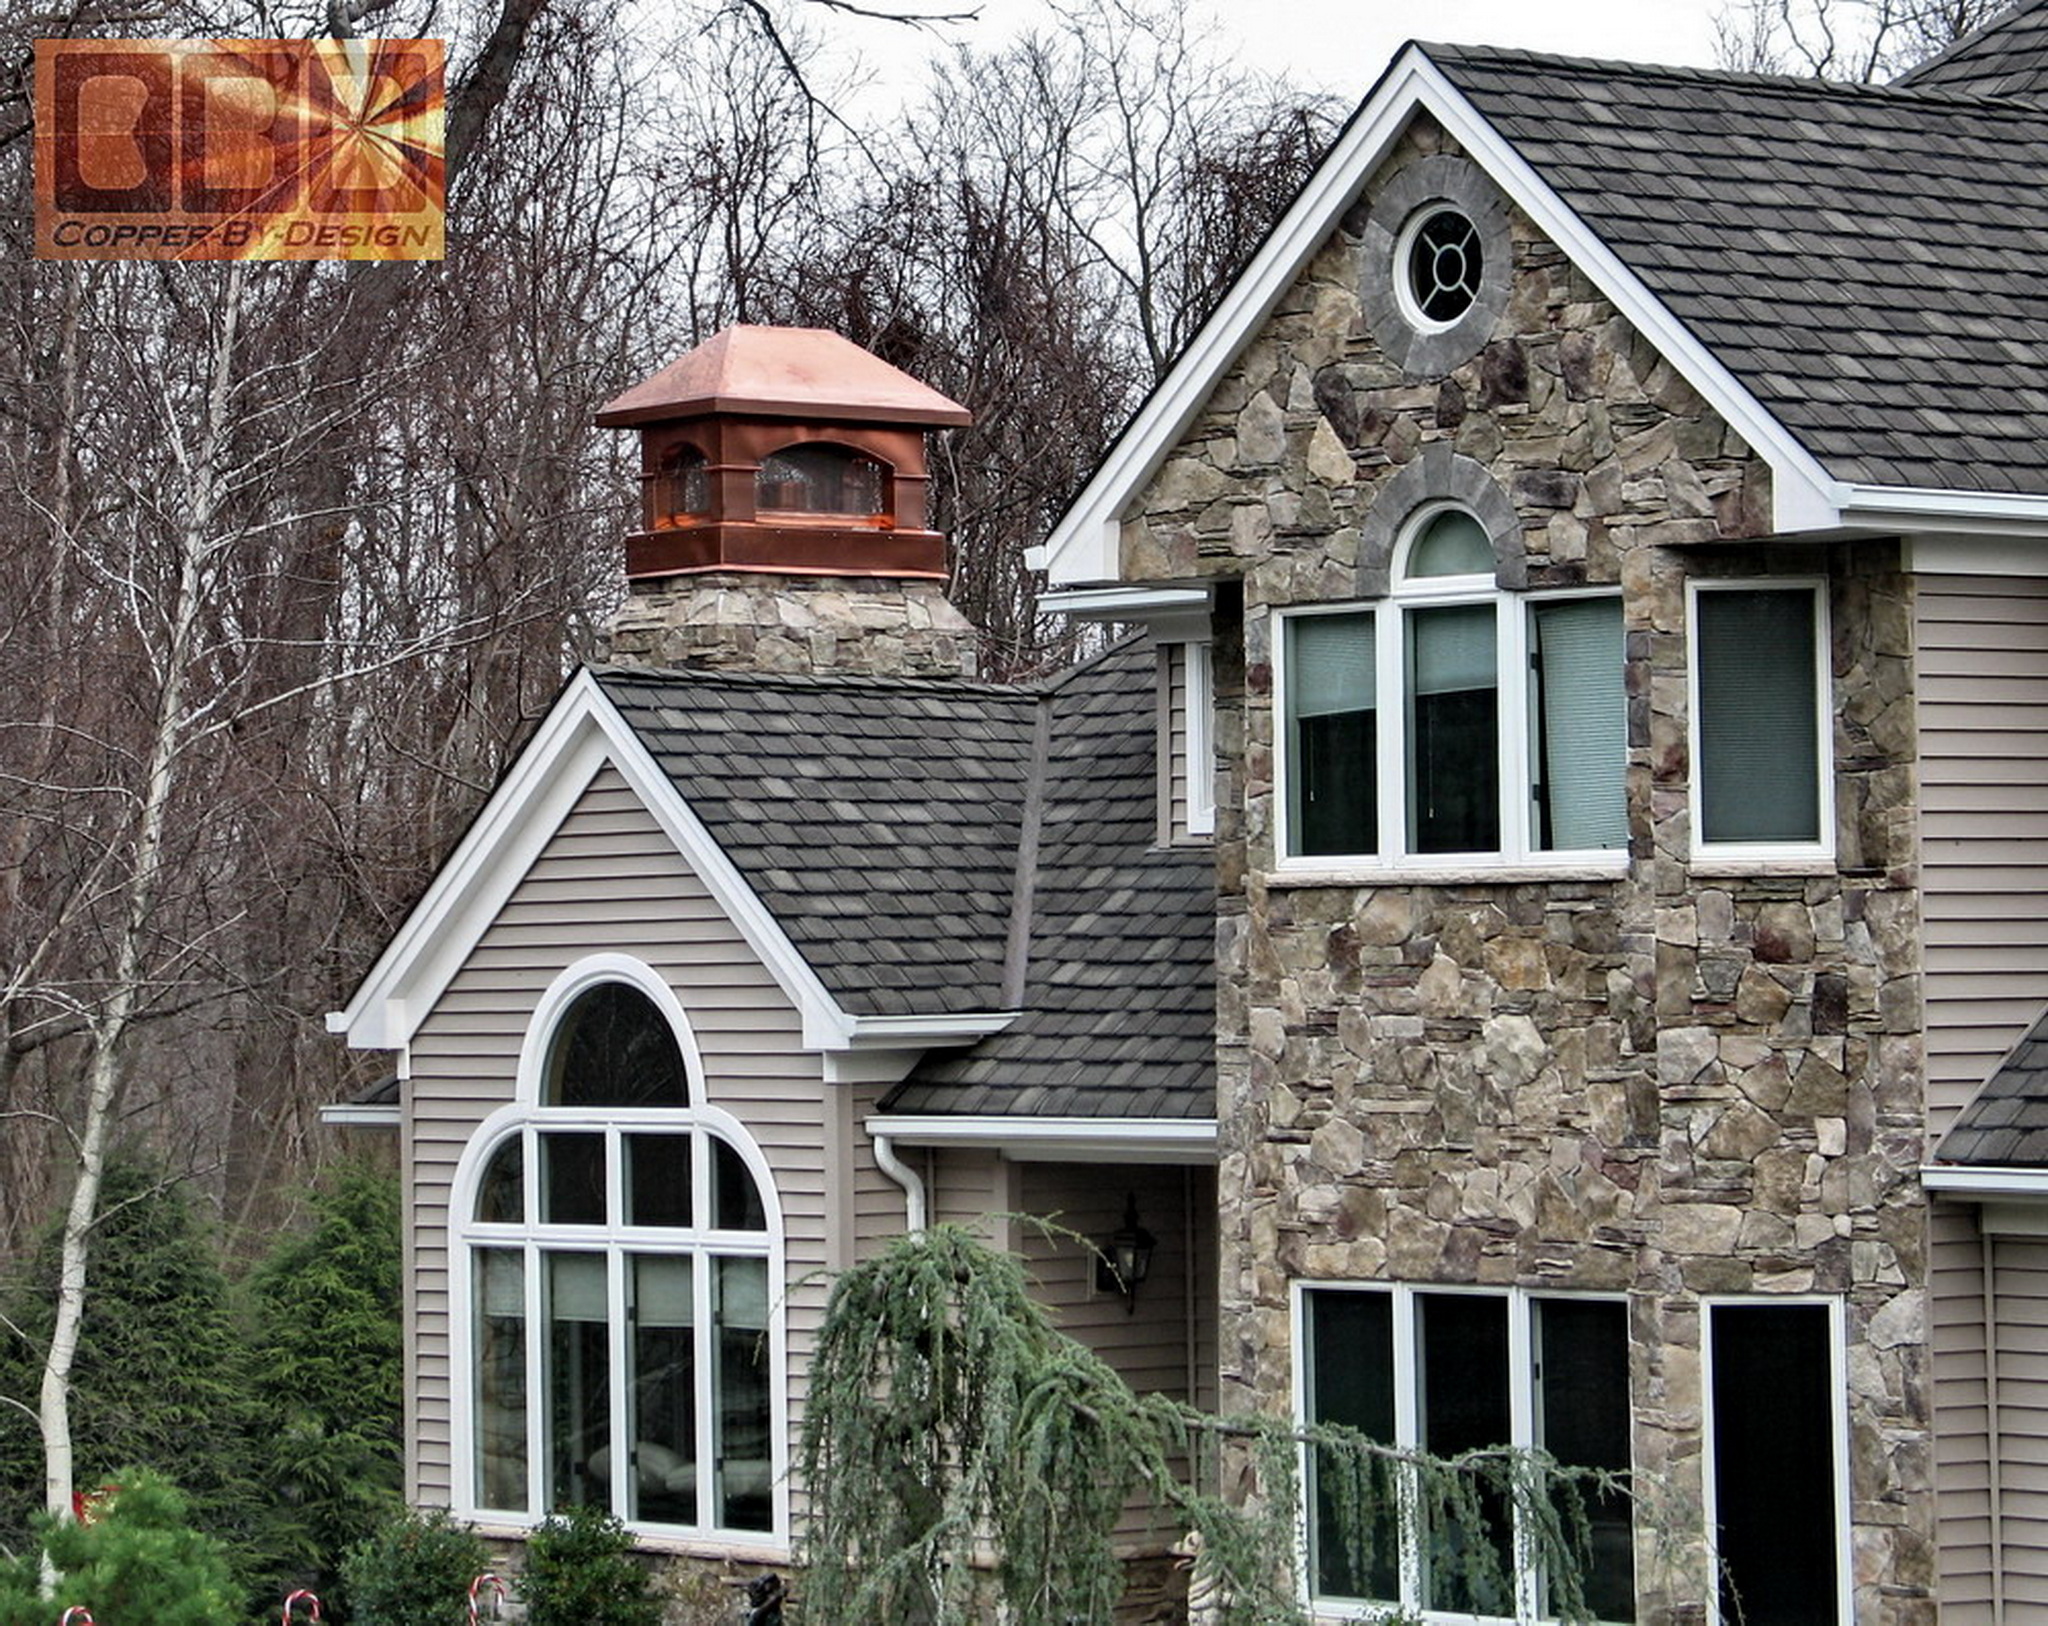
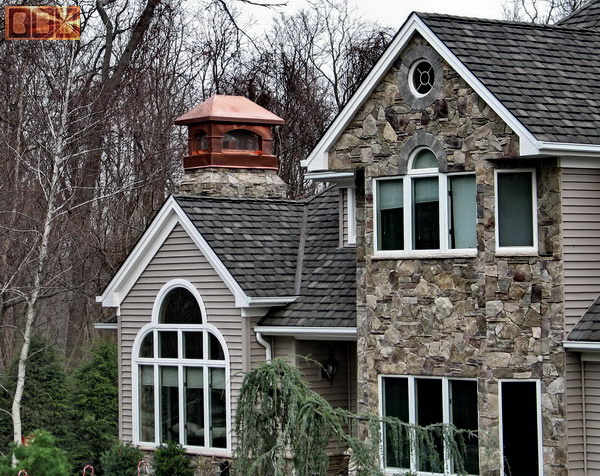
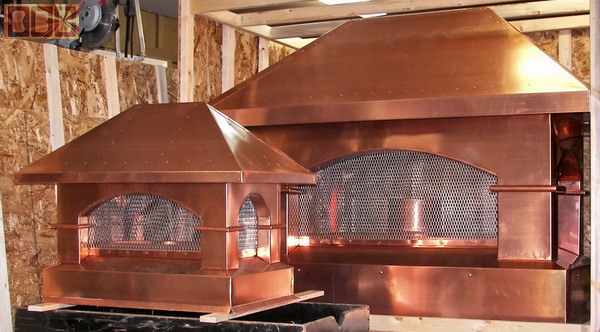
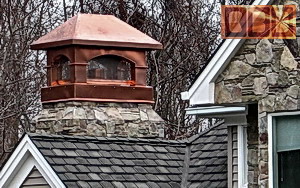
We made this a set of
2 chimney caps and a matching lighted cupola that are designed after
our Tuscan arched style 4 column w/screened exhaust vents. These
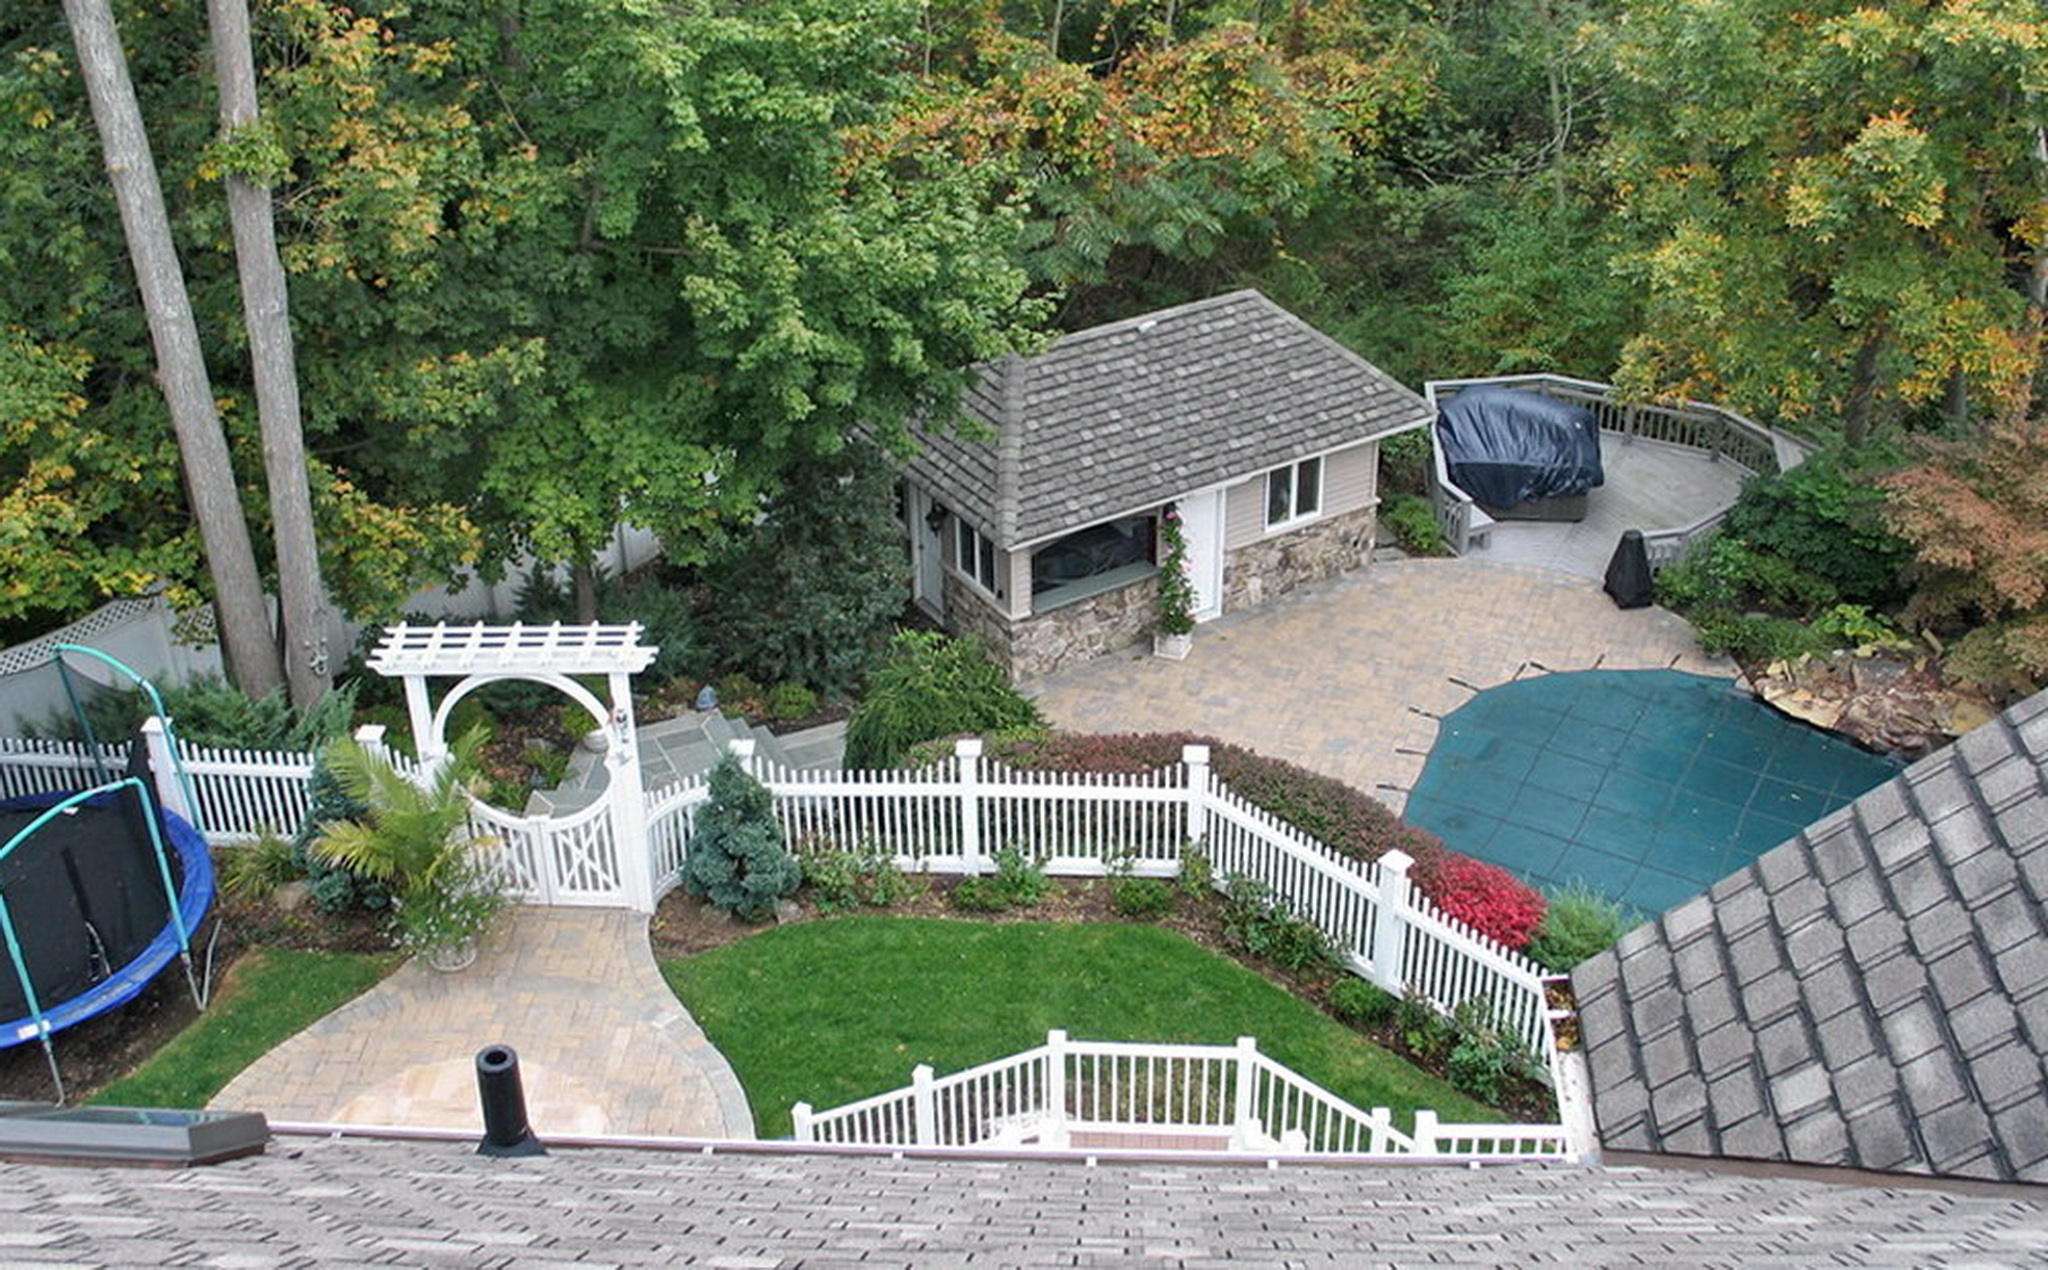
were for our client named Scott Matovich in Setauket, New York,
who had been patiently waiting around 6 months for us to begin his
project.
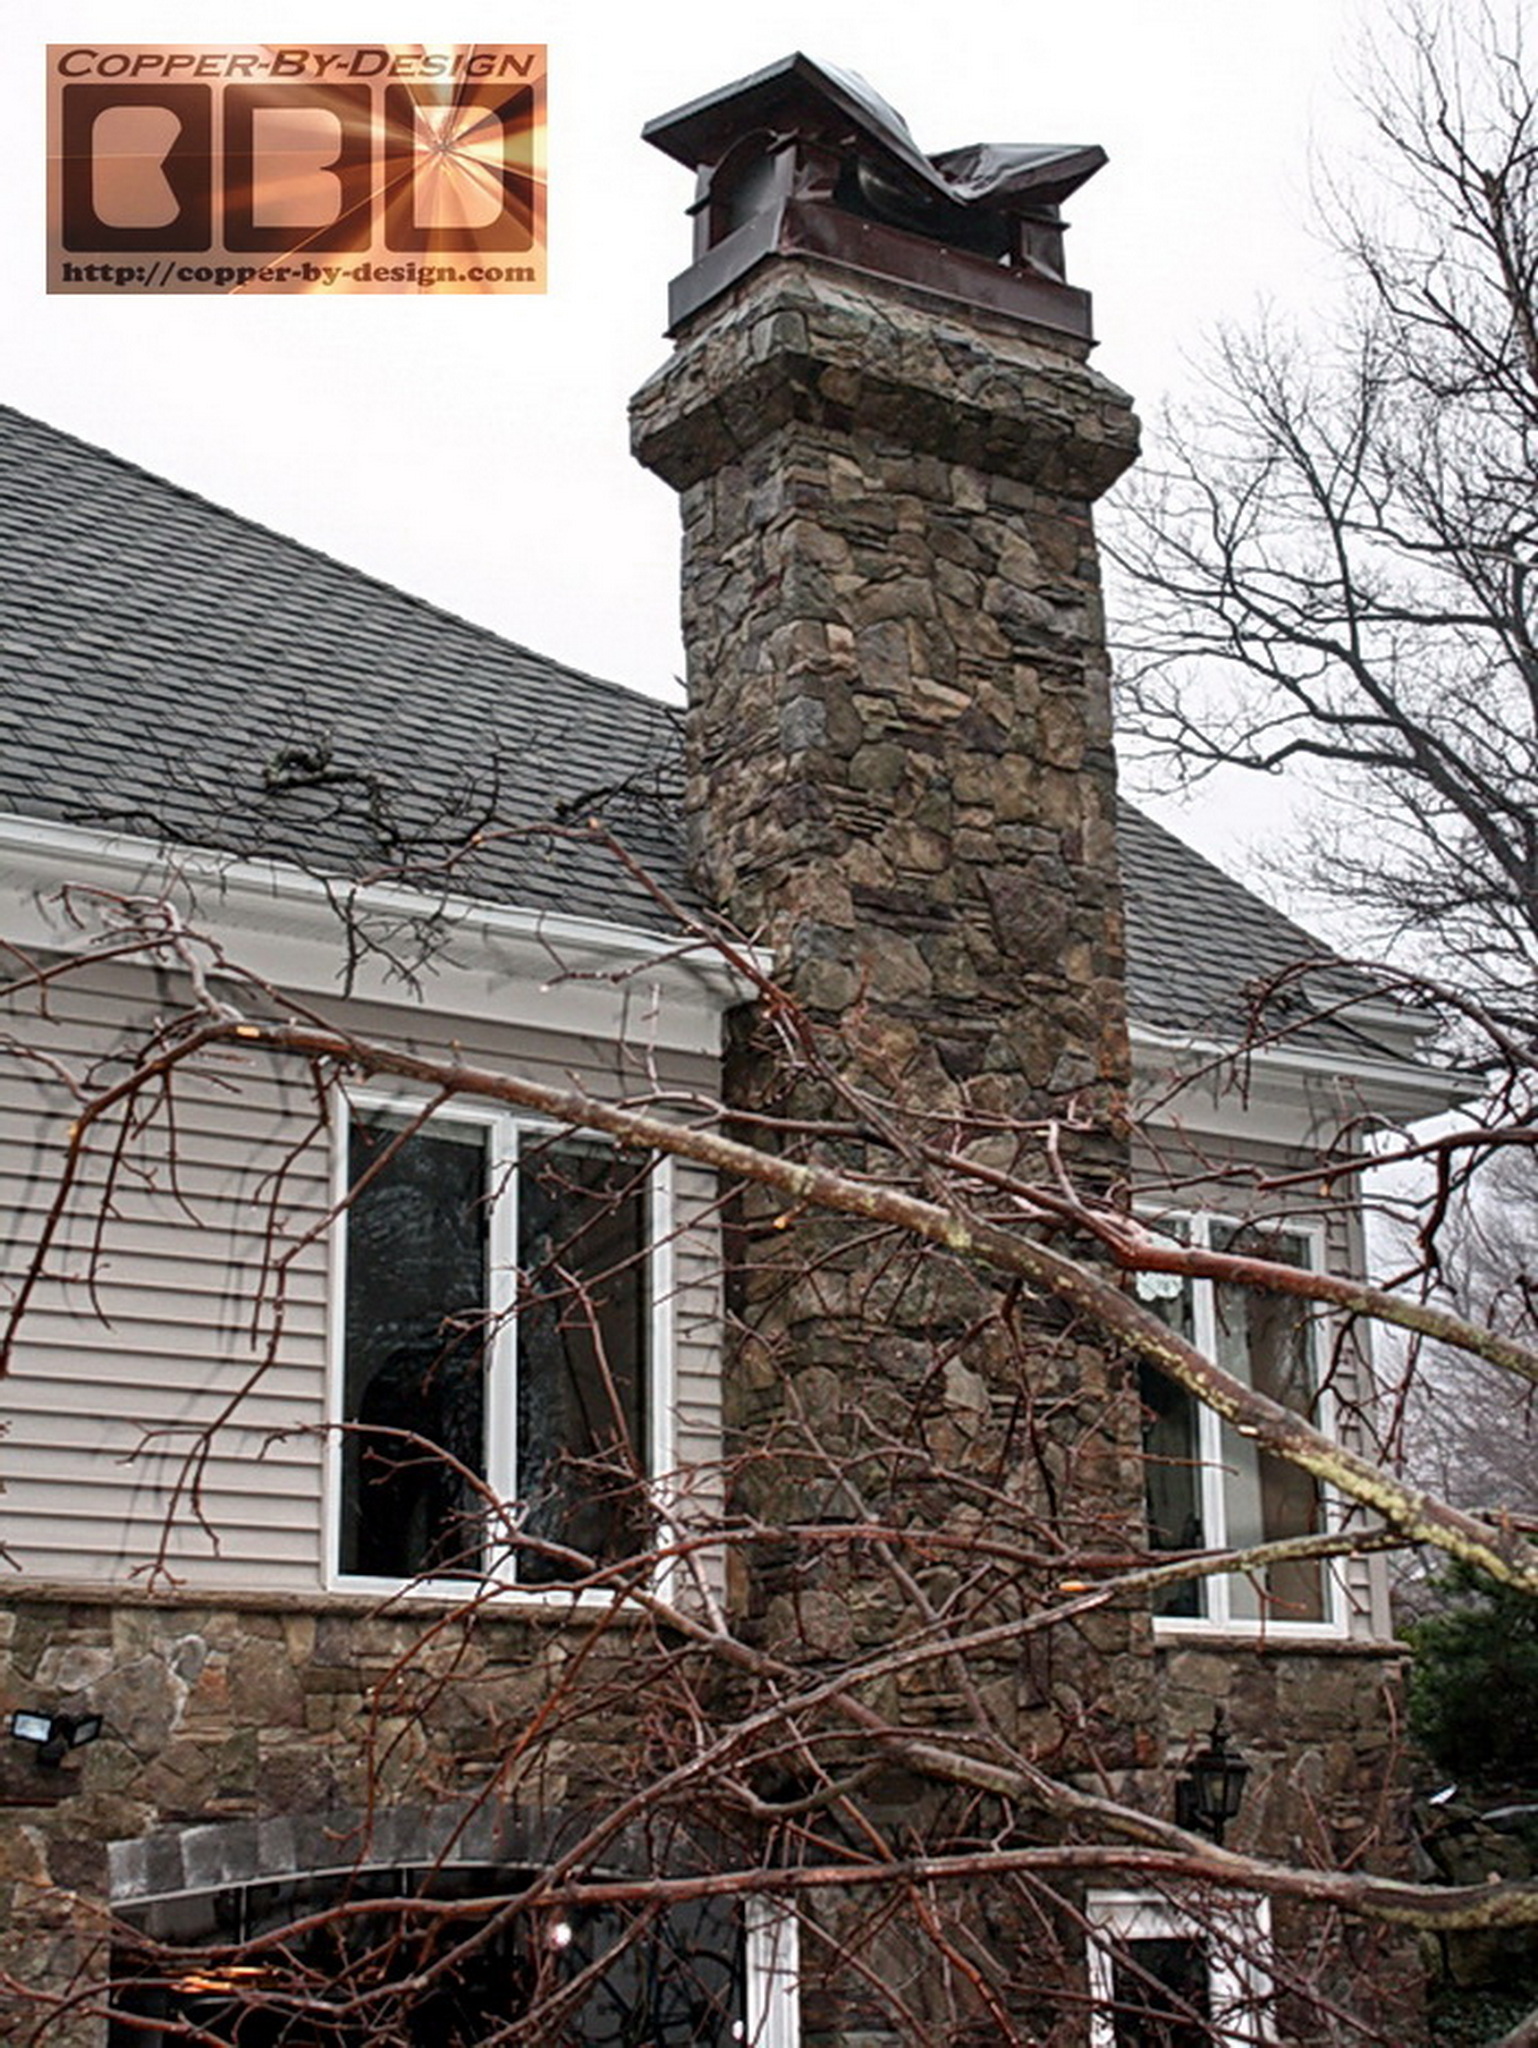
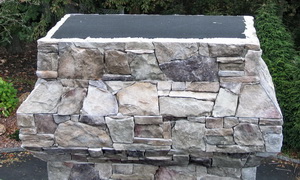
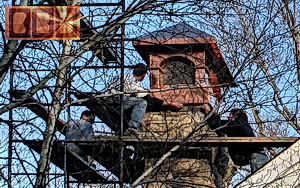
In the Winter of 2010 a large tree was
knocked over in a storm and hit the larger chimney cap seen
here, so I've been asked to rebuild it with the improvements
I've made since this was first made. One noticeable option will
be to make the longer sides with a double arch design, instead
of this one long arch. This way the end arches will match more
closely to the sides. I would also like to lower the roof a bit,
so it's not quite as high up over the arches.
I shared 150 of these digital photos
you'll see below during
the construction process with this client through e-mail. I doubt
there are any other shops who would do this.
|
|
Stage 1:
Working the Deal
The client shared several
good clear photos with me, so I had a good picture of what these
chimney caps will be mounting on. They need to have a sturdy
mount to withstand high winds and also be removable for servicing
or flue cleaning.

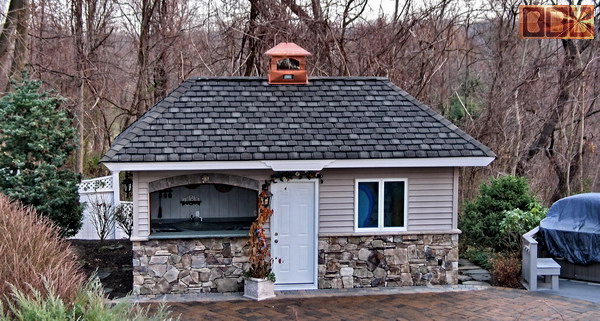
This is his pool house that he wanted a matching
copper cupola with a soft light inside and a flood light for late
night clean-up. We were able to work up a quote that was agreeable
for both parties with only a couple e-mails on 4/17/06.
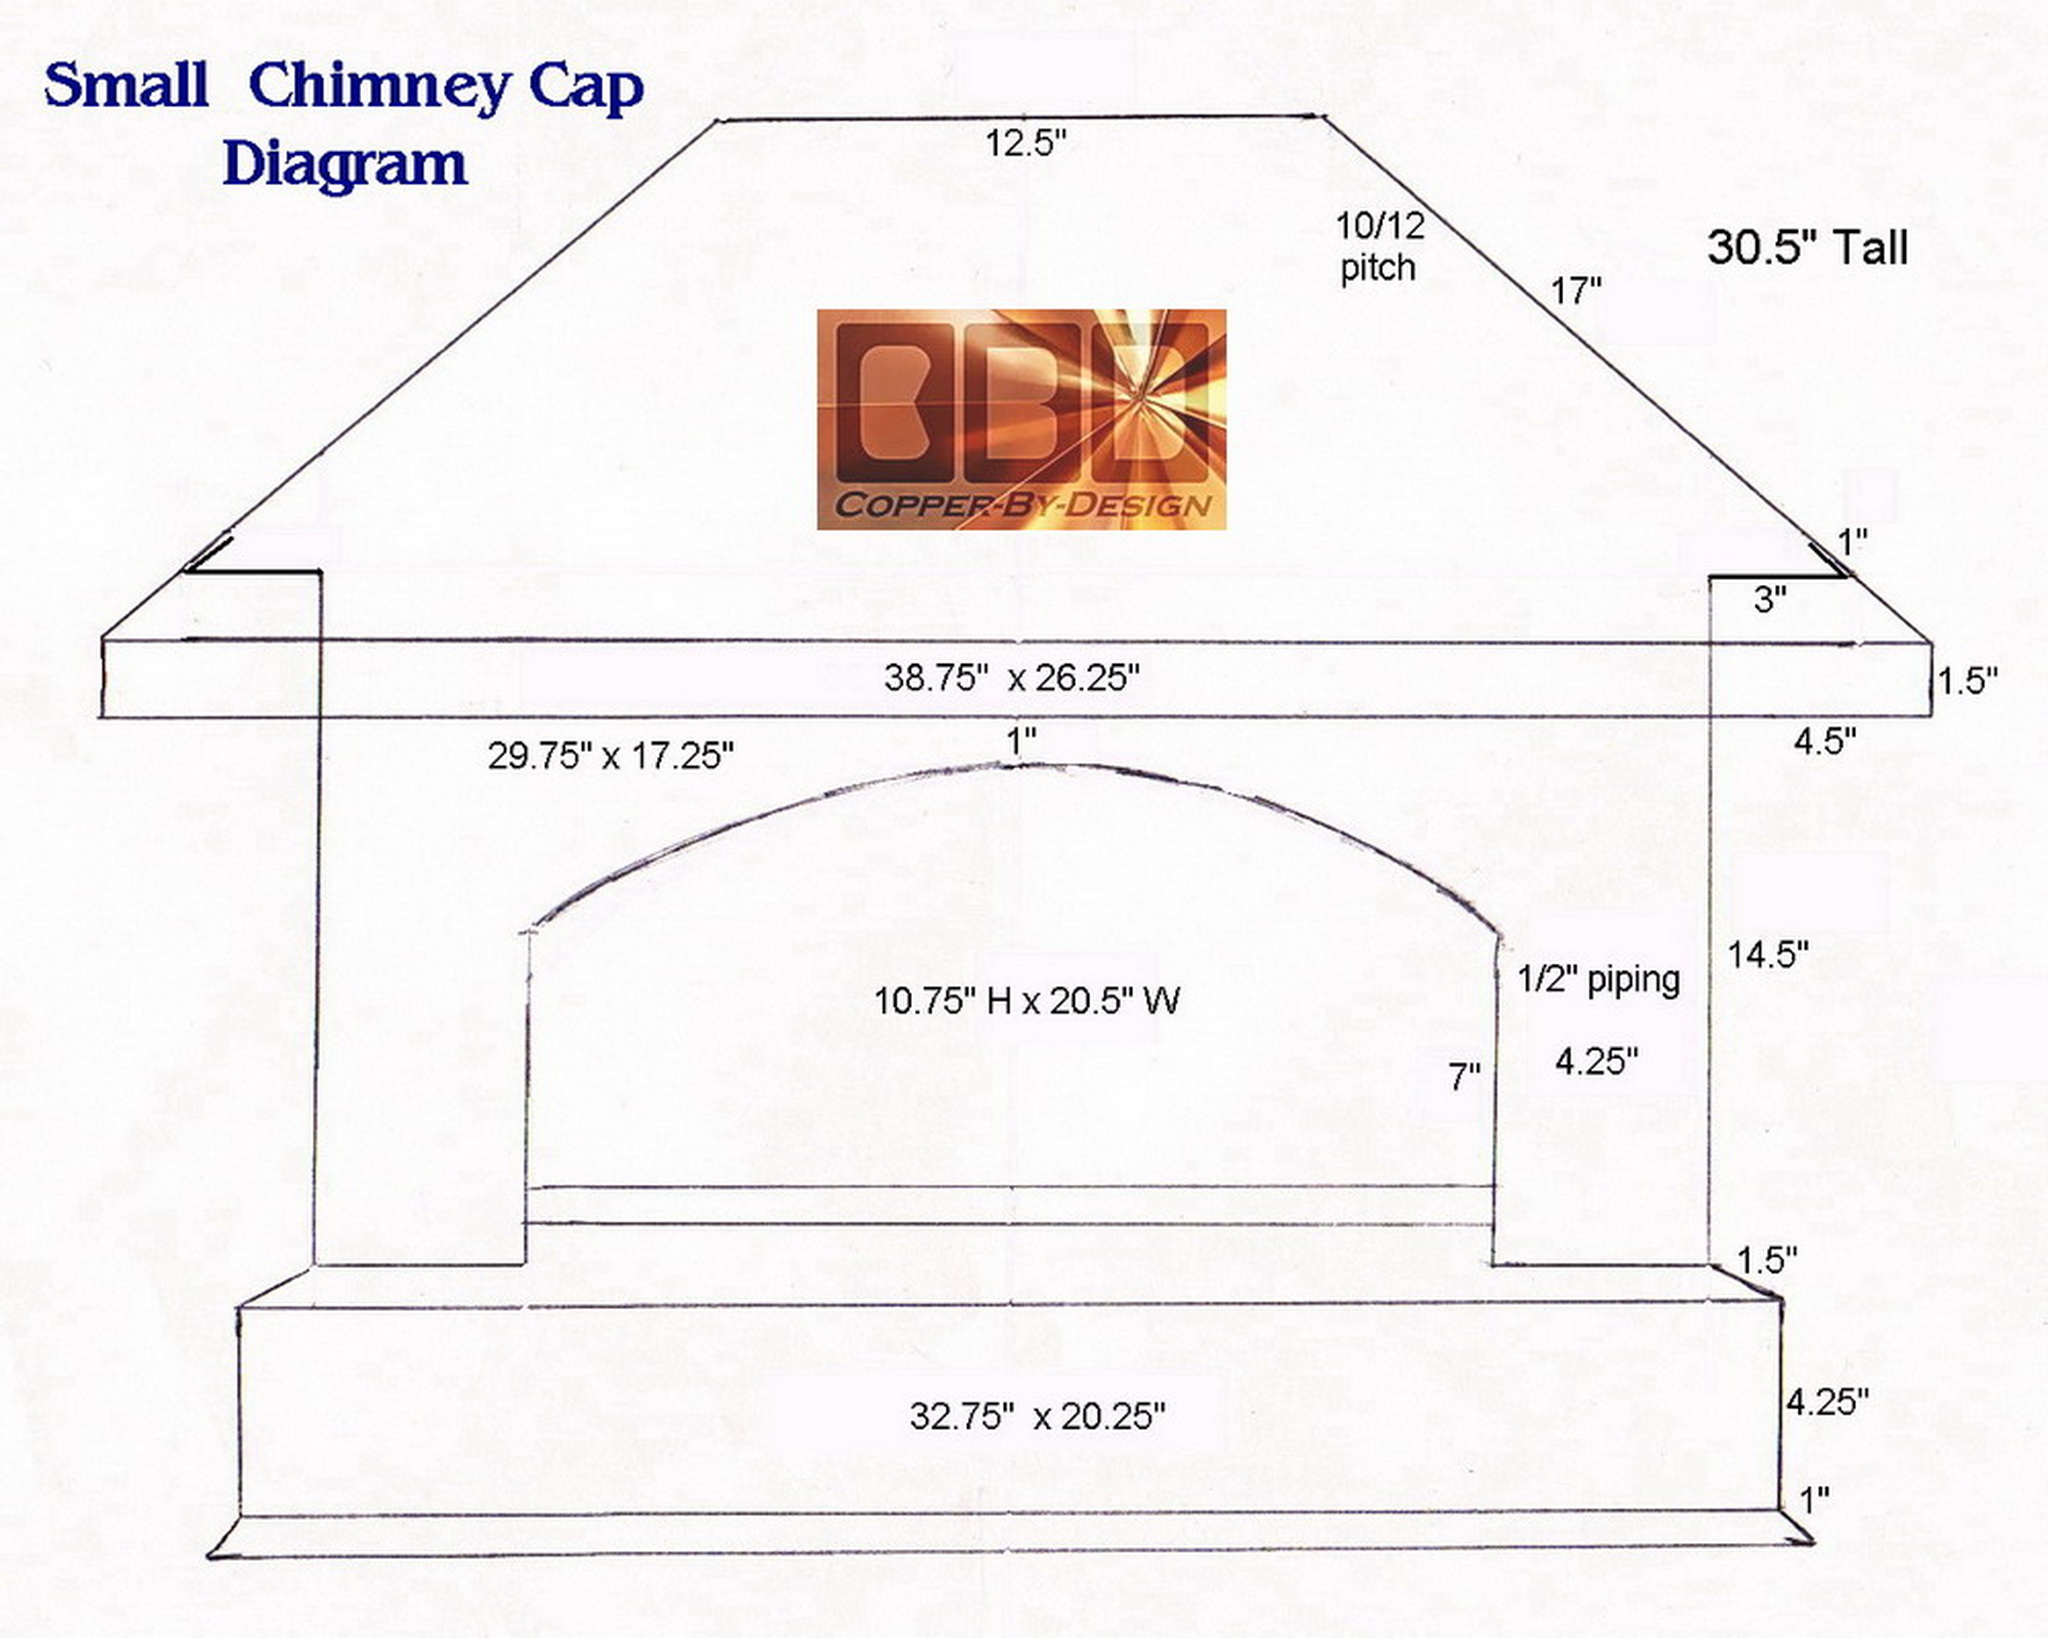
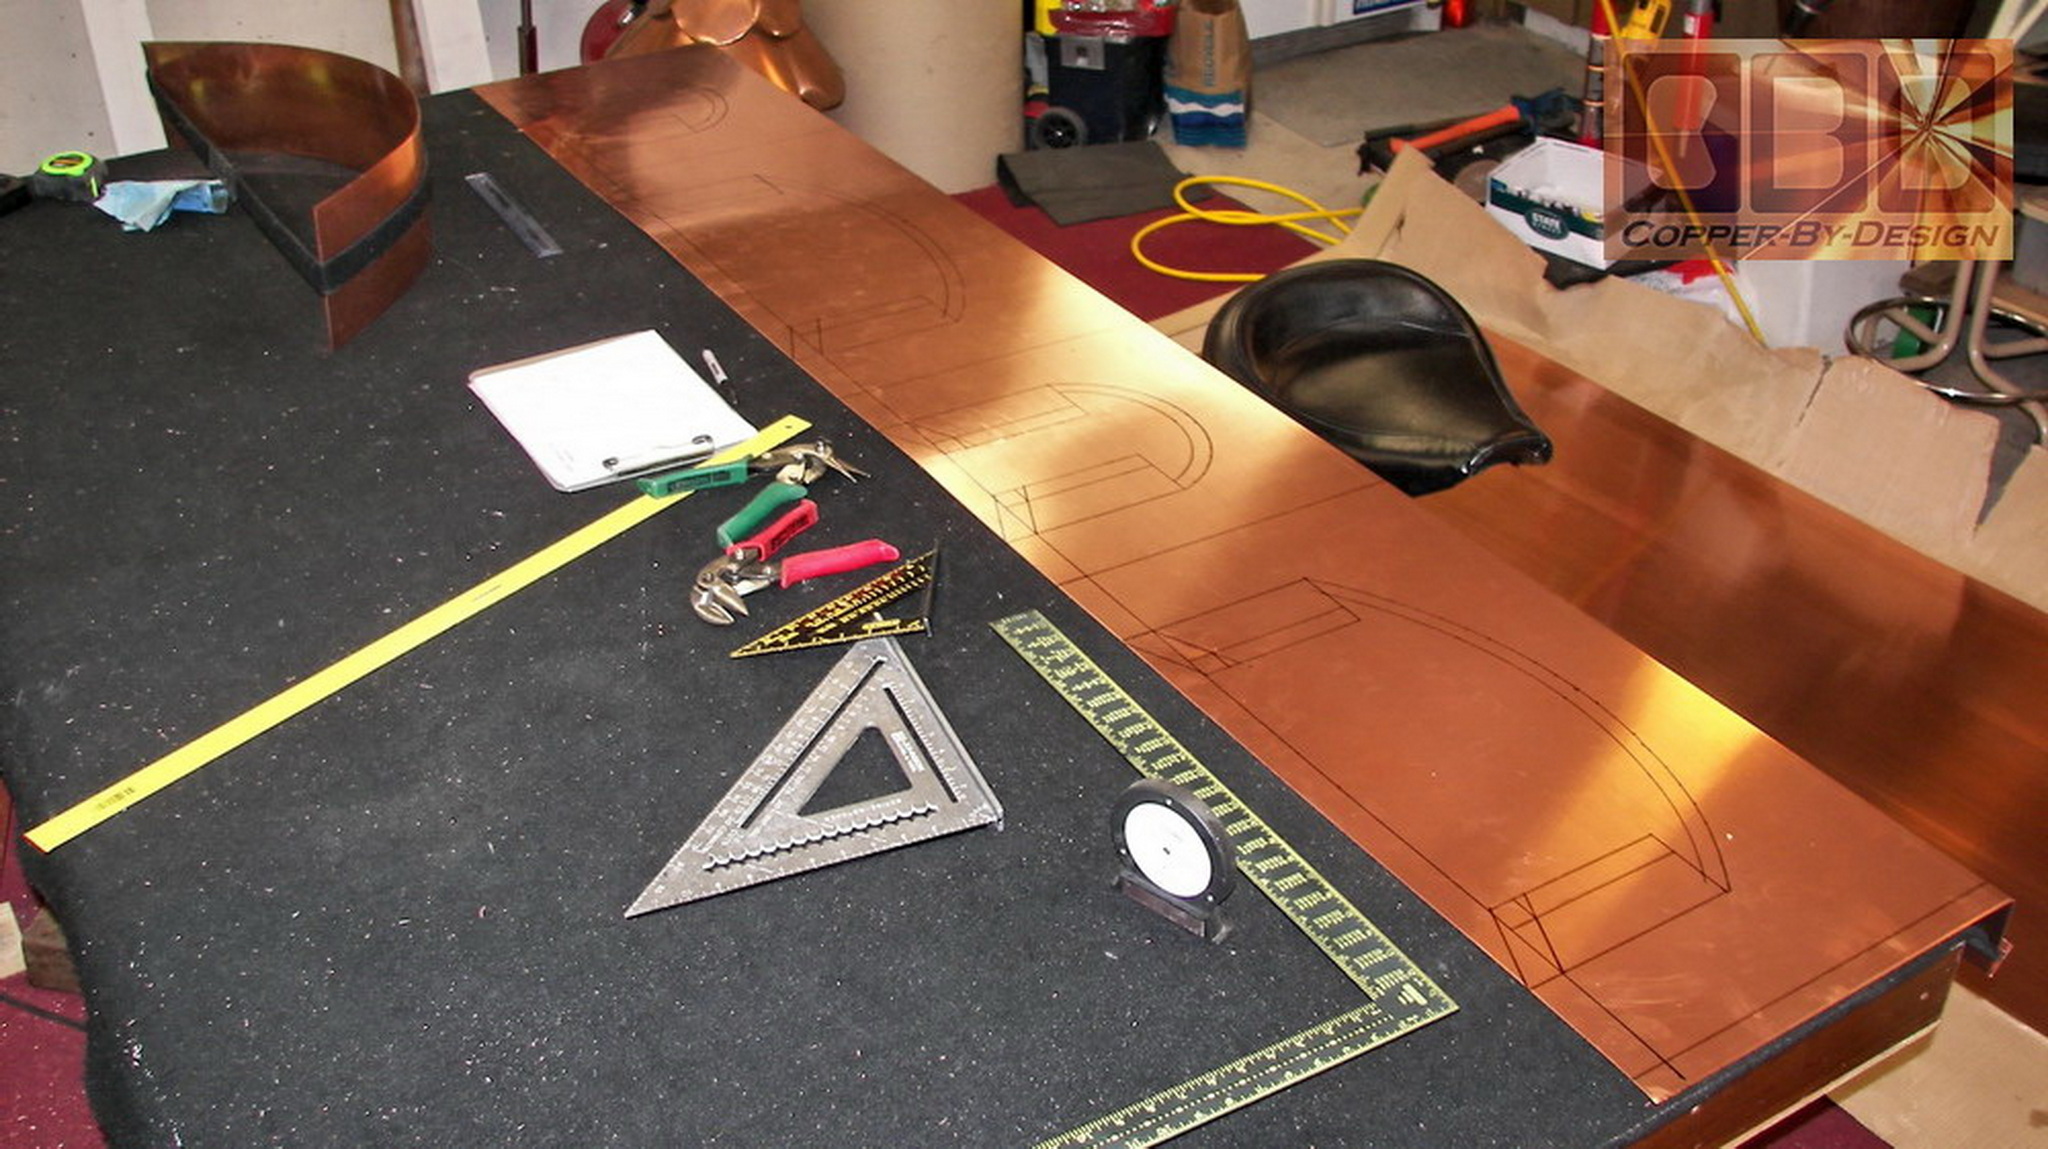
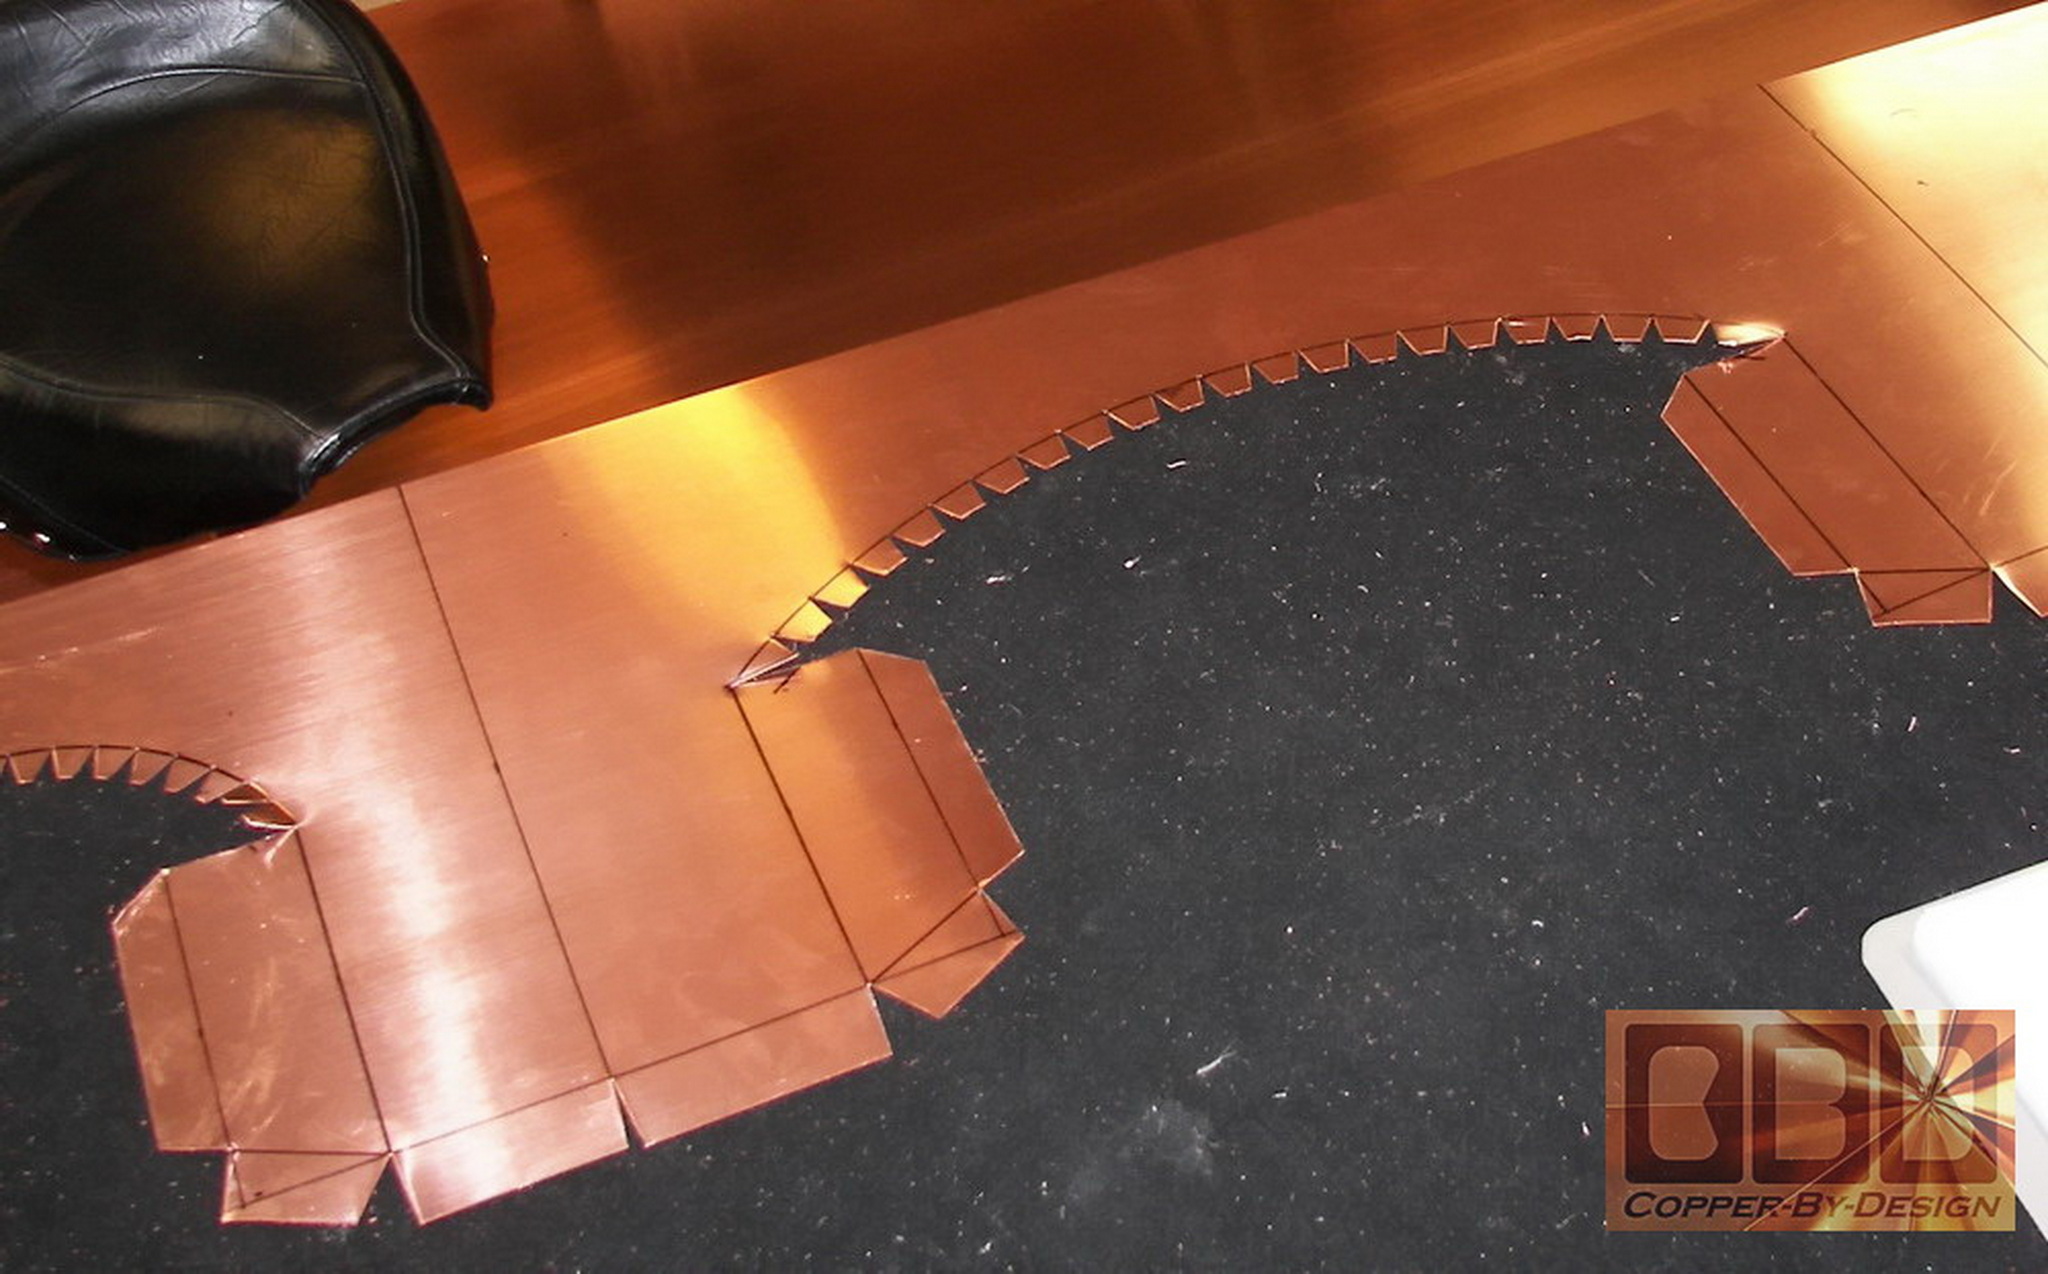
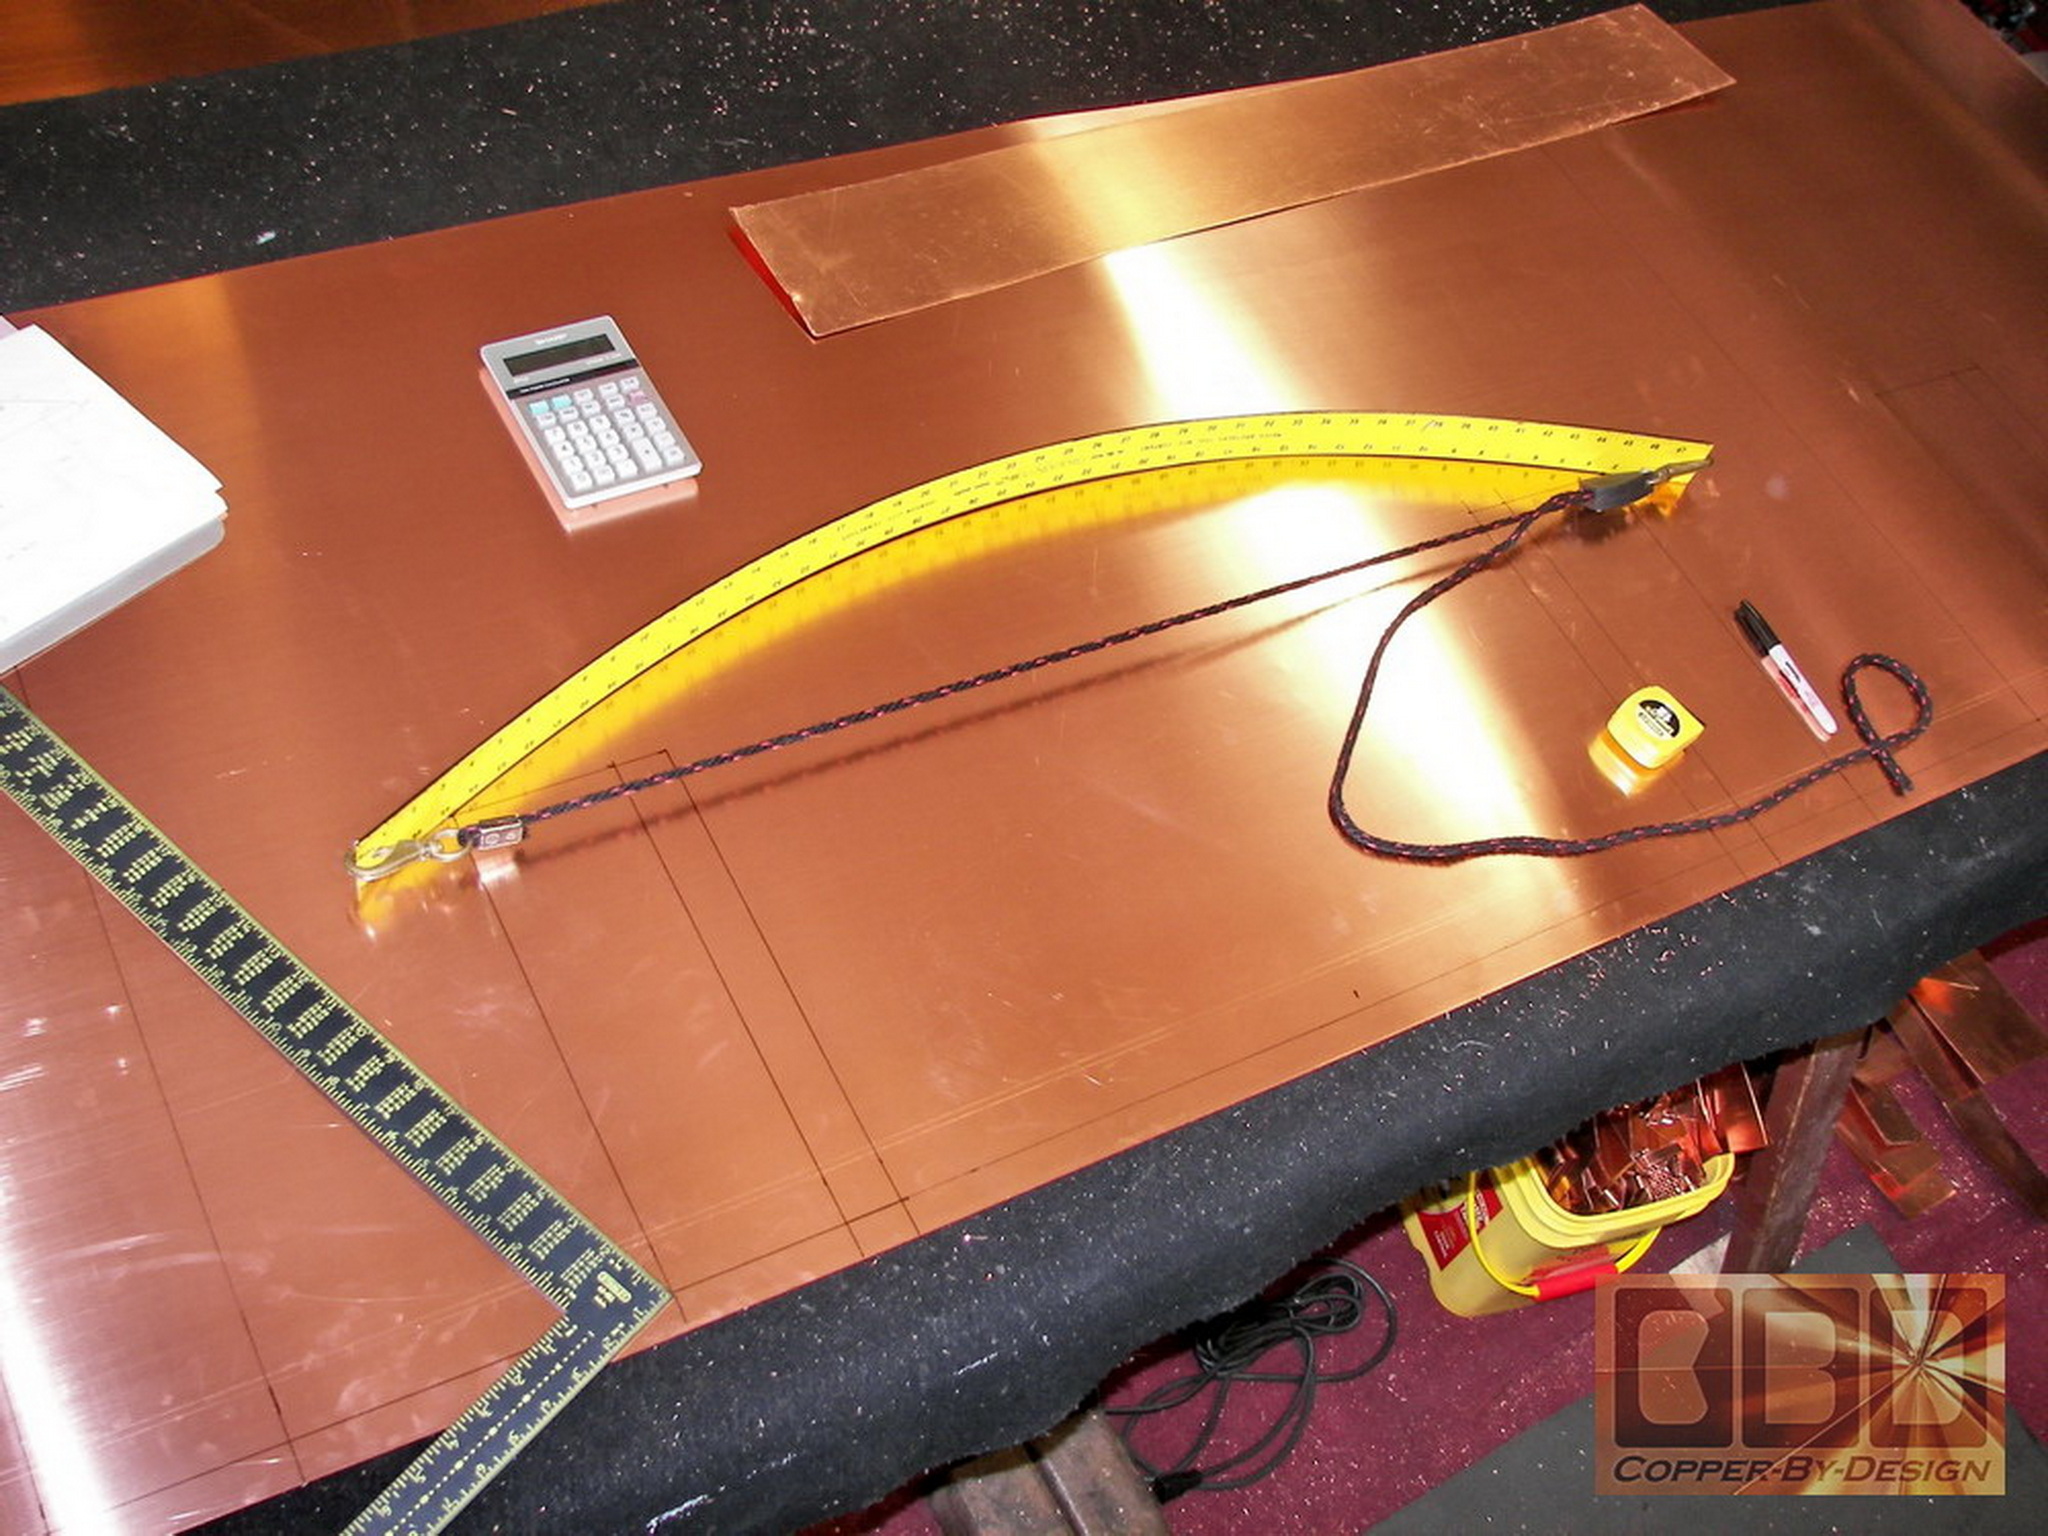
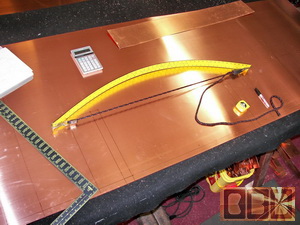
There is a lot of tricky
math that goes into these fabrications. I had to mathematically
scale each unit to be proportional to the Silbernagel cap in order
to have the same sort of look. In general I divided those measurements
by 1.4 to reach just the right proportions for this smaller chimney
cap. The larger unit will needed a 64" x 36.25" base with a roof
that is 73.5" x 45.5". I needed to multiply the dimensions by 1.6
to reach the right proportions.
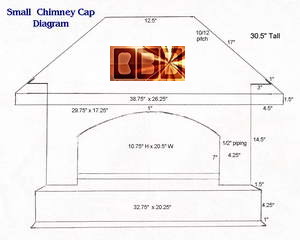 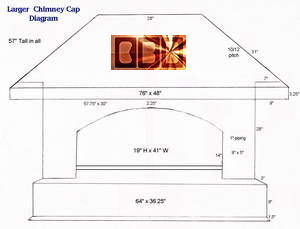
You can see the differences
here, even though the look is very similar. The smaller cap diagram
was scaled to 1cm = 2", where the larger cap diagram was drawn to
a 1cm = 3" scale. The reason I am so generous about the info we
supply on our web site is that we hope these do inspire a higher
quality work in other shops, but sadly there is not a lot who have
what it takes to benefit from this information.
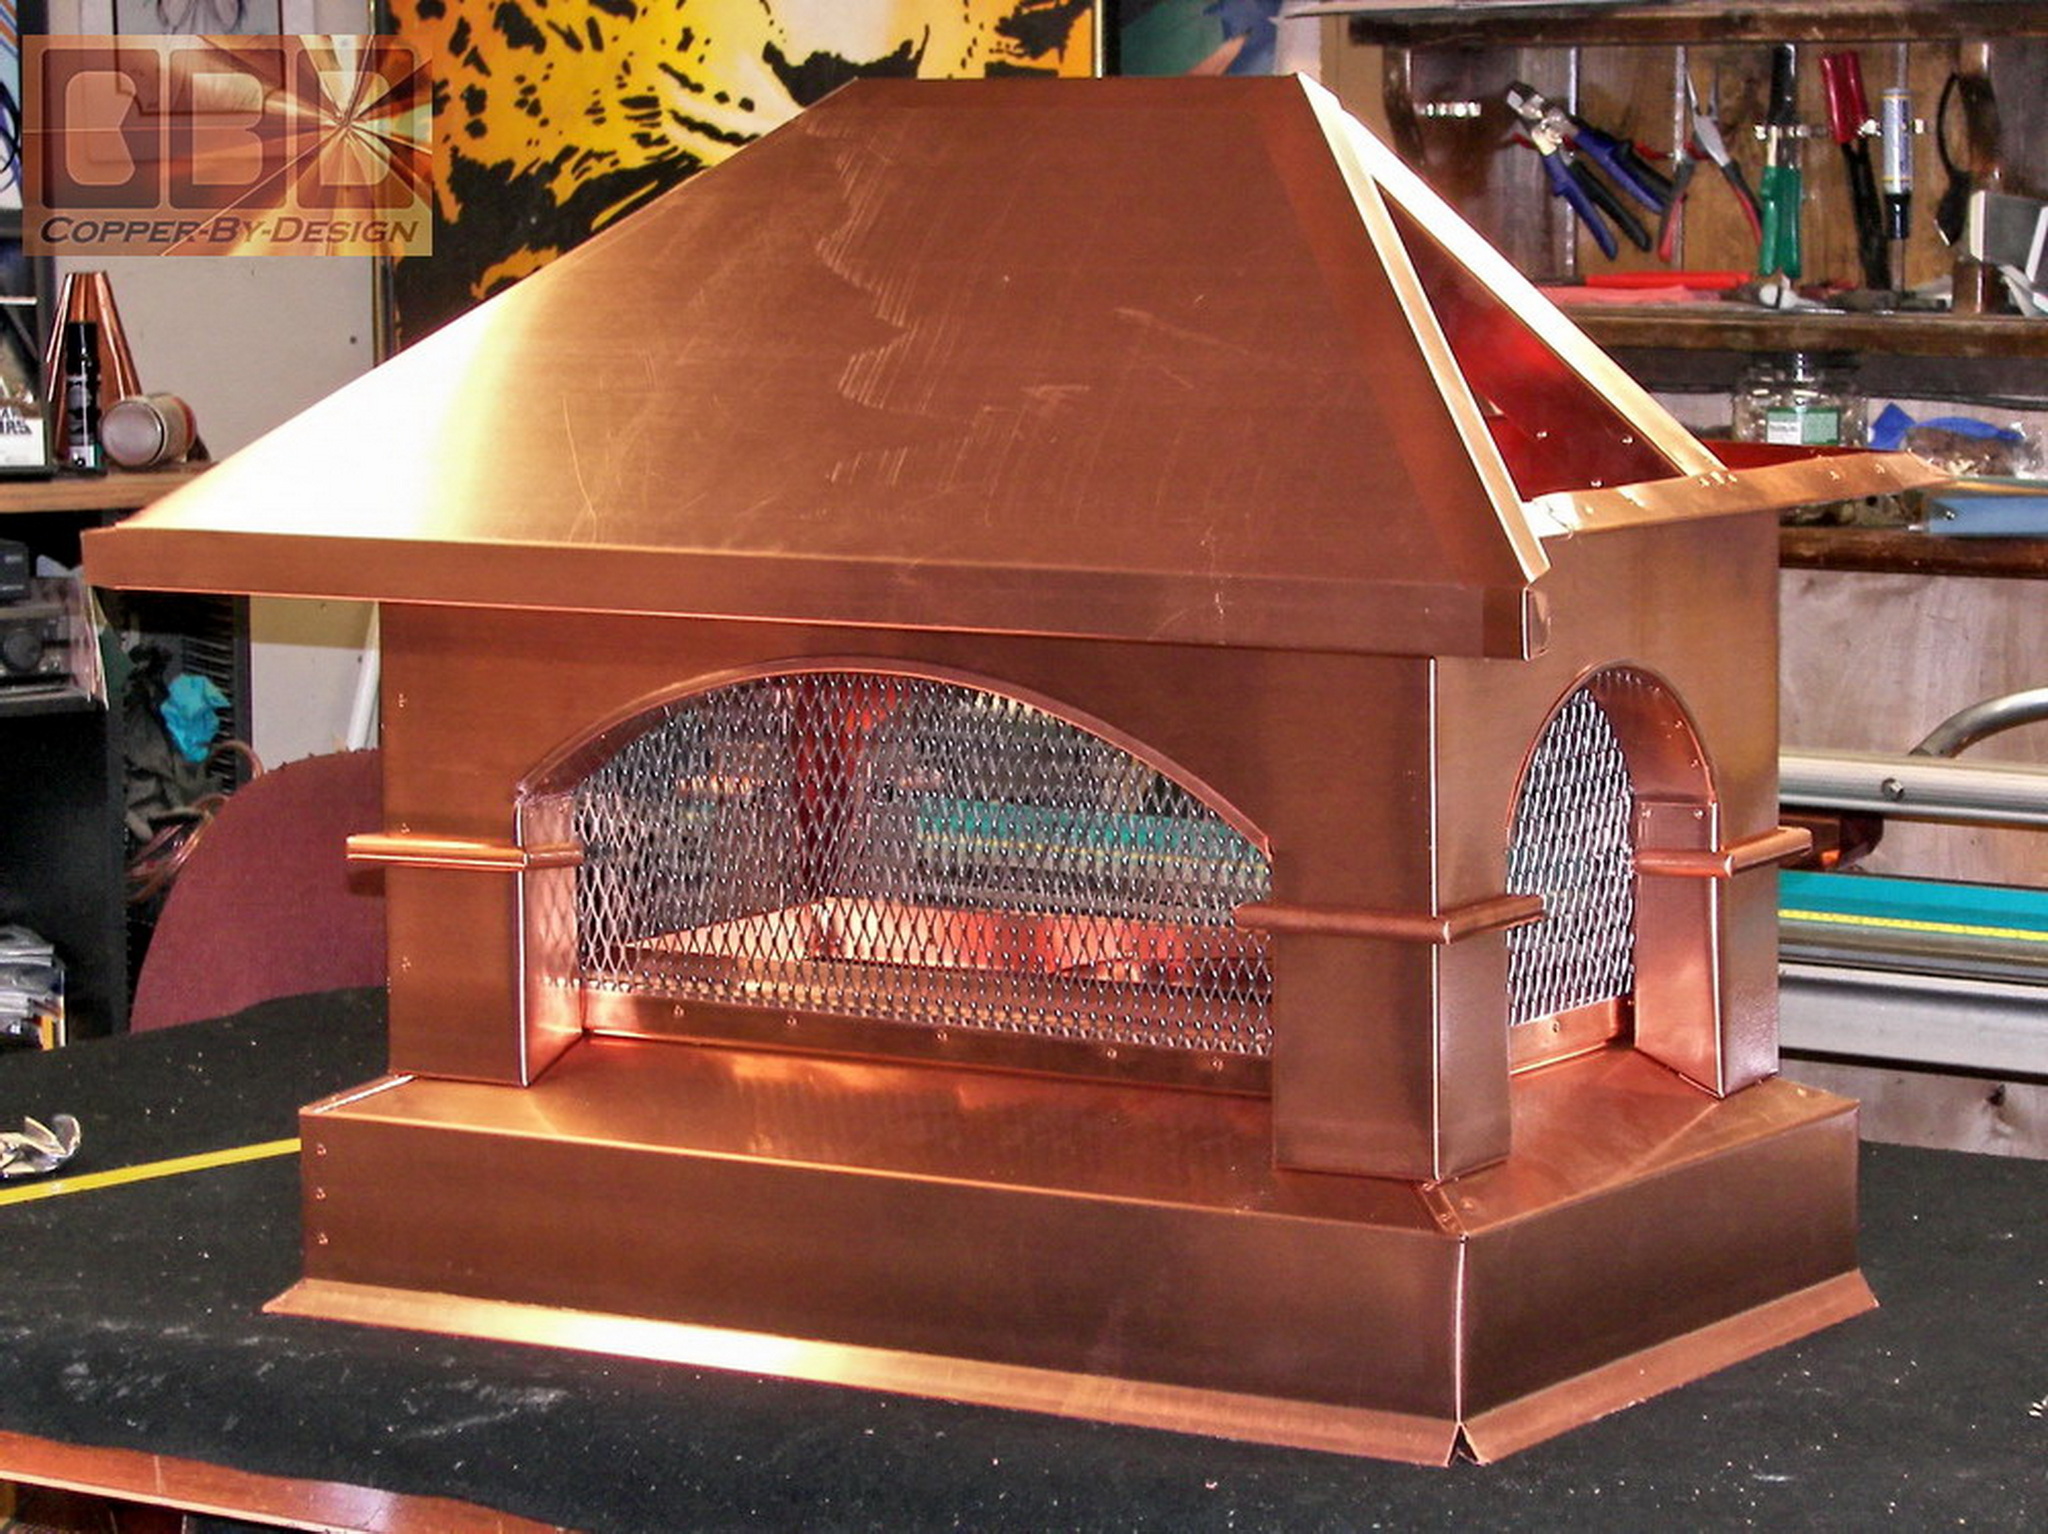
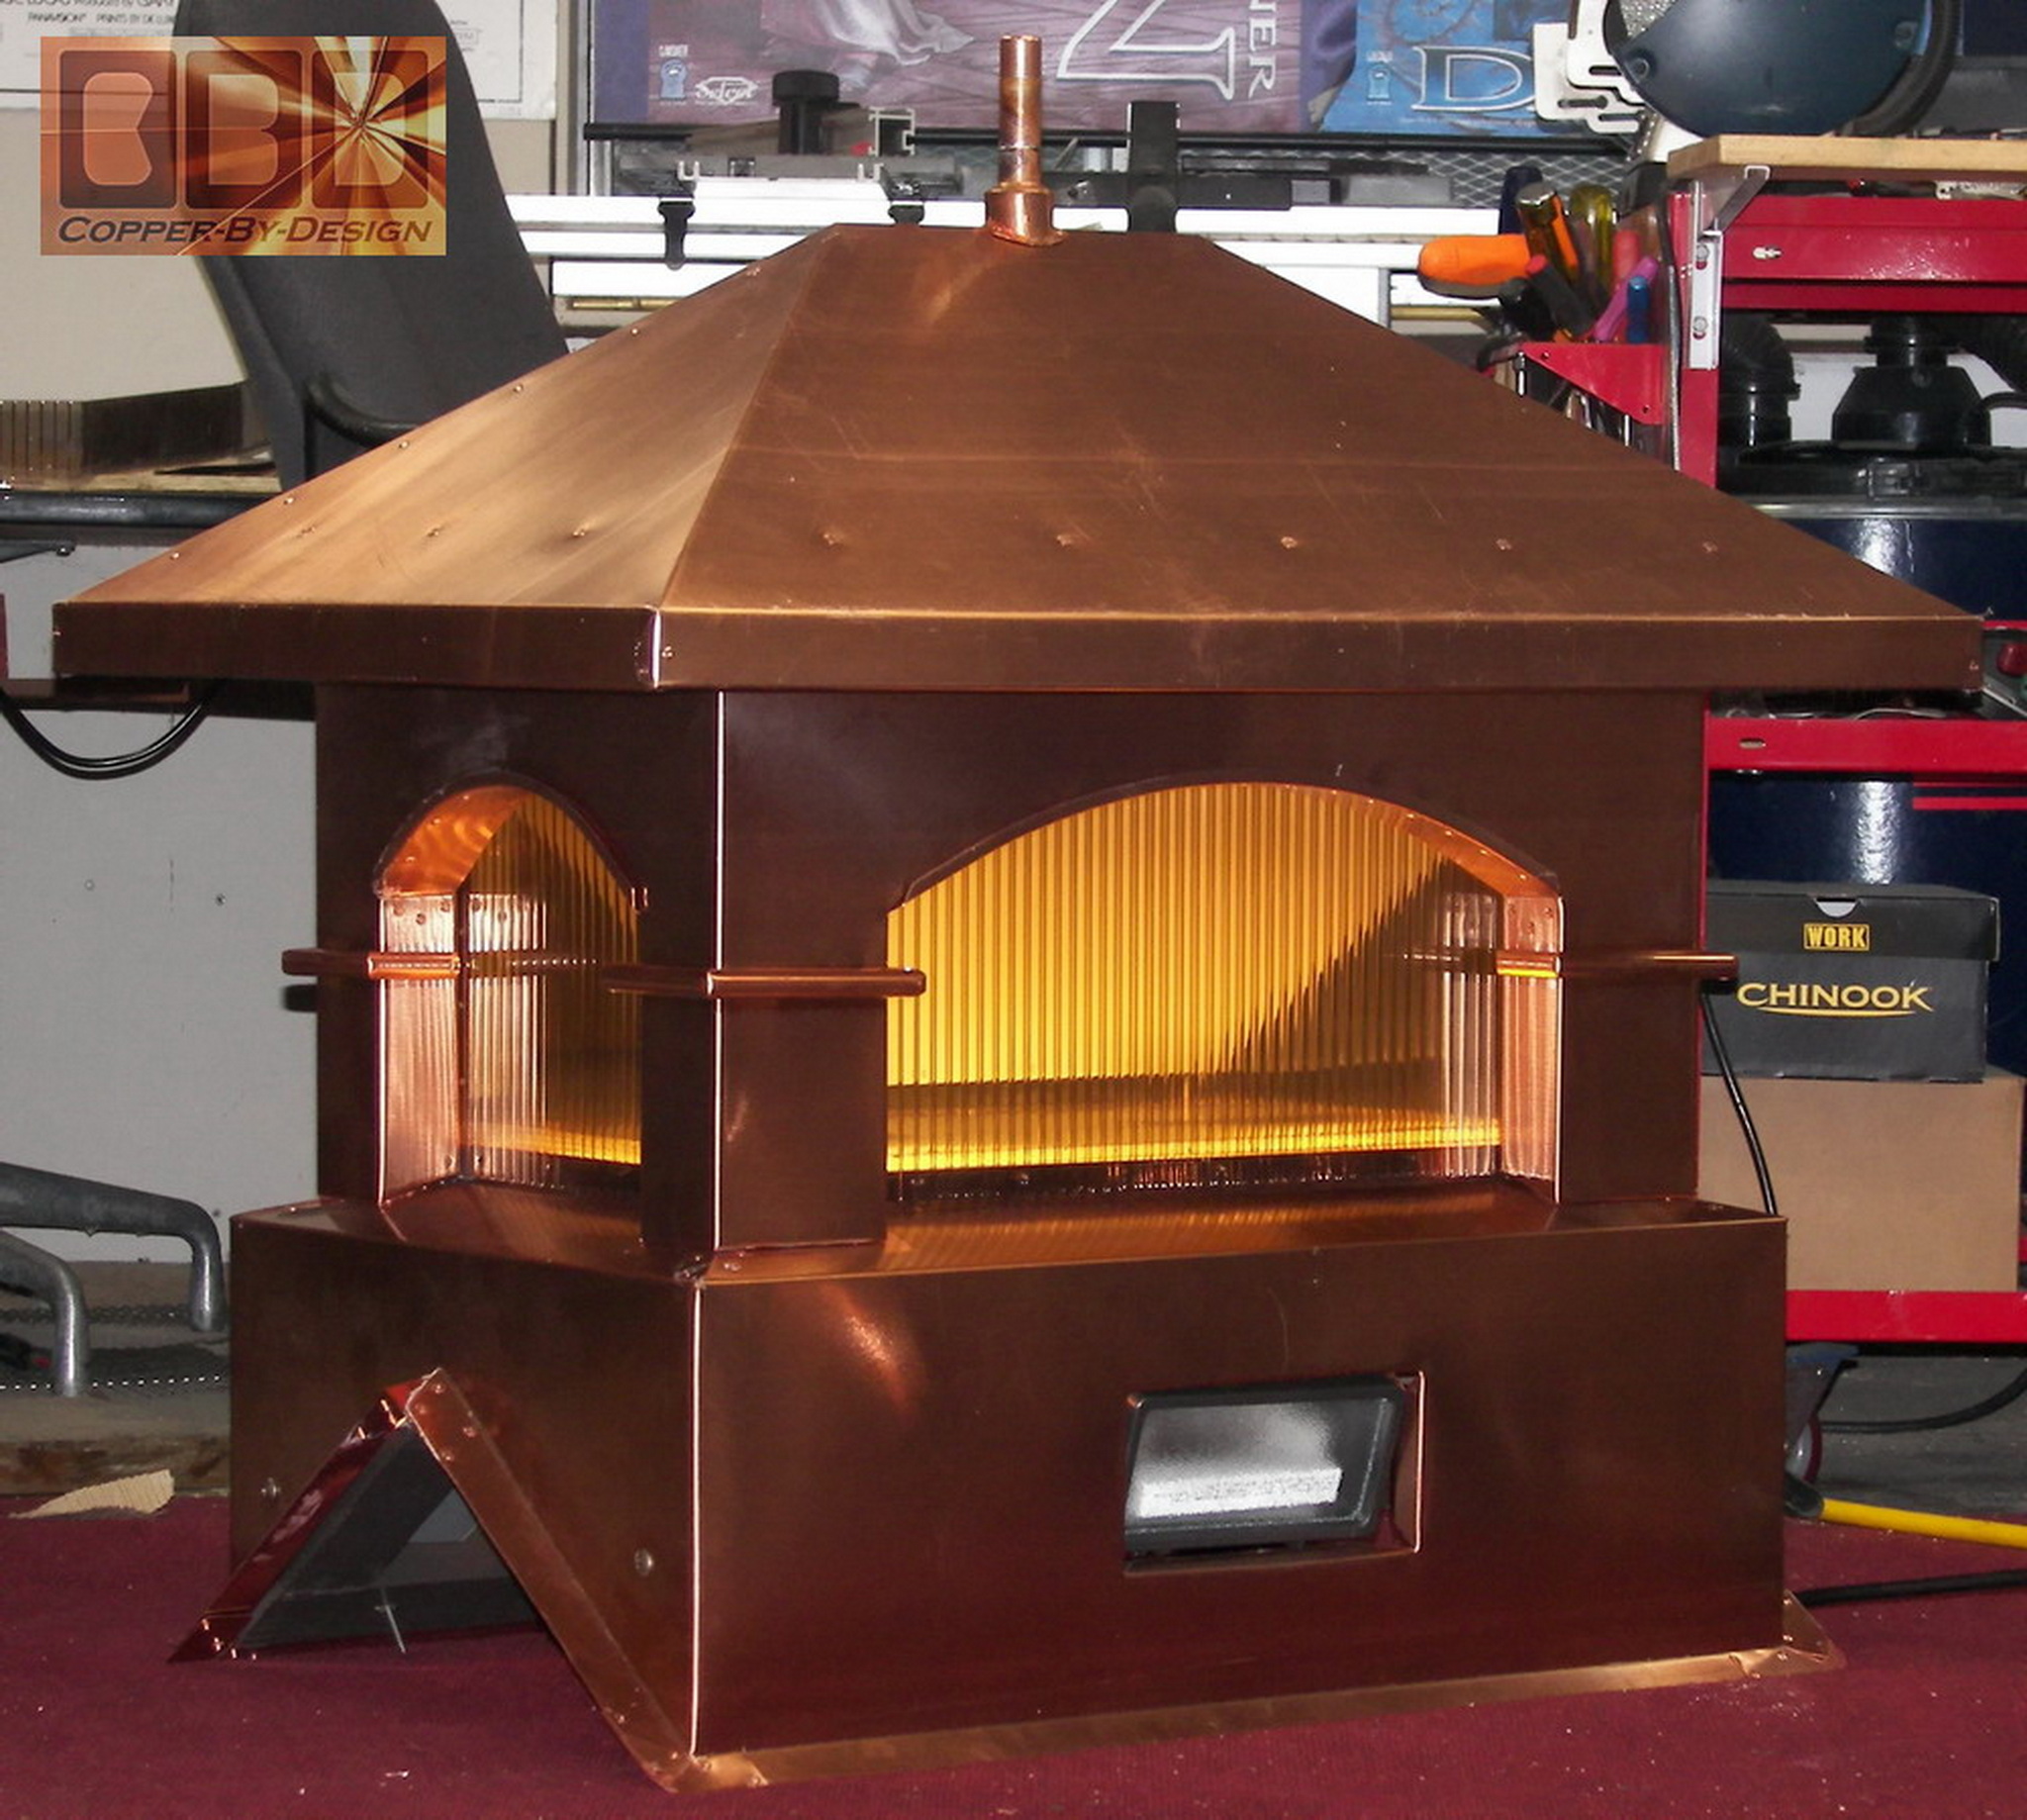
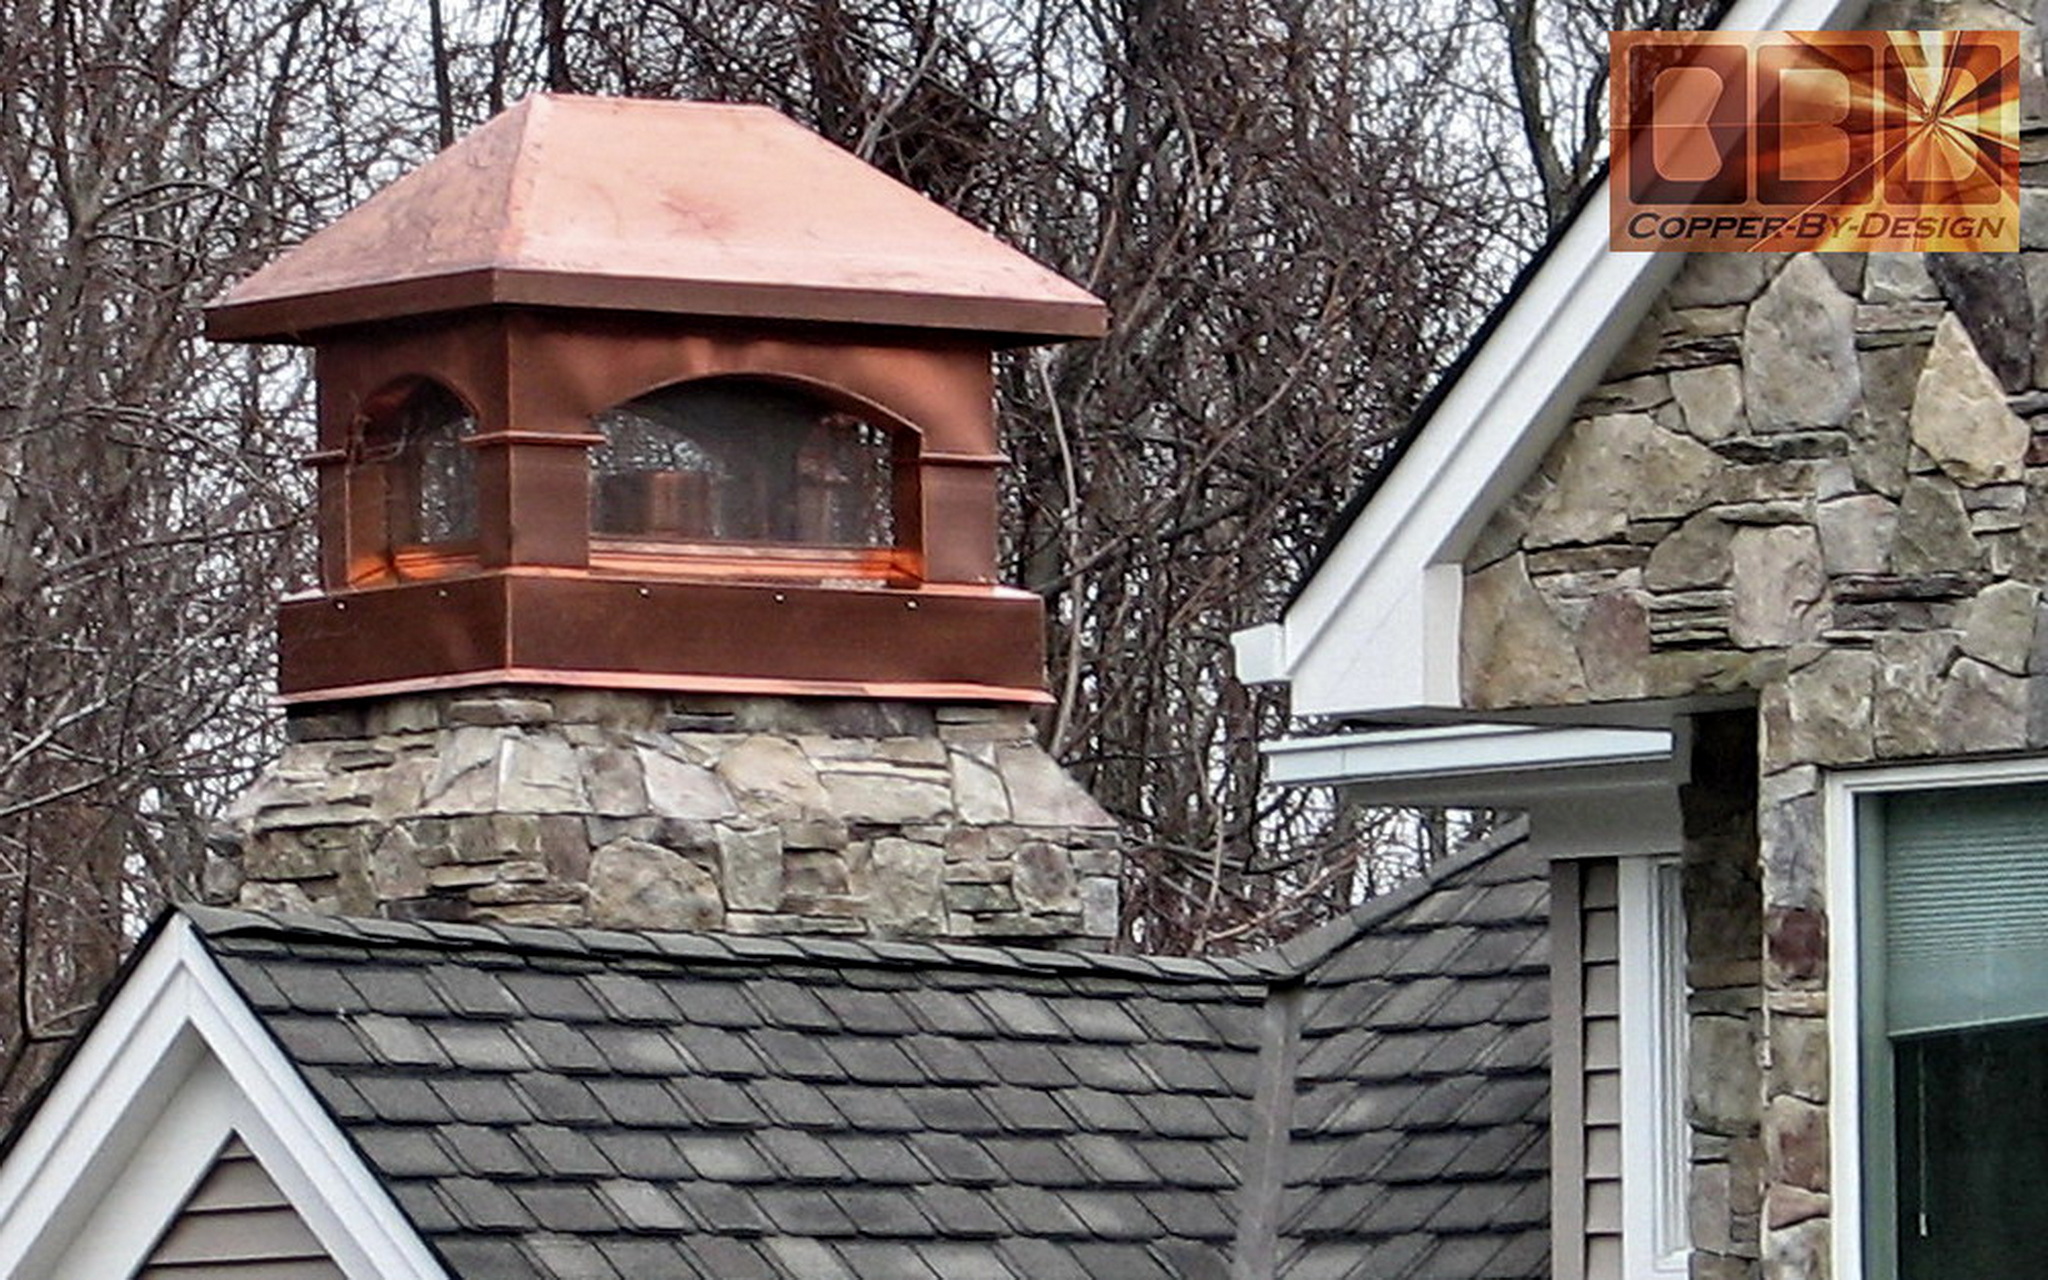
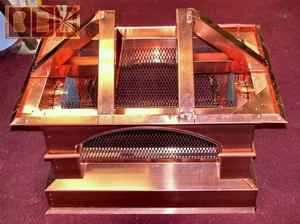
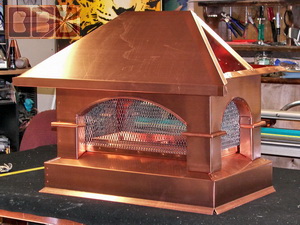
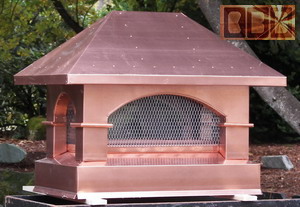
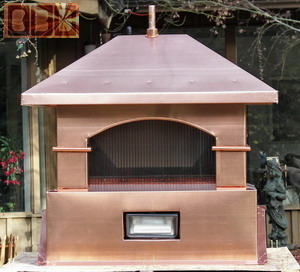
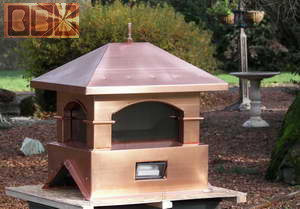
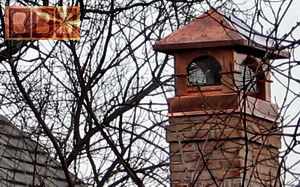
These have a 10/12 pitch
hipped roof design to match their house roof, along with a thick
stainless steel screening set back behind columns. We also included
a custom angle cut wood frame for the larger chimney cap to rest
on, with the stainless steel mounting hardware, so it is secure,
yet removable for cleaning or other maintenance.
|
|
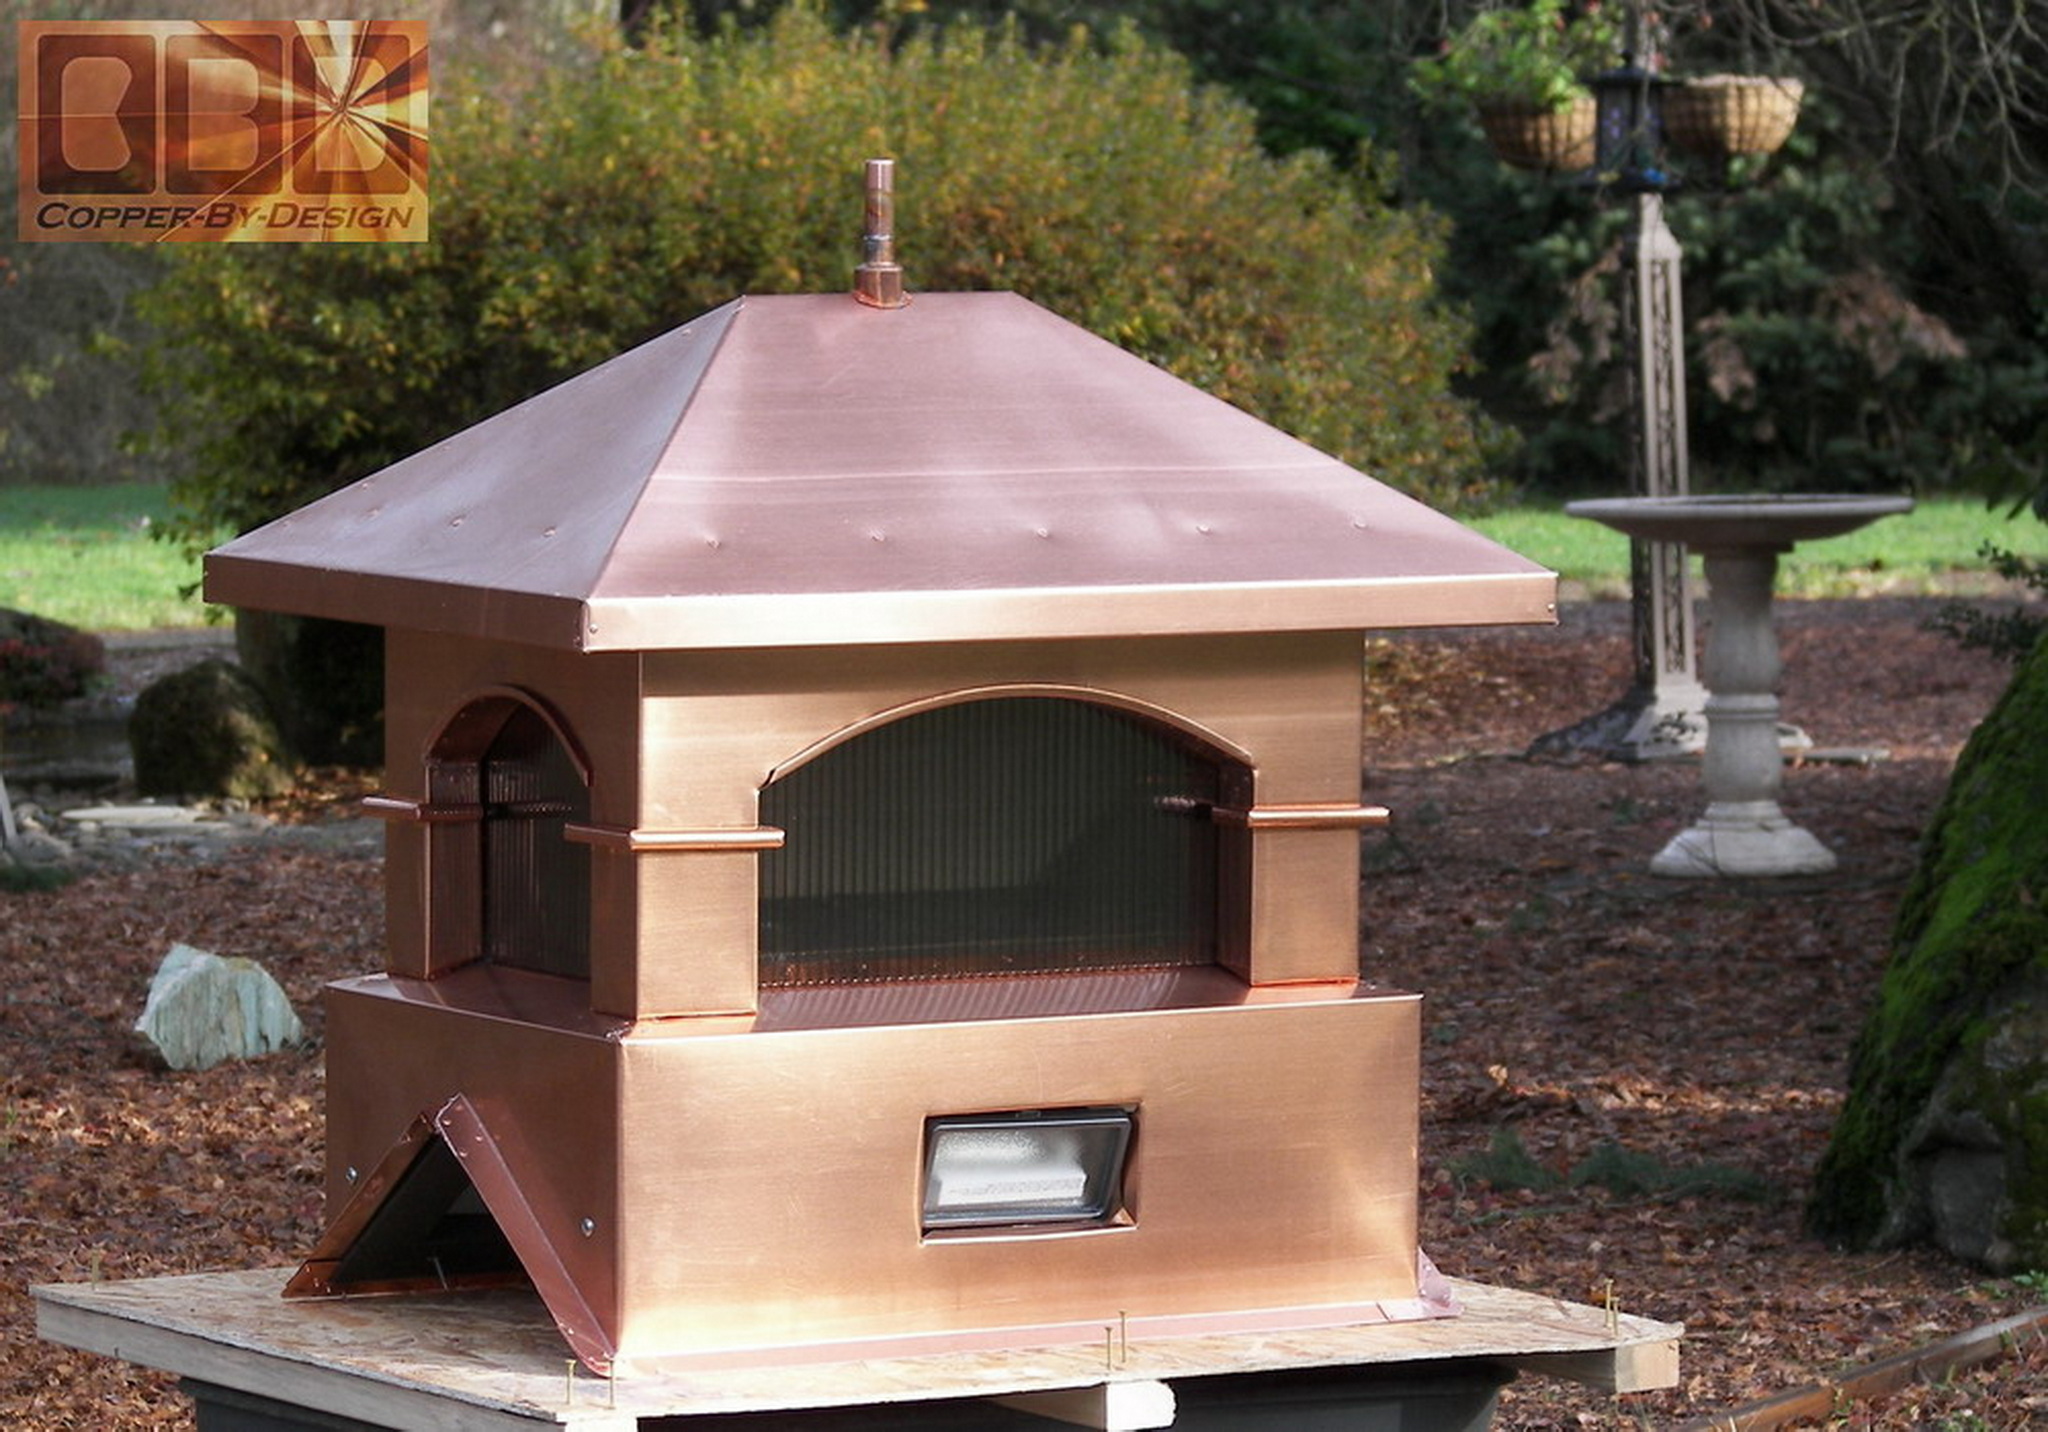
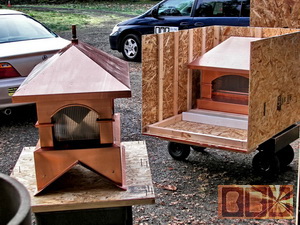
The Smaller
Chimney Cap Fabrication
|
|
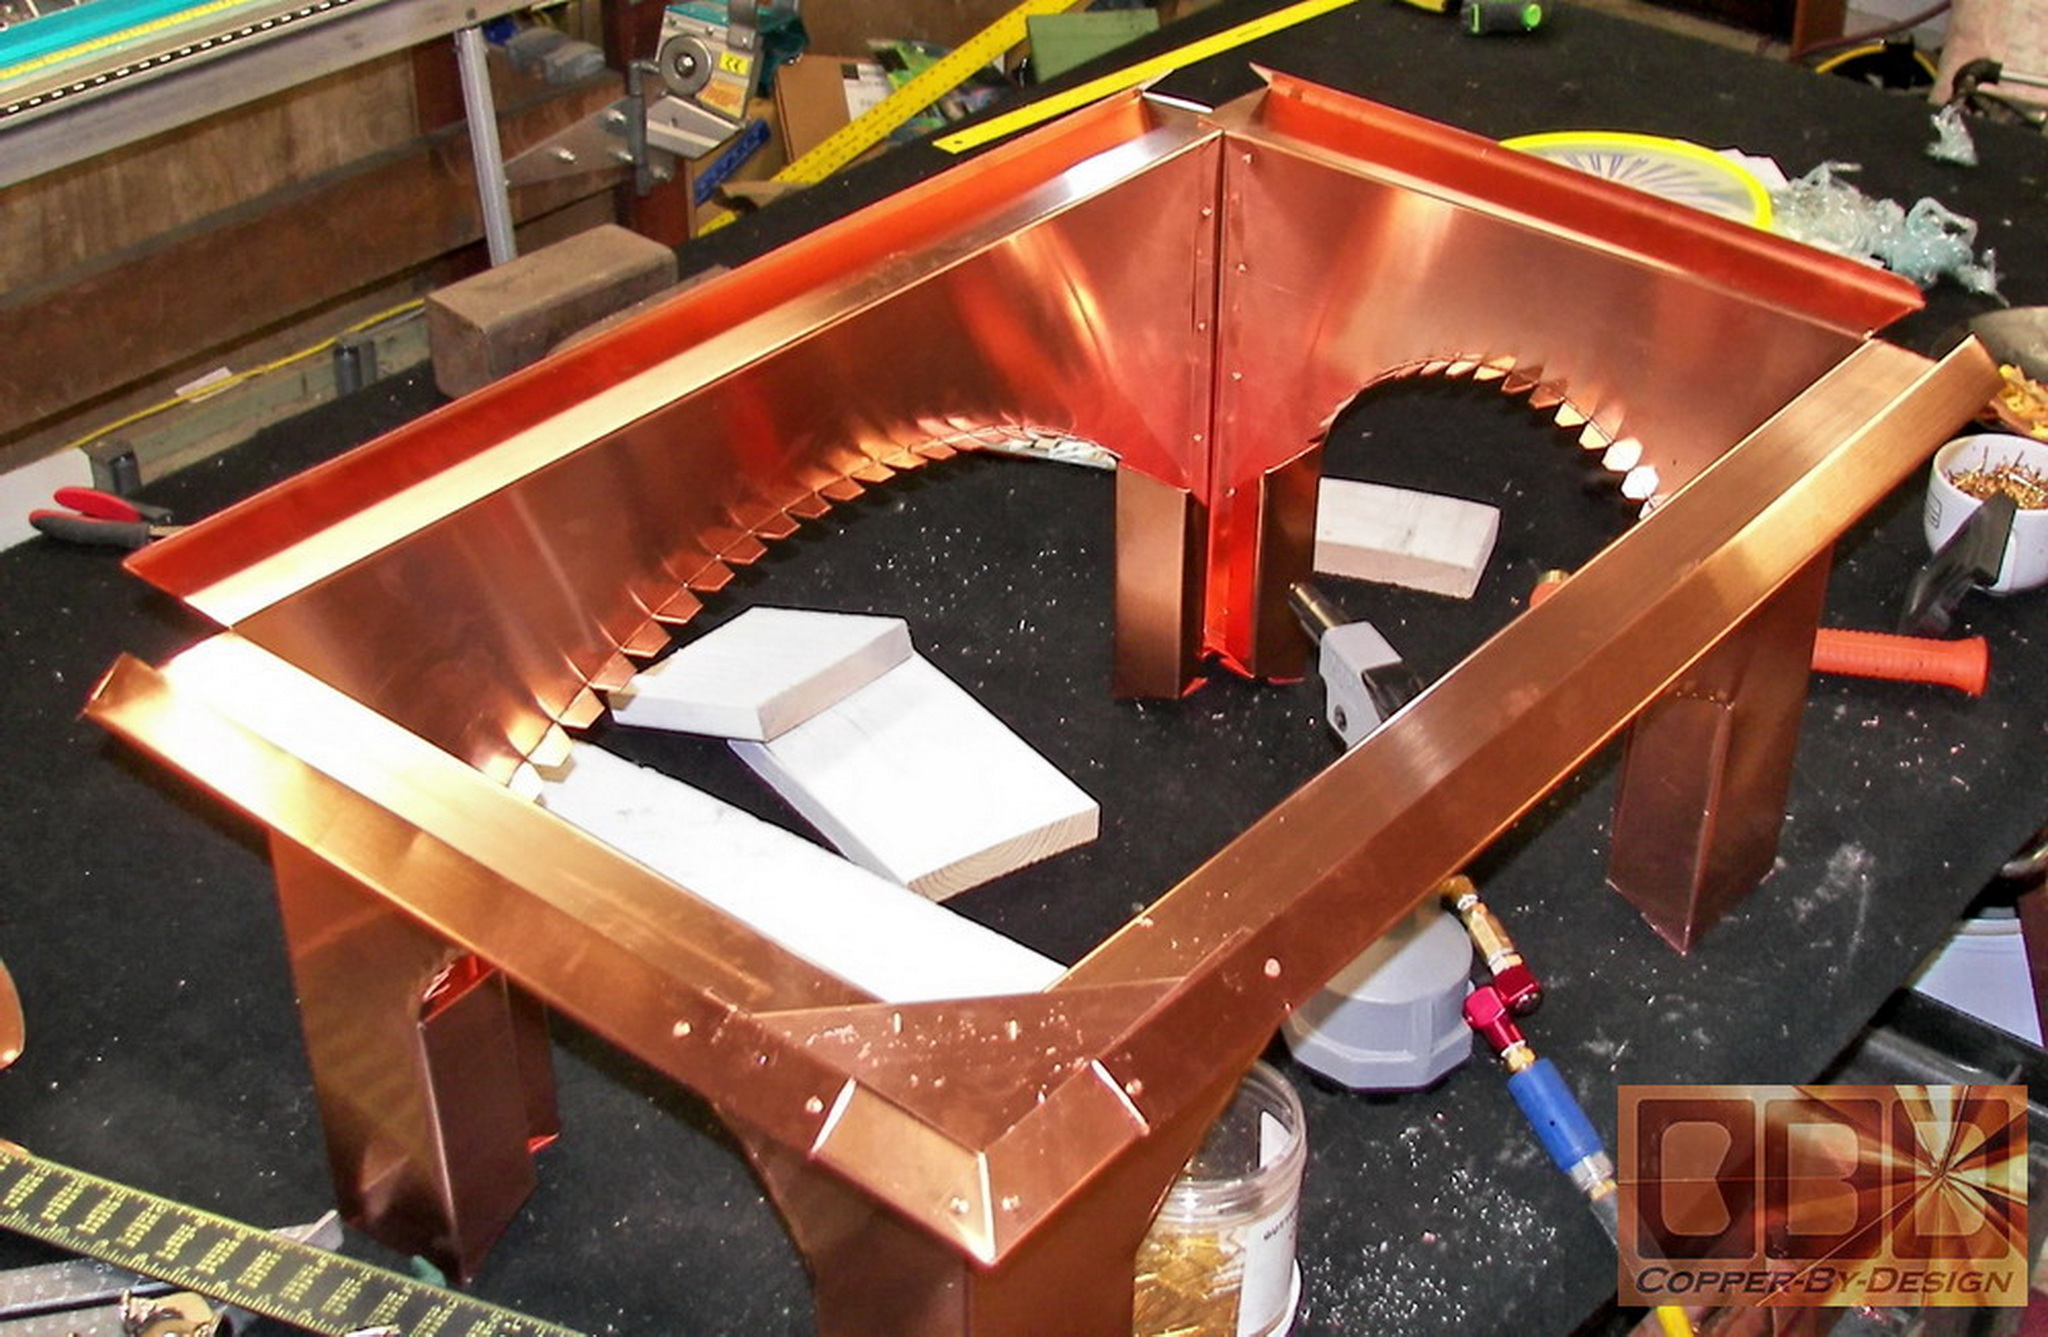
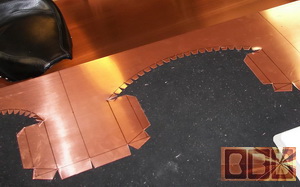
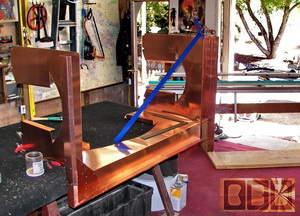
Stage 2:
The Base
(10/11/06)
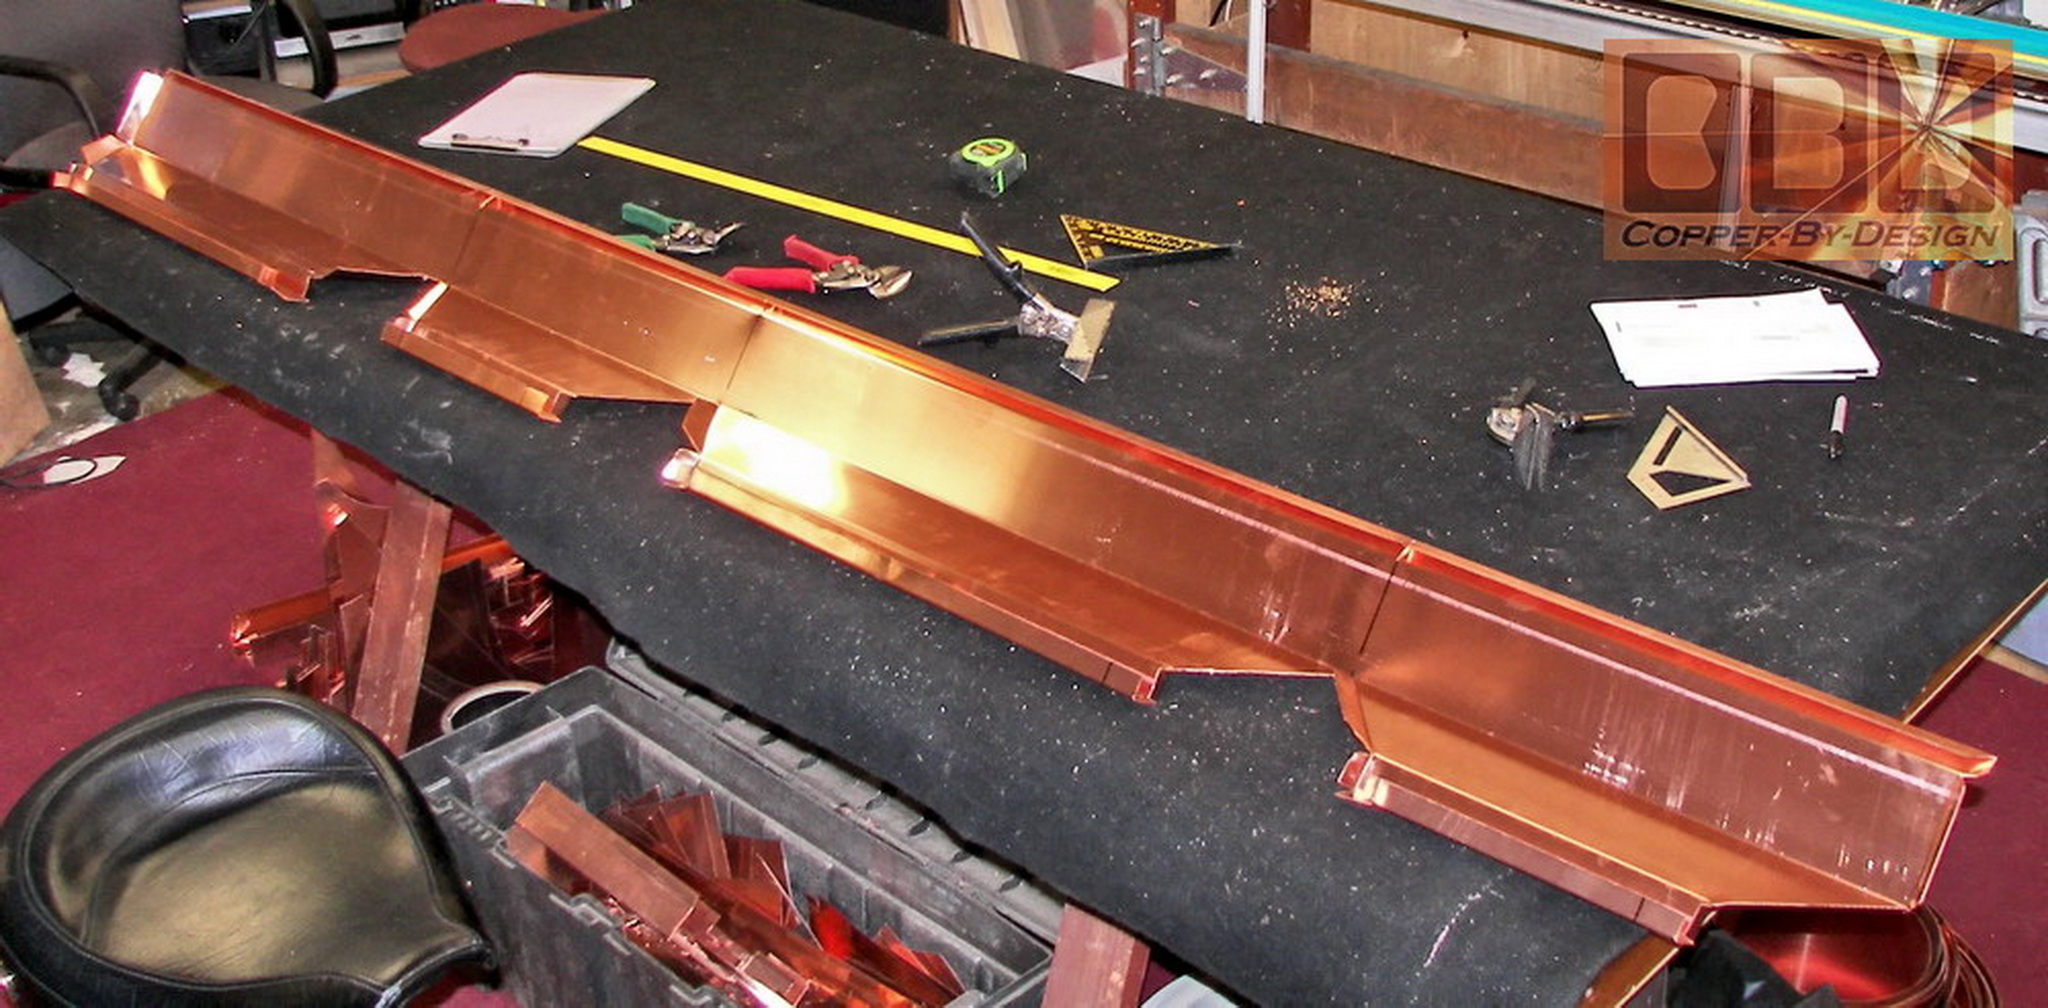
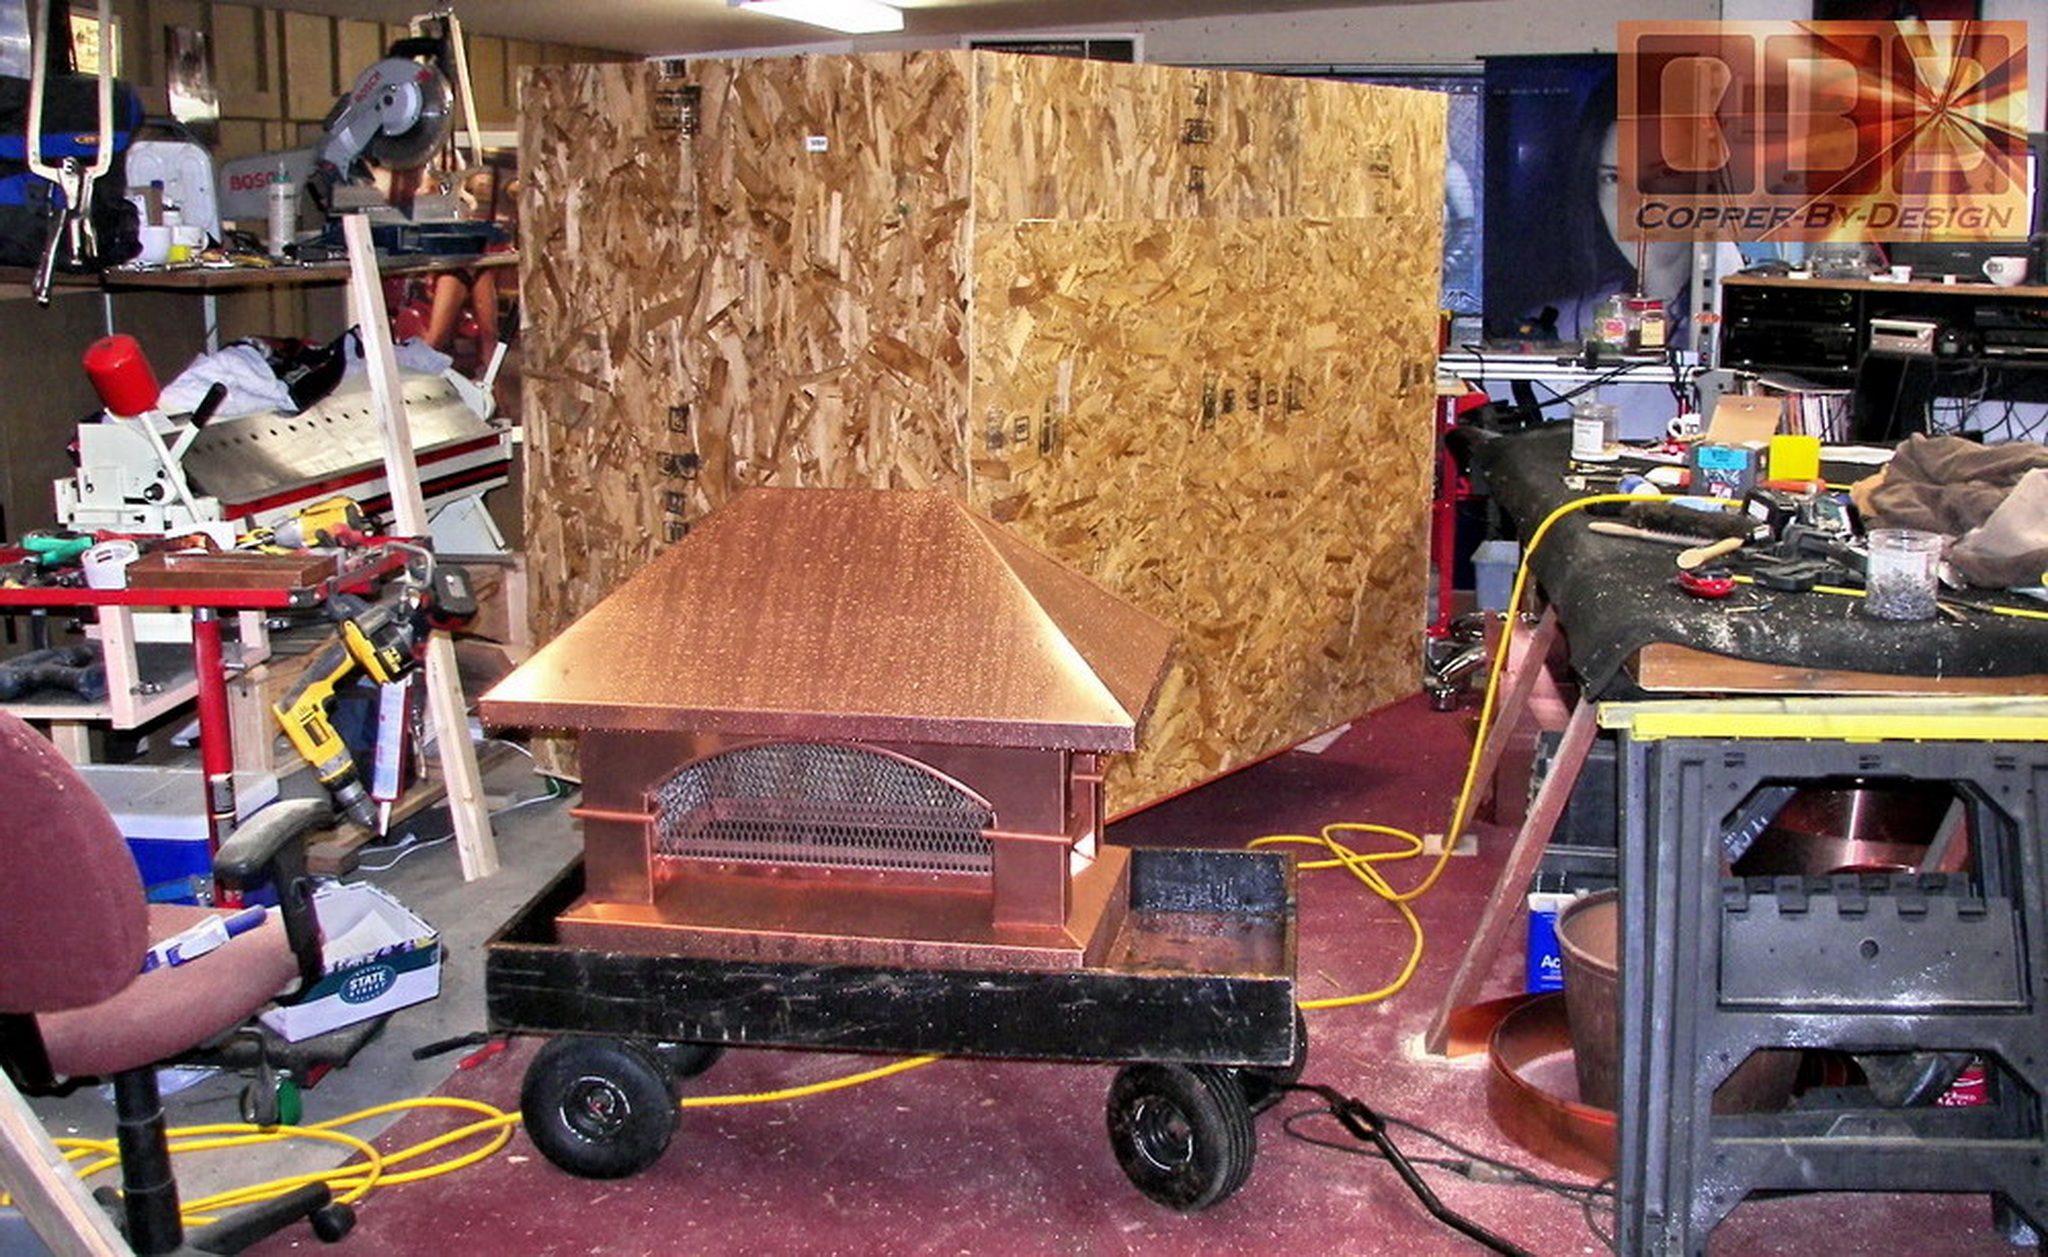
Beginning fabrication of the smaller chimney
cap . This one is over twice as long, which means it took
over 3.3 times as much metal to build to the same proportions. This
shows the base being formed with the stainless steel screen cage
set in the channel I made on the base.
|
| Stage
3: Mid Arched Column Section
(10/13/06)
The fabrication of the arched column section. This shows the arched column frame being bade in one single piece.
The test fit was good.
|
|
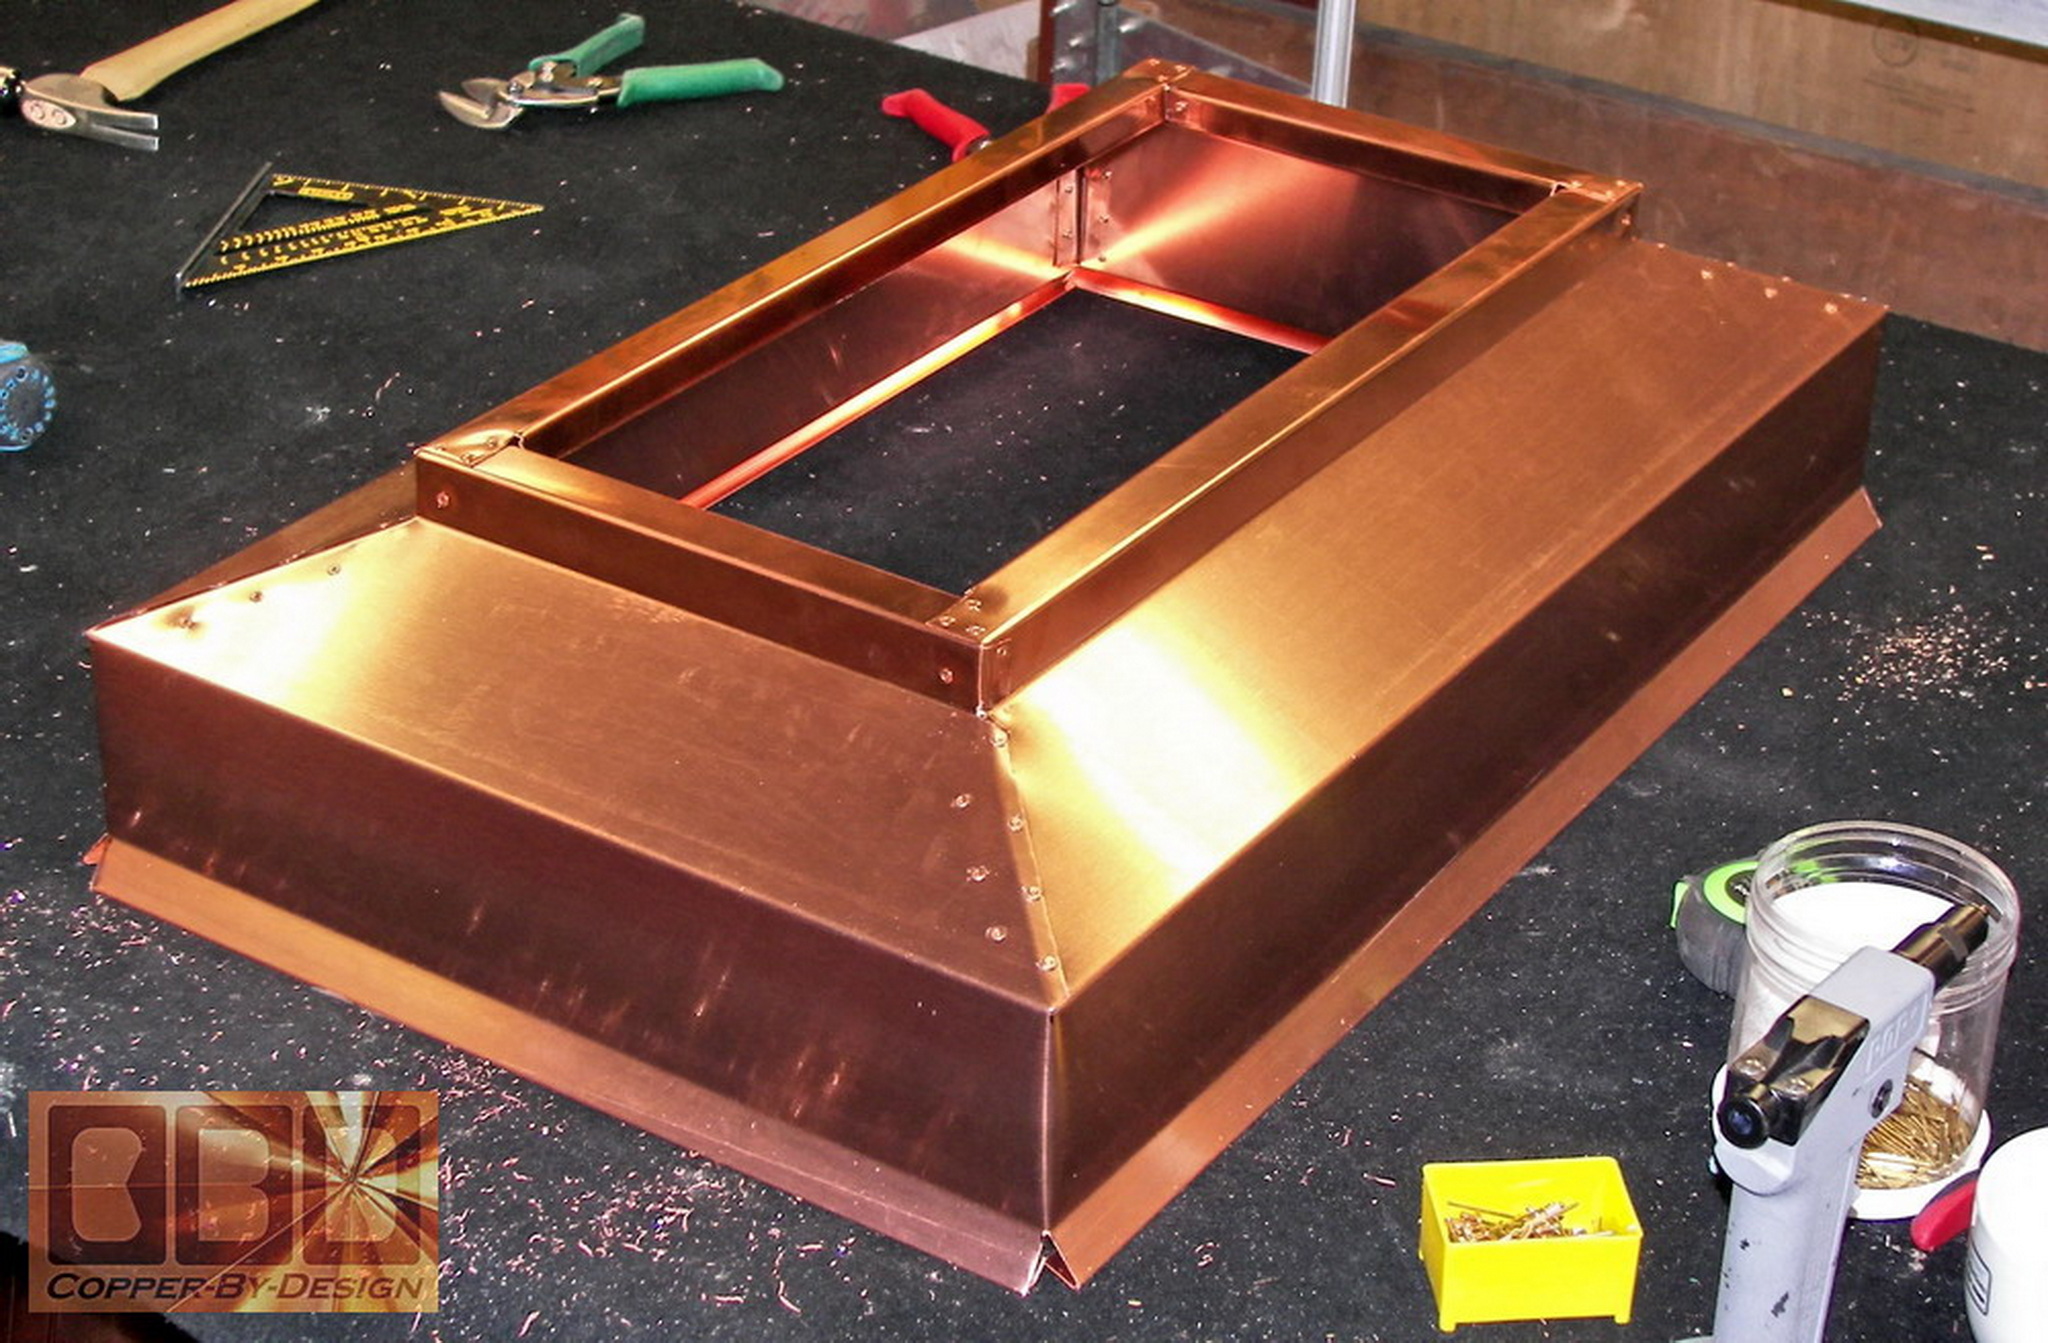
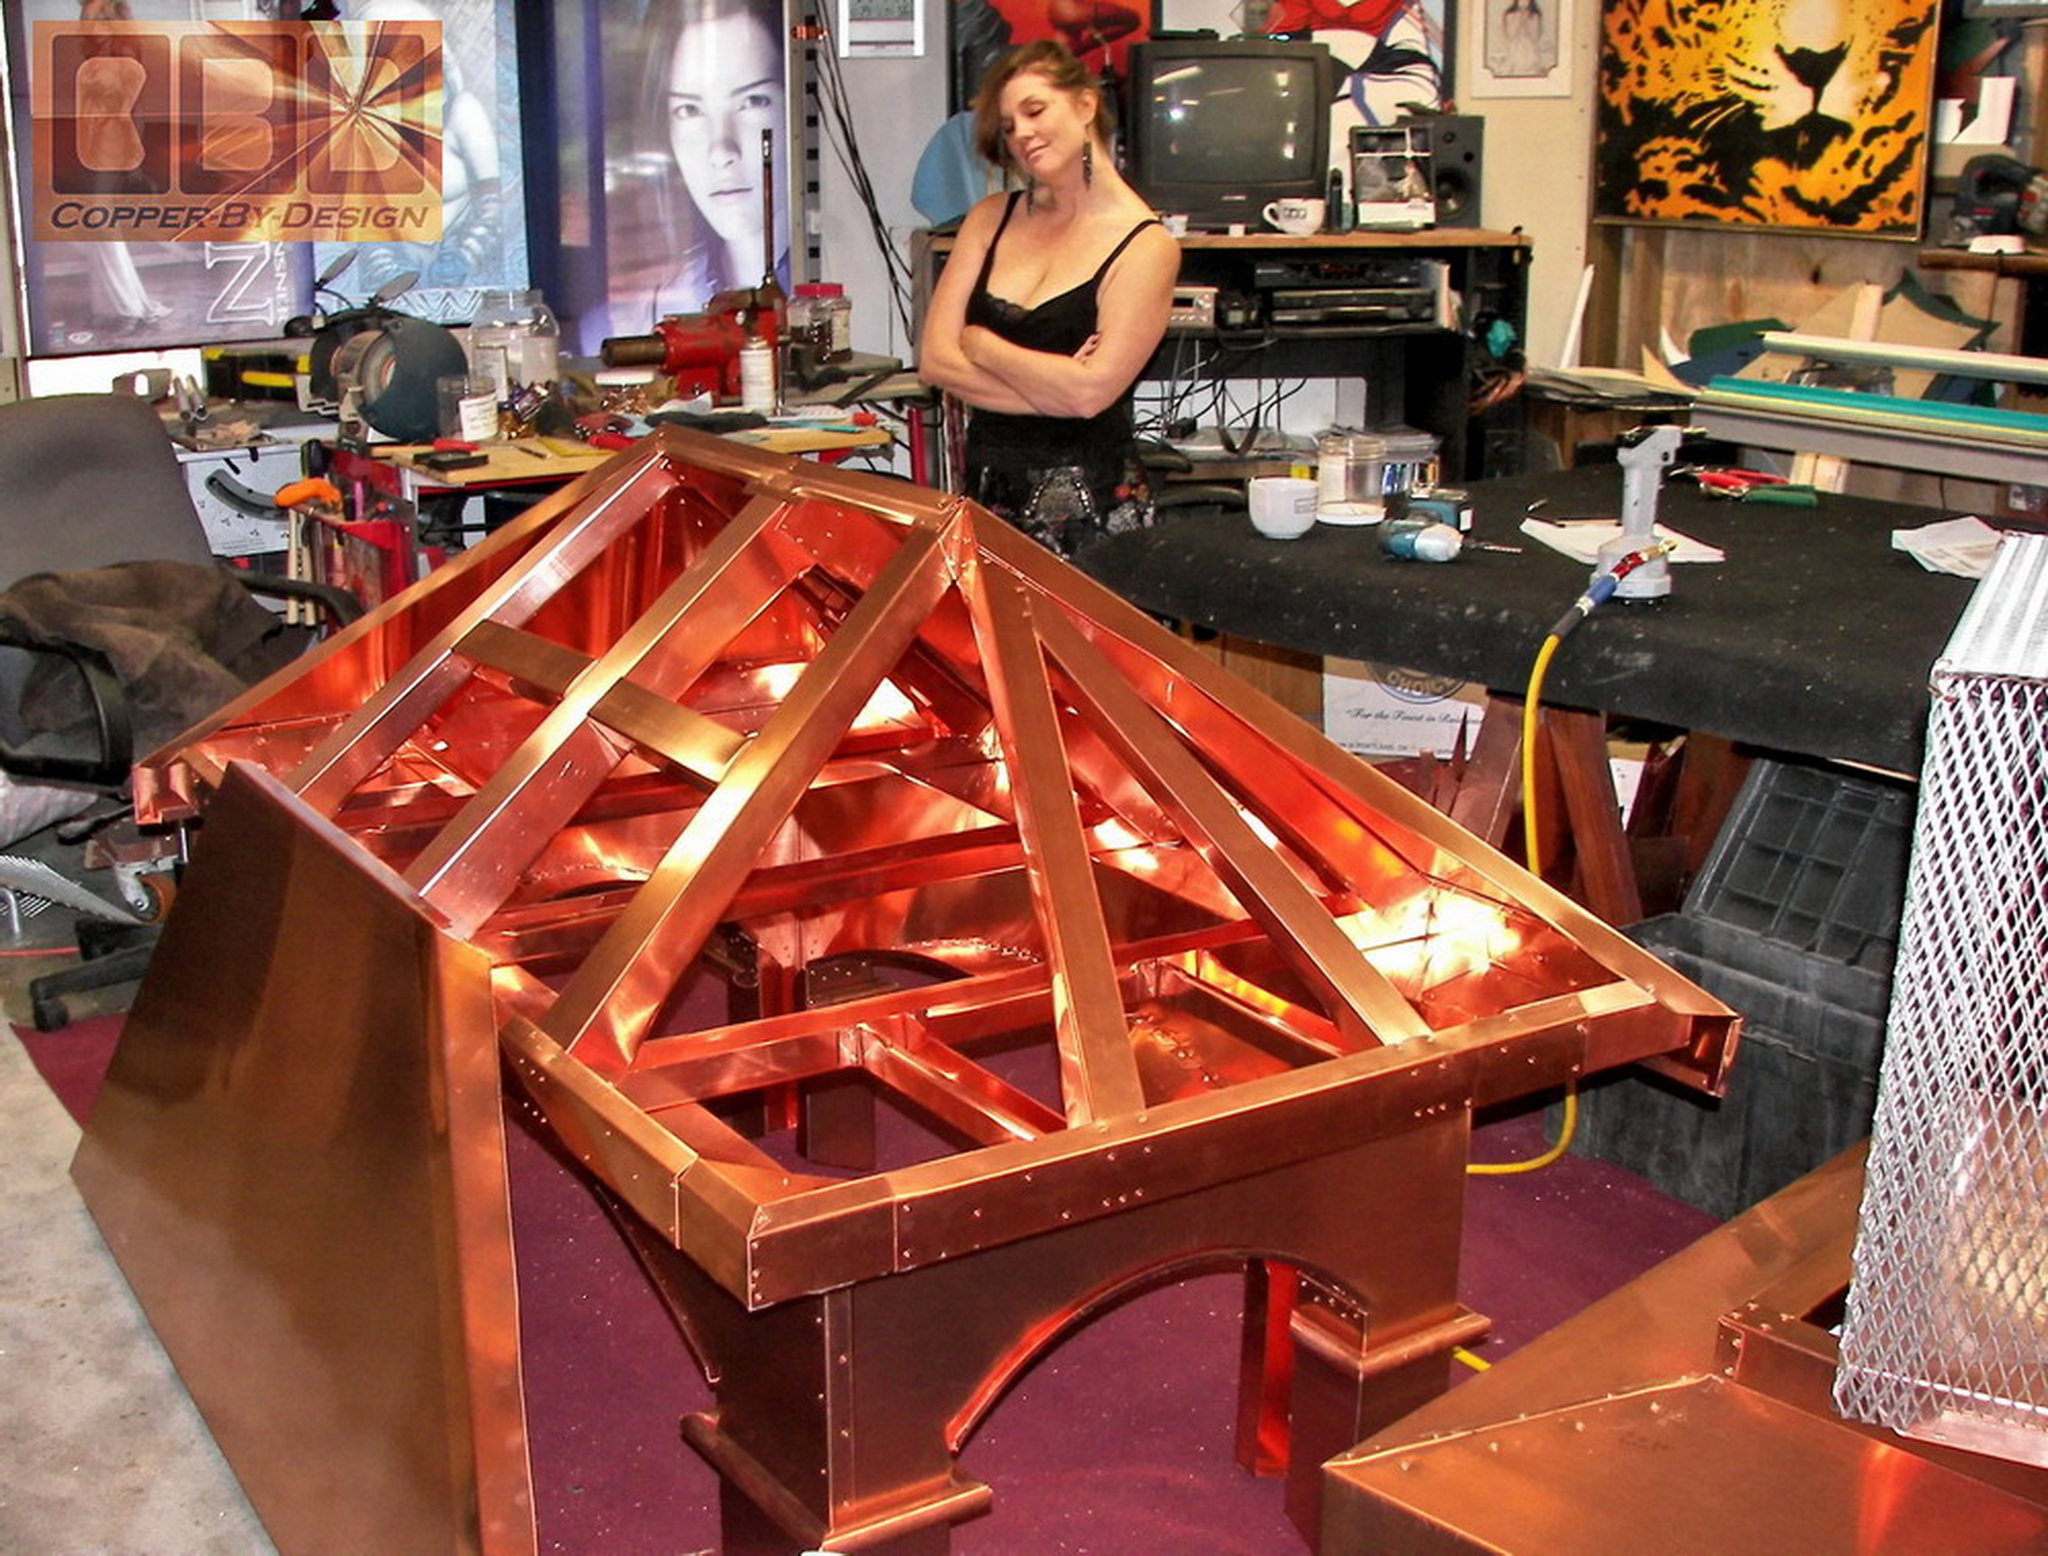
Stage 4:
Roof Framework (10/14/06)
The corners of the soffit
need filled in and the roof bracing goes on. I built these
2" wide roof braces over that to support the roof panels from impacts
and snow loads that could occur. Once assembled it was structurally
solid feeling and does not seem to have any flex to it when lifted
up on one corner. I think this is the sturdiest chimney cap I have
made to date.
|
|
Stage 5:
Finishing Mid-section Details
& Attachment to the Base (10/16/06)
The arch frame needs
attached to the flanges between the columns.
Attaching the decorative piping on the columns
and fastening this to the base.
This shows the stainless
steel screen riveted under the roof bracing to make a fully enclosed
cage.
|
|
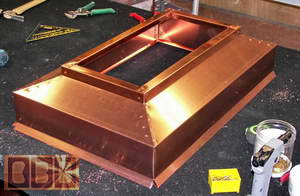
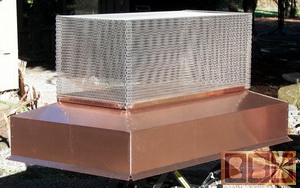
Stage 6:
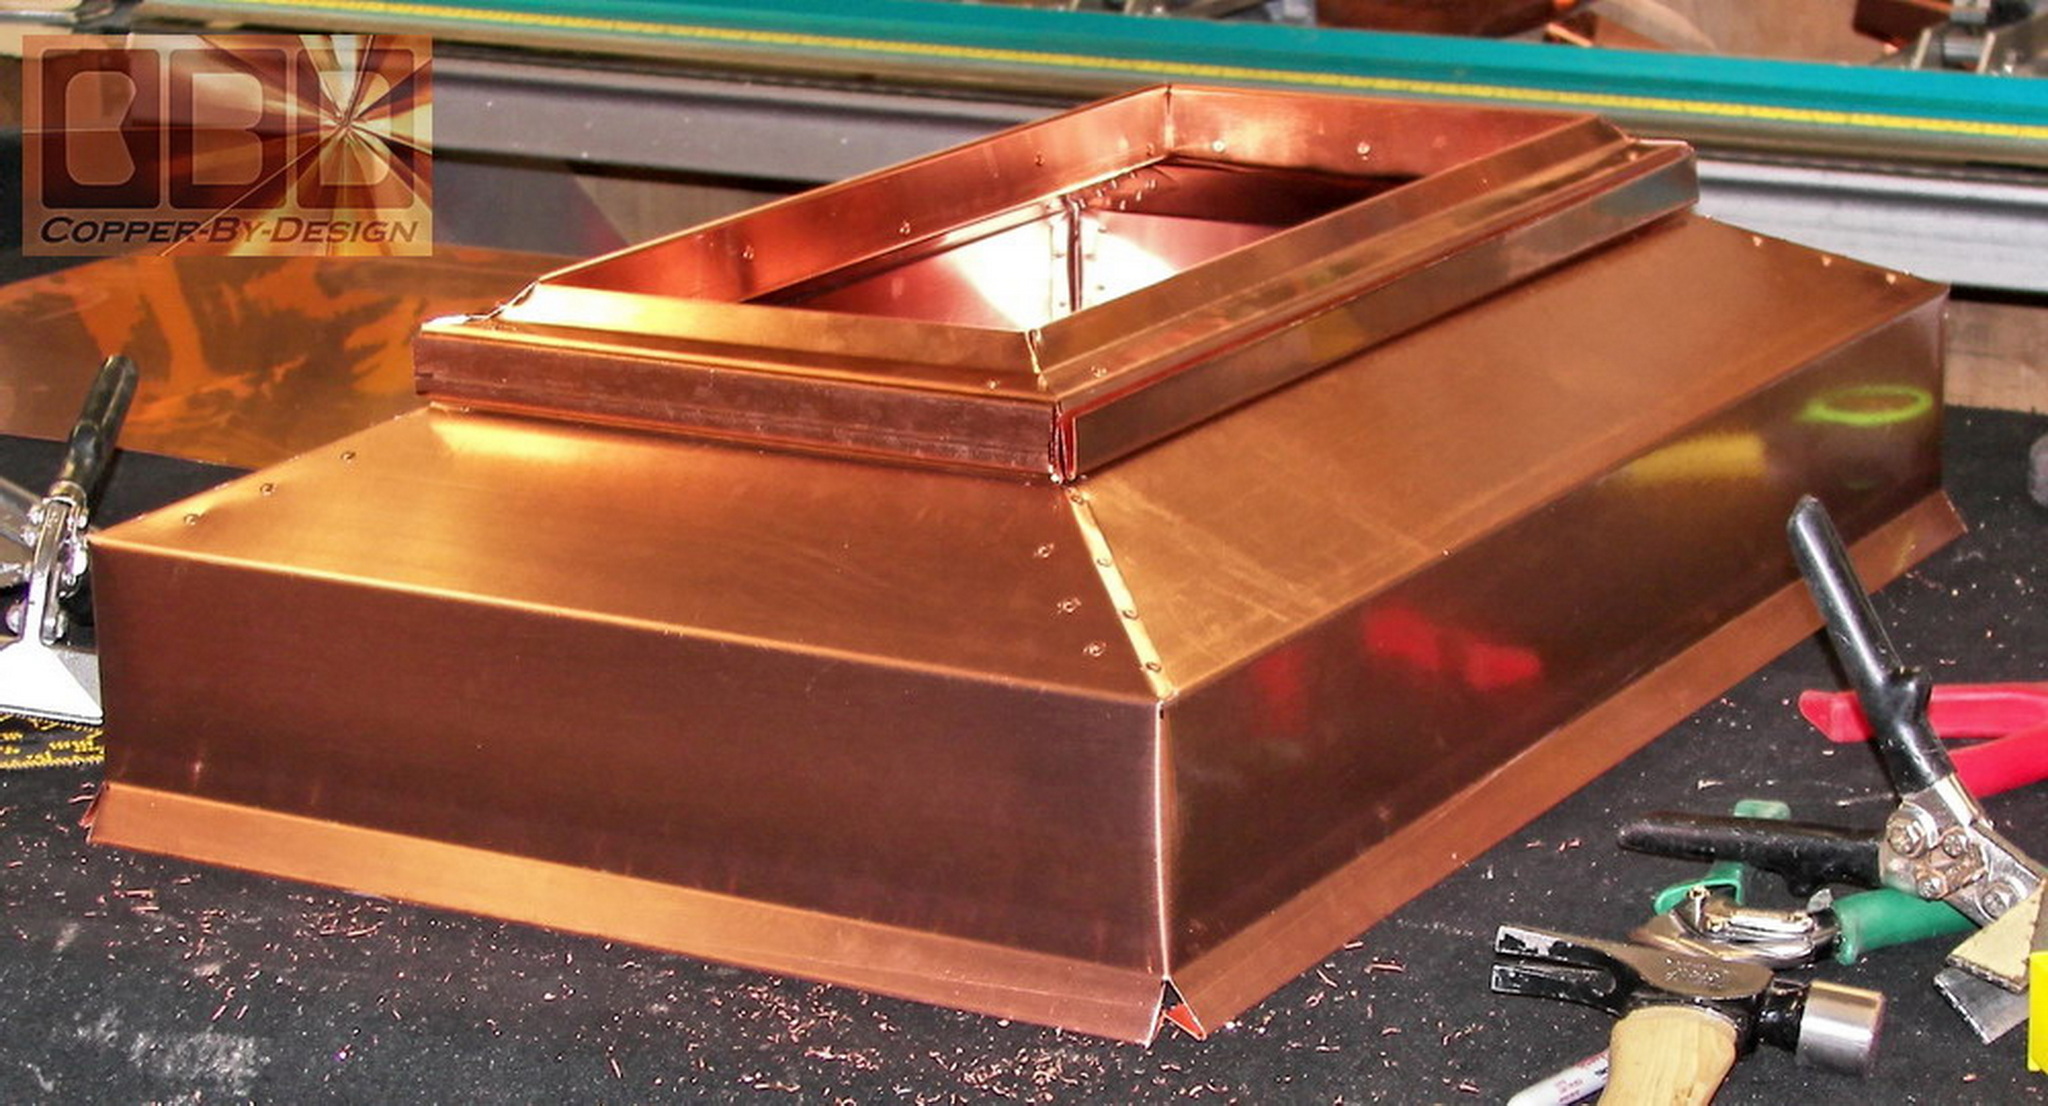
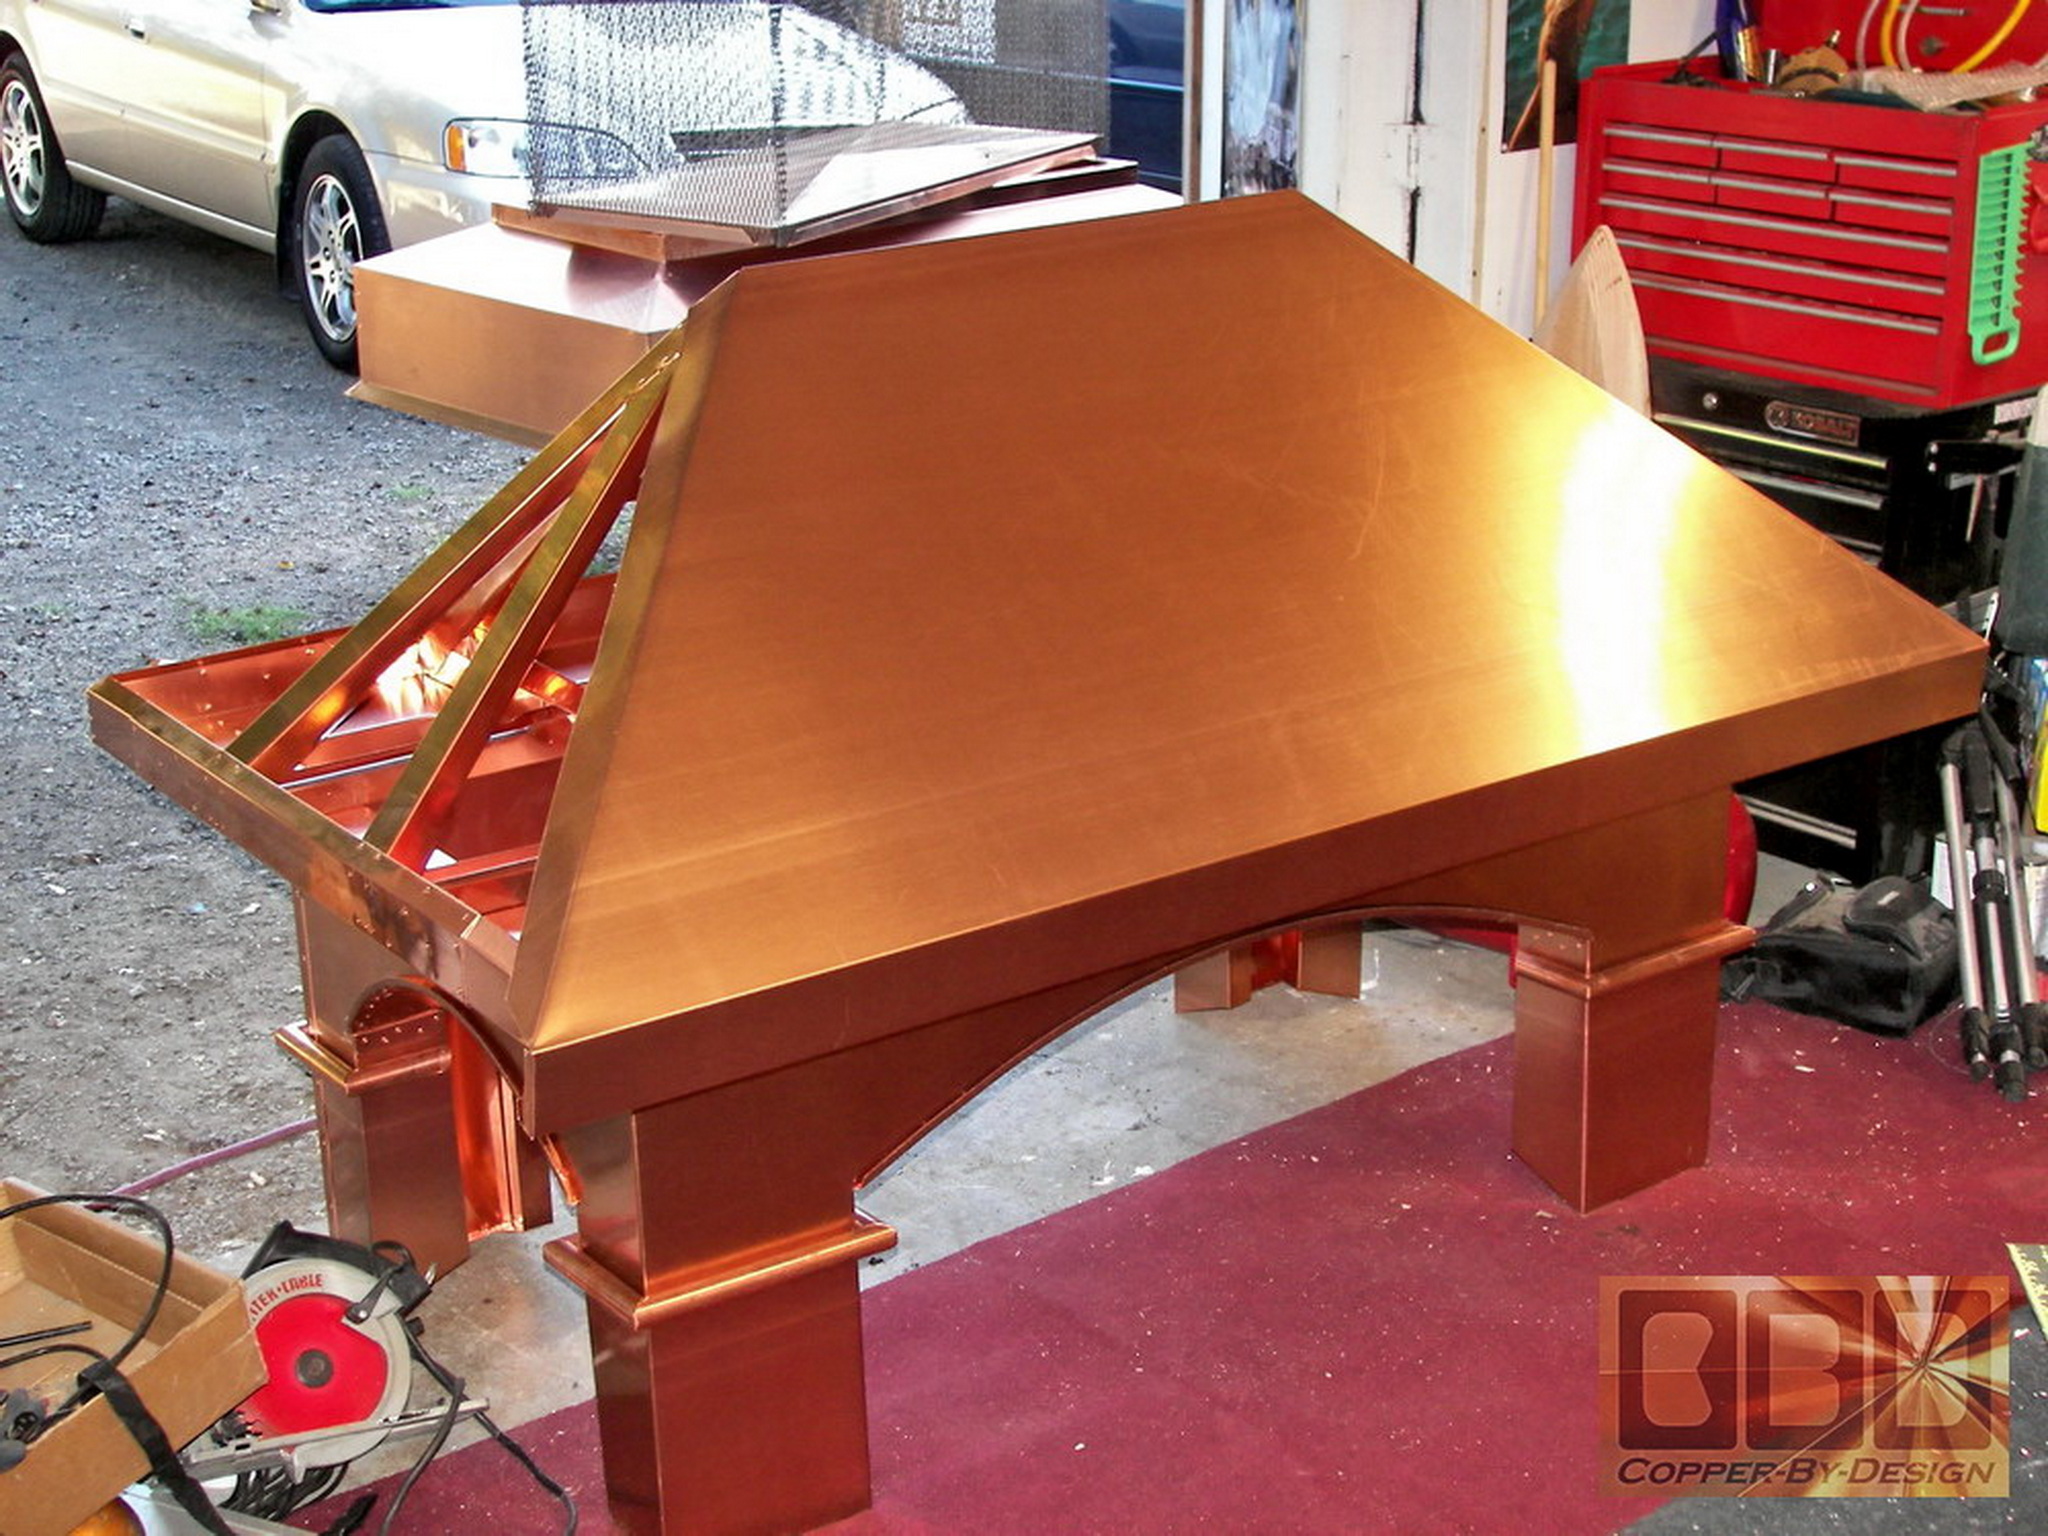
Roof Cover (10/17/06)
Then the 2 part roof skin goes over the bracing
and riveted in place.
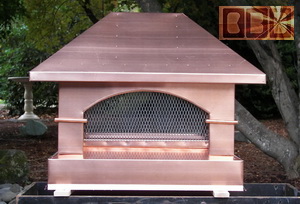 
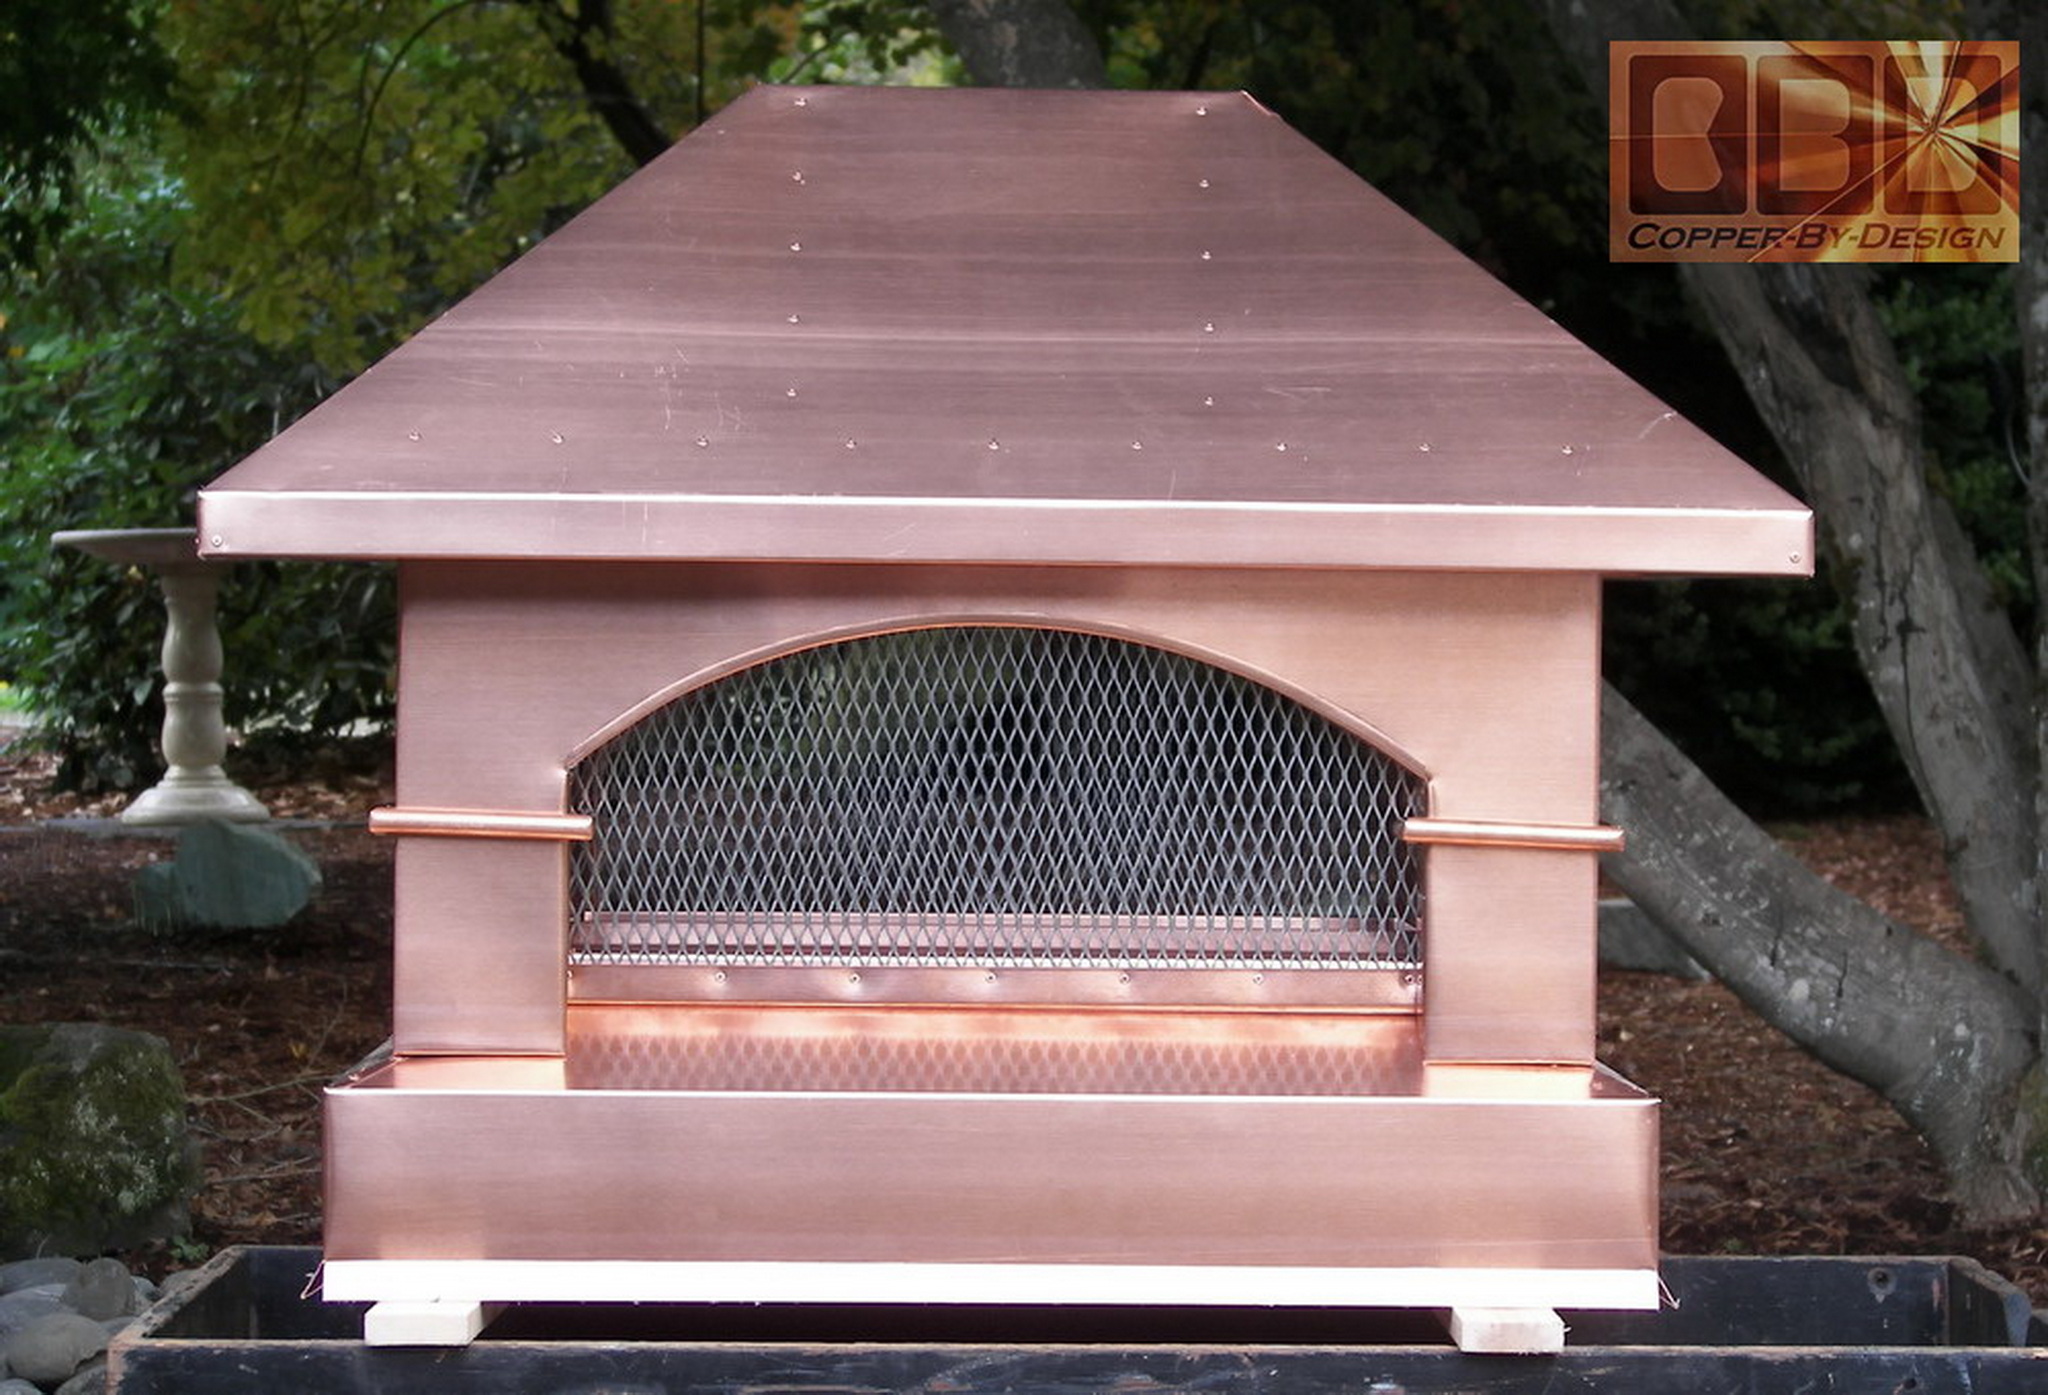
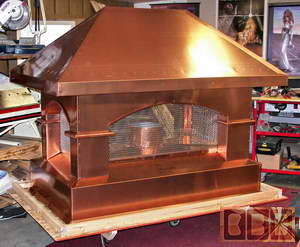
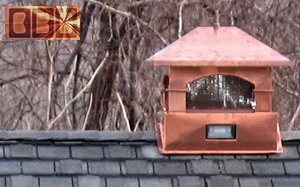
This is the small chimney
cap complete with a base rim of 32.75"long and 20.25" wide inside
measurements. The sides of the base are 4.25" tall plus the drip-edge
kick-out at the bottom. The arched frame that supports the roof
over the base you see below is 14.5" tall with 8" tall screened
vent openings that are 20.5" wide. If you look at the larger
images that these smaller images link to; you
can see the thin clear vinyl protective film on it covering the
outer shell of the 20oz copper we use. They will need to peel this
plastic film off after they install the chimney caps, so the copper
can tarnish as it should. The final weight was 66 pounds.
That equates to 48.48 square feet of copper and 8 square feet of
the SS screen.
|
|
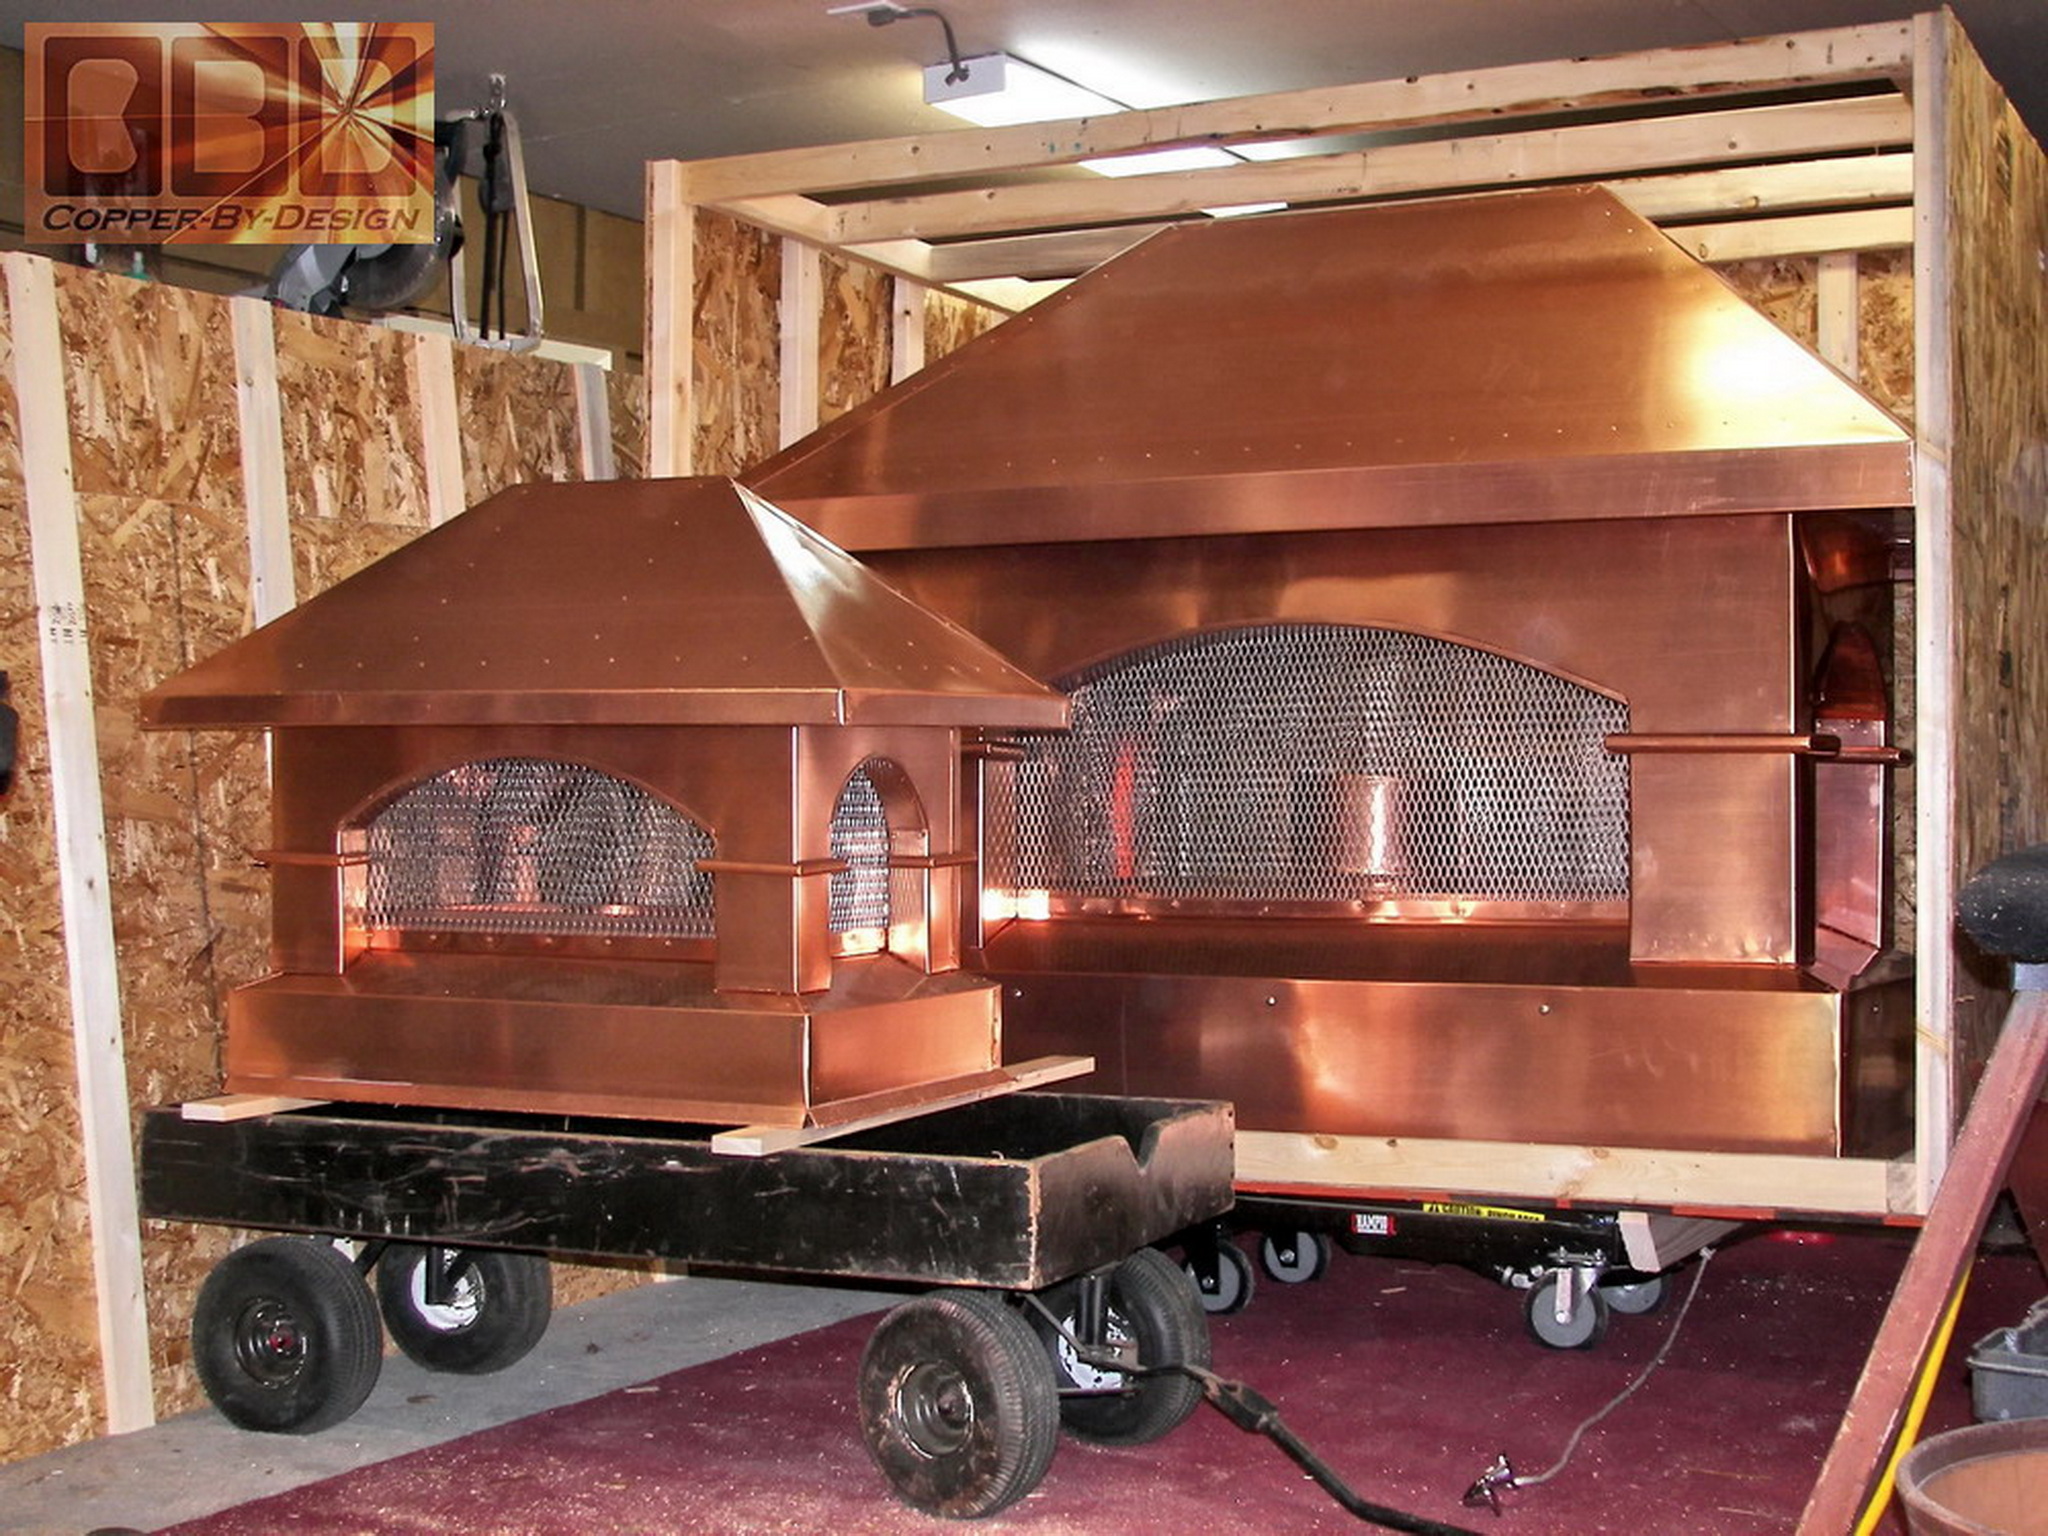
$1,614.40 -
small chimney cap 48.48 sq' x $30 per sq' plus 8 sq' SS screen x
$20
|
|
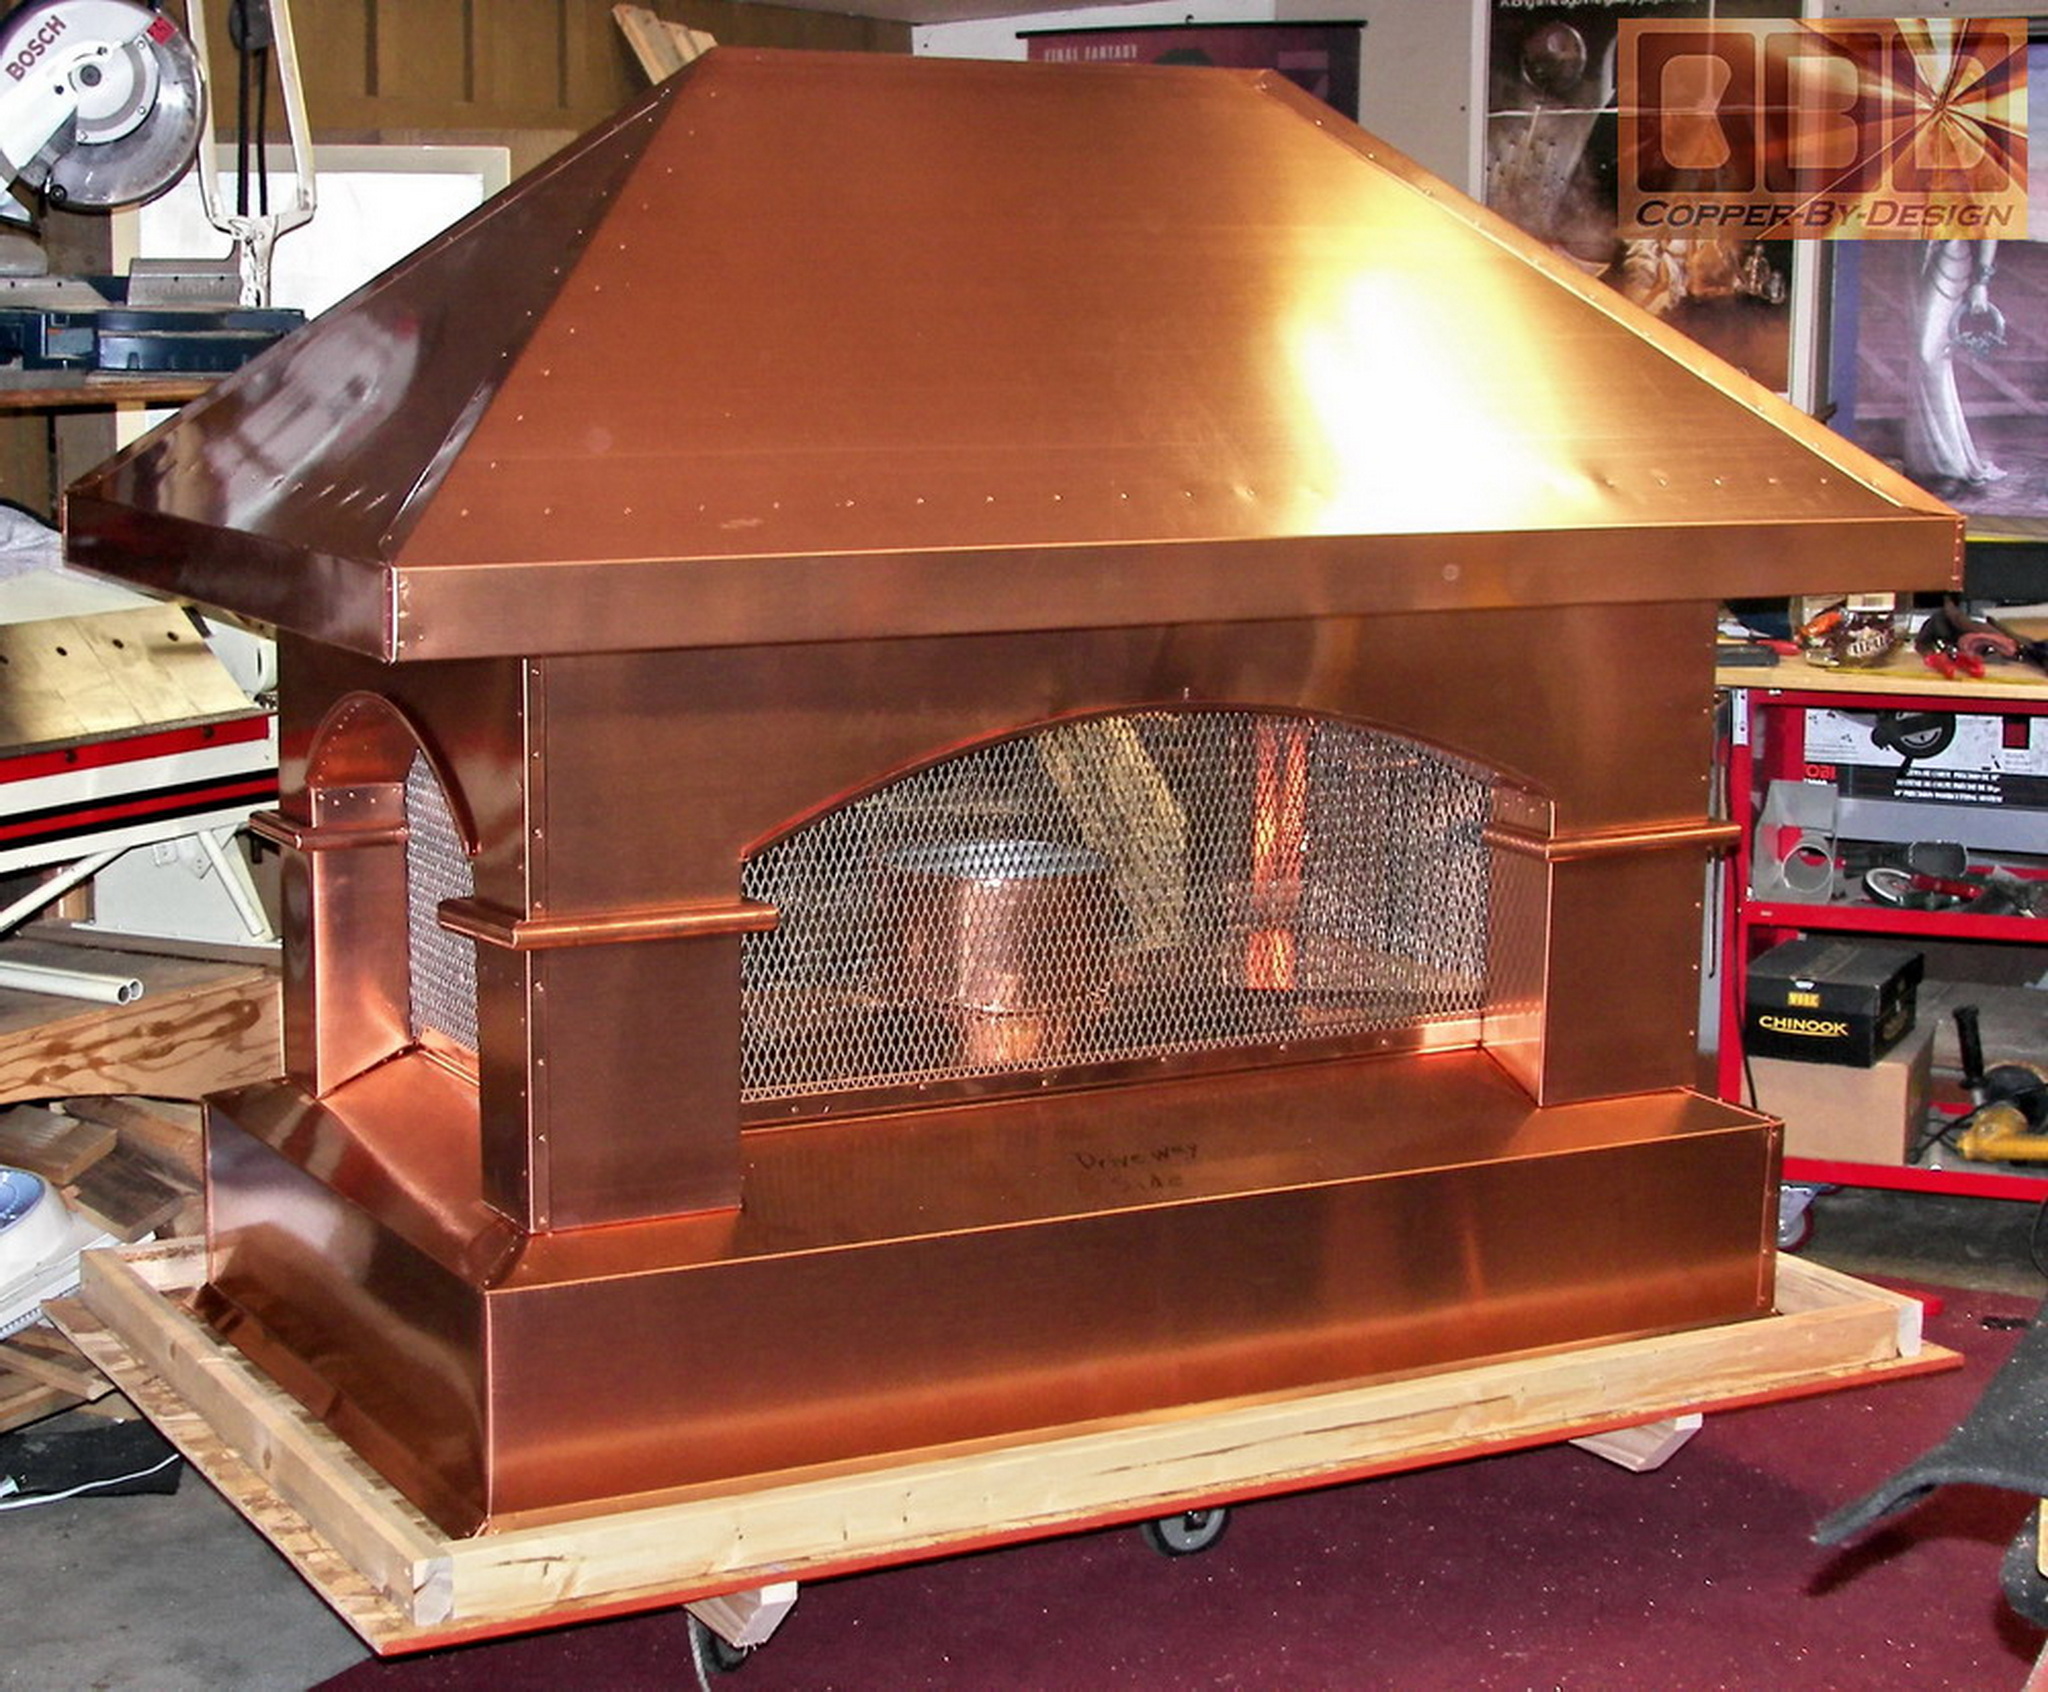
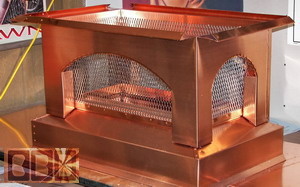
The
Larger Chimney
Cap Fabrication
|
| Stage
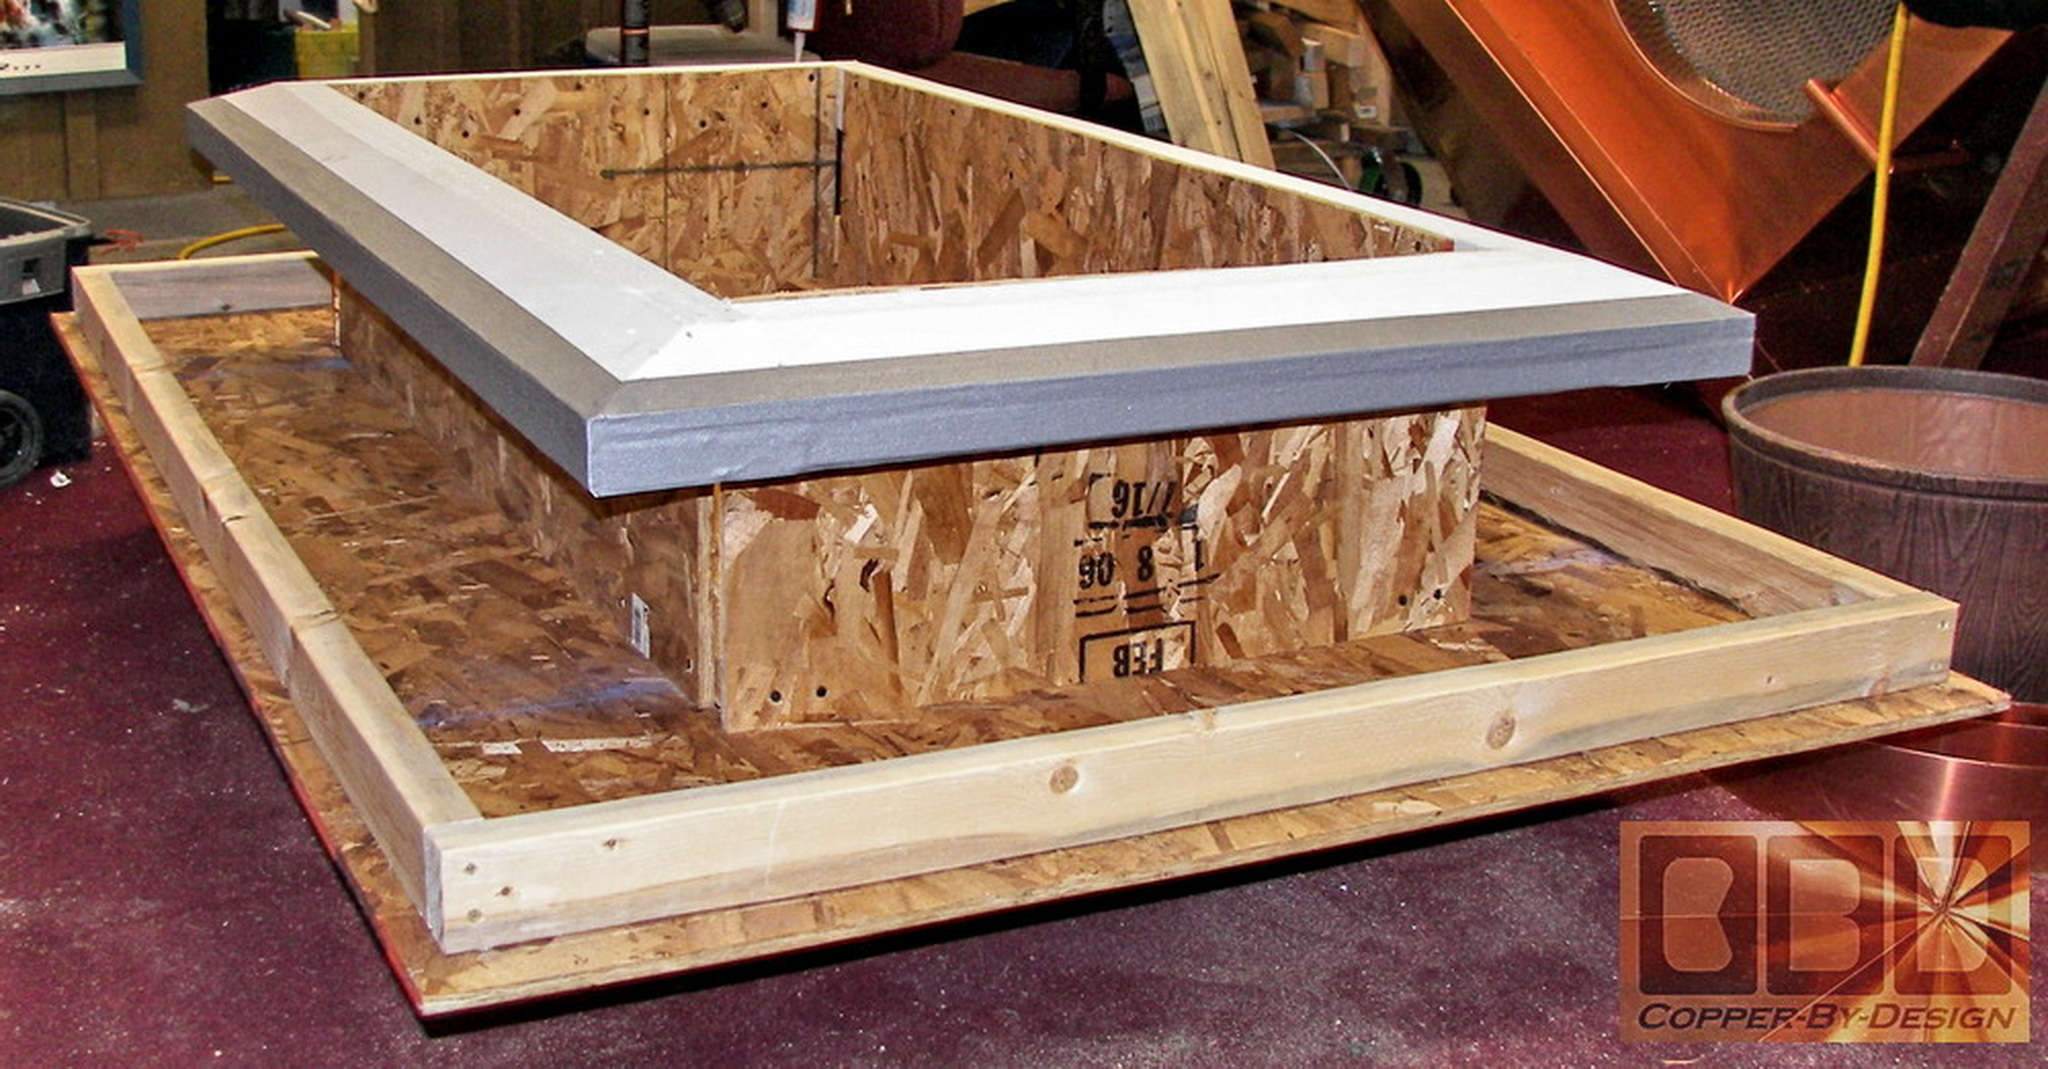
7: The Wood Saddle
(10/19/06)
I first had to build this frame to set the copper base on while
I work on it. This was made with 5/4" x 6 pre-primed fascia boards
glued and screwed together. Then I had to angle cut the top to match
the angel of the copper chimney cap base section.
|
|
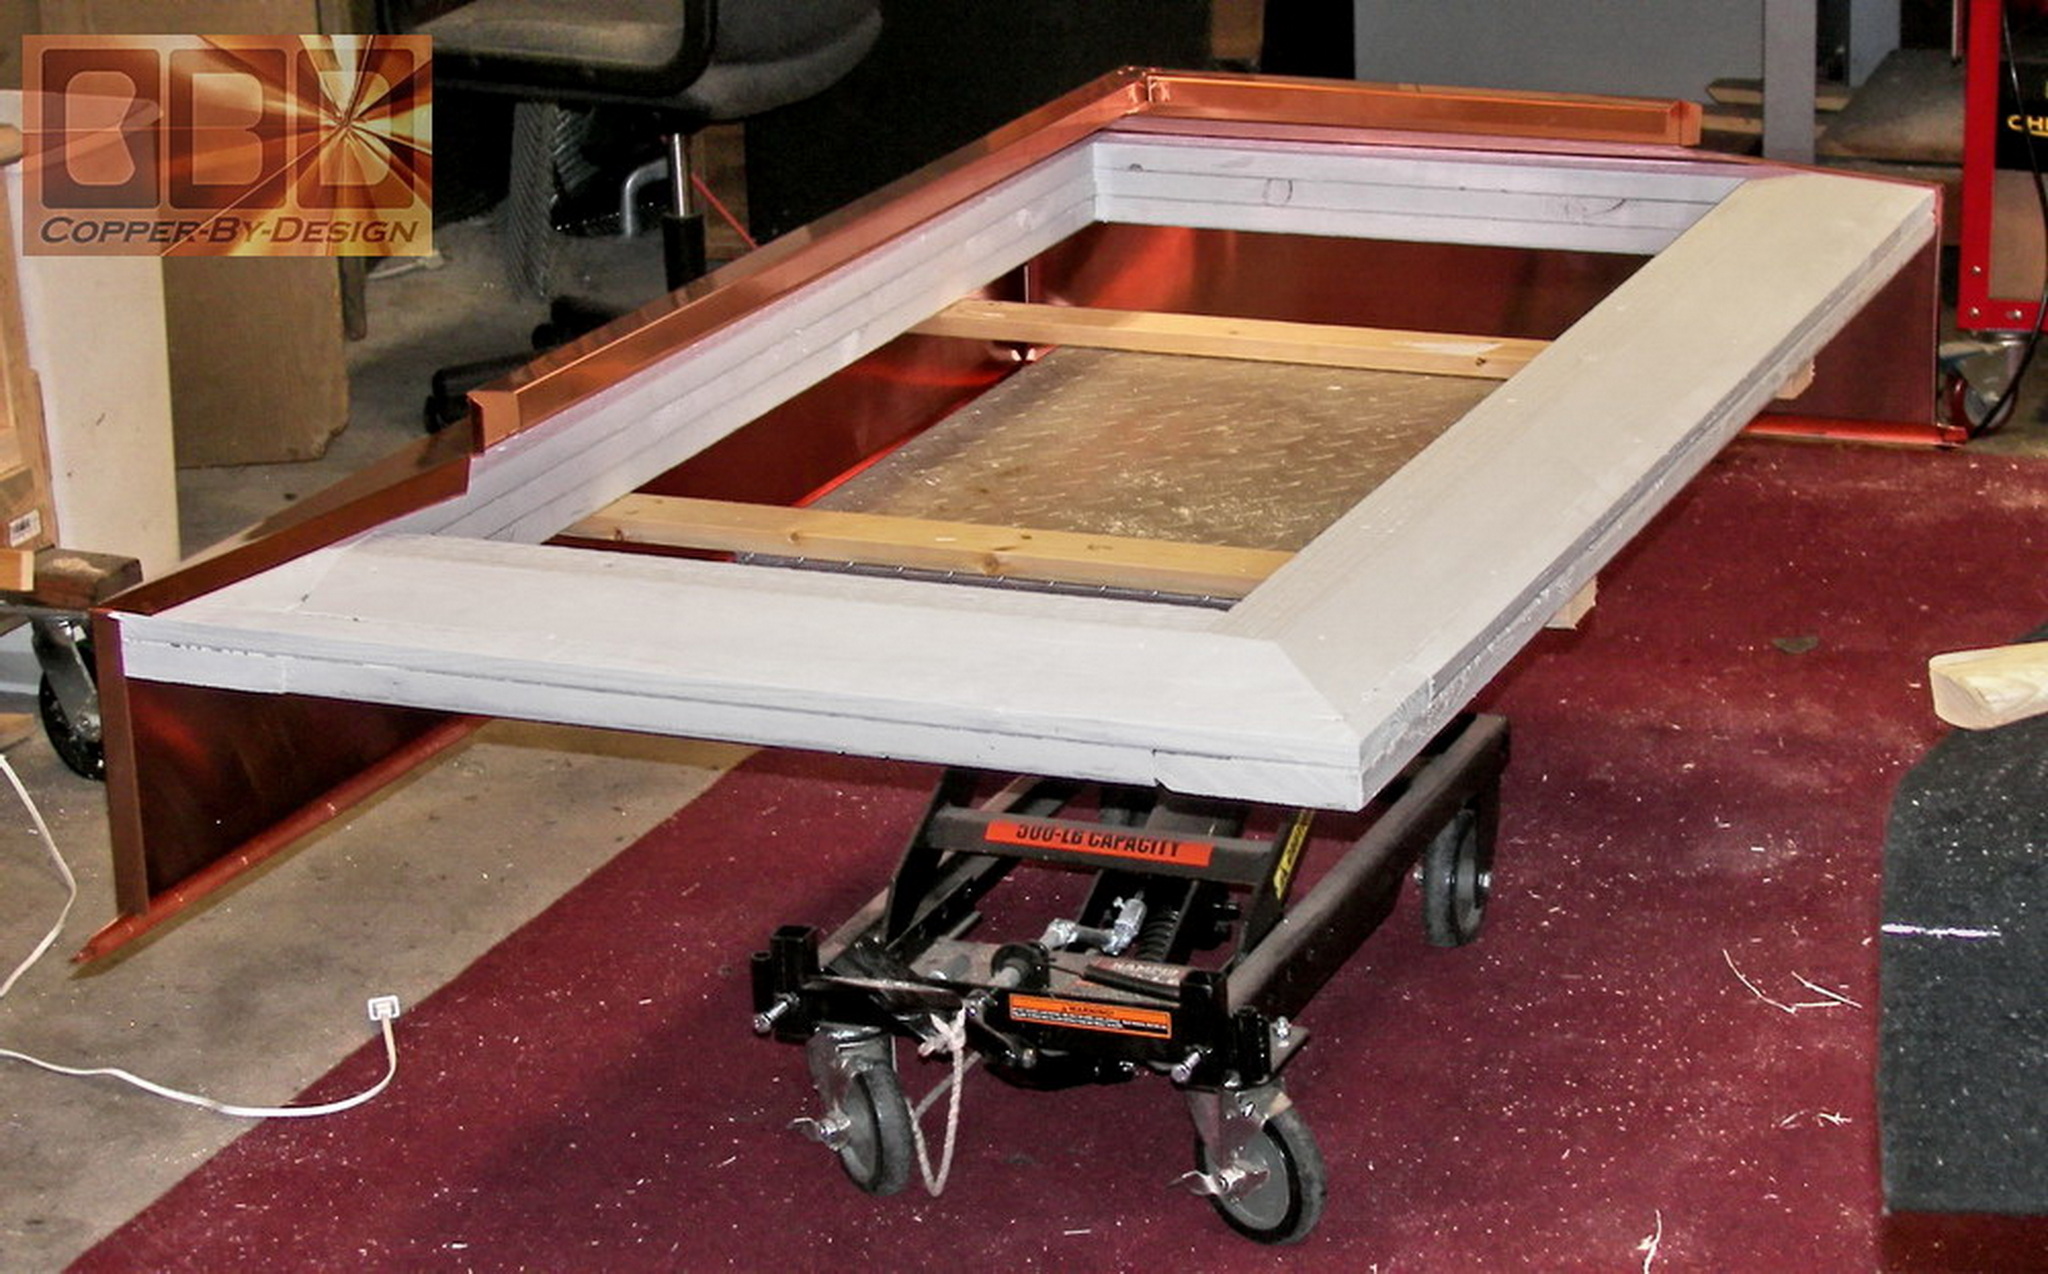
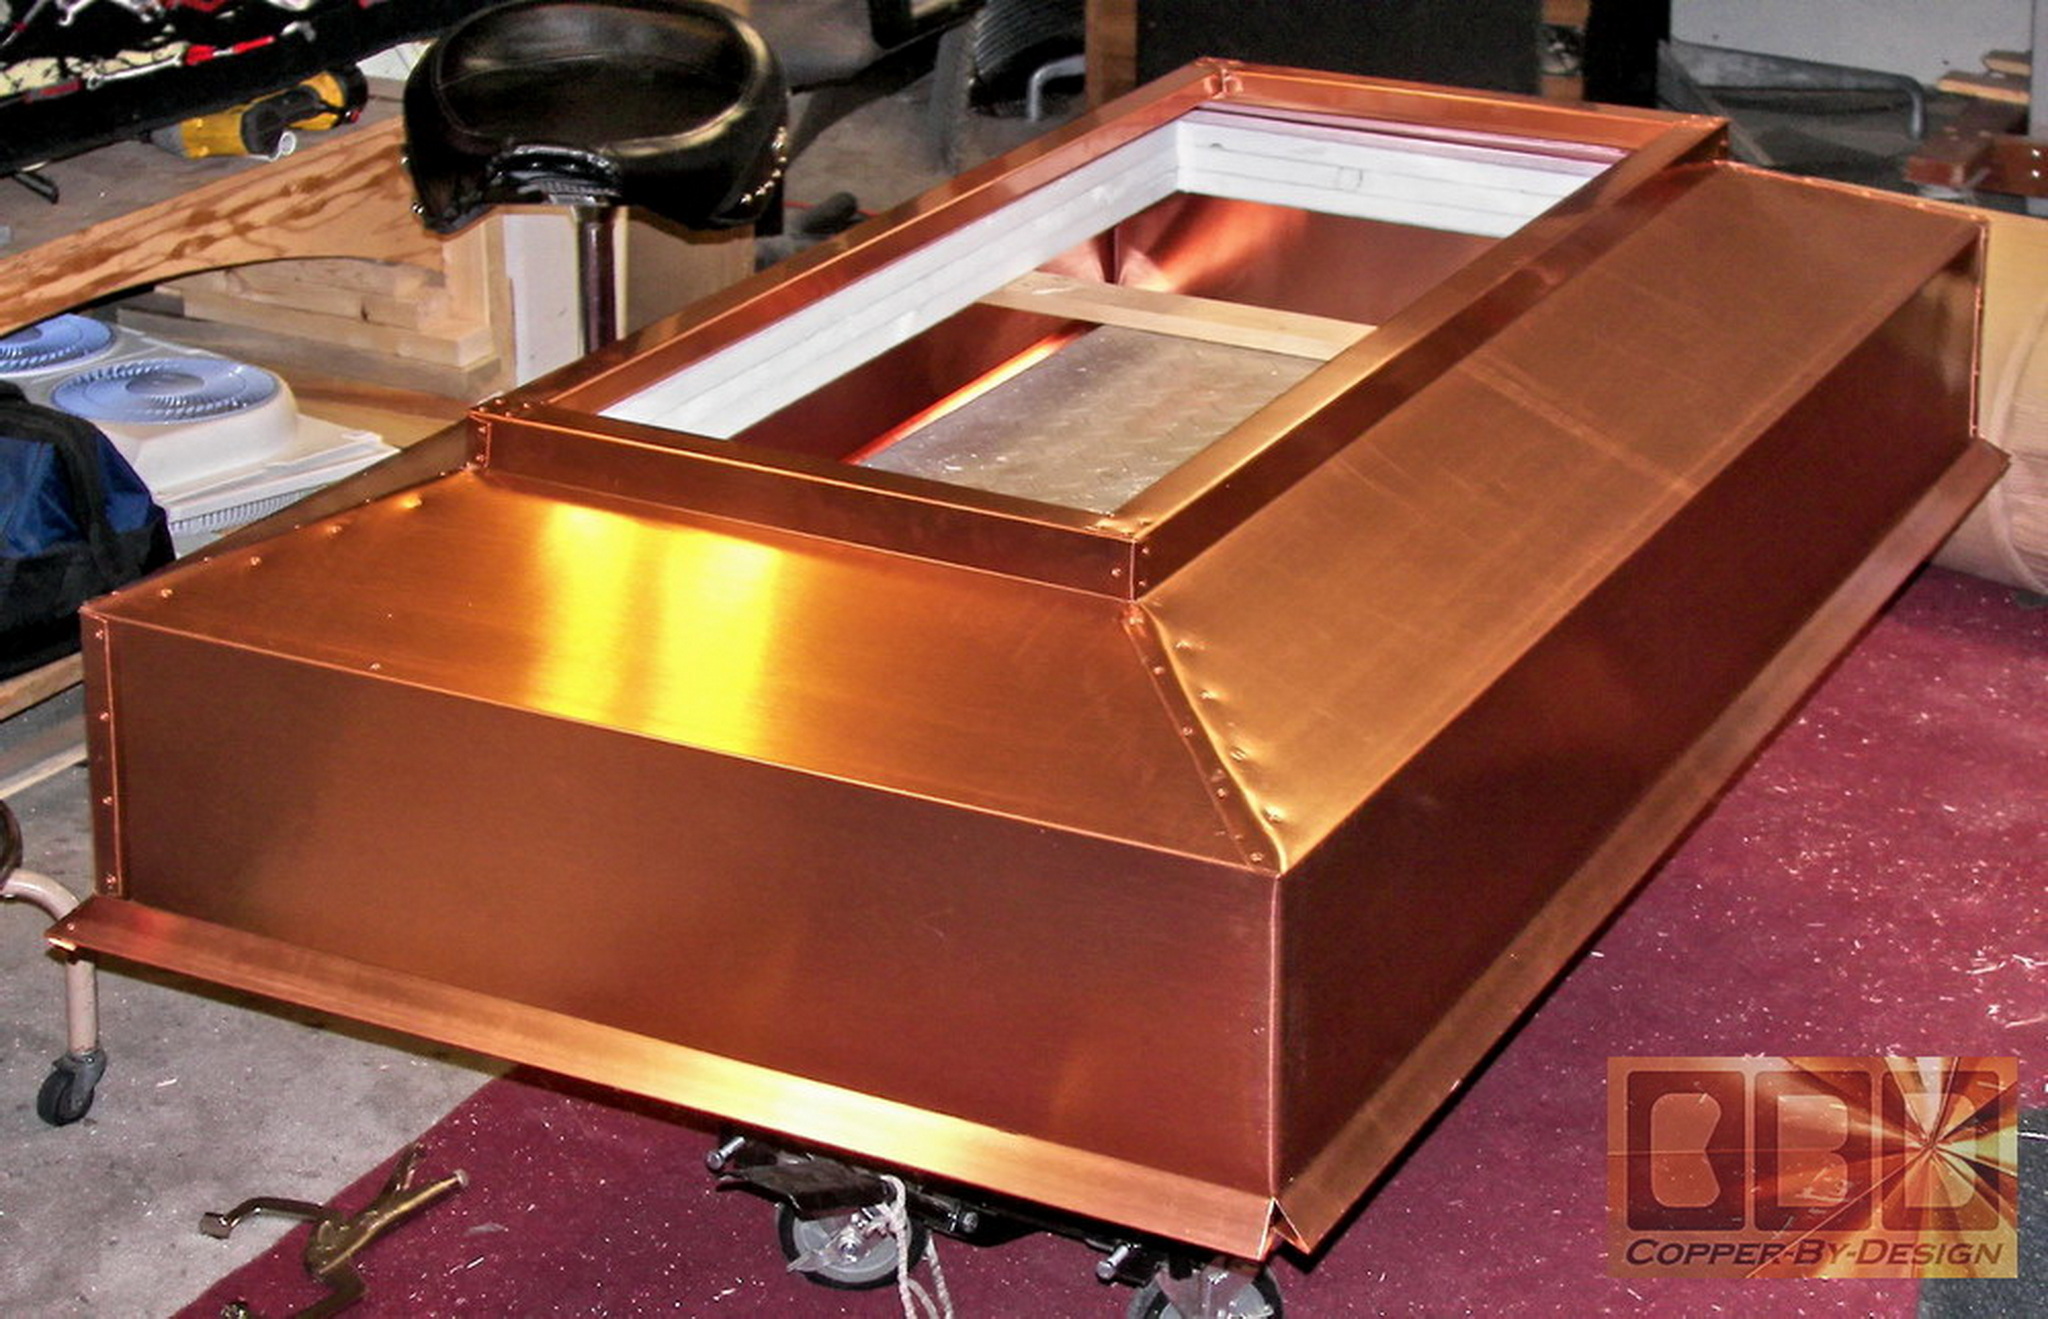
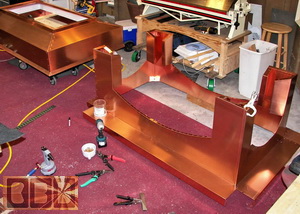
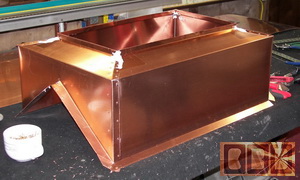
Stage 8:
The Copper Base & Center Pan
(10/11/06)
Here is the first 2 sides of the copper base
being formed in one piece, folded, and sealed. Then set on the wood
saddle that is suspended up off the floor.
Here is the first other 2 sides of the copper
base attached to the first part and sealed together. Then the center
pan is made to cover the middle with a channel for the stainless
steel spark arrest screen to set in around the edge of this pan.
I bent this big X in the middle of the pan to help raise it up in
the center, so the splashing rain will drain out to the sides.
 
|
|
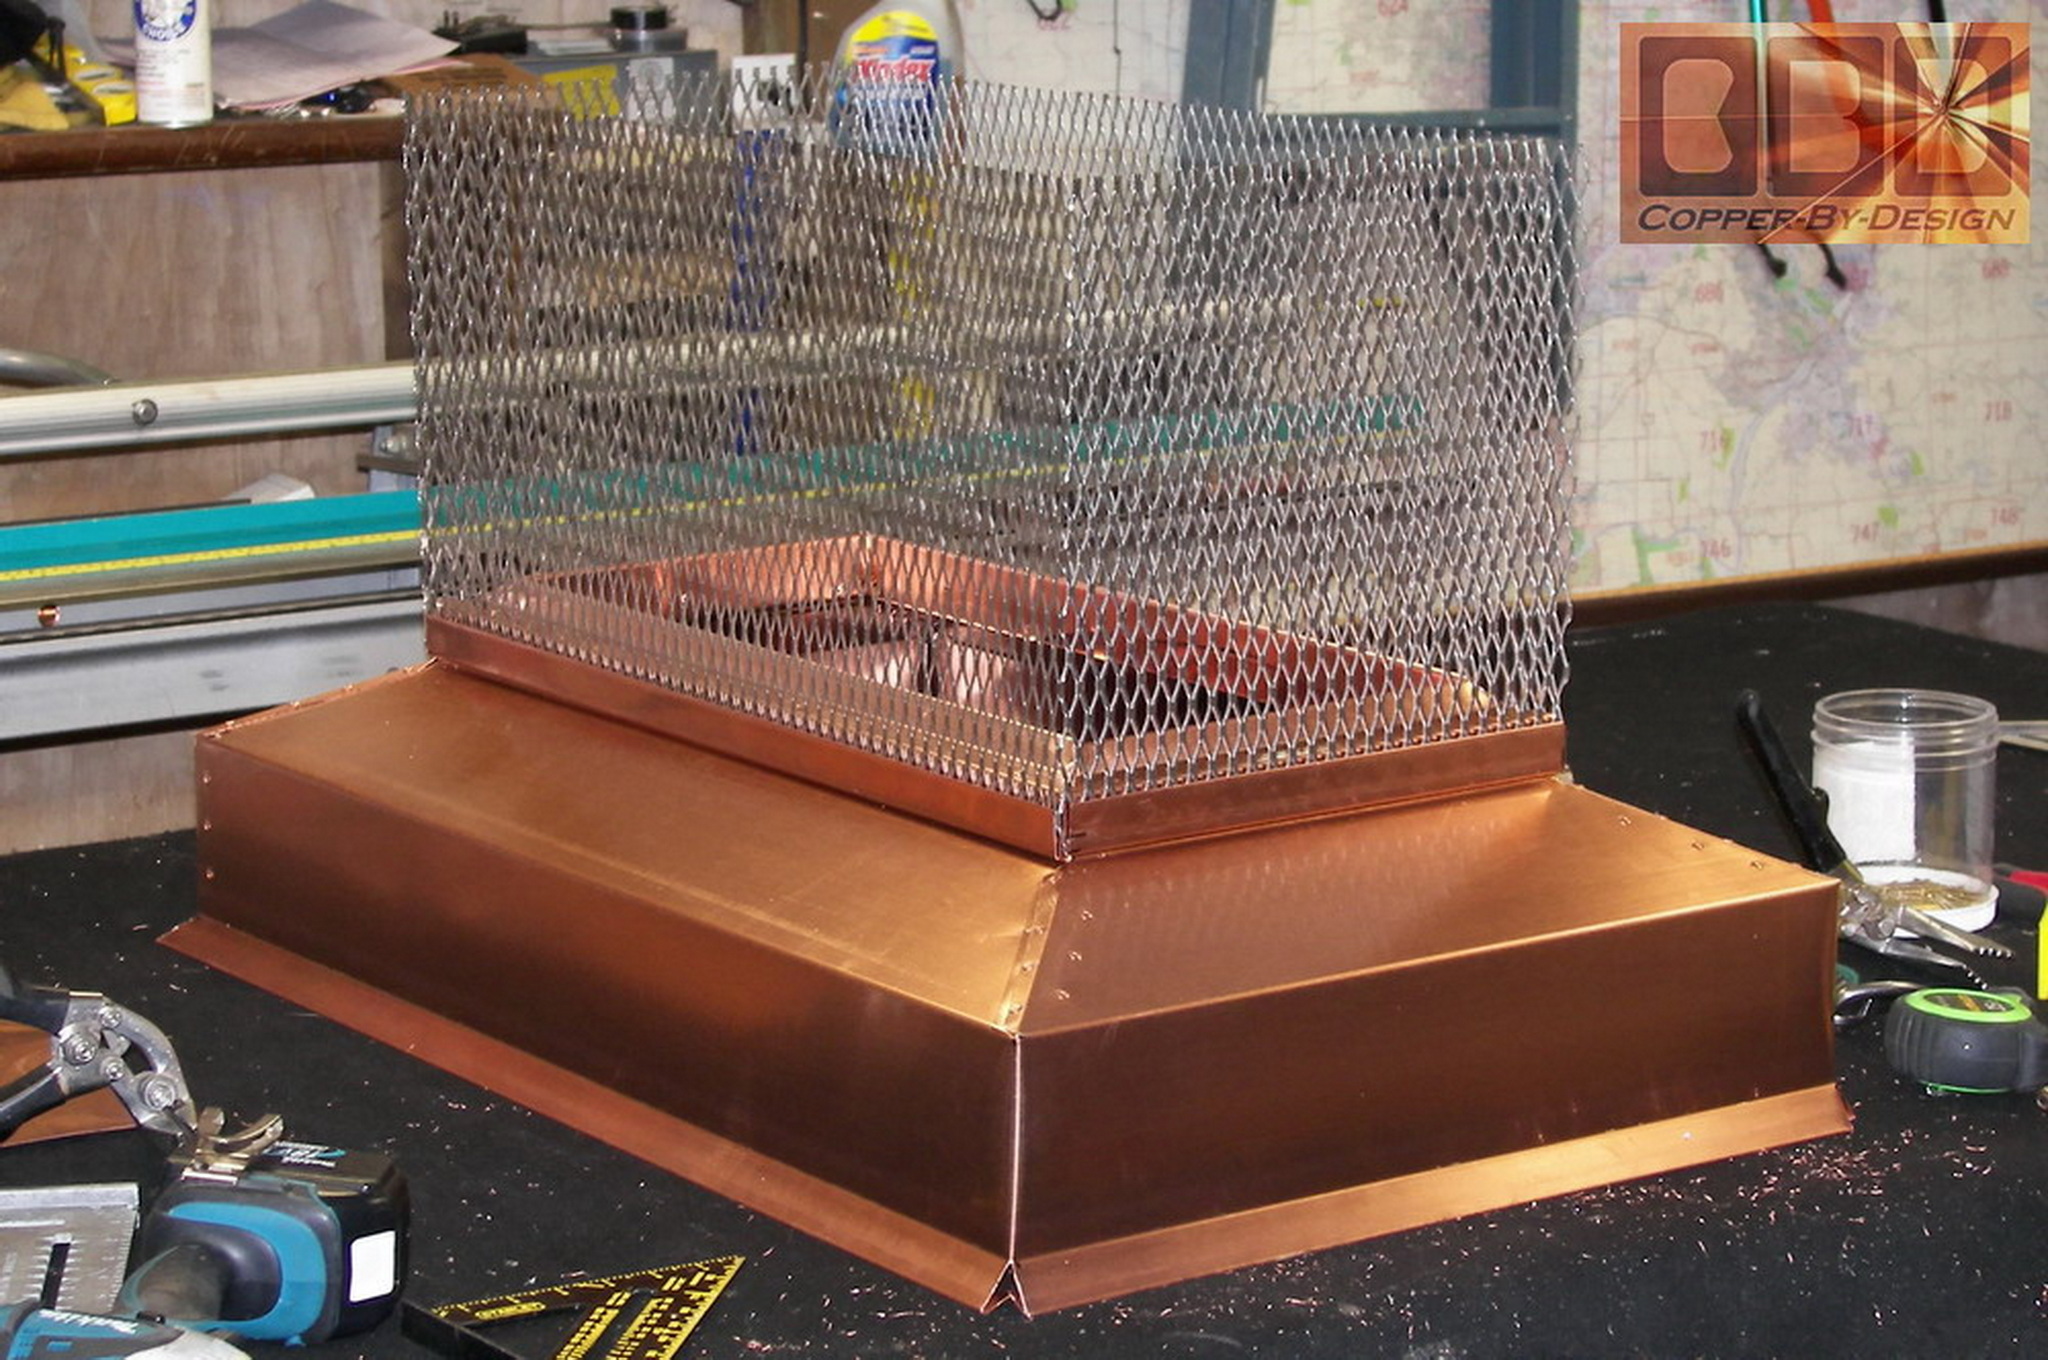
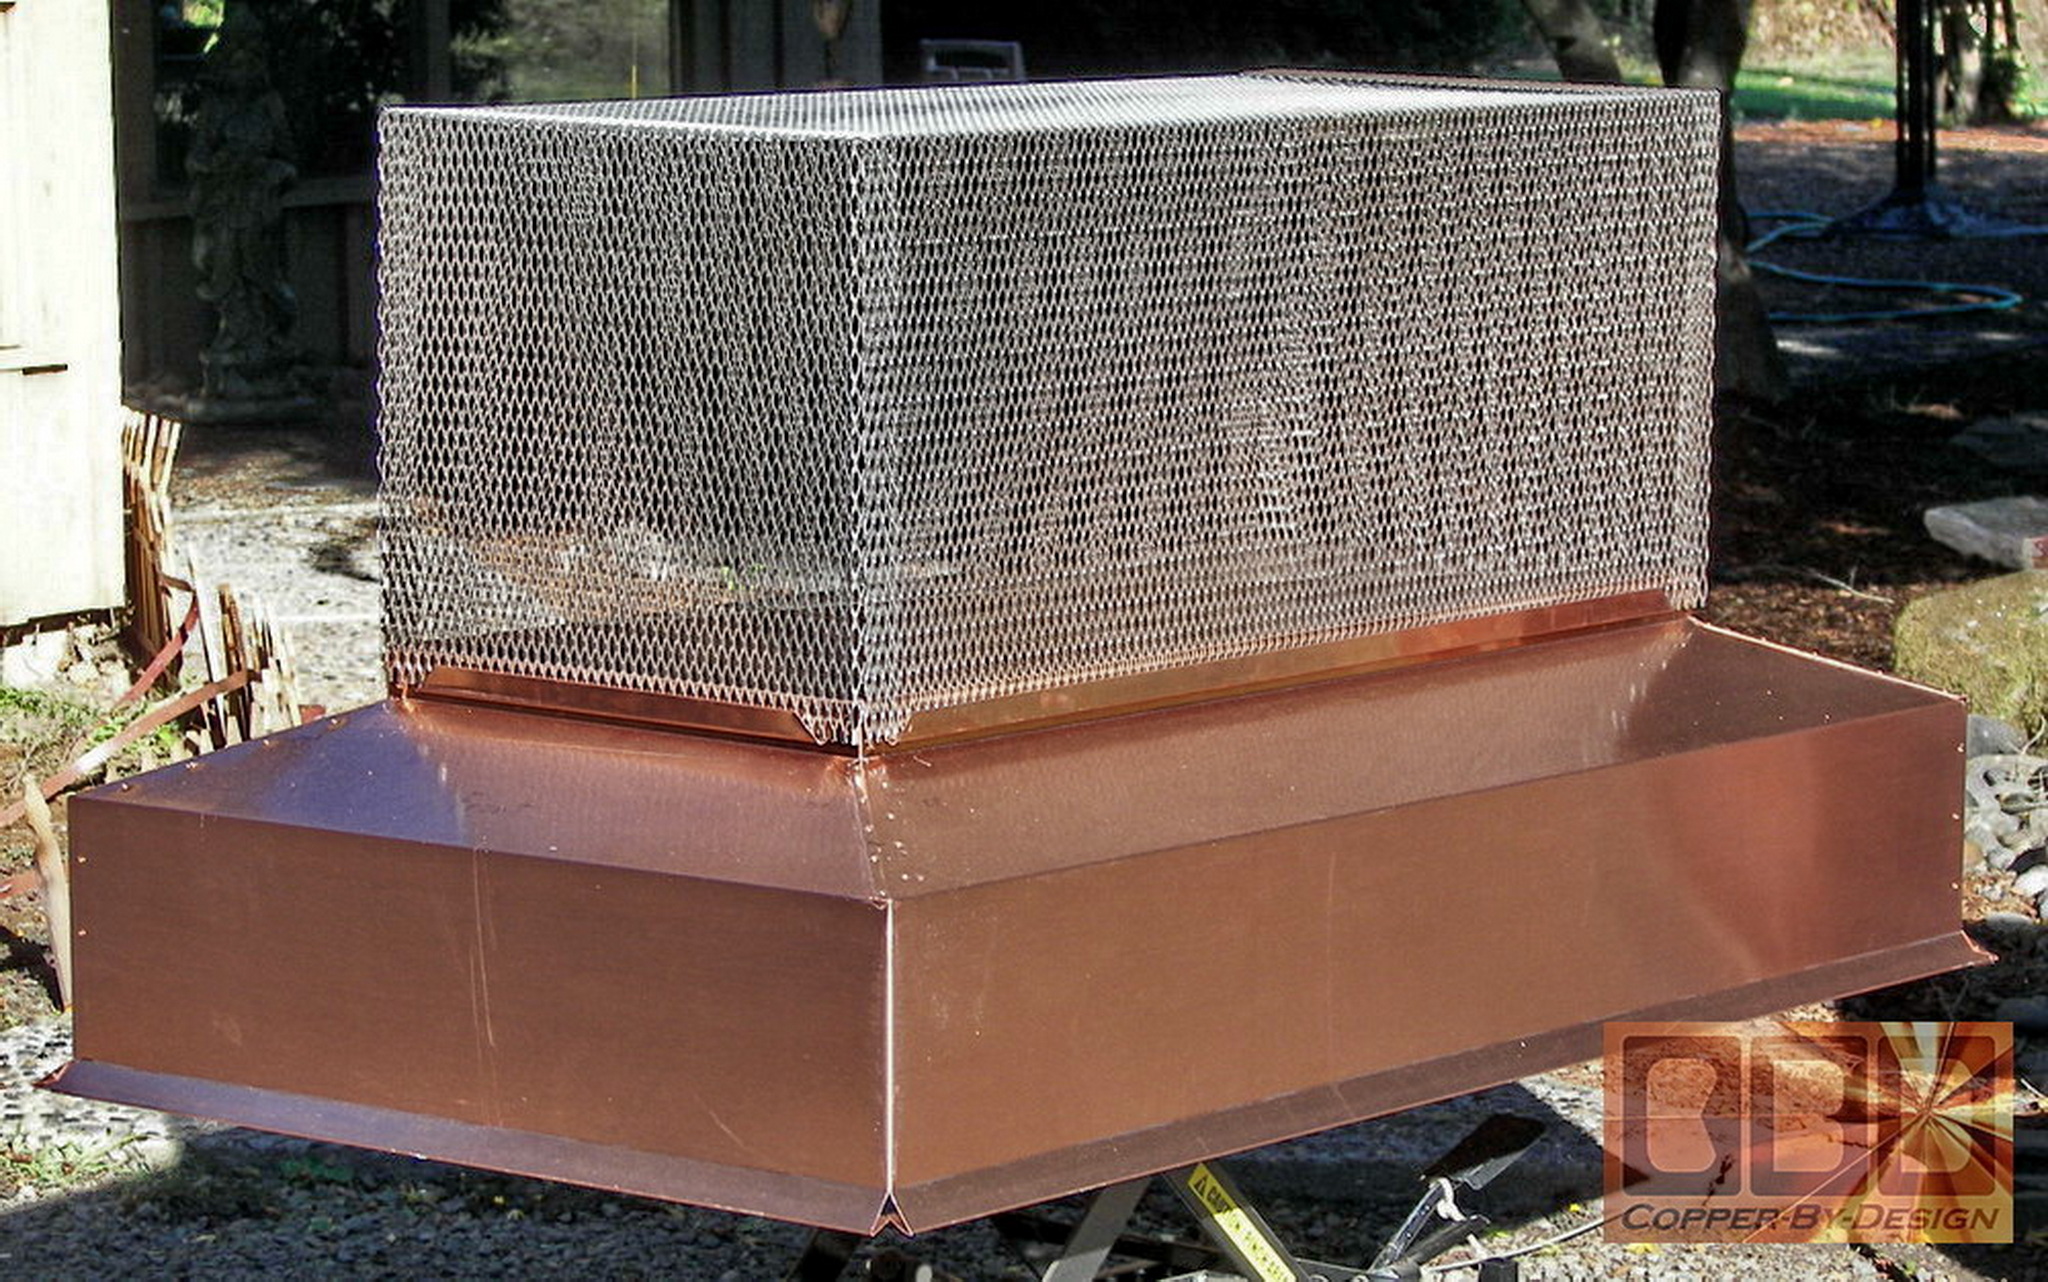
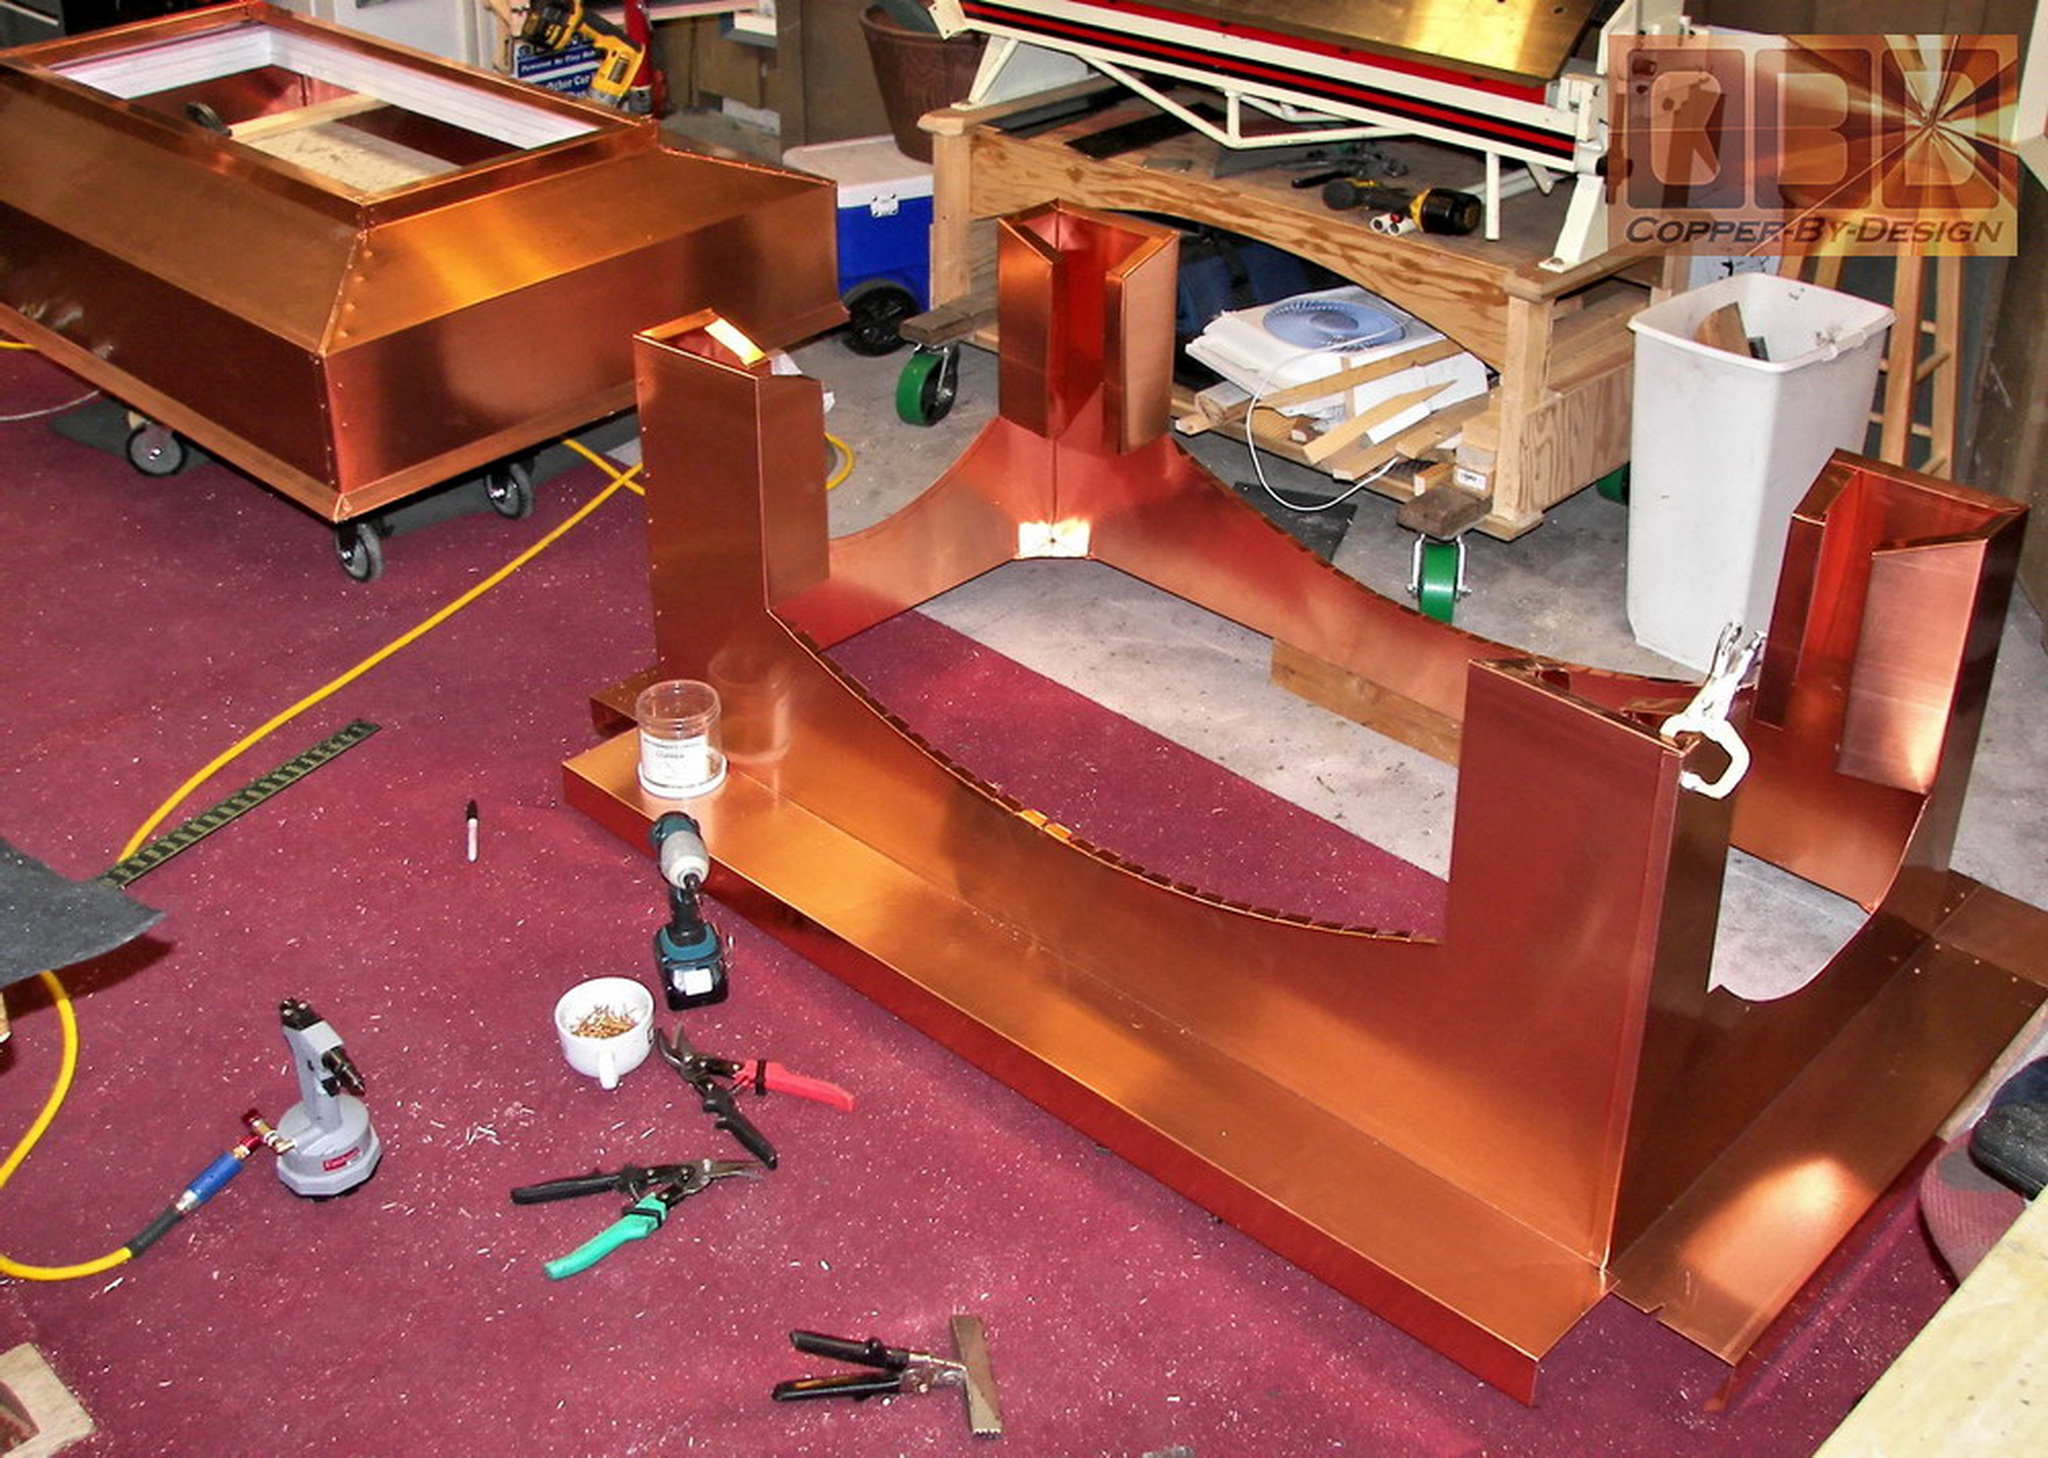
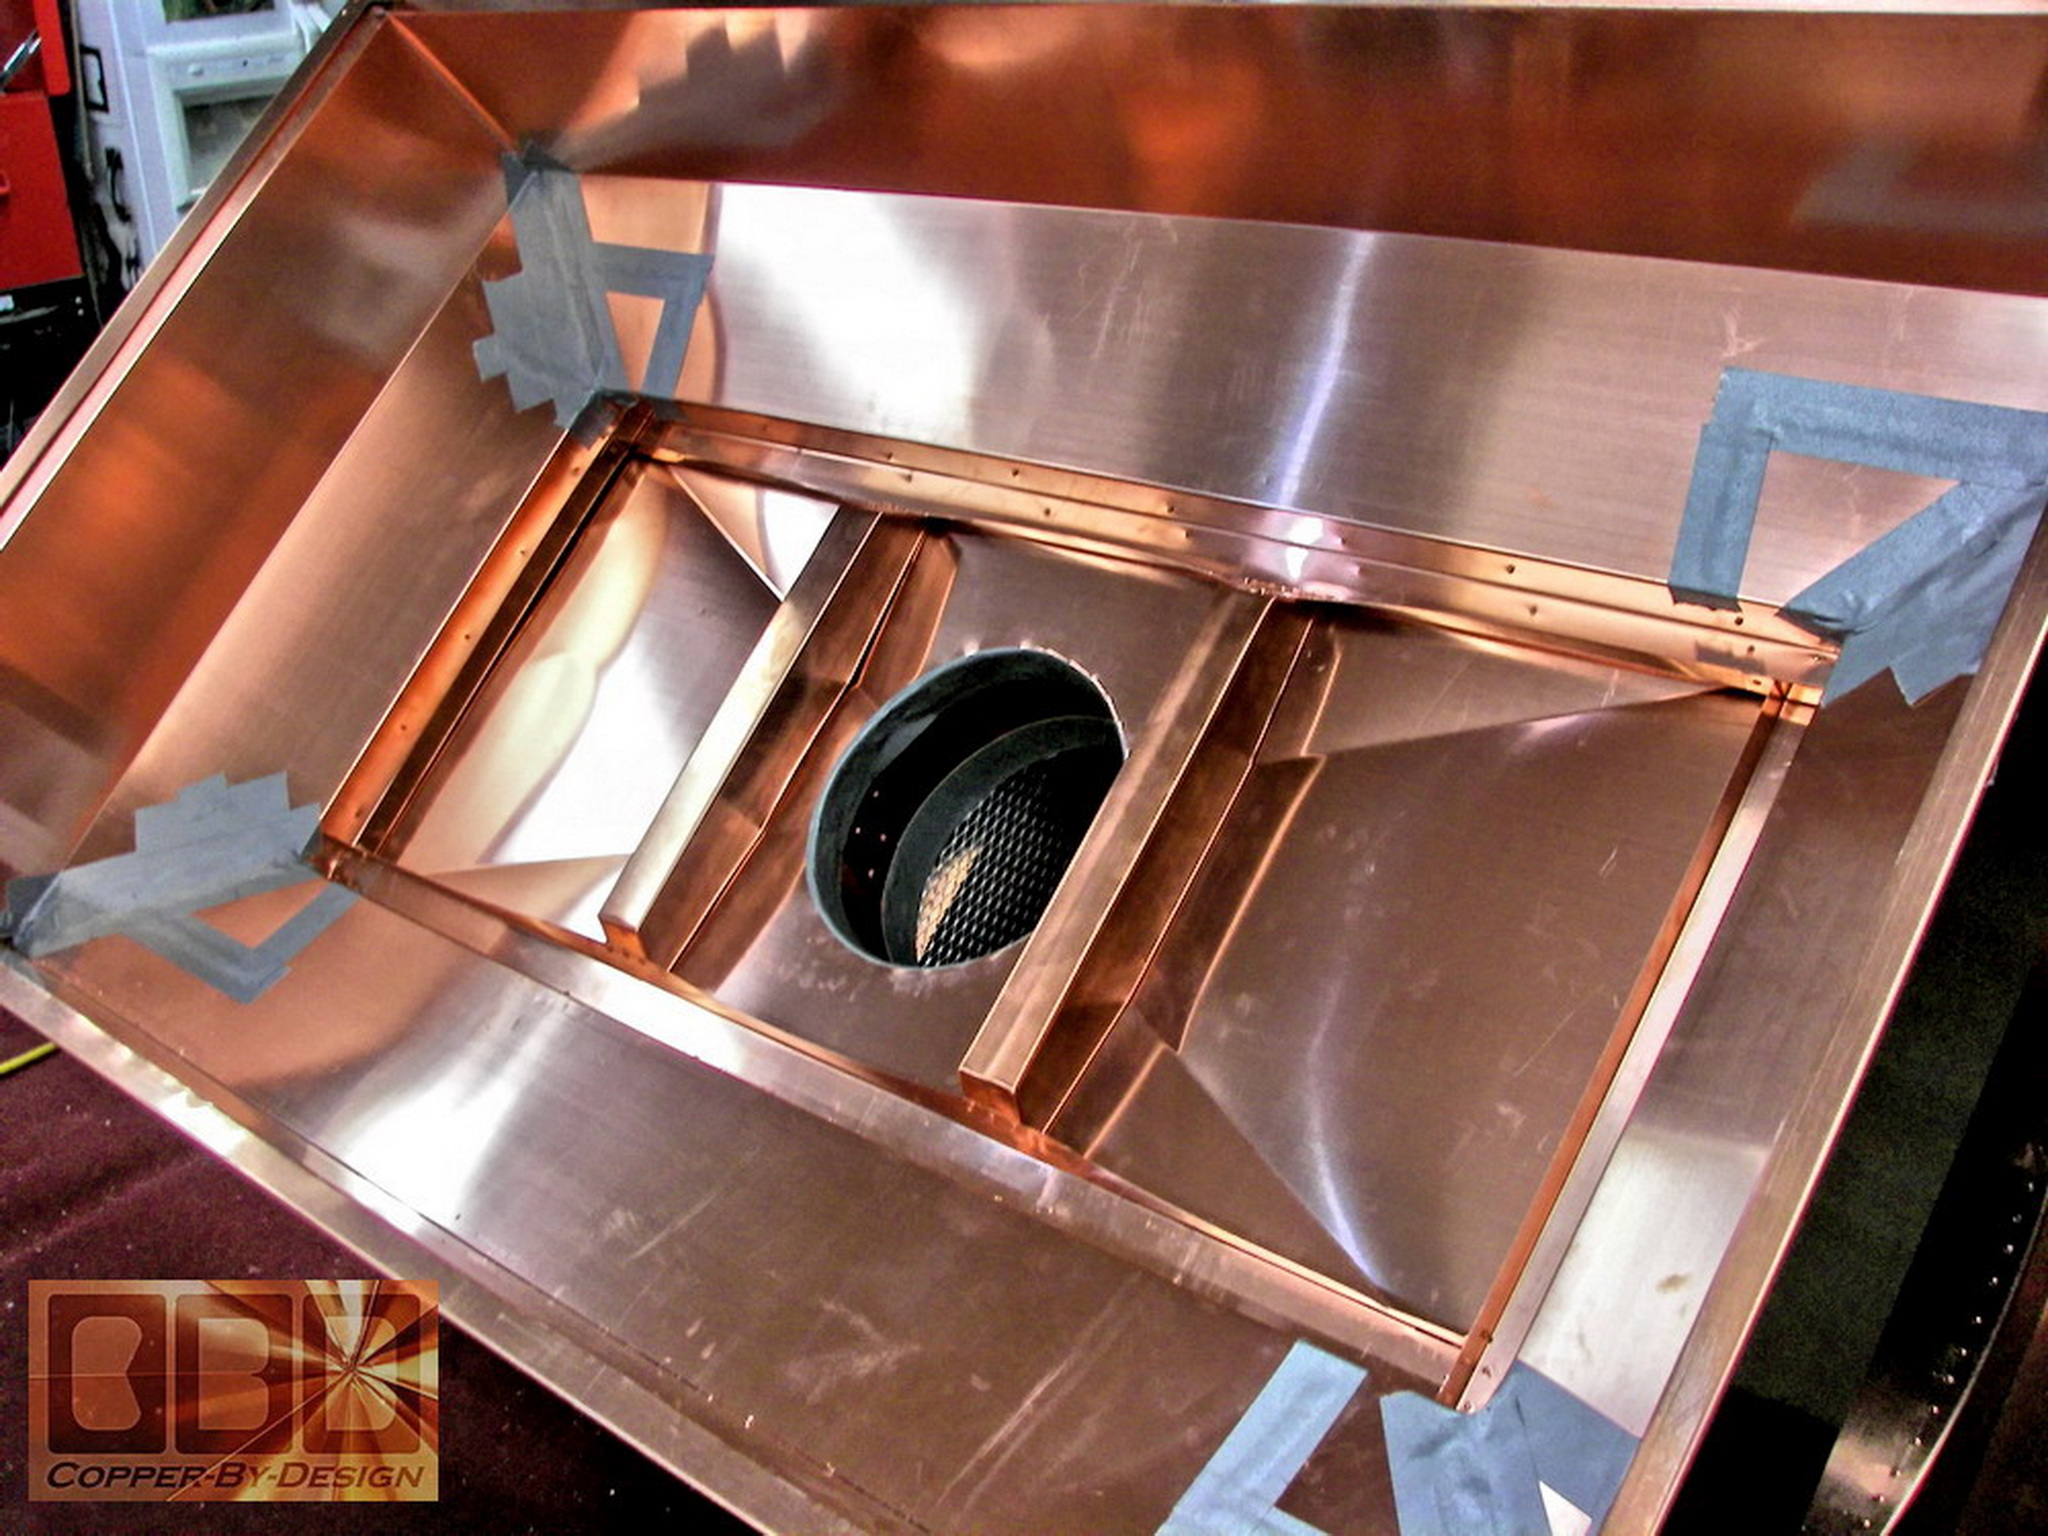
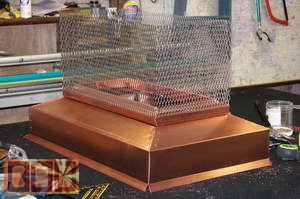
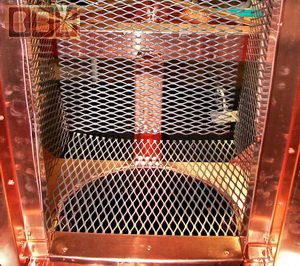
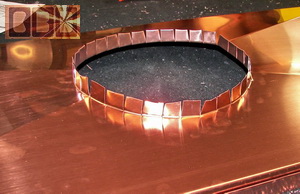
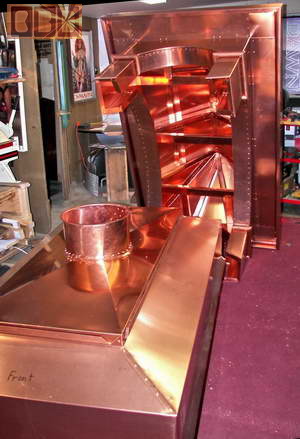
Stage 9:
The Stainless Steel Spark Arrest Cage
(10/20/06)
Here is the base with a pan built inside so the driving rain
cannot get in. There is a channel around this pan for the
stainless steel screening to set in. I made an entire 5 sided
stainless steel screen cage for over the pan. This is a high grade
stainless steel that will not attract a magnet, so that means there
is no iron in it to rust. It is noticeably harder to cut and drill
than copper or steel. We have to use a special 10lb electric Bosch
shear just to cut it. That tool cost $650 alone. I built the
long sides and top all in one piece for the best possible strength.
Then attached the end pieces.
Then the flue hole gets cut and the collar
gets attached and sealed to the pan.
|
|
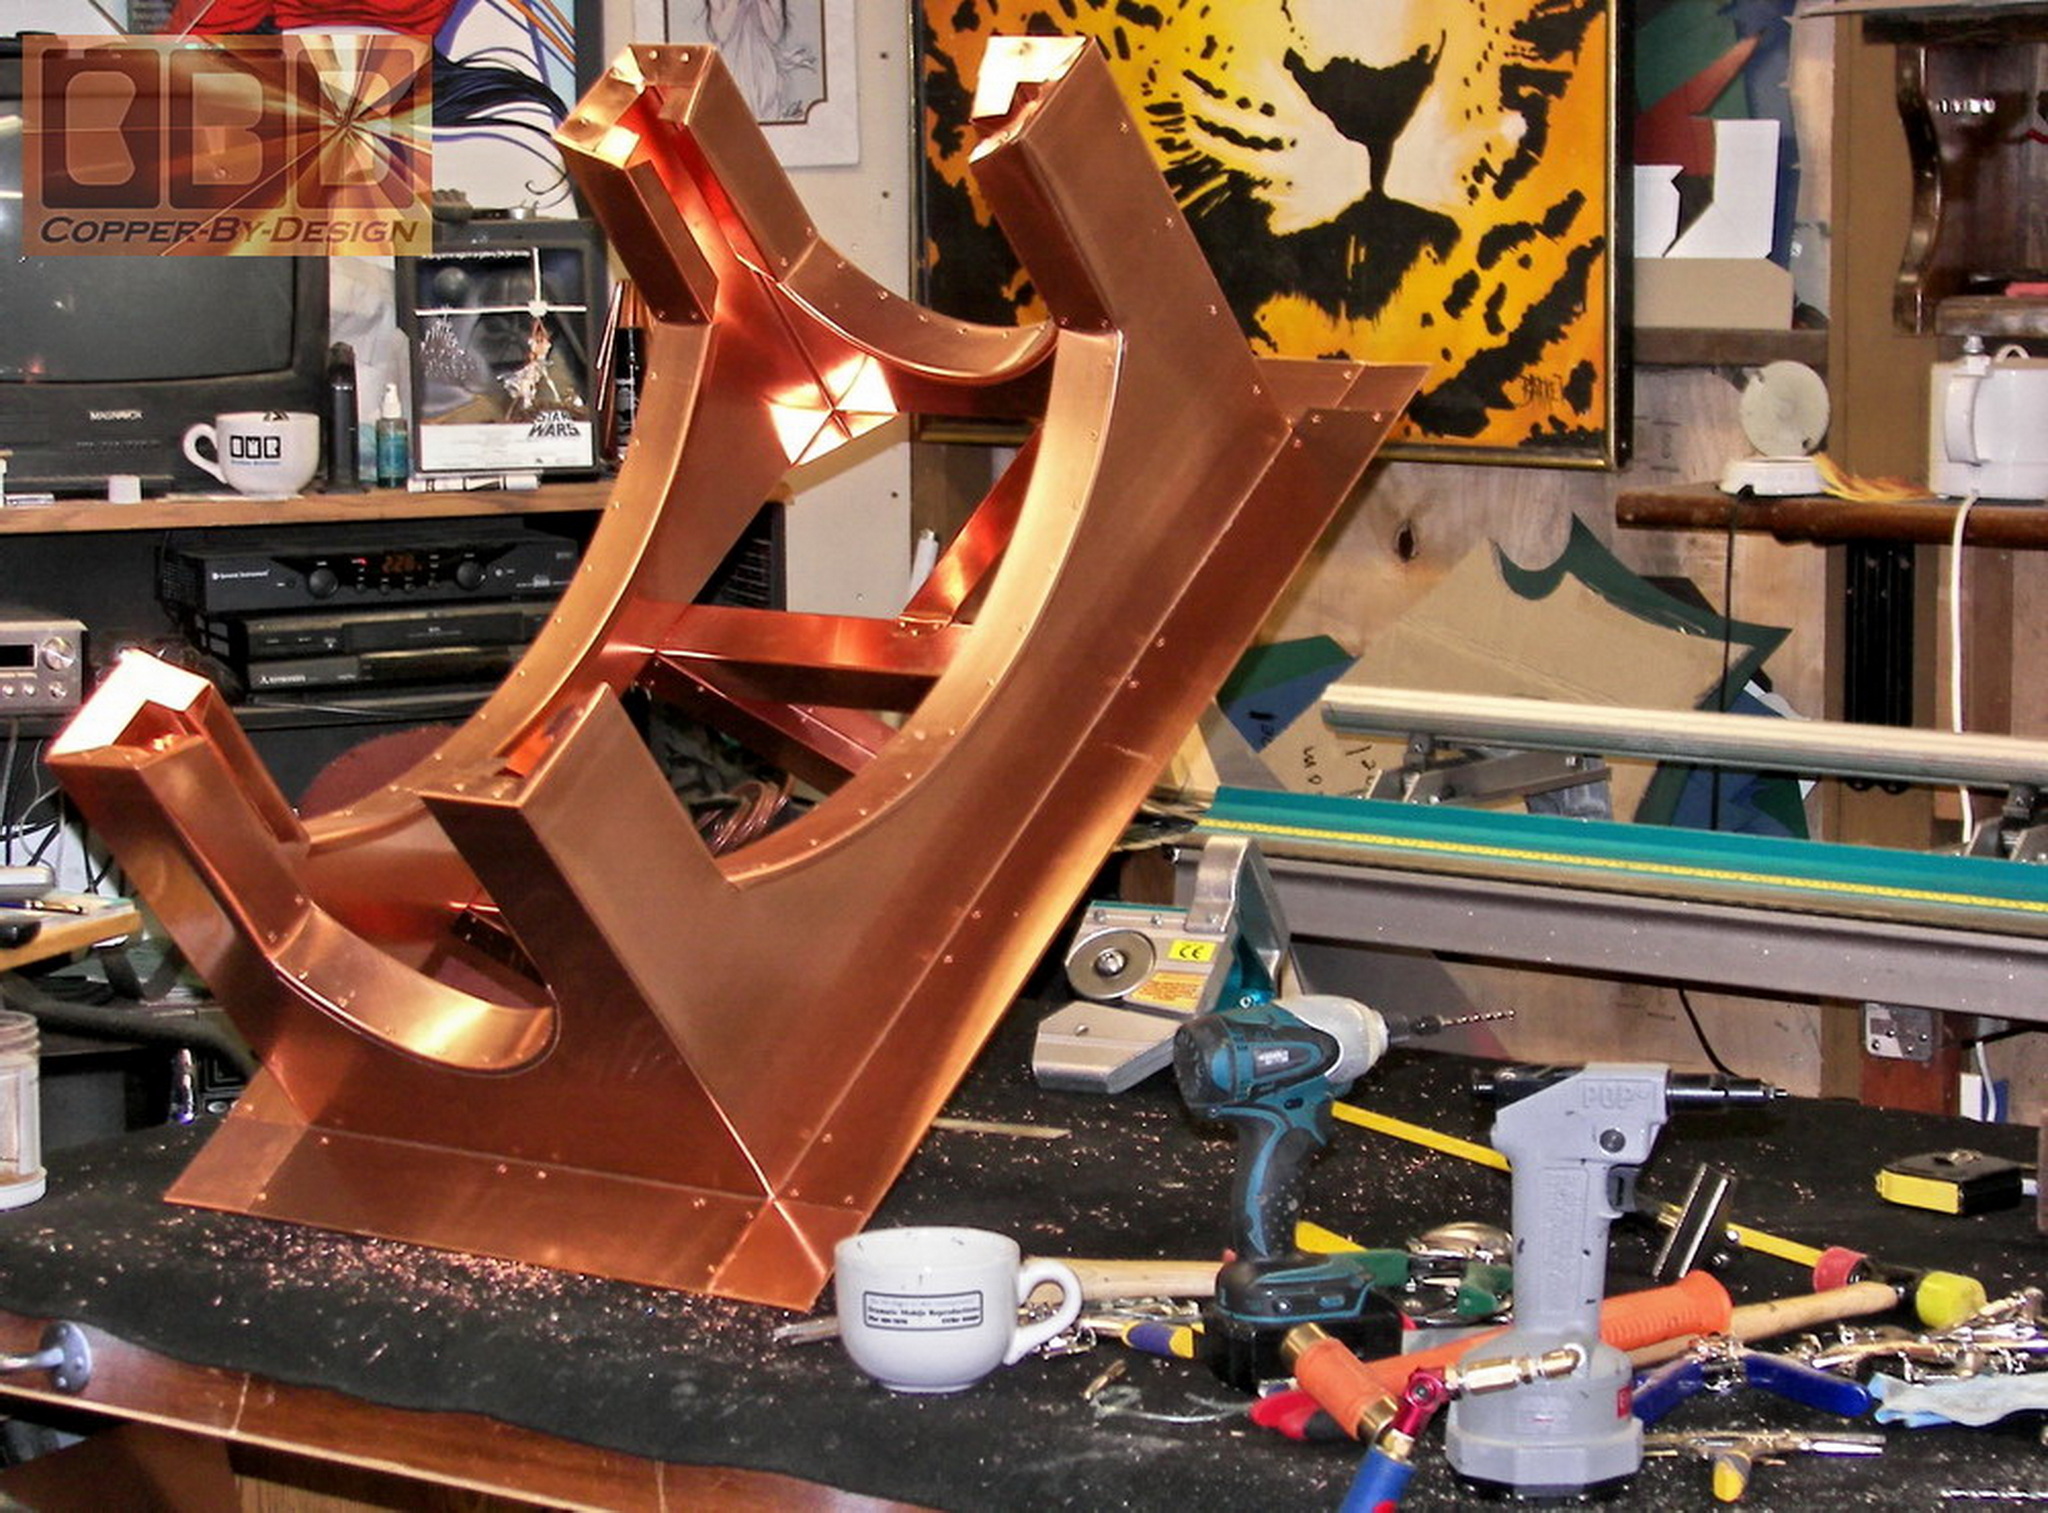
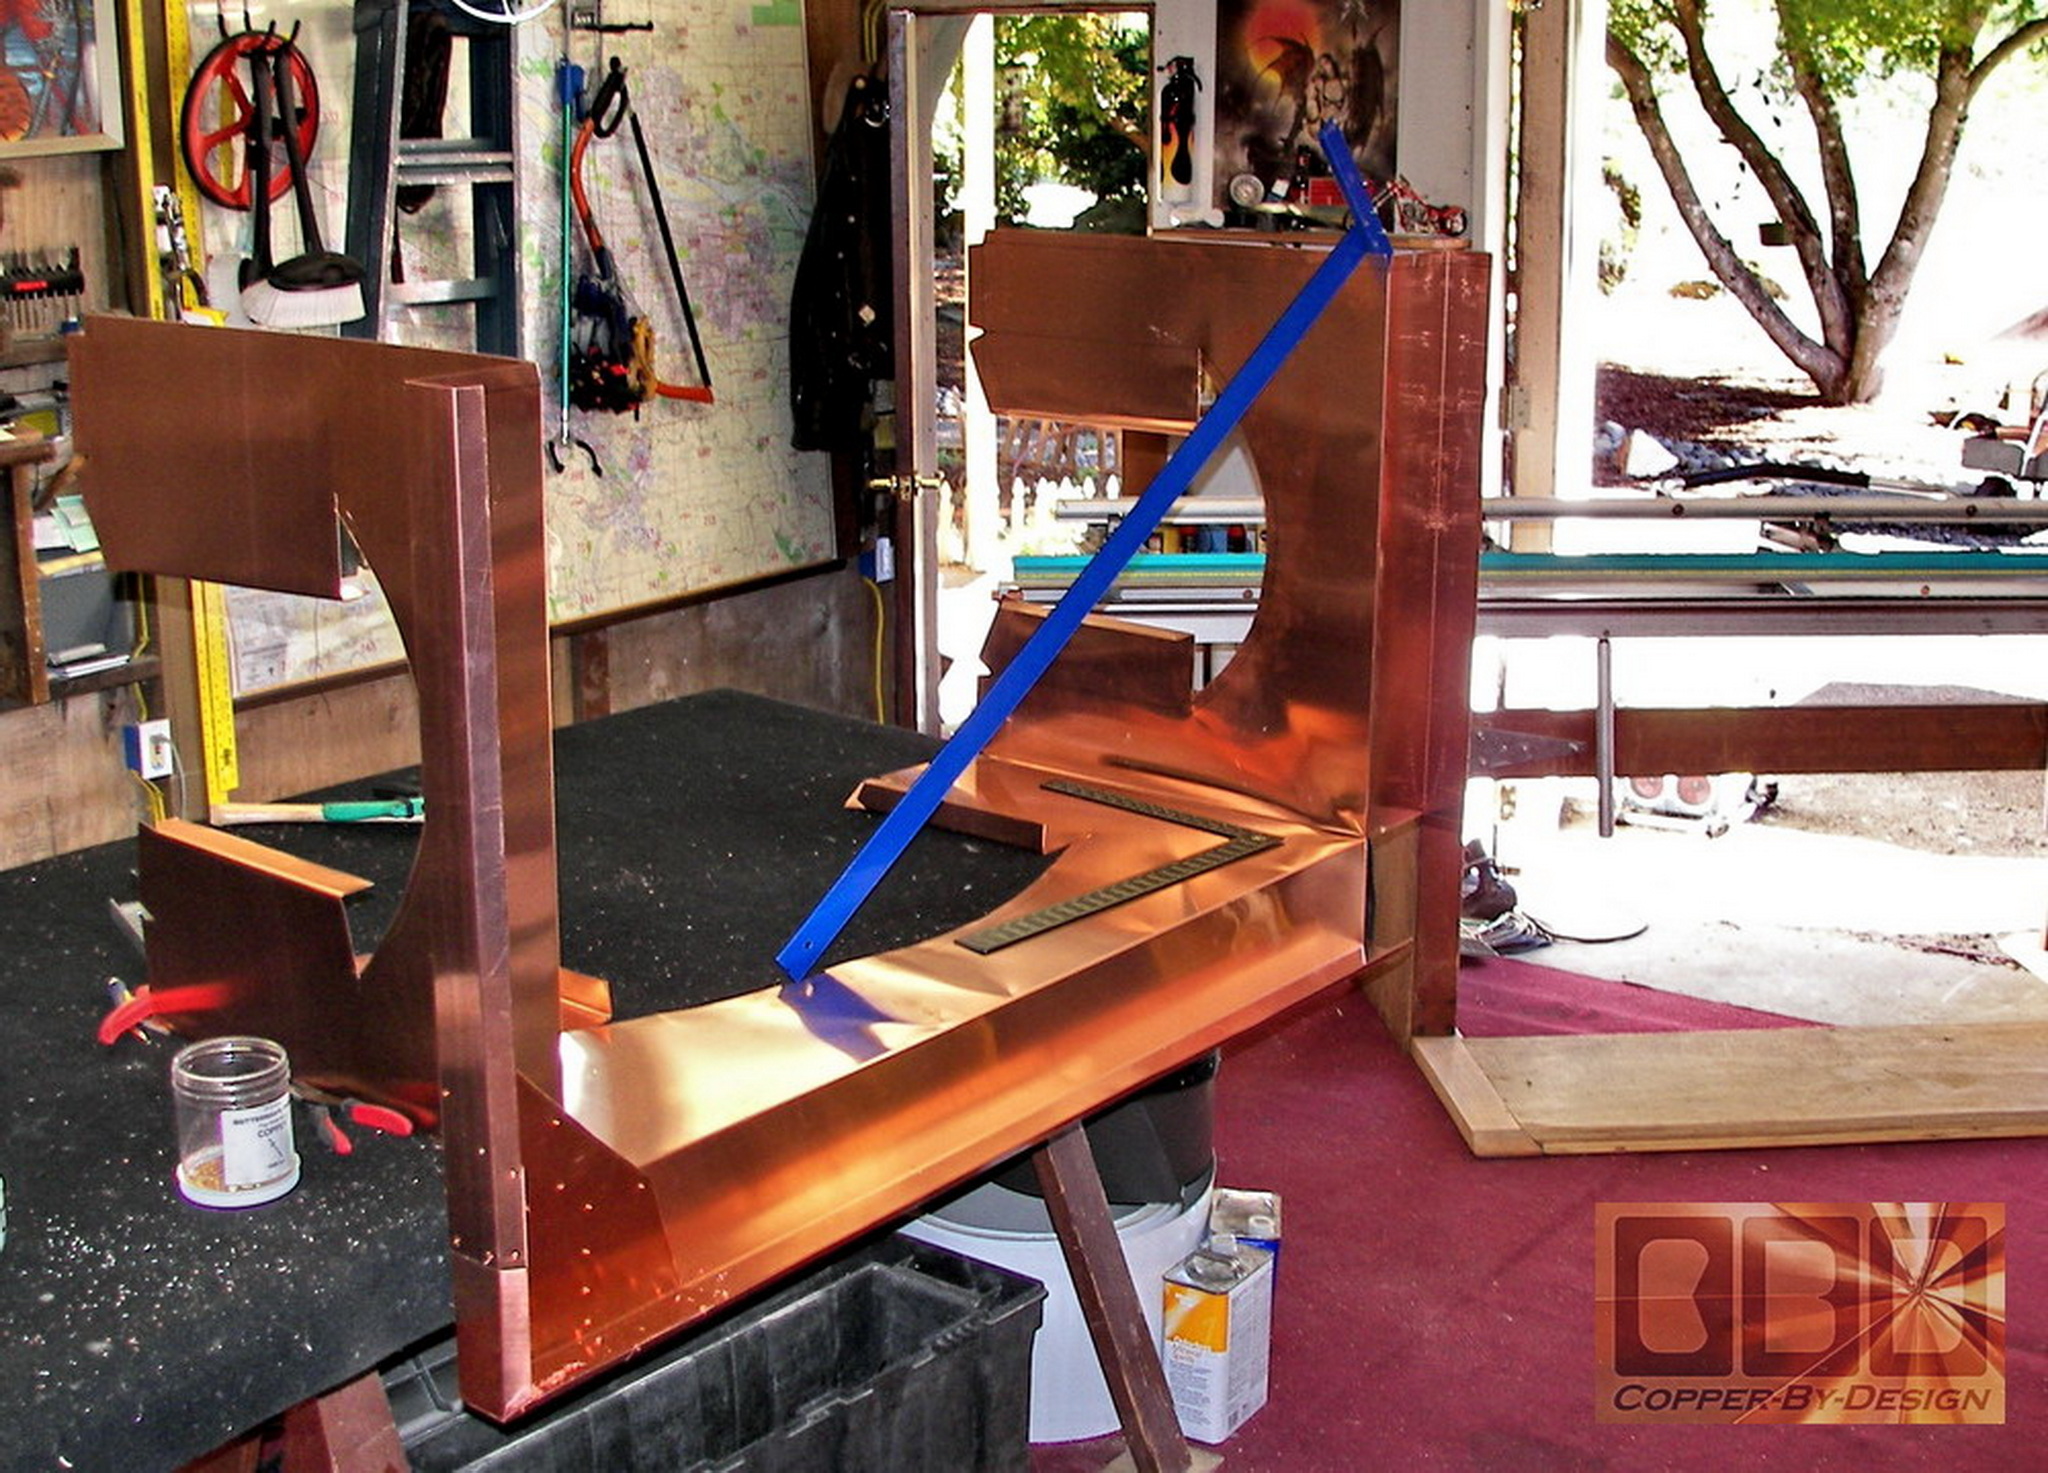
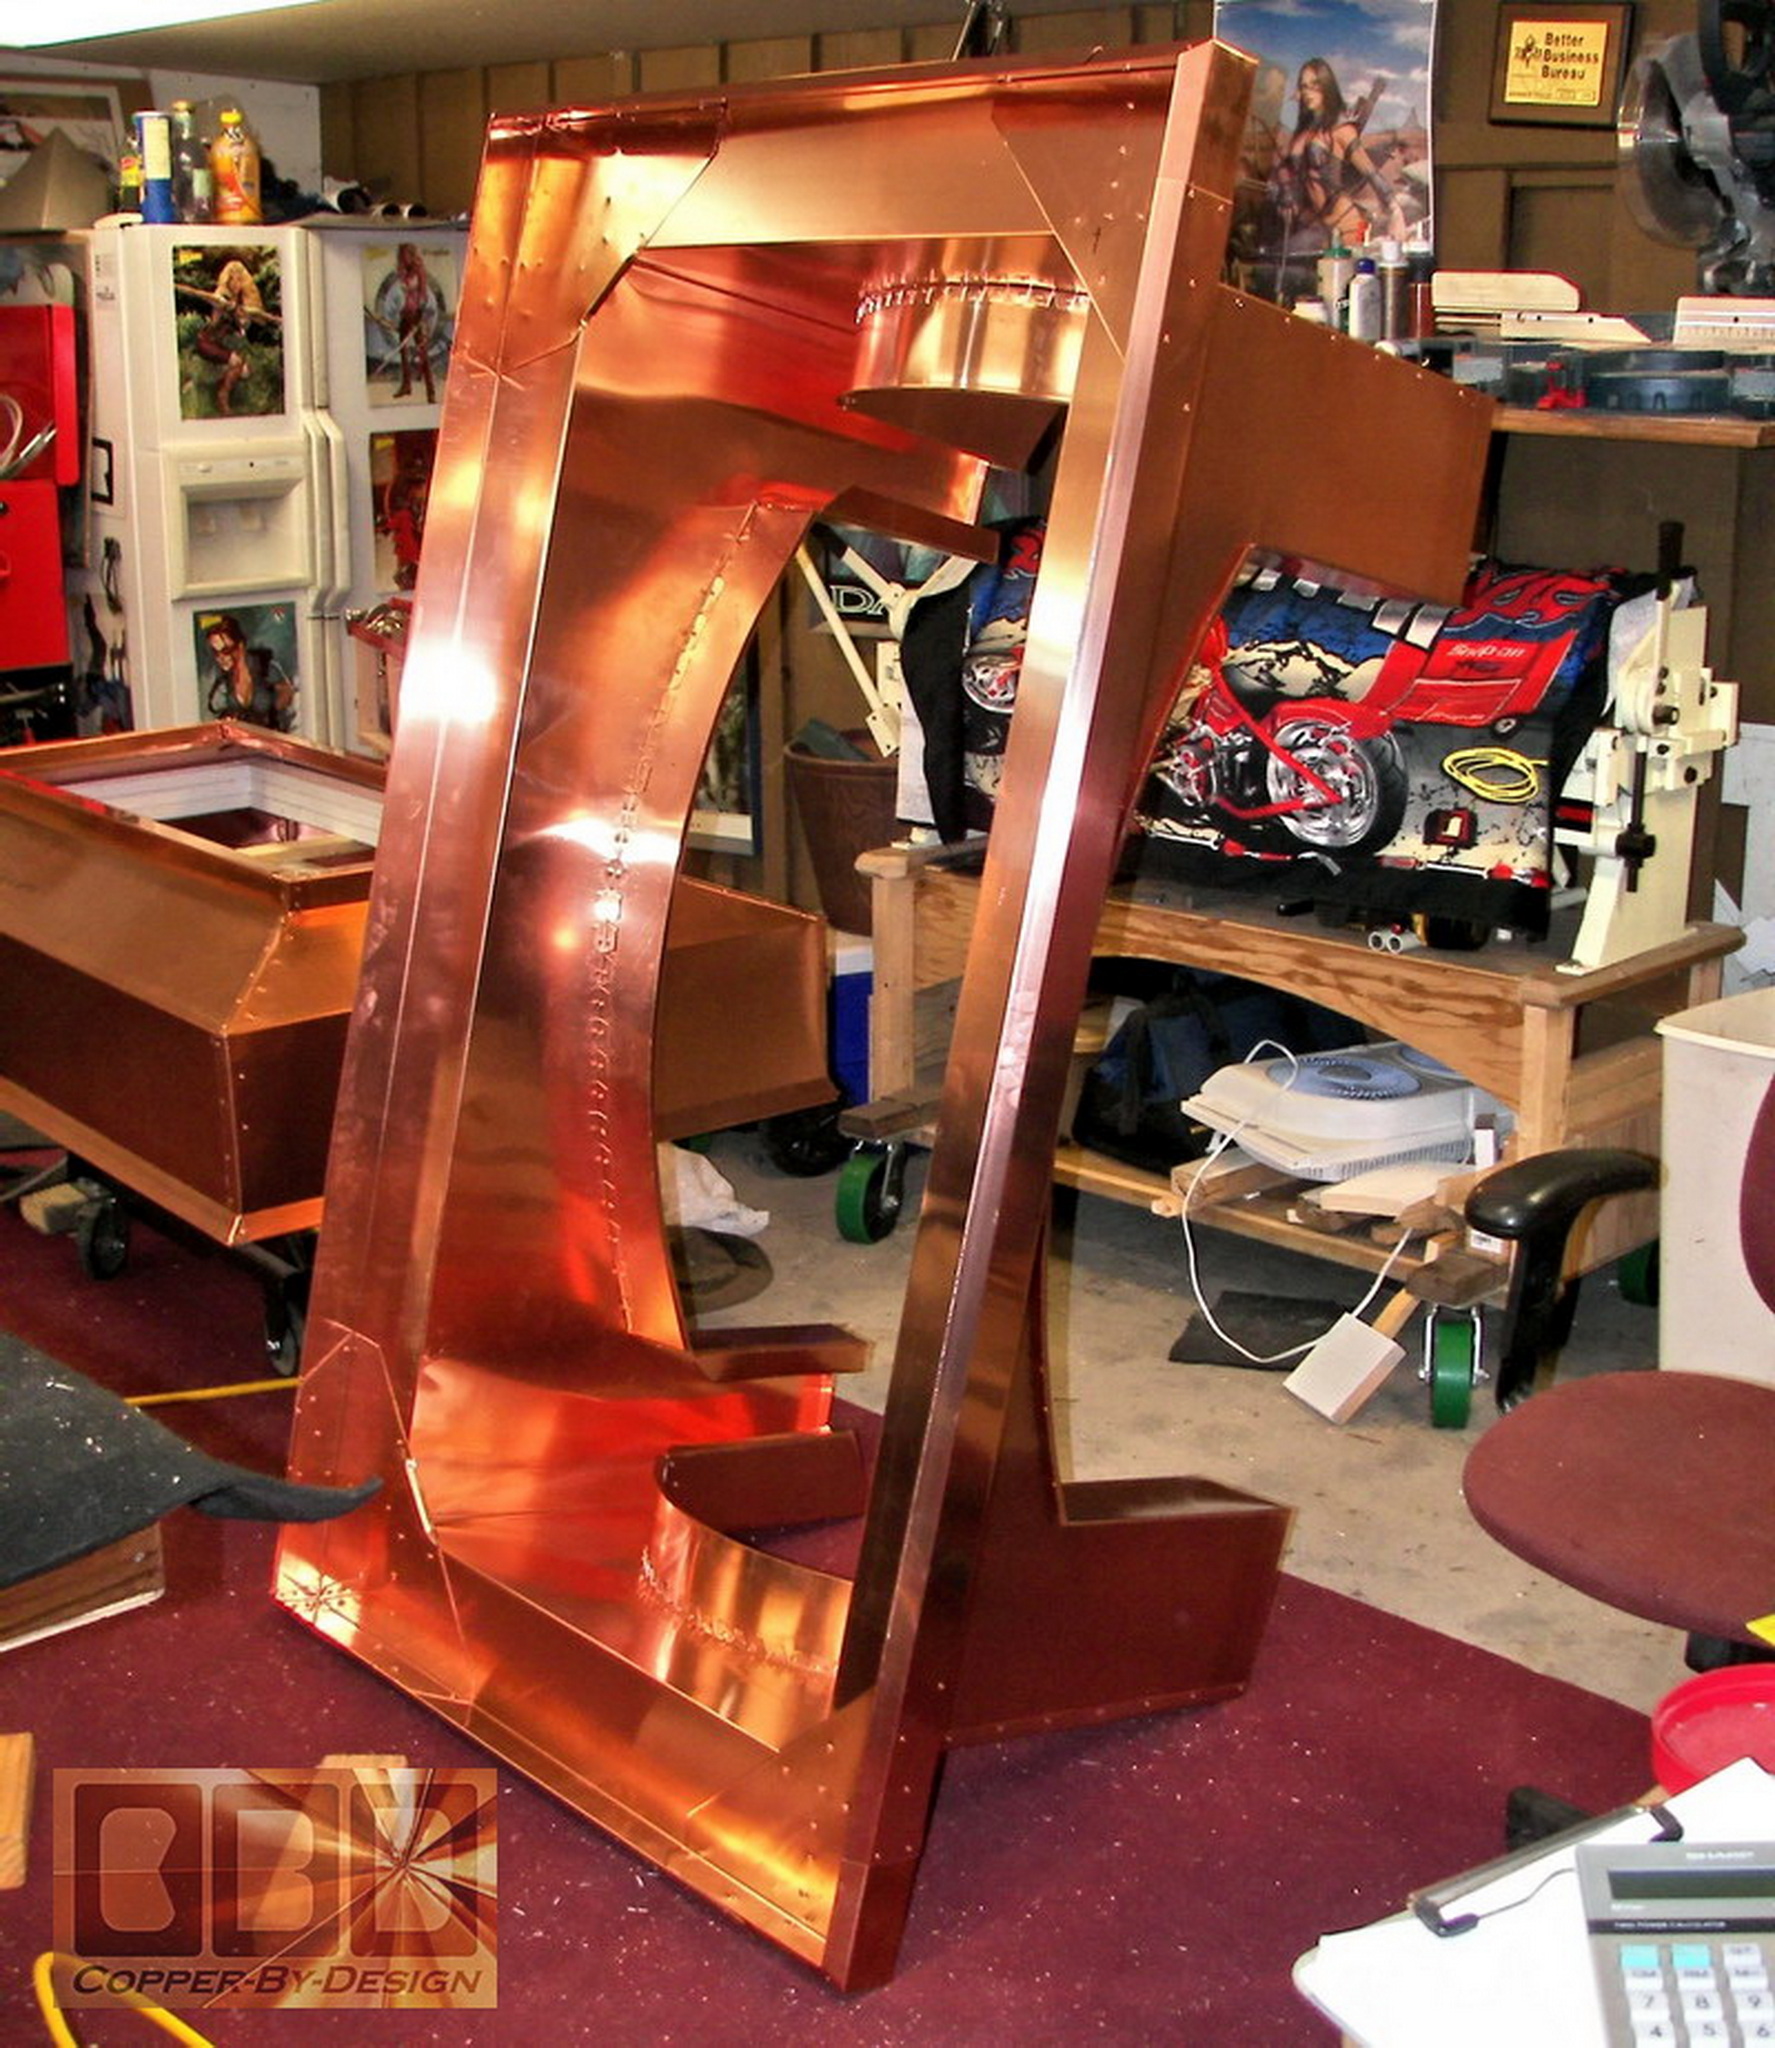
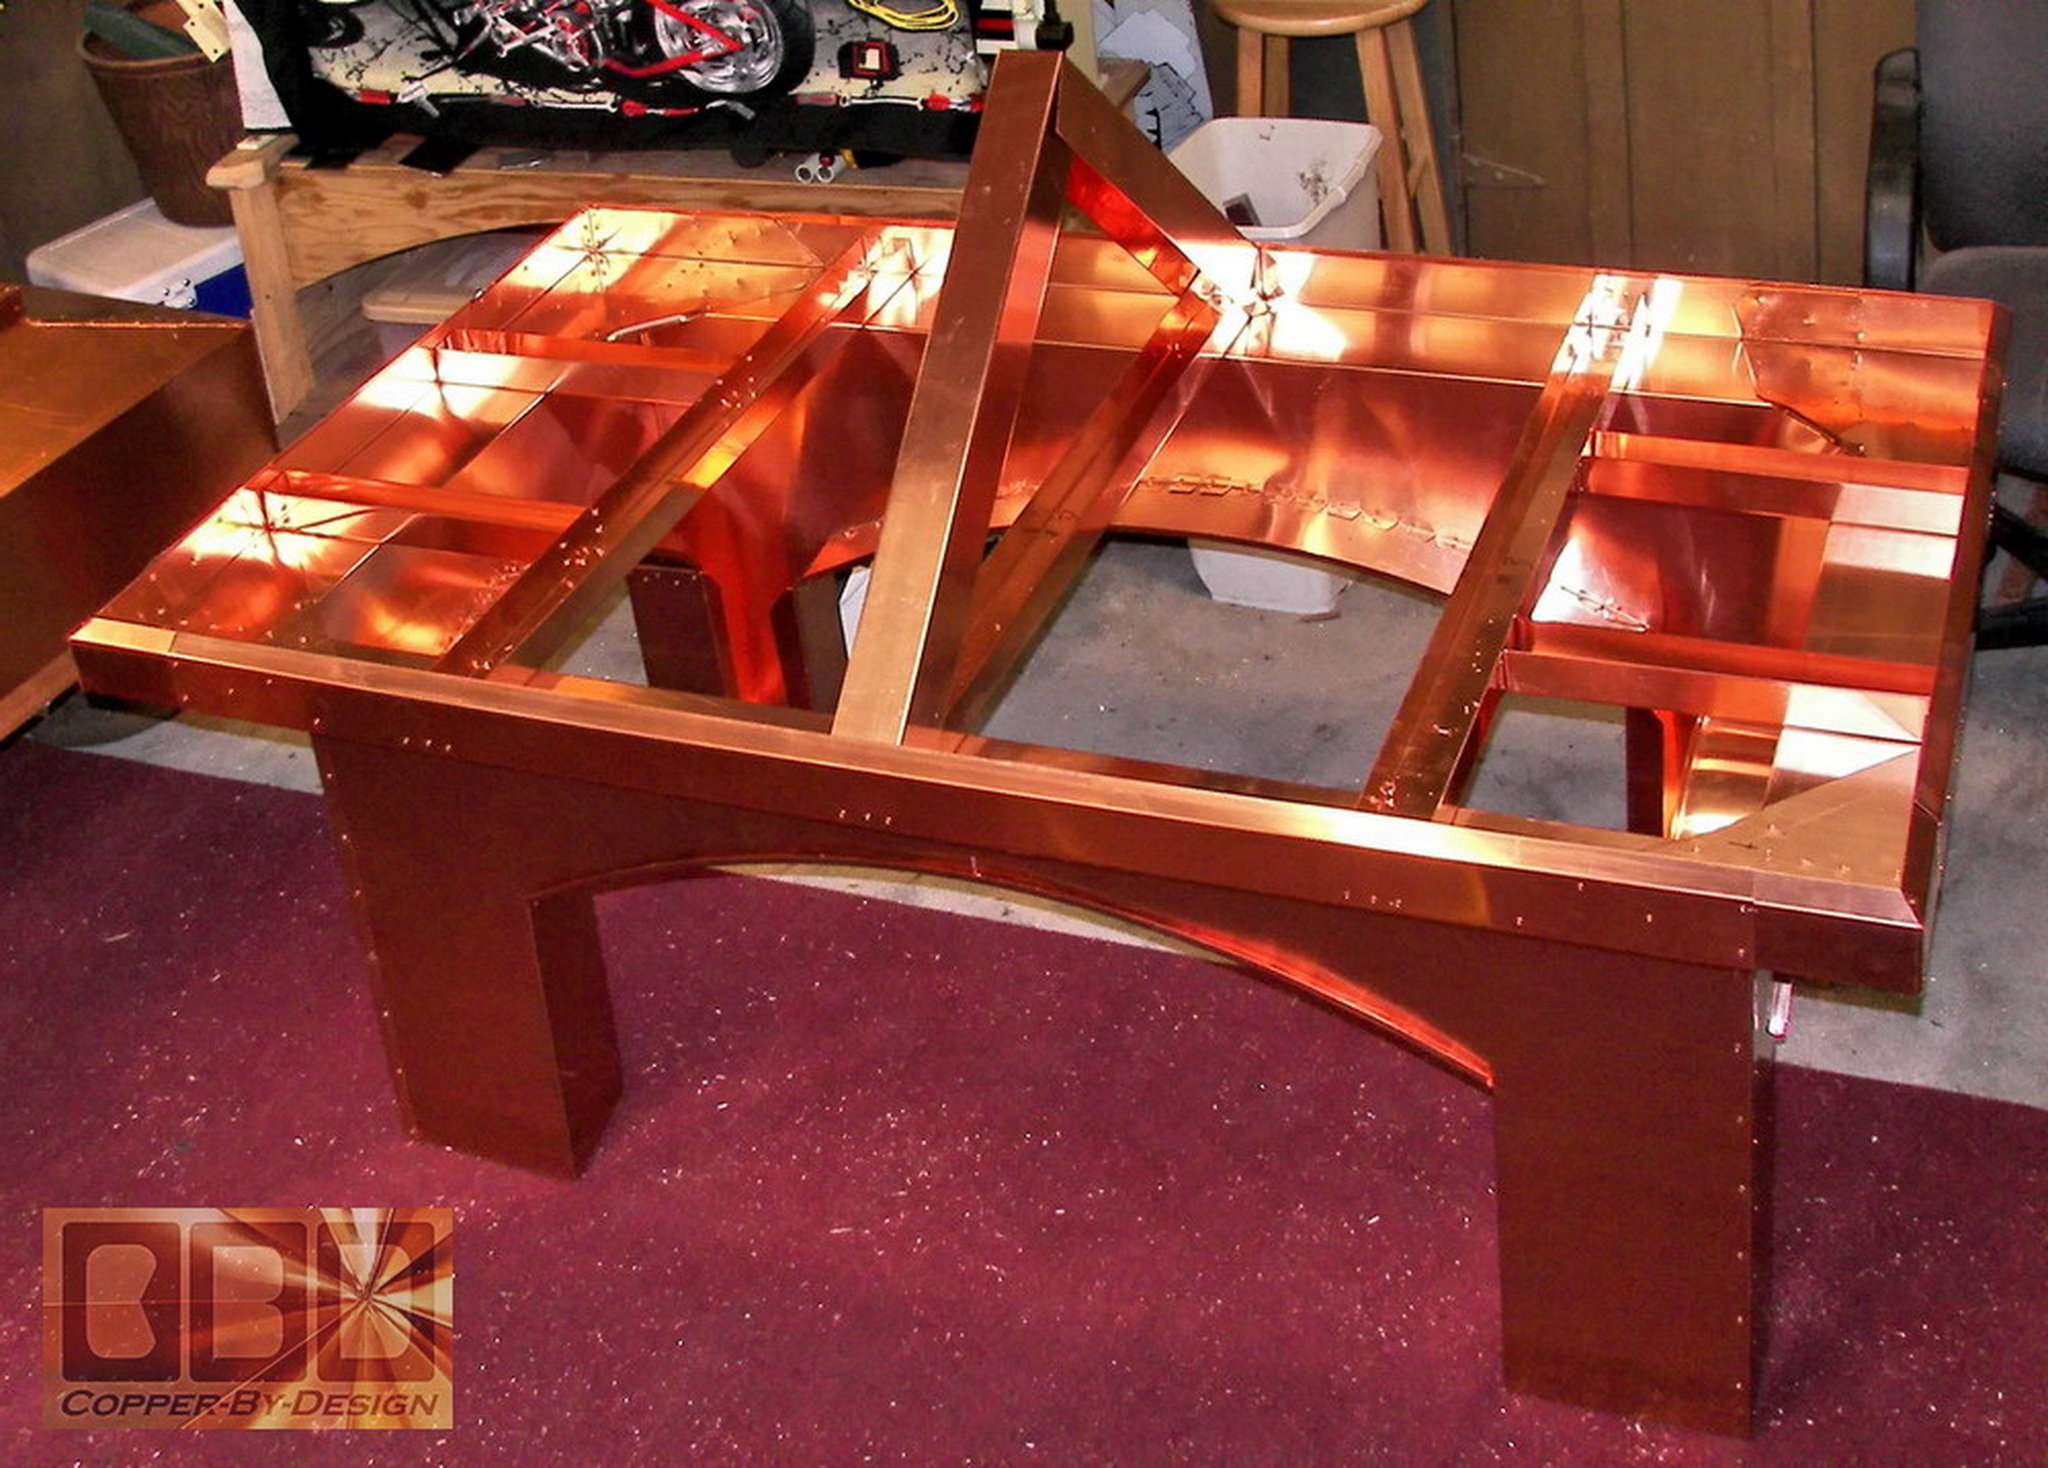
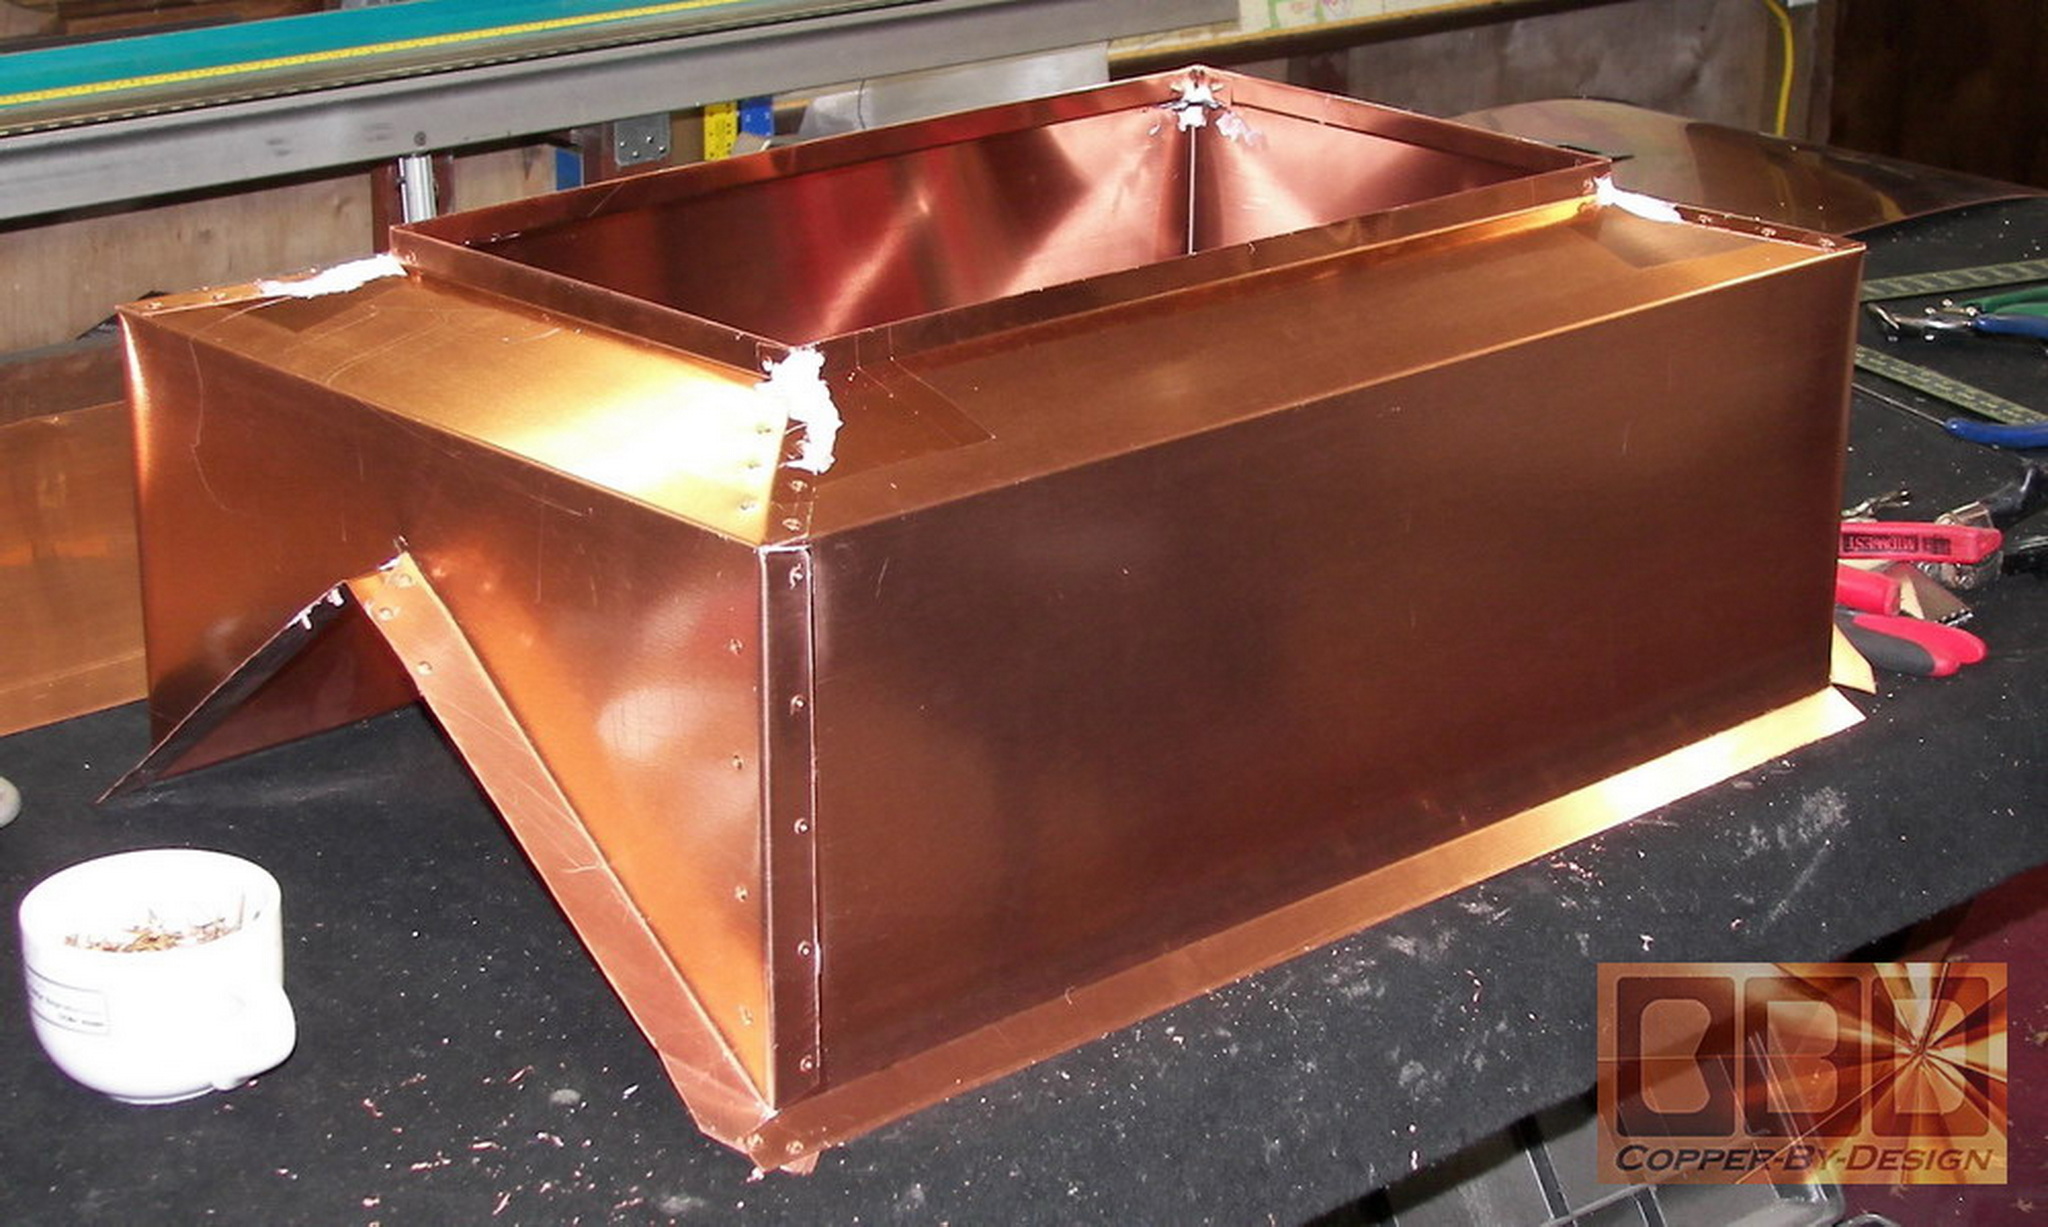
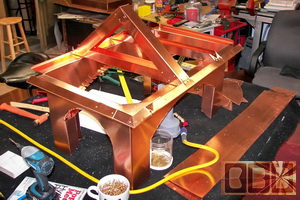
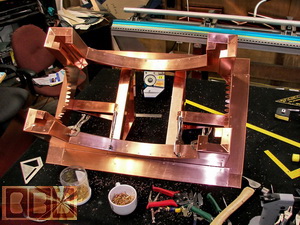
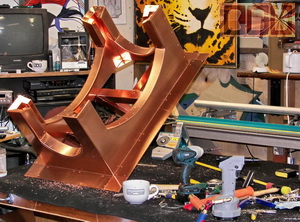
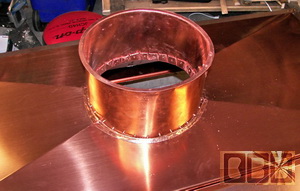
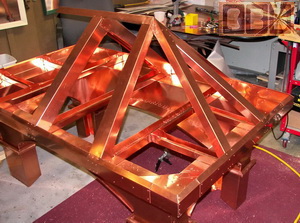
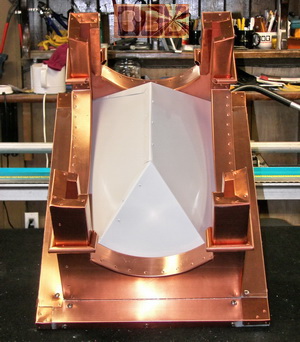
Stage 10:
The Mid Arched Column Section
(10/21/06)
I began to build the mid column section. I was crazy enough
to build 3 sides all in one piece for the best possible strength
and seamless look on one side of this chimney cap. Then attached
the back piece.
This shows the frame
being attached to the undersides of the arches between the columns.
 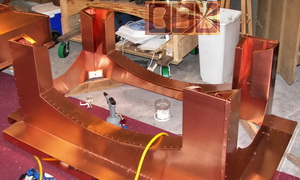
Here it is up on one
end with all the corner soffits in. Then the piping goes on
the columns.
|
|
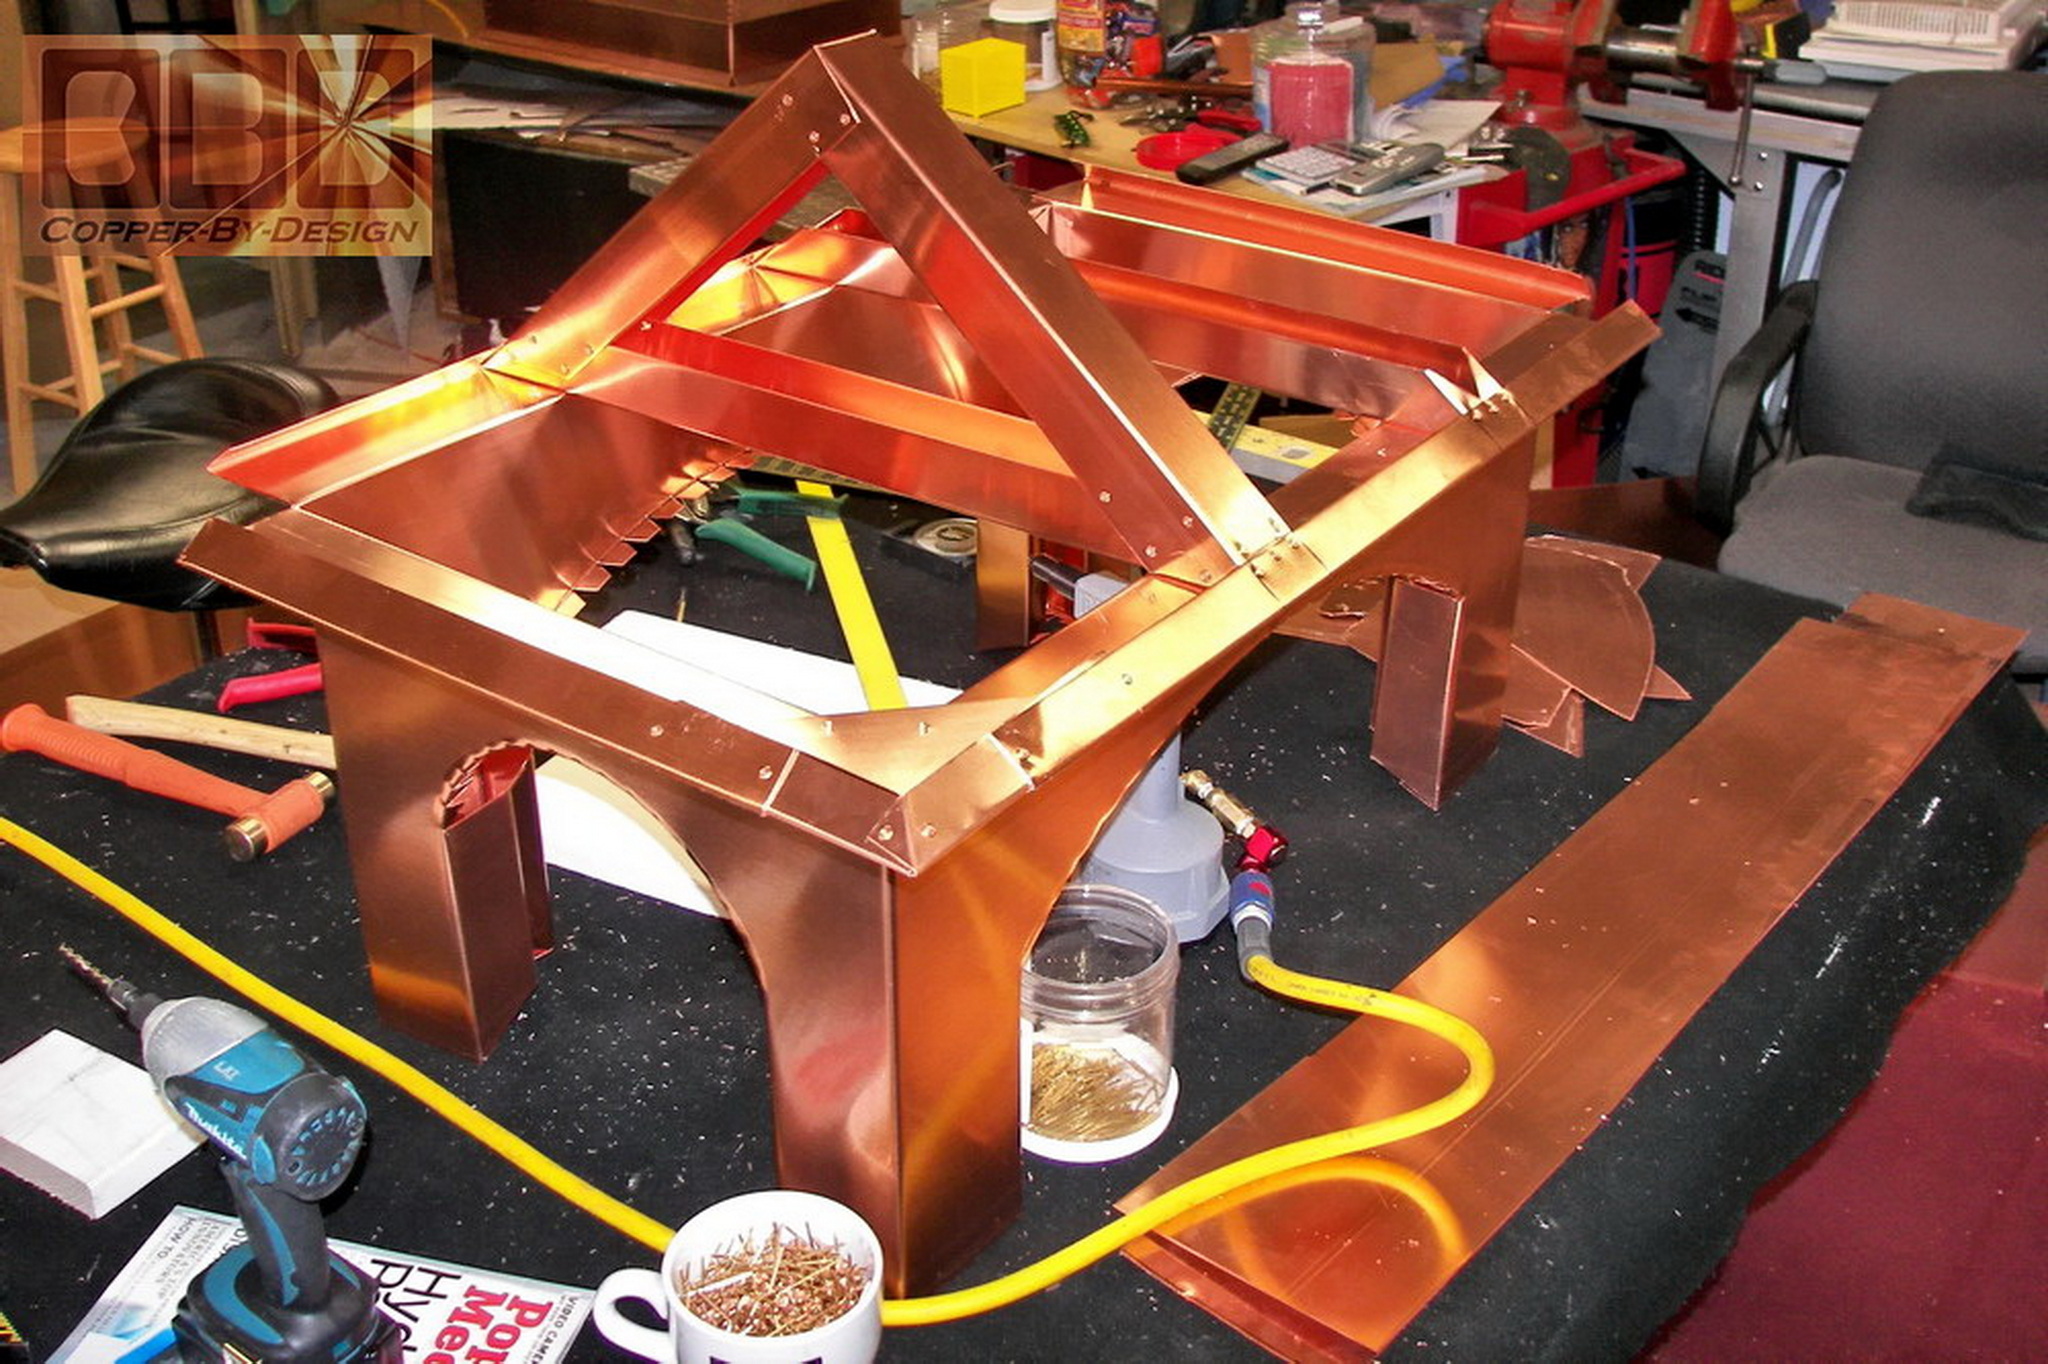
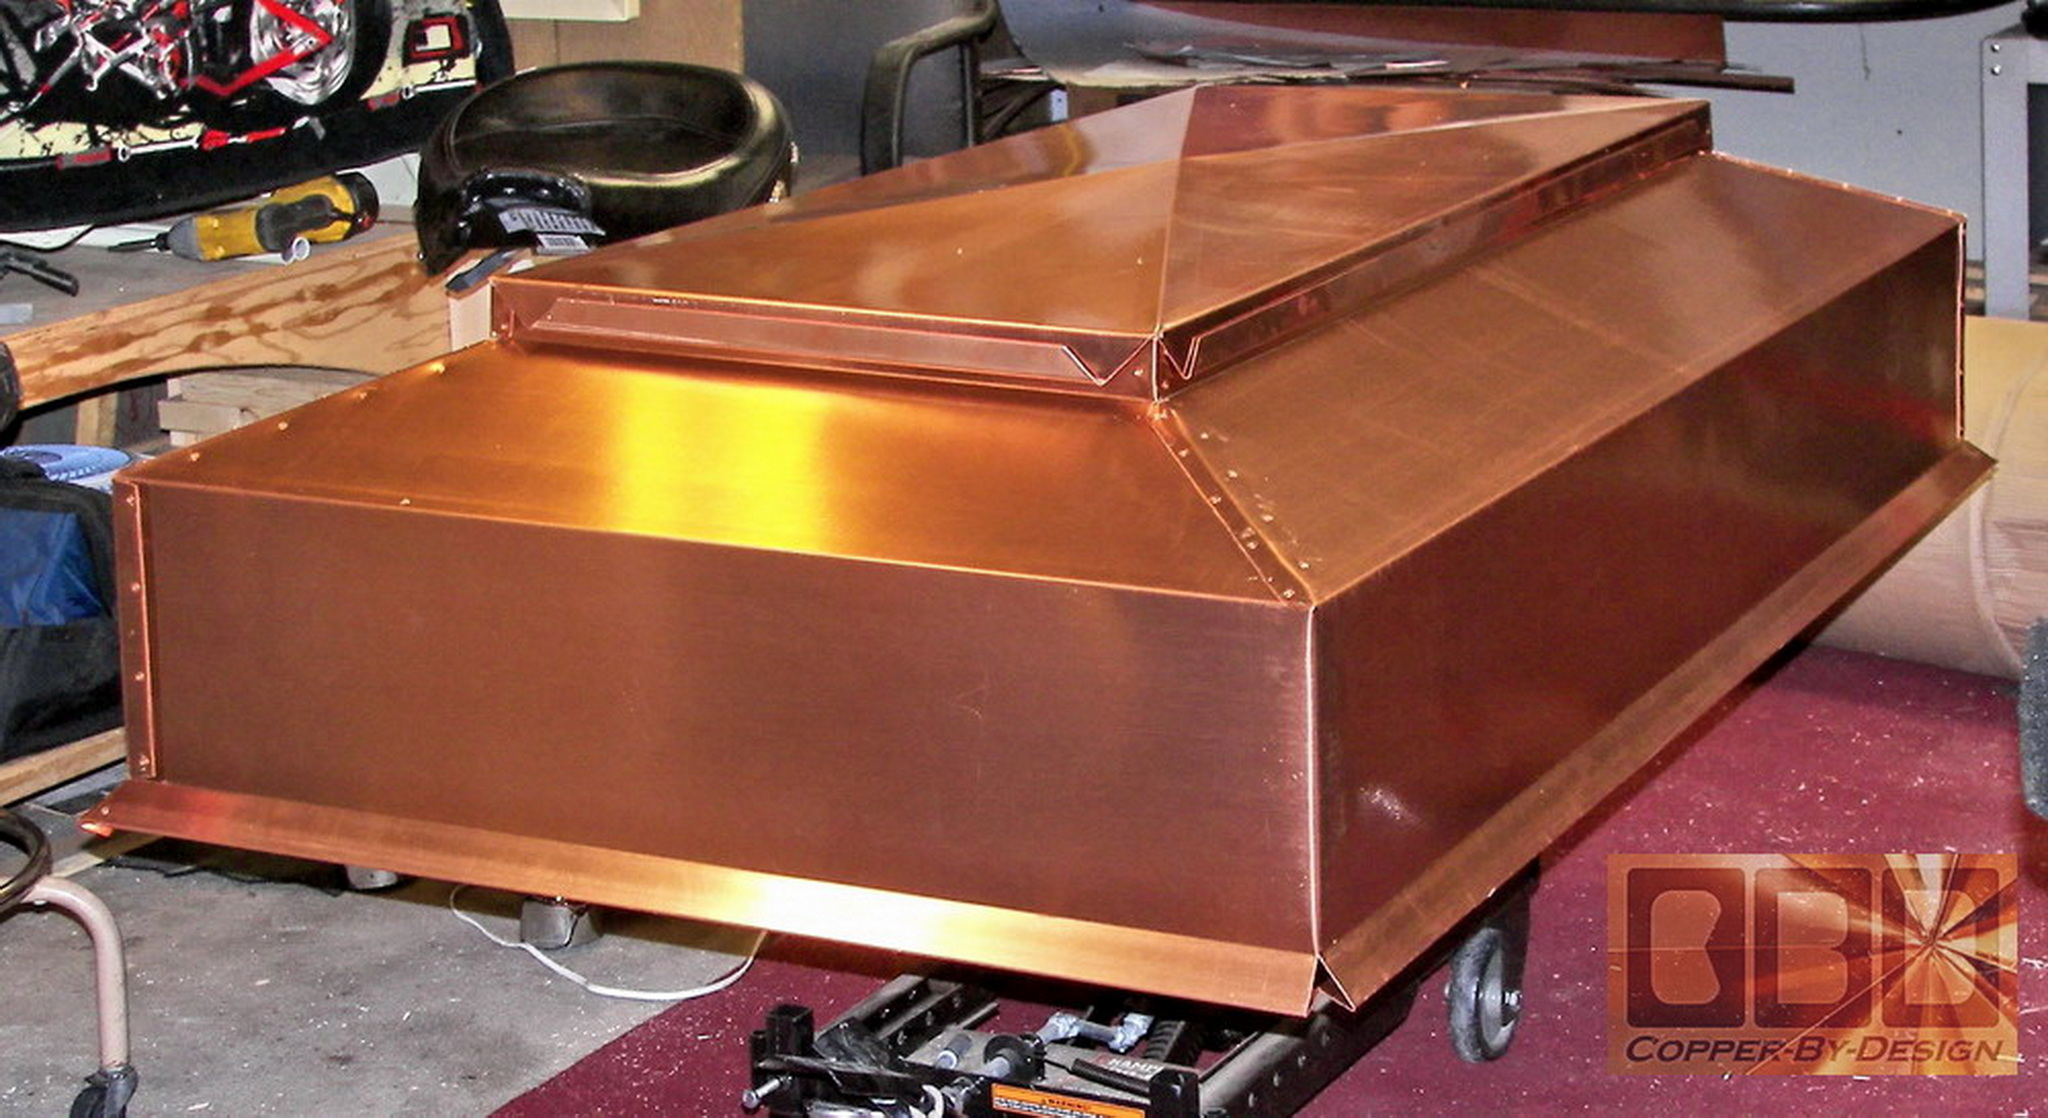
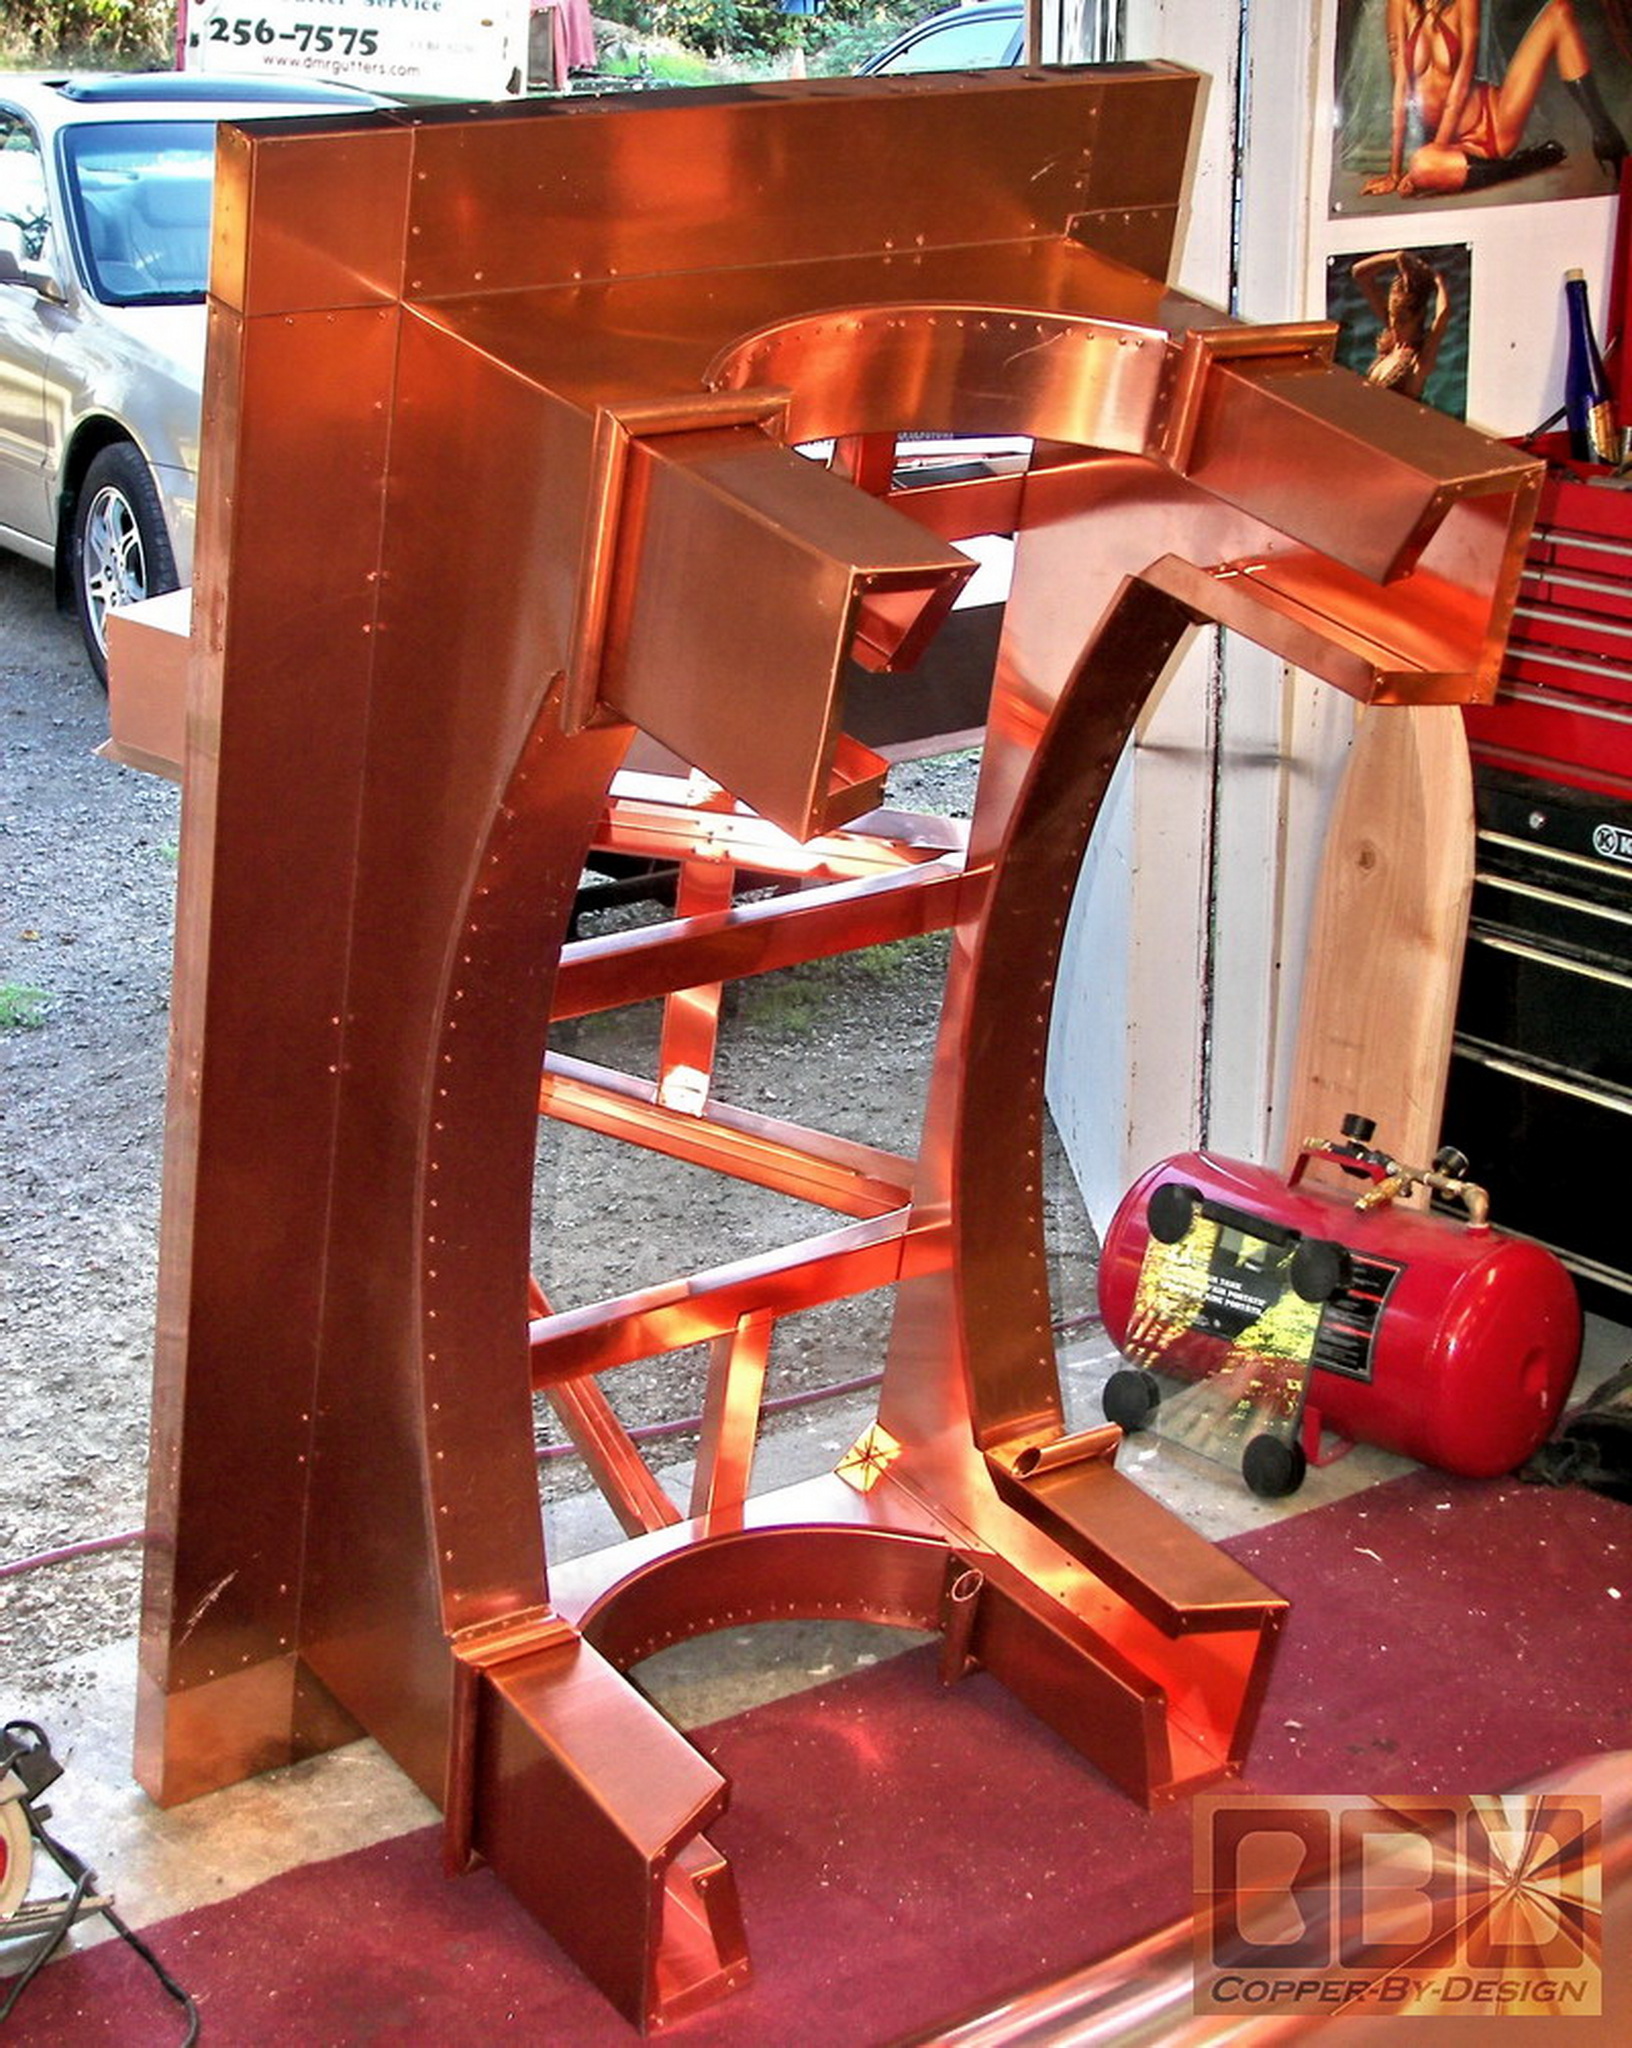
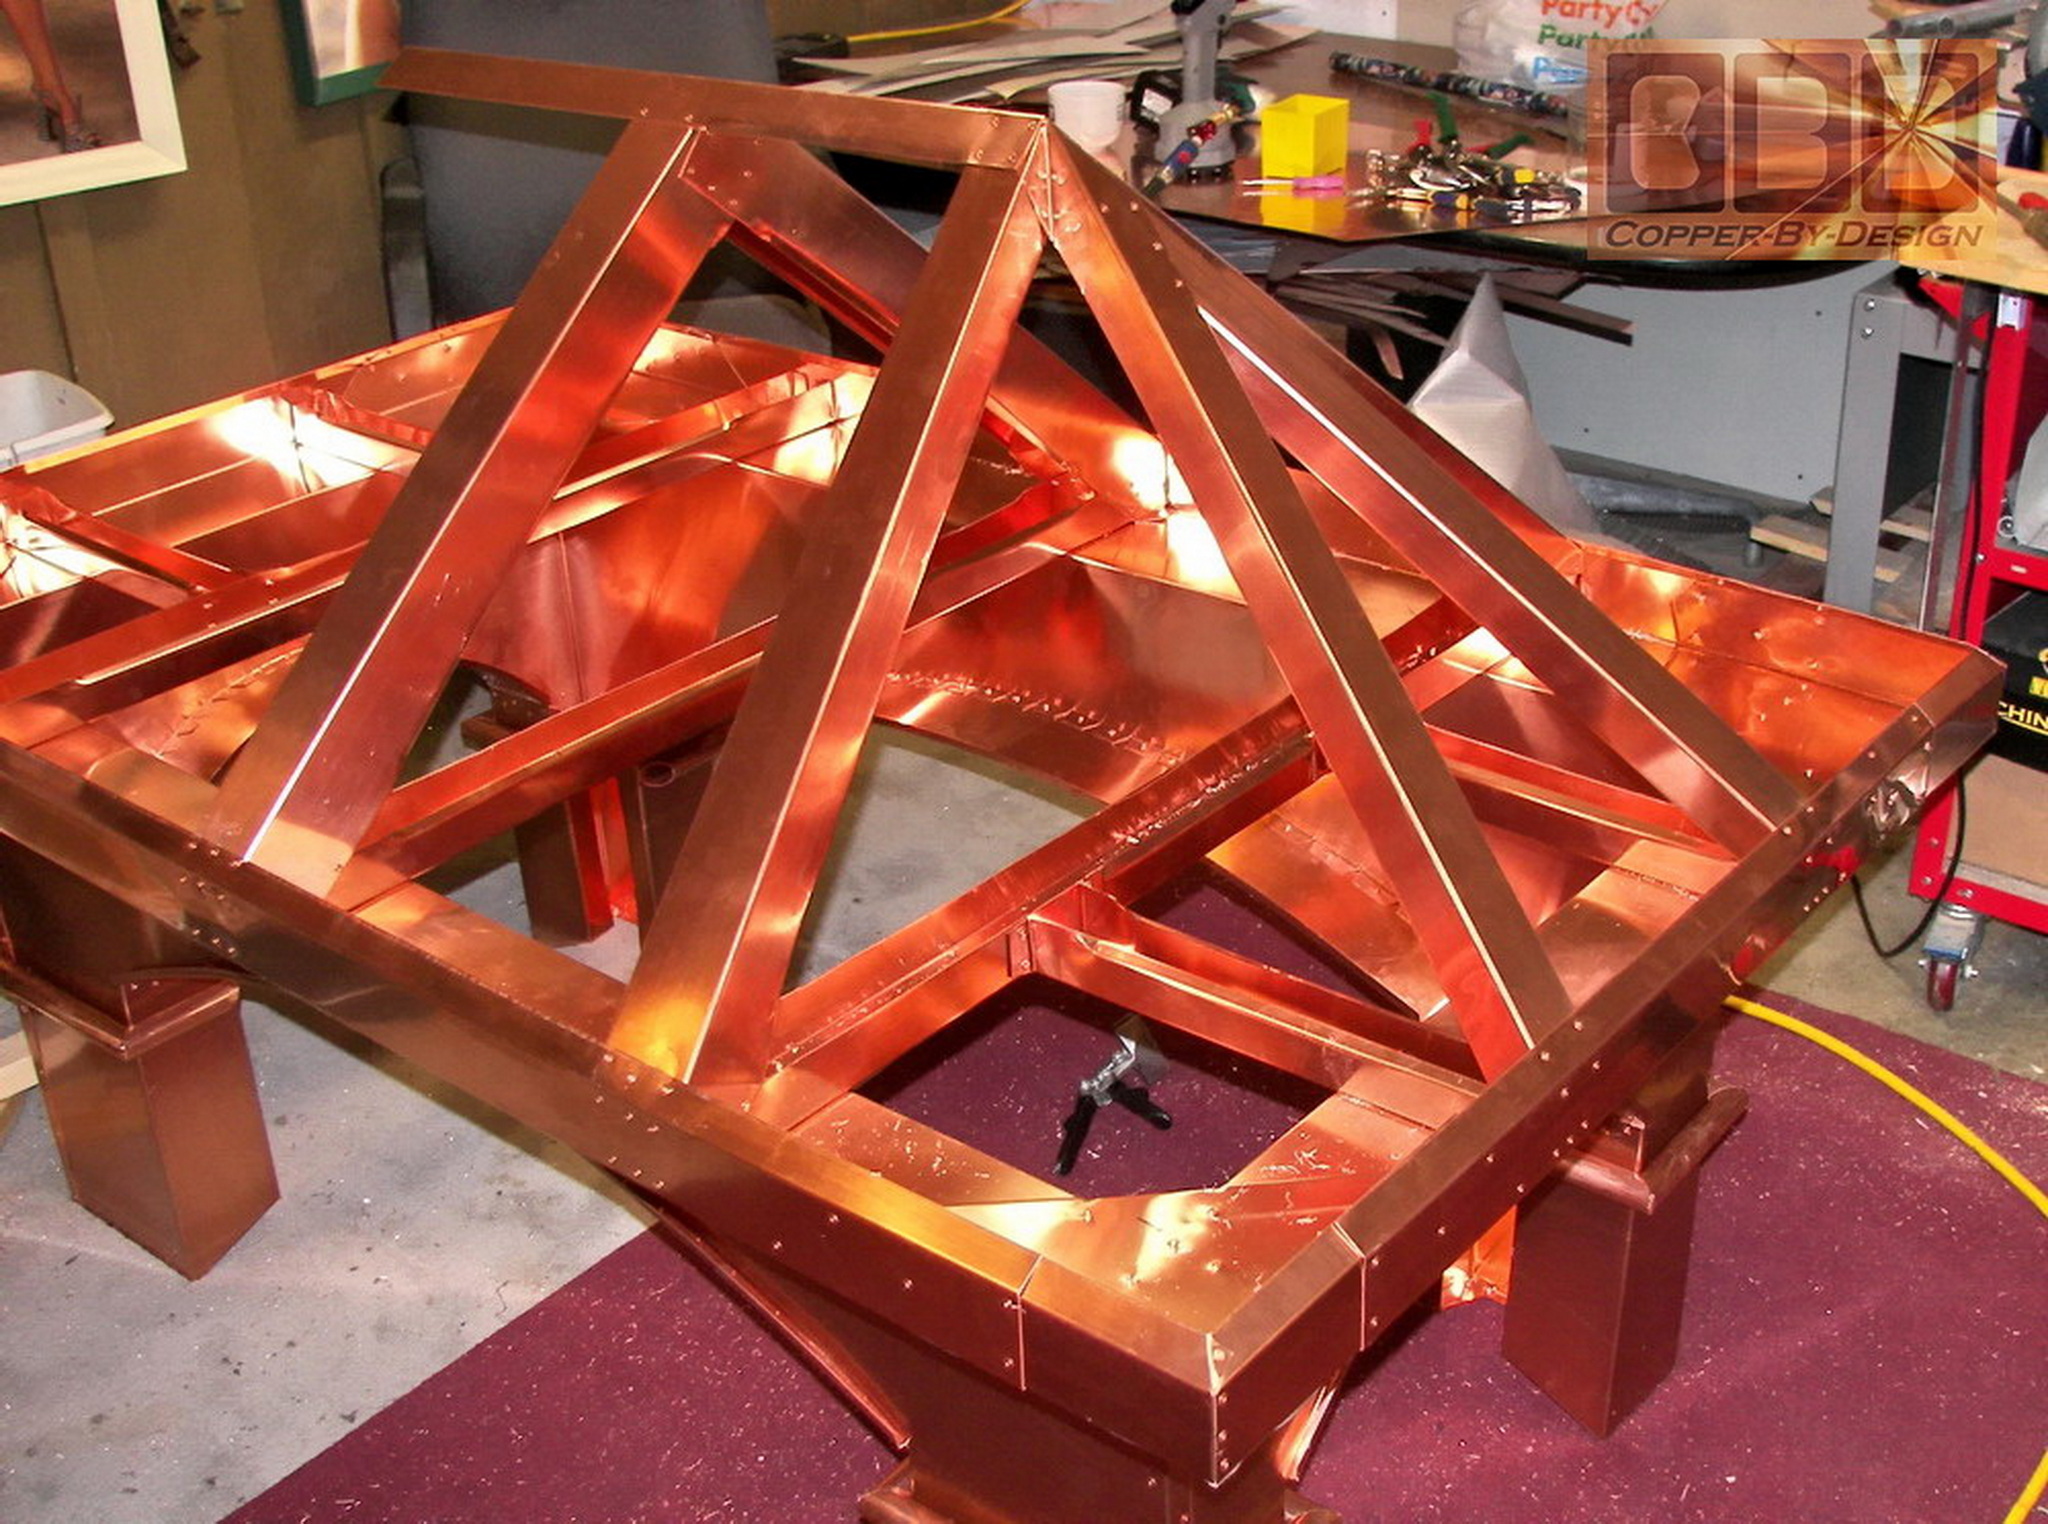
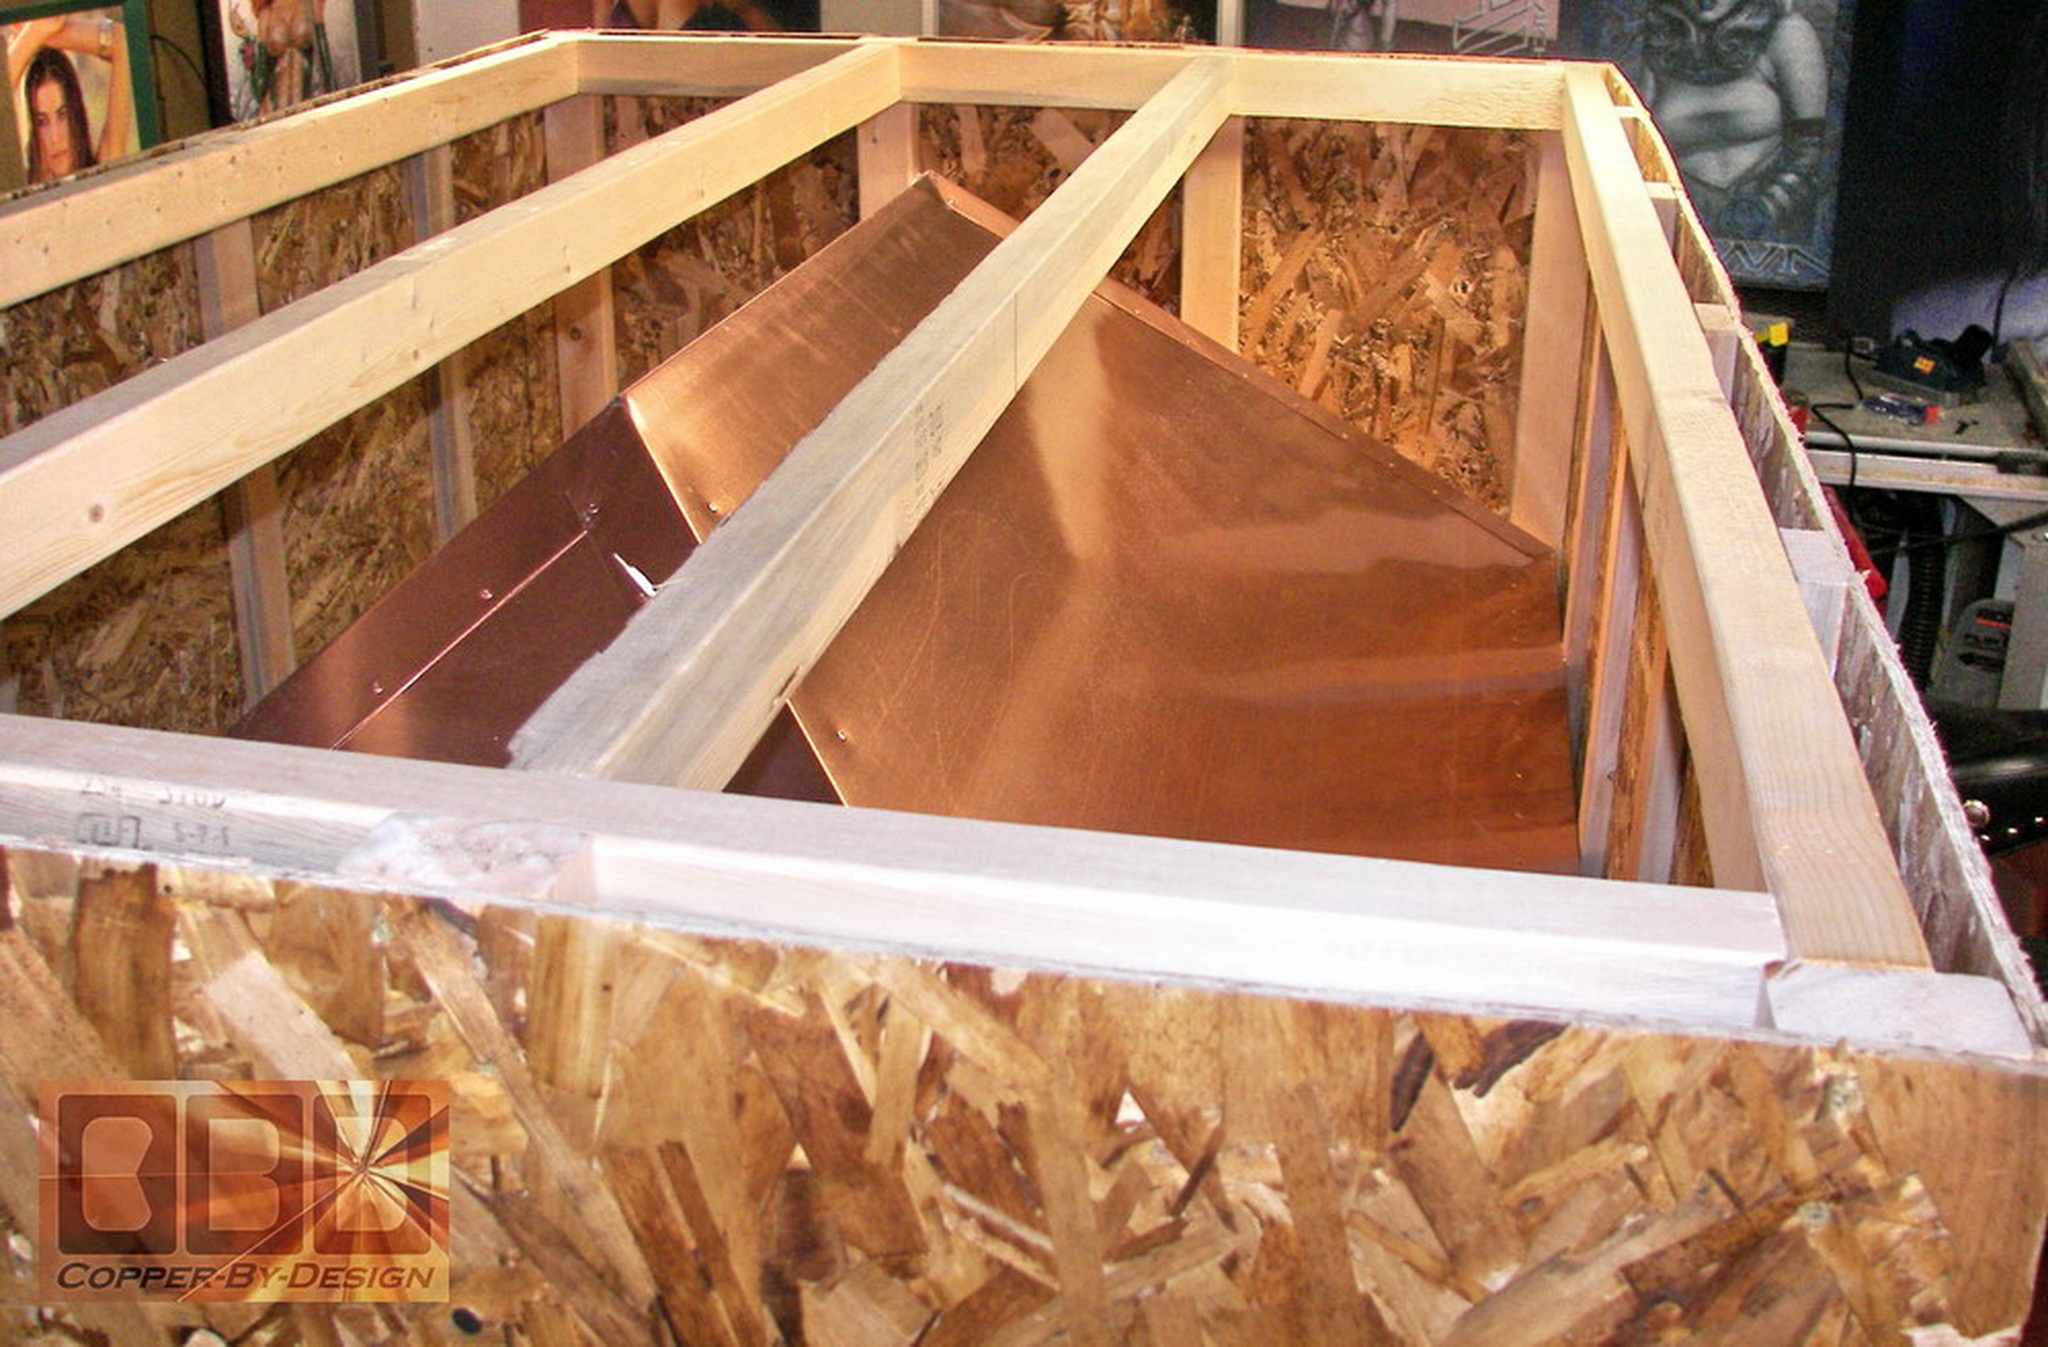
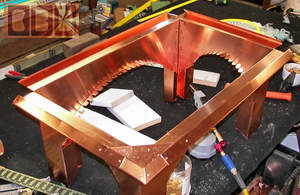
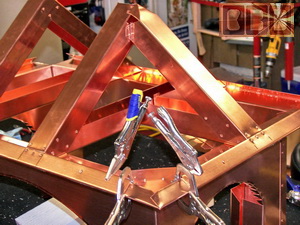
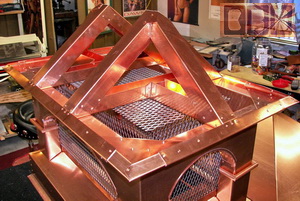
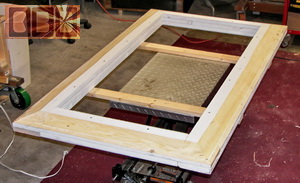
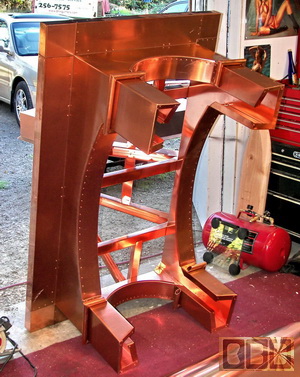
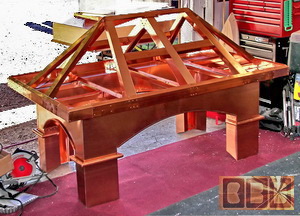
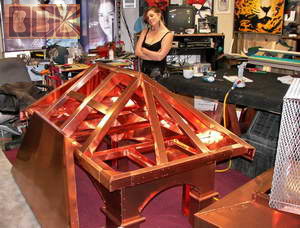
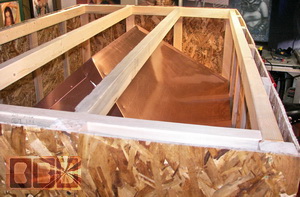
Stage 11:
The Roof Framework (10/23/06)
These photos below shows the much more elaborate
3" wide roof bracing for this larger unit. The braces here take
a sheet of copper that is as much as 9" wide.
When I got these braces fastened on it was amazing how rigid this
mid section became. I could lift it up by on corner and have hardly
any flex. It seems I had still drastically under bid this job.
This added so much more
copper than originally predicted. I had based the quote on how much
copper the Silbernagle chimney cap had used. Not factoring the bracing
under the roof, and I had not gotten the roof pitch of the house
until the day I was to draw up the final diagrams and begin construction.
The Silbernagle chimney cap had only a 6/12 pitch roof, where this
client is getting them with 10/12 pitch roofs. Fortunately for me
Mr. Matovich was understanding and offered another $1k to cover
these changes, but he still was getting about $1,000 worth of free
copper and stainless steel screen in this one unit alone, for this
$4,650 chimney cap.
|
|
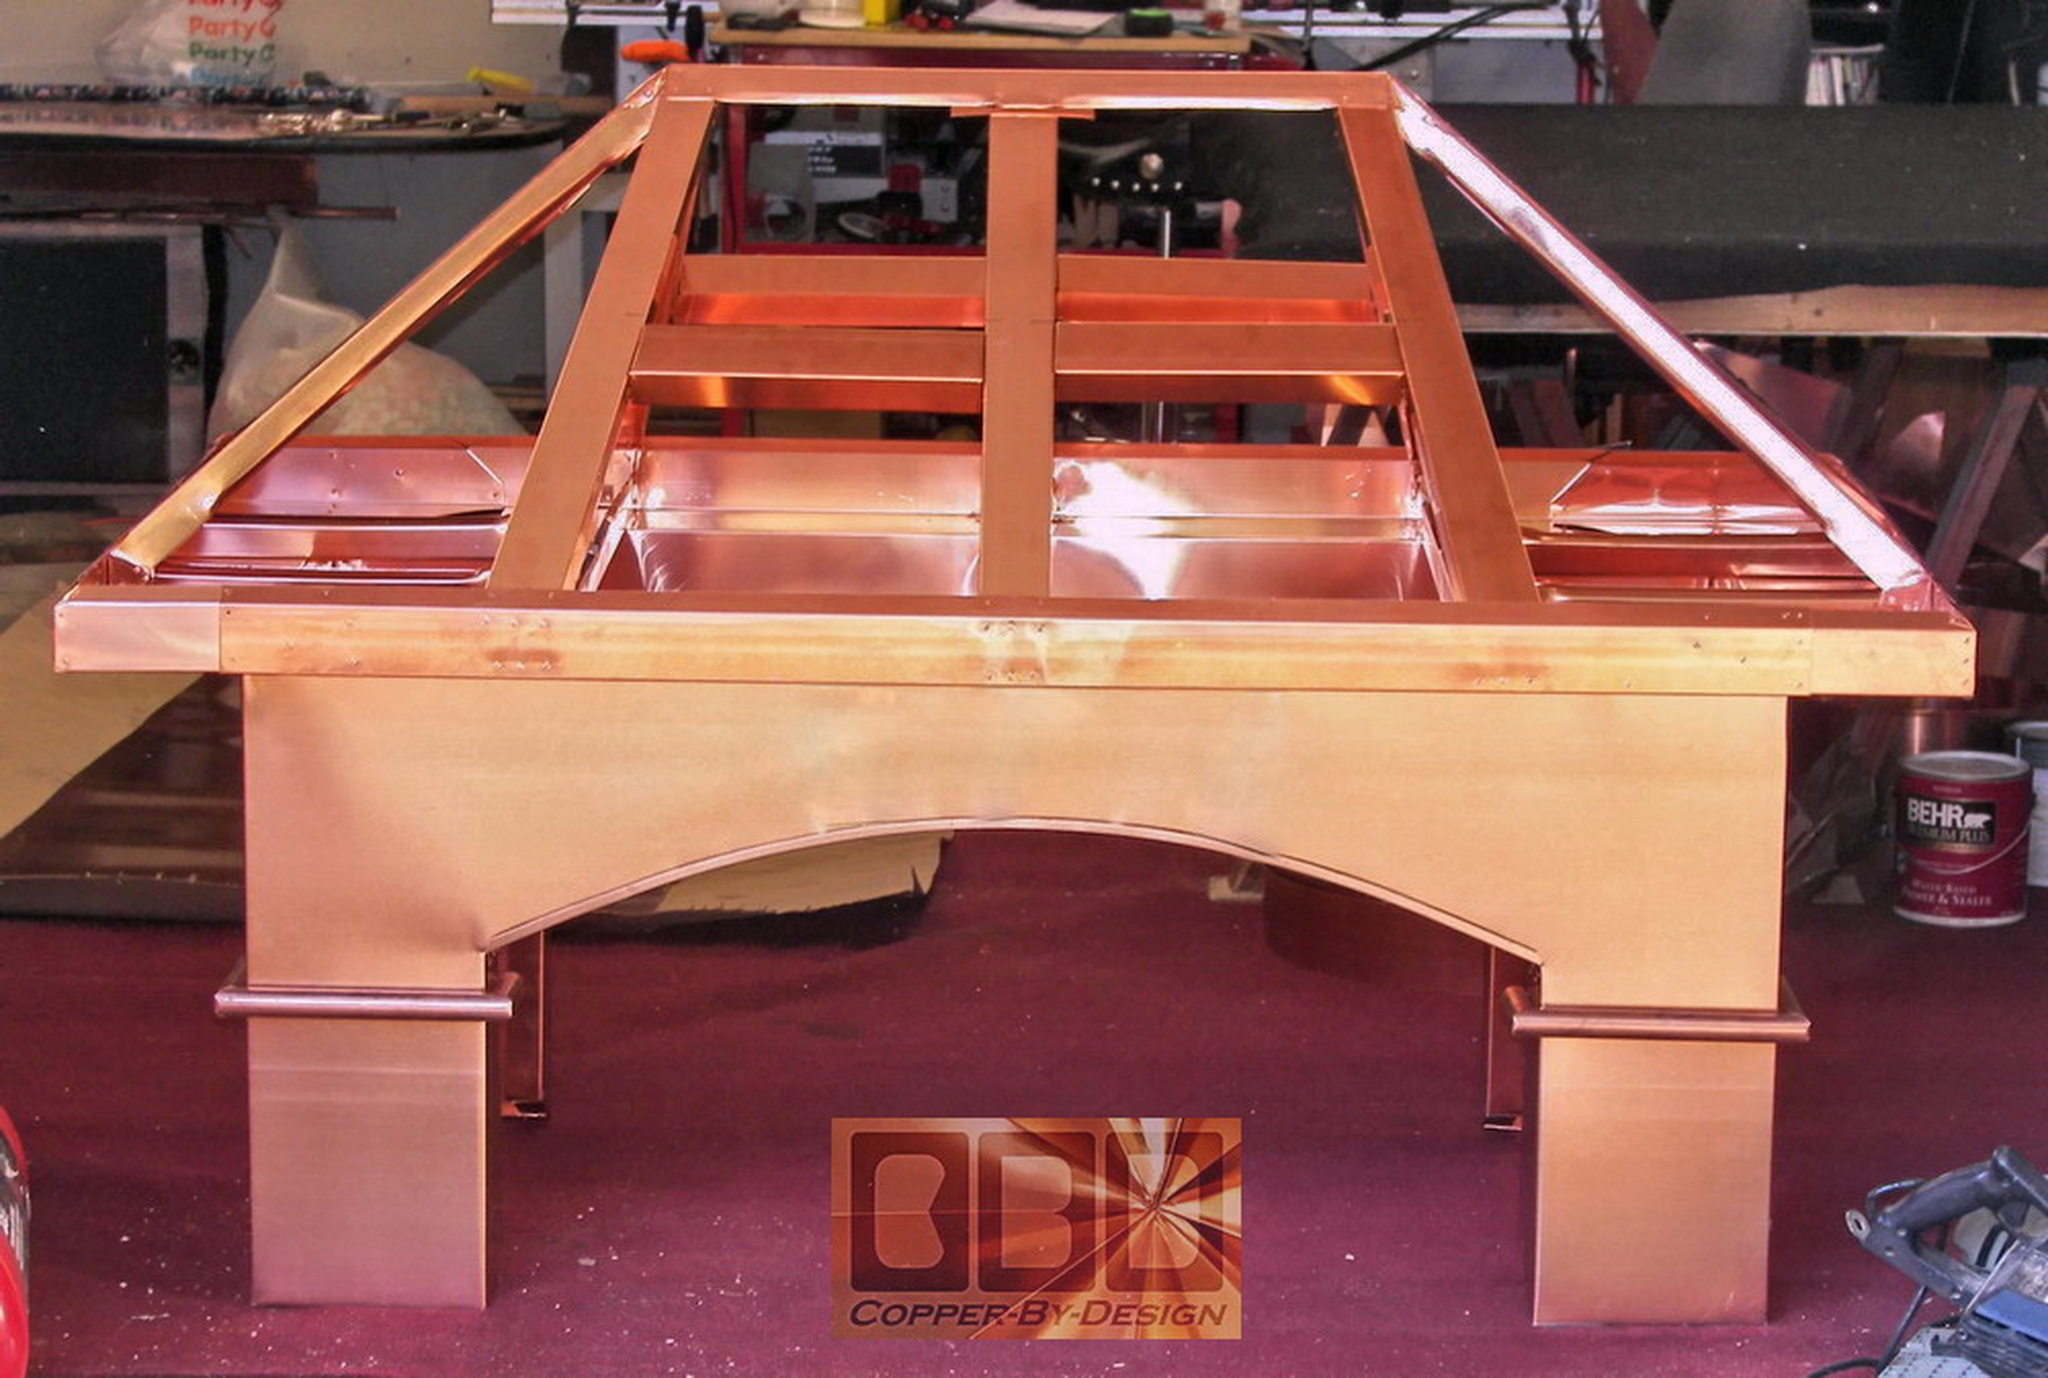
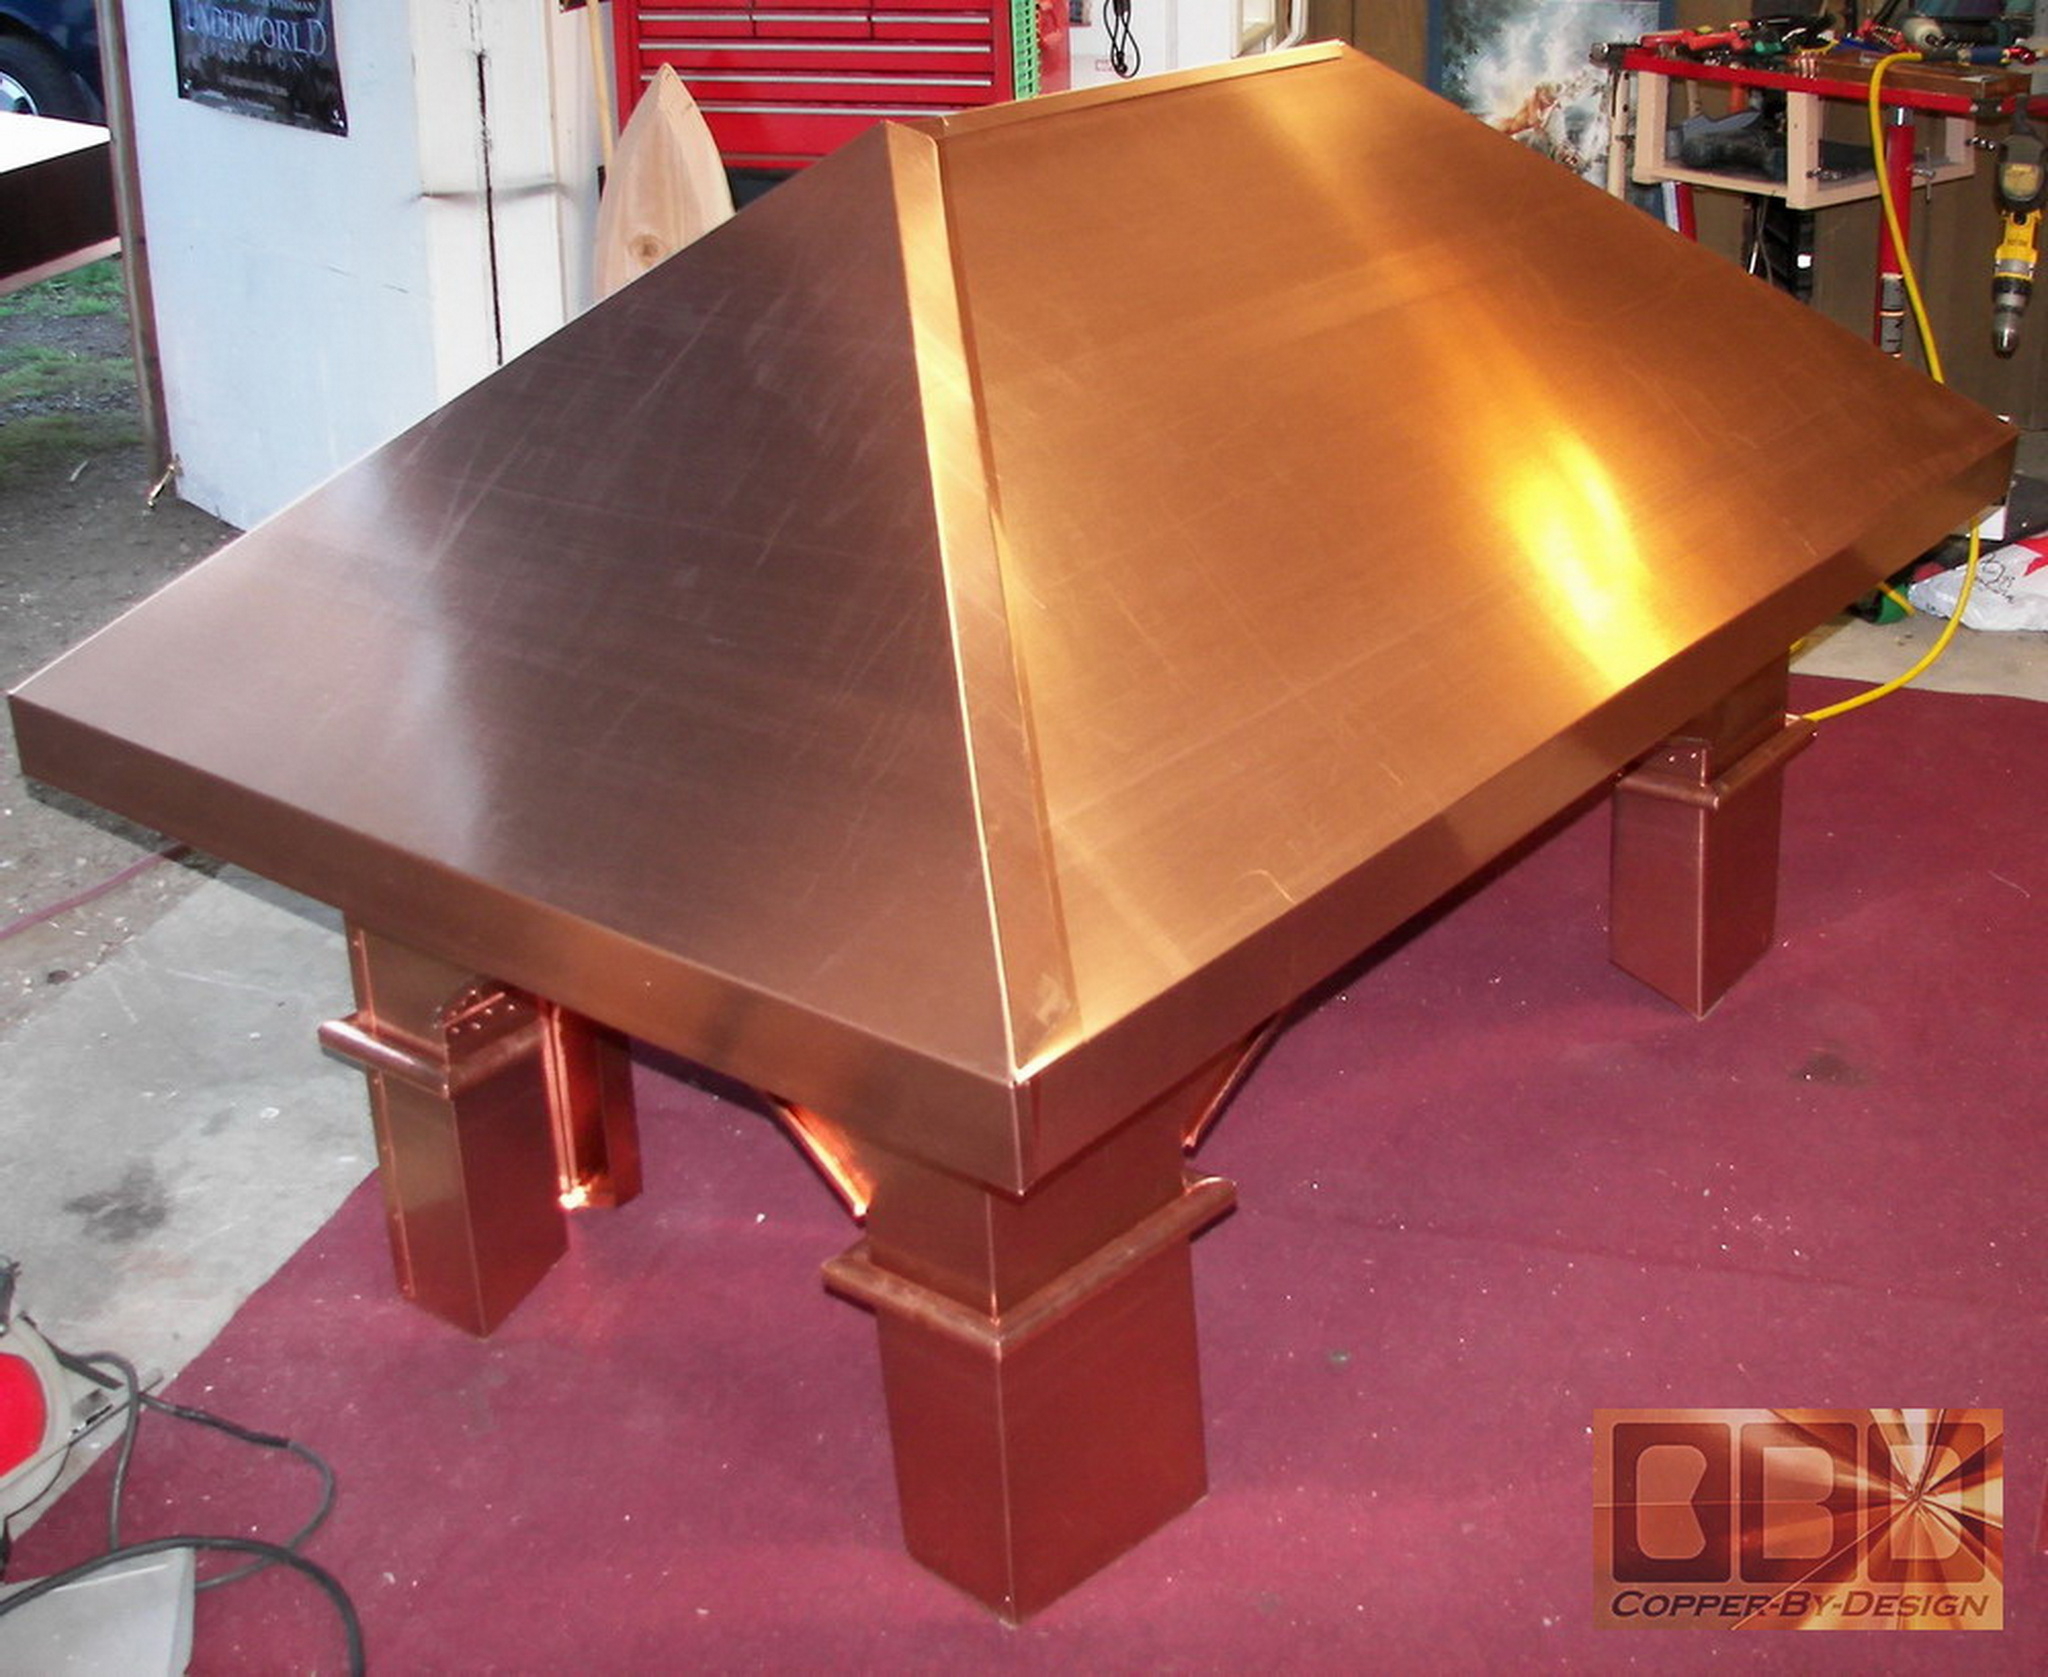
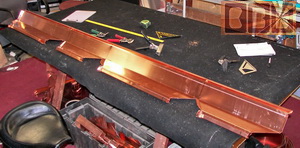
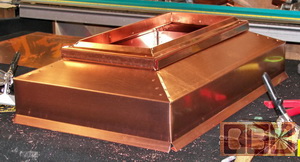
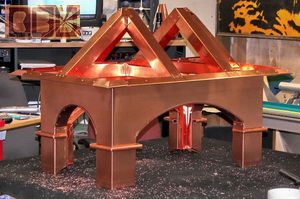
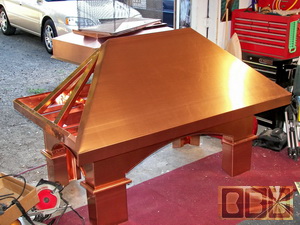
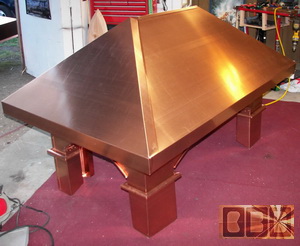
Stage 11:
The Roof Skin (10/27/06)
Then the 4 part roof skin goes over this bracing
and riveted in place.
|
|
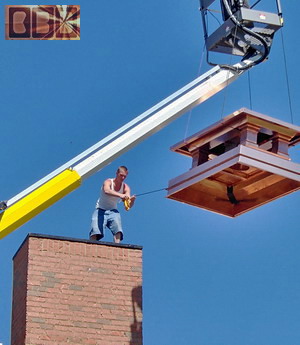
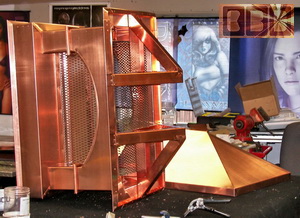
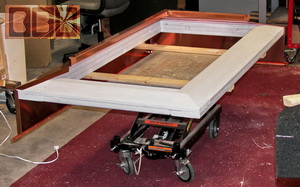
Stage 11:
The Top is Fastened to the Base
(11/2/06)
Here The top ready to get attached to the
base. You can see here I added a brace on both sides of the flue
hole under the pan to help support it from possibly sagging in the
middle. I want to be sure there is no water puddling on the
pan.
|
|
|

|
|
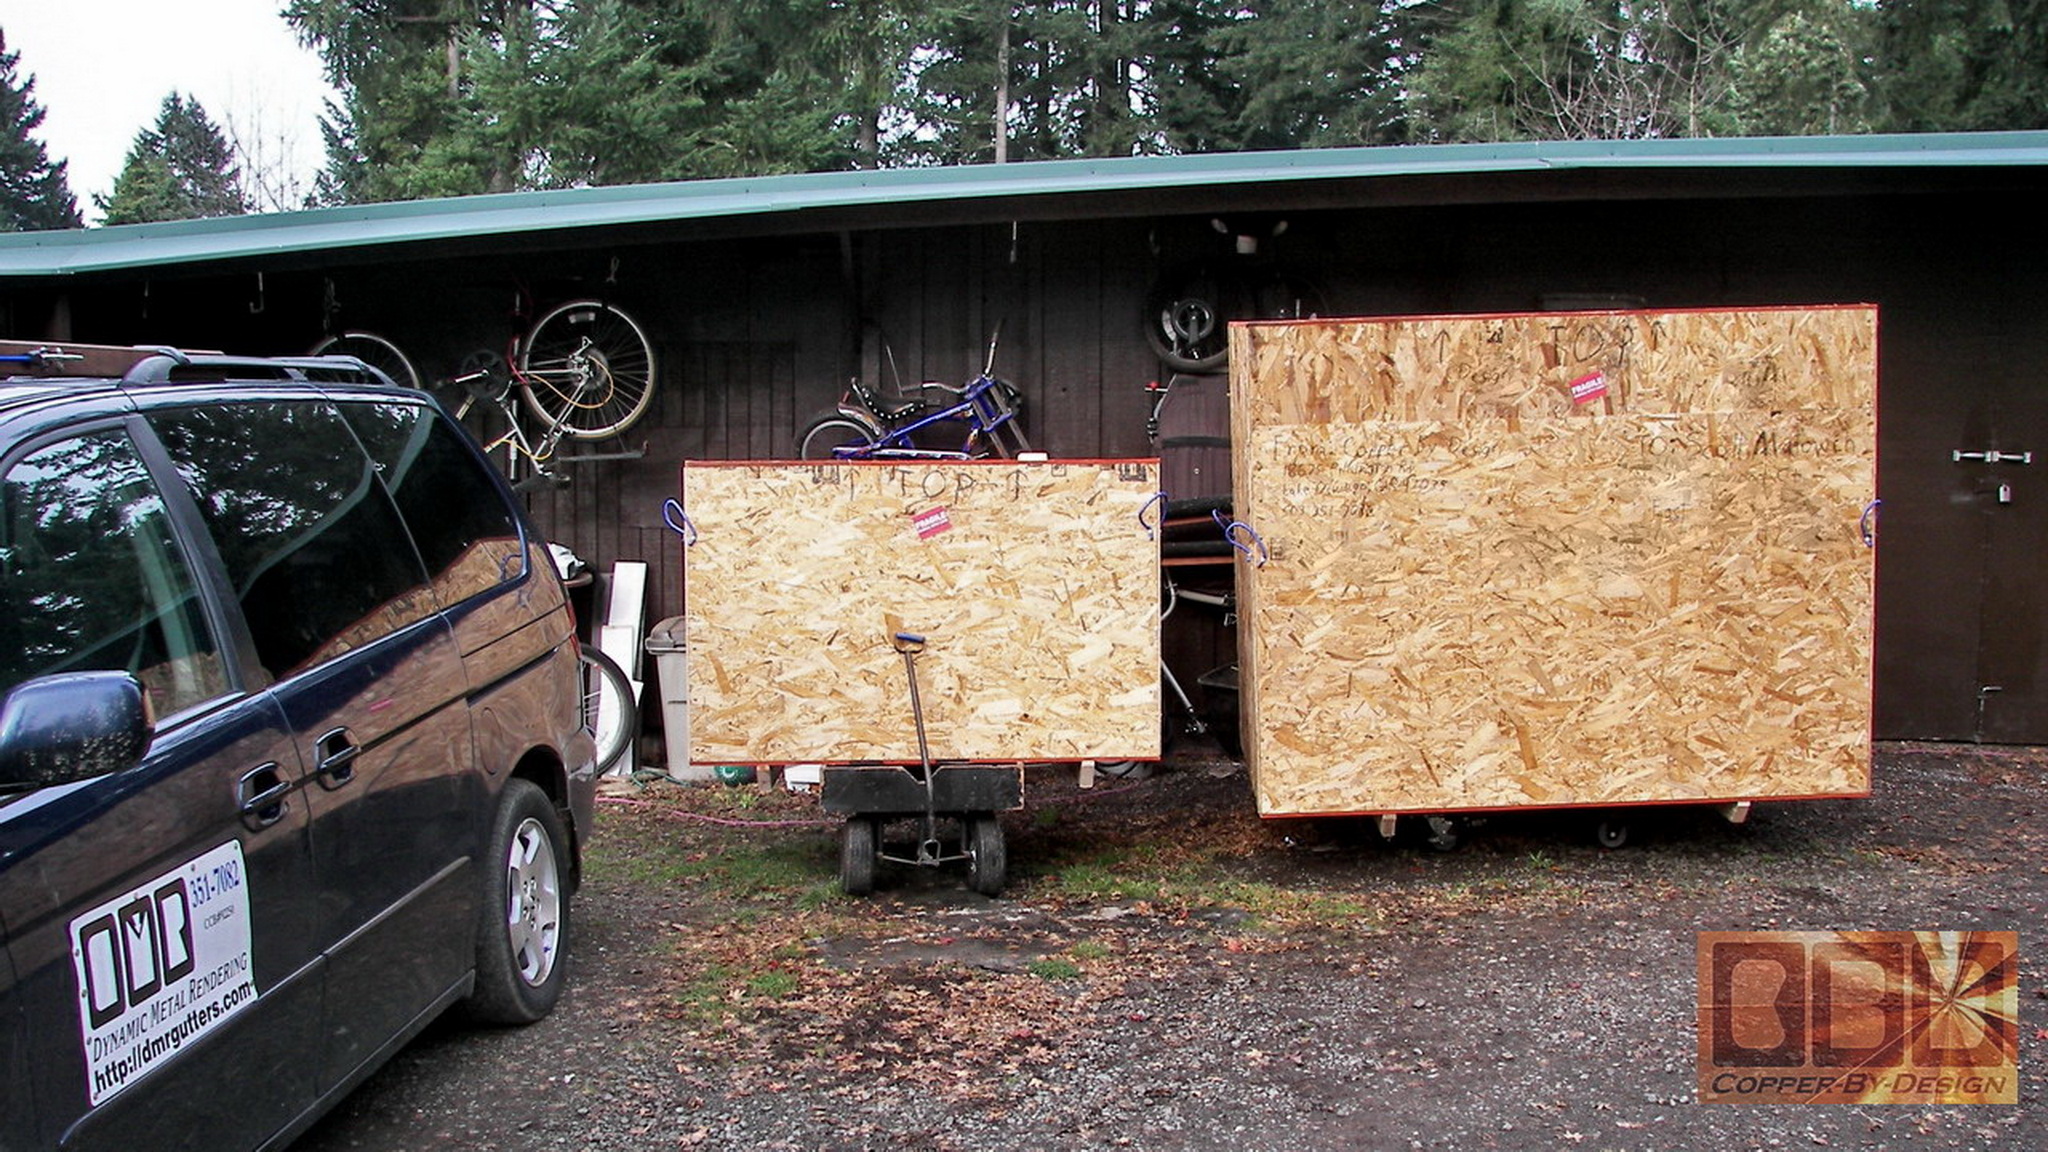
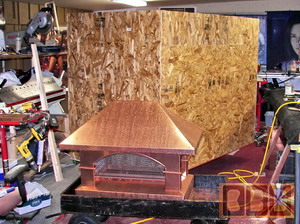
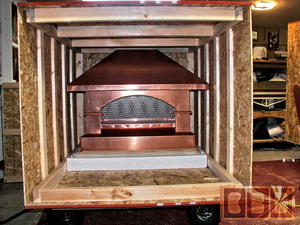
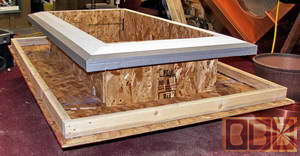
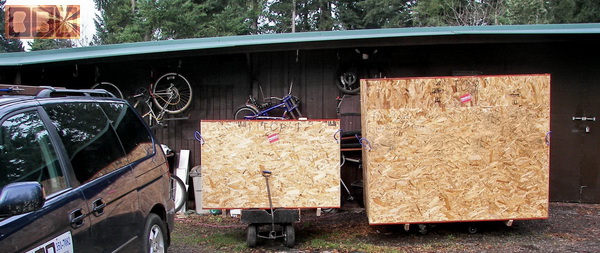
Stage 12:
Building this Large Crate
(11/5/06)
I used 1x3 and 2x3 boards
for this crate frame with all the screw holes pre-drilled, so the
boards would not split. I also glued them together as I set the
screws. The chip board was then glued and nailed to this frame.
I later came to realize that even though the 1/4" hardwood plywood
may be twice the cost, it is worth it in the savings of crate weight.
The shipping charges are more for the heavier wood than the cost
difference of the lighter harder crate shell.
I used about 162.75
square feet of copper plus 27.9 square feet of the SS screening,
compared to the total of 130 sq' we had estimated. I later got the
final measurements that were a good deal larger than the first set
of numbers. That is 60.48 square feet more than in the original
quote. This is a good example of how we refuse to short cut quality
even when we are not getting paid enough for the amount of materials
that go into a project. Strength is paramount to us. This unit weighs
a total of around 230 pounds in all, not including the weight of
the wood frame the chimney cap will be resting on.
$5,440.50
- large chimney cap 162.75 sq' x $30 per sq', plus 27.9 sq'
SS screen x $20
This project has already taken over
3 weeks so far.
|
|
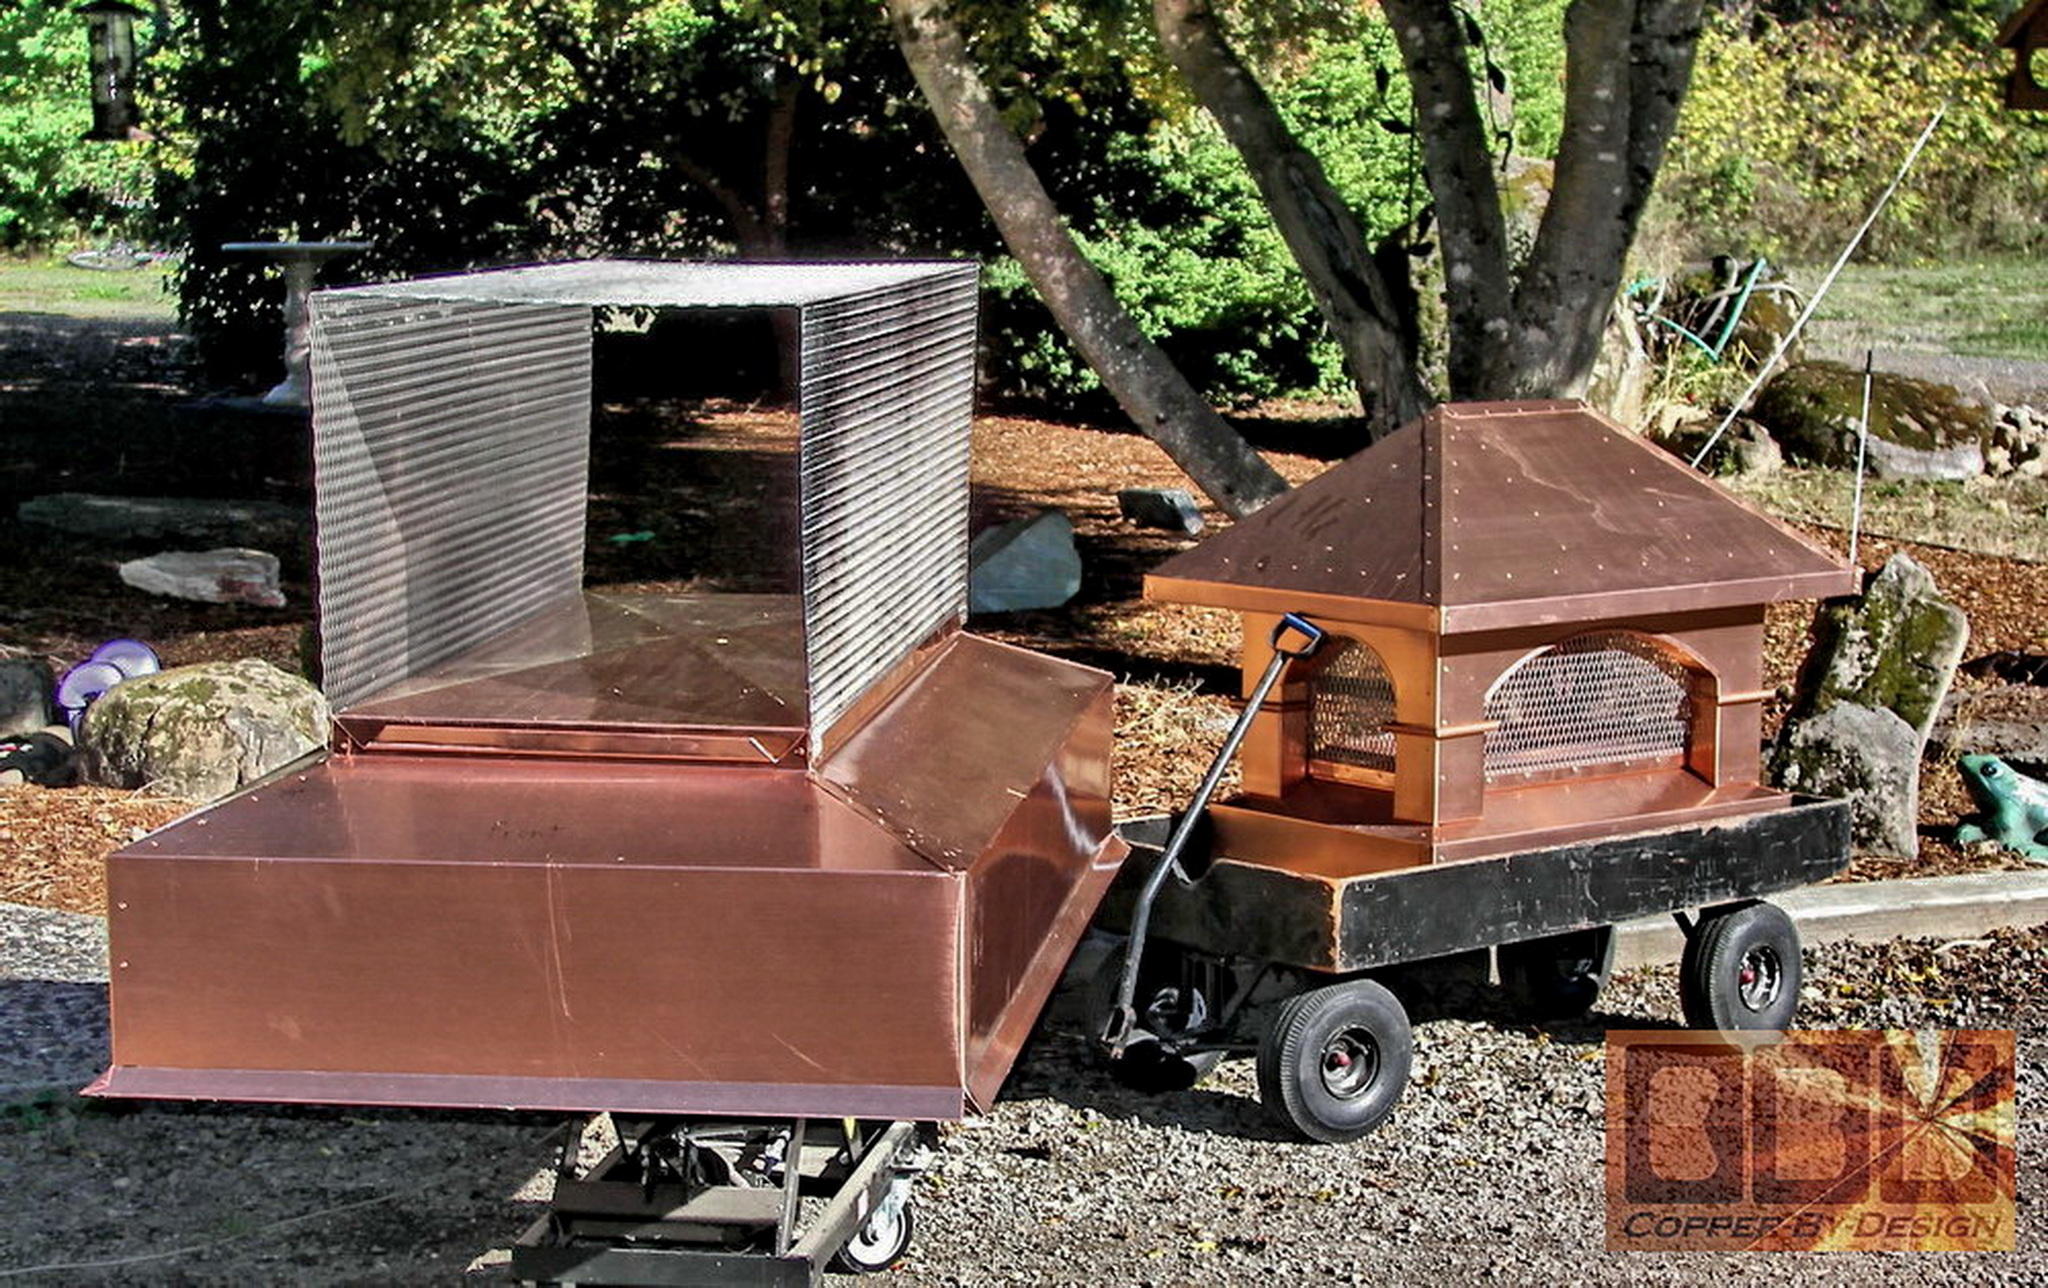
The
Matching Cupola w/Lights & Weathervane
Mount
|
|
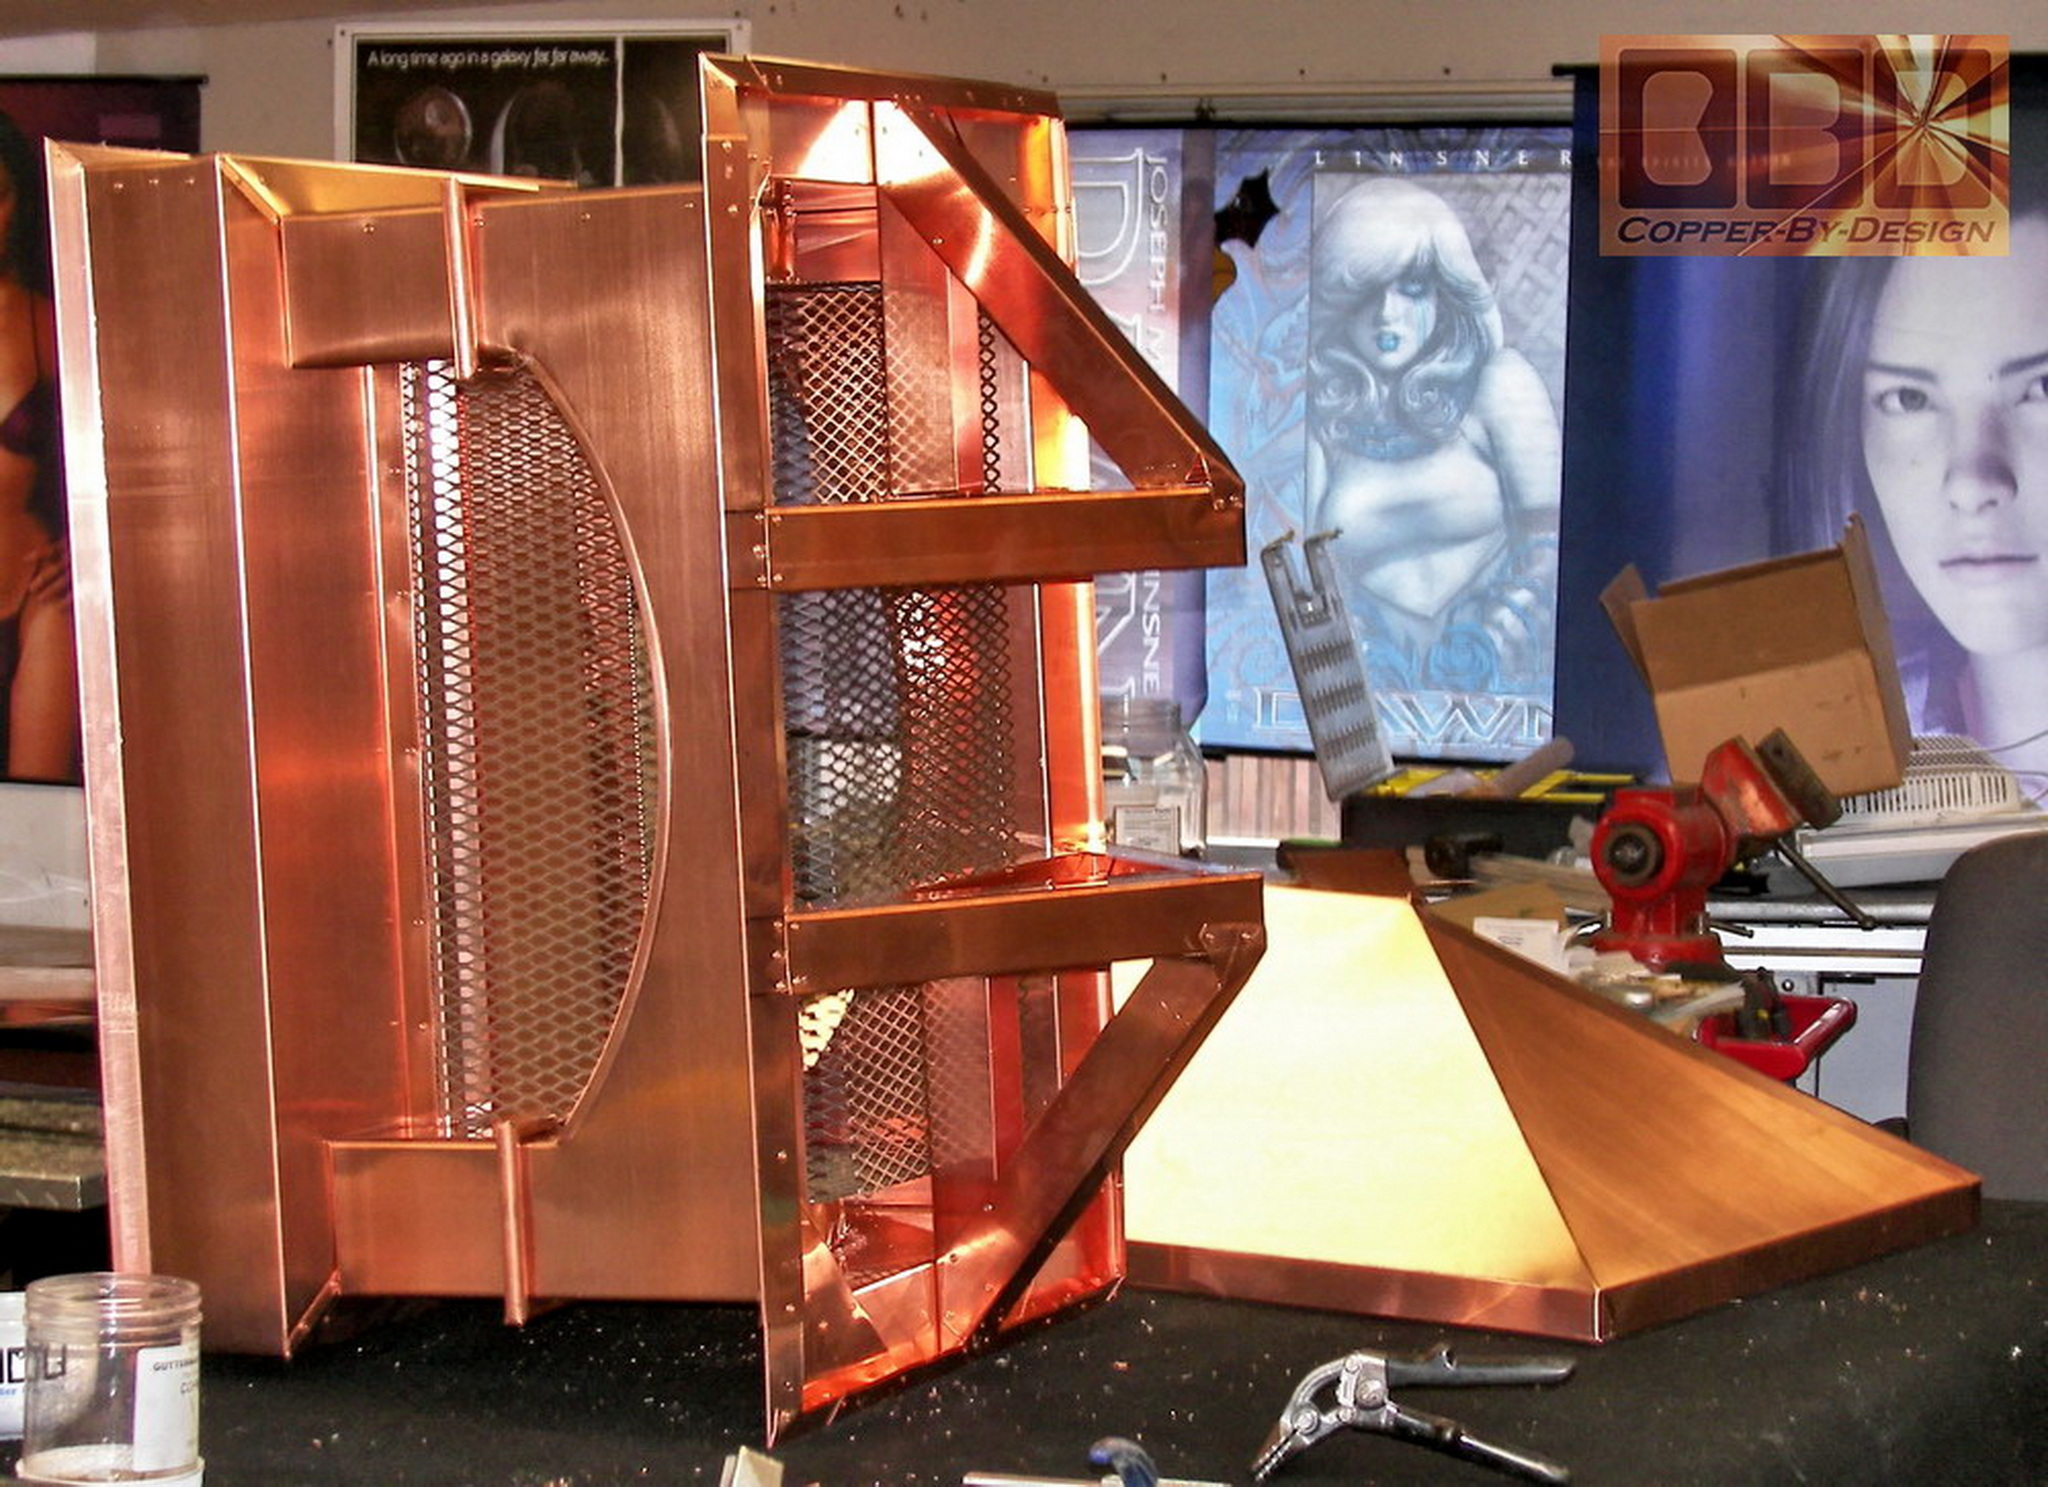
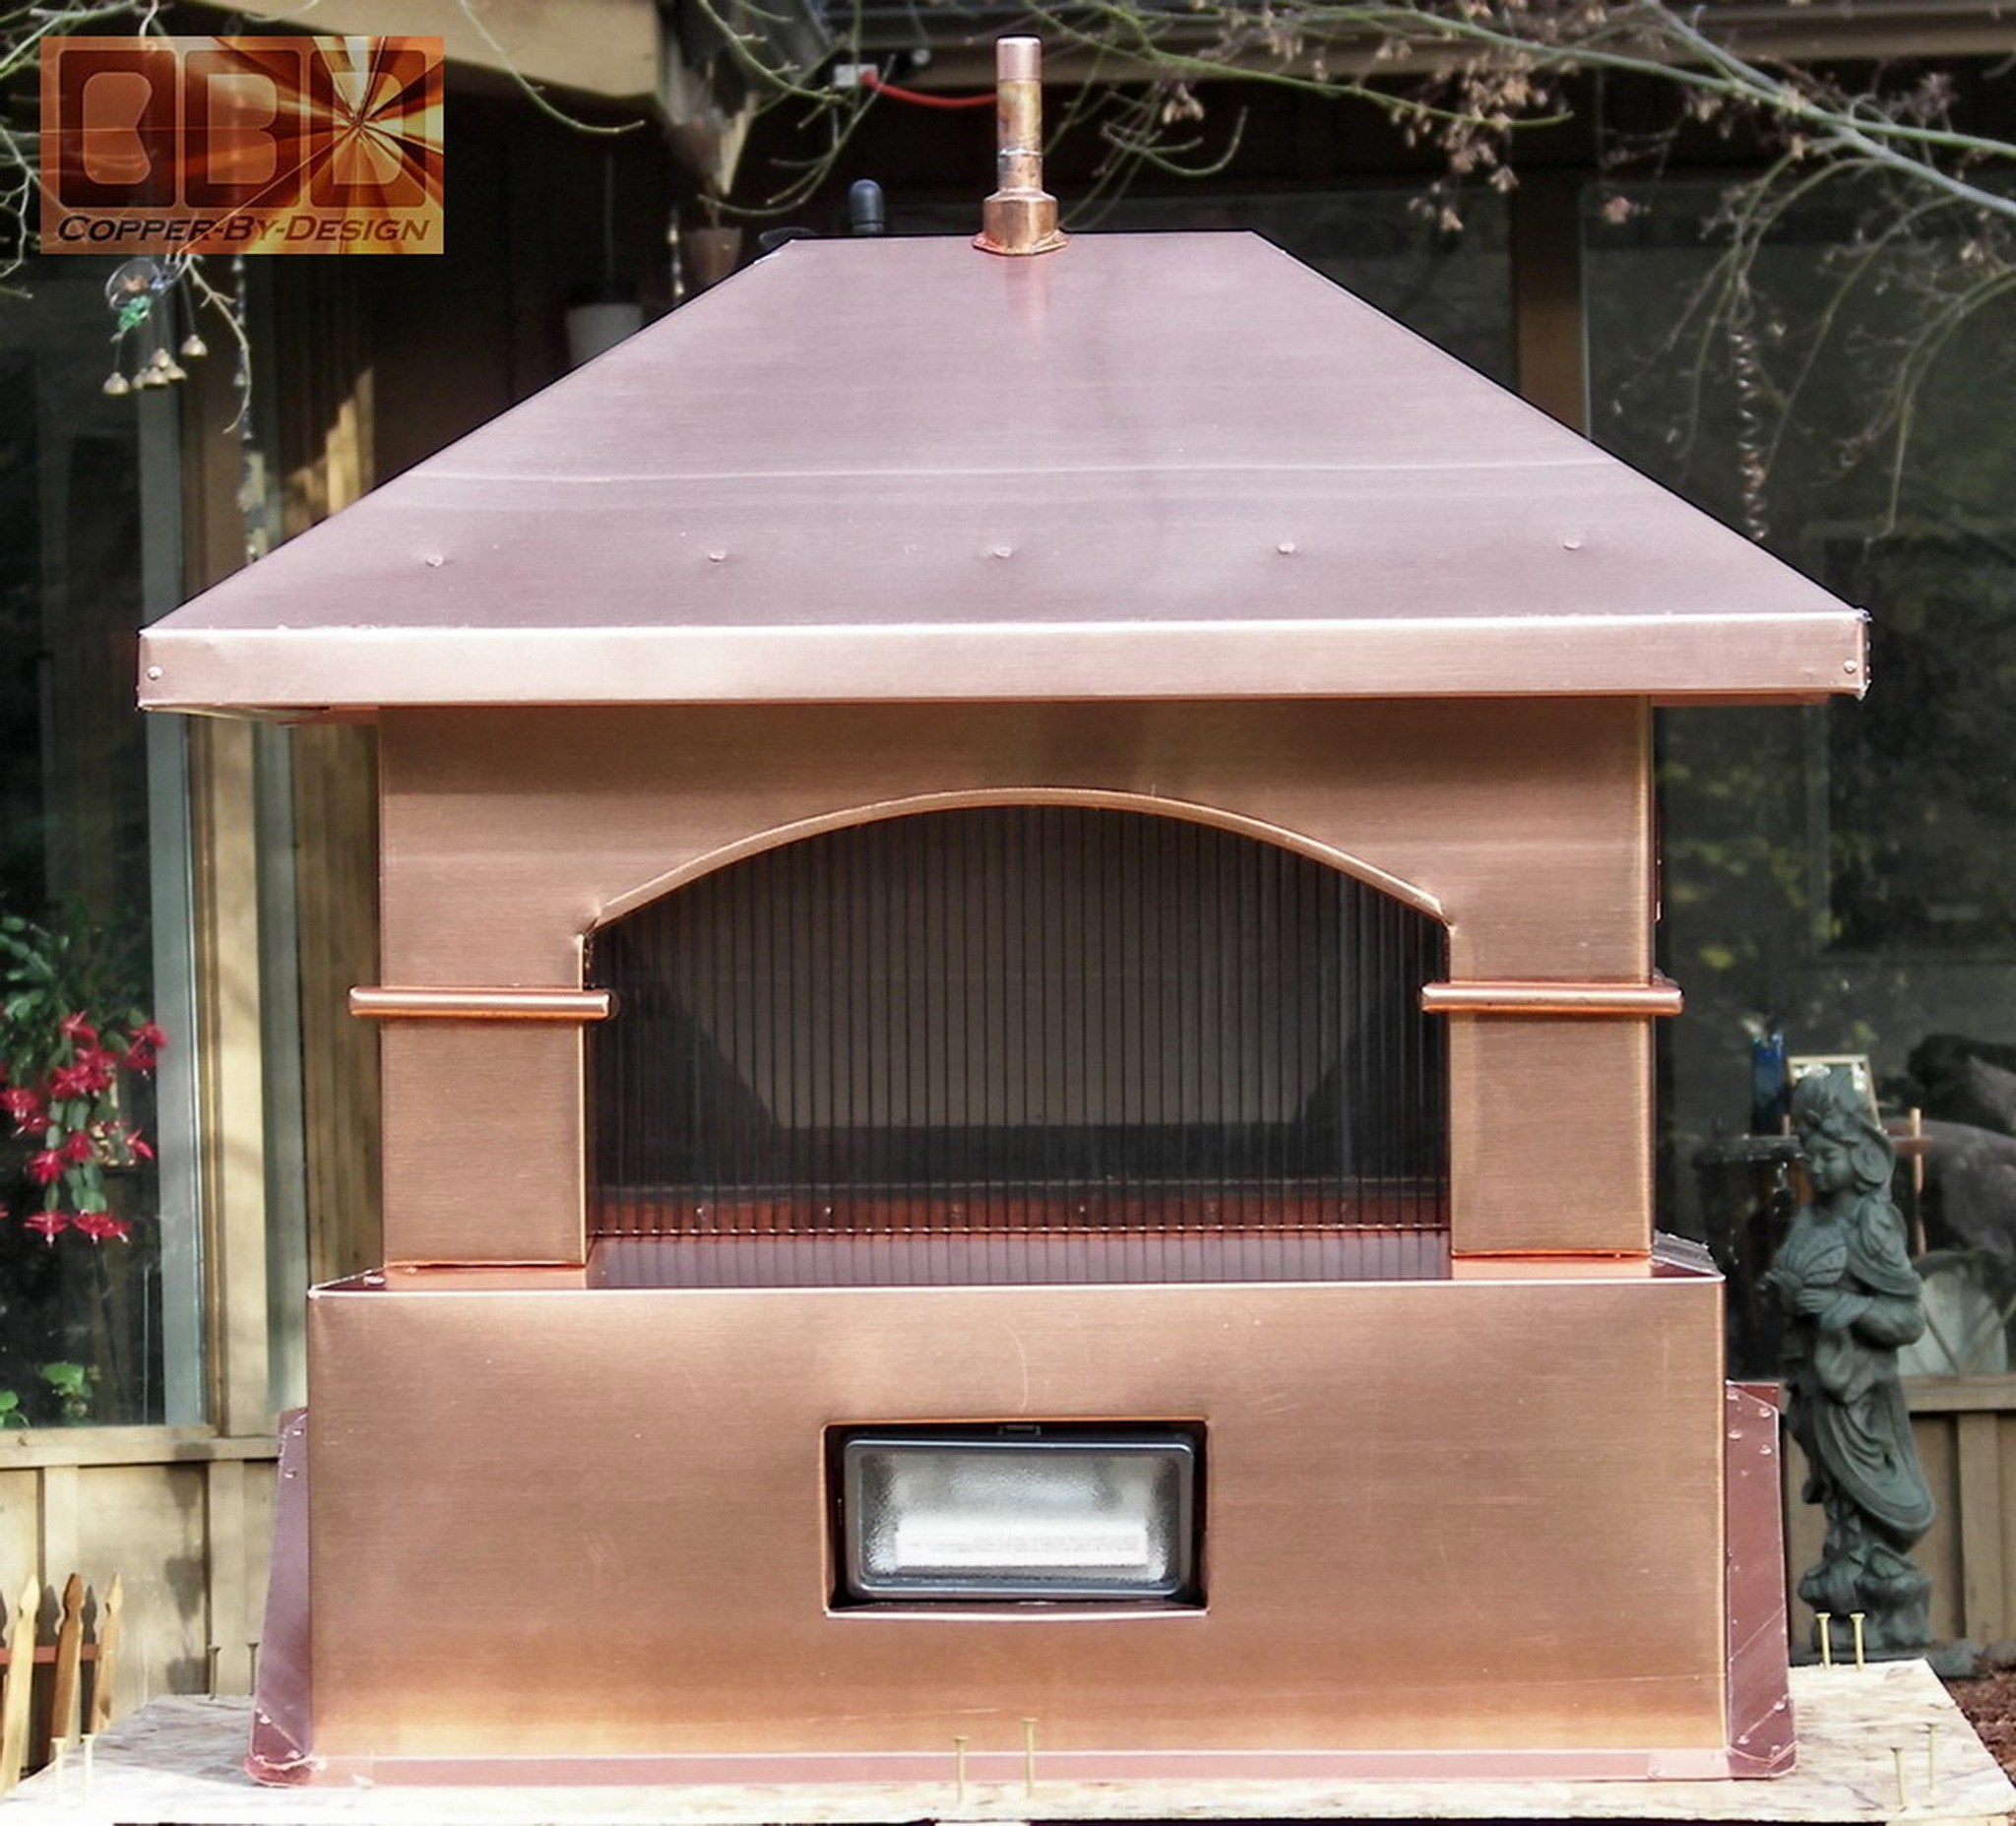
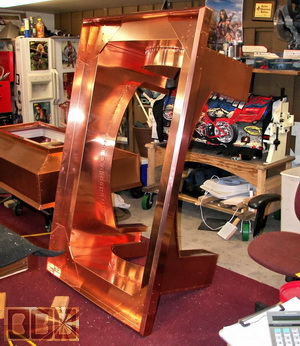
Stage 13:
Building the Cupola (11/16/06)
This one is just a couple inches smaller than
the small chimney cap shown above, but taller with the longer base
skirt to match the roof angle to sit on the roof ridge. I had to
rig up a weathervane mount in this roof structure. This right shot
shows the 3 layer 1x4 Poplar hardwood brace I made in the middle
to hold the bottom of the support pipe. It has a cherry stain over
it.
|
|
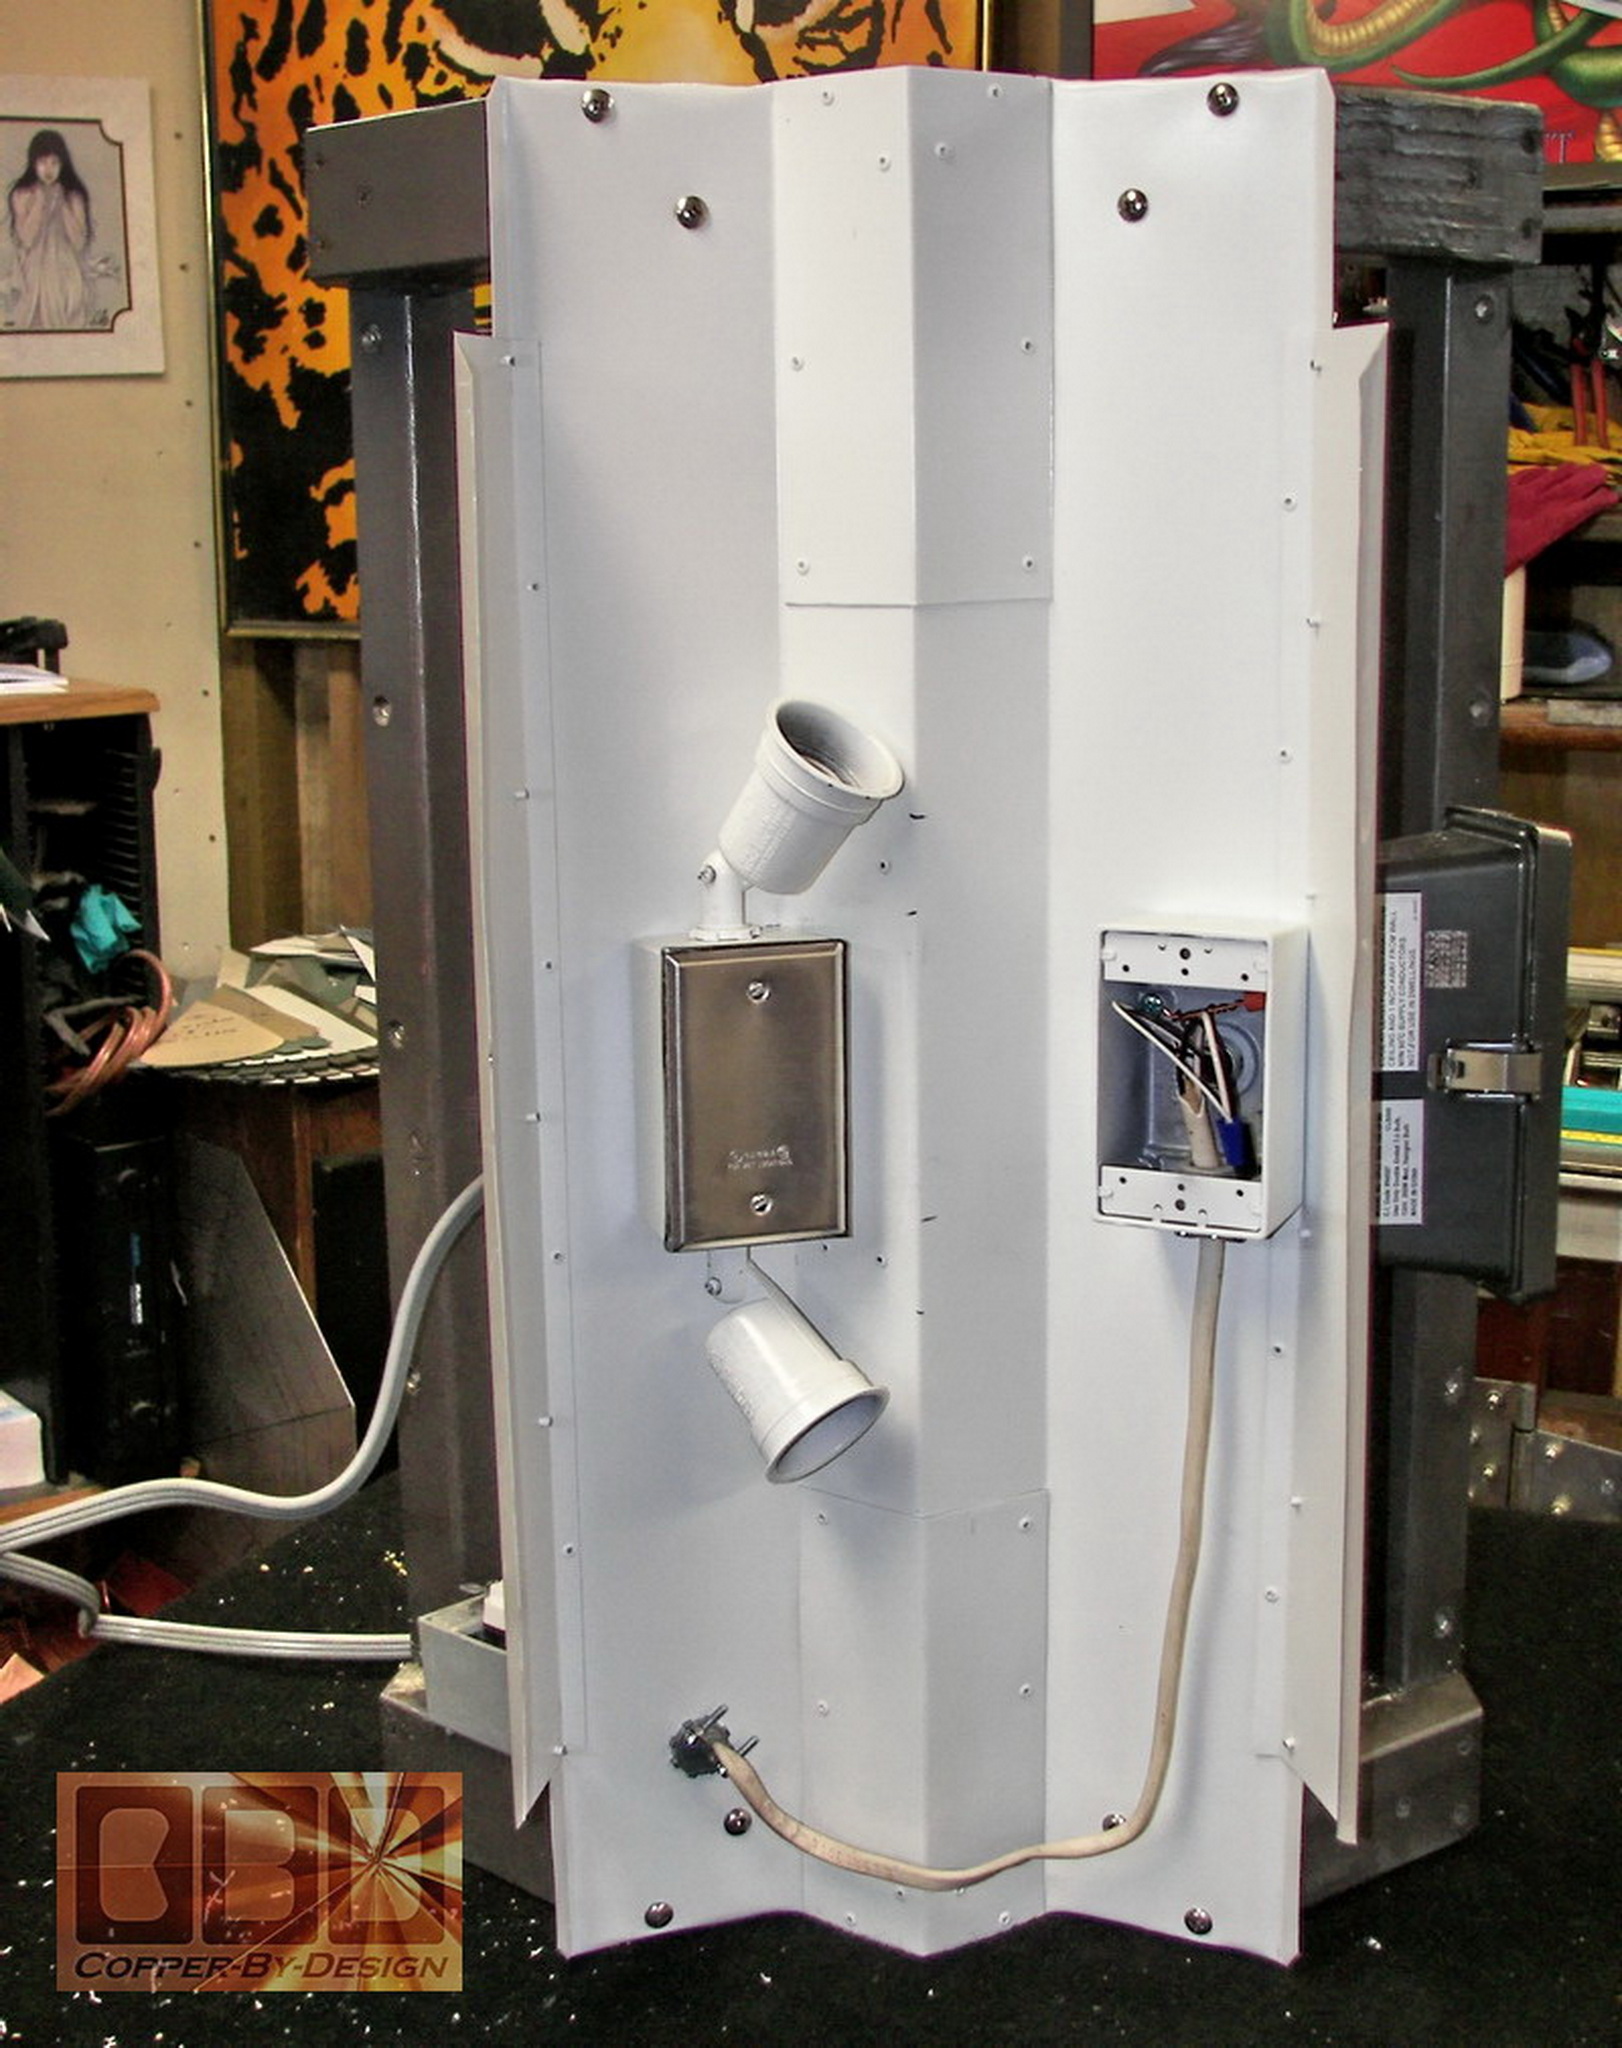
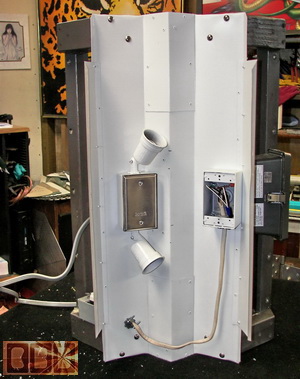
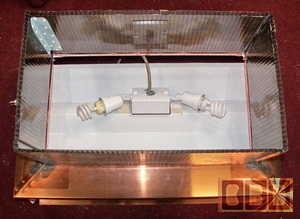
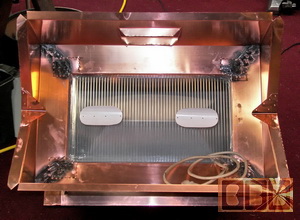
Stage 14:
Figuring Out the Lighting & Wiring
(11/20/06)
I needed to experiment for a while with several
different systems to see what would work best. I ended up using
a set of 2 bulbs that reflected off a shield above and a larger
reflector below in the base. I also made a third white reflector
up in the center of the cupola.
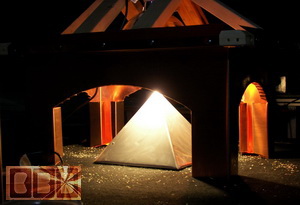 
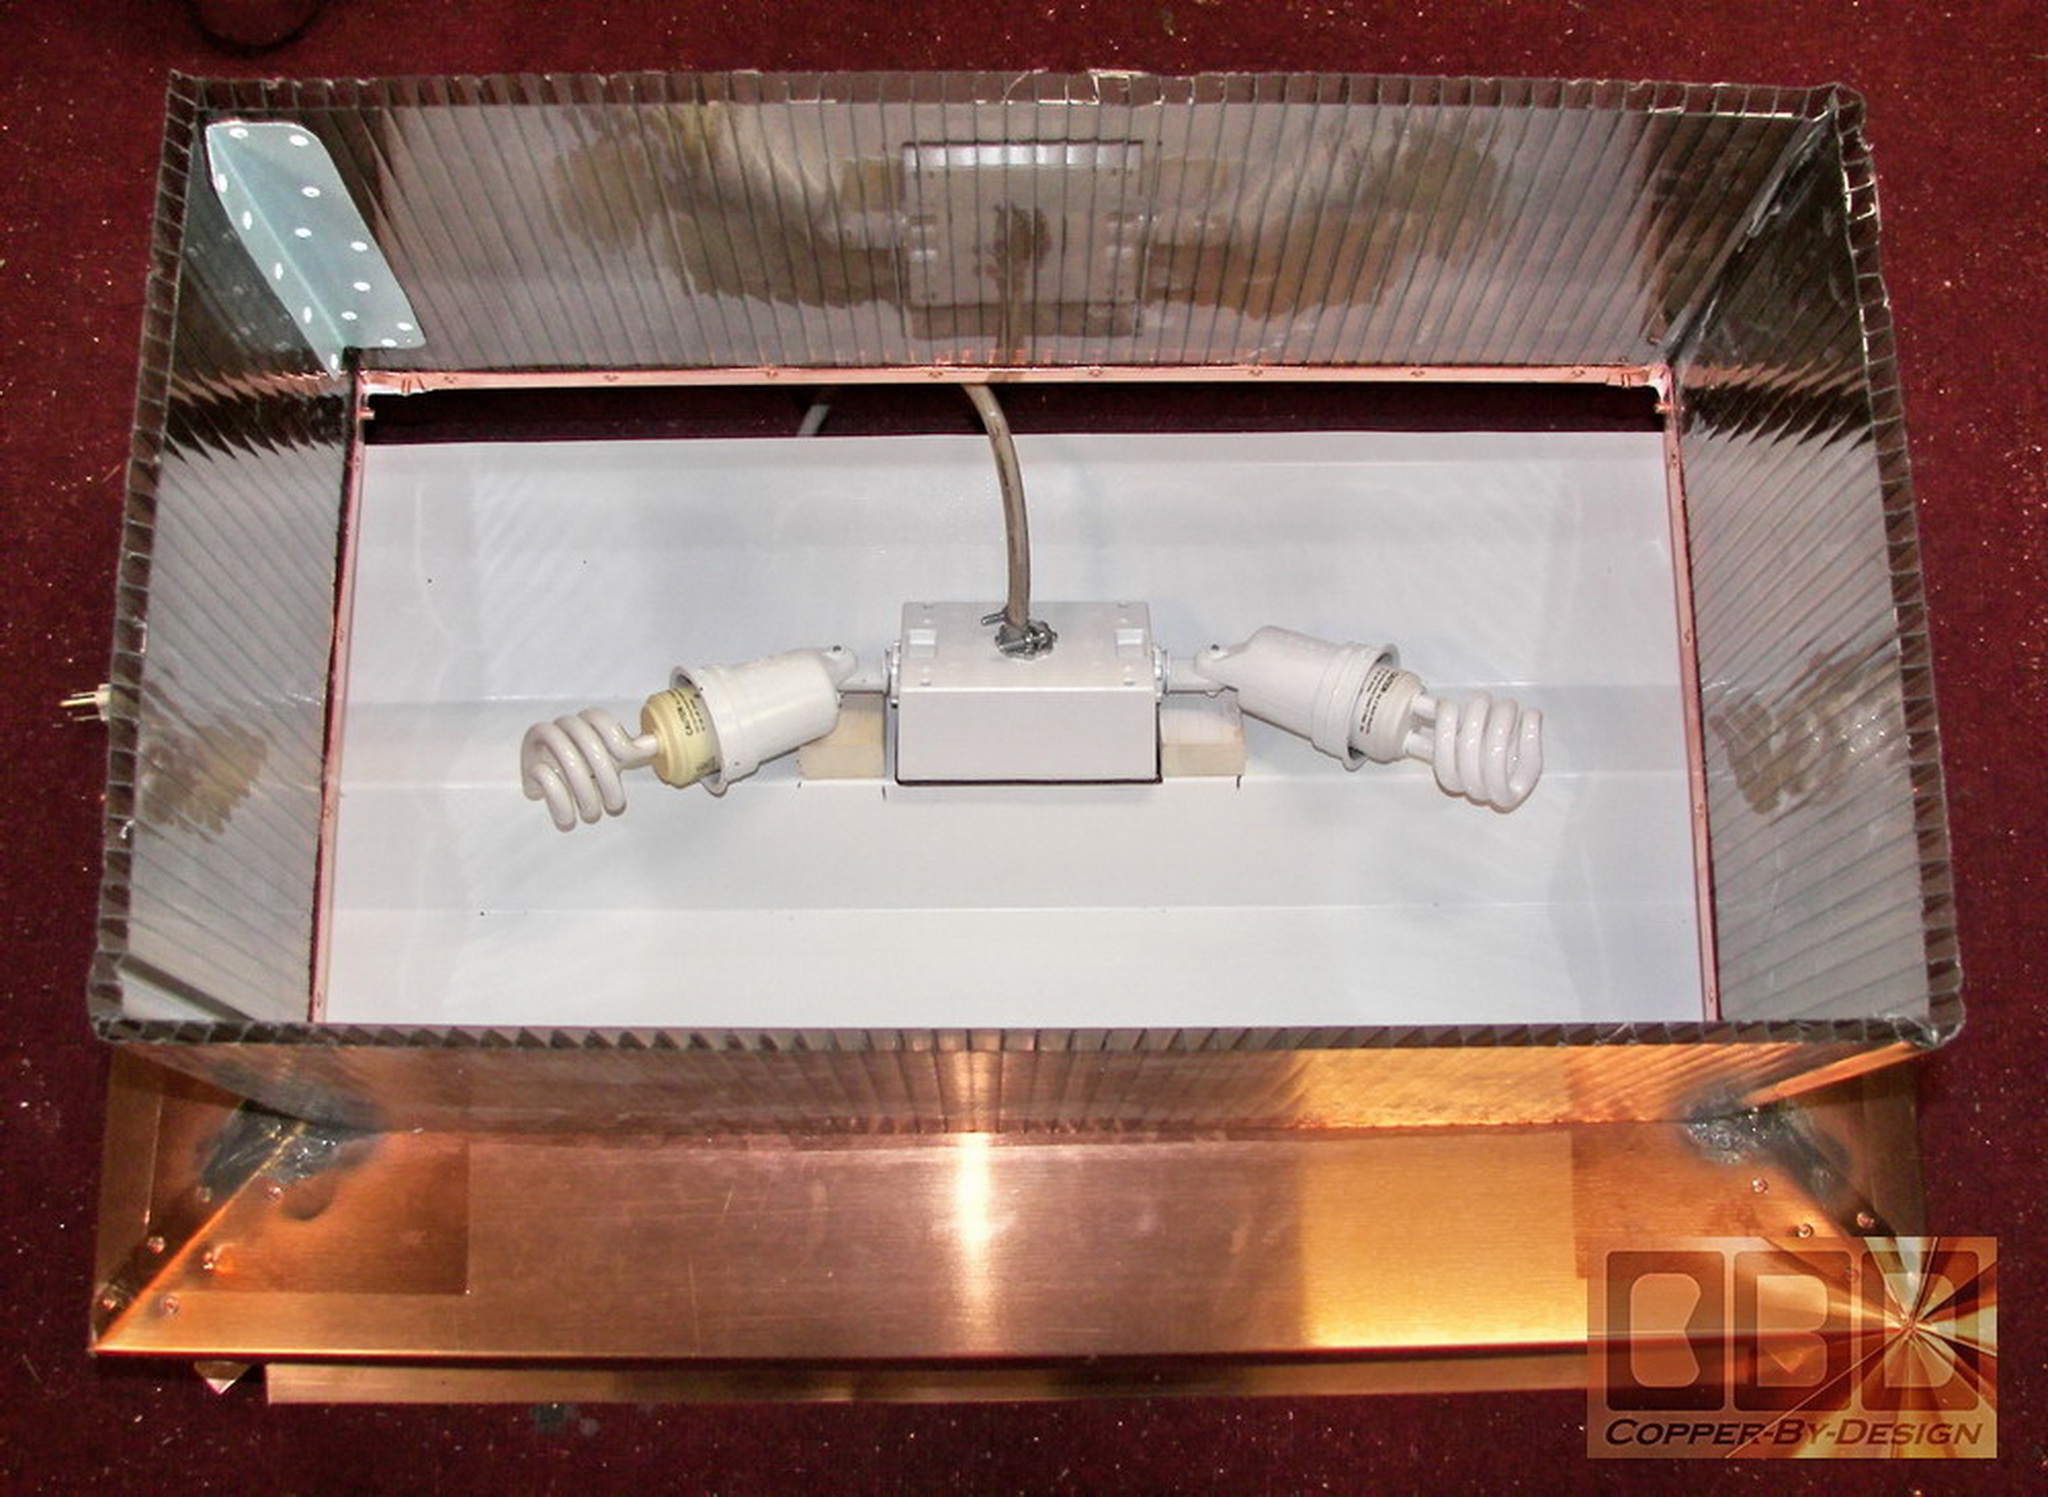
I tried a 12" stainless steel pyramid inside
as a reflector, but that was not giving me the look I was after.
I finally went with a white pre-painted aluminum to use as the reflector
lit from in side the base, so the light bulbs would not be seen.
I then had to rig up a security flood light in the base with limited
space.
In the left shot you can see the pair of florescent
bulbs down in the base over a white aluminum reflector. The
right shot is from under the base, where I added a set of oval reflectors
on a sheet of clear polycarbonate plastic to go over the light bulbs,
so they would not be shining up directly on the reflector making
extra bright spots down low.
As you can see here I finally
achieved a nice soft even glow on the upper reflector inside.
|
|
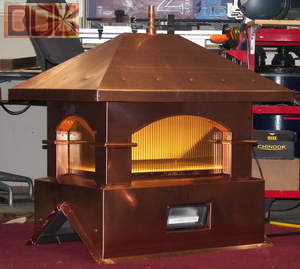
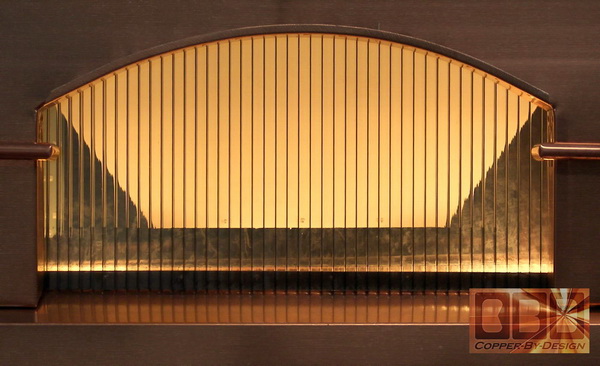
Stage 15:
This is Finally Finished
(11/30/06)
This small project took me longer to build
than the larger chimney cap above. I had to do something a
bit different to work out a soft glowing light inside, where the
hardware would not be seen from outside in the days time, so I used
the tinted polycarbonate plastic to hide it. It think it turned
out pretty well.
|
|
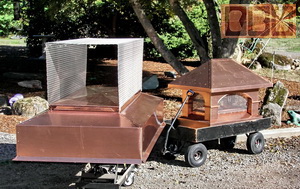
 Stage
16: Crated Up & Ready to Go
(12/1/06) Stage
16: Crated Up & Ready to Go
(12/1/06)
I boxed up the small chimney cap and cupola
in the same crate, since they were so similar in size. I had flat
sheets of Styrofoam between them so as not to scratch or dent each
other while bouncing down the road.
I have to make sure the crates are very strong,
since the trucking company will probably be stacking other boxes
on top of these.
|
|
The final measure for both of these chimney
caps was 316.44 square feet, which was 101.44 square feet over the
estimated amount. That means they got $1,528.40 in free fabrication
work. For both this and the Gross chimney cap bids (shown above)
I had based the estimate on the copper used in the Silbernagel cap
and multiplied that by how much larger or smaller these caps were
to be. My mistake was how I did not take into consideration: (a)
the extra height they would need to be, to be in the same proportions.
(b) the steeper roof pitch. (c) and the need for cross bracing under
the roof skin for such large caps. I had no bracing inside the Silbernagel
cap since it was small and had not heat exhaust issue.
$1,614.40 - small chimney cap 48.48 sq' x $30 per sq' plus 8 sq' SS screen x $20
$5,440.50 - large chimney cap 162.75 sq' x $30 per sq', plus 27.9 sq' SS screen x $20
$2,028.75 - lighted cupola 46.25 sq' copper x $25, 11.5 sq' aluminum x $15, weathervane support pipe $125,
------------------------wood frameworks in base$100, wood in the roof$150, electronics $200, and tinted windows $125
$ 244.75 - wood base frames 45.5 board' x $5.5'
$ 400.00 - large crate
$ 300.00 - smaller crate
$10,028.40 grand total
Total cost for
this 3 unit project: $8,500
$1,528.40 savings from the actual
copper that went into these
The client handled shipping costs
through his account
|
|
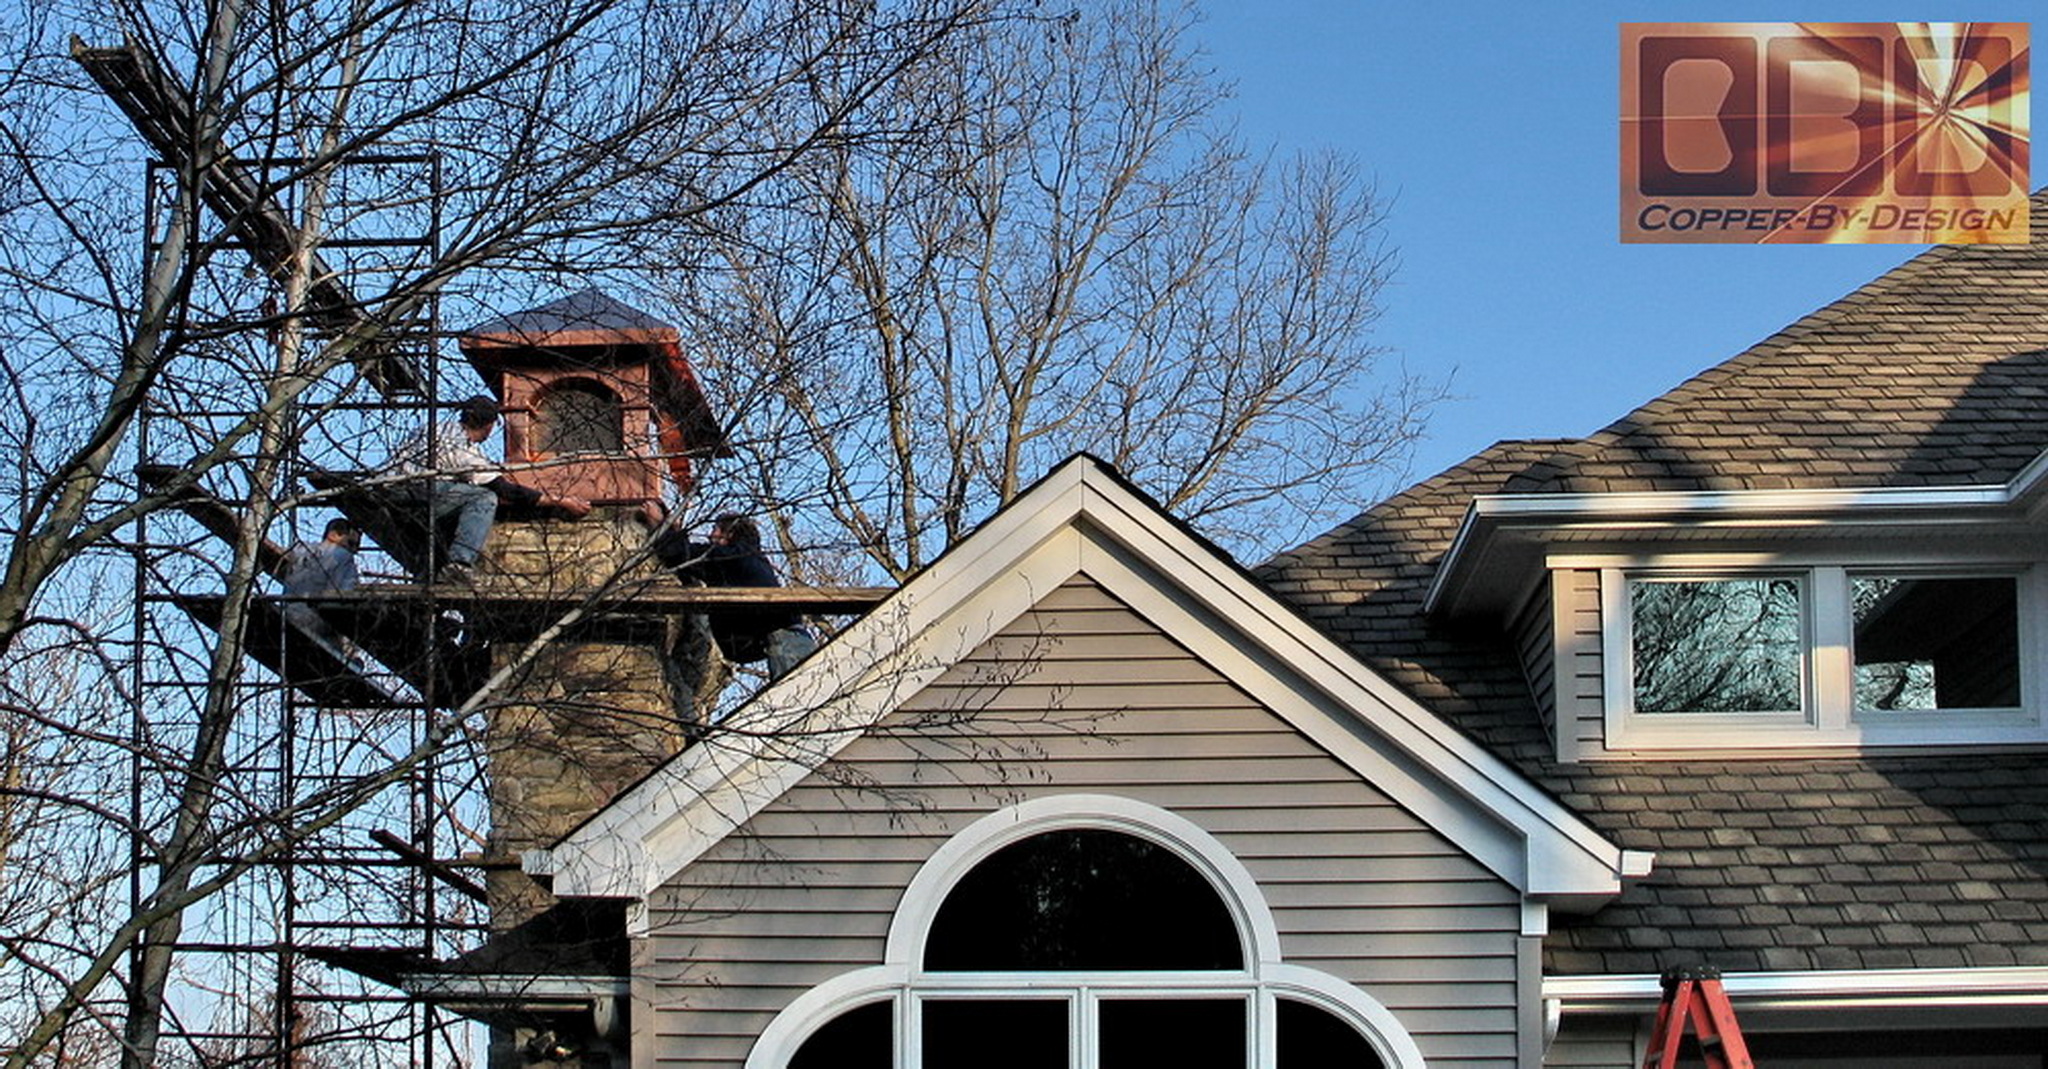
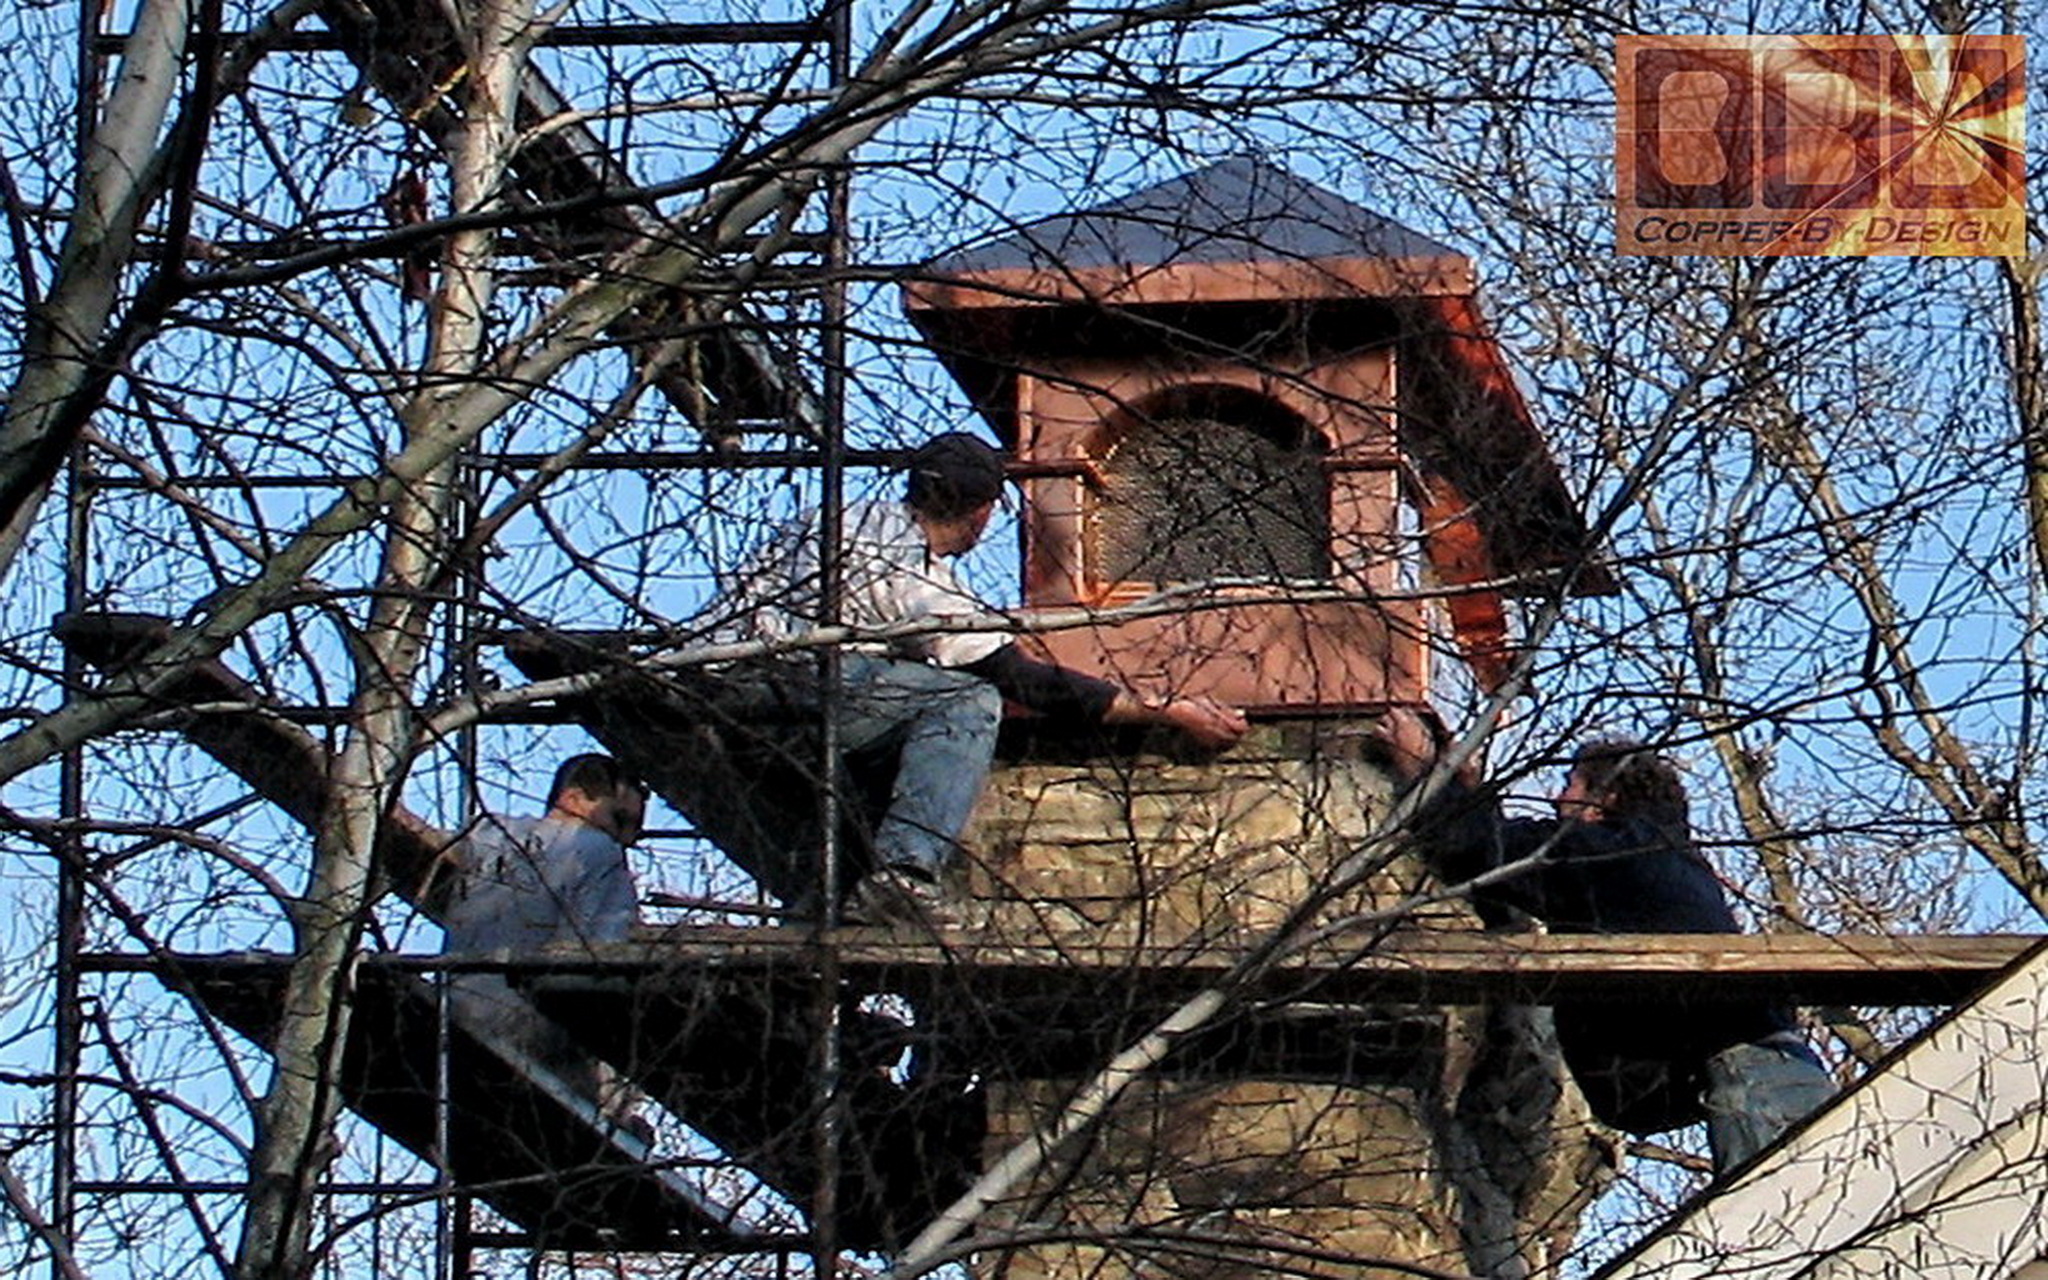
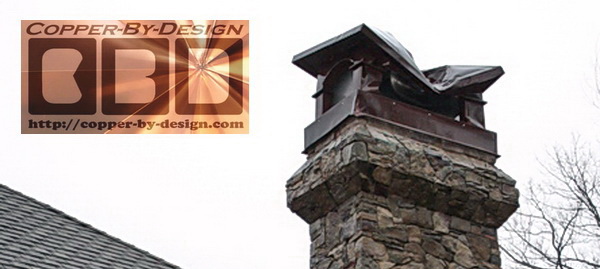
Stage 17:
They are Installed & We Have Pics to Show
(3/7/07)
David - I will certainly send you
some photos, after install. It has been a pleasure
to work with you - thanks for all the good communication
and support. I trust the install should go well and we can
contact you if any questions....
Take care....Scott
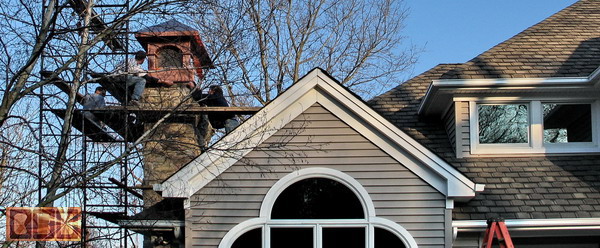
Hello David,
They are finally installed and look
great. Their were a few small "bumps in the road"
during install, but the GC resolved them quickly.
I will get a few photos and send to you, as we just finished
some of the stone and trim work, so all is done.
Scott
|