The Lulich Custom Copper Chimney Cap Details & Photo Page

Portland, Oregon (12/12)

Company
Profile
Roof Caps You are here Chimney
Caps
Scuppers Gutters Shipping

Contact Info


.

This is much like the larger chimney cap I made for a local client named Bardana in Lake Oswego, Oregon. The differences besides being a little scaled down was that I made this one with a 2 stage step in base/skirt, Like I had for Mr. Berger, but only 2 arches along the sides. This order was for Ted & Diane Lulich in S. W. Portland, Oregon. He was one of the best clients I've had the opportunity to work with. It was great how enthusiastic he was and involved in the process. We still make better money replacing gutters, so his enthusiasm really make it worth while.

He had gotten a quote for less from another shop, but when he wanted to discuss options he was treated as if he were an annoyance to them. After finding my web site and spending a lot of time there reading through the vast amount of info he realized this was the shop for his project and laid down a $1.1k deposit on 9/15/12, once we had worked out the basic details and formulated a ceiling cost of $3.4k installed well before fabrication began.

Given the long rectangular length of their brick chimney we felt it was best to build this one with 2 arches along the long sides in stead of just one long arch. I designed the roof line to resemble their house with hipped 6/12 pitch, so this will look more like what the architect might have designed for this house. The client approved this design and were very pleased with the results. We discussed aesthetic options like adding 1" wider roof than the base/skirt. They also wanted us to commemorate this fabrication with a personalized CBD dated plaque. My logo was sand blasted into a thick disc of 32oz copper and riveted in place.

Here's the before and after photos of the installed chimney cap. We had to make some modification to the flue liners to make it sit the way I wanted this to be.

Building the Base/Skirt Section

Here's the 4 pieces of 5/4X6 Ipe hardwood support frame we need to build inside the copper base that helps anchor this down in high wind storms. Each board has been cut on all 4 sides at an angle. The top and bottom were cut on my table saw at a 18 degree angle and the ends were cut at a 45 degree angle to miter them together. They weigh 30# and will be positioned down low where it should not suffer heat from the chimney and shielded from the elements. They are glued in and we also treat it with tung oil on the inside to keep them dry.

The base/skirt for the chimney cap cut out and shaped  with the wood being pressed down into the frame while the expanding Gorilla Glue sets. Then it is ready to be assembled into this base/skirt. It is also held in place with long rivets. There's a channel for the SS spark arrest screen already in this section as well. 3 sides of this were formed in a single piece to minimize the seams.

Building the Mid Exhaust Section

This shows the 6 column/arch mid-section just after the sheet of copper is bent. There is a good deal of math and geometry involved here, so it's all in the right proportions, and the bottom of the columns rest on the angled base just right.

I was able to make these mid-section walls from just 2 separate sheets of copper for a strong structure with a clean look that has very few seams or rivets showing. There were numerous test fittings before we could fasten it down to the base.

From: Ted Lulich <tedlulich@hotmail.c*m>
Subject: Update, mid section
Date: Wed, 12 Dec 2012


Hi David,
Its looking great! Its fascinating to get updated photos to see How its all constructed, what a treat. Boy the two arched sides was a great idea of yours and really makes a difference. Thanks!
Sent from my Windows Phone

It took us a few days just to build this set of columns and line the arches. The SS screen was formed in 2 pieces and locked into the channel in the base and the columns slide down over the screen.

Then there was the decorative piping to attach to each column before the columns are attached over the screen. Each corner column required a pipe that was about 28" long. It took more than 10' pipes for this one chimney cap.

We cut and bent the 2 piece 13 gauge stainless steel screen to set into a channel along the inside rim of the bases. These screens are what we get my hands lacerated on more than any other aspect of our work, so it's important to hide all the edges of this SS screen, so these are safe for anyone else after these are completed. The SS screen is secured to the base through the 2 layers of copper with dozens of longer rivets, and then riveted into the back of each arch and column. Once it is fully attached with hundreds of fasteners the SS screen adds a great deal of strength to this structure.

The column are then attached to the base with 24 SS screws and 50 rivets. They are also attached from inside to the heavy duty SS screen with more rivets and screws.

From: Ted Lulich <tedlulich@hotmail.c*m>
Subject: Update, mid section
Date: Wed, 13 Dec 2012


Good evening David. The renaissance masters work is truly becoming a masterpiece. I have a feeling your be getting many request for this double arch design in the future. Thanks!

Building the Eave & Roof Section

From: Ted Lulich <tedlulich@hotmail.c*m>
Subject: Update, mid section
Date: Wed, 15 Dec 2012


Hi David, looks great! The eaves are pleasant and match our house nicely. You made so much progress this week. Its amazing how all the complex parts come together and create such a piece of art. Have a great weekend!!

Then the eaves are made and attached, which adds a lot more strength to these long side walls. Then there is the 6 sets of roof support braces to make and attach with SS screws and copper rivets. That's over 28' of roof substructure bracing used here. We actually reused some copper downspouts we had replaced a few months prior to form these braces with. I believe these braces are a very important detail that is not done by most any other sheet metal shop, from what we've seen. I do what I can to prepare for the worst case elements these clients are likely to encounter.

Then these were ready for the 3 piece copper roof skins to go over these braces and attach under the eaves. I decided to use a thicker 24 oz copper for this without asking this client for more money.

From: Ted Lulich <tedlulich@hotmail.c*m>
Subject: Update, mid section
Date: Wed, 15 Dec 2012


Hi David. Just got home from another long day at work so I'm really tired. If you want I could look at it Sunday morning before the top wrap goes on or just wait till Tuesday, your thoughts,. We will make final payment after installment which is always a good idea was just trying to be helpful. I would prefer to just bring Tuscan pizza and drinks for Tuesdays visit and leave it for you to enjoy before I head down to Eugene and since Diane is working even longer hours and is busy with my kids and all, but thanks. I'm thinking on using your crane service and in fact already budgeted two hundred dollars for it outside of your free installation time etc and cap budget so it's ok with me, would just have to coordinate a time. Its been a great working relationship with you from the moment I went to your web site. We are both detailed, creative individuals and it has been a good and enjoyable fit!. I like and believe in the way you conduct business and relates well to the way i conducted my business for 22 years before i sold it. Thanks!

Here's Chris polishing up the outside of the copper wiping down all the finger prints and such just before the installation.

From: Ted Lulich <tedlulich@hotmail.c*m>
Subject: Update, mid section
Date: Wed, 16 Dec 2012

It was a great and relaxing visit to your wonderful shop today David, and you should be proud! I'm wondering if your lift truck will need a street permit which might be a good idea since our street is a little narrow?. We had a neighbor go through this next to us. And i will pay for the permit if needed and as discussed any and all lift truck charges. I will have the driveway and curb cleared of cars to help. Hope your evening was pleasant!

Date: Wed, 17 Dec 2012

Good evening David, it looks beautiful like a newborn baby! (your wife should like that). See you tomorrow, looks great!!

Date: Wed, 17 Dec 2012

The " masterpiece is complete" master!

The weights and cost breakdown of these pieces are as follows.

223.8# total weight

- 30# hardwood

-10.4# stainless steel spark arrest screen

= 93.4#  copper weight

X 0.8

= 74.72 sq' of 20oz & 24oz copper used in this chimney cap

X $35

= $2,615.20 cost for the copper portion

+ $203.70 for the 13.58 ln' of 5/4 Ipe hardwood

+ $258.80 for 12.94 sq' of stainless steel screen

+ $250 for the crane service this client opted to use and offered to pay for

+ $200 for delivery and our customized installation

+ $50 for 4.5" wide round plaque

= $3,577.70 total installed

Delivery & Installation

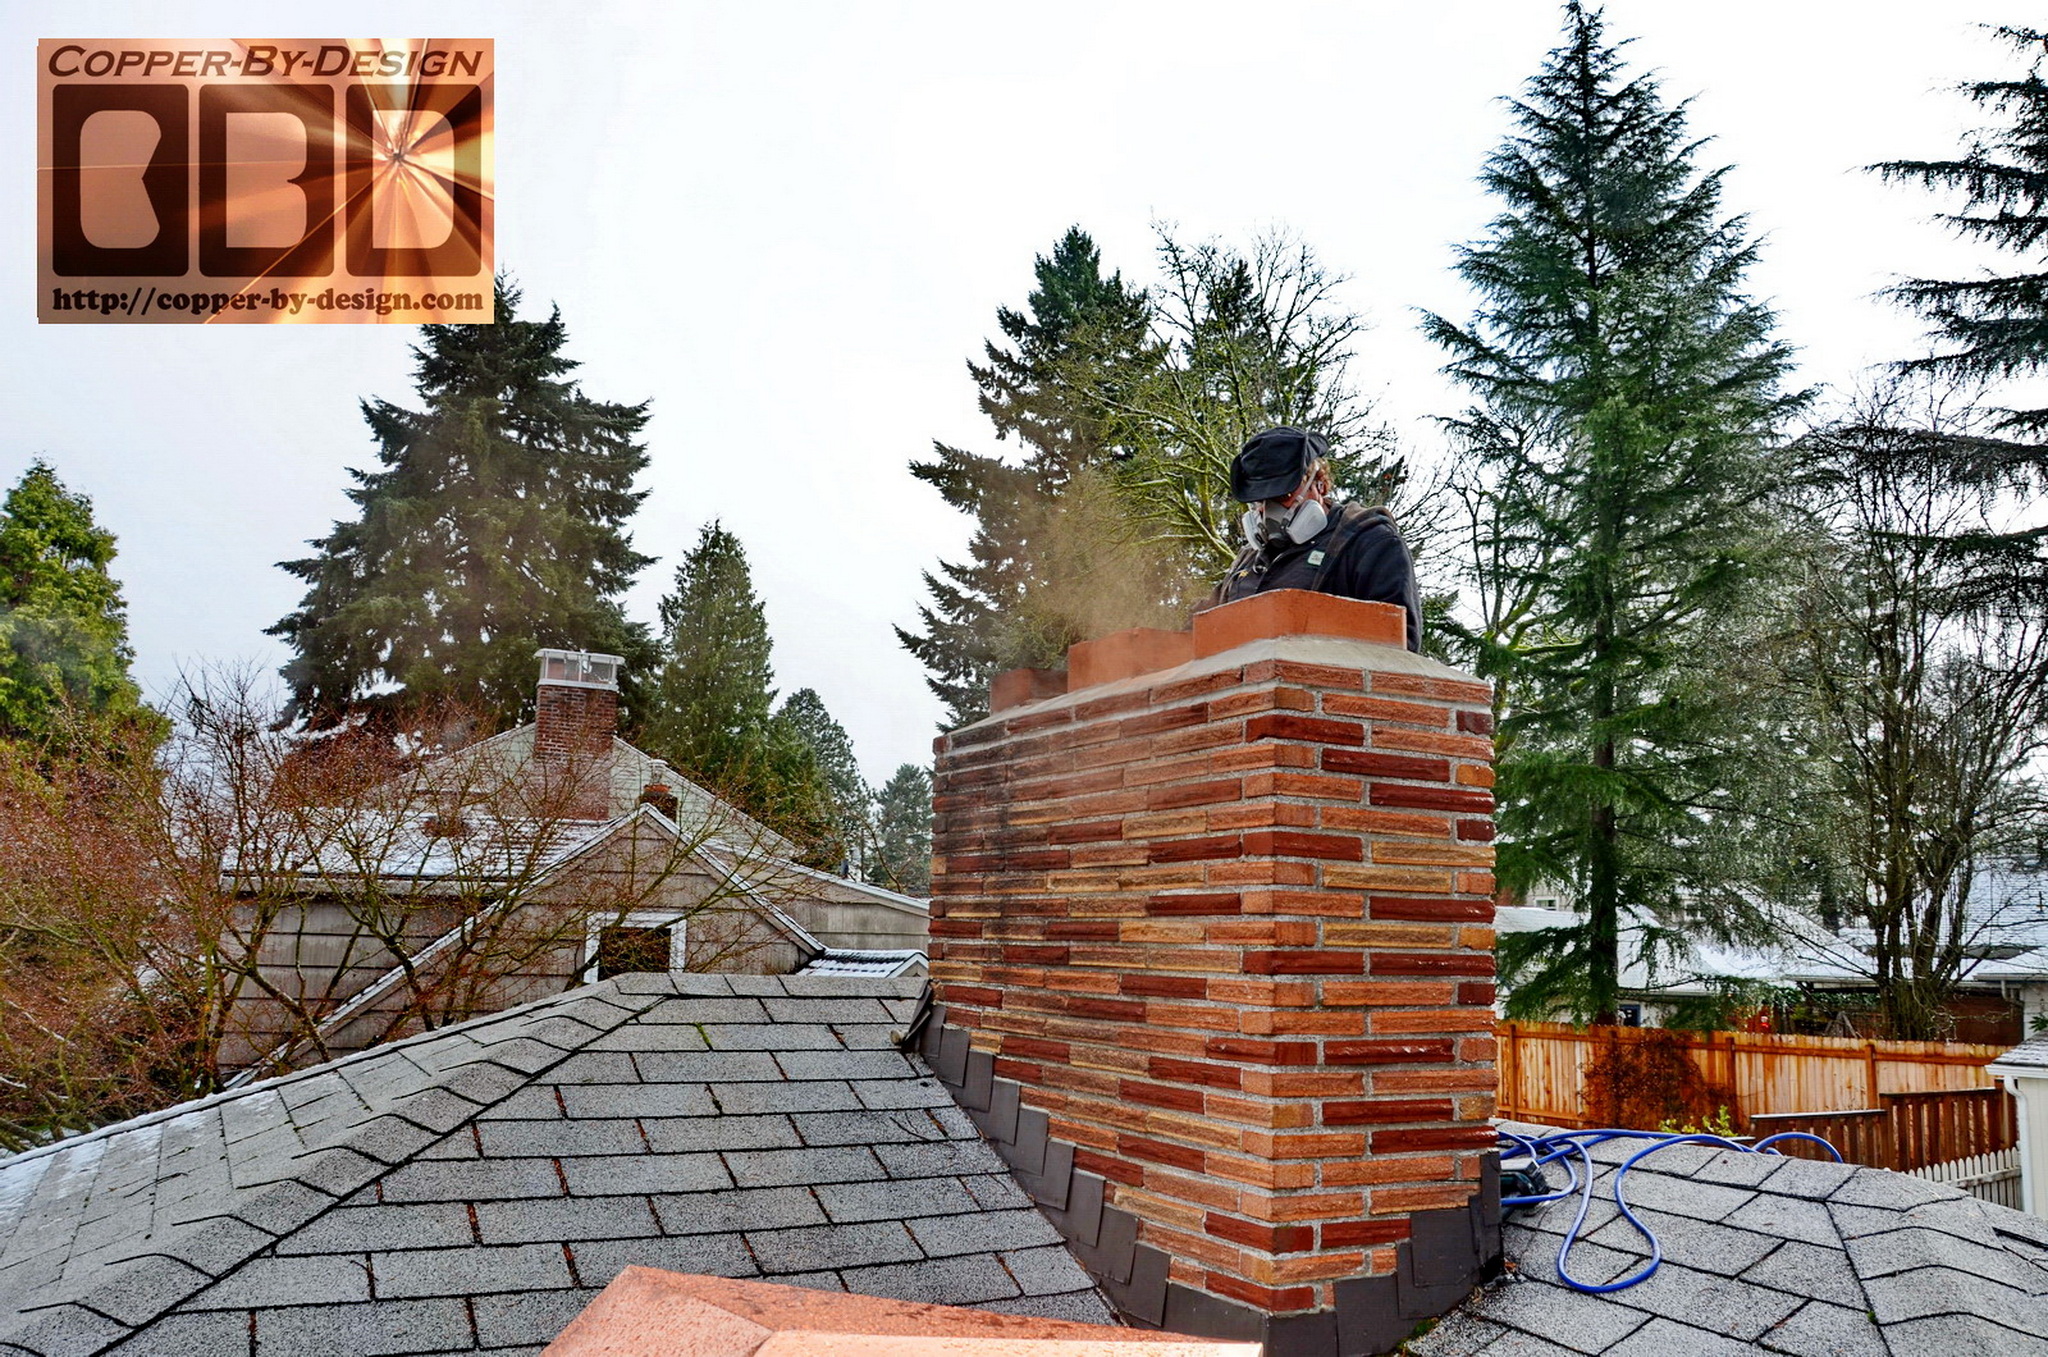
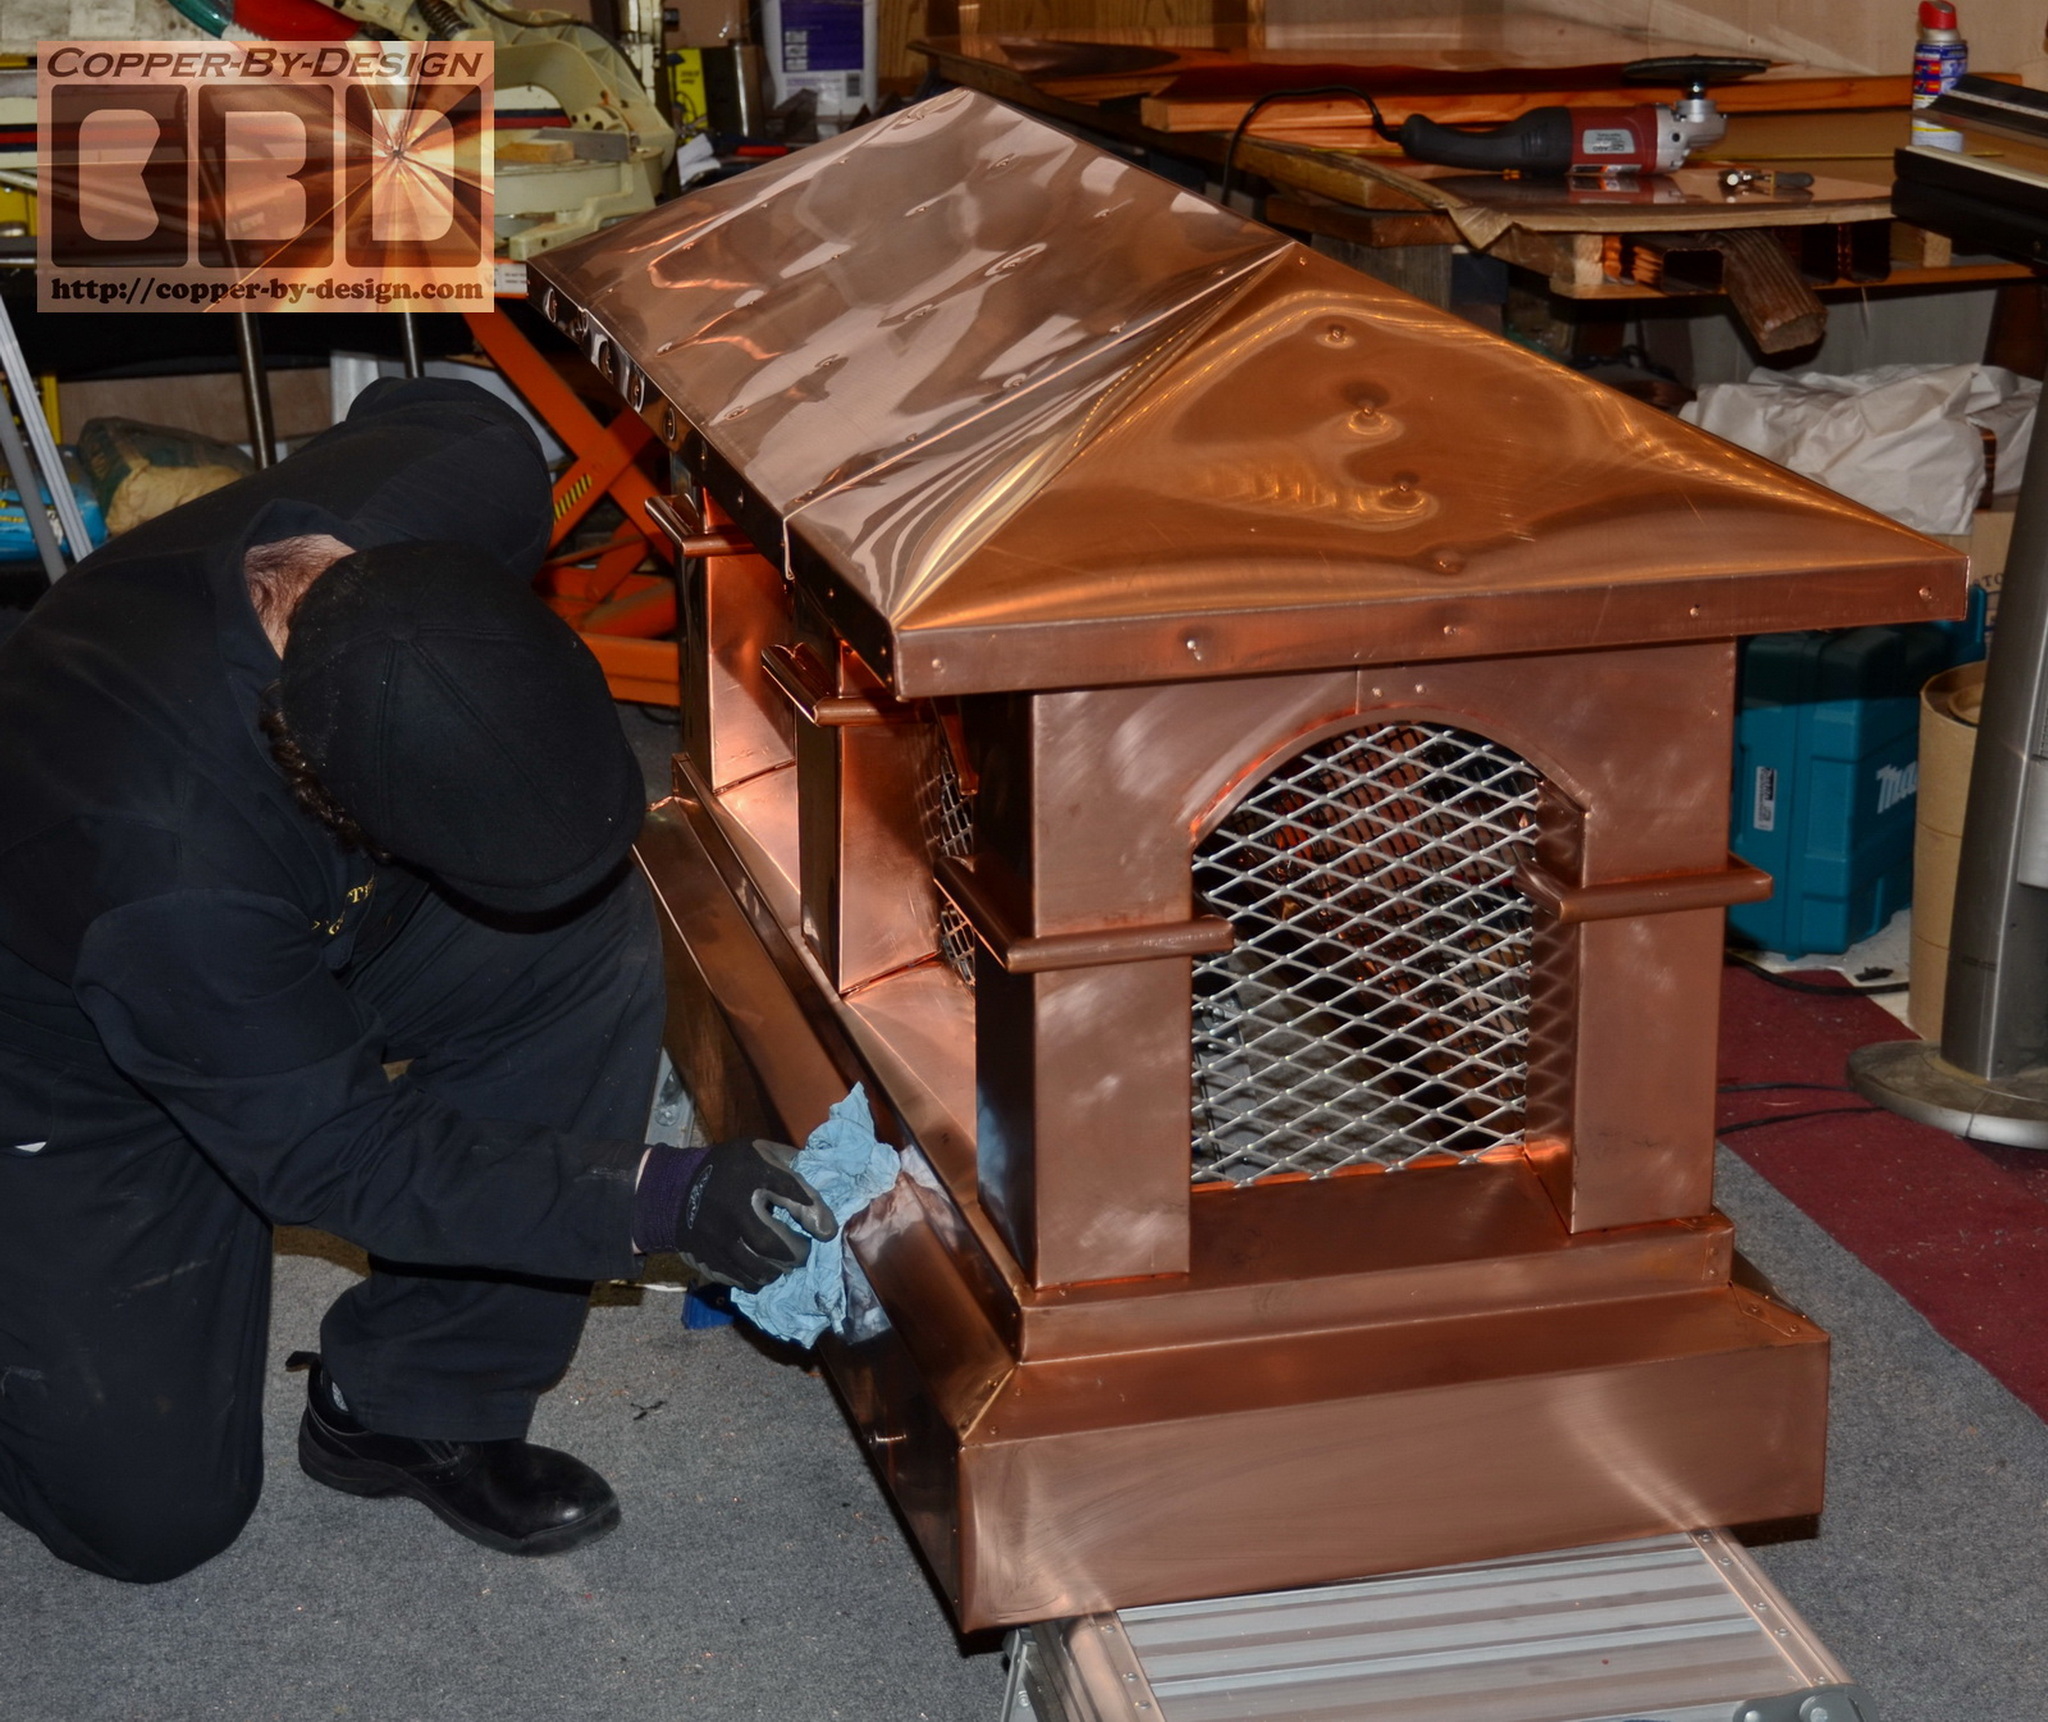
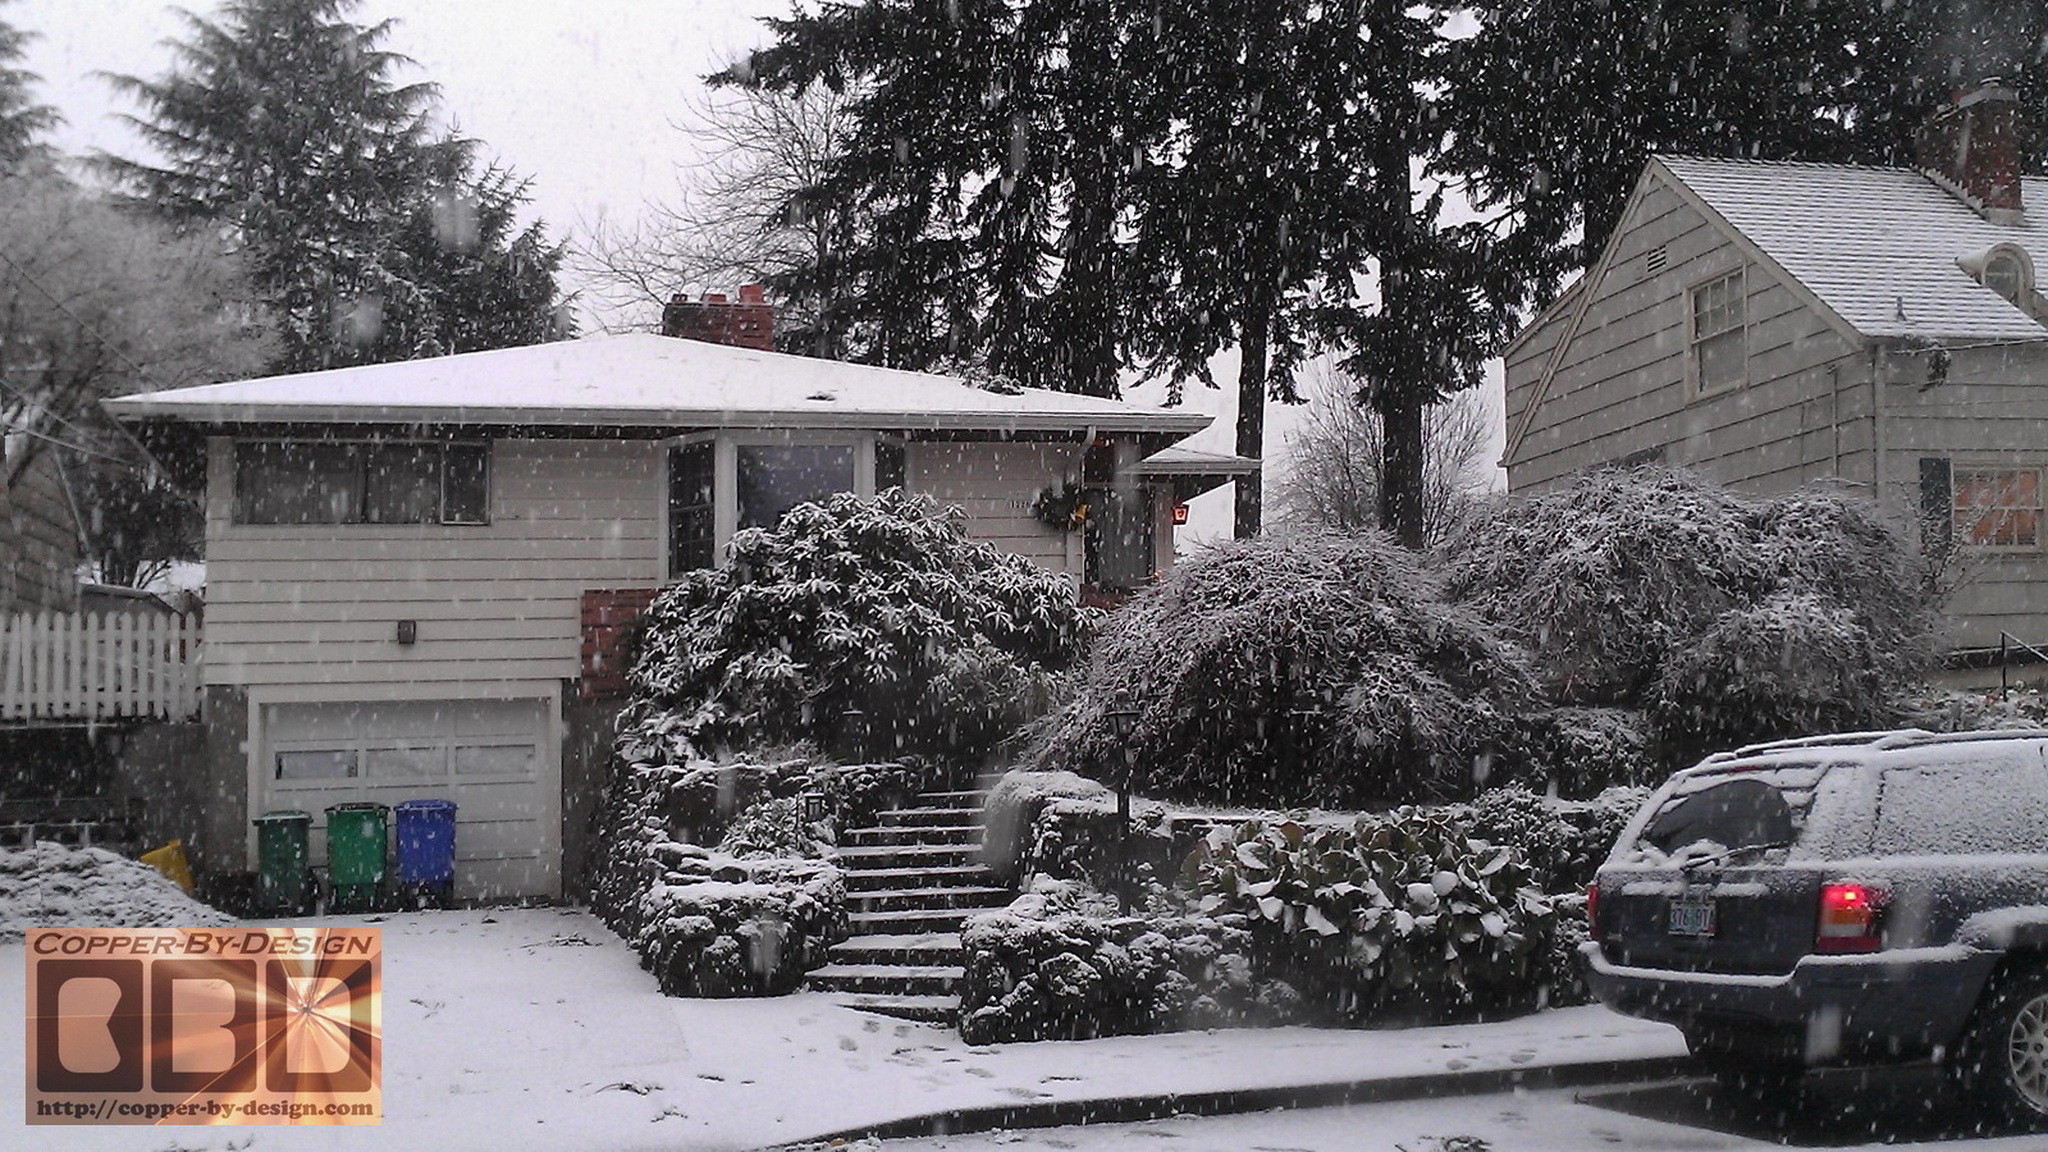
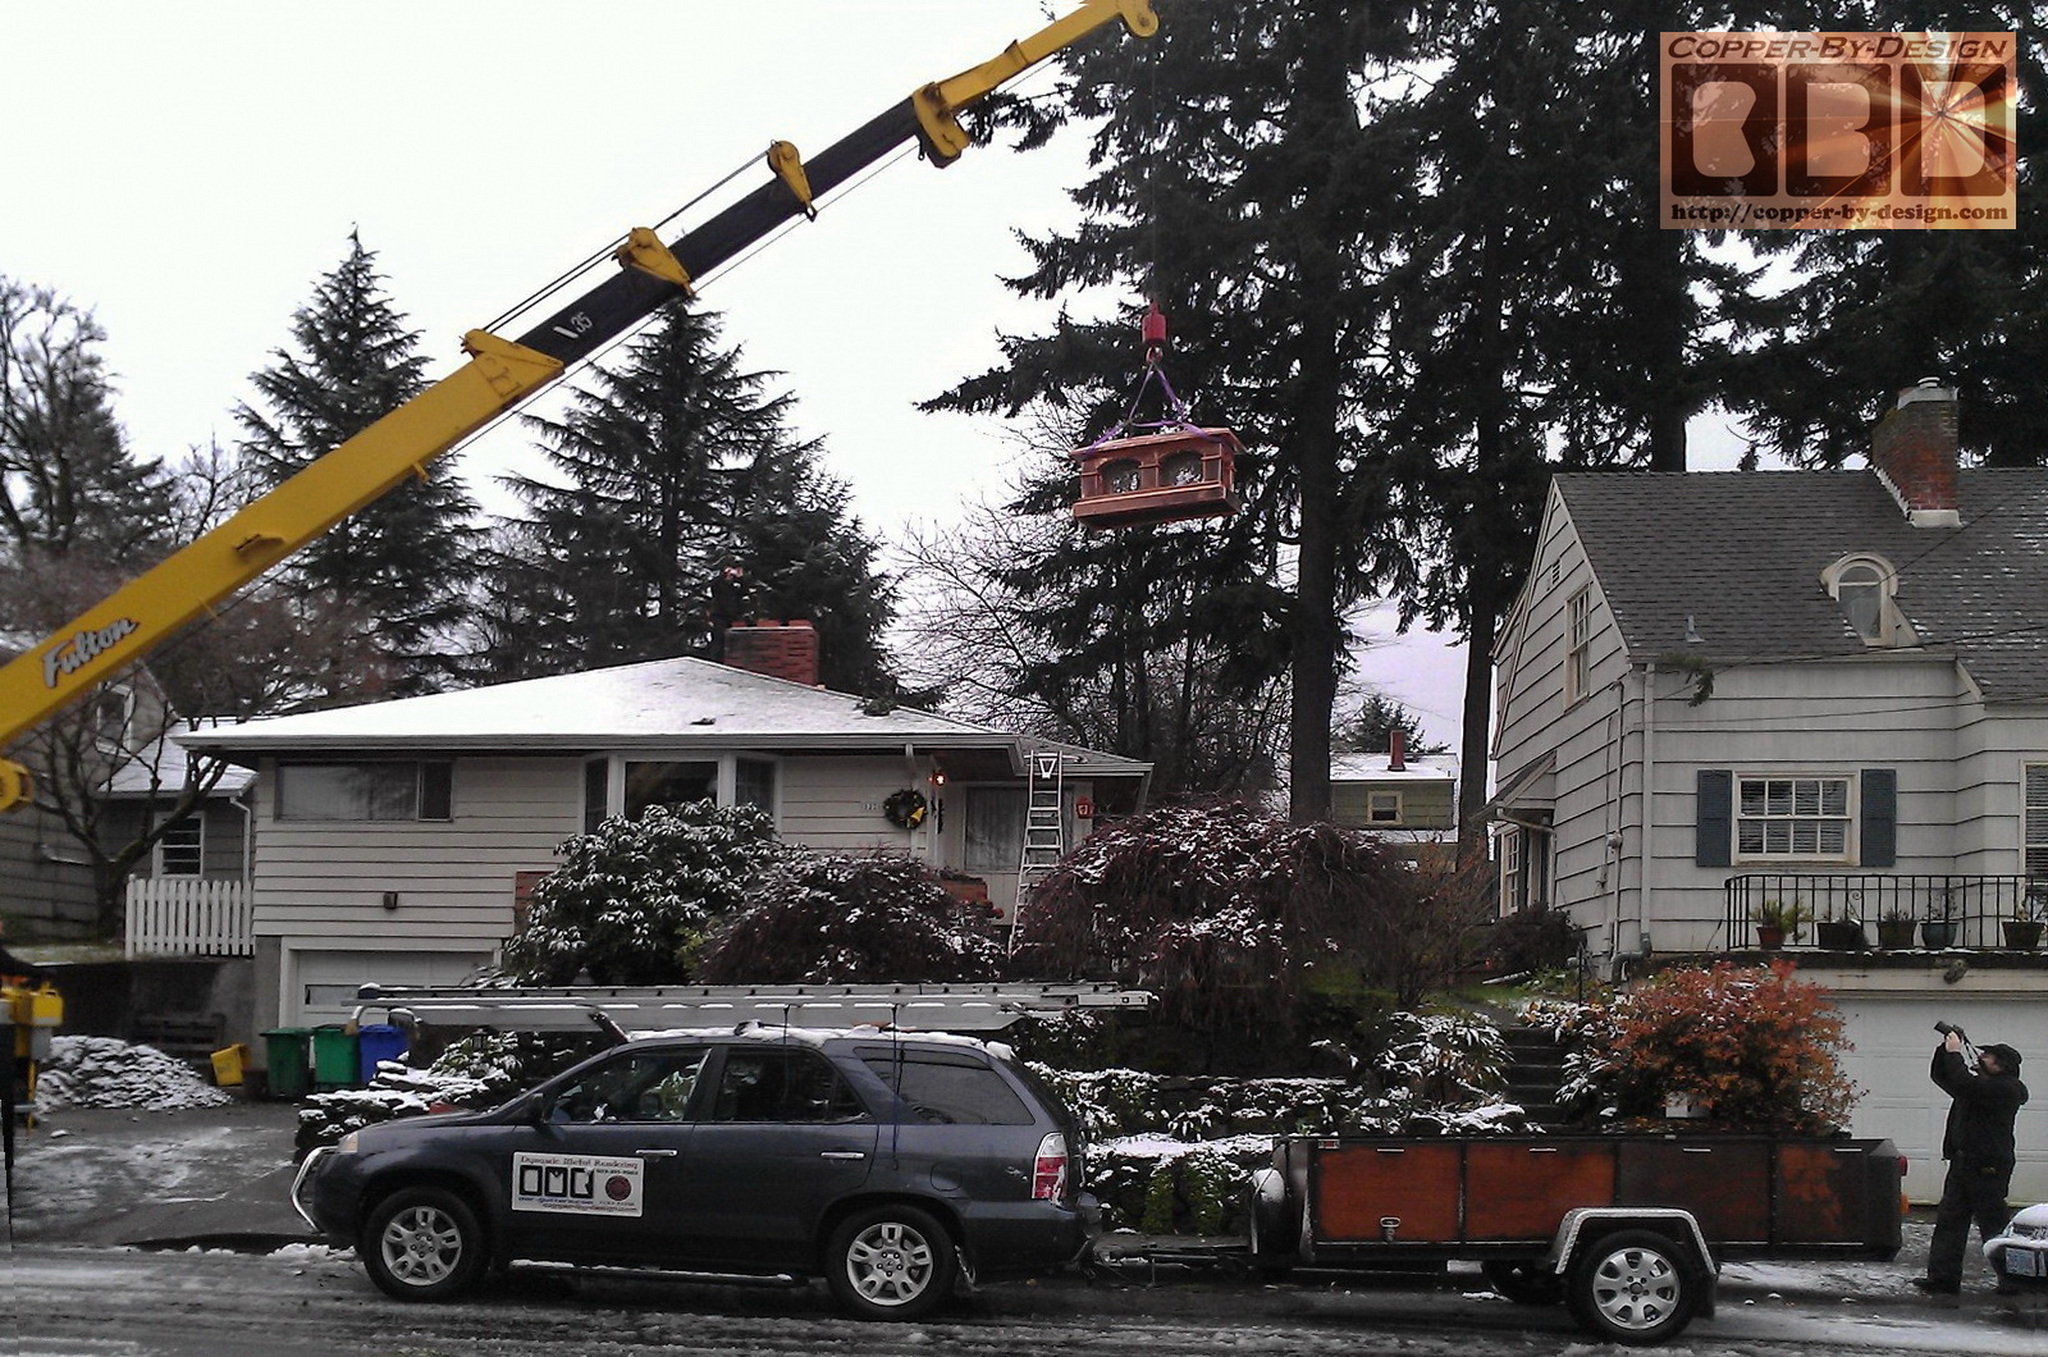
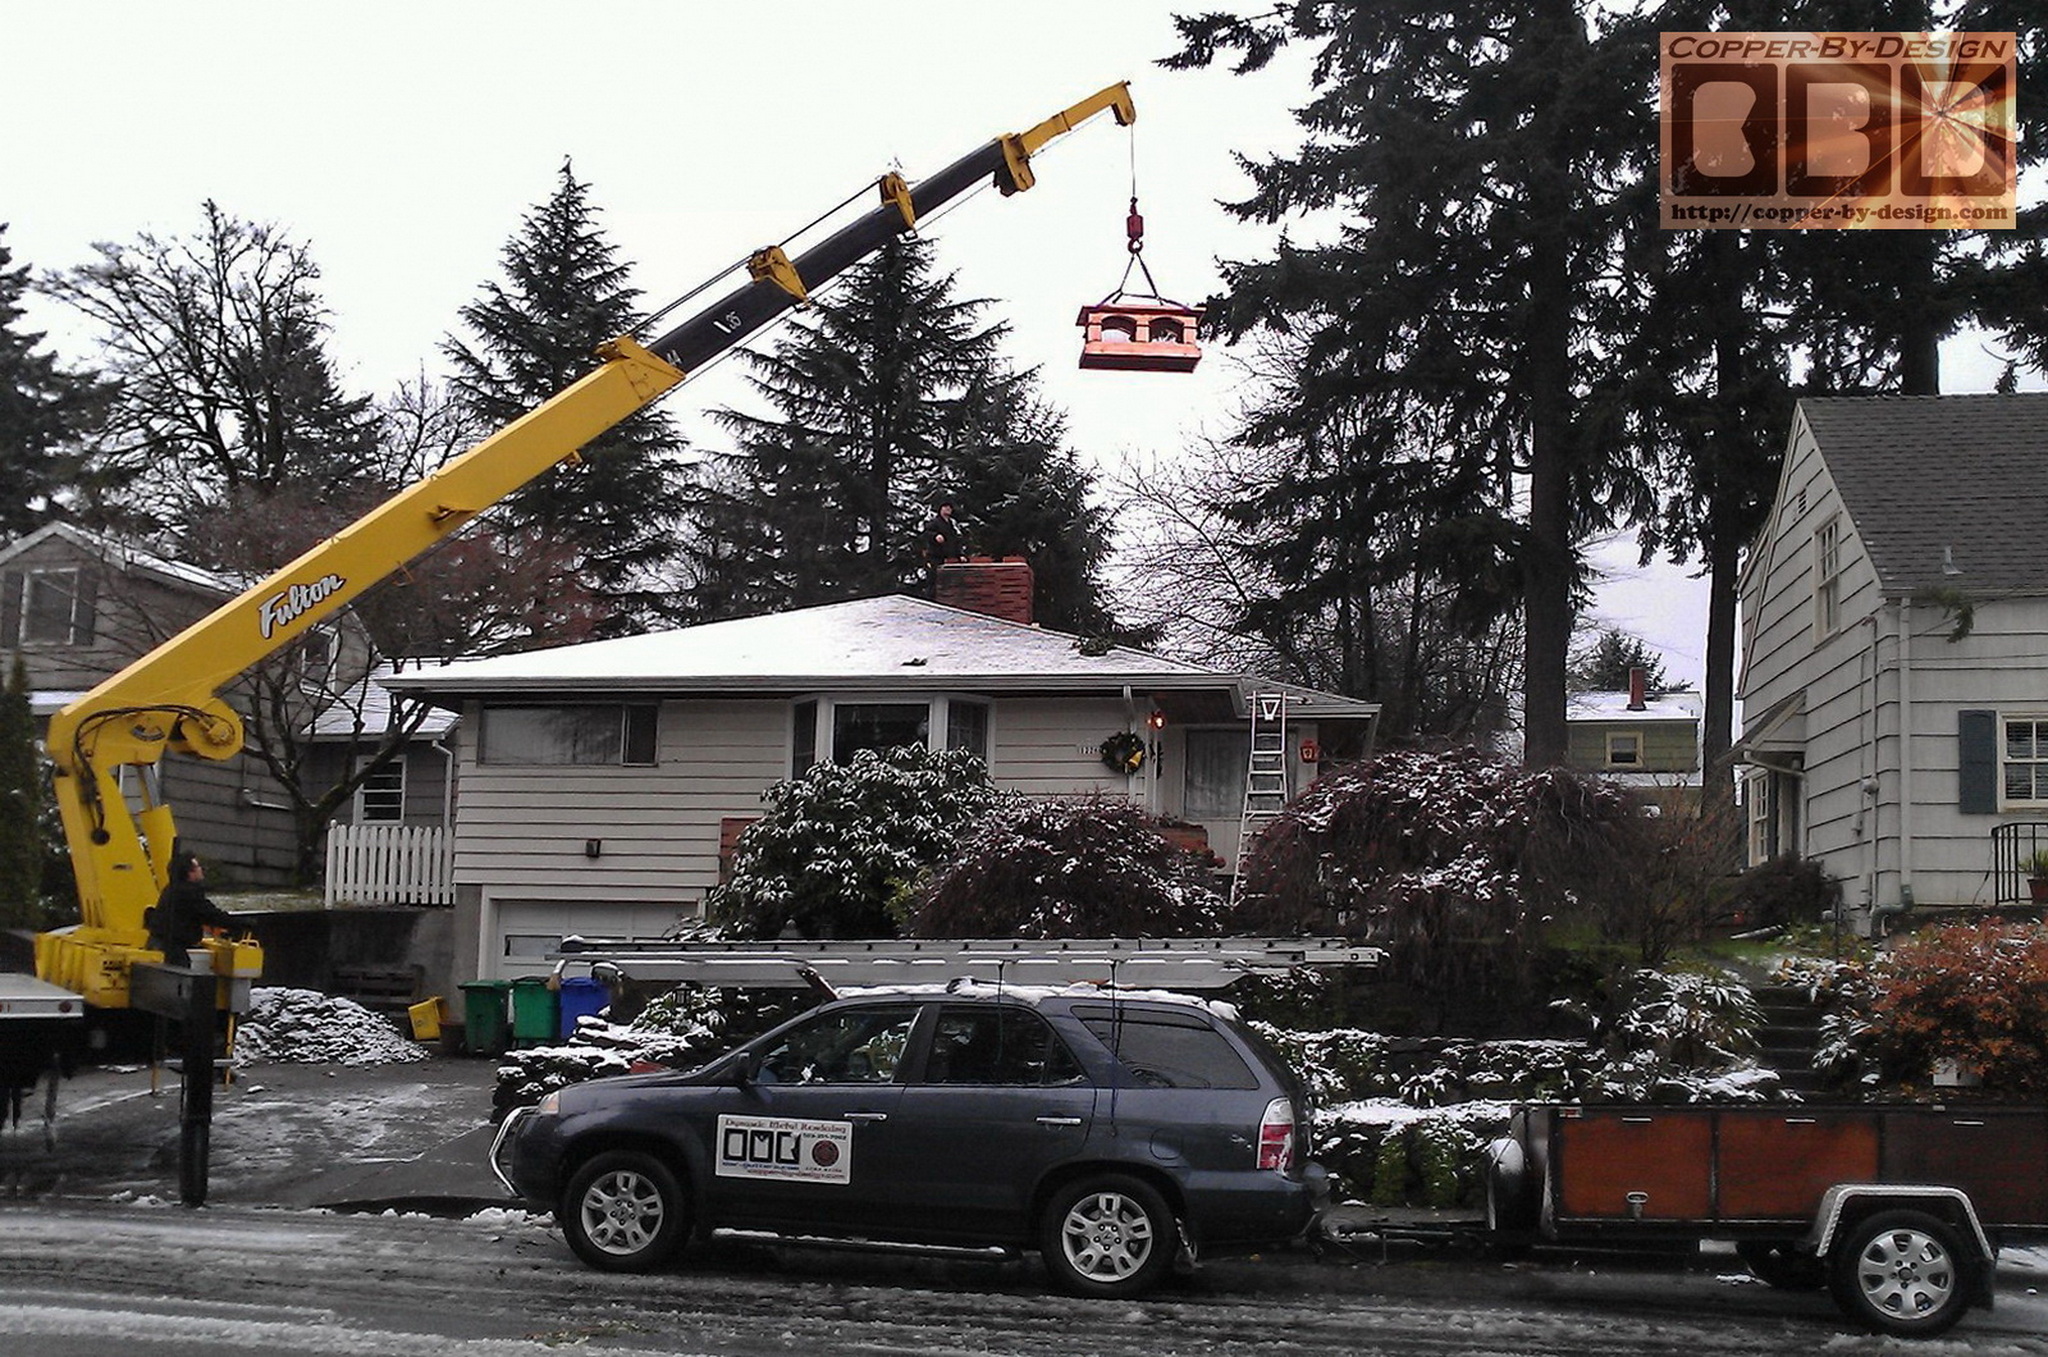
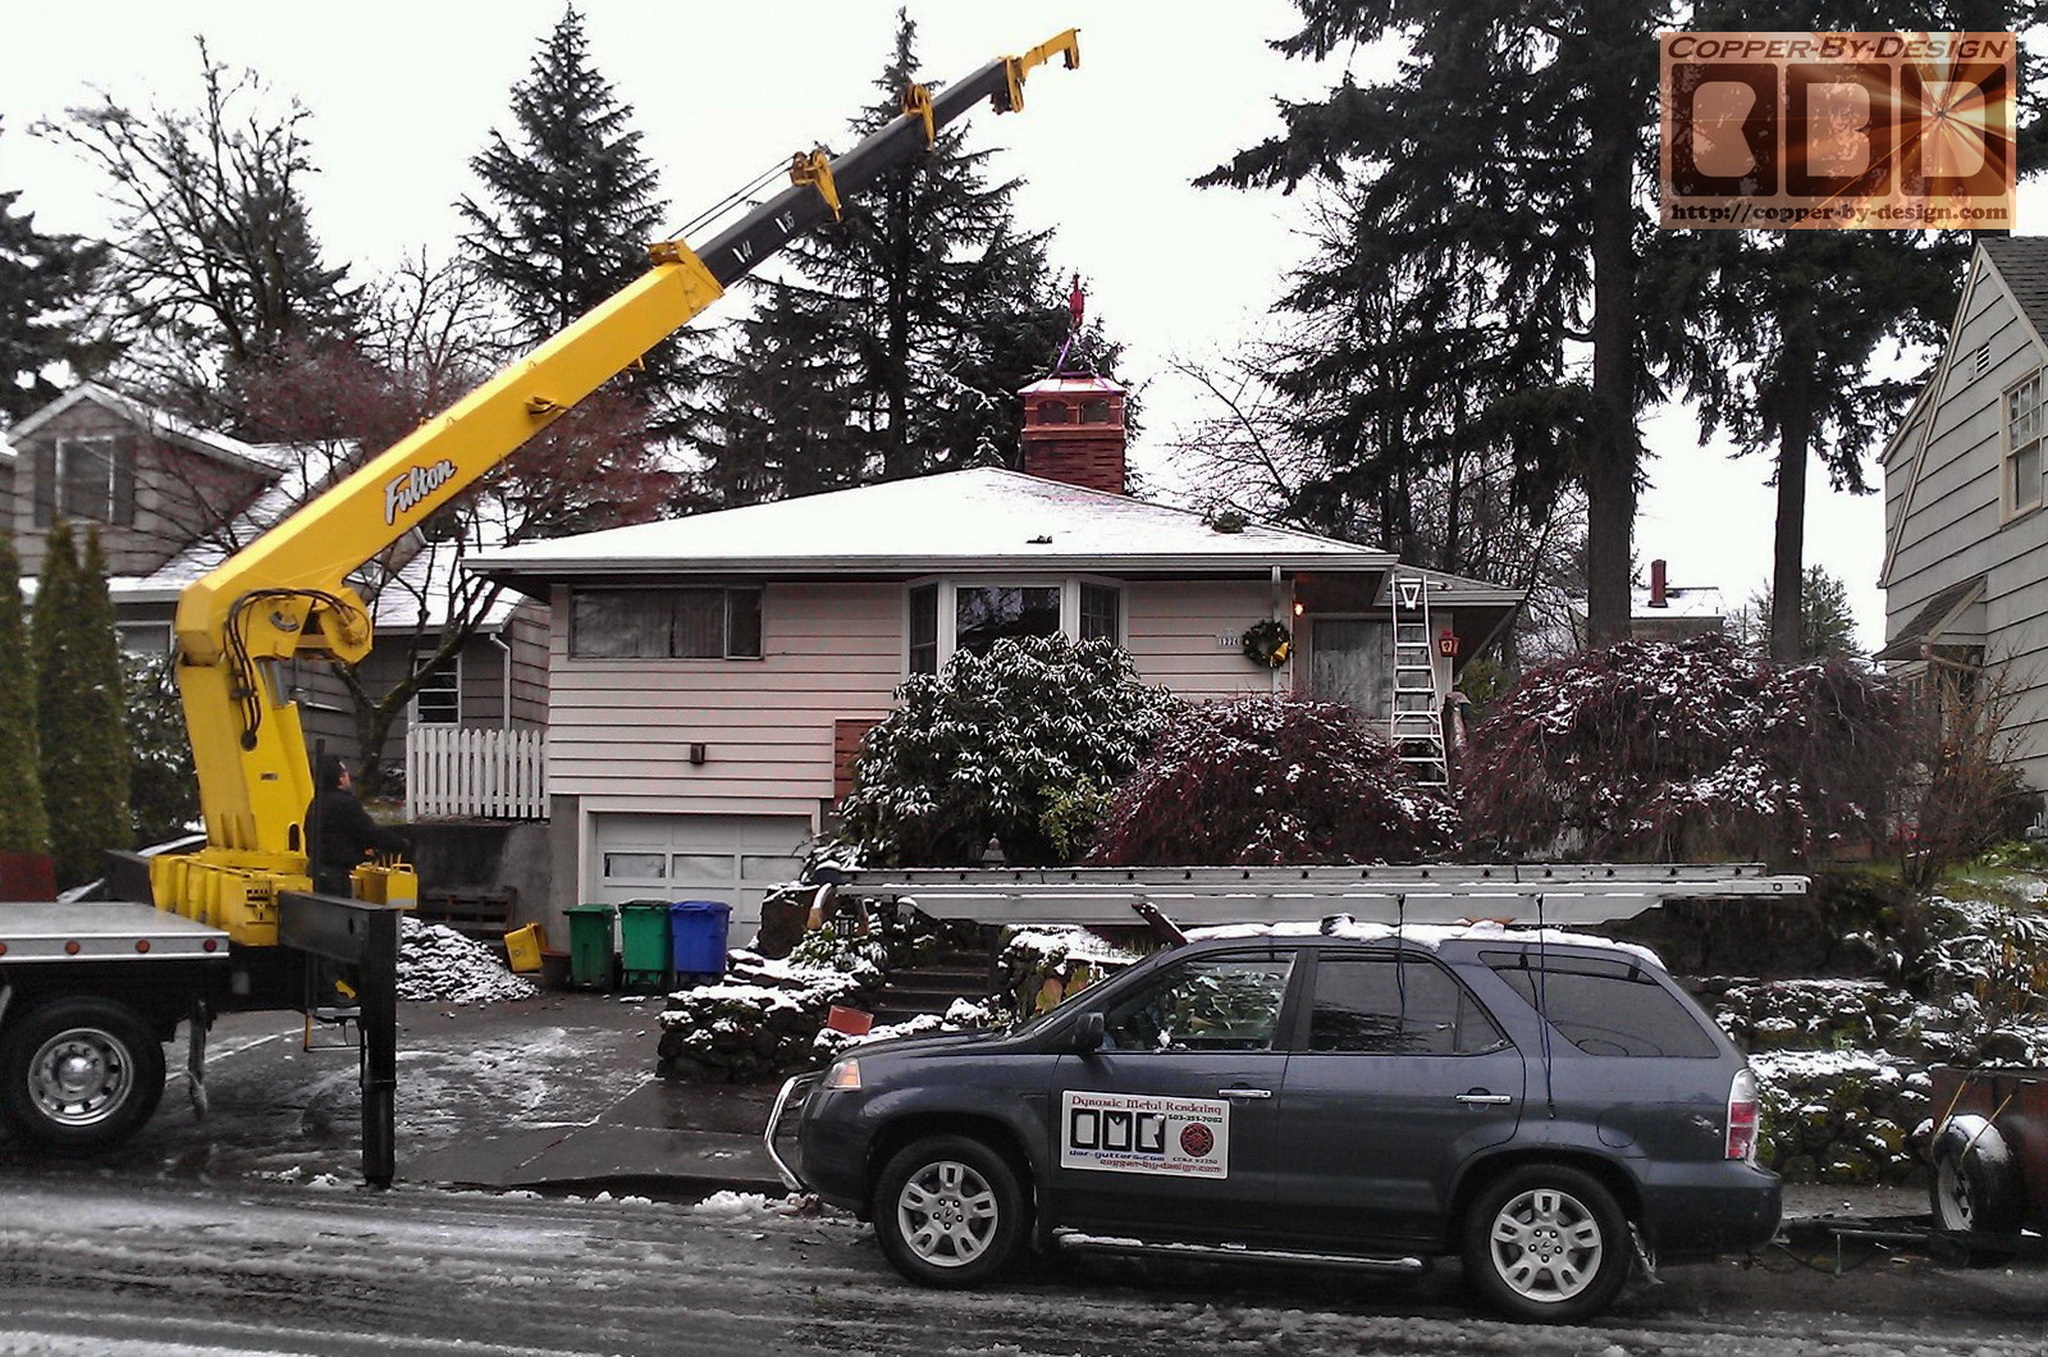
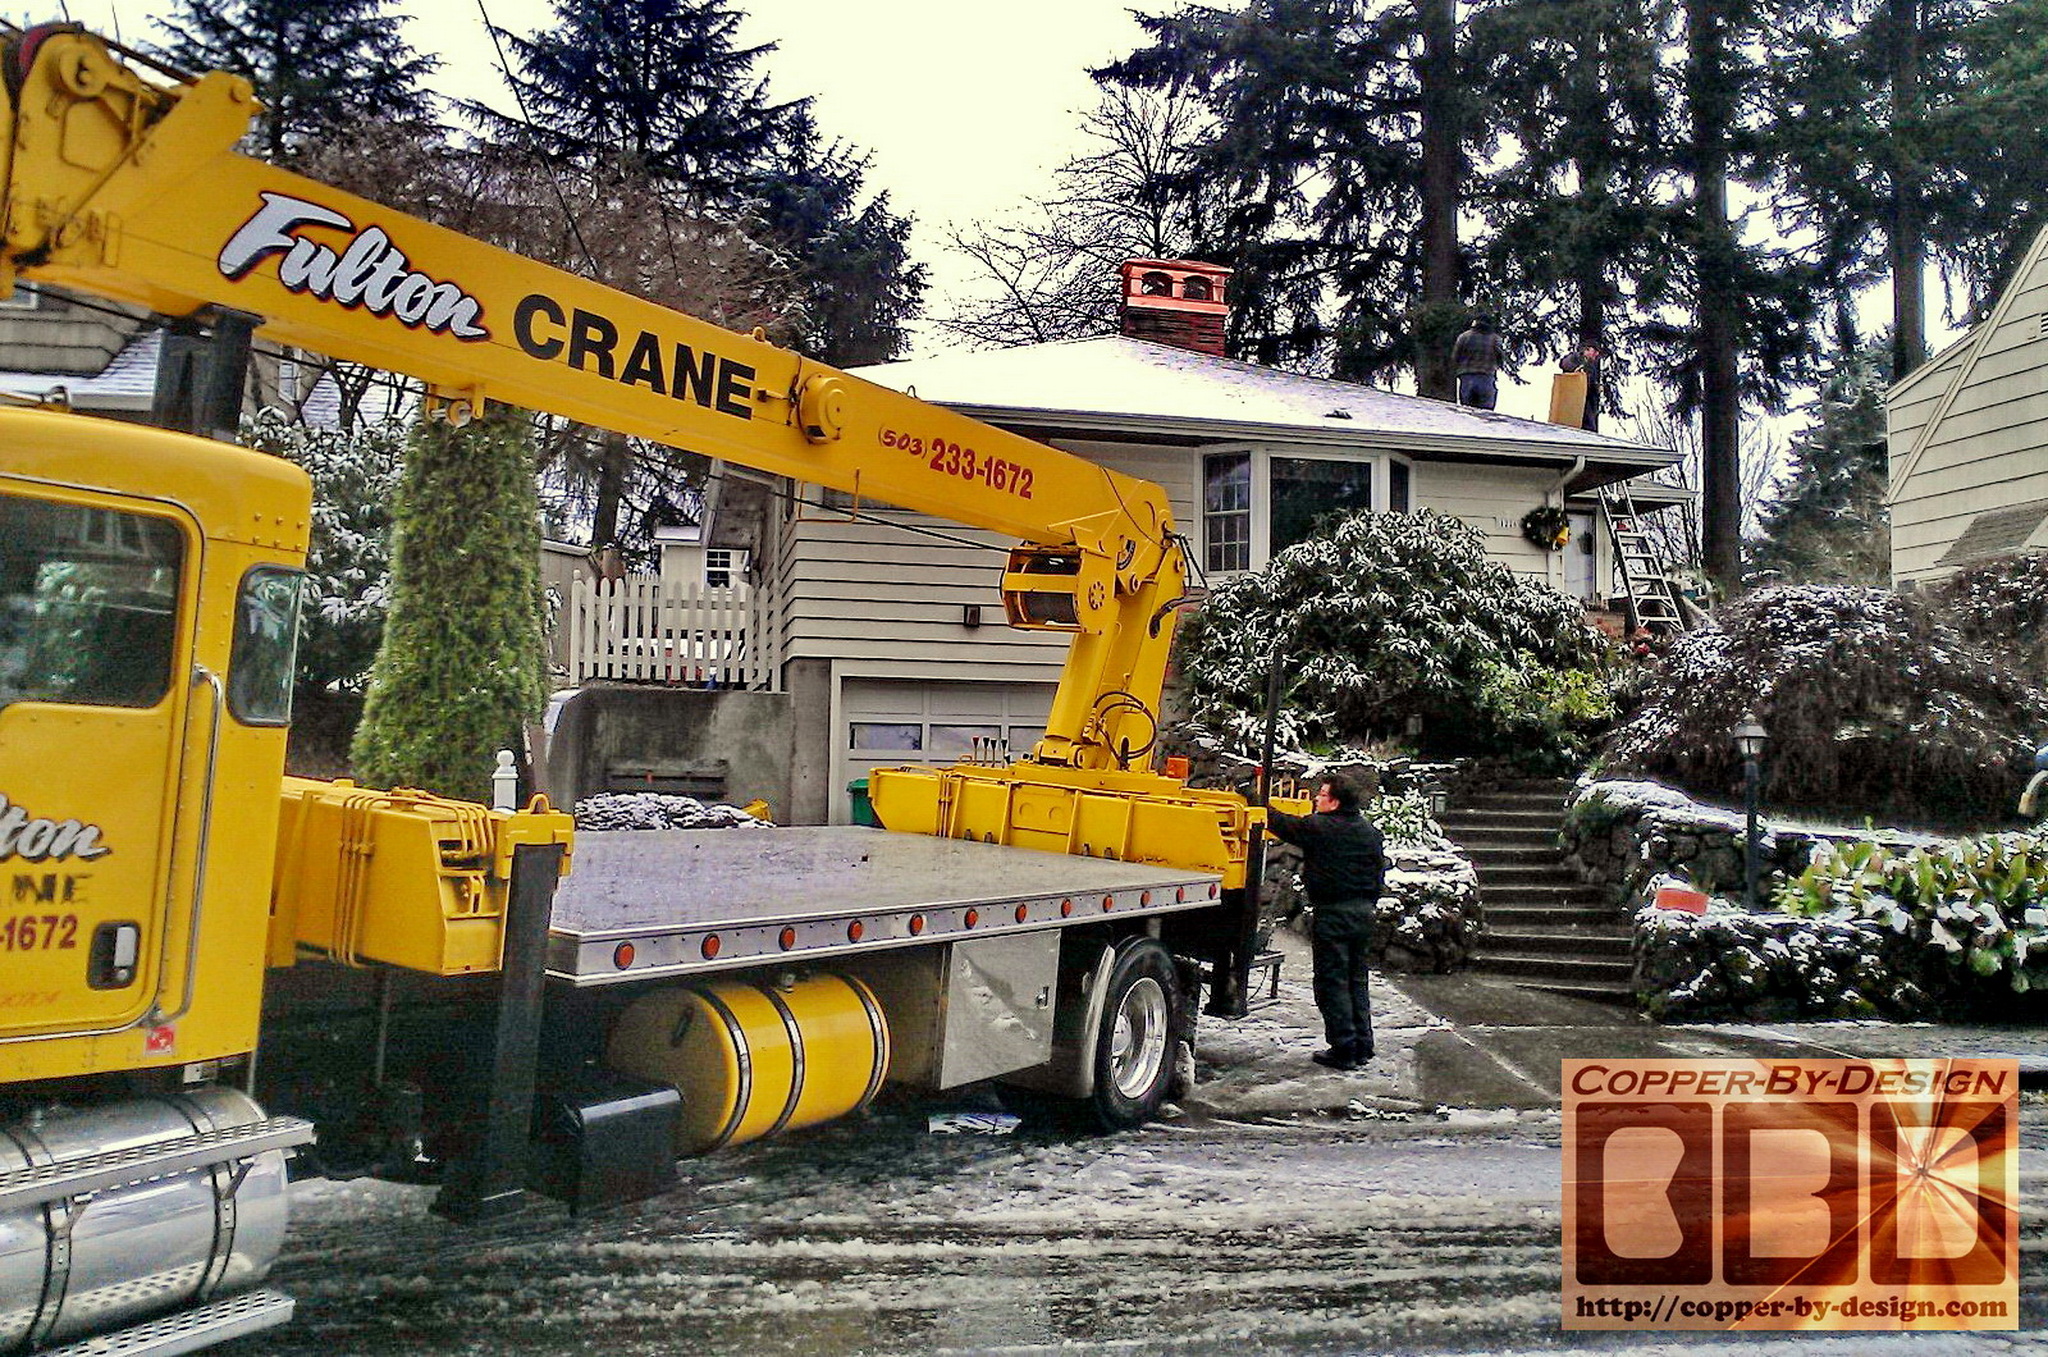
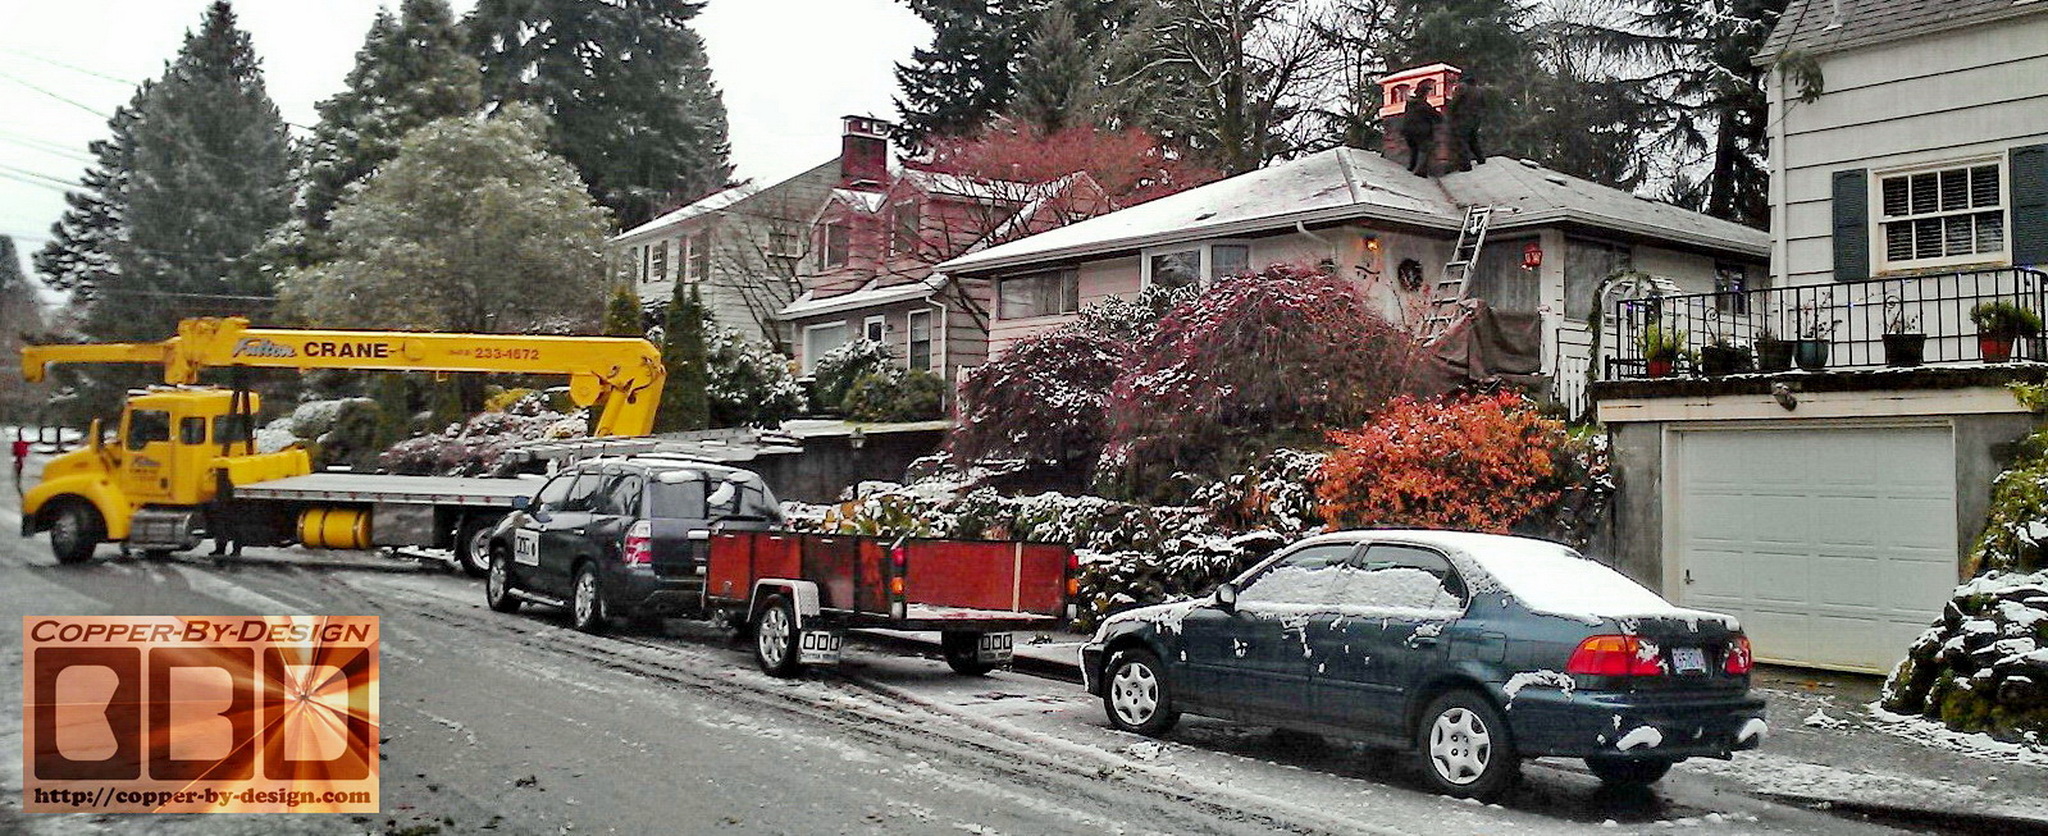
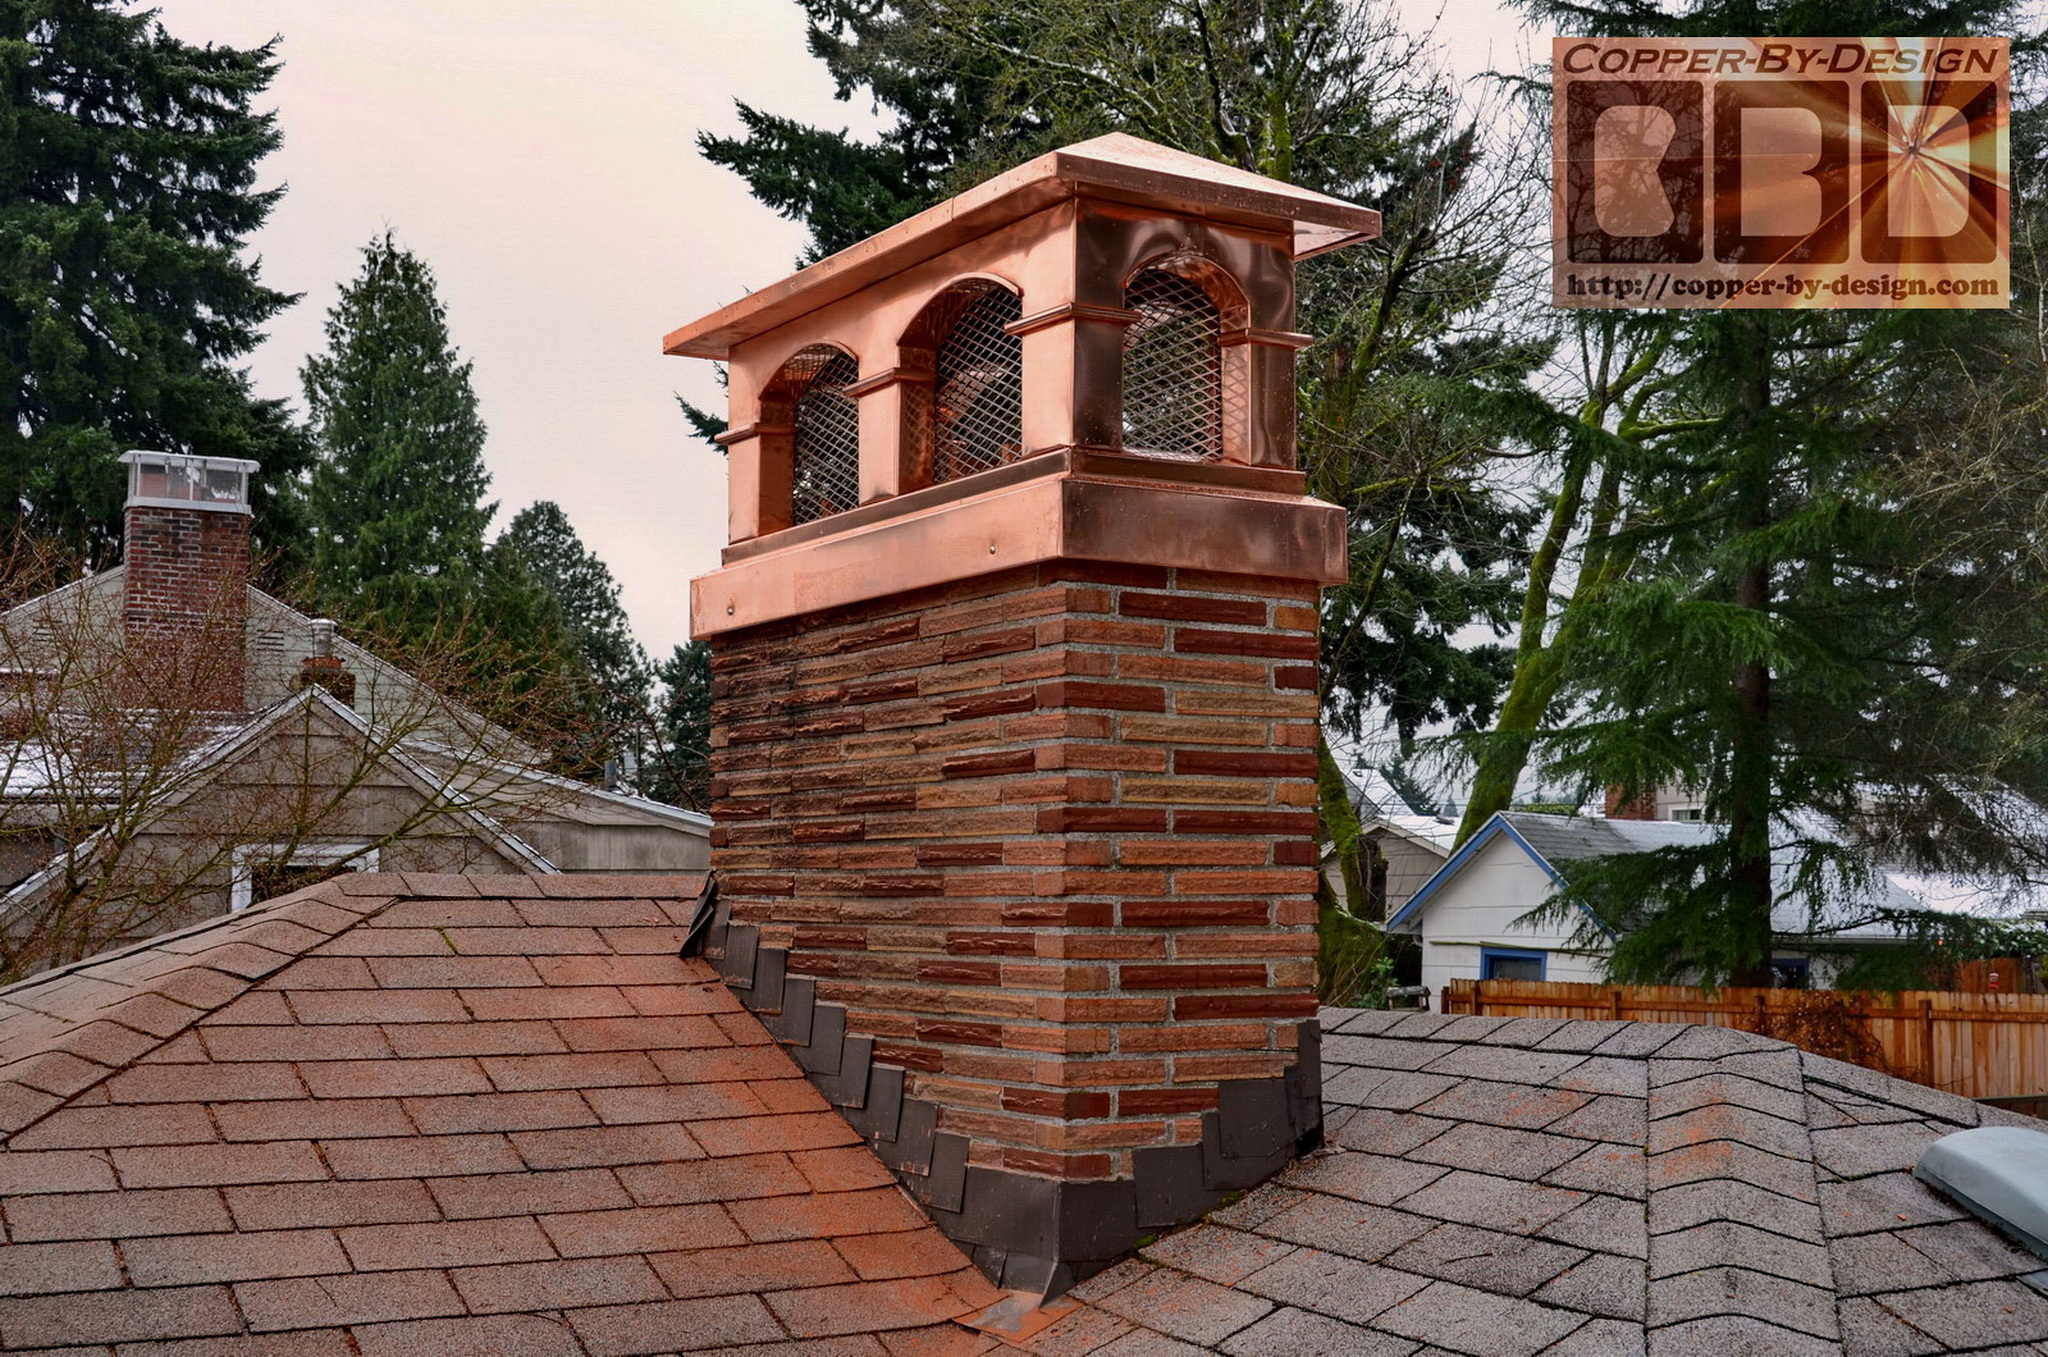
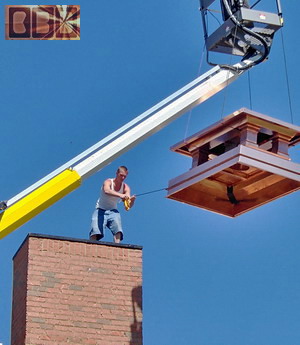
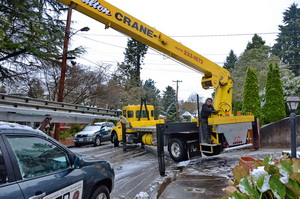
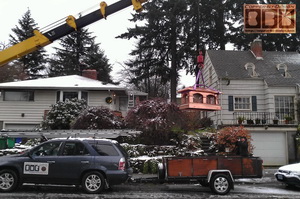
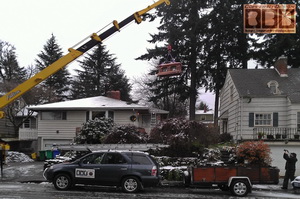
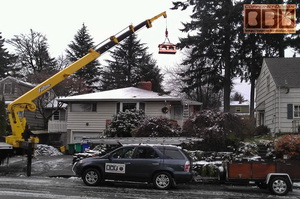
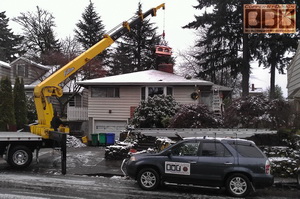
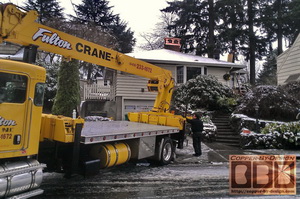
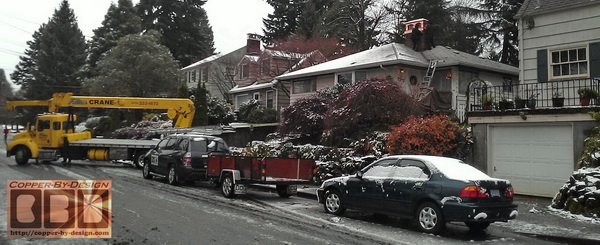
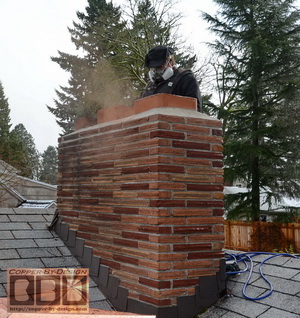
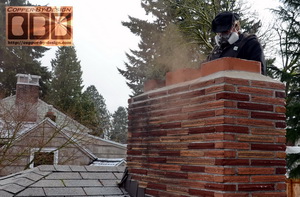
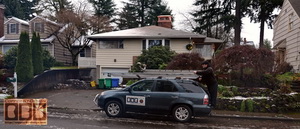
We happen to get our first snow of the year that morning. Fulton Crane showed up nearly an hour early just shortly after we arrived, so we had no time to prepare, but it still went pretty smoothly. As seen in the video 
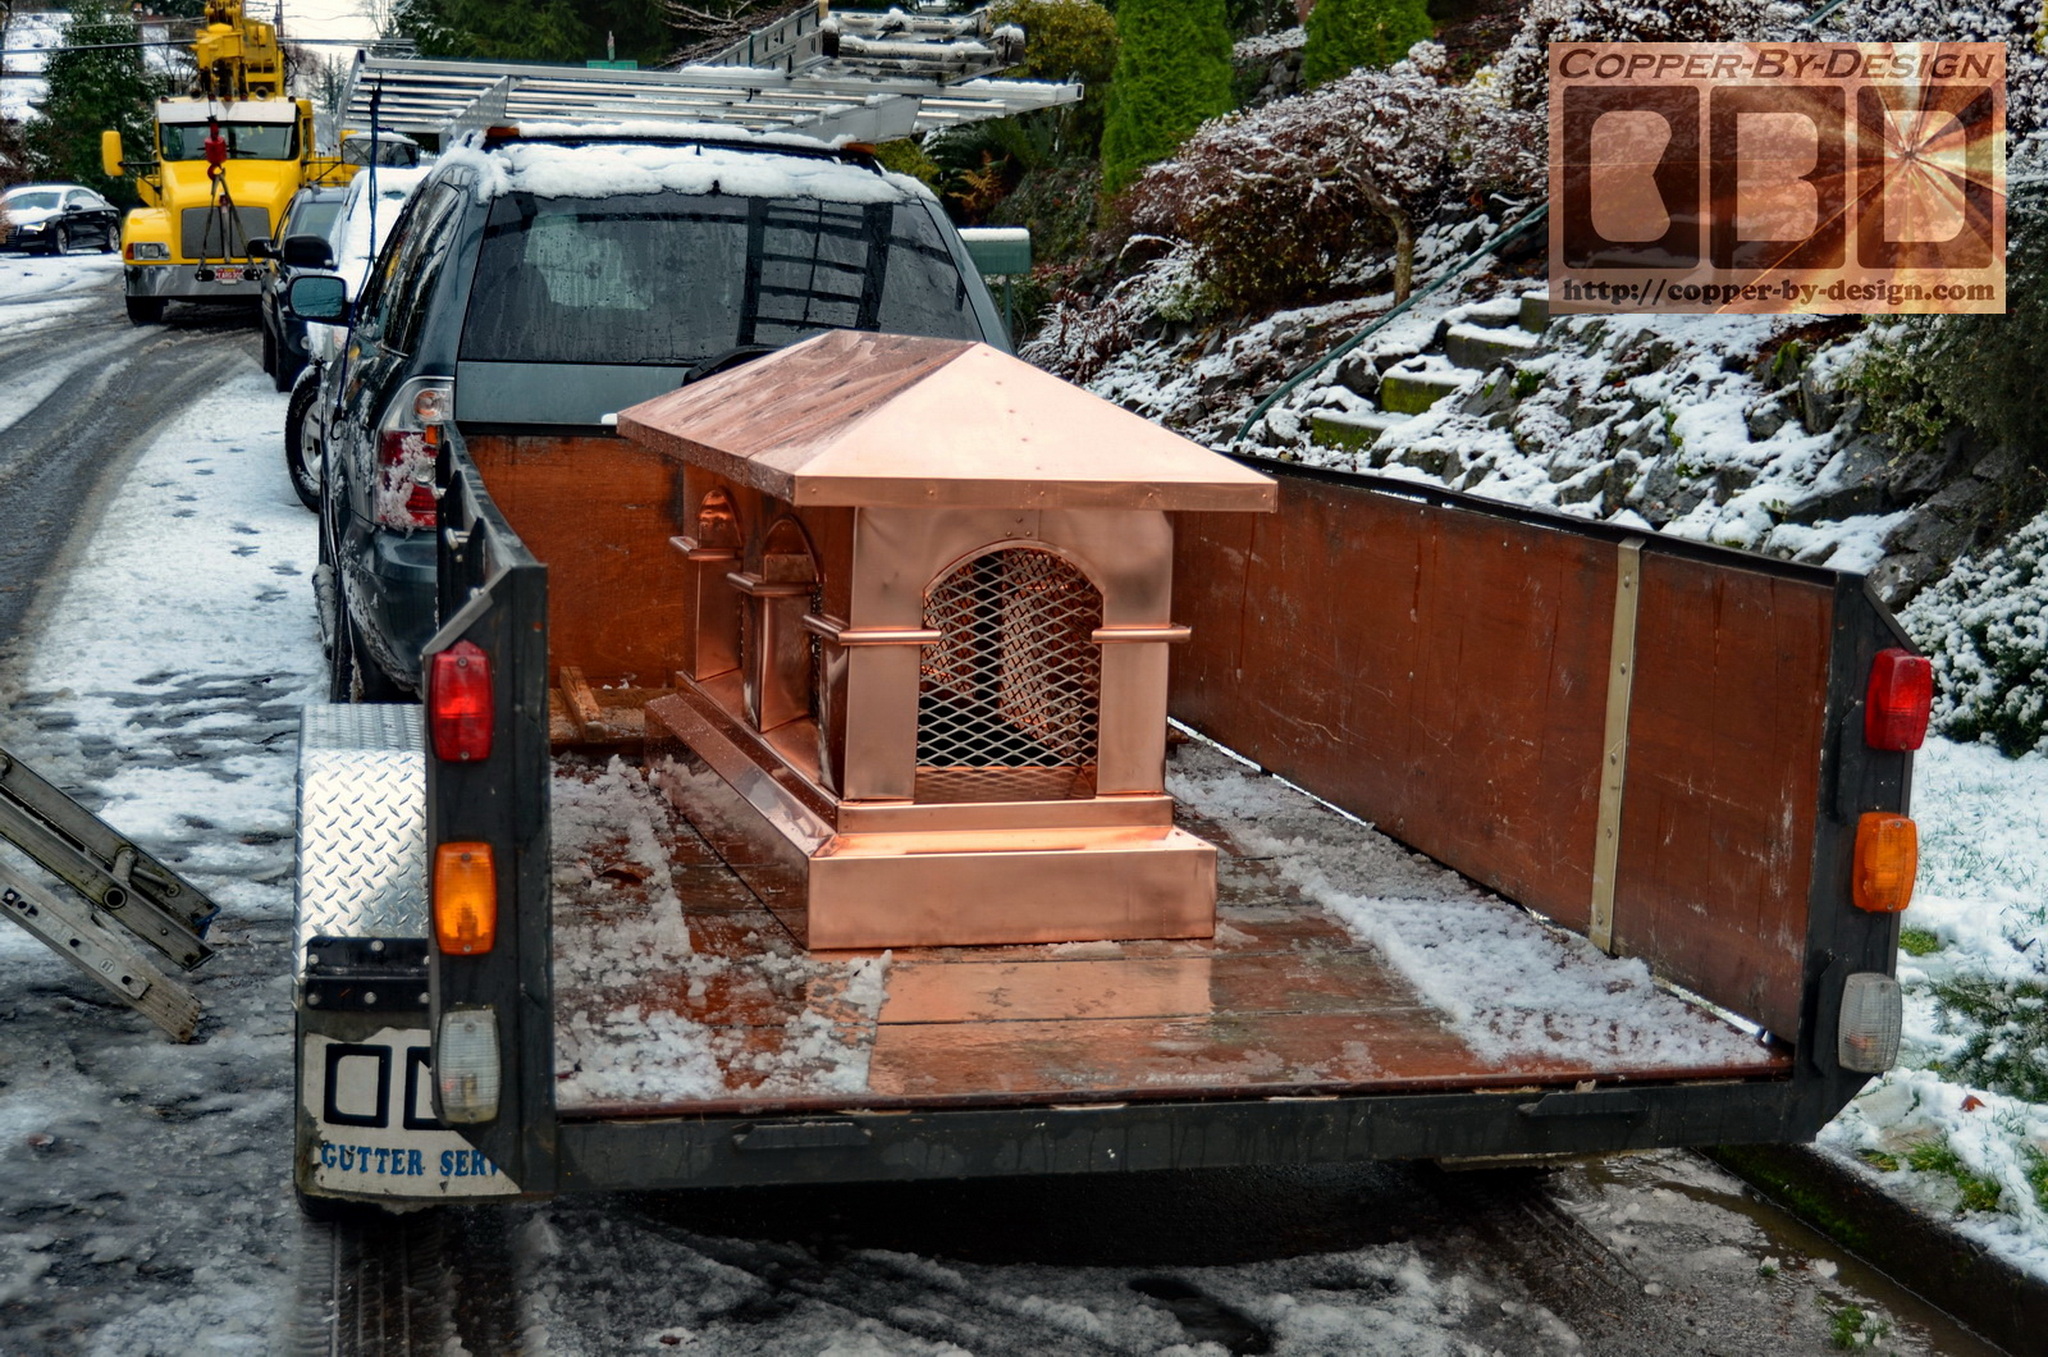
I took the lift lasted just a few minutes. Most of these pics of the lift were taken by the client with his smart phone while I was capturing a video of it.

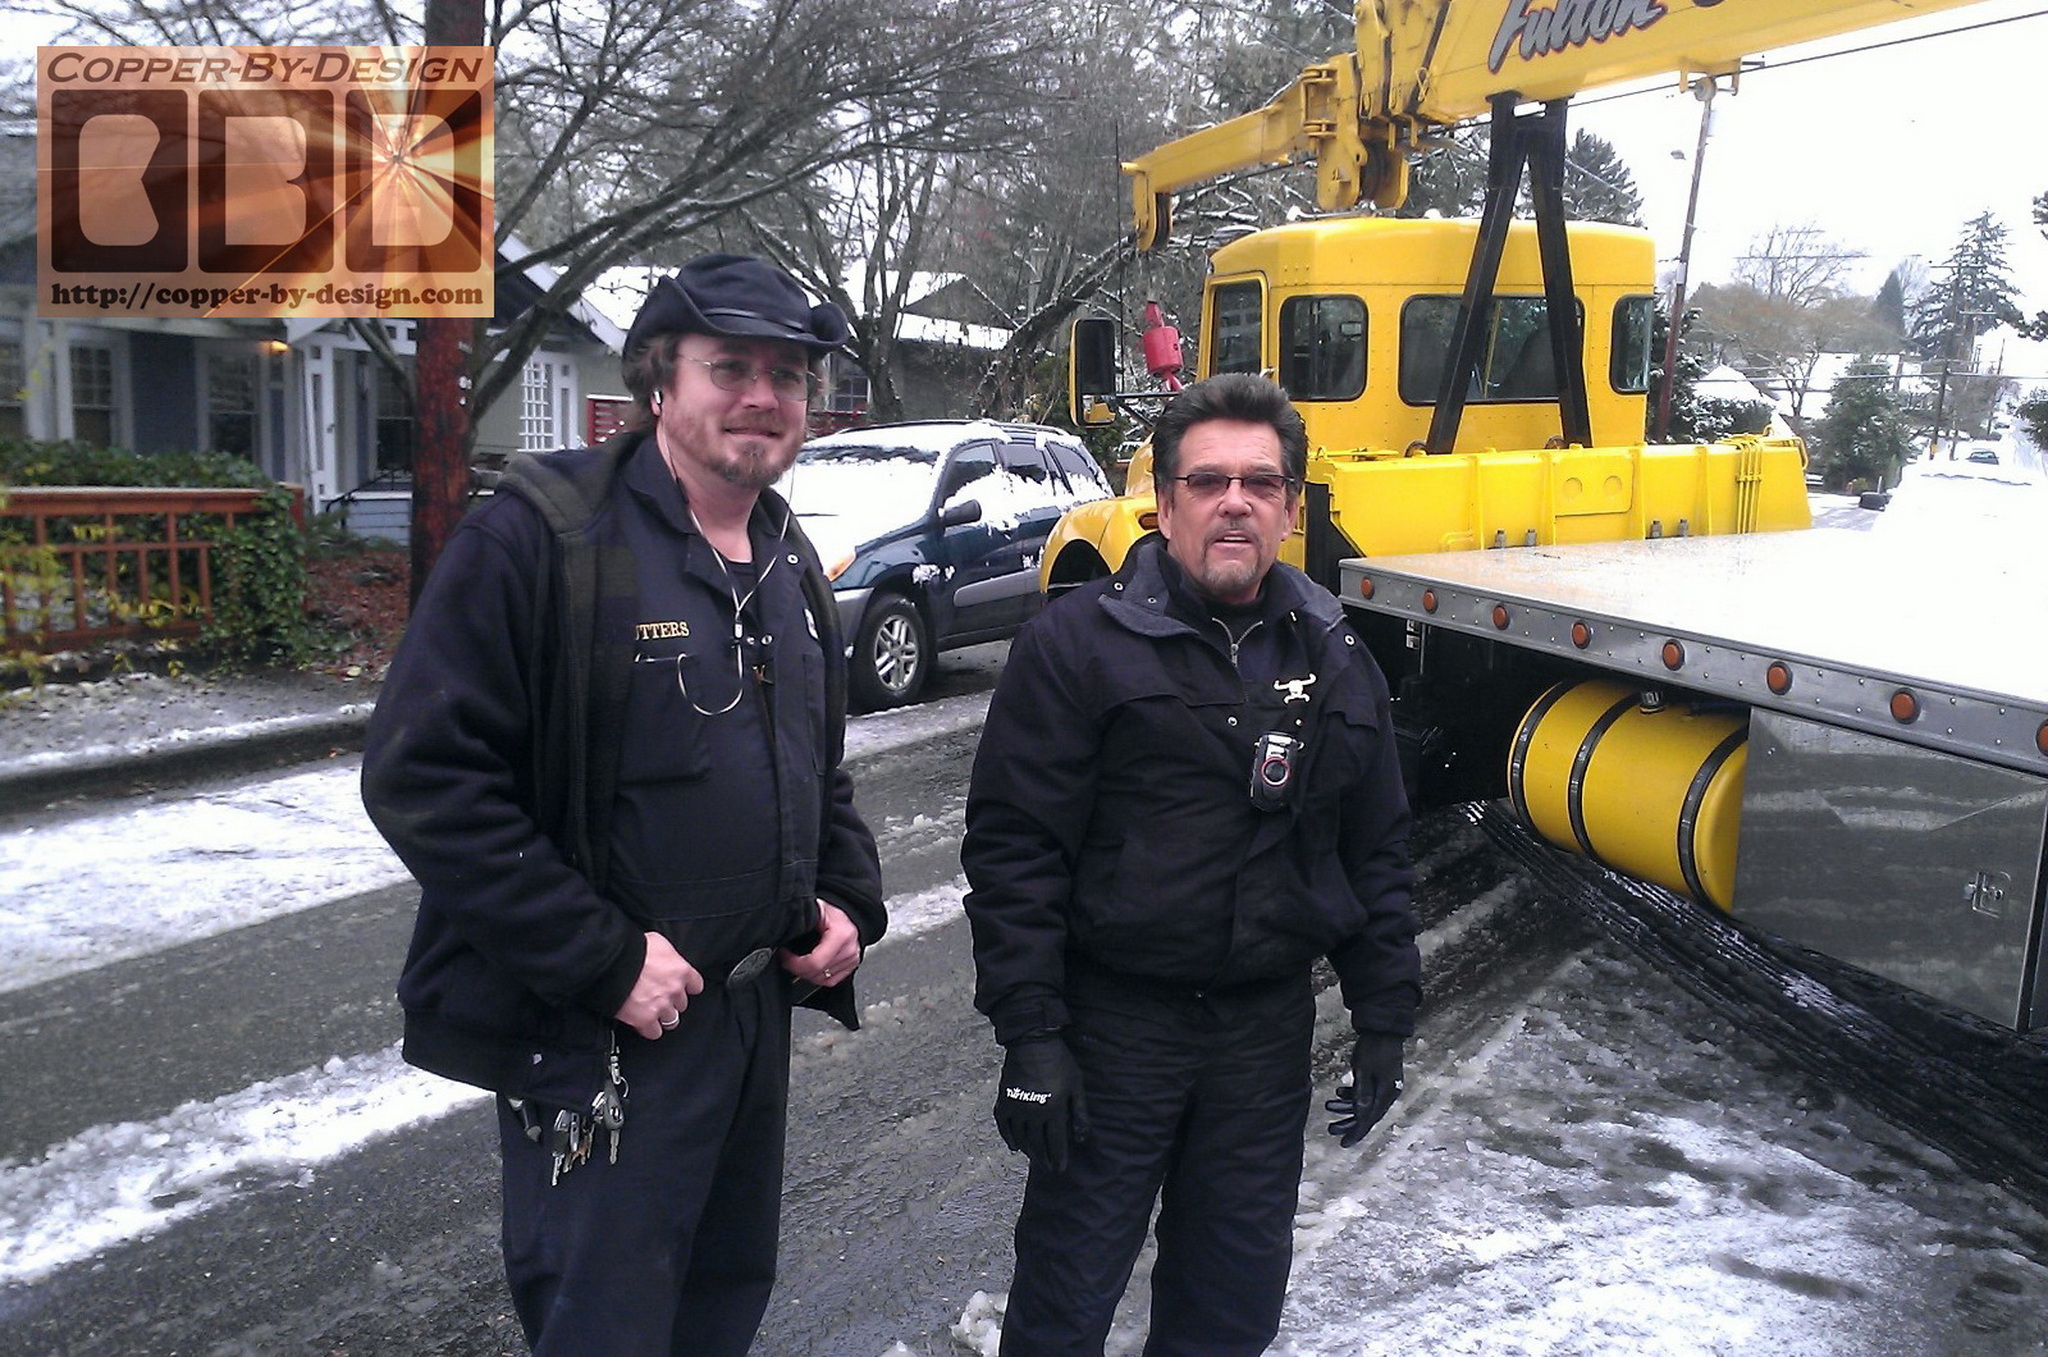
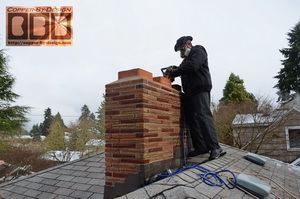
Gary of Fulton Crane has always been reliable, and a can-do guy. He has a really nice piece of equipment he keeps real clean and he's very nice to work with. I would highly recommend this, as opposed to renting 
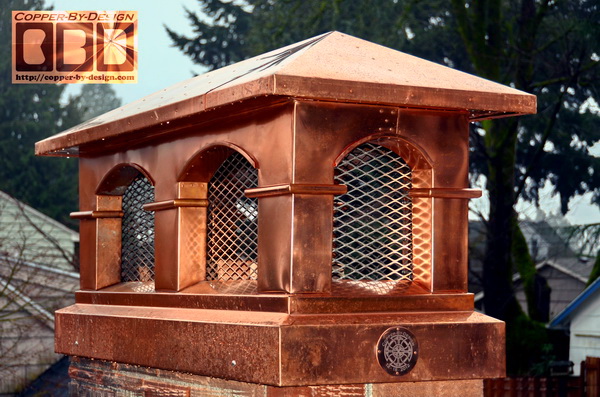
a high lift. They don't make a ladder strong enough for 2 men, let alone with the weight of this chimney cap as well, so muscling it up there is not really an option.

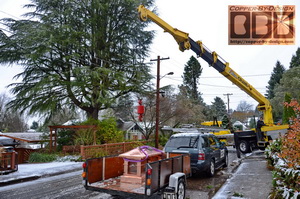
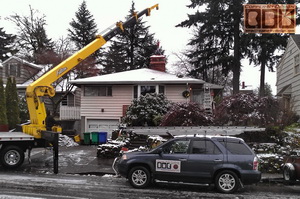
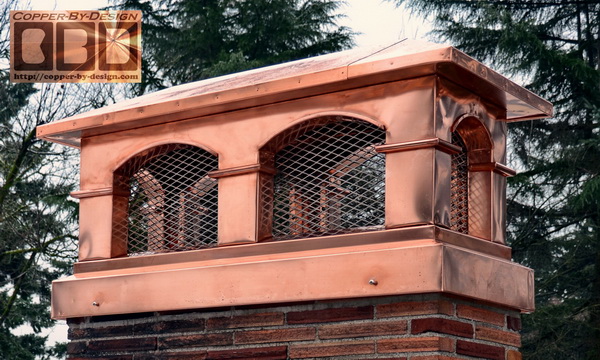
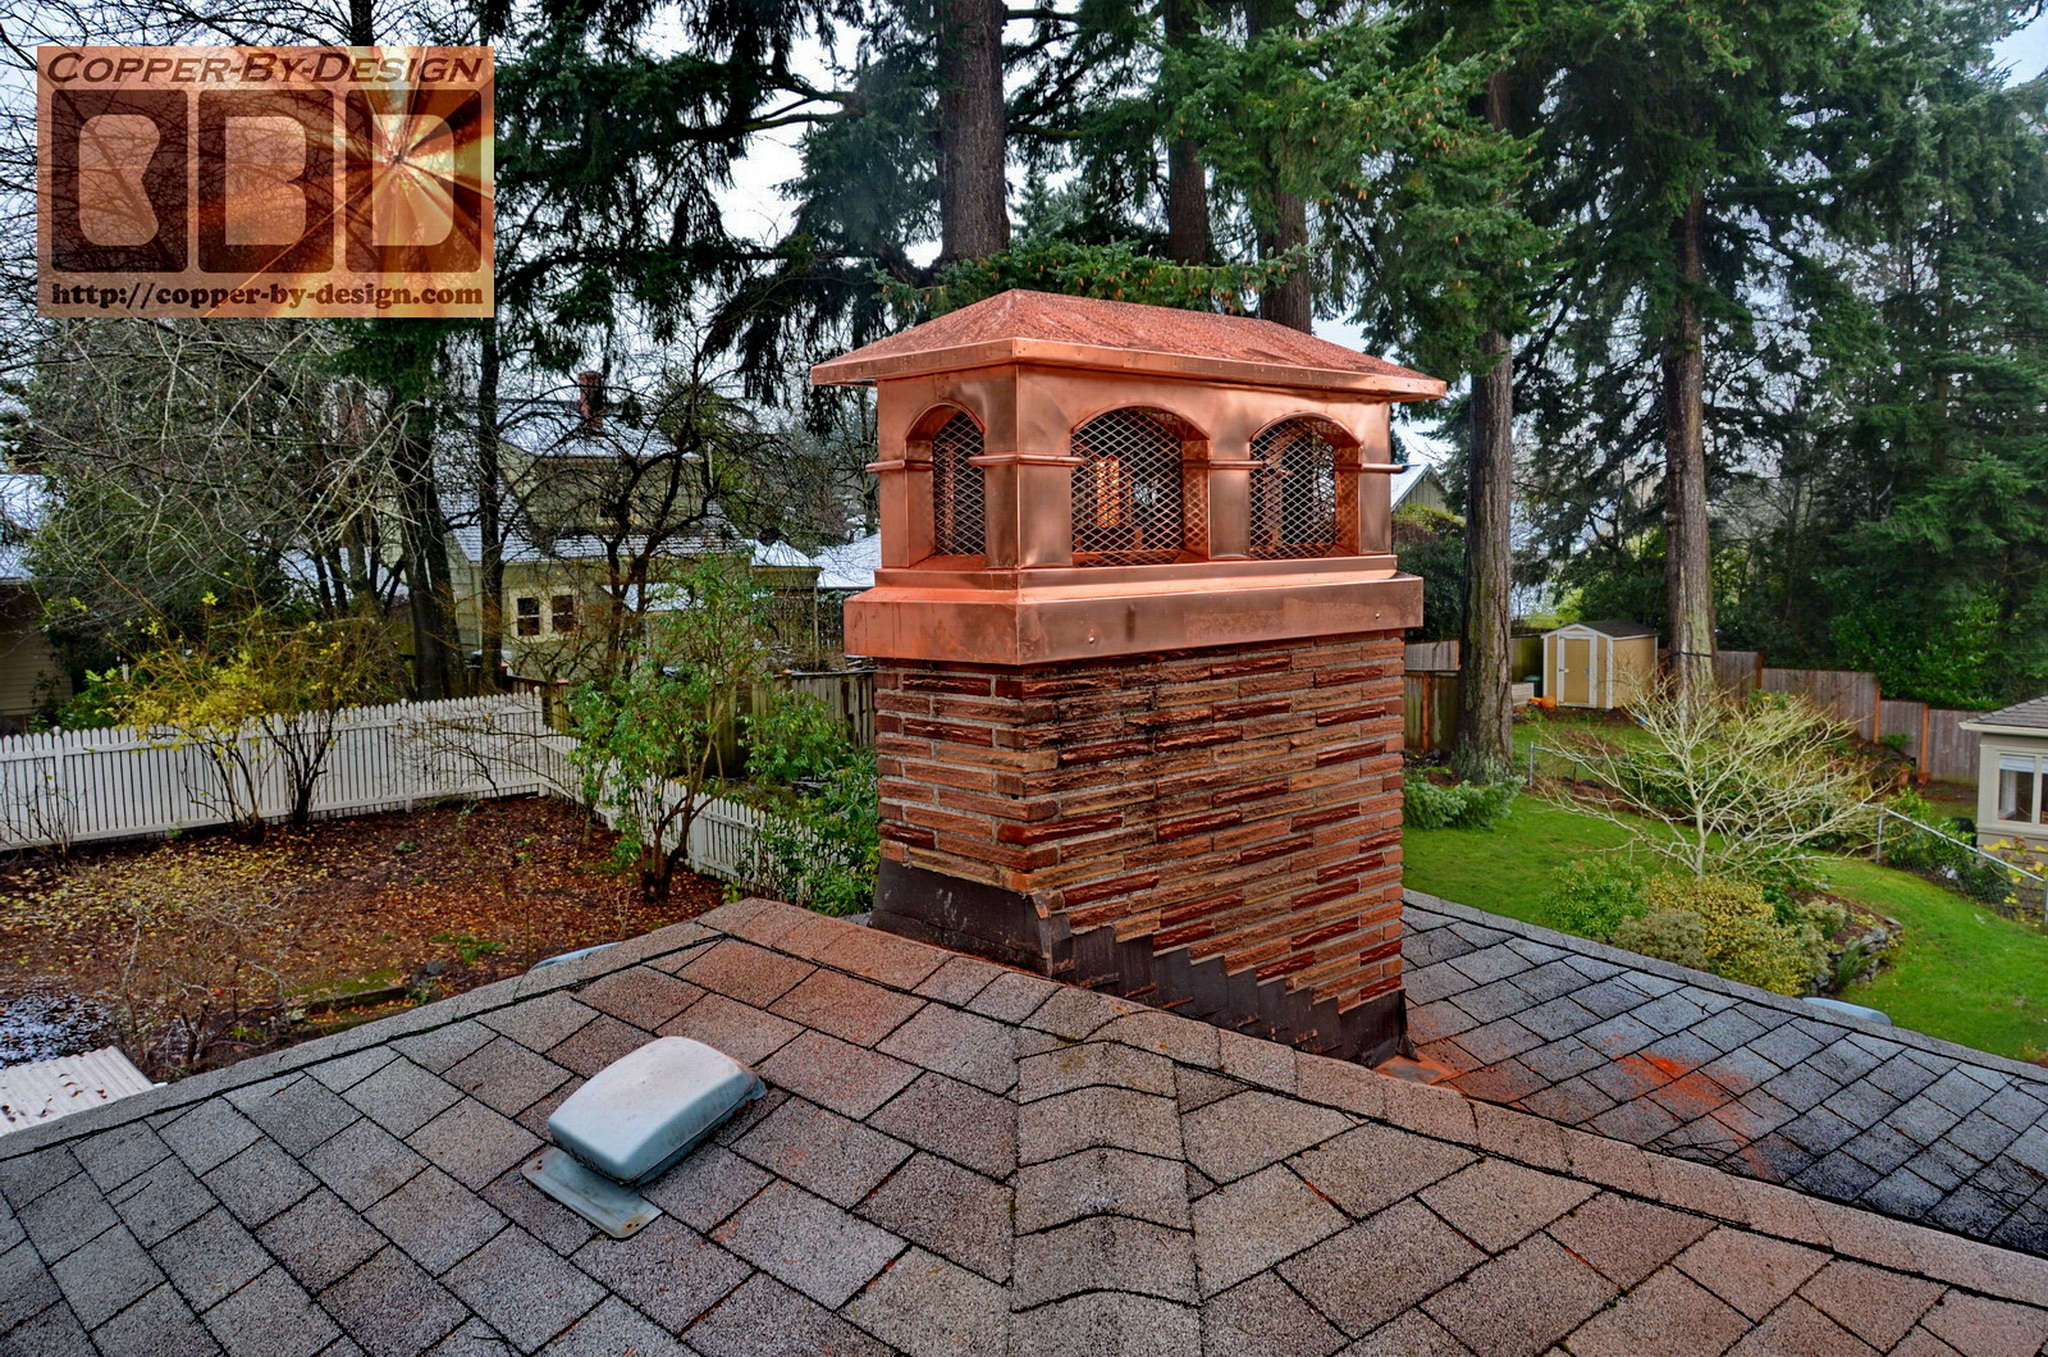
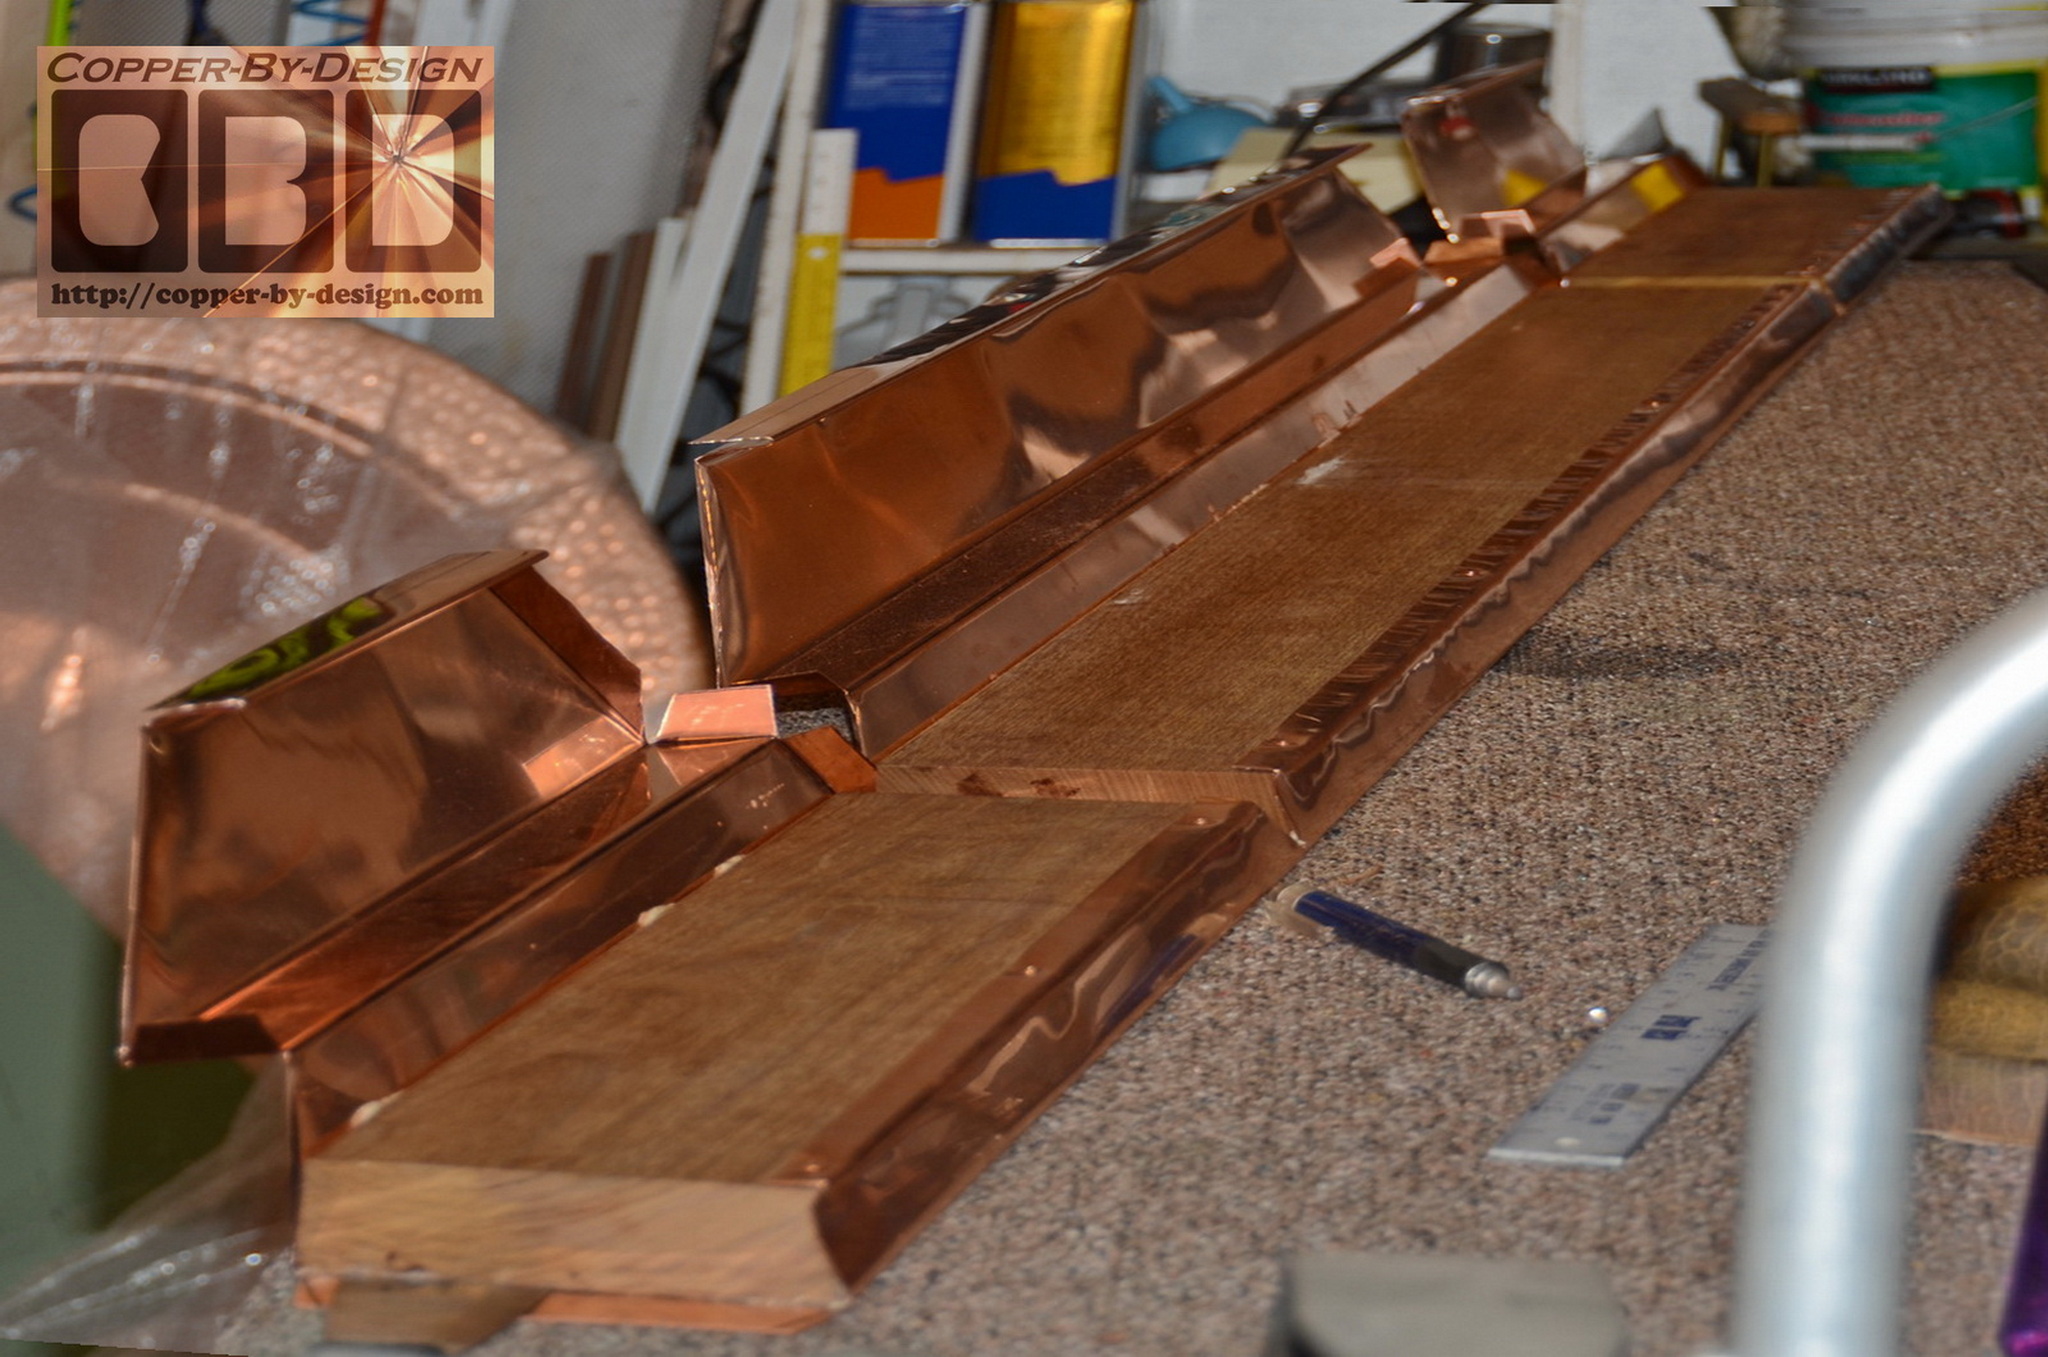
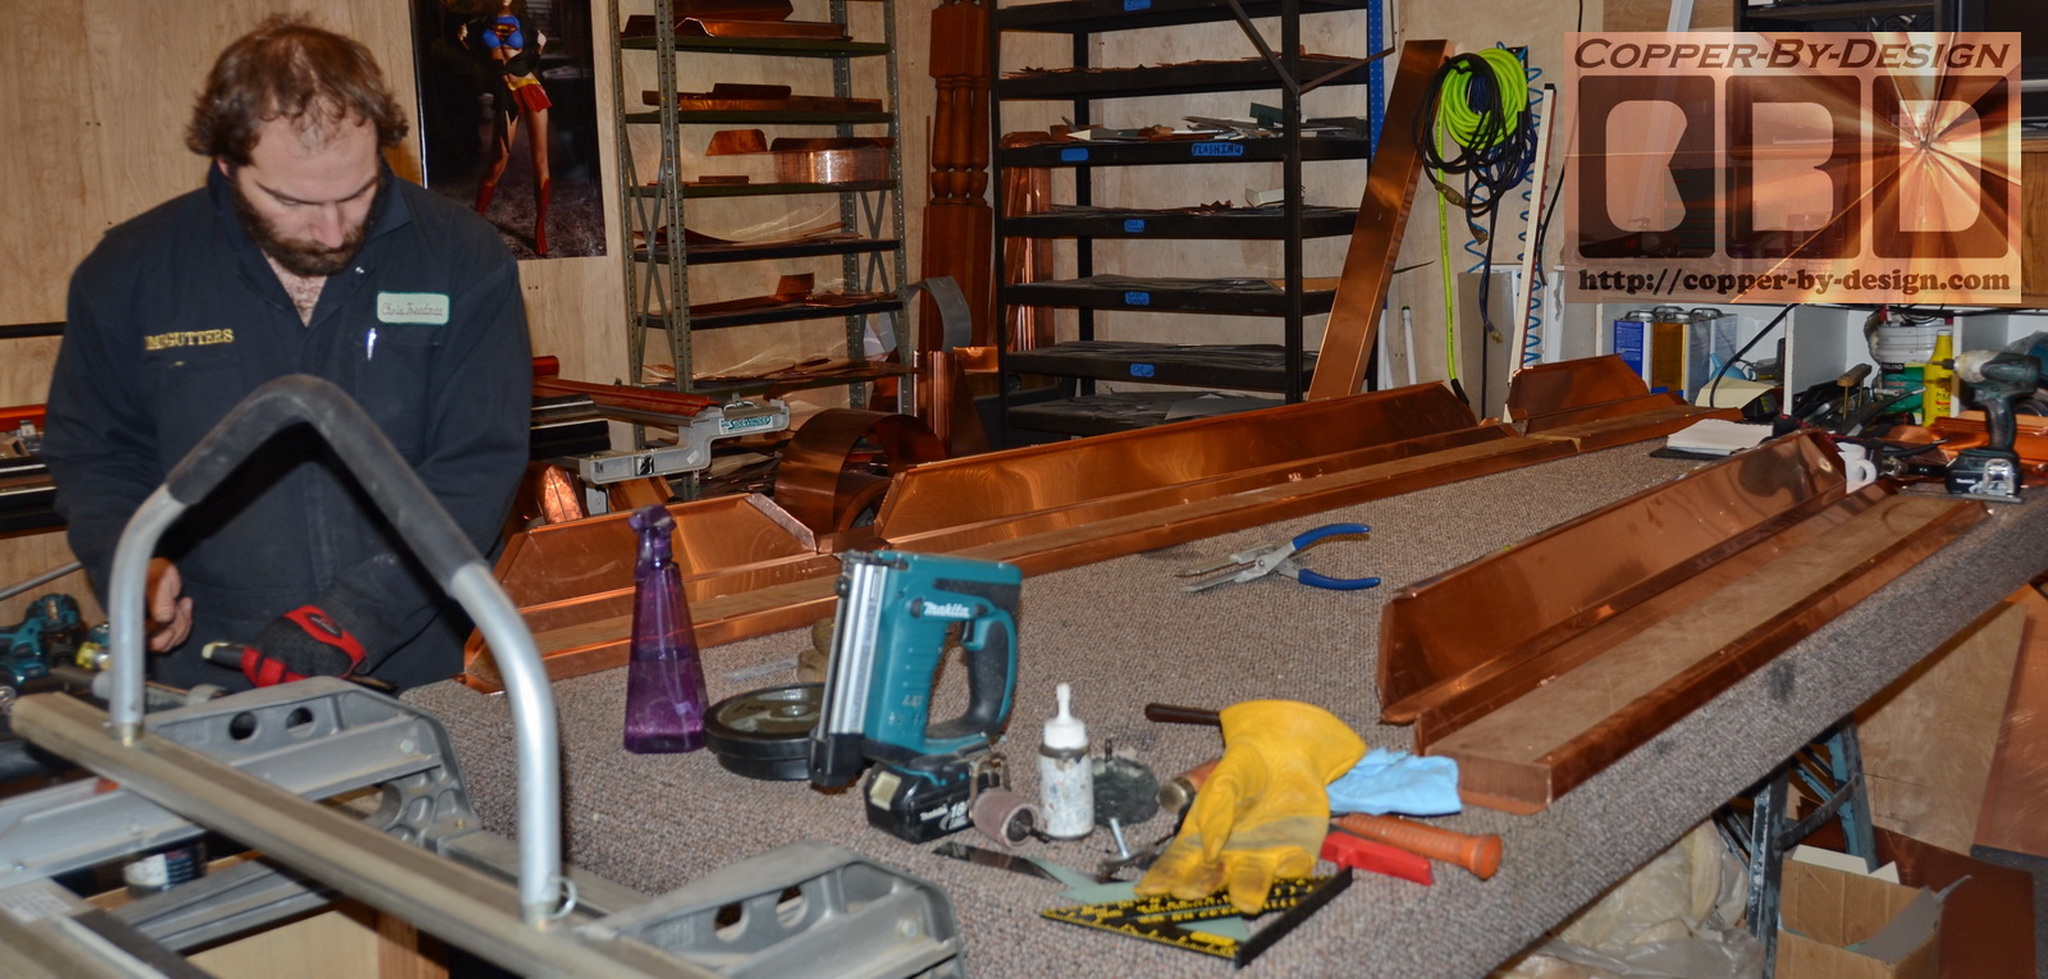
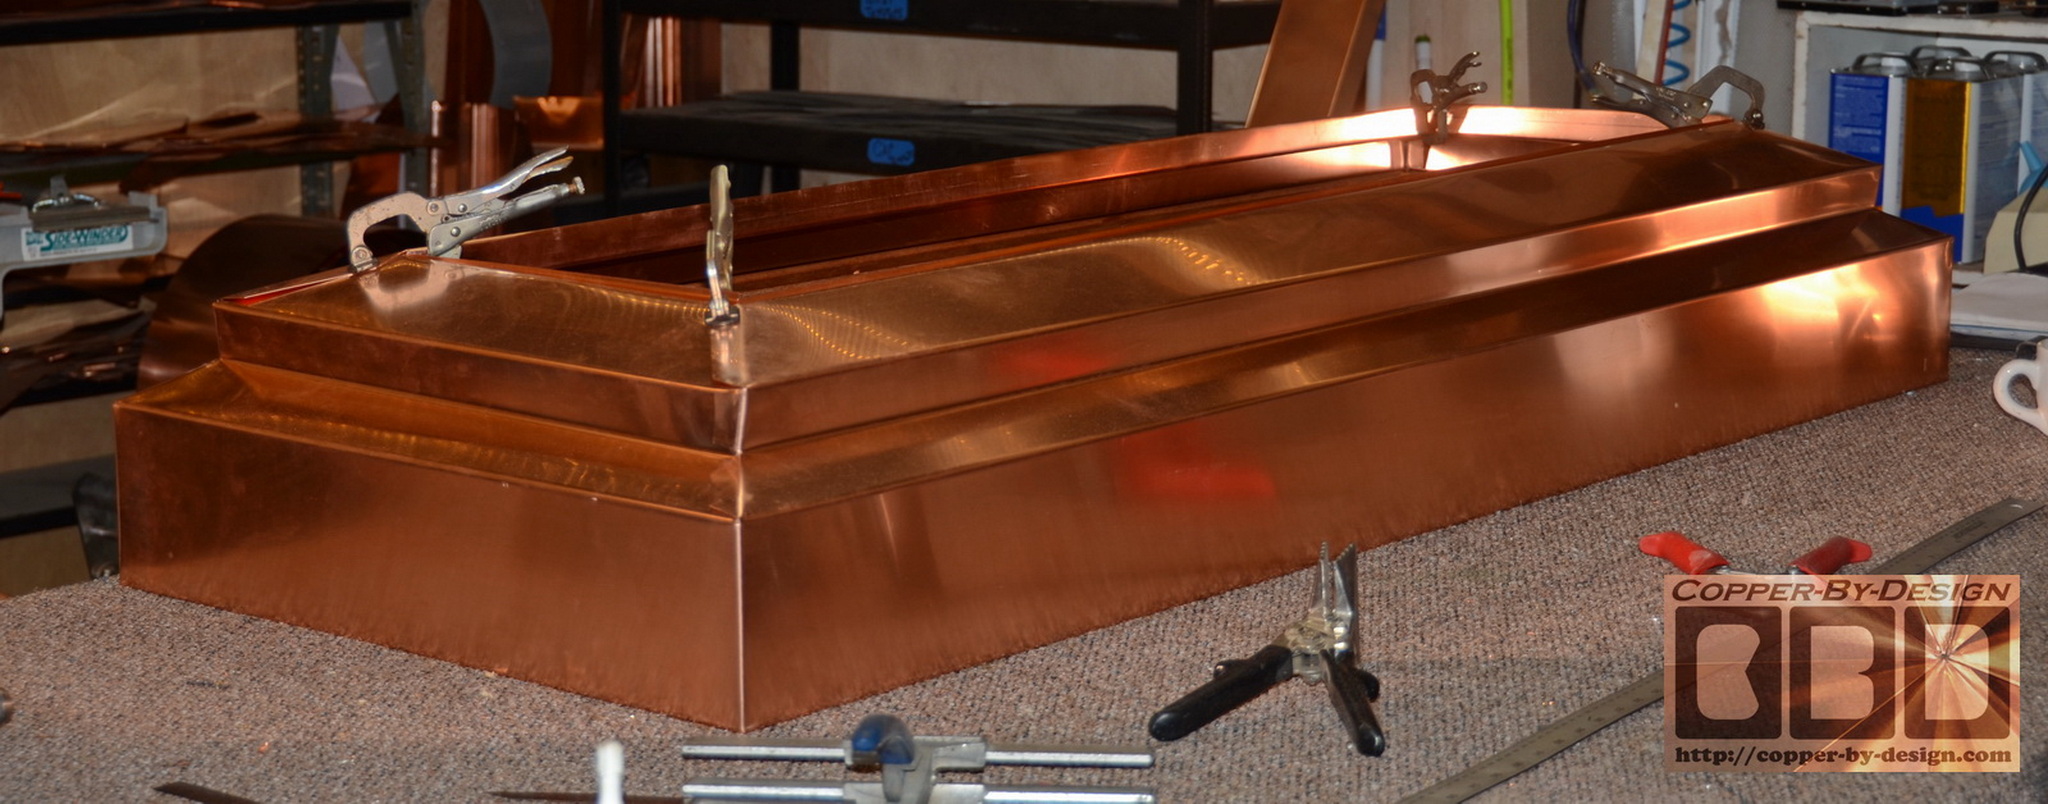
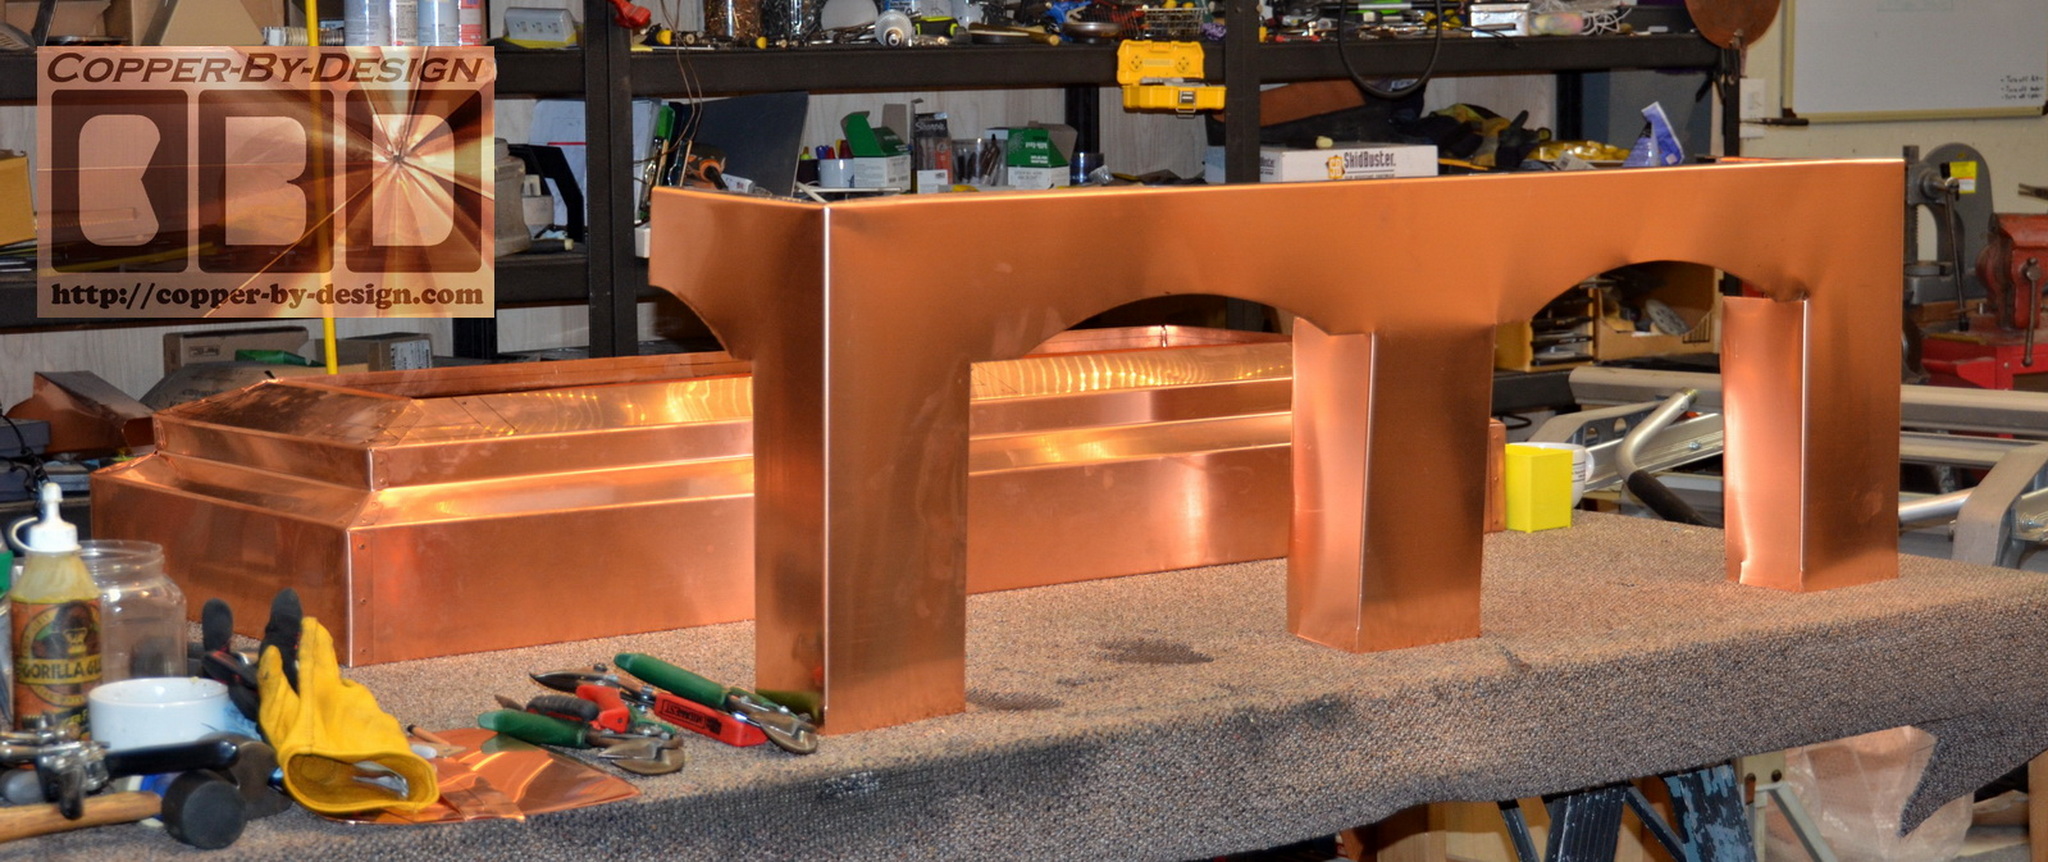
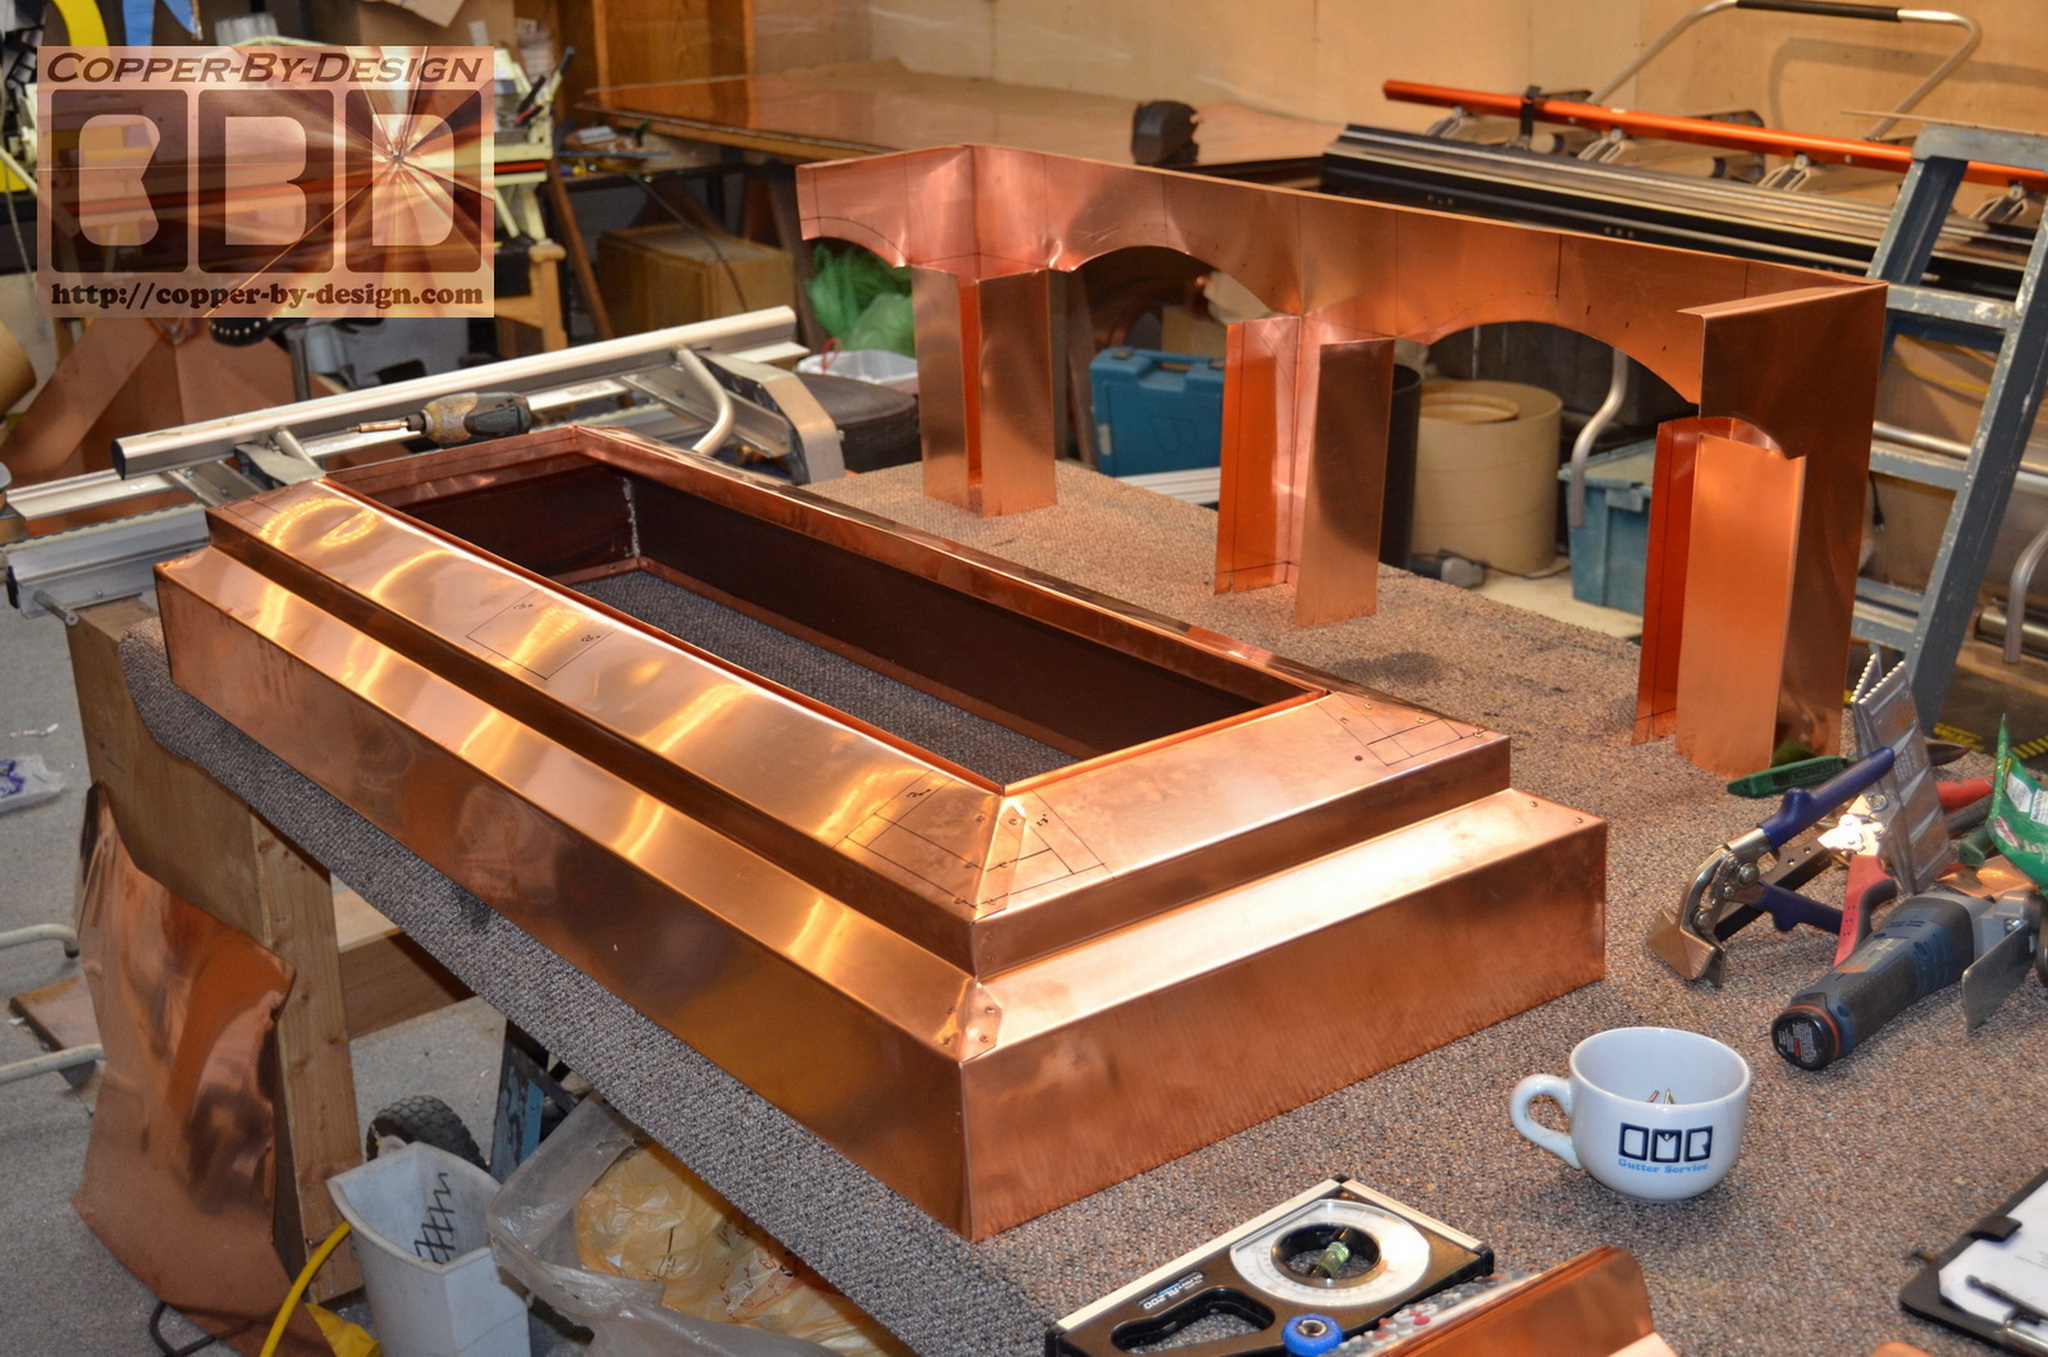
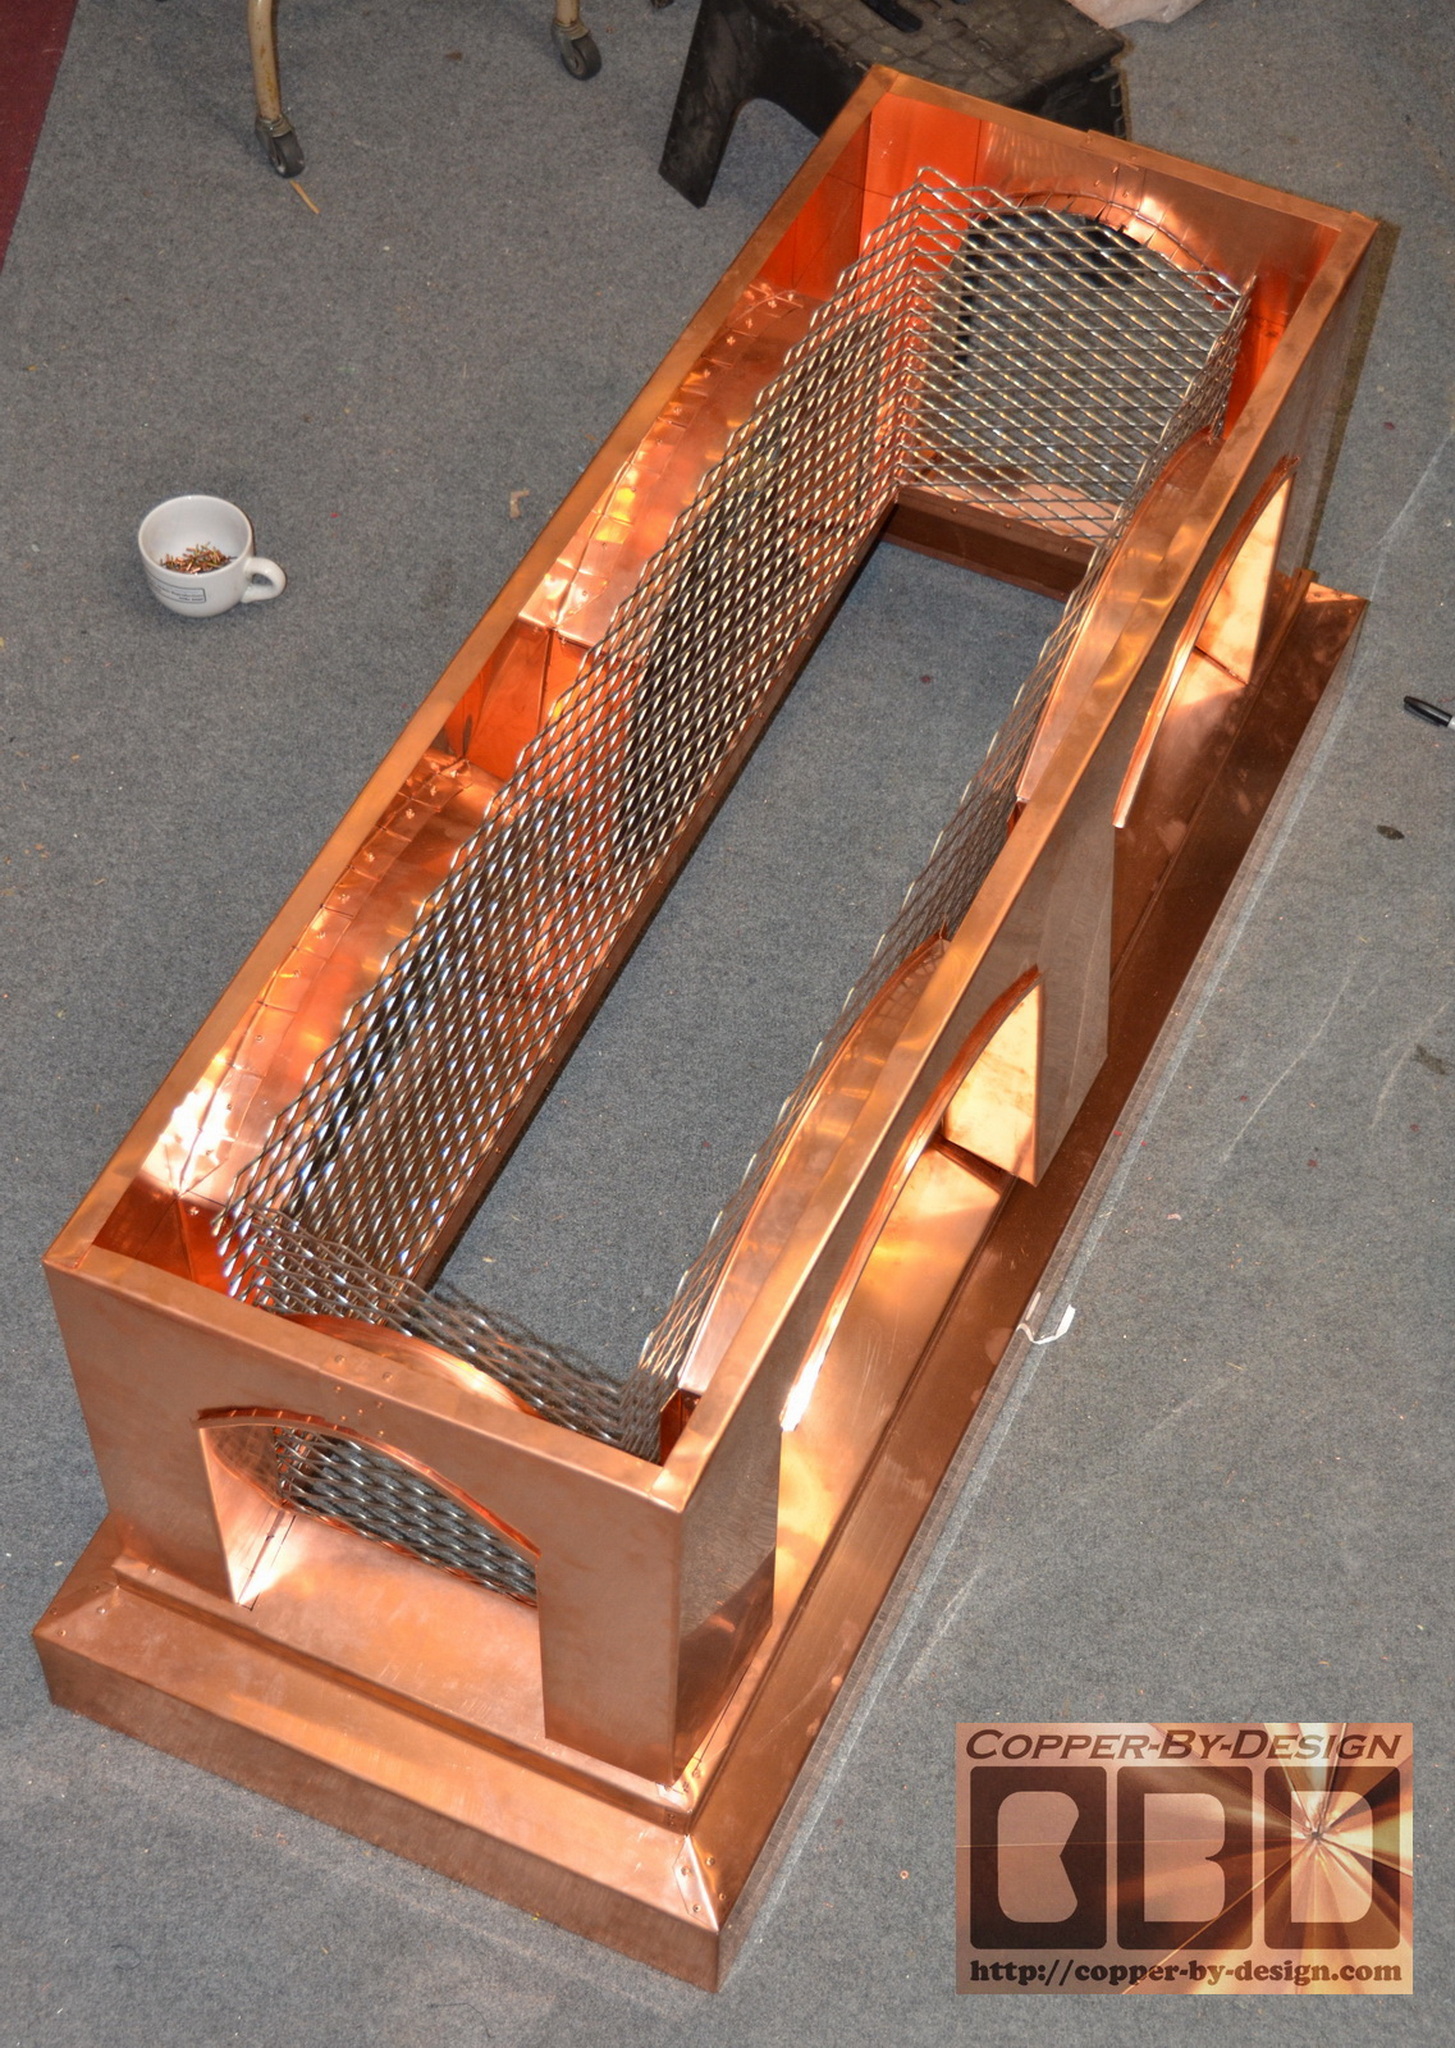
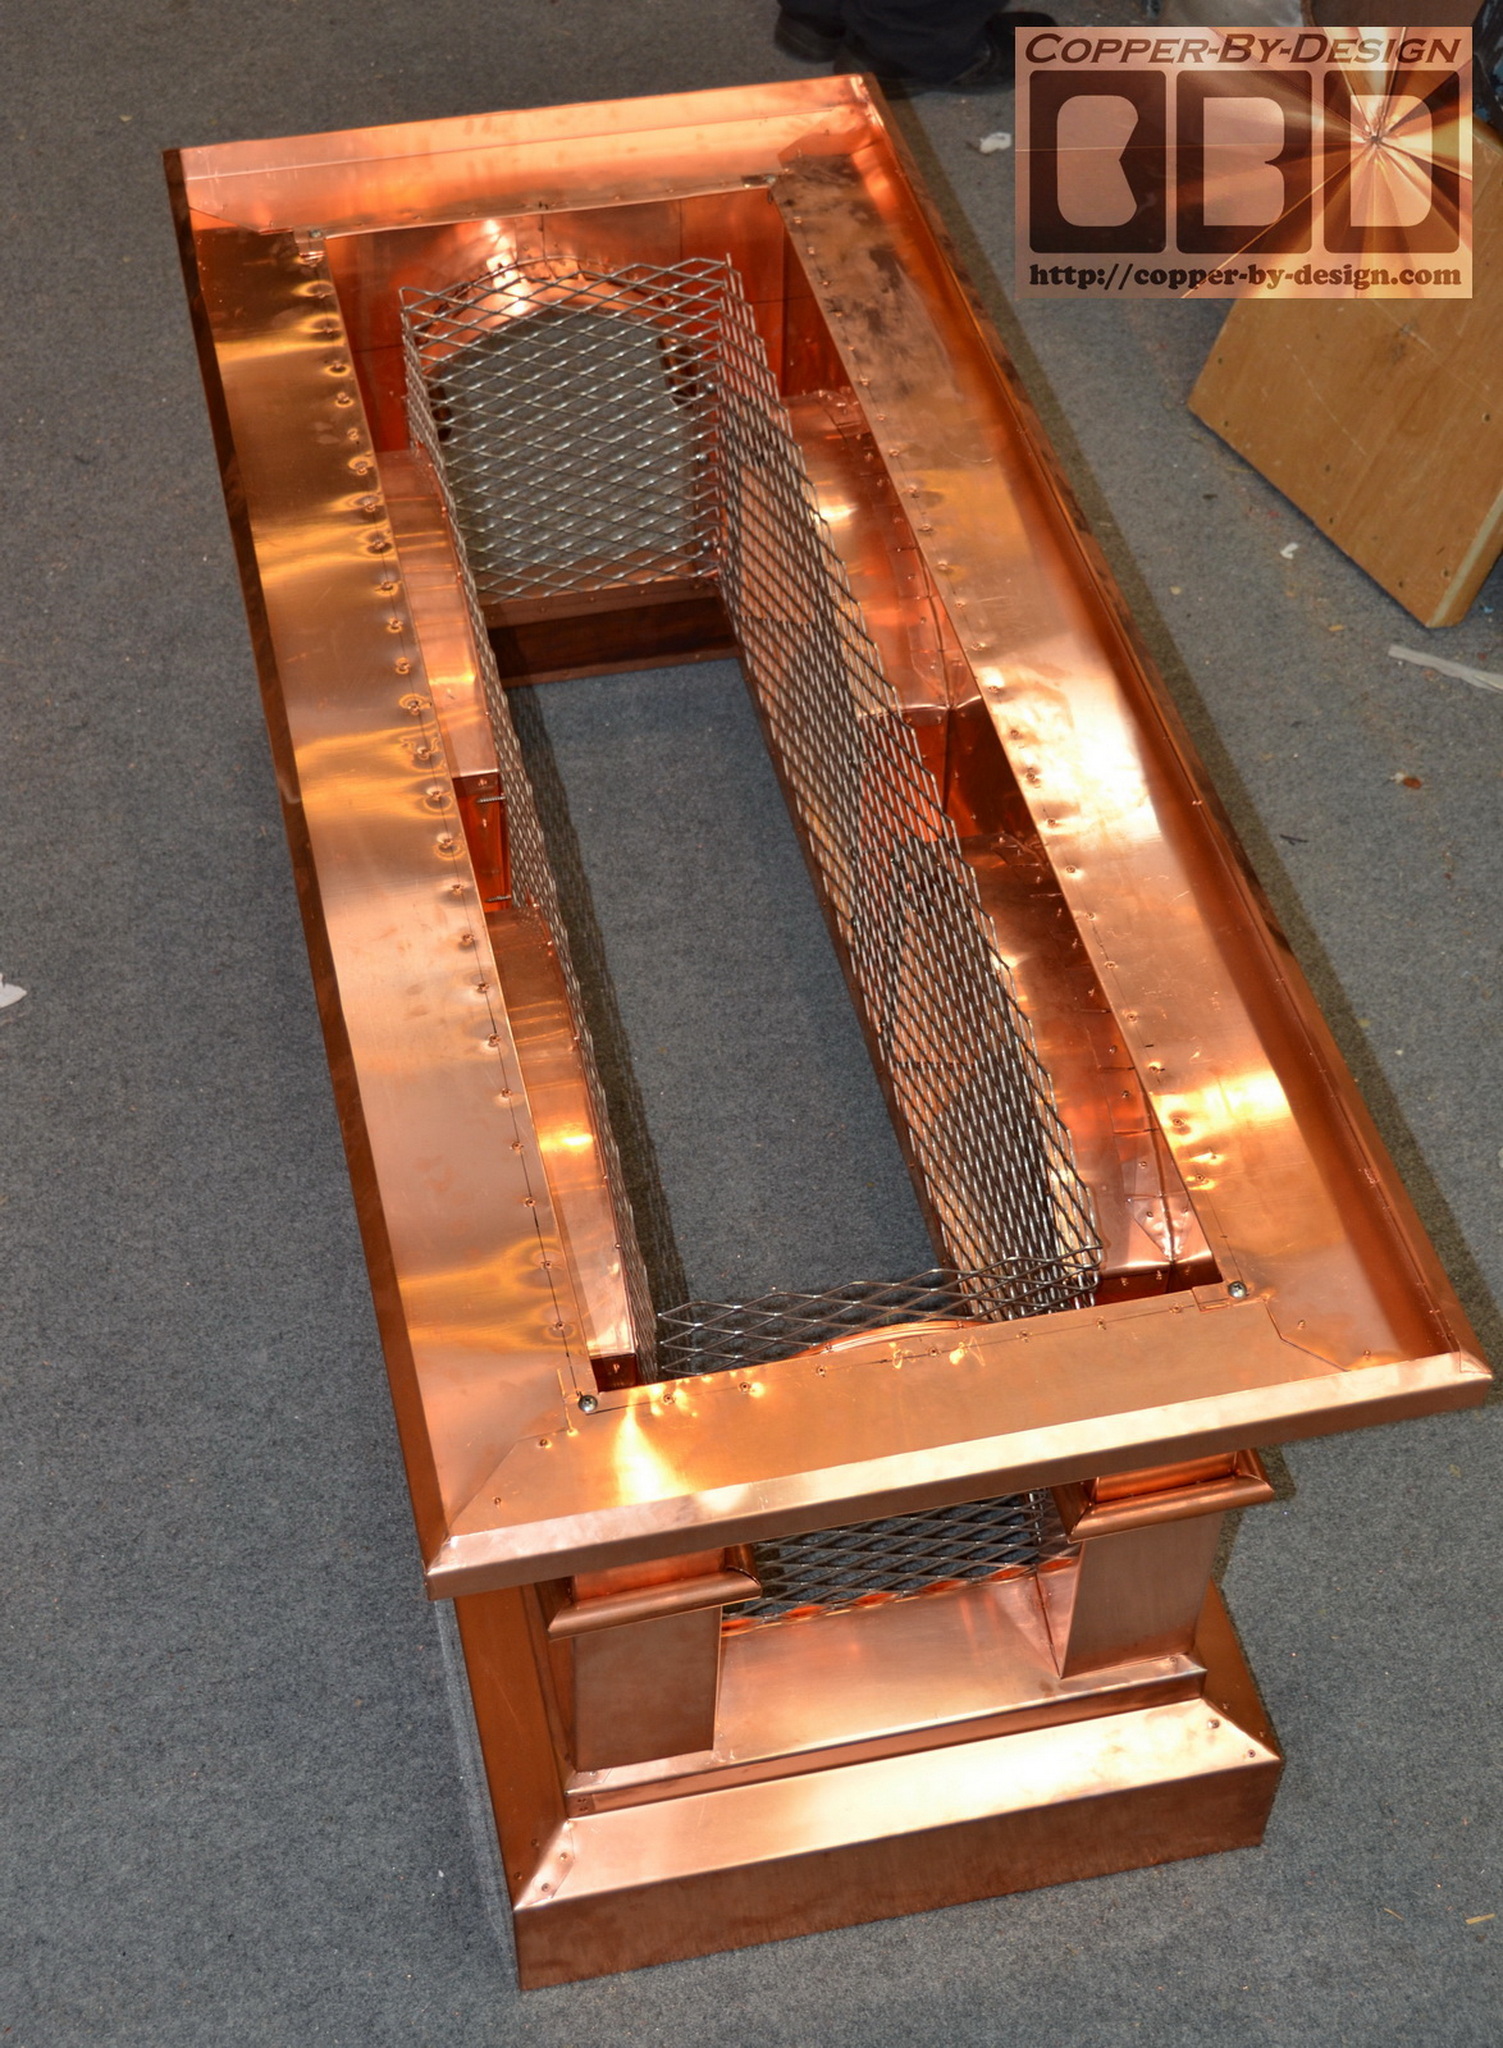
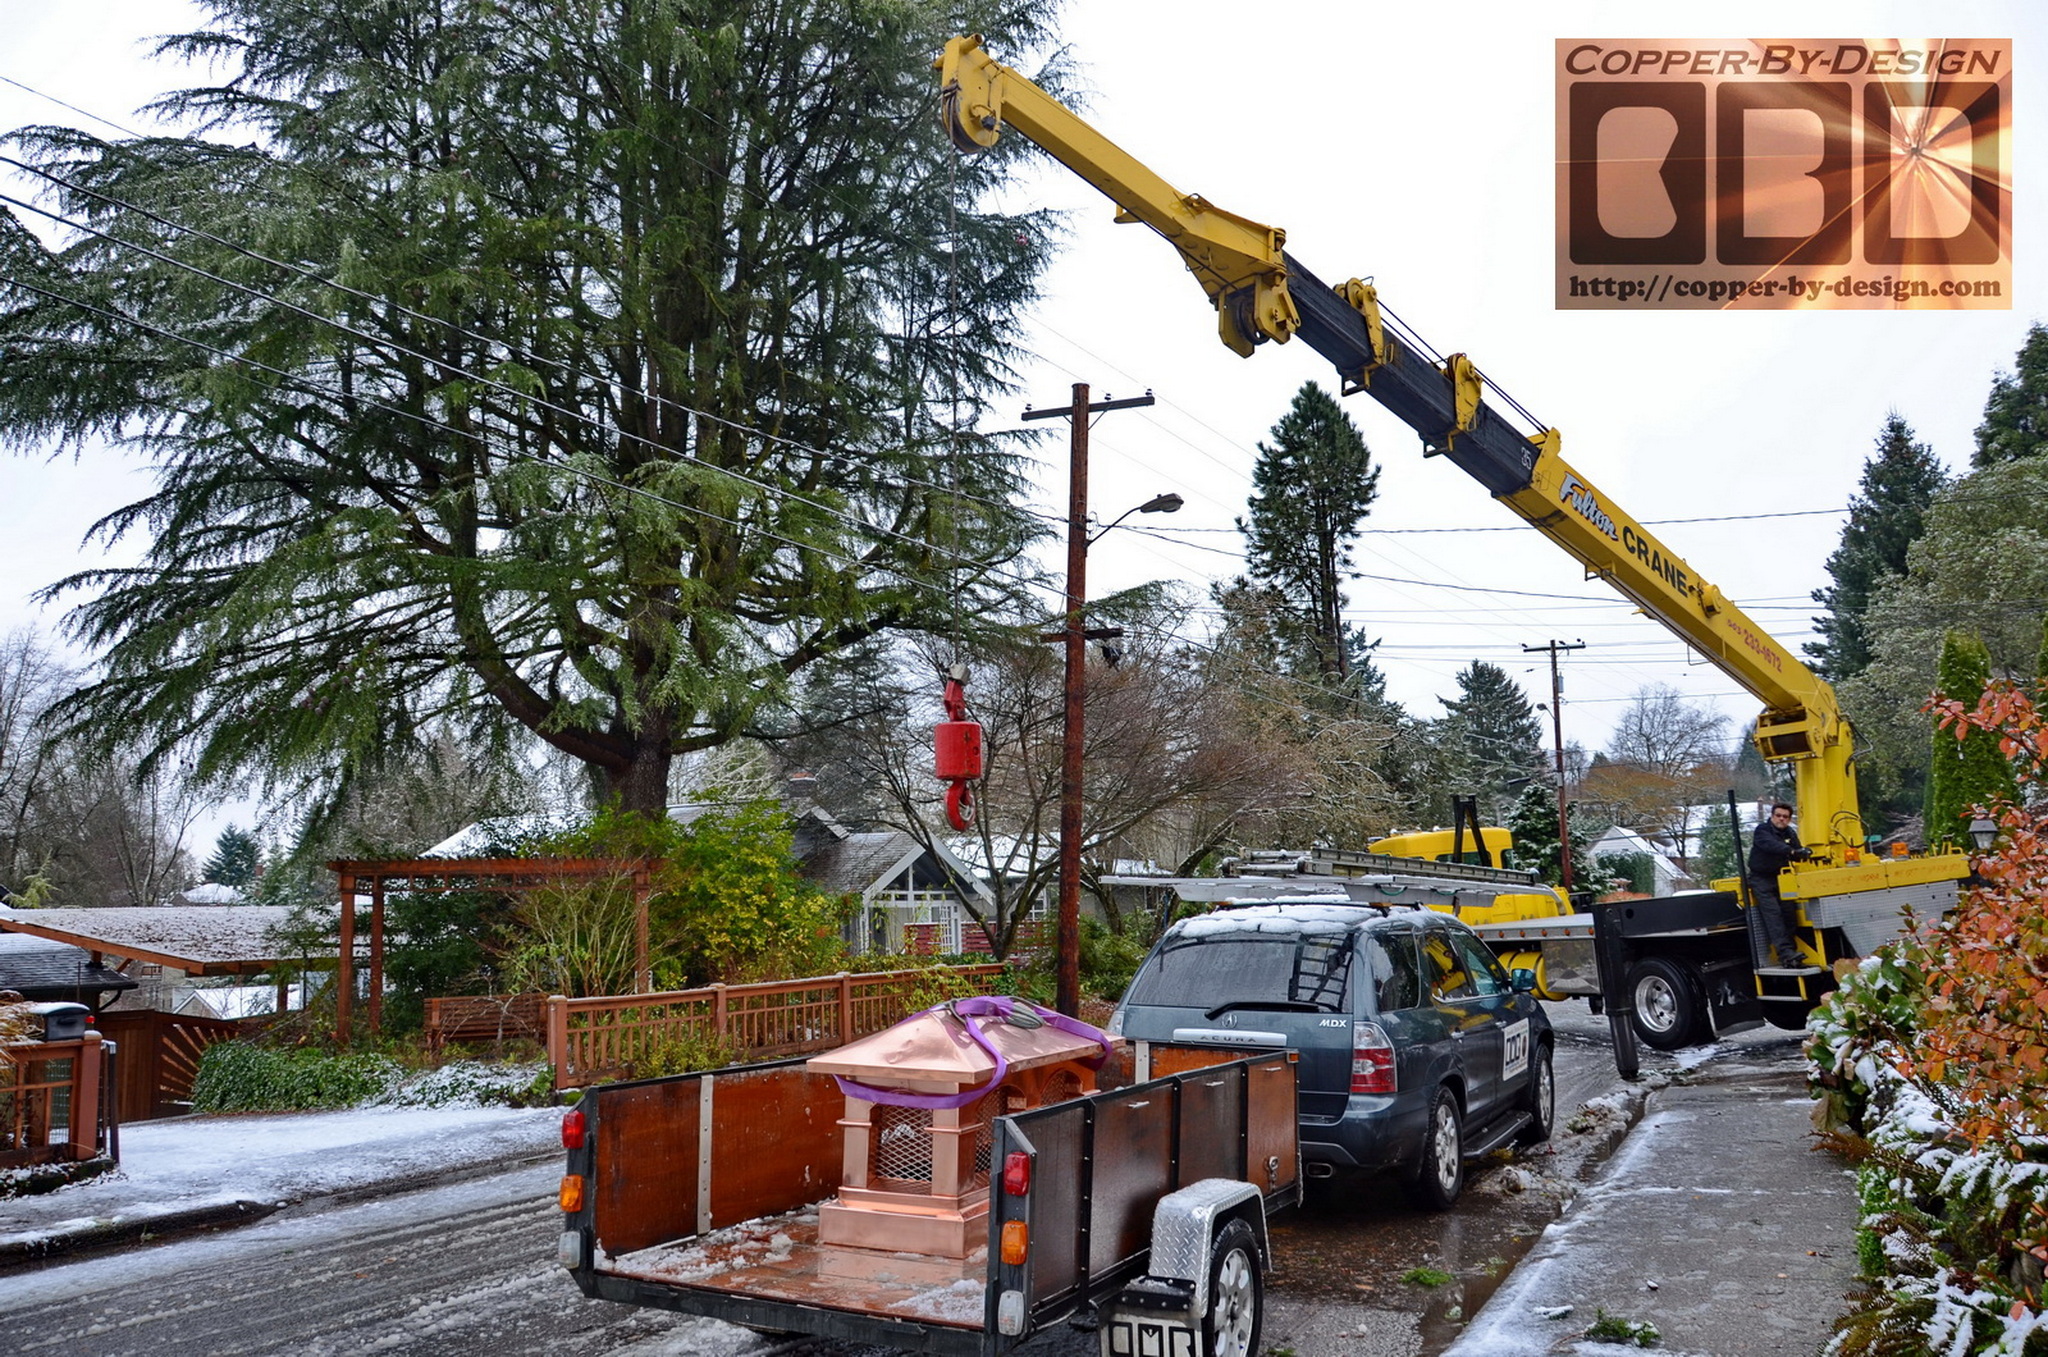
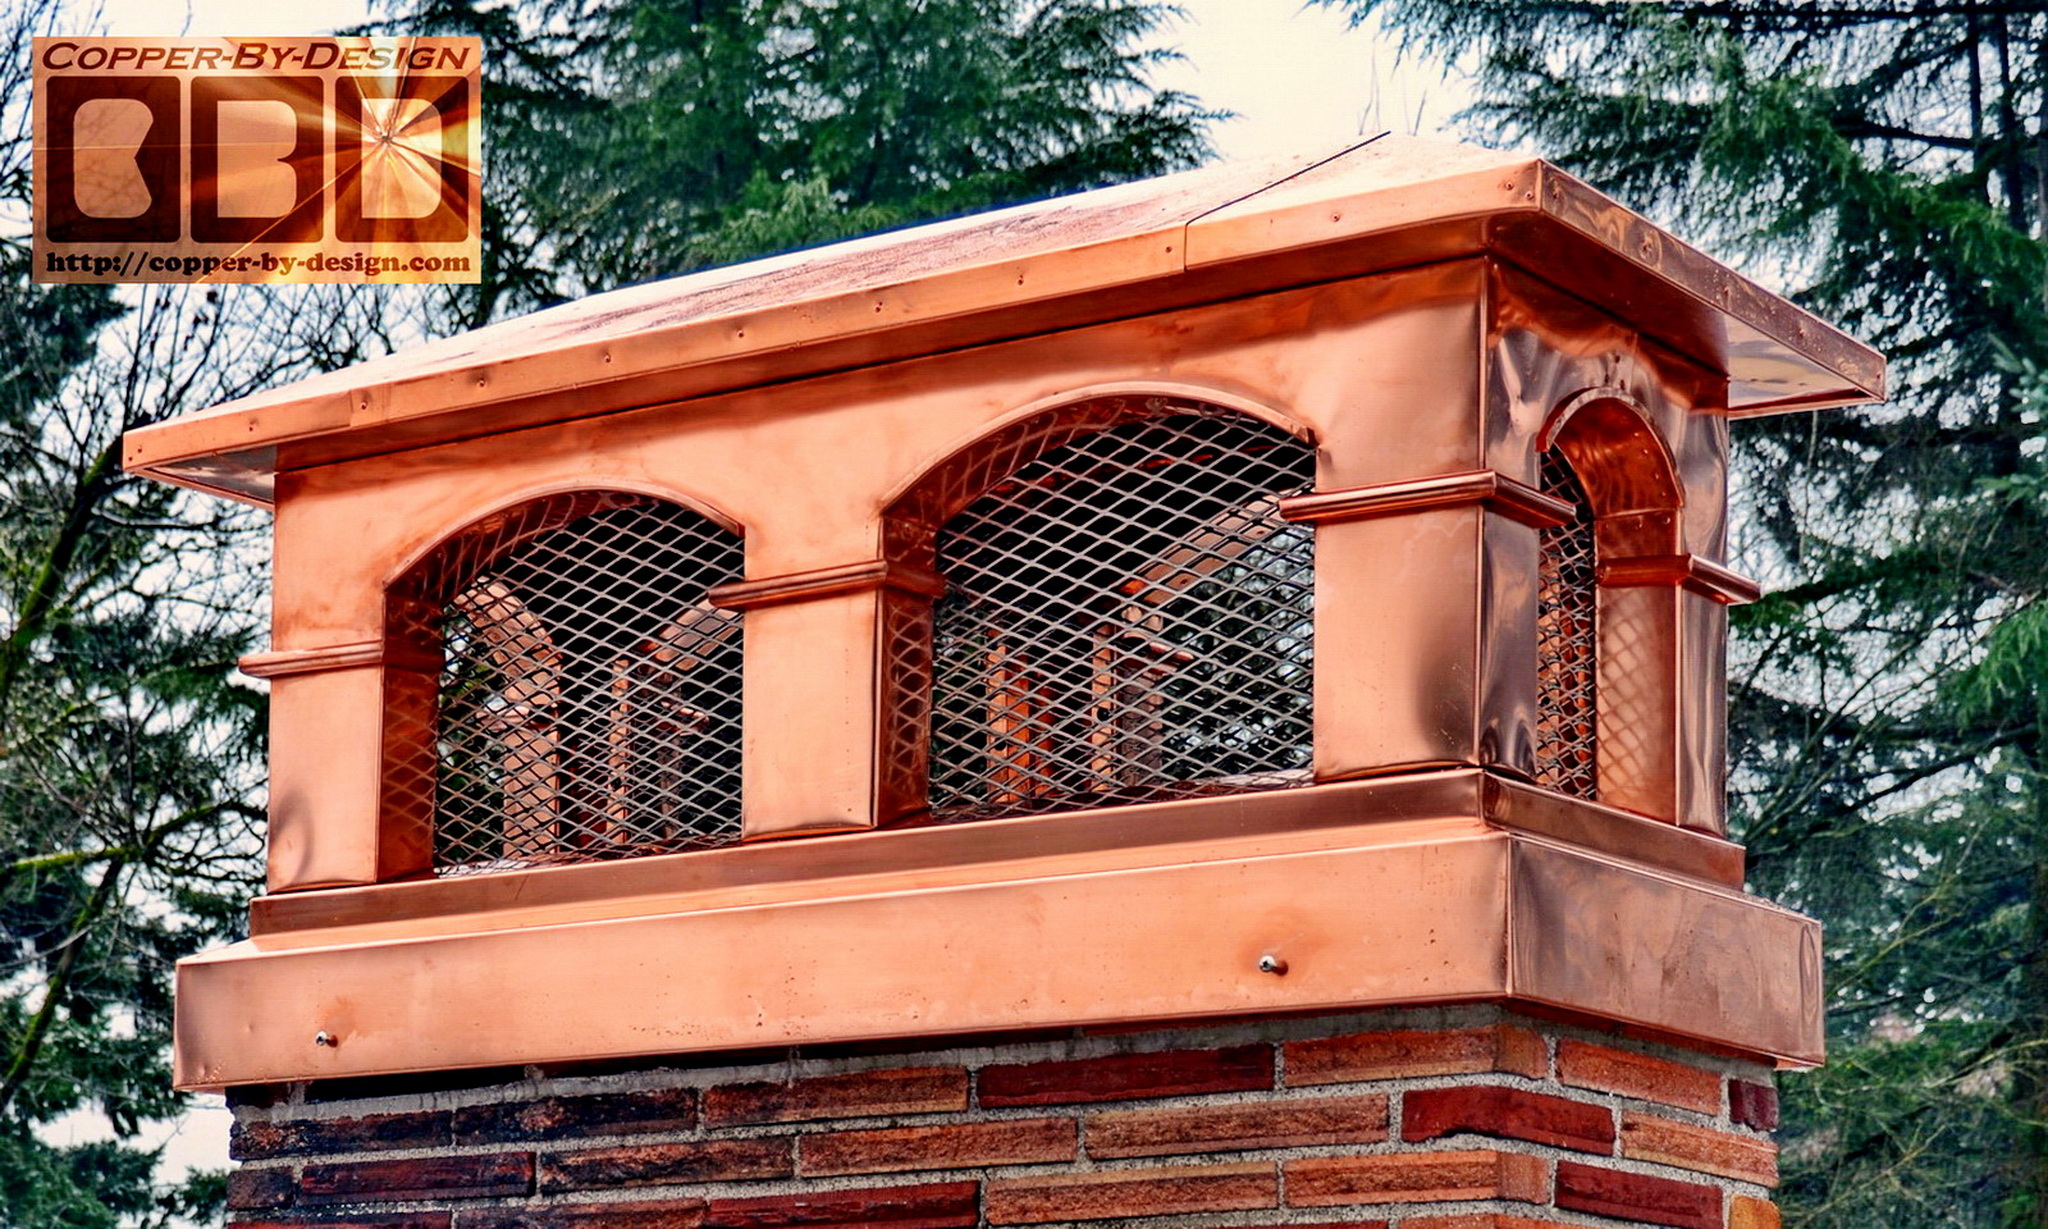
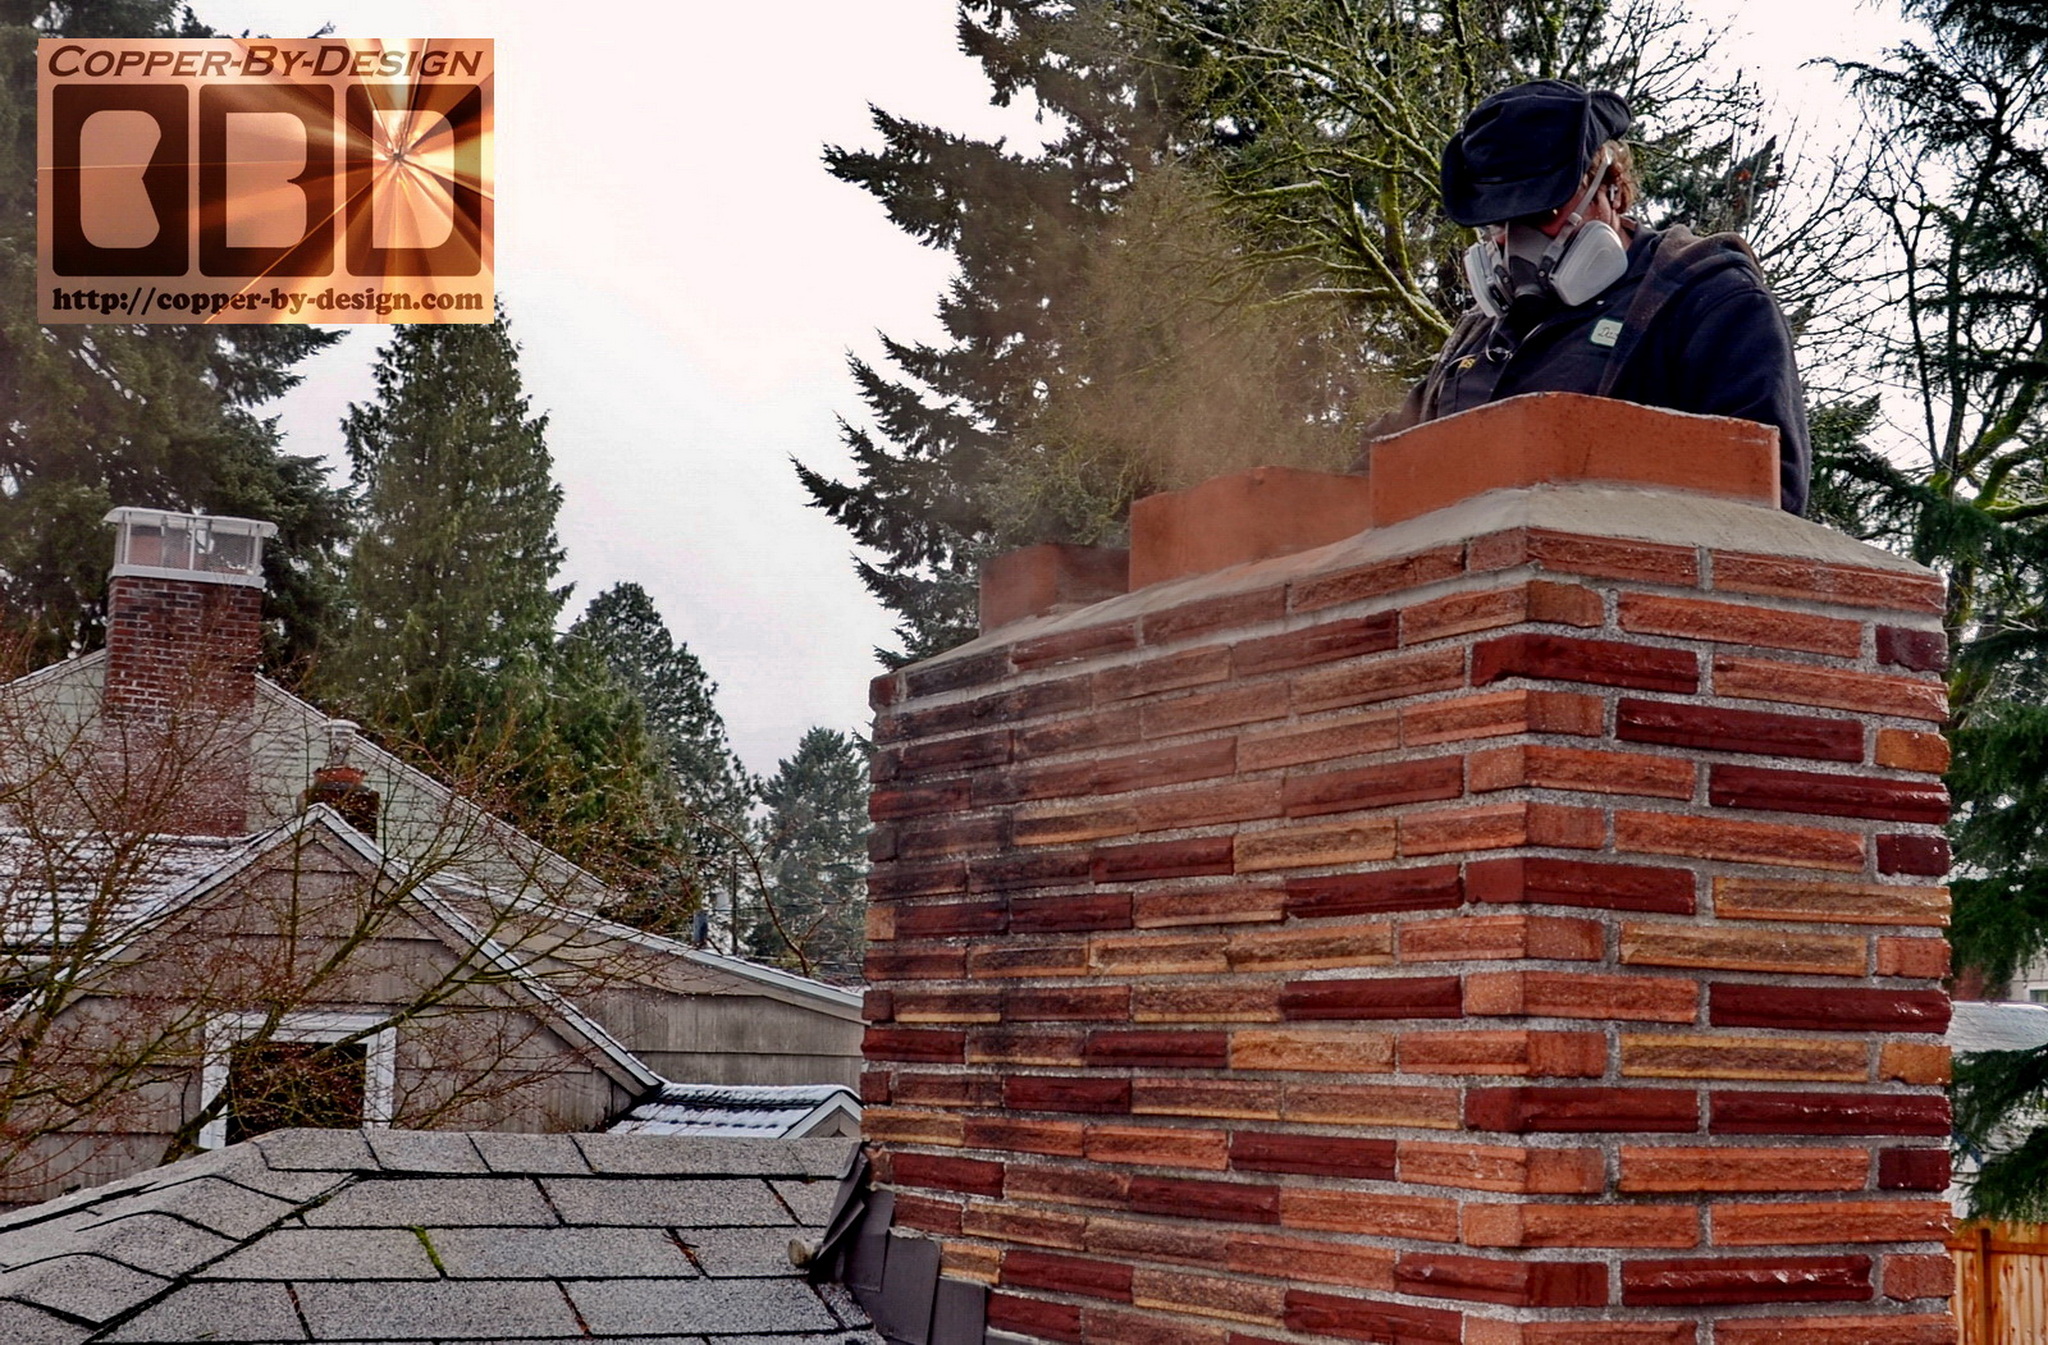
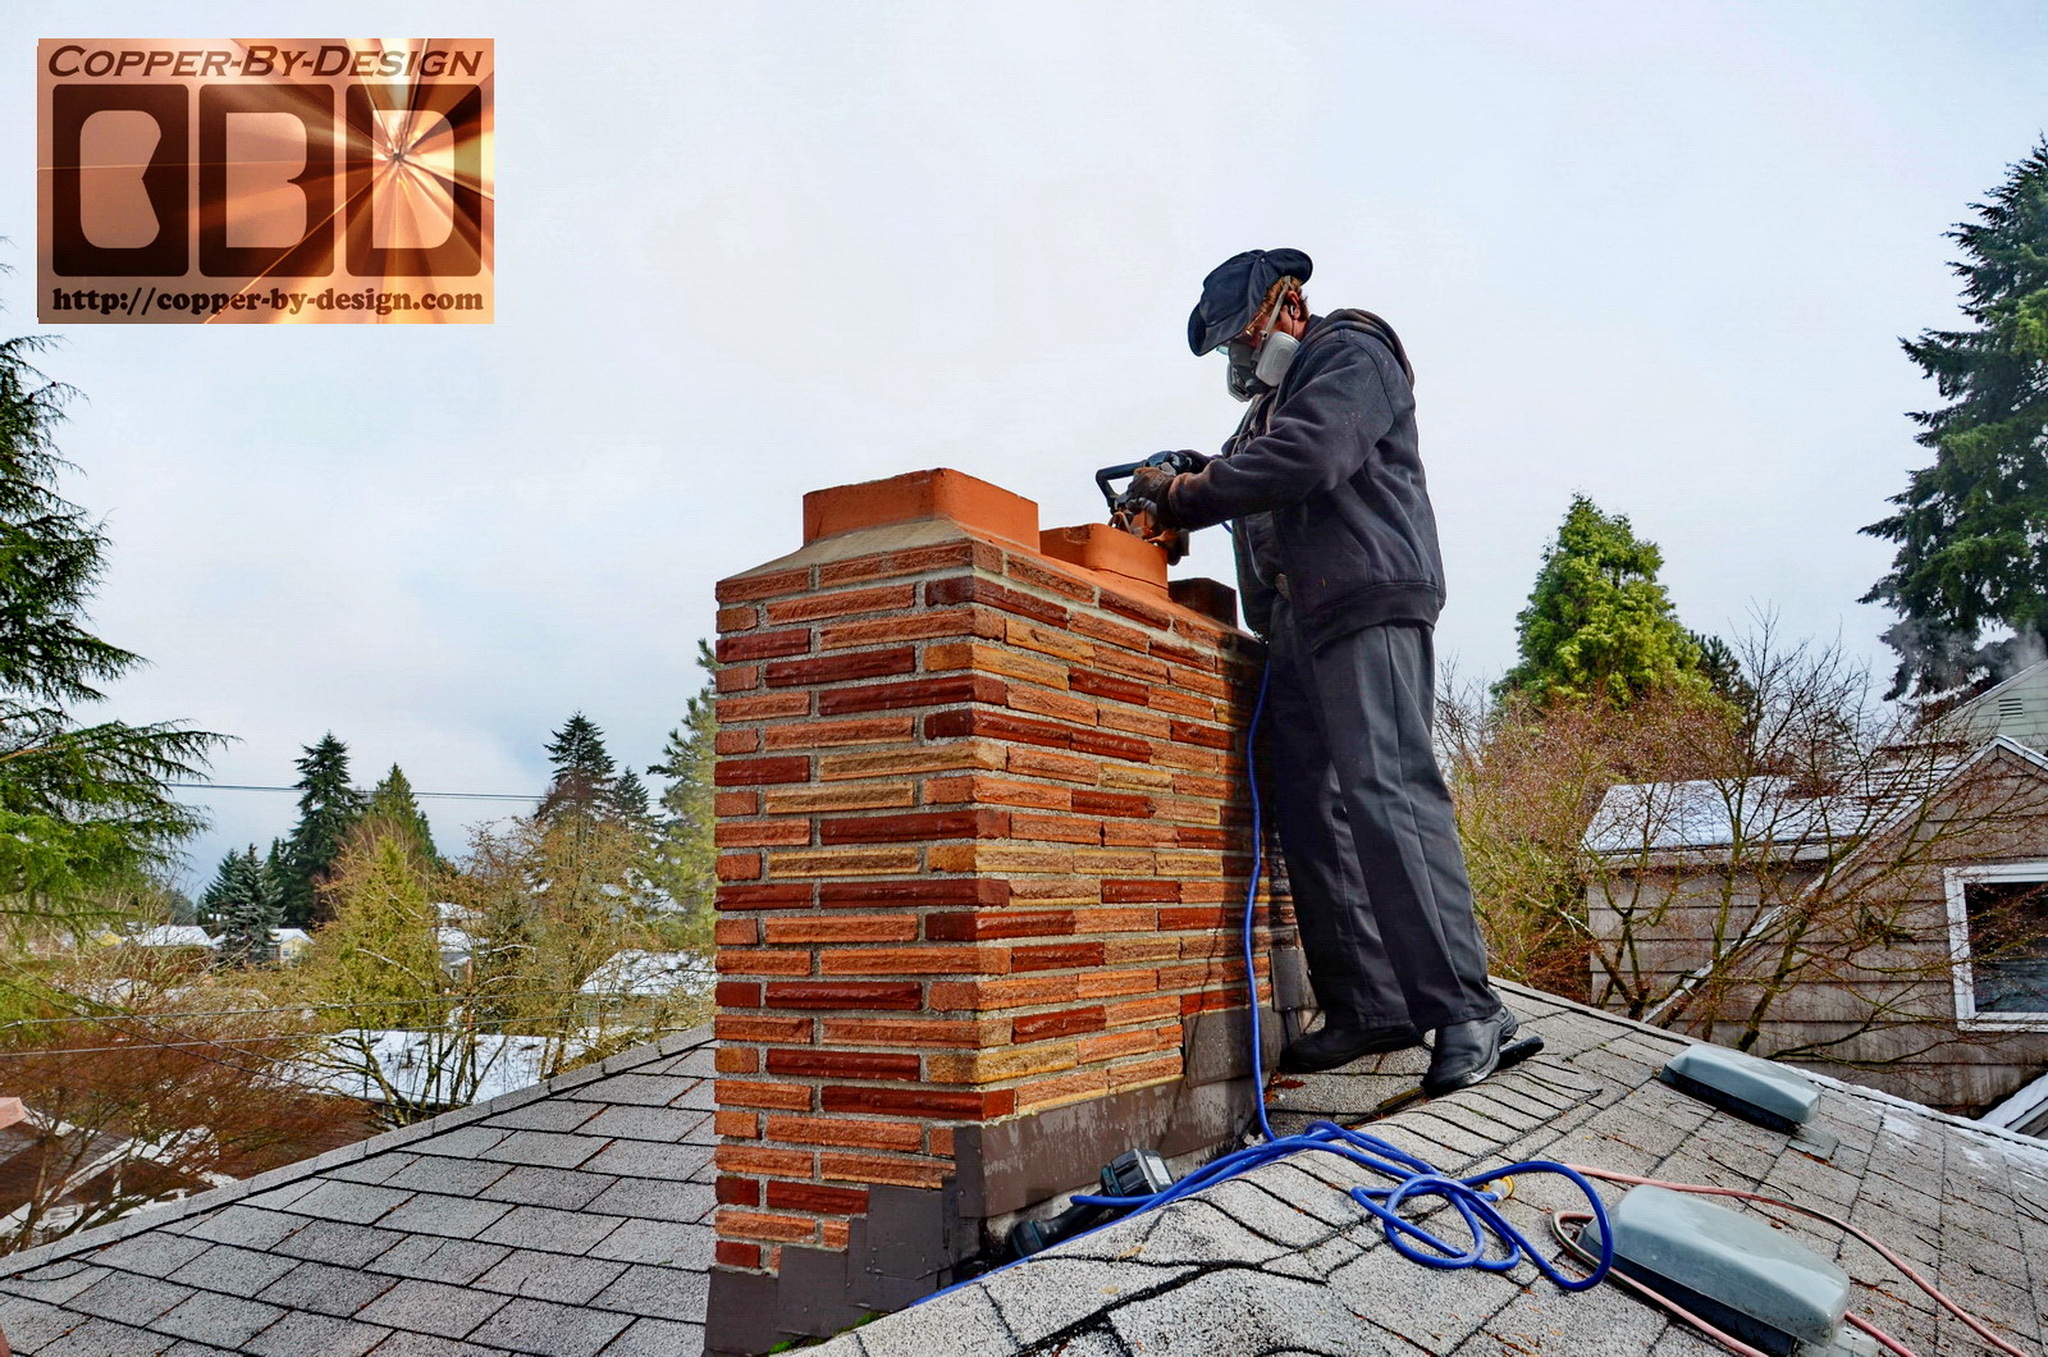
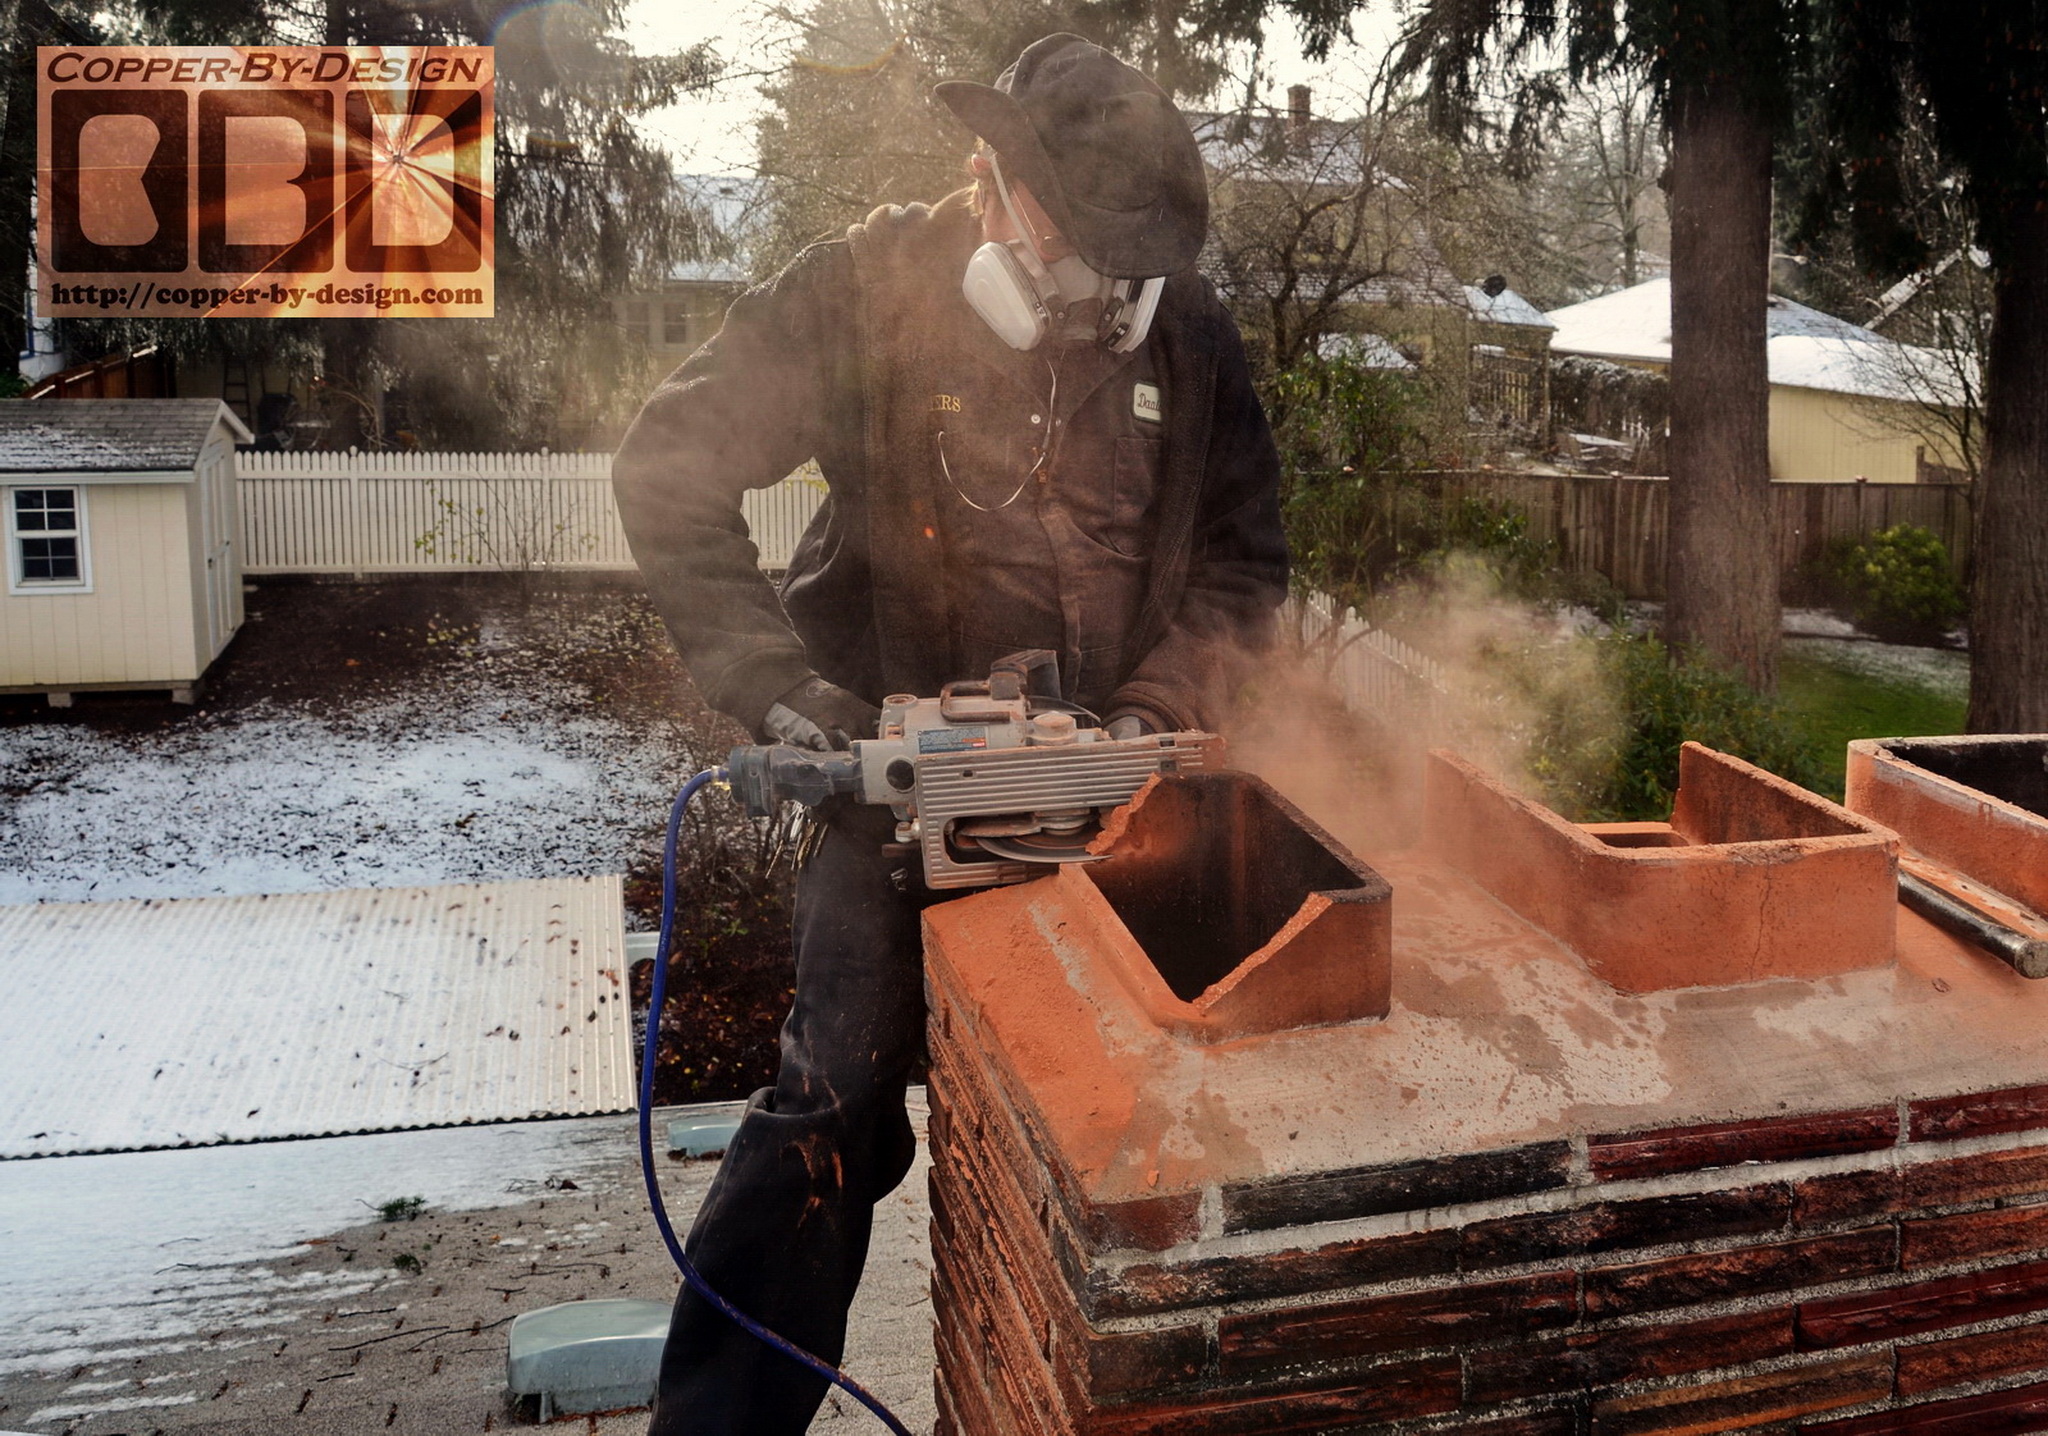
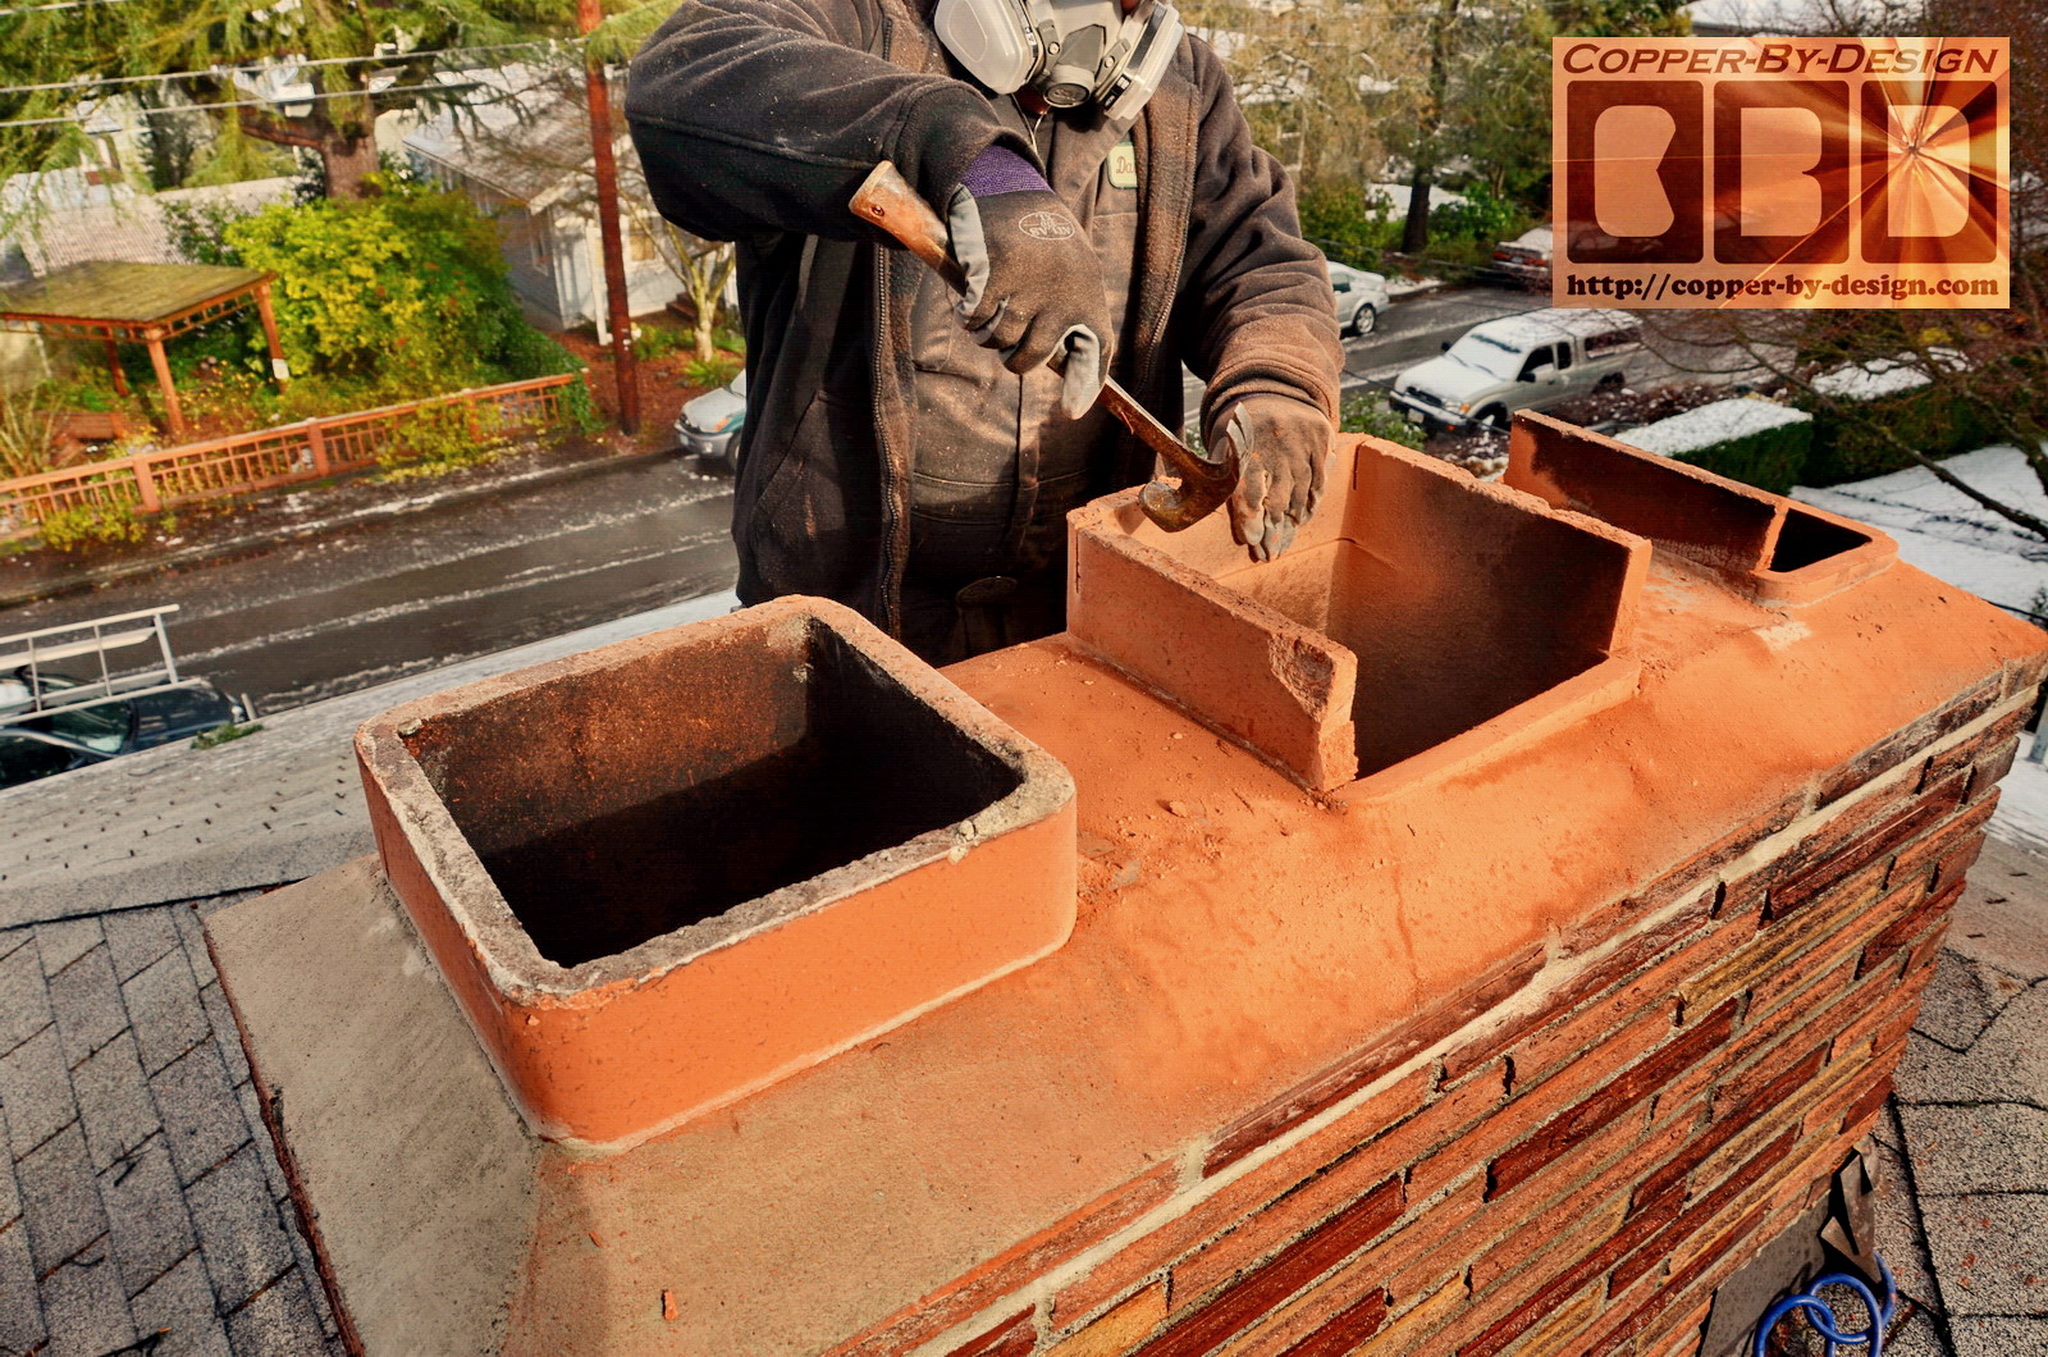
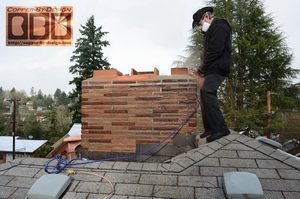
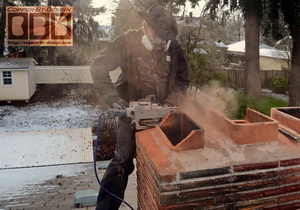
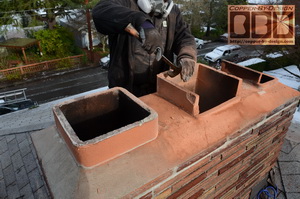
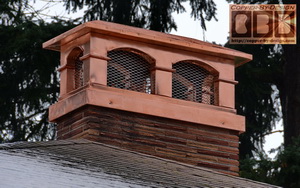
The flue liners were in the way from this chimney cap from sitting down where it was intended, so I had to drive back to my shop to get a masonry cutting saw to trim them down.

From: Ted Lulich <tedlulich@hotmail.c*m>
Subject: Update, mid section
Date: Wed, 19 Dec 2012


Forgot to tell you when I was in Eugene last evening I showed my older brother the photos, he had to bring up your web site and had the same positive reactions. He lives off of shields street on top of a mountain in Eugene surrounded by rich, second and third generation lumber
Barron's with mansions just ripe for your work. Thanks again, talk later, happy holidays! Ted and Diane.

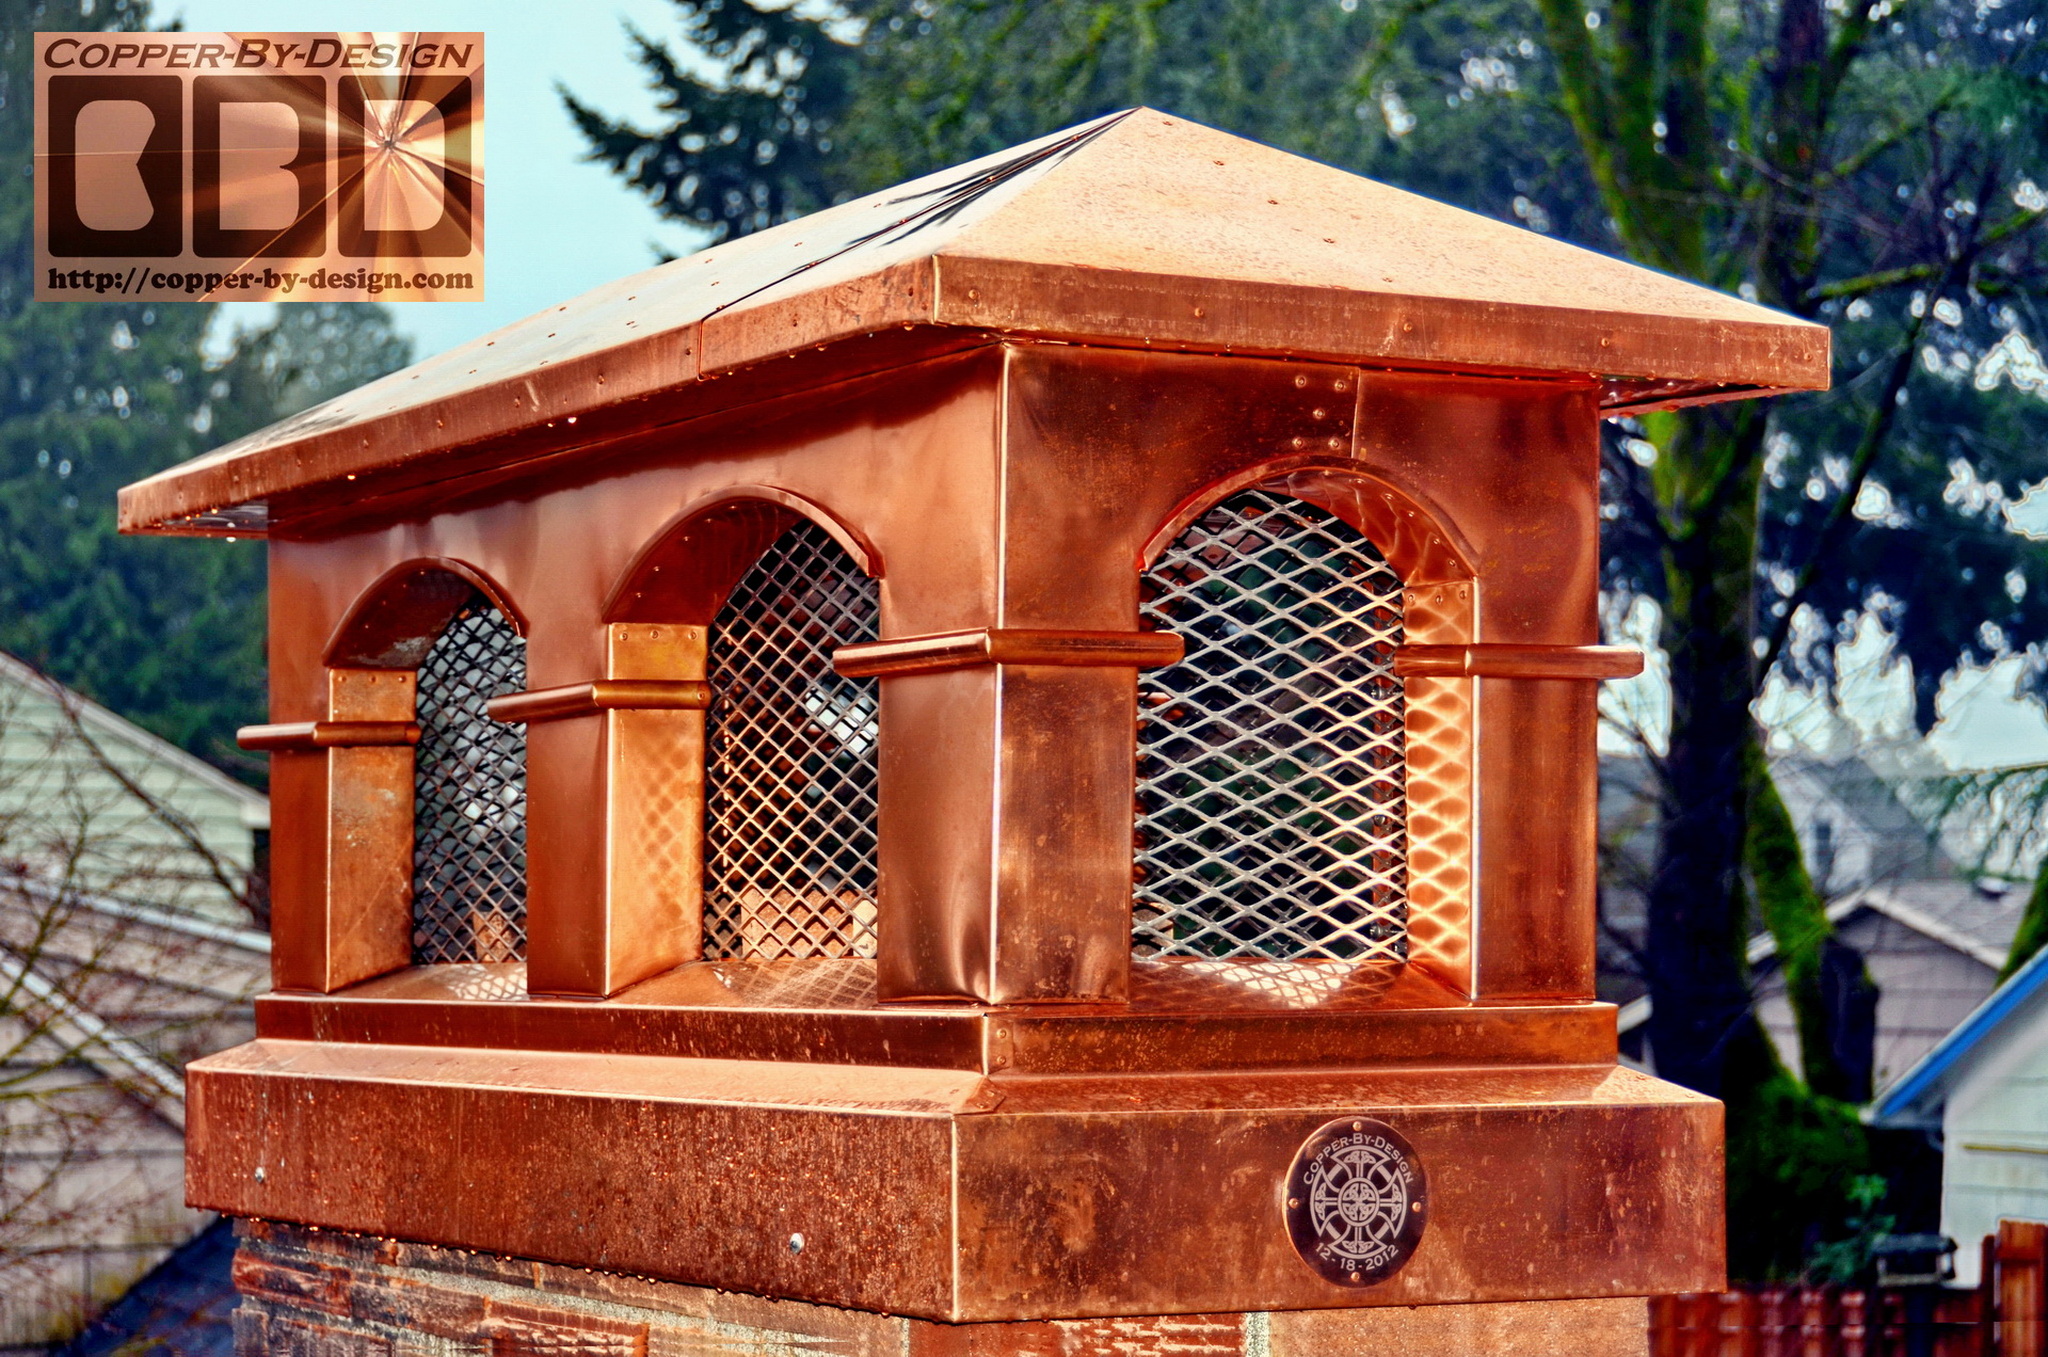
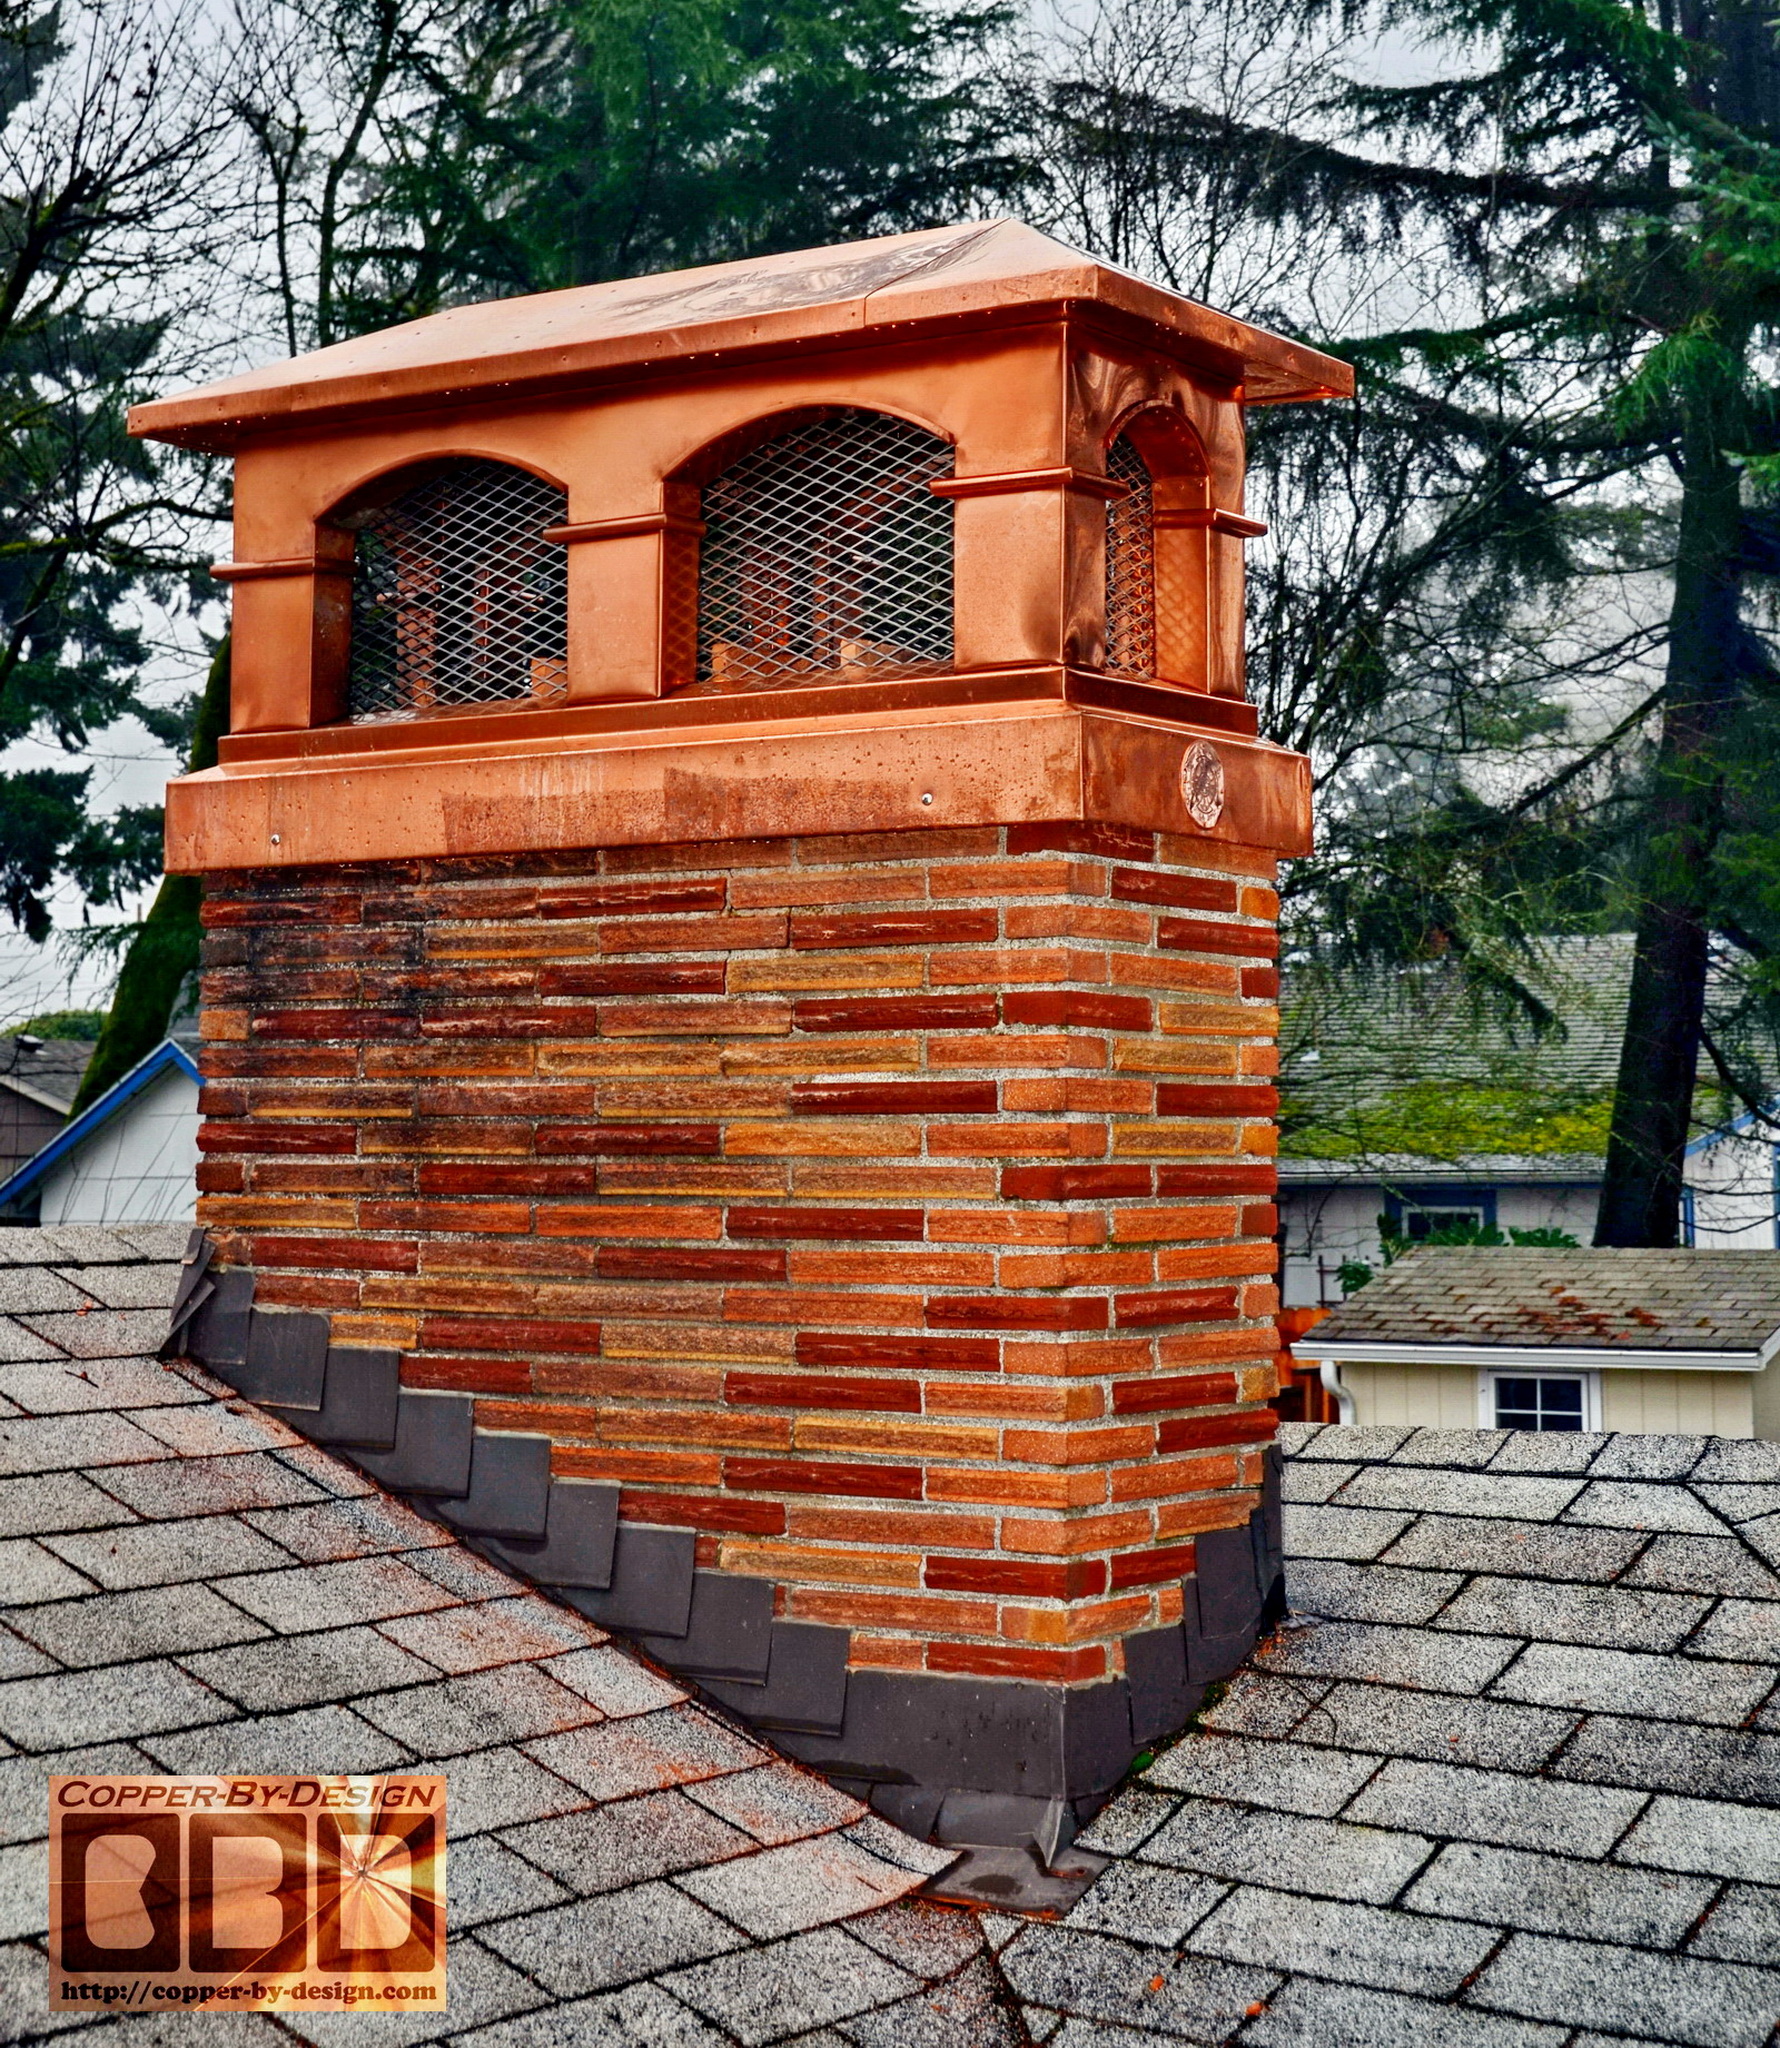
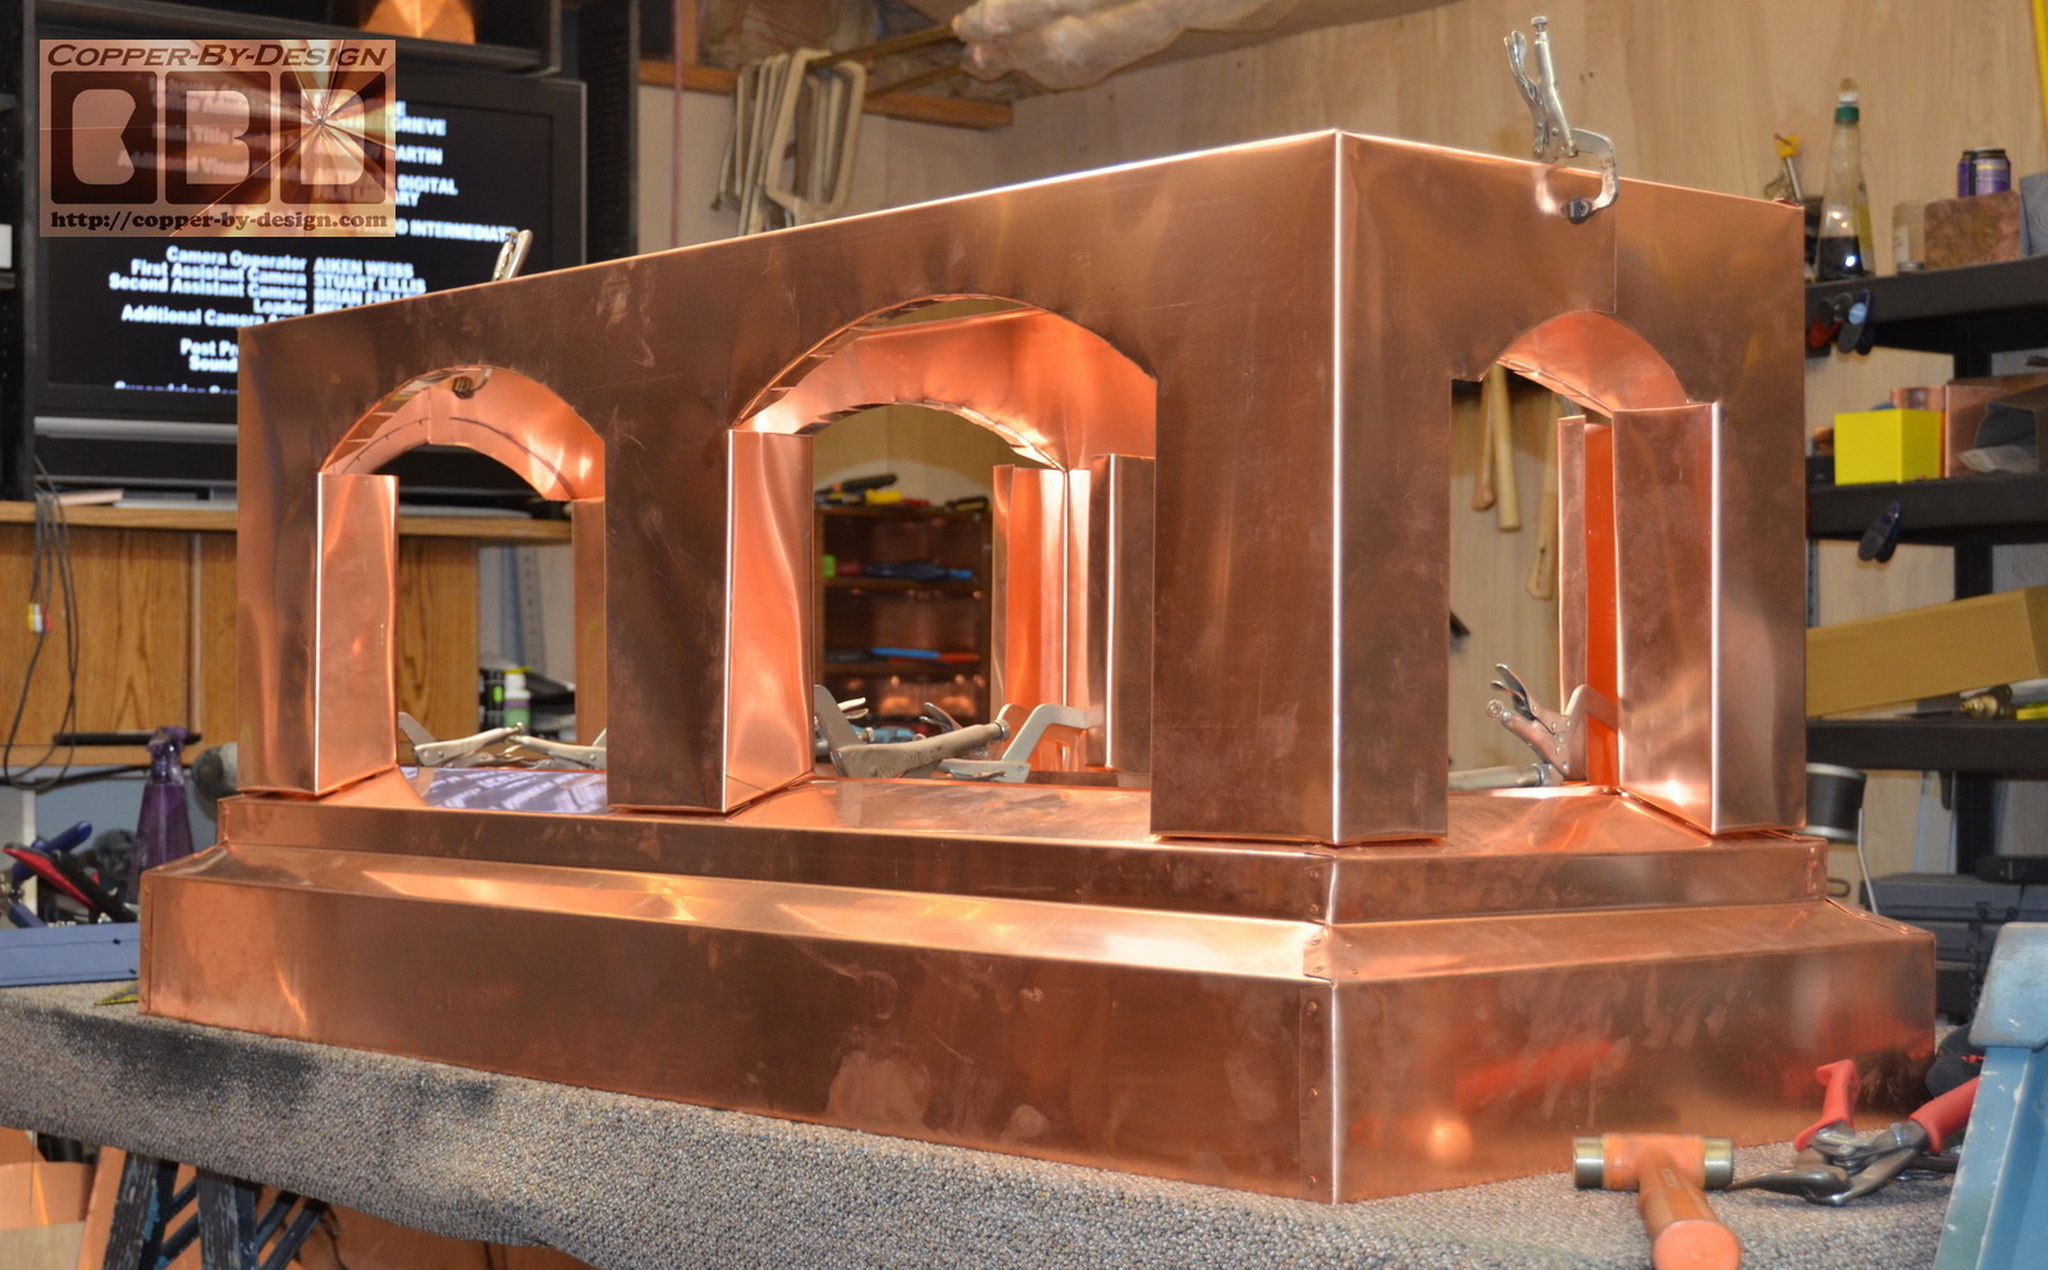
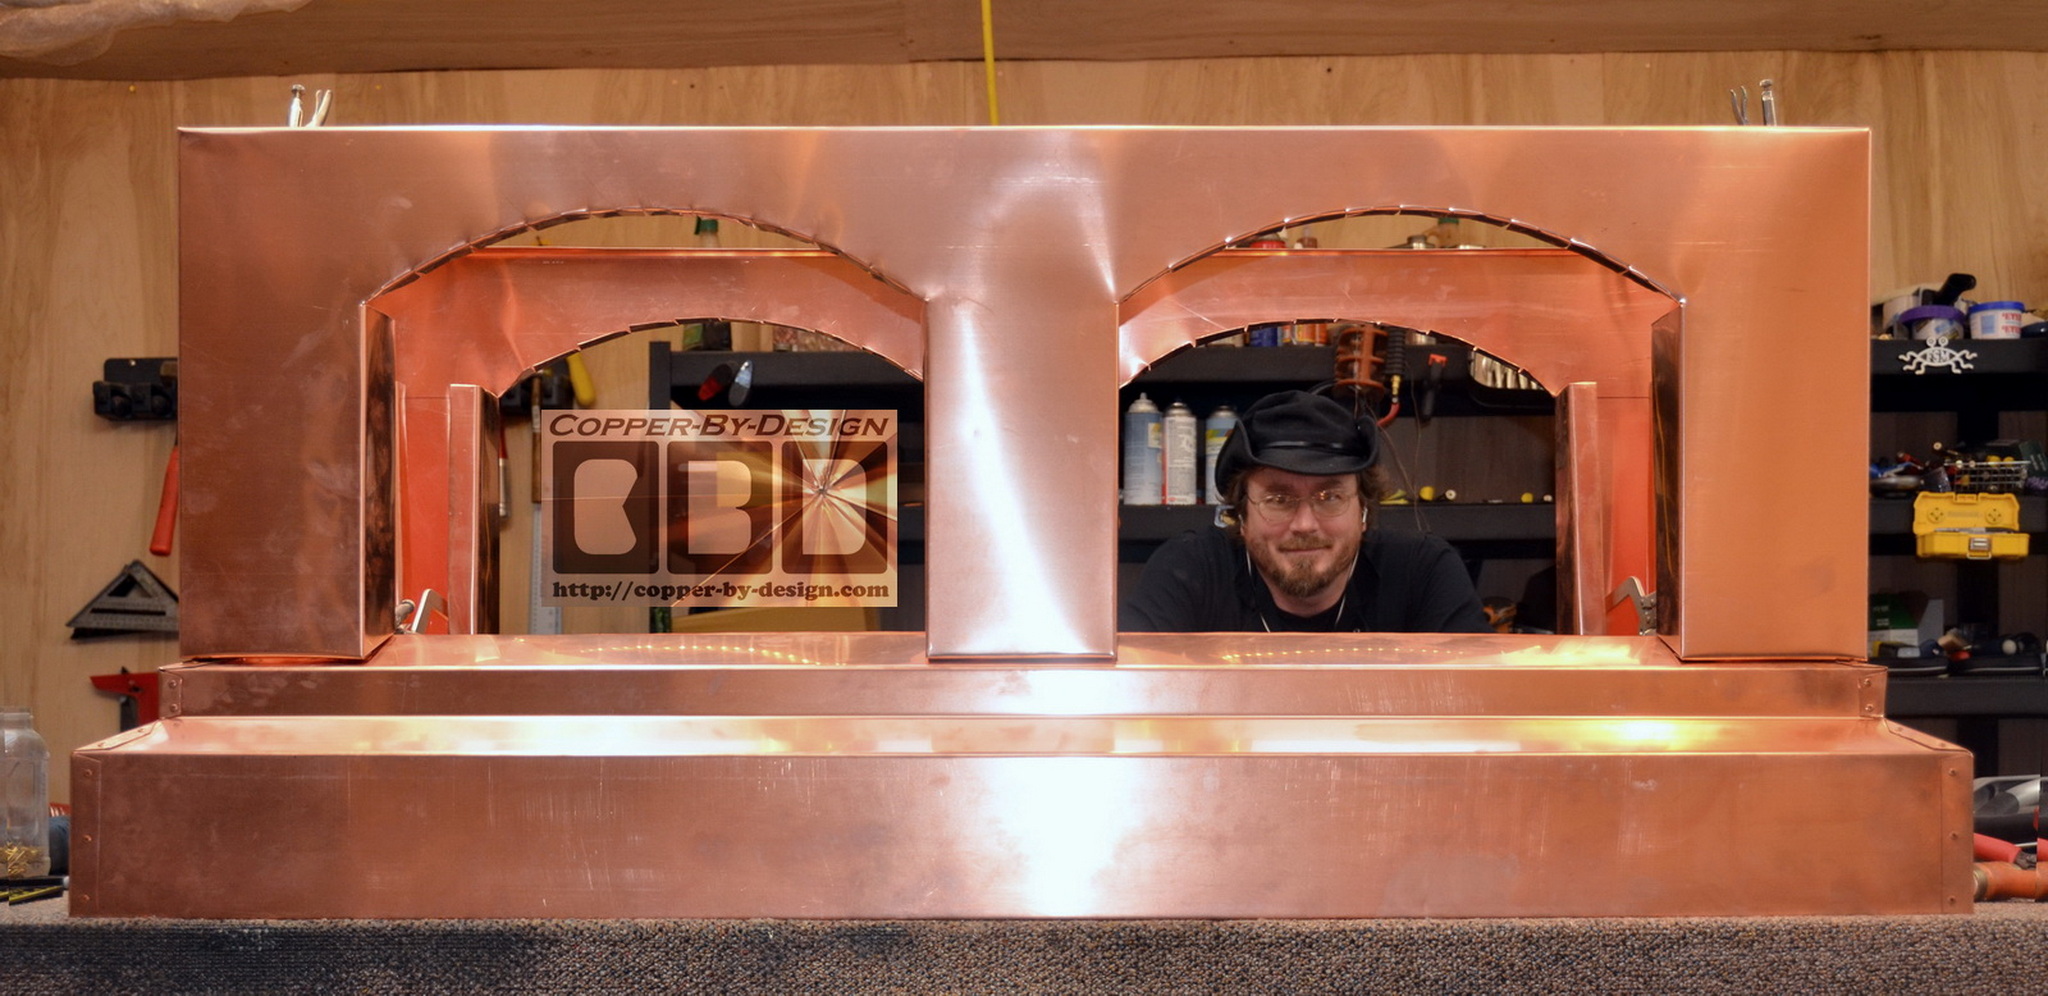
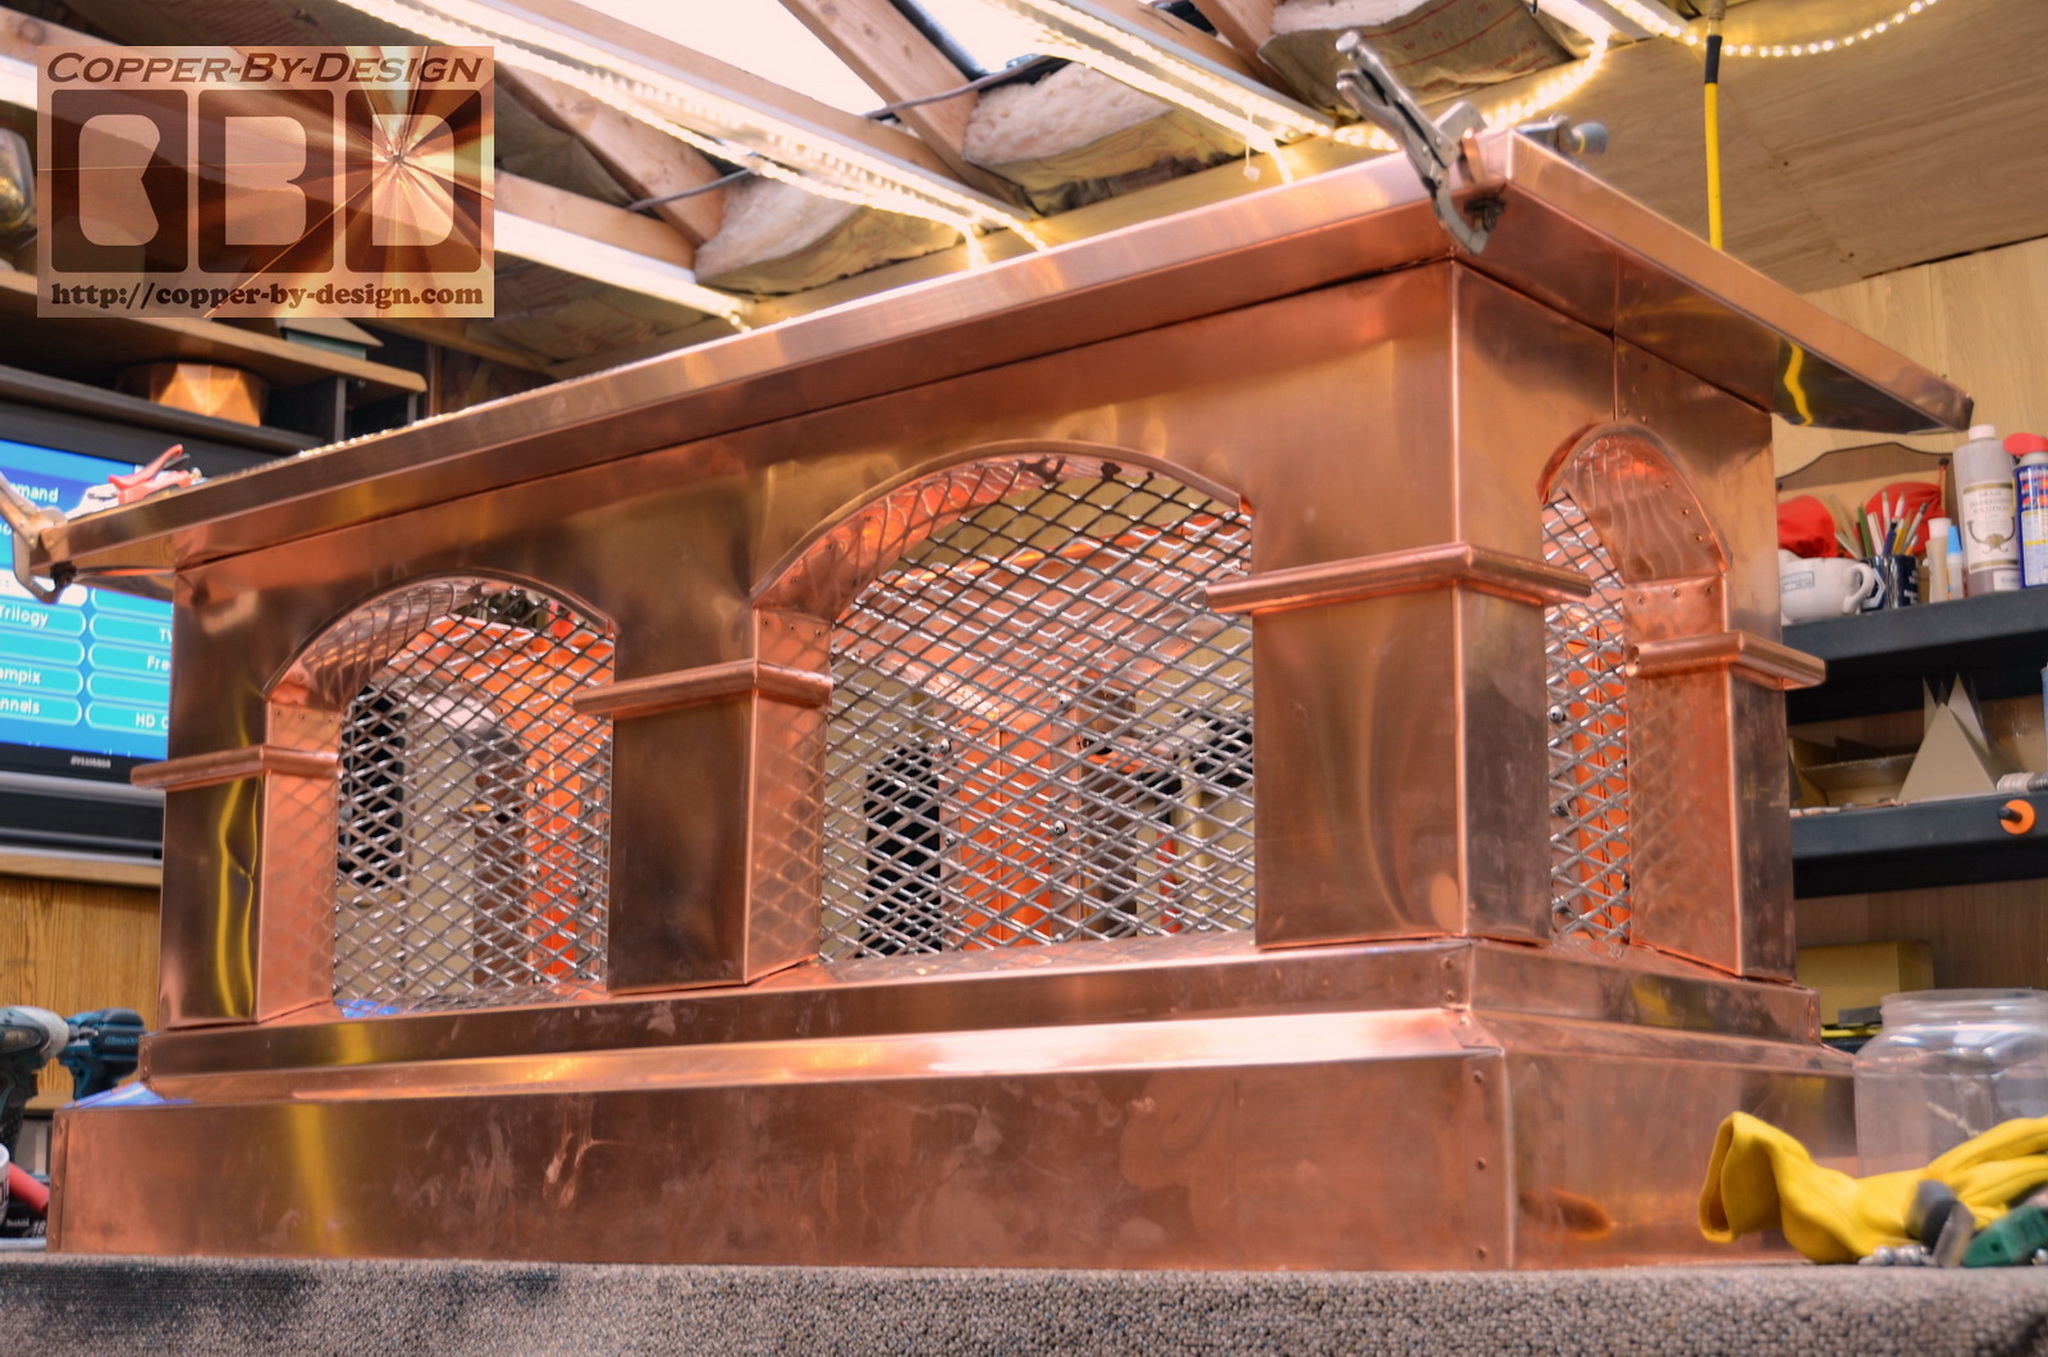
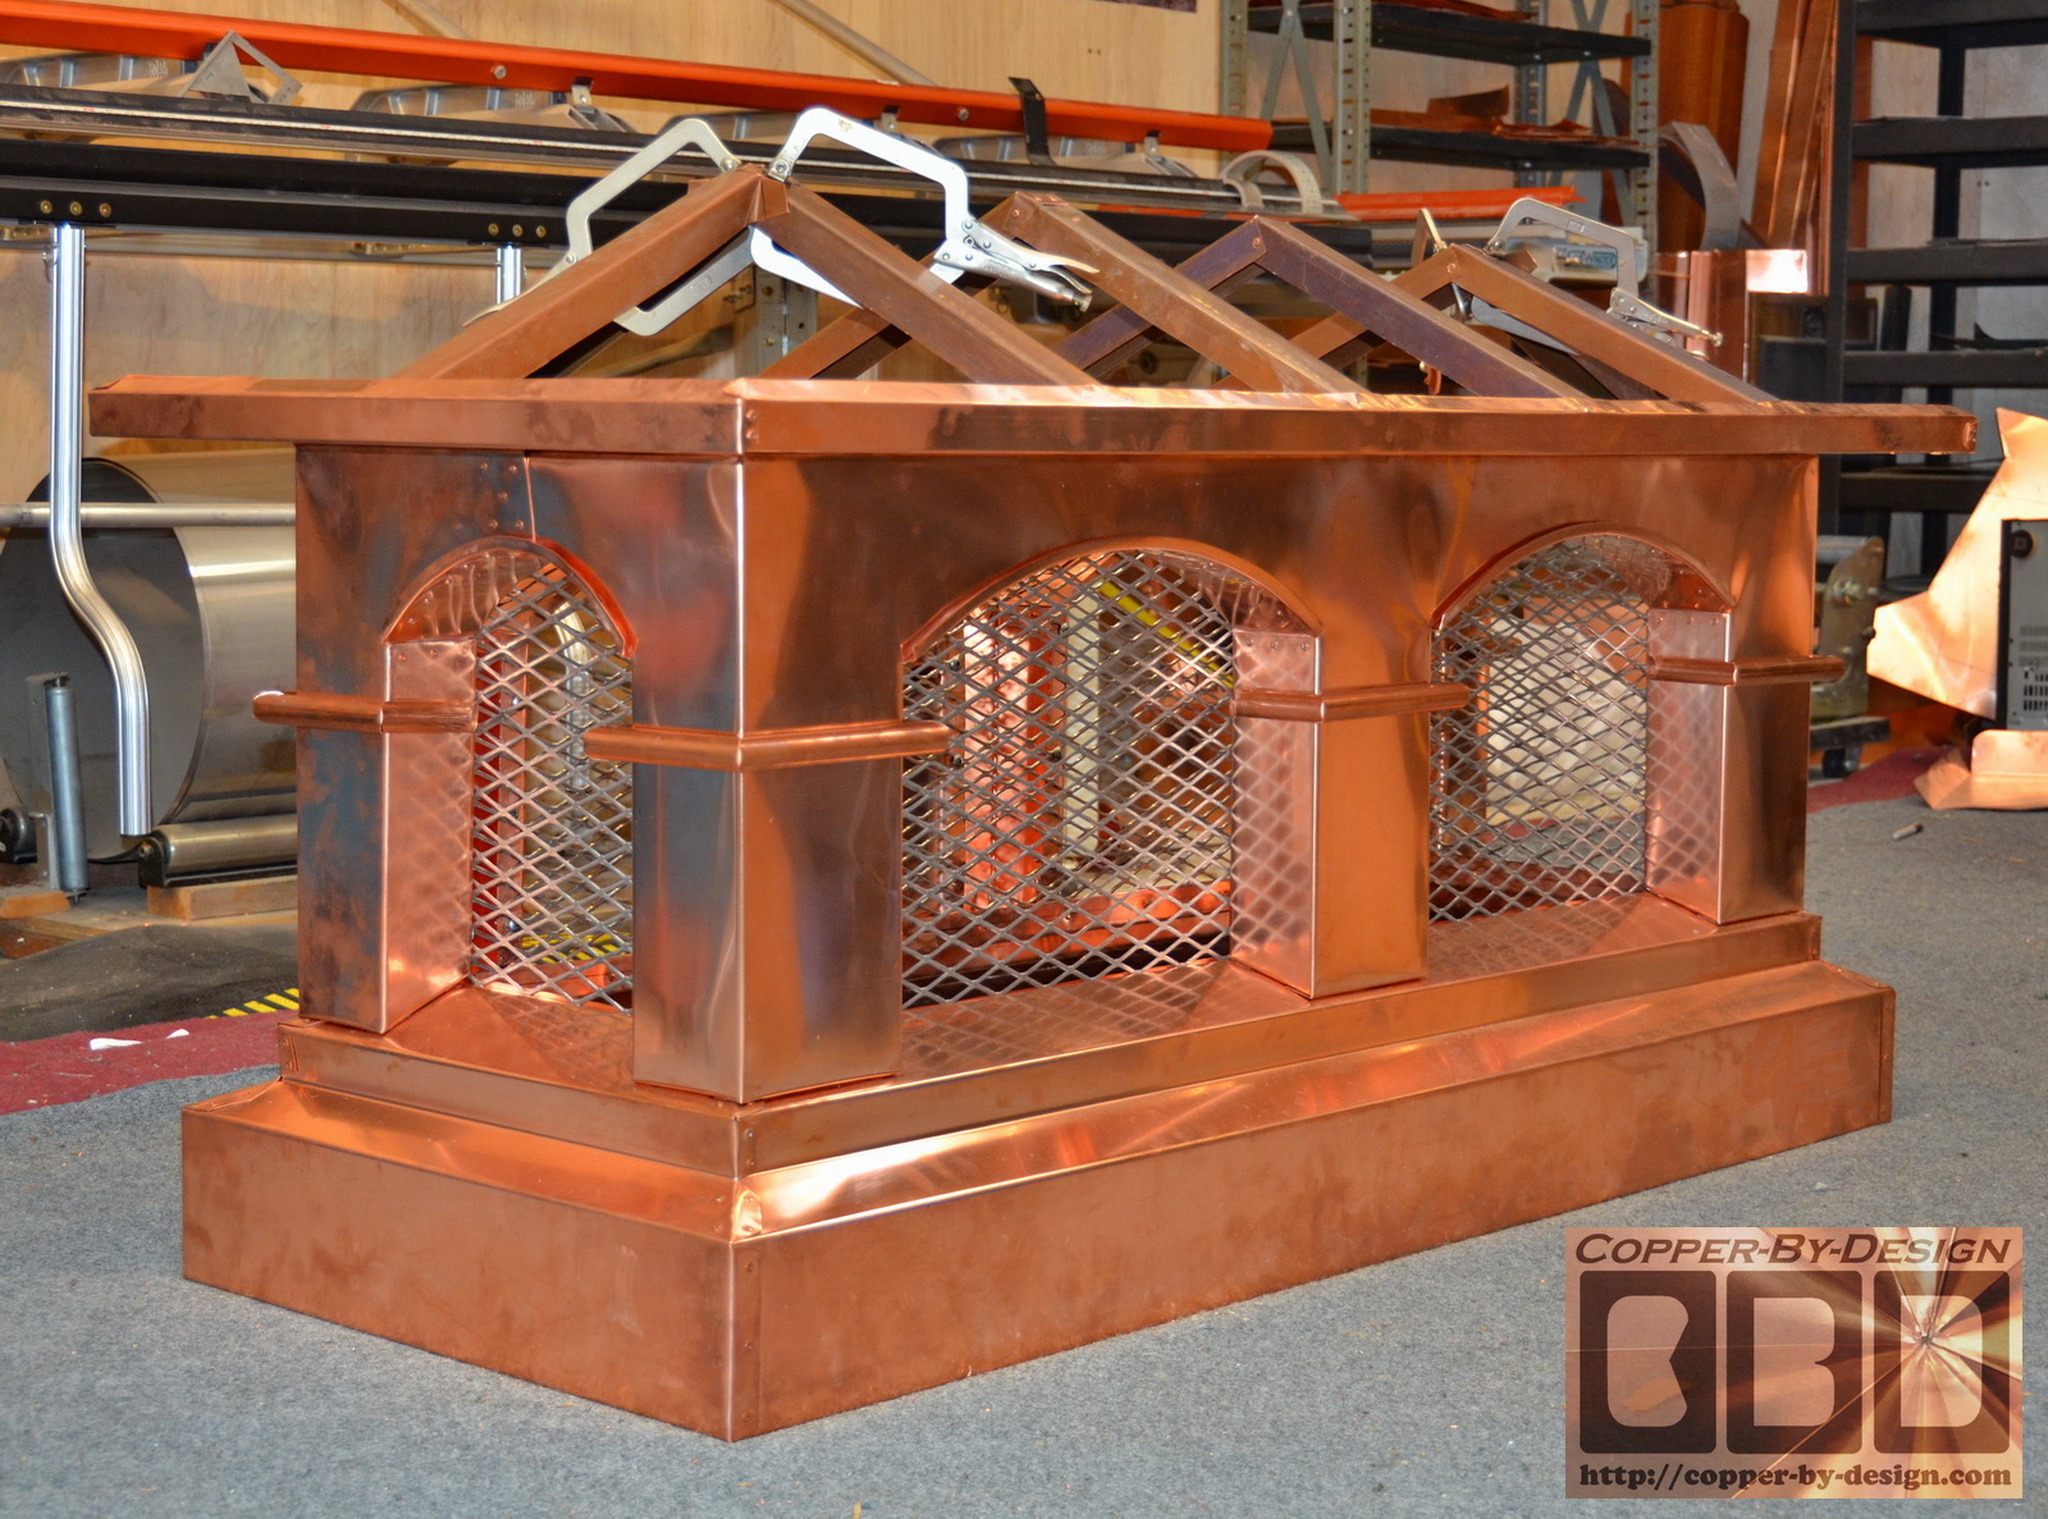
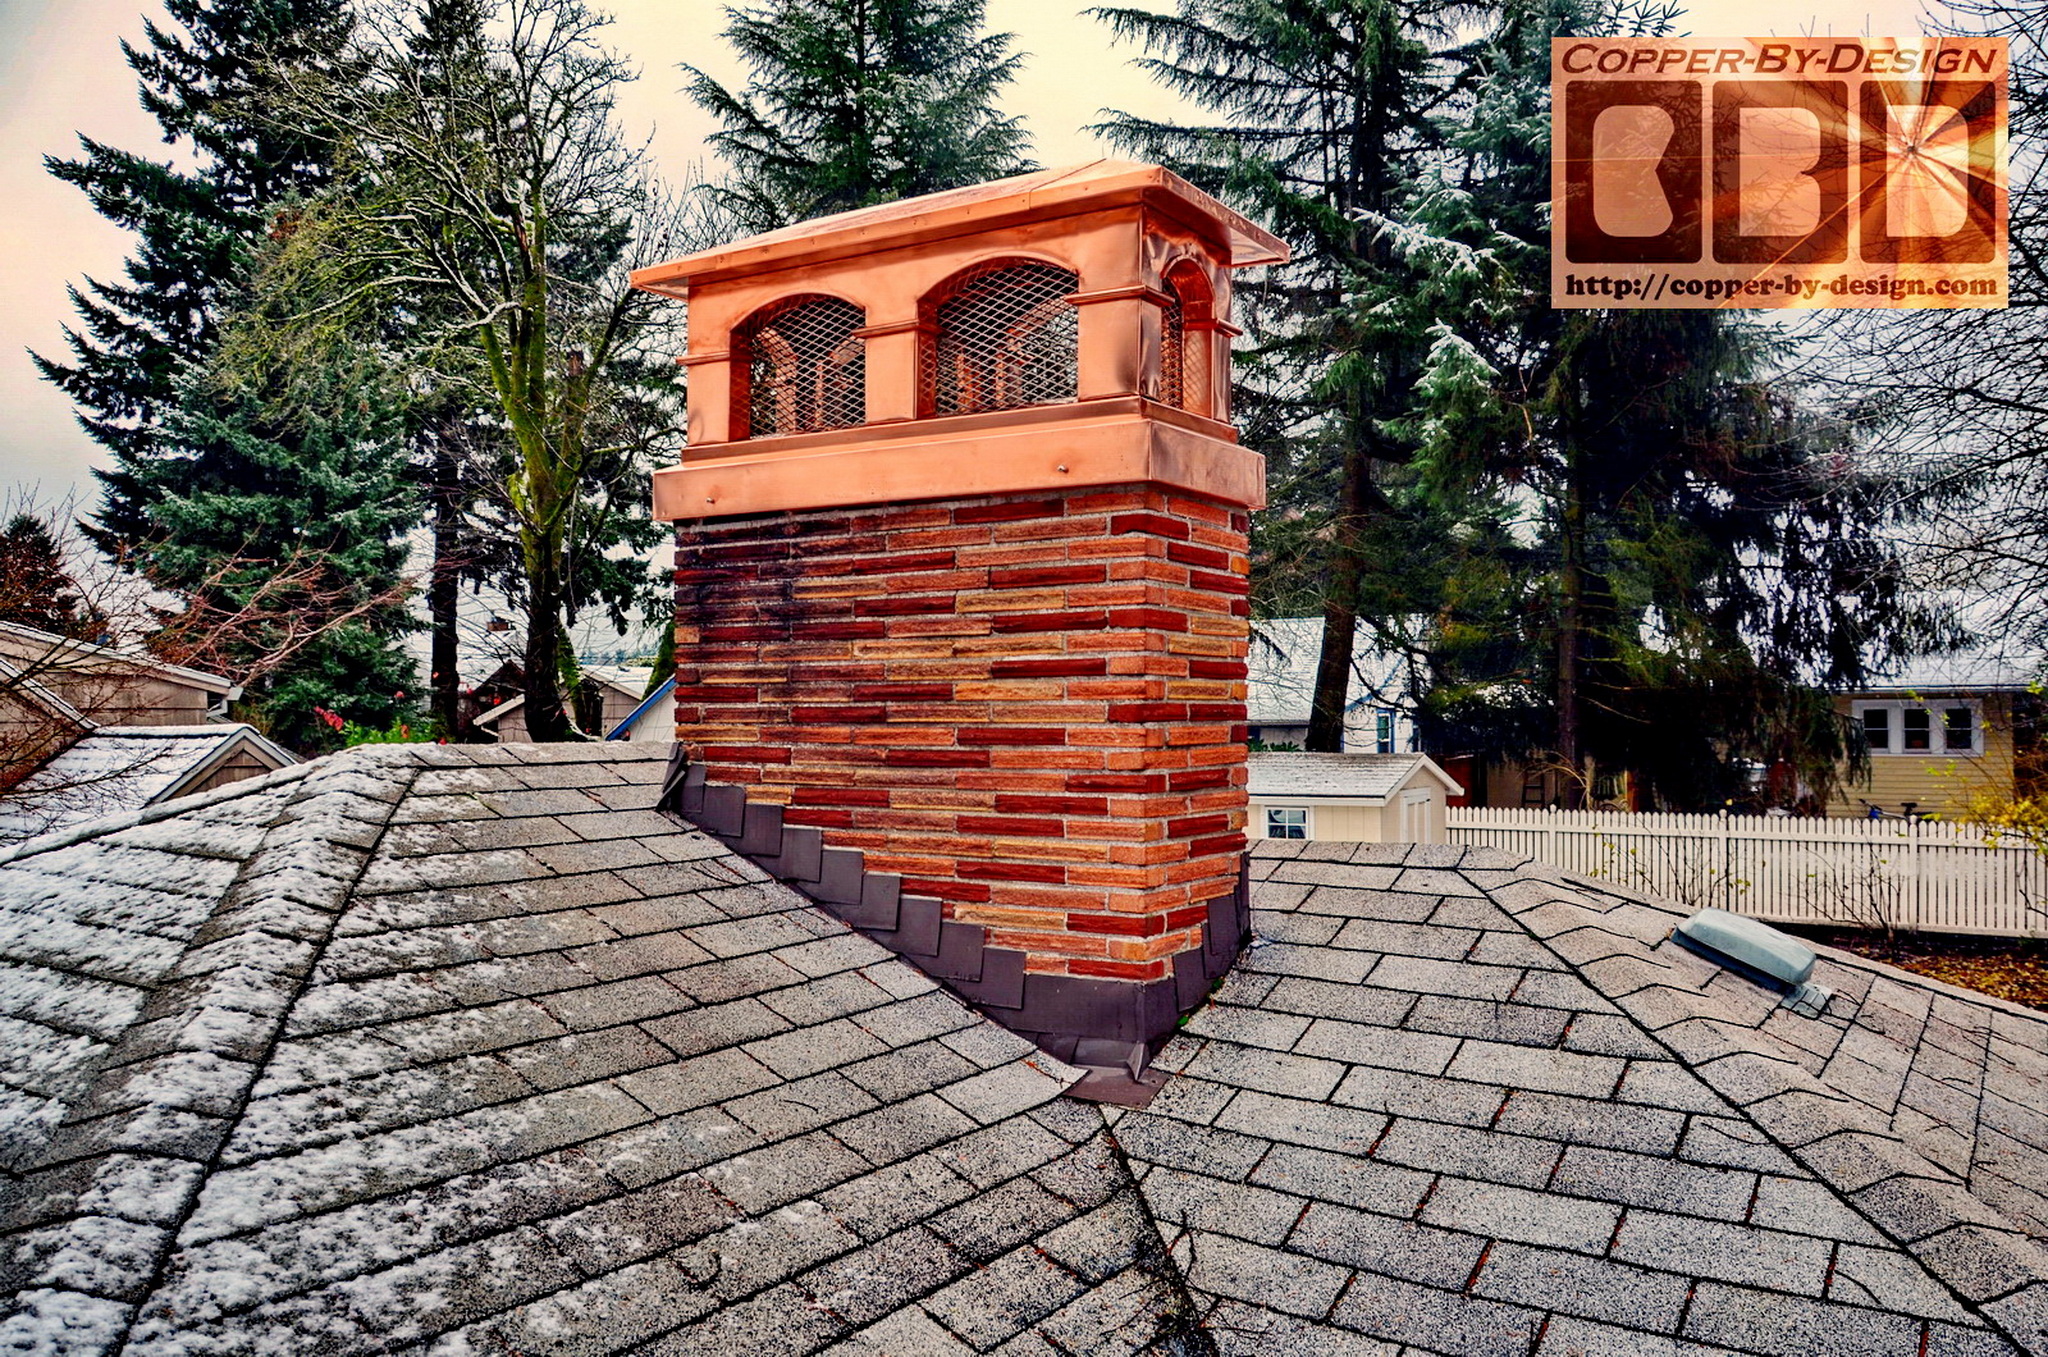
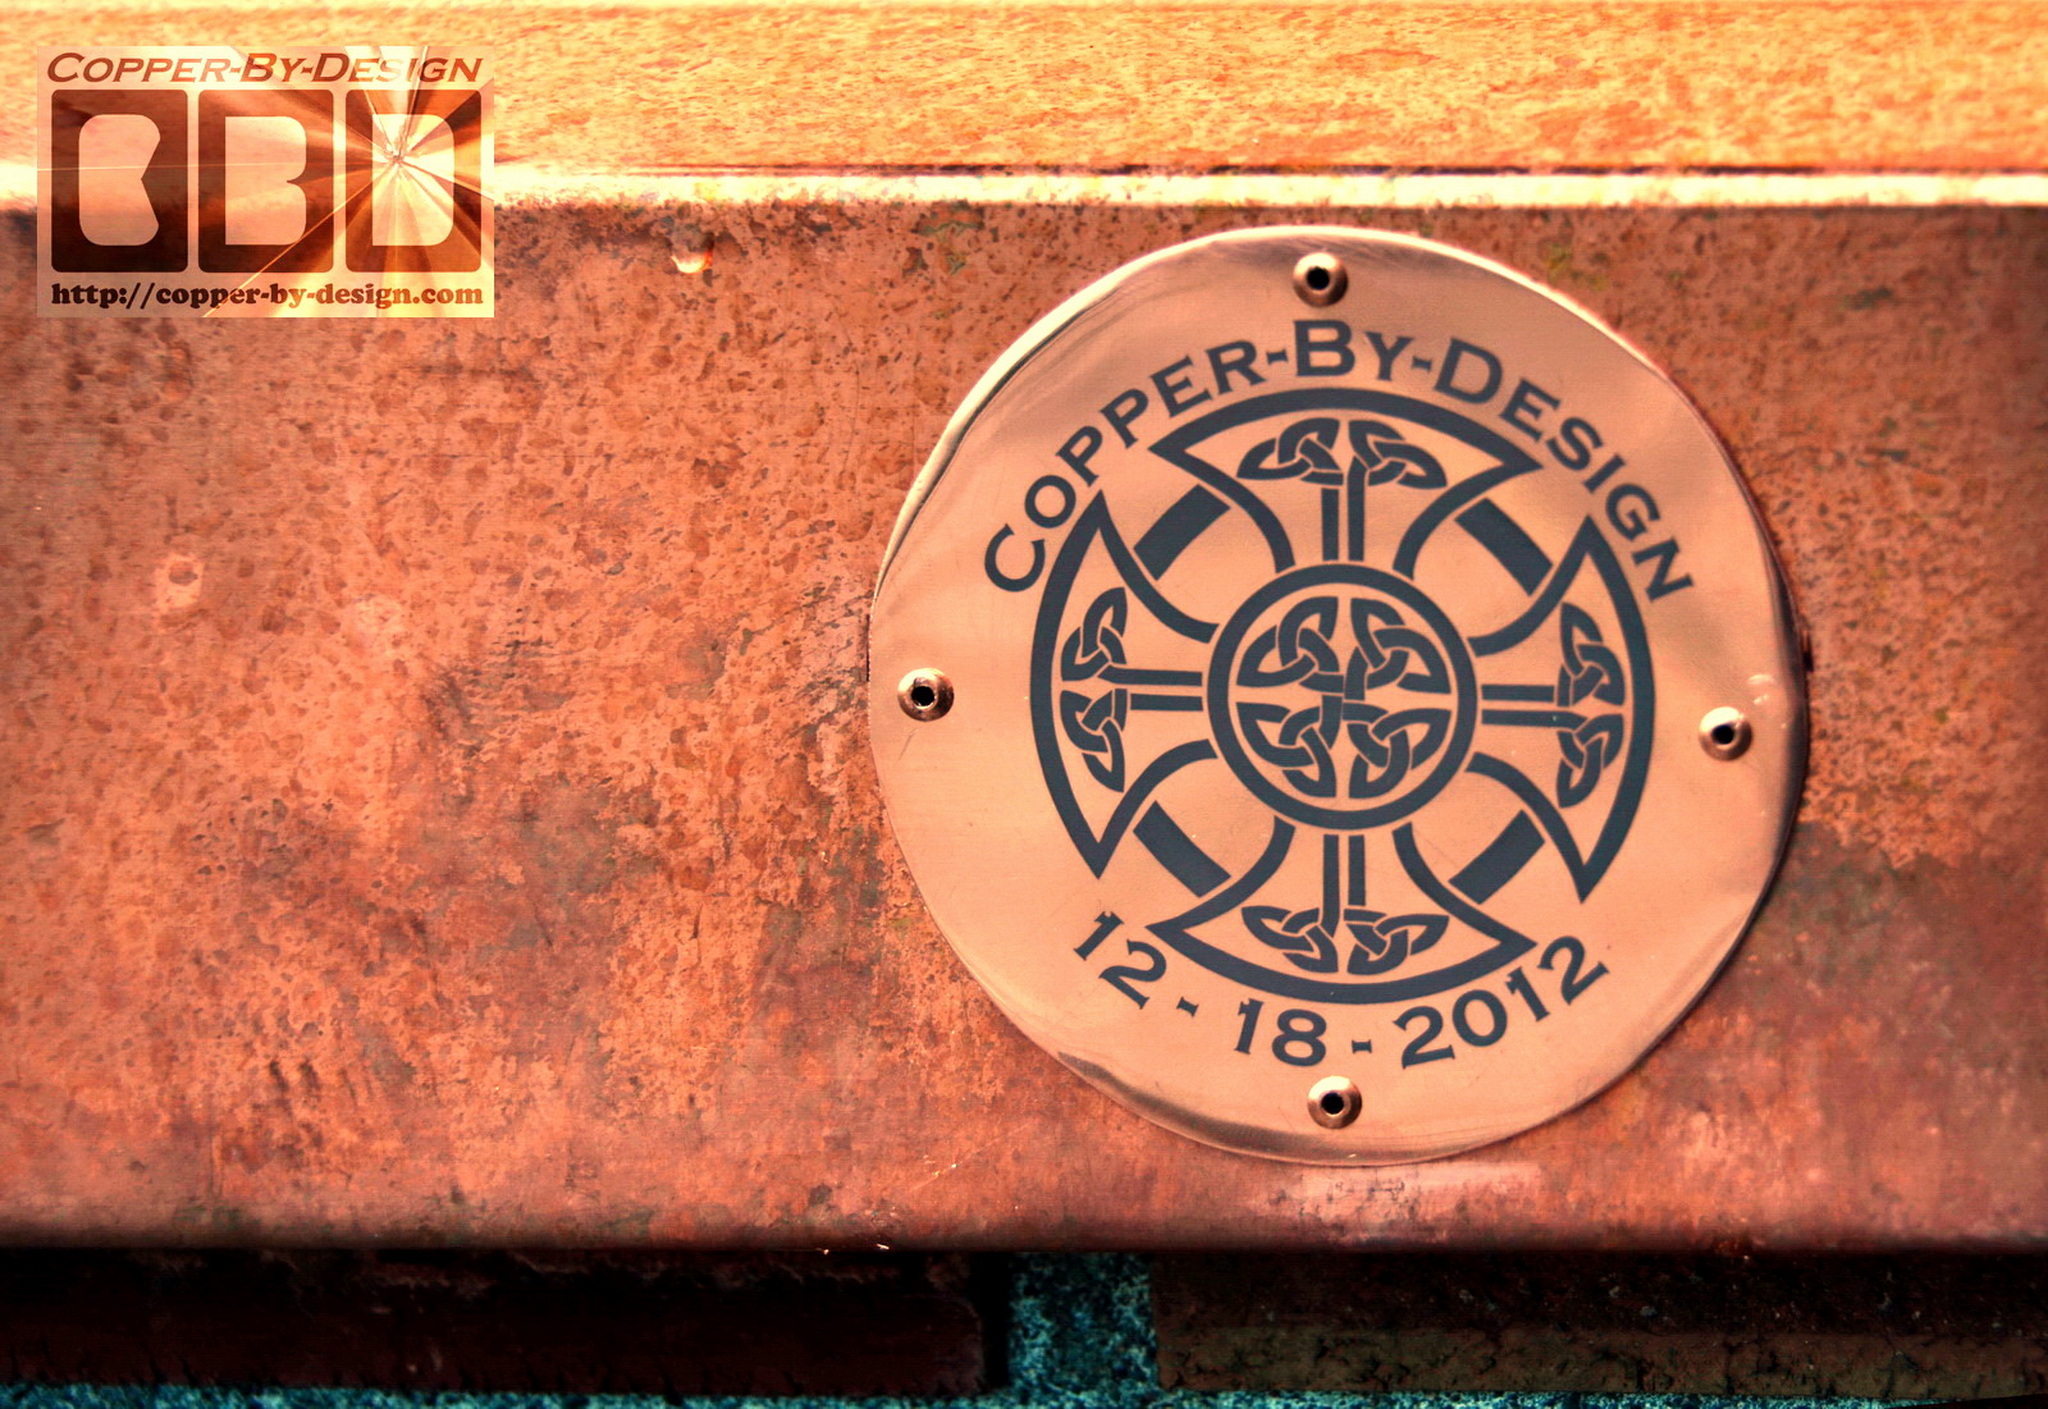
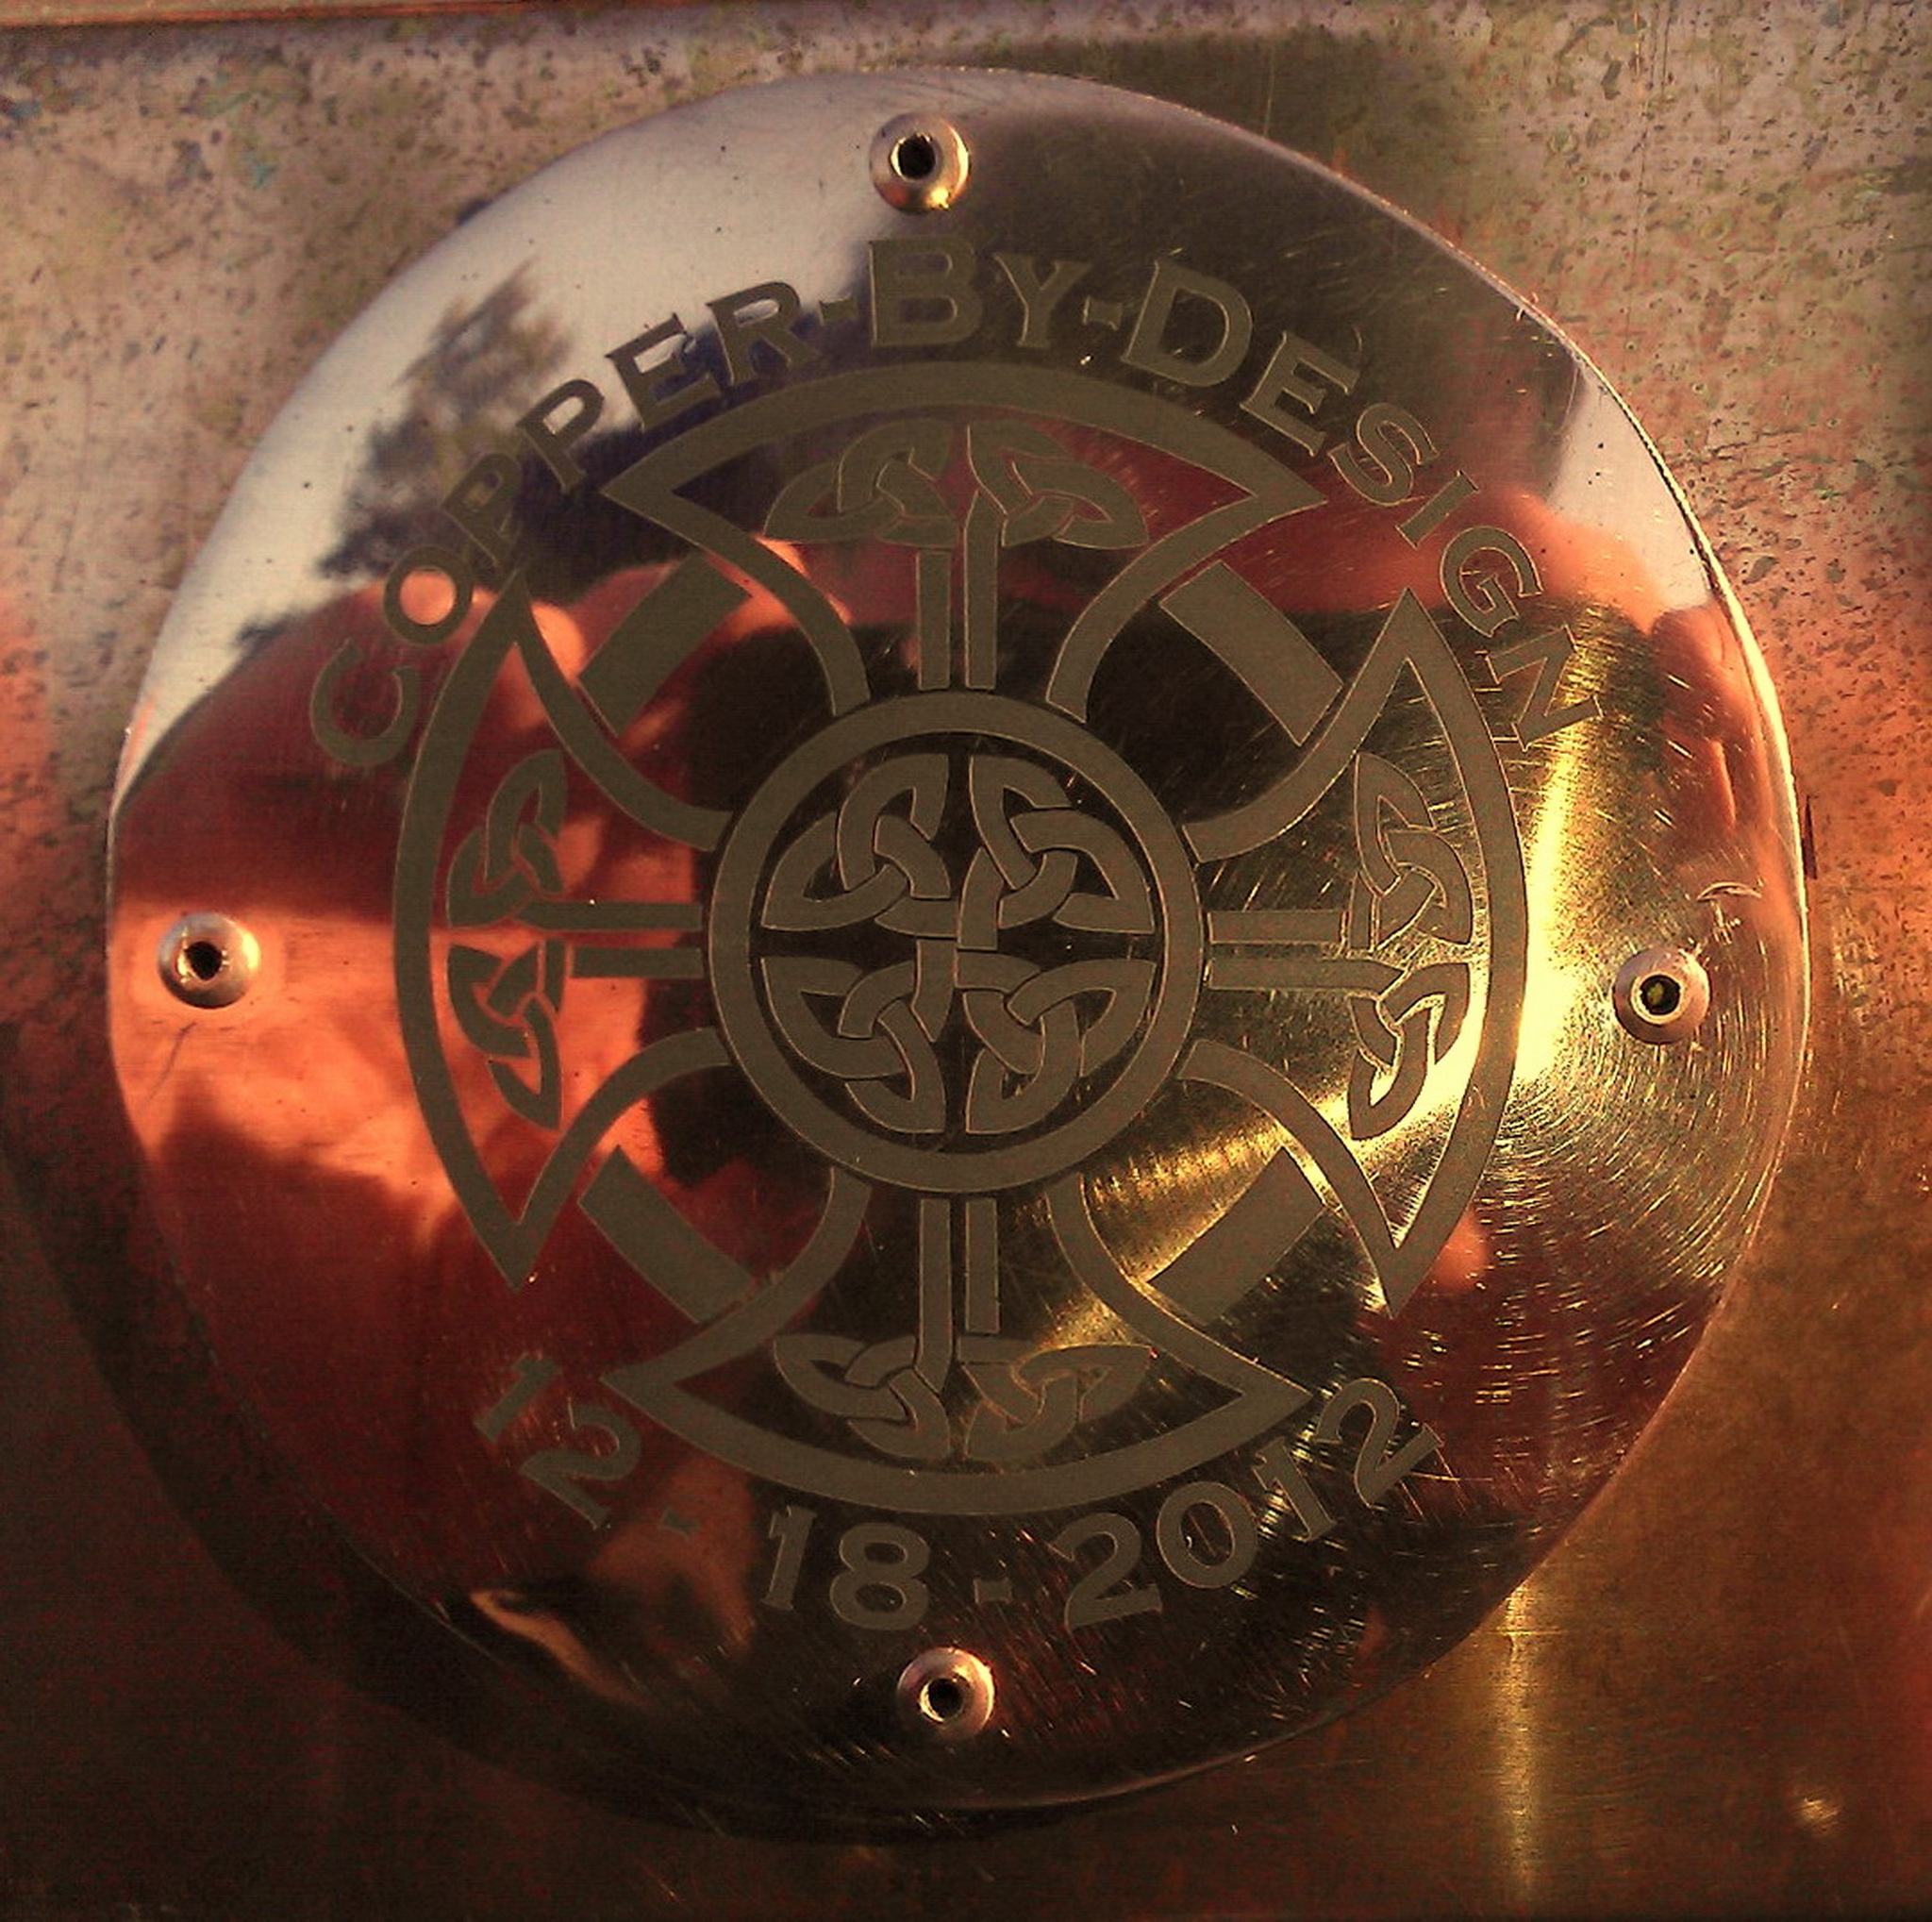
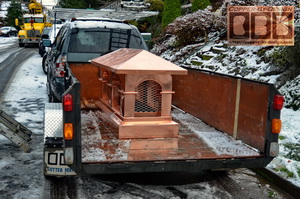
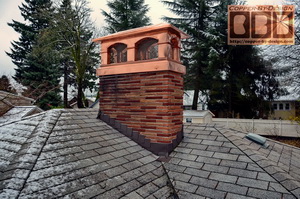
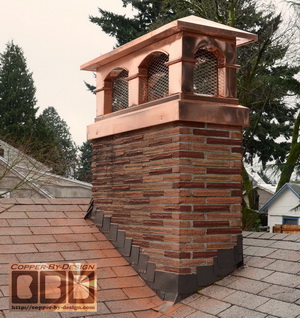
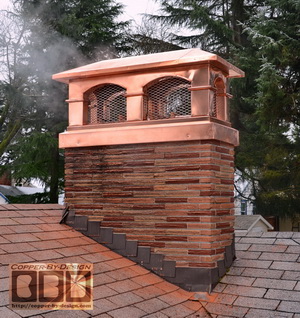
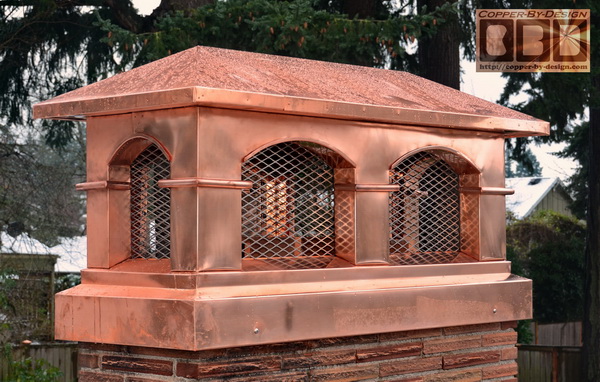
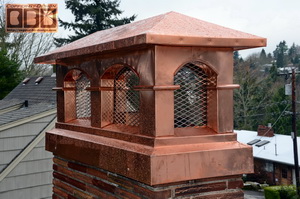
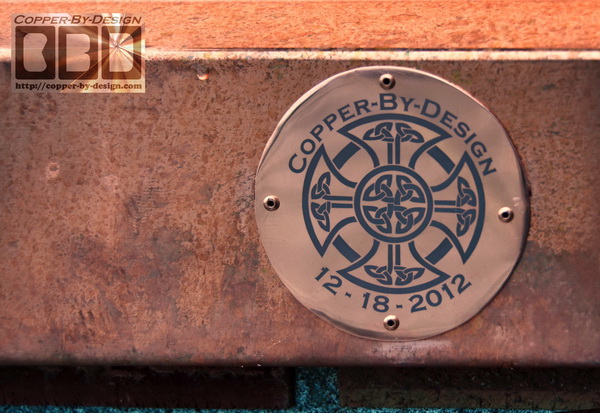
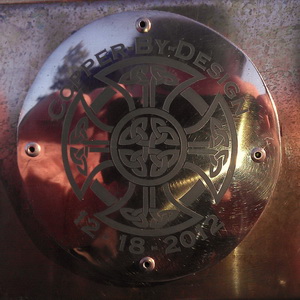
This client asked us to commemorate this lovely fabrication with this dated plaque. I was ready a week later, hence the little extra tarnished copper in these 2 shots.

From: Ted Lulich <tedlulich@hotmail.c*m>
Subject: Update, mid section
Date: Wed, 21 Dec 2012


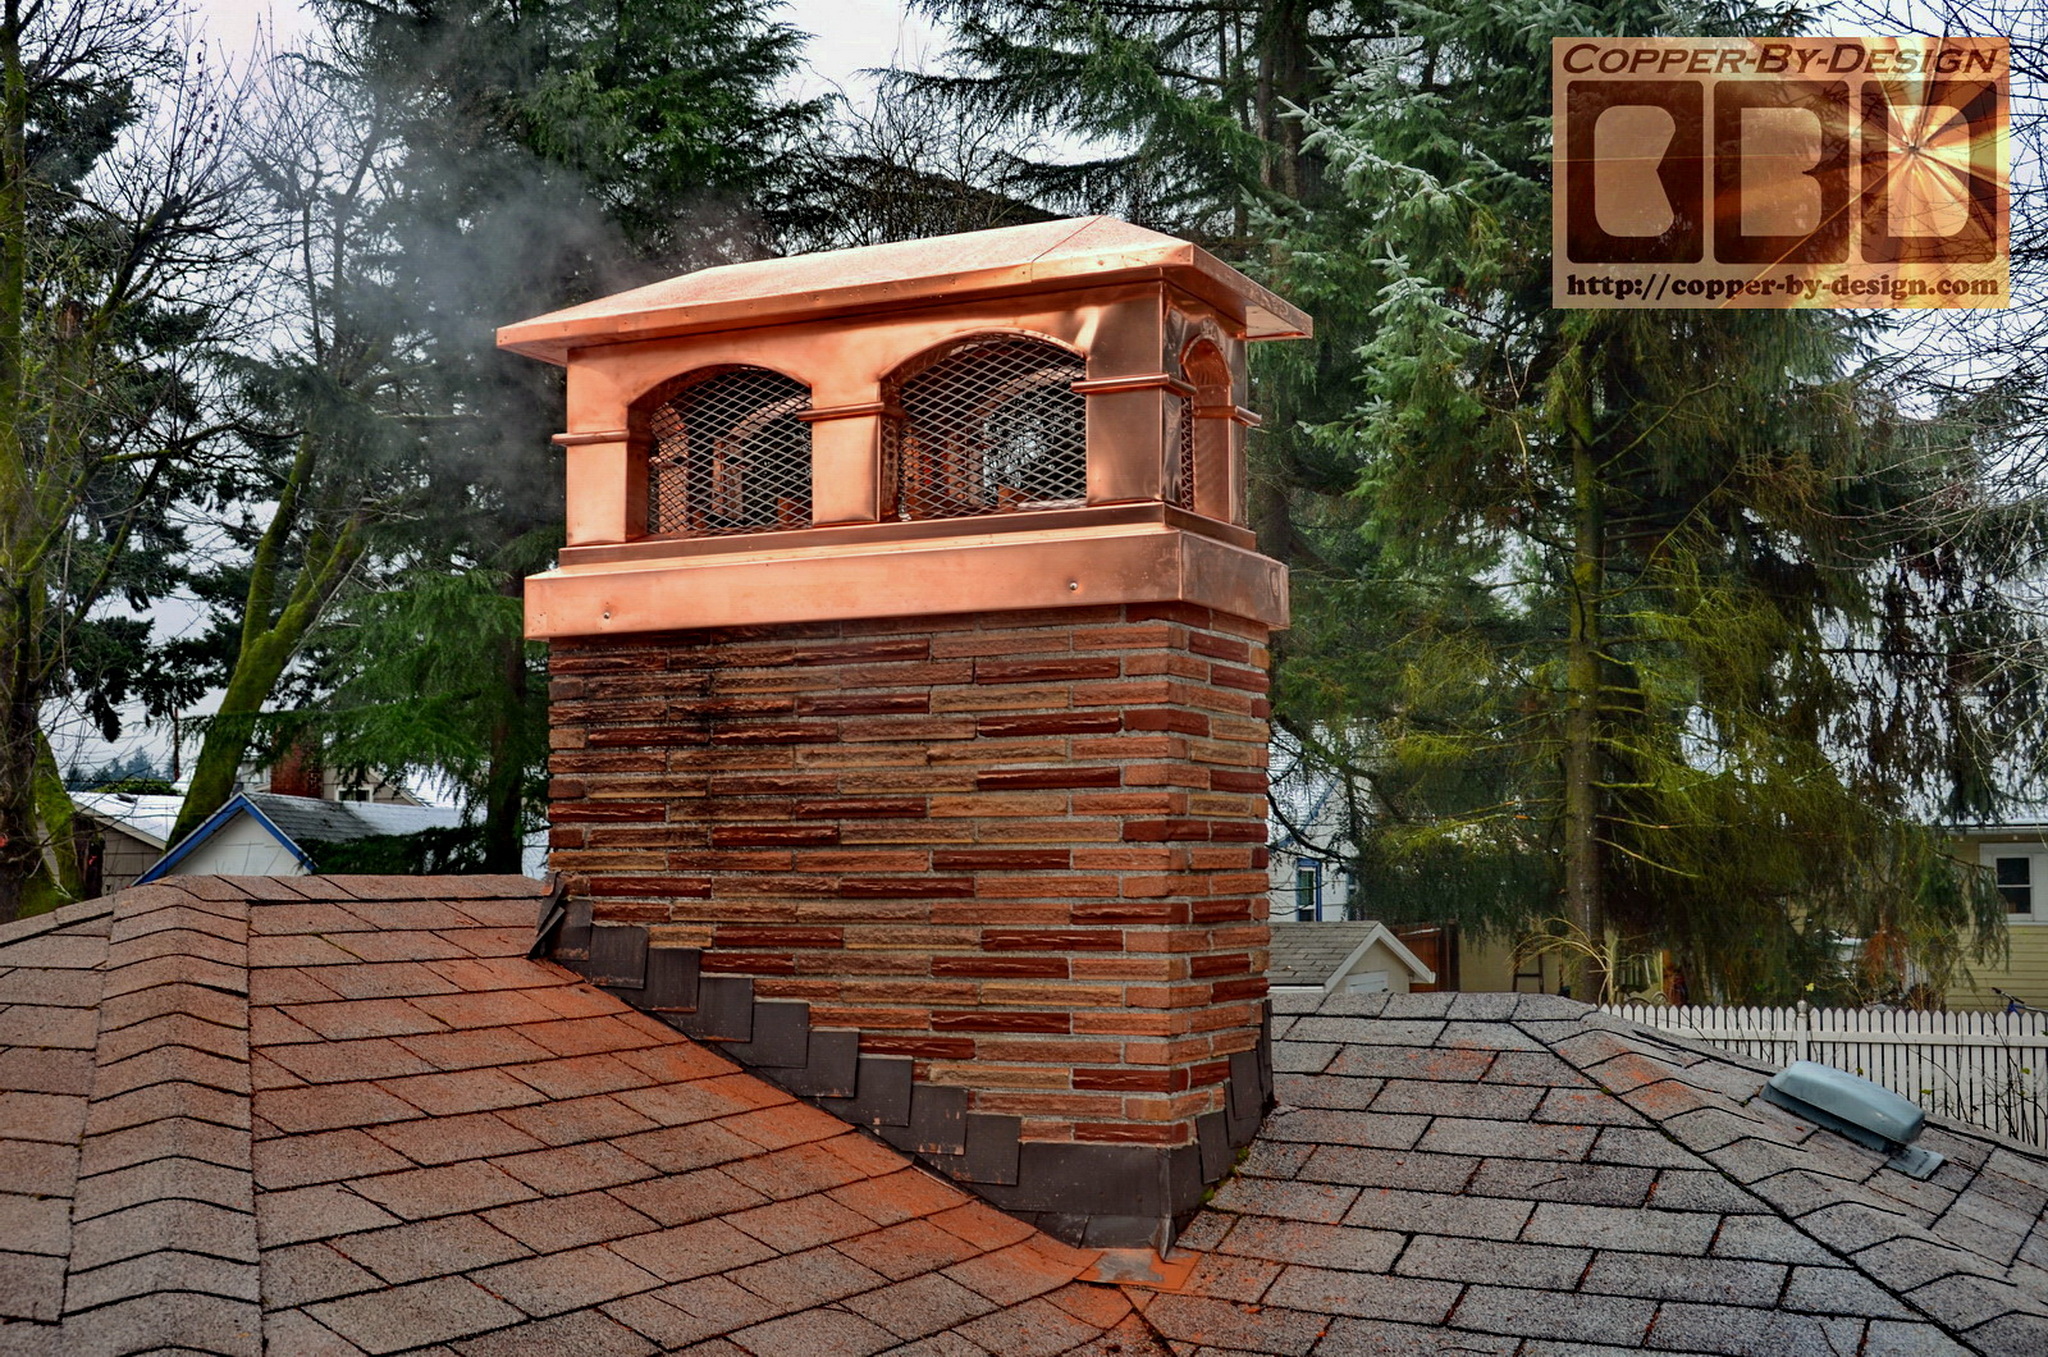
Have a wonderful holiday David, you deserve it. The copper chimney cap could not not have turned out any better! You even got it installed for Xmas...just like you said. We look forward to working with you in the future. Again thank you, and well done.

From: Ted Lulich <tedlulich@hotmail.c*m>
Subject: Update, mid section
Date: Wed, 30 Dec 2012


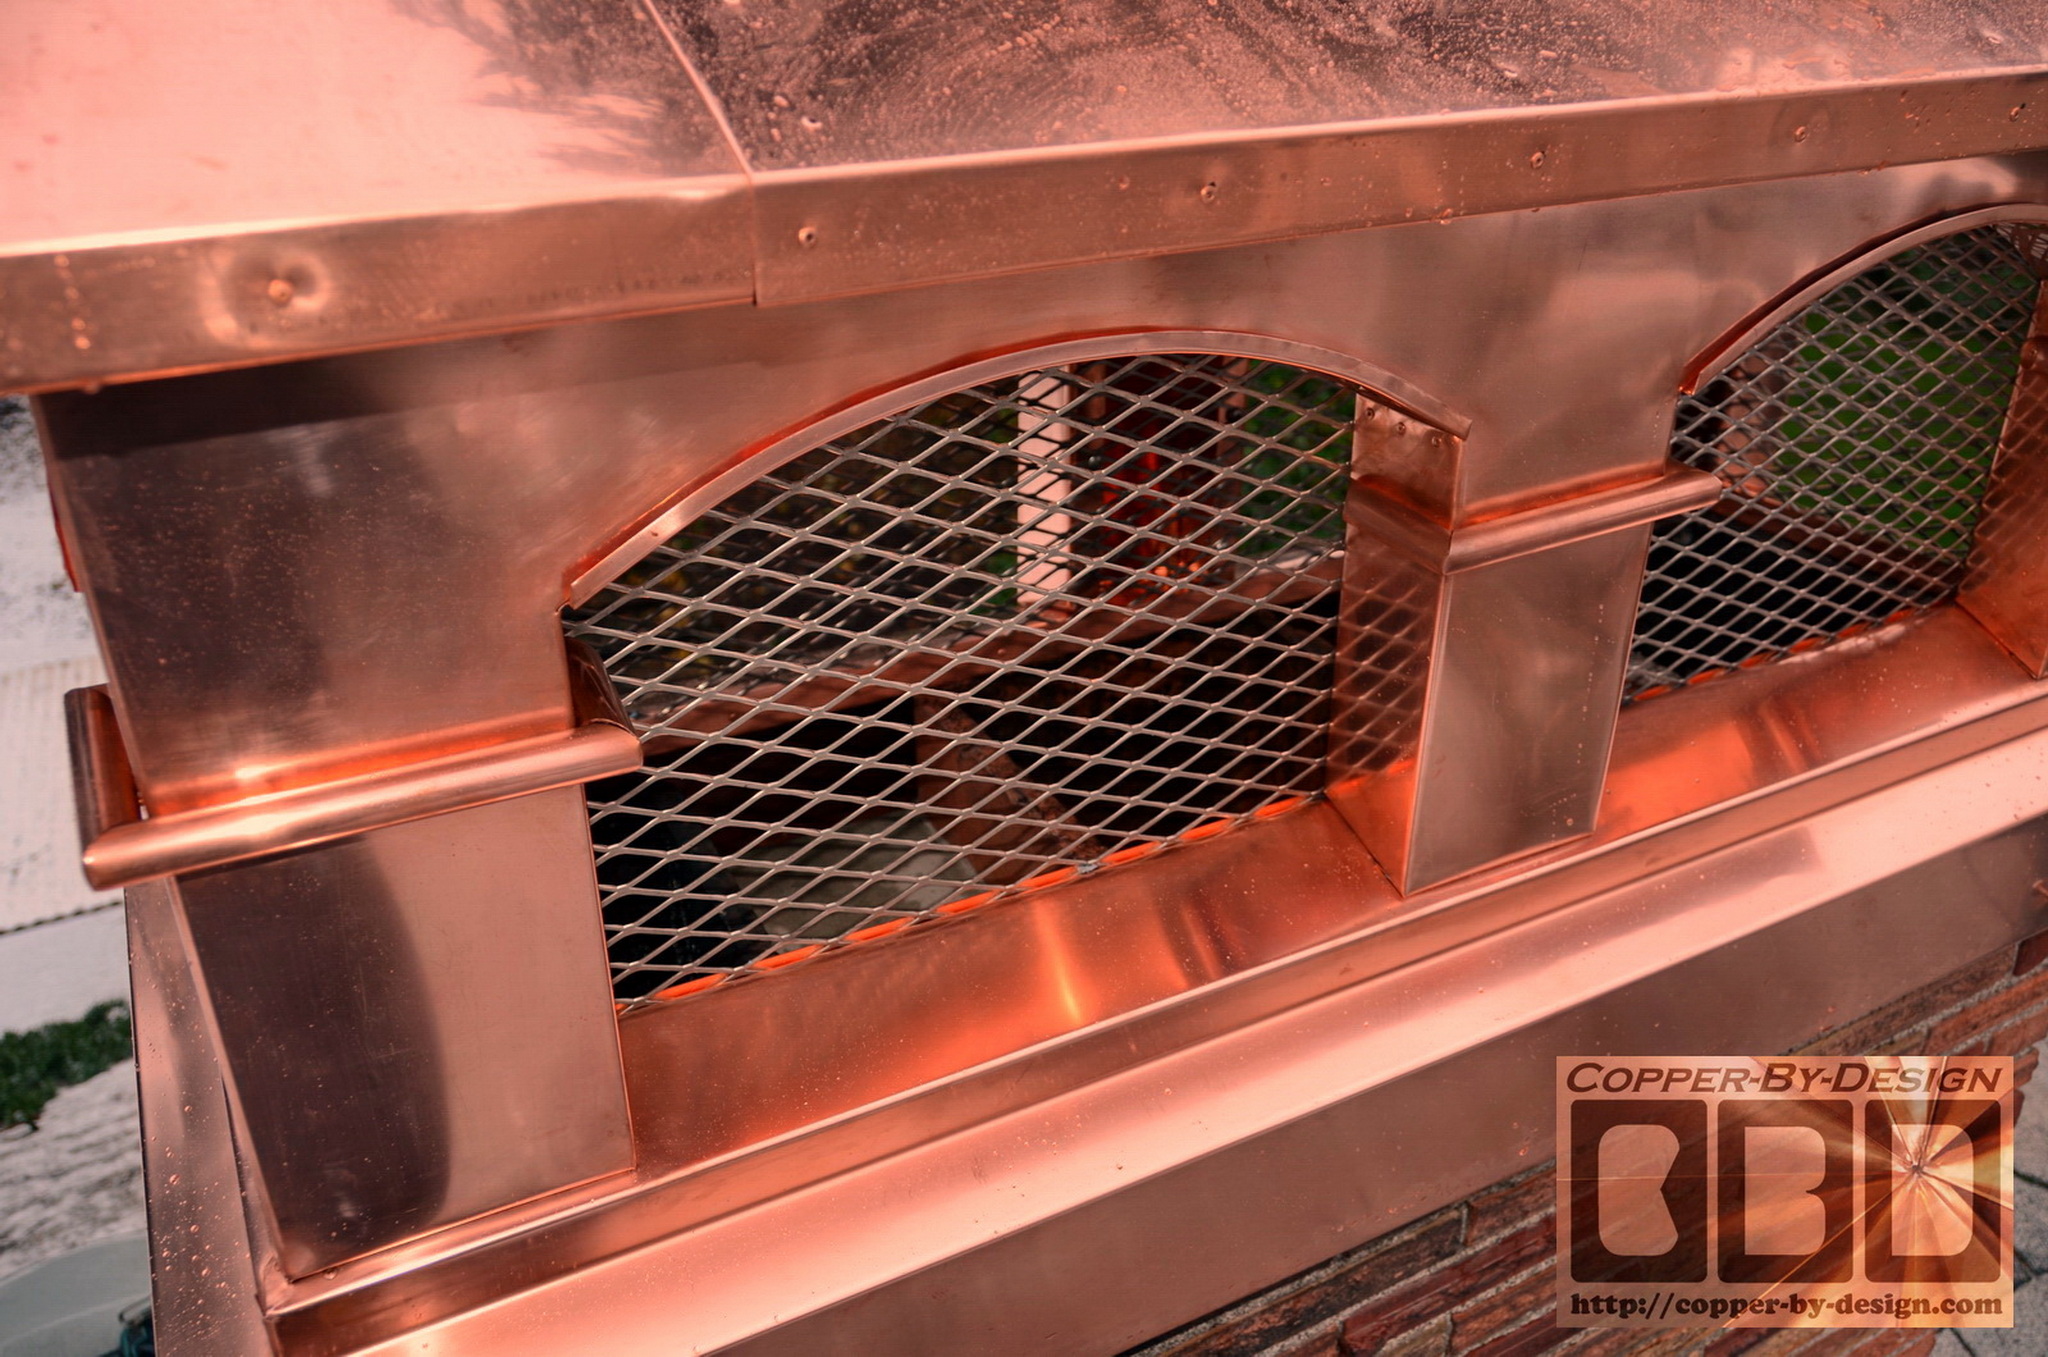
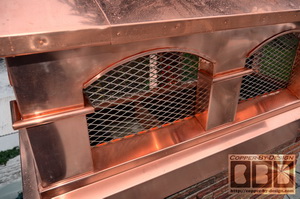
David, not sure if you got any photos of the plaque installed so here are a few, it looks great and the cap is already aging beautifully, its neat to see so many values of color being born. You truly created a perfect copper cap for us!!. Thanks. Ted and Diane. Have a prosperous new year!!

.

Click in this photo to go back to Chimney Caps main info page

.


Below is a photo of our
Better Business Bureau's
NW Business Integrity Award
for the year 1998

1999 Better Business Award

We were also a 1997 finalist for this same award. See our referral web page to see how we managed to be honored with this special award


Back to homepage
Homepage

Site Map

.

Company
Profile
Roof Caps You are here Chimney
Caps
Scuppers Gutters Shipping

Contact Info
.

.

.

.

.

.

..

.

.

.

.

 copper-by-design.com