|
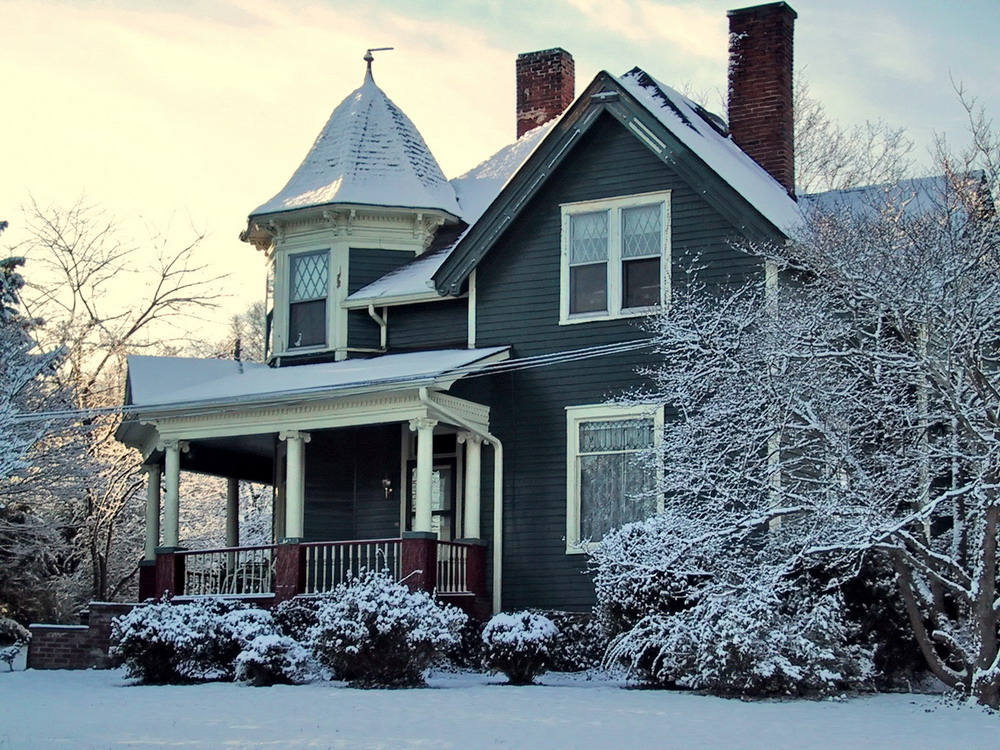
Homeowners John and Jennifer
Boll in Jellico, Tennessee contacted
us on Saturday March 27, 2004 in regards
to re-fabricating
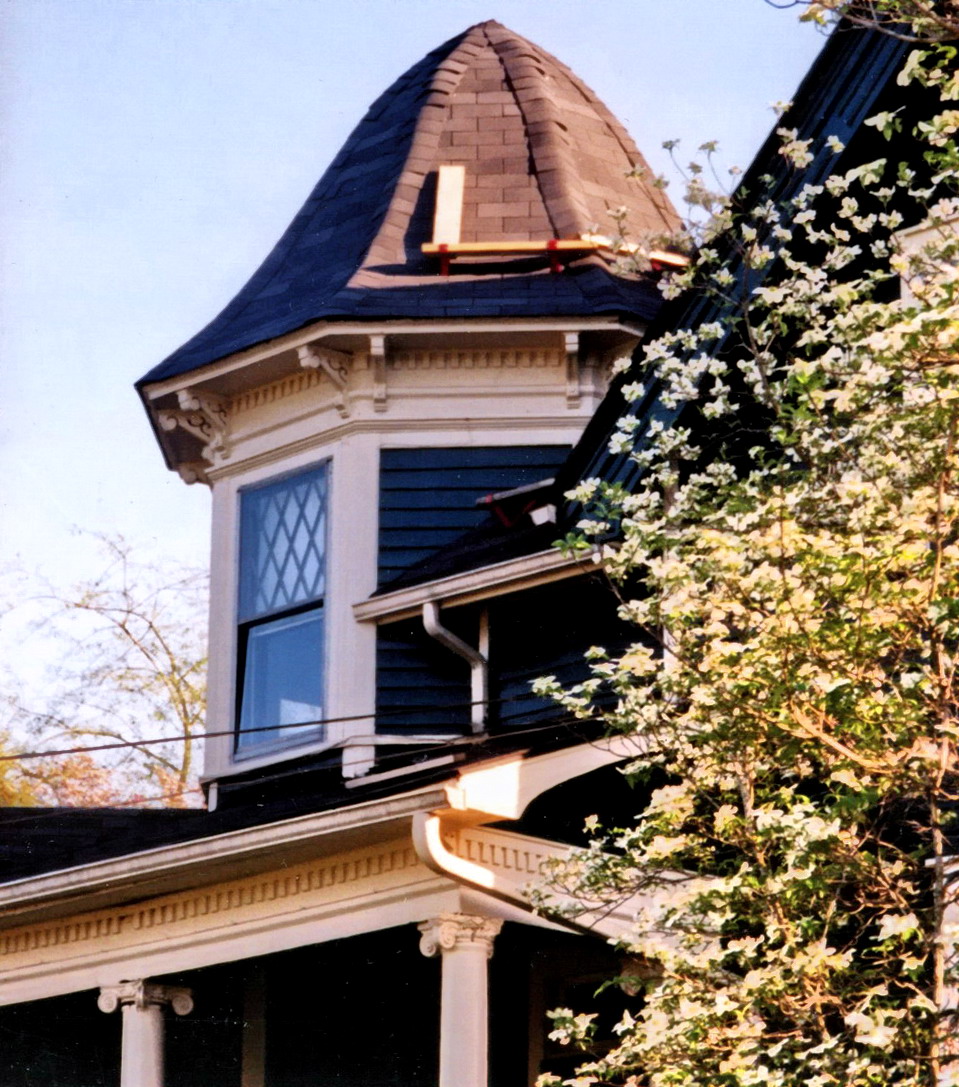
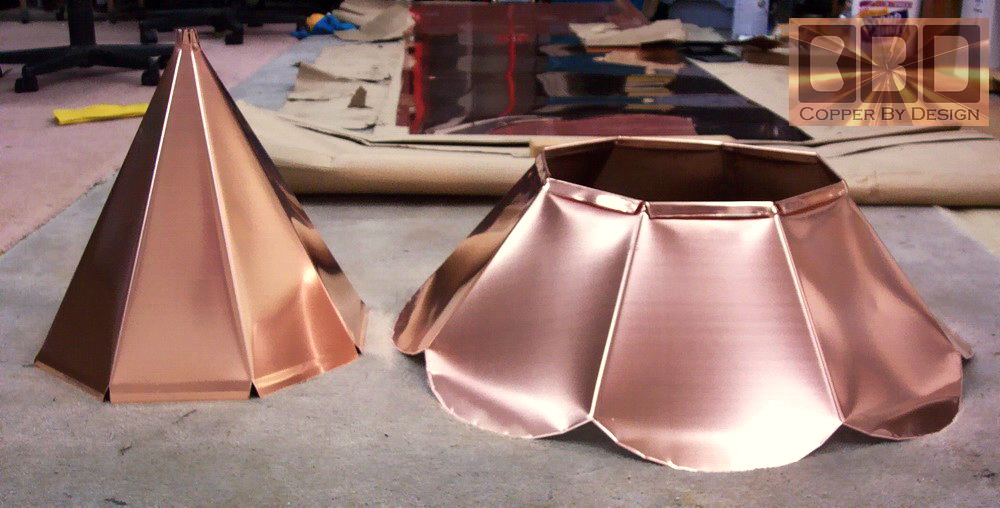
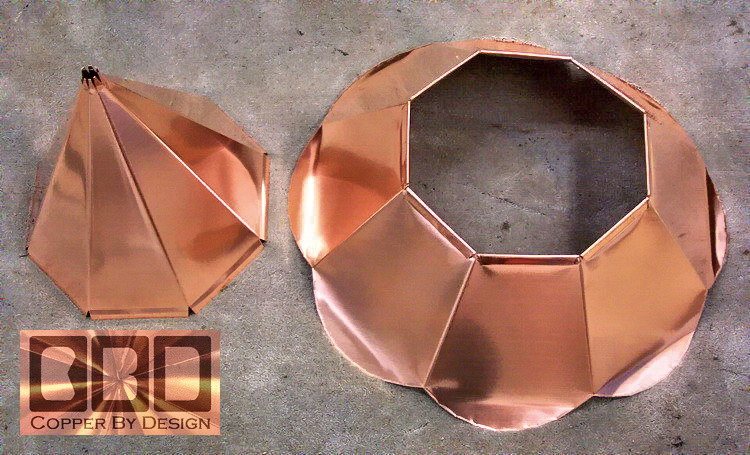
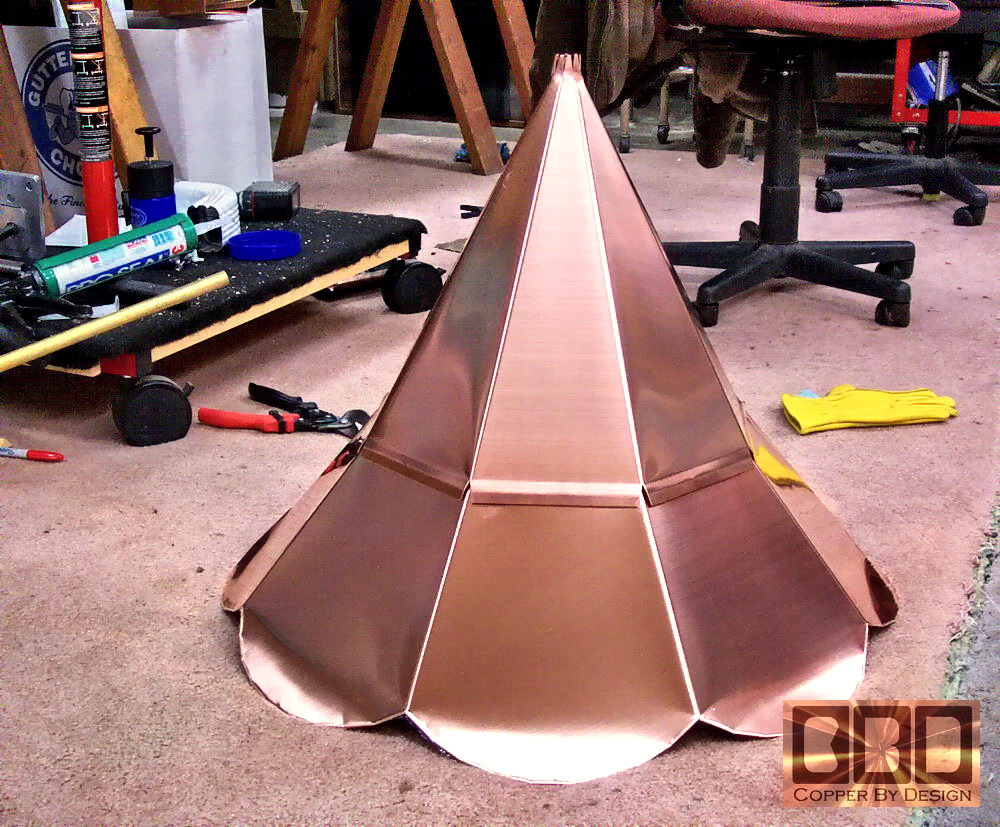
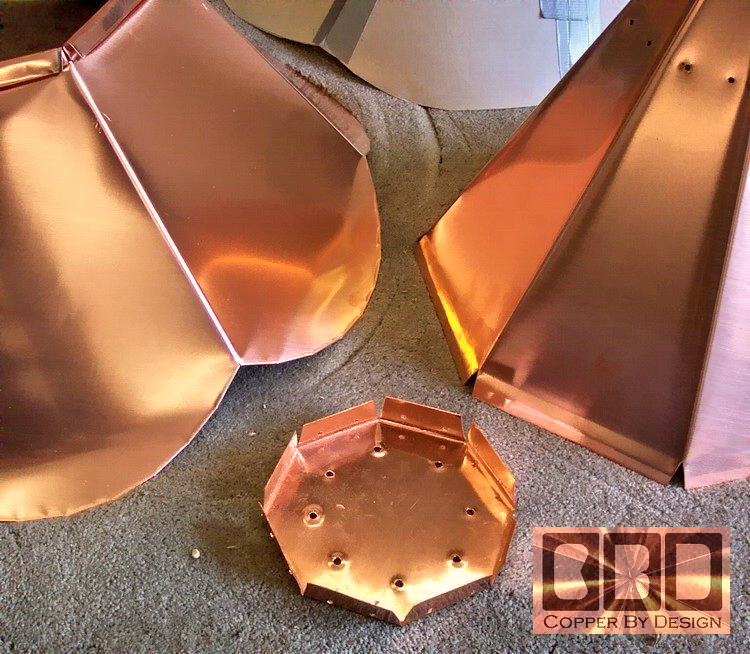
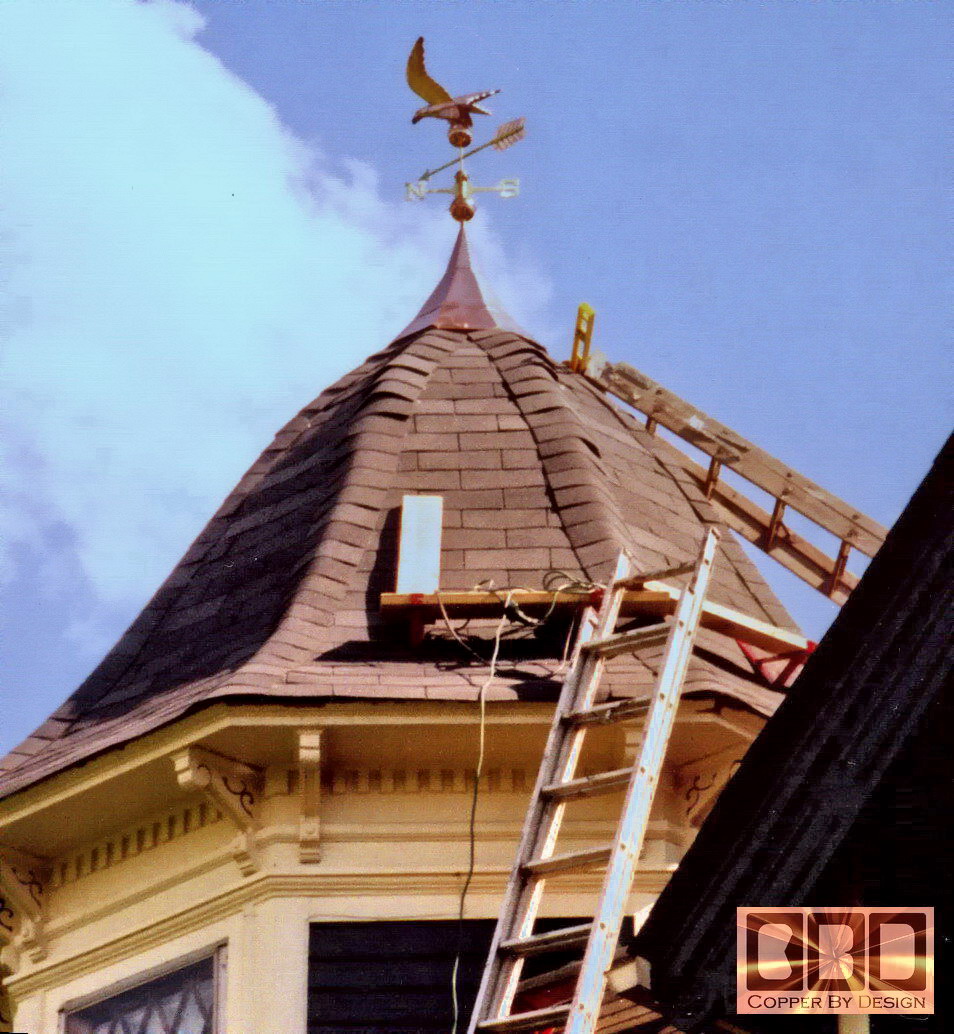
the steel roof cap for this turret on their charming classic house.
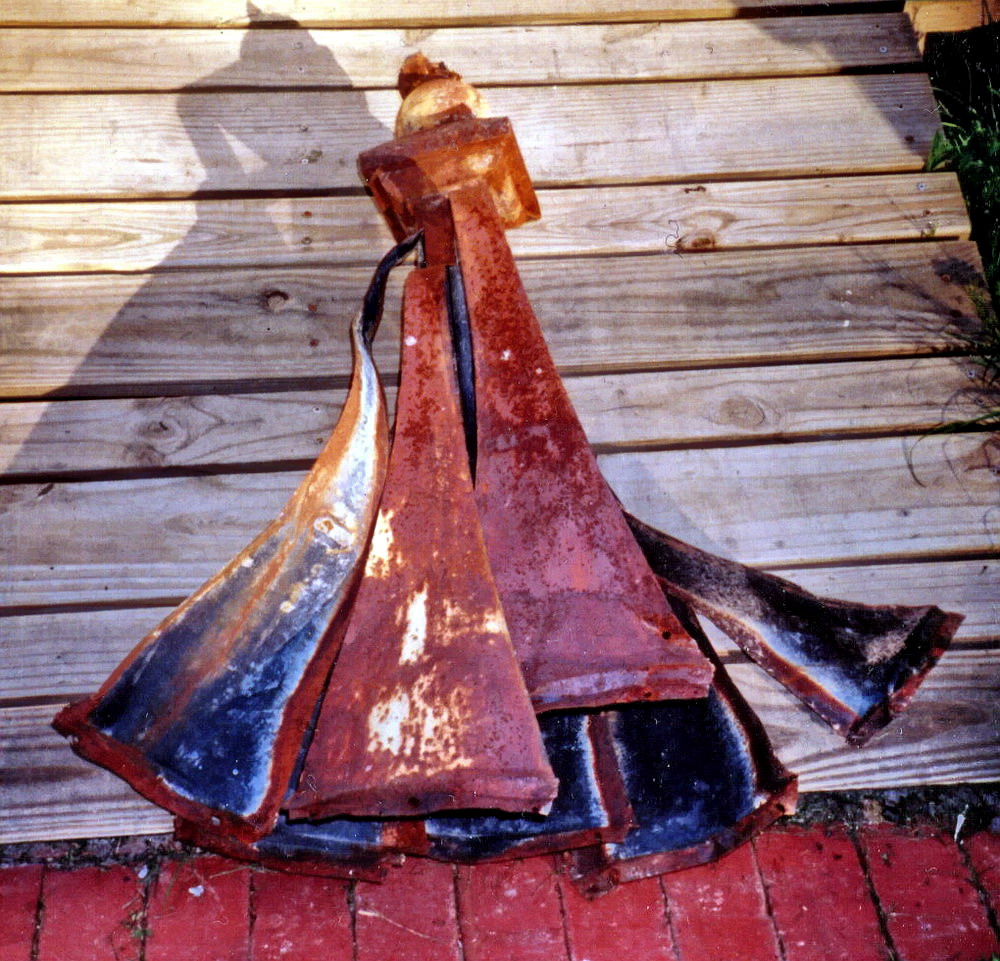
The steel cap they had was so rusty, it had literally fallen apart.
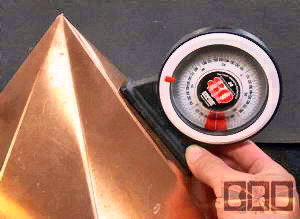
They did not know how to calculate the roof pitch, since it varied in
pitch all the way up.
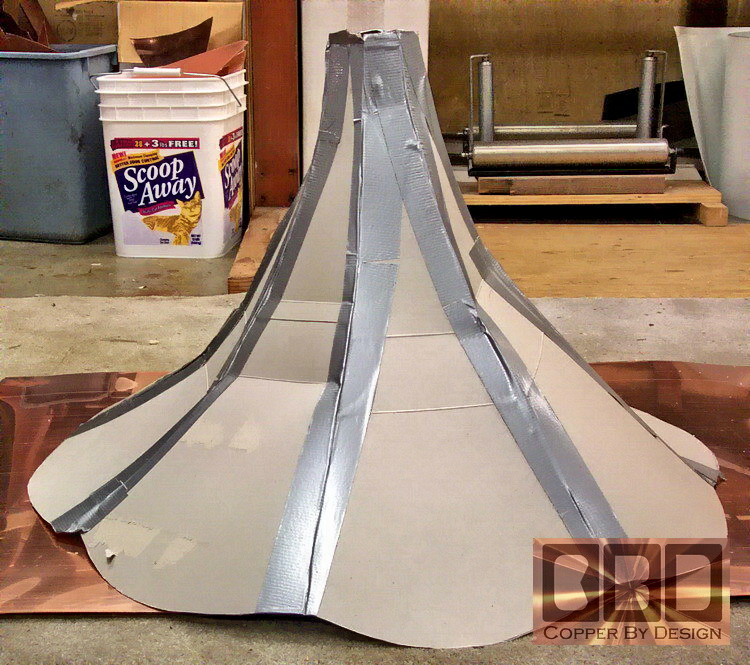
The owner followed our instructions
on this web site and made a cardboard model out of cereal boxes taped
together with duct tape from the old cap
(as you see below).
They mailed the cardboard model to us, so we had a template
to work from.
|
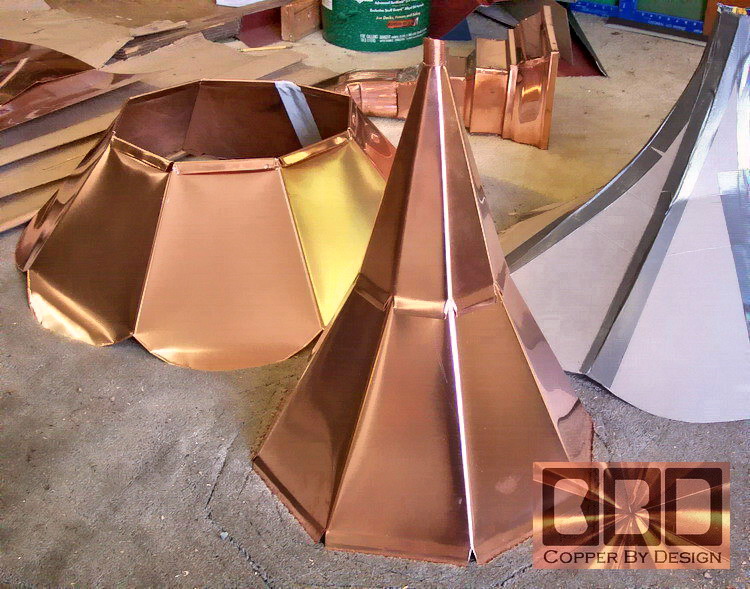
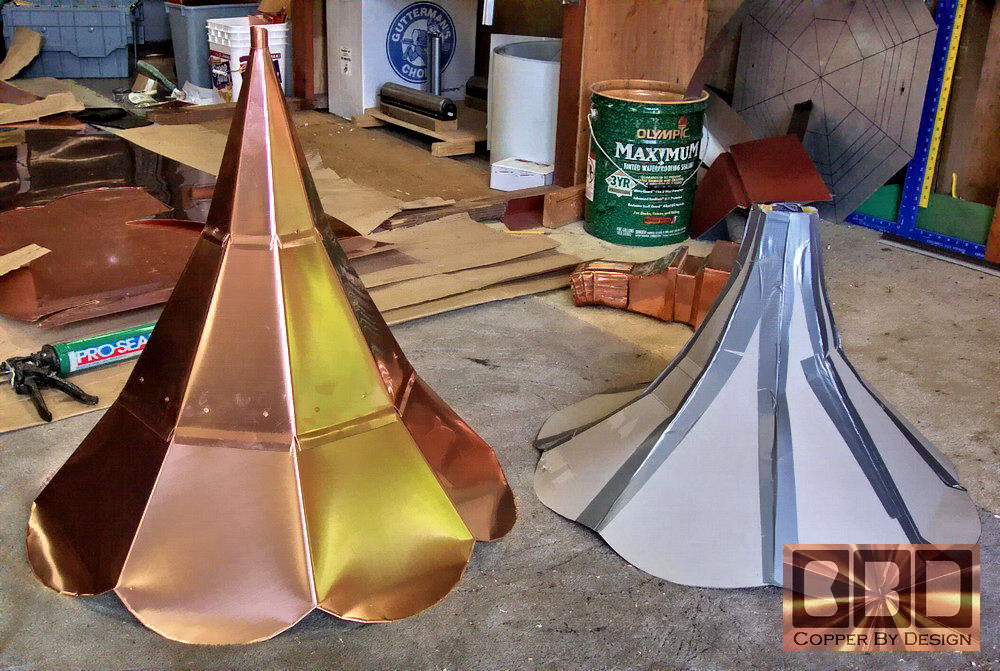
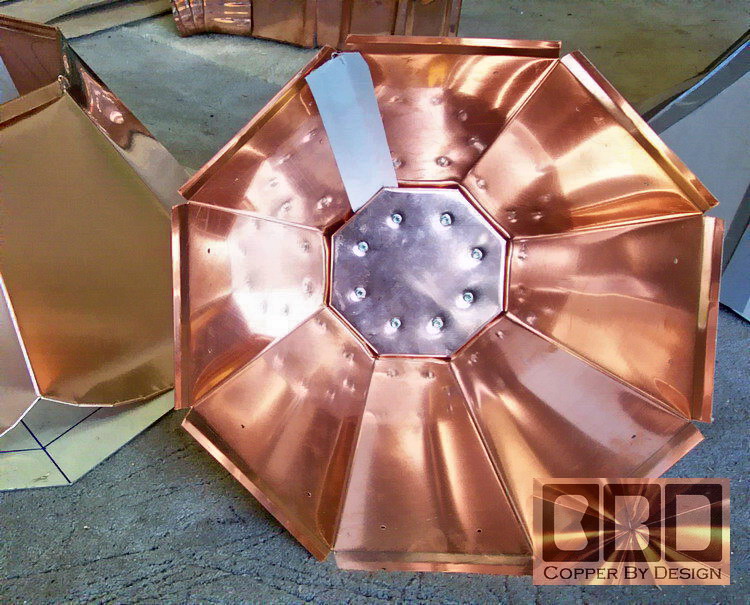
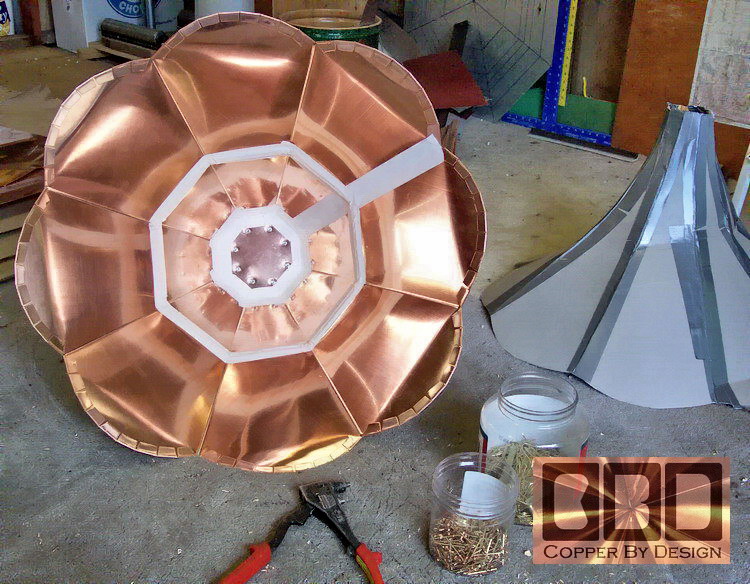
| Below is an example of the
letter of instructions we send after shipping
off the order: At 08:14 AM 5/19/2004, you wrote:
>It is beautiful!! Wow!<
Hey John,
That is music to my eyes. <LOL>
I have some more good news:
We got it finalized and shipped
off today, and dropped it off at the shipper this afternoon. The
Airborne Express
tracking number is
56405XXXX. You can go to their web site to see about it's
progress. They will call 423 784-XXXX if they run into any problems
delivering it.
It was funny, It was 1" less wide than their door
of 32" to fit through. They also insist that I make an inspection access
hatch to open the crate in order to make sure there is no person hiding
in it, or some sort of contraband inside. They say it is a new mandate,
so I brought a hand stapler to seal it
up just before they take it.
The whole thing weighed 42lb. Most
of the weight is the 2x2 and 2x4 wood frame. They charged me about $89
for their ground shipping. I insured it for $300 value.
To open
the crate and safely remove the cap, all you should need is
a box cutter, a large garbage bag, and a #2 Phillips tip in a drill/driver
for the wood crate, and a new #3 Phillips tip for the stainless
screws to fasten it to the roof.
I stapled cardboard over the
wood frame to appease the shipper and keep the cap clean. Even though
it has a 'top side' designation on the cardboard, it should be safe
to turn it over in all direction, as the cap should be securely suspended
in the crate. I just wrote "top" on the outside so it is upright while
in transit and bouncing around on the road.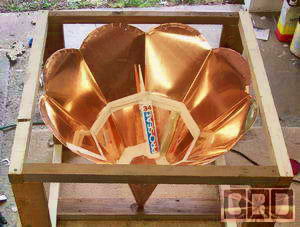
There should be a couple extra stainless steel screws in the bag
in case some of the screws get dropped
or the Phillips slot gets worn or stripped out.
1. Cut open the
cardboard cover just on the inside of the corner line of staples, and
tear it off the wood frame. Don't worry about getting all the cardboard
off or removing all the staples.
2. Get the cardboard and
Styrofoam out of the way and stuff it in the garbage
bag.
3. You will find the zip-lock bag of screws and a partial tube
of the special caulk we use taped inside the the cap. Go ahead and remove
them and set them aside.
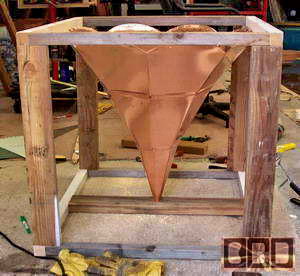
4. When you are ready to do the cap installation,
you should be able to lift the cap out of the wood frame in the upside
down position. It is recommended to wear clean gloves when handling
the copper cap, so you do not leave finger prints on the copper, that
will tarnish first.
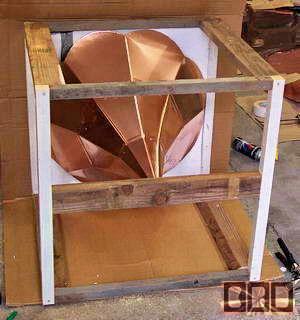
5. There are only screws in the corners. Unscrew
the wood frame apart if you want and set the boards aside.
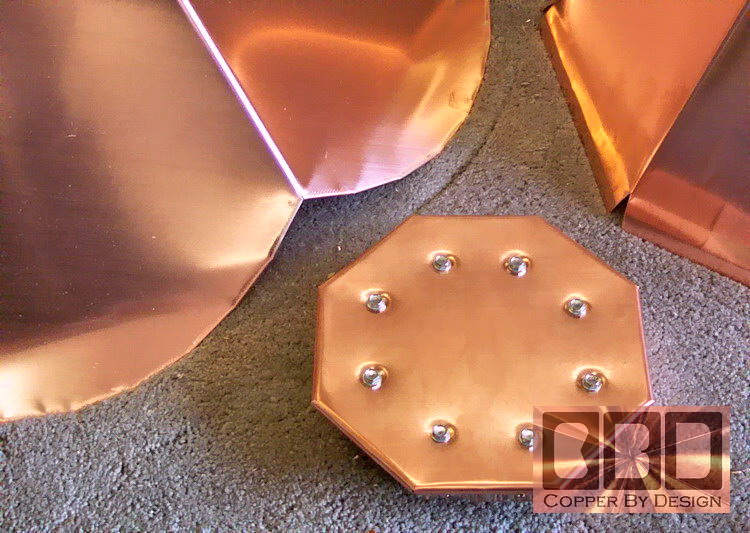
7. As
in the photos, the bottom scalloped edge should not be straight. I bent
them in a soft curve out to match with what the roof angle should be.
You may need to make some minor adjustments when fitting it in place.
You can bend it with your hands easily
8. When finished, dispose
of the cardboard and wood as you see fit.
Detailed Installation Instructions:
You will have to decide if you
want to do step (b) before step (a). At least play with step (b) first
to work out some of those details in advance, like a dry run.
(a) The Cap
You should place the seam of the cap more toward
the back, or what ever side is less seen.
The cap will go
on the roof using the dome head #3 Phillips stainless screws.
Insert a 3/4" wood dowel or the weather vane shaft it's self to check
the vertical level of the shaft in all 4 direction before setting any
screws. Mark the holes for the screws with a fine tip magic marker or
ice pick. You may even do well to draw the bottom edge of the cap on
the roofing with the marker. I recommend you pre-drill the holes
with an 1/8" drill bit. It would be best to add a line of caulk
on the roofing, just above the line your drew on the roofing, over the
screw holes. Do not use all the caulk for this. You will
need to start with 2 opposing holes and start the screws in and re-check
the level to make sure it did not shift, and repeat with 2 cross opposing
screws. From there it should be set in place for the rest of the screw
placements.
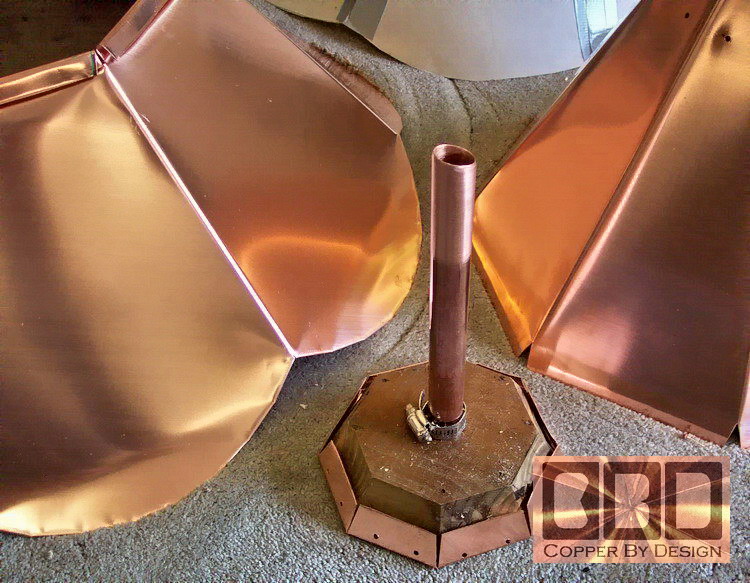
(b) The Weather
Vane Placement
Set it in the
hole at the top of course, with or without the ornamentation, as you
choose, but it might make it hard to drive in the copper wedge
(supplied in the zip-lock bag).
Be sure to have a compass with you to set the directions. Experiment
with different shaft depths if you may need the longer shaft extension
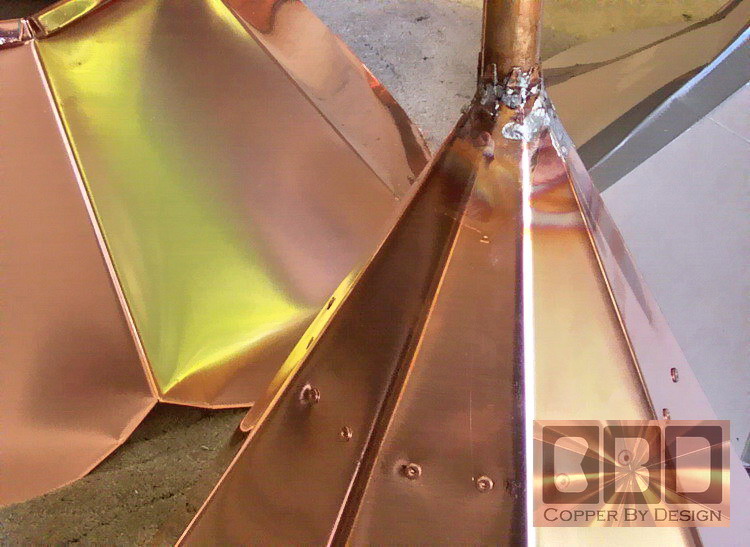
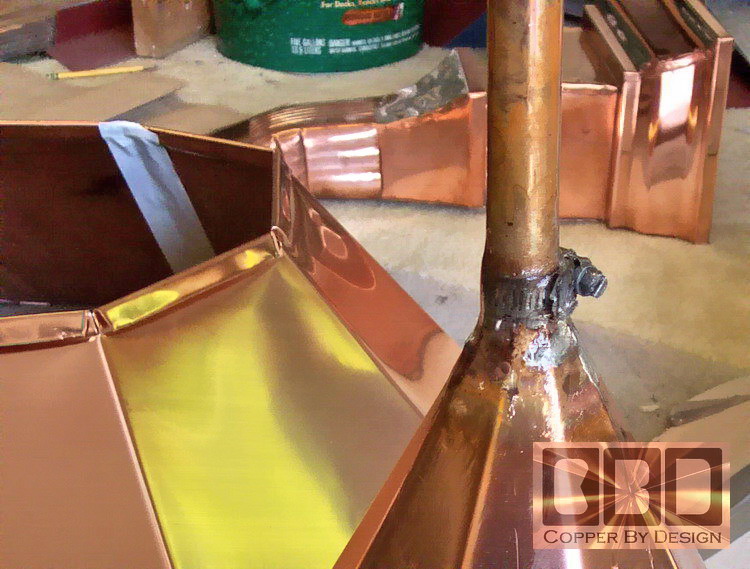
you have. I set it with a 10" long pipe in the cap. Once
you figure out the depth, mark on the shaft where it is at the top of
the pipe in the cap. Lift it up about 3" and smear the clear caulk about
2" on the shaft a good inch under the line you drew. Mark the copper
wedge (that was in the baggy)
at 1", 2", and 3" increments to get and idea how deep you manage to
drive the edge in the pipe beside the weather vane shaft. Lower the
shaft into the pipe to the line and drive the copper wedge down at least
2" to 3" in the side of the shaft, inside the pipe to lock the weather
vane shaft in place so it will not rotate. The more the better
so it is nice and tight. You should be able tap it in with a small
hammer. The caulk when dry should also help hold the shaft in place
from rotating. Cut or break off the remaining wedge as close to the
top of the pipe as you can. If you score the outside of the wedge at
the top of the pipe with a box cutter or hack saw it should break off
easily.
If you run into any questions, you can try to reach me
by phone at 1-503-351-7082, and I will be happy to help out where I
can.
>We sent the check yesterday.
You should receive it in a few days.<
Yes, we got it yesterday. Thanks.
>I look forward to seeing the cap on
our roof.<
If you don't mind, we would love to see
pictures of it installed. Even in steps as you install it, as long as
it does not compromise your safety of course. If you do not want them
used on the web site for any reason, just say so, and we will honor
your desire.
>Great Job!!<
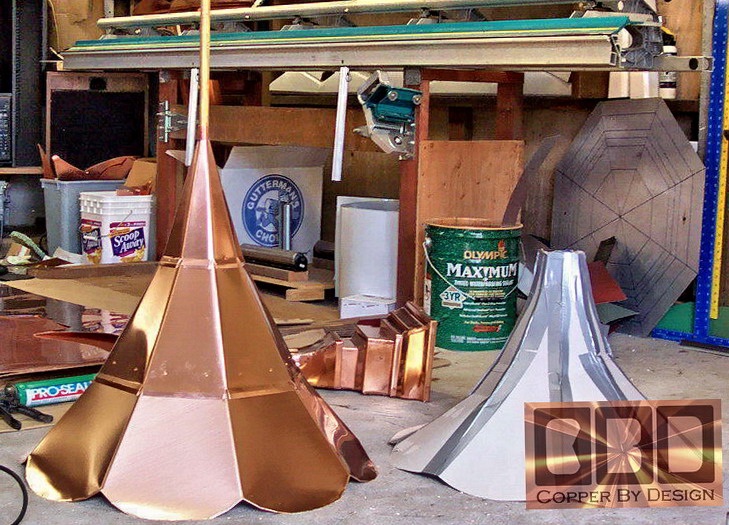
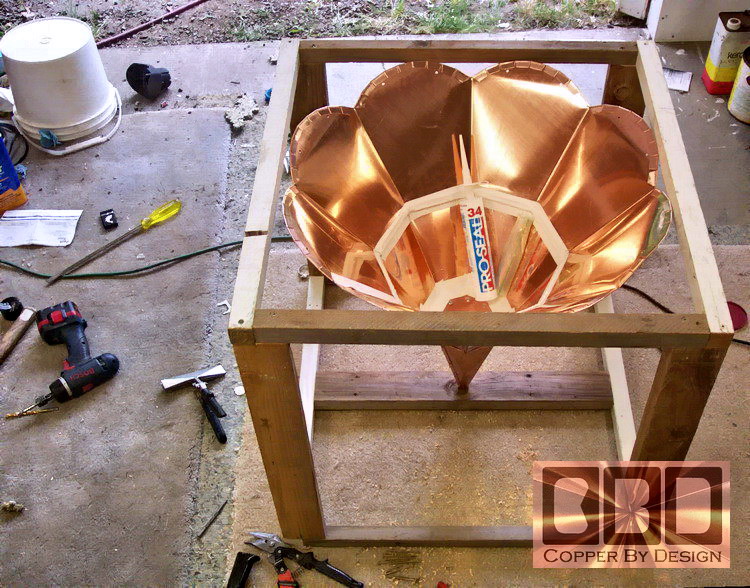
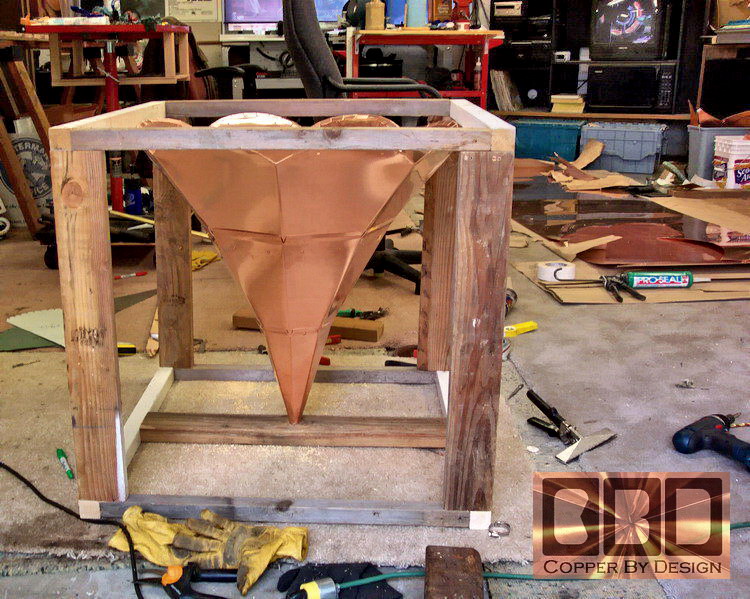
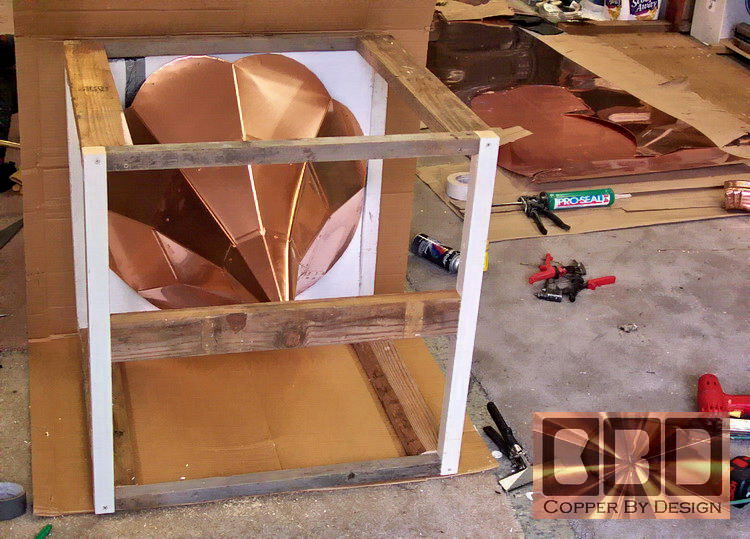
Thanks. It was good working with you. Below
are more pics of its development. Enjoy:
|