|
|
My First Copper Chimney
Caps |
|---|

|
|
Company Profile |
|
Roof Caps |
|
Chimney Caps |
|
Scuppers |
|
Gutters |
|
Shipping |
|
Contact Info |
|
|
My First Copper Chimney
Caps |
|---|
|
|
Company Profile |
|
Roof Caps |
|
Chimney Caps |
|
Scuppers |
|
Gutters |
|
Shipping |
|
Contact Info |

.
|
Below is a few more examples of my first custom copper chimney cap designs I had made. There's also links to see more photos and details w/price breakdown of the parts used for most projects. I have made numerous improvement to my chimney cap fabrication since then. Most important was moving from this frail copper gutter screen to a much stronger stainless-steel spark arrest screen with a larger hole patern. Note: We do not intend to be misleading with the prices listed on these web pages for chimney caps made prior to 2006, when metal and fuel prices had doubled that year, so I had to raise my prices as well. So keep in mind how the prices listed may not reflect the current cost. They are here as a guide to see what those had cost at that time. These also show how I had made lots of improvements since then. I use a thicker 24oz & 32oz copper now for these kind of projects. Where the standard in the industry is still just 16oz copper, which are usually soldered together, which is insane! |
.
|
Silbernagel's 20oz Copper Chimney Cap |
|
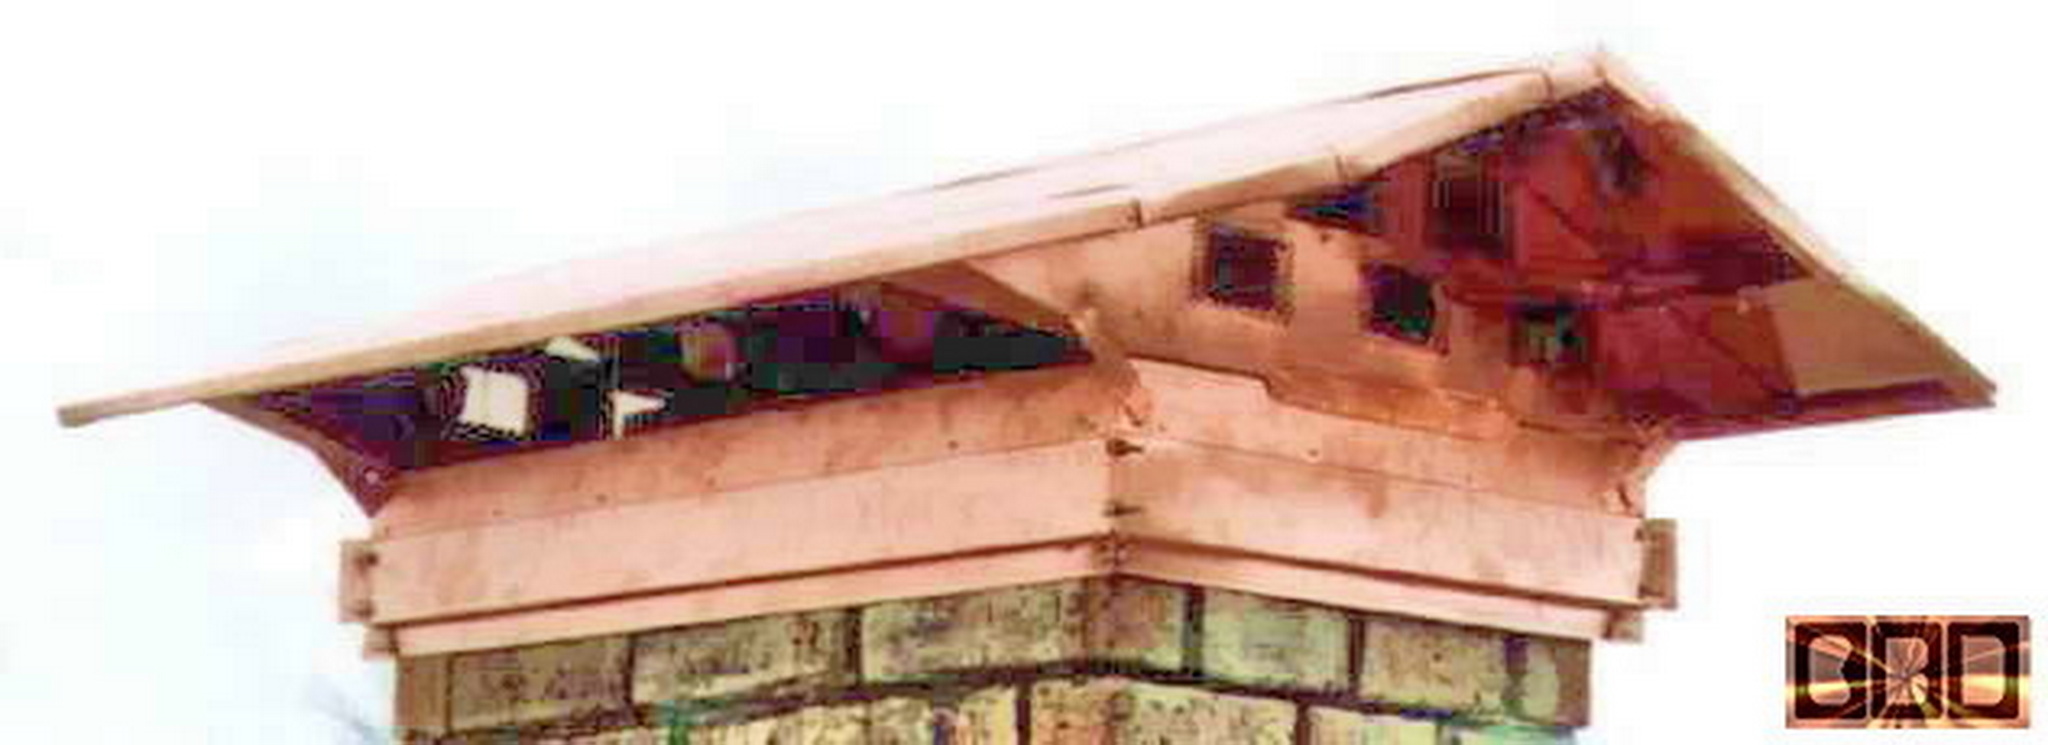
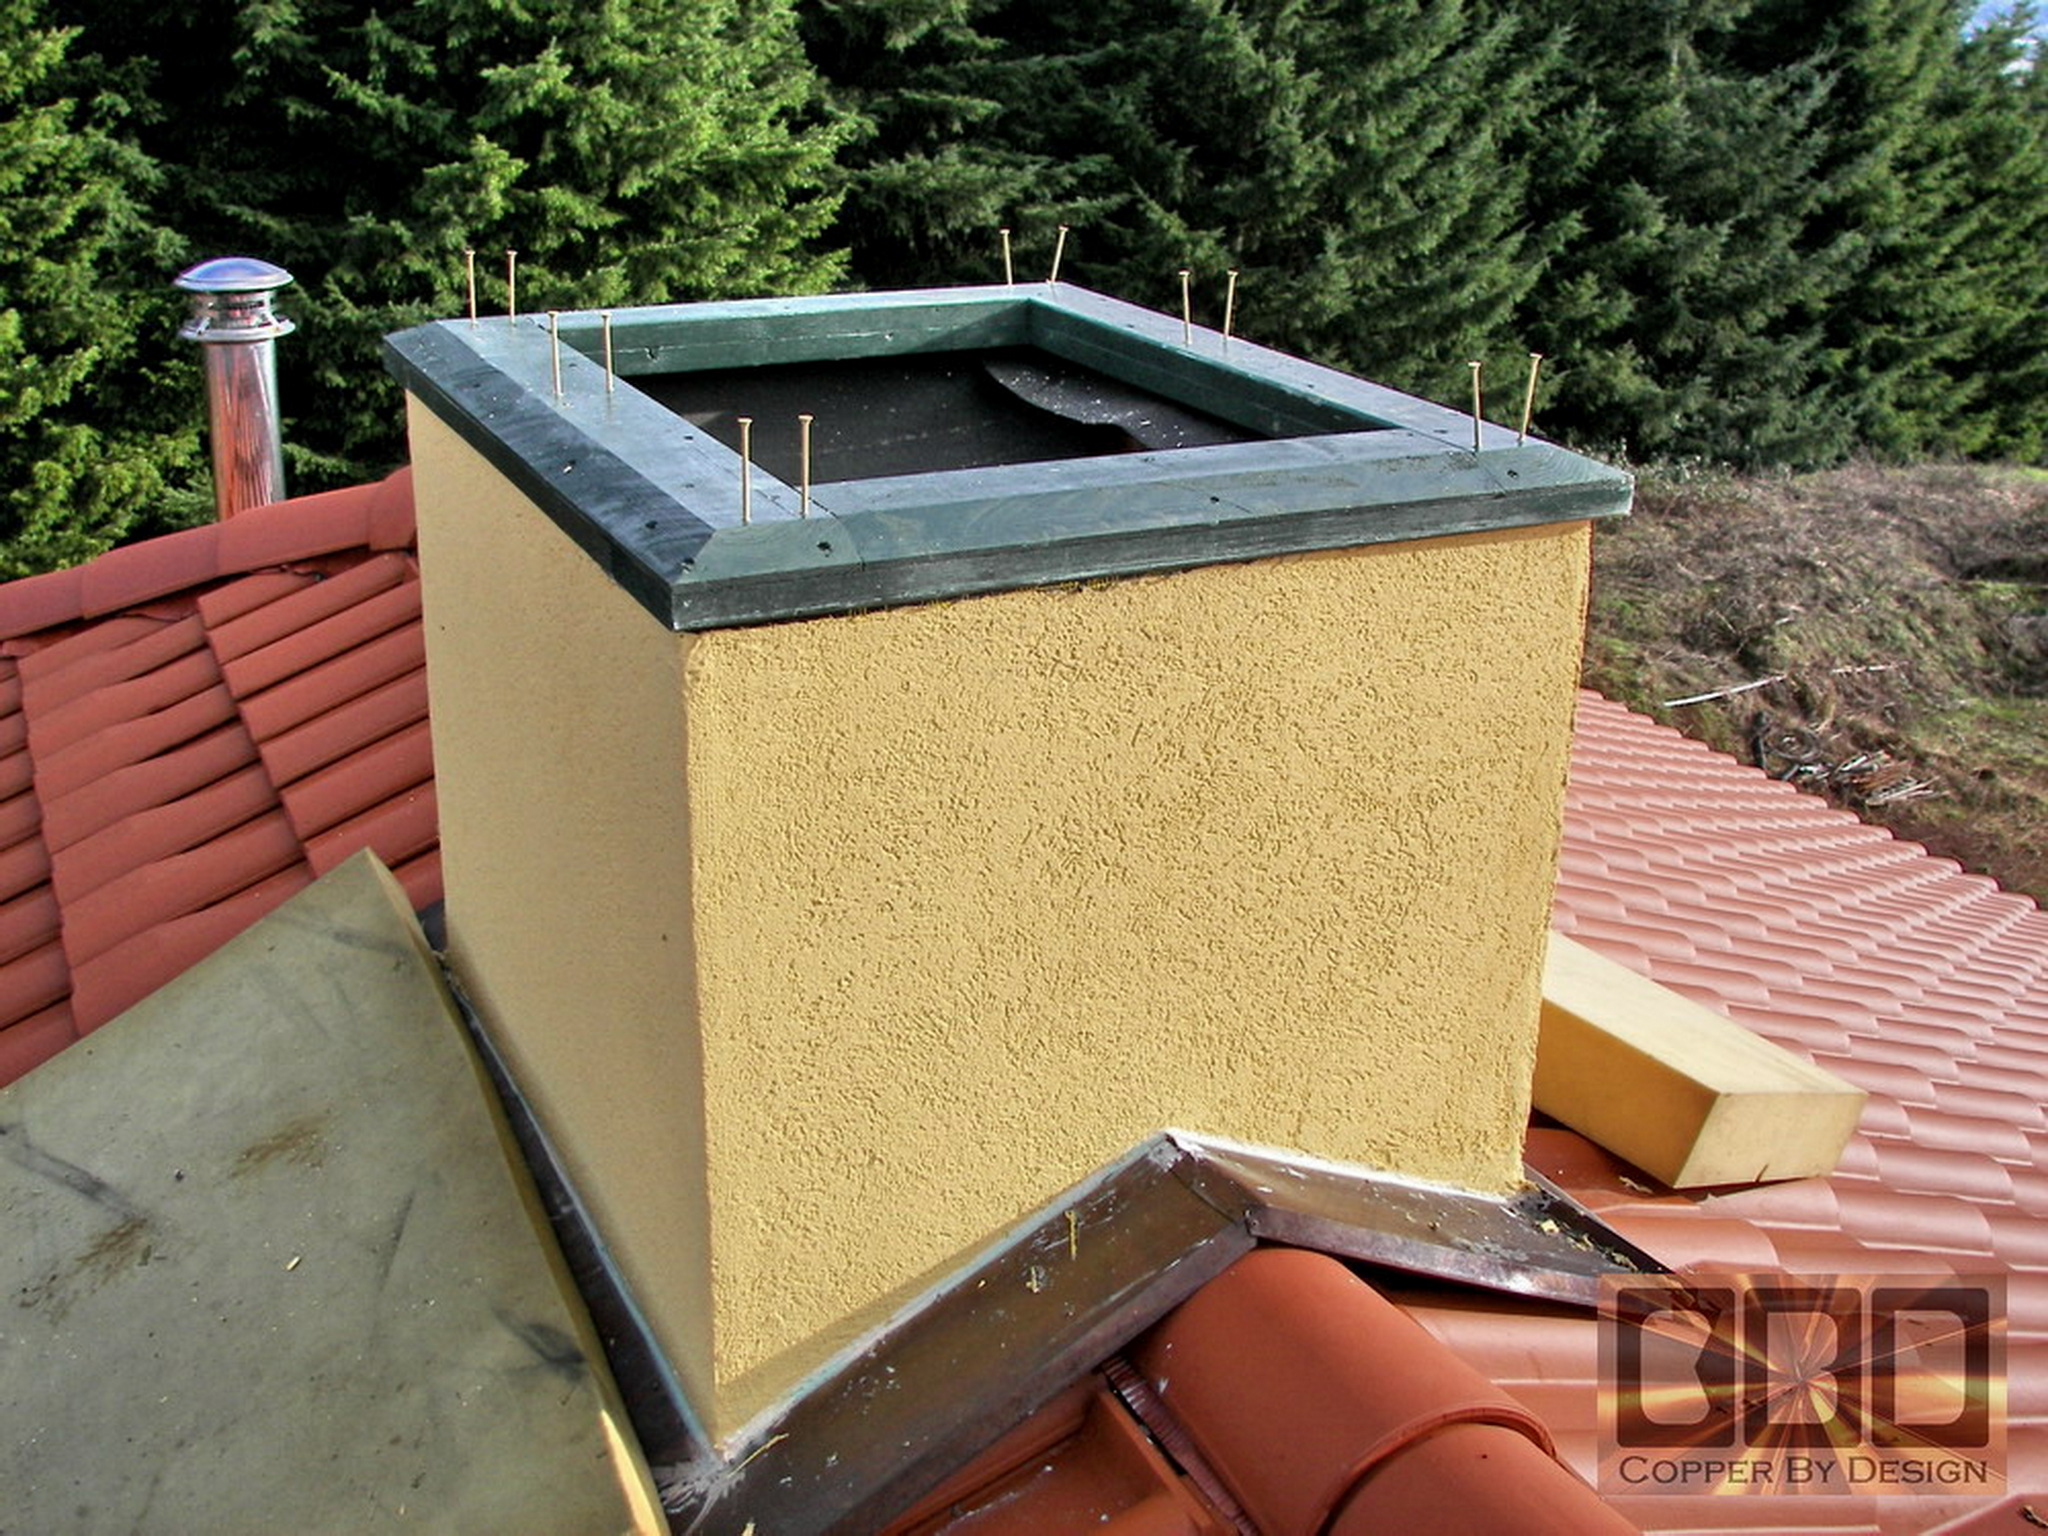
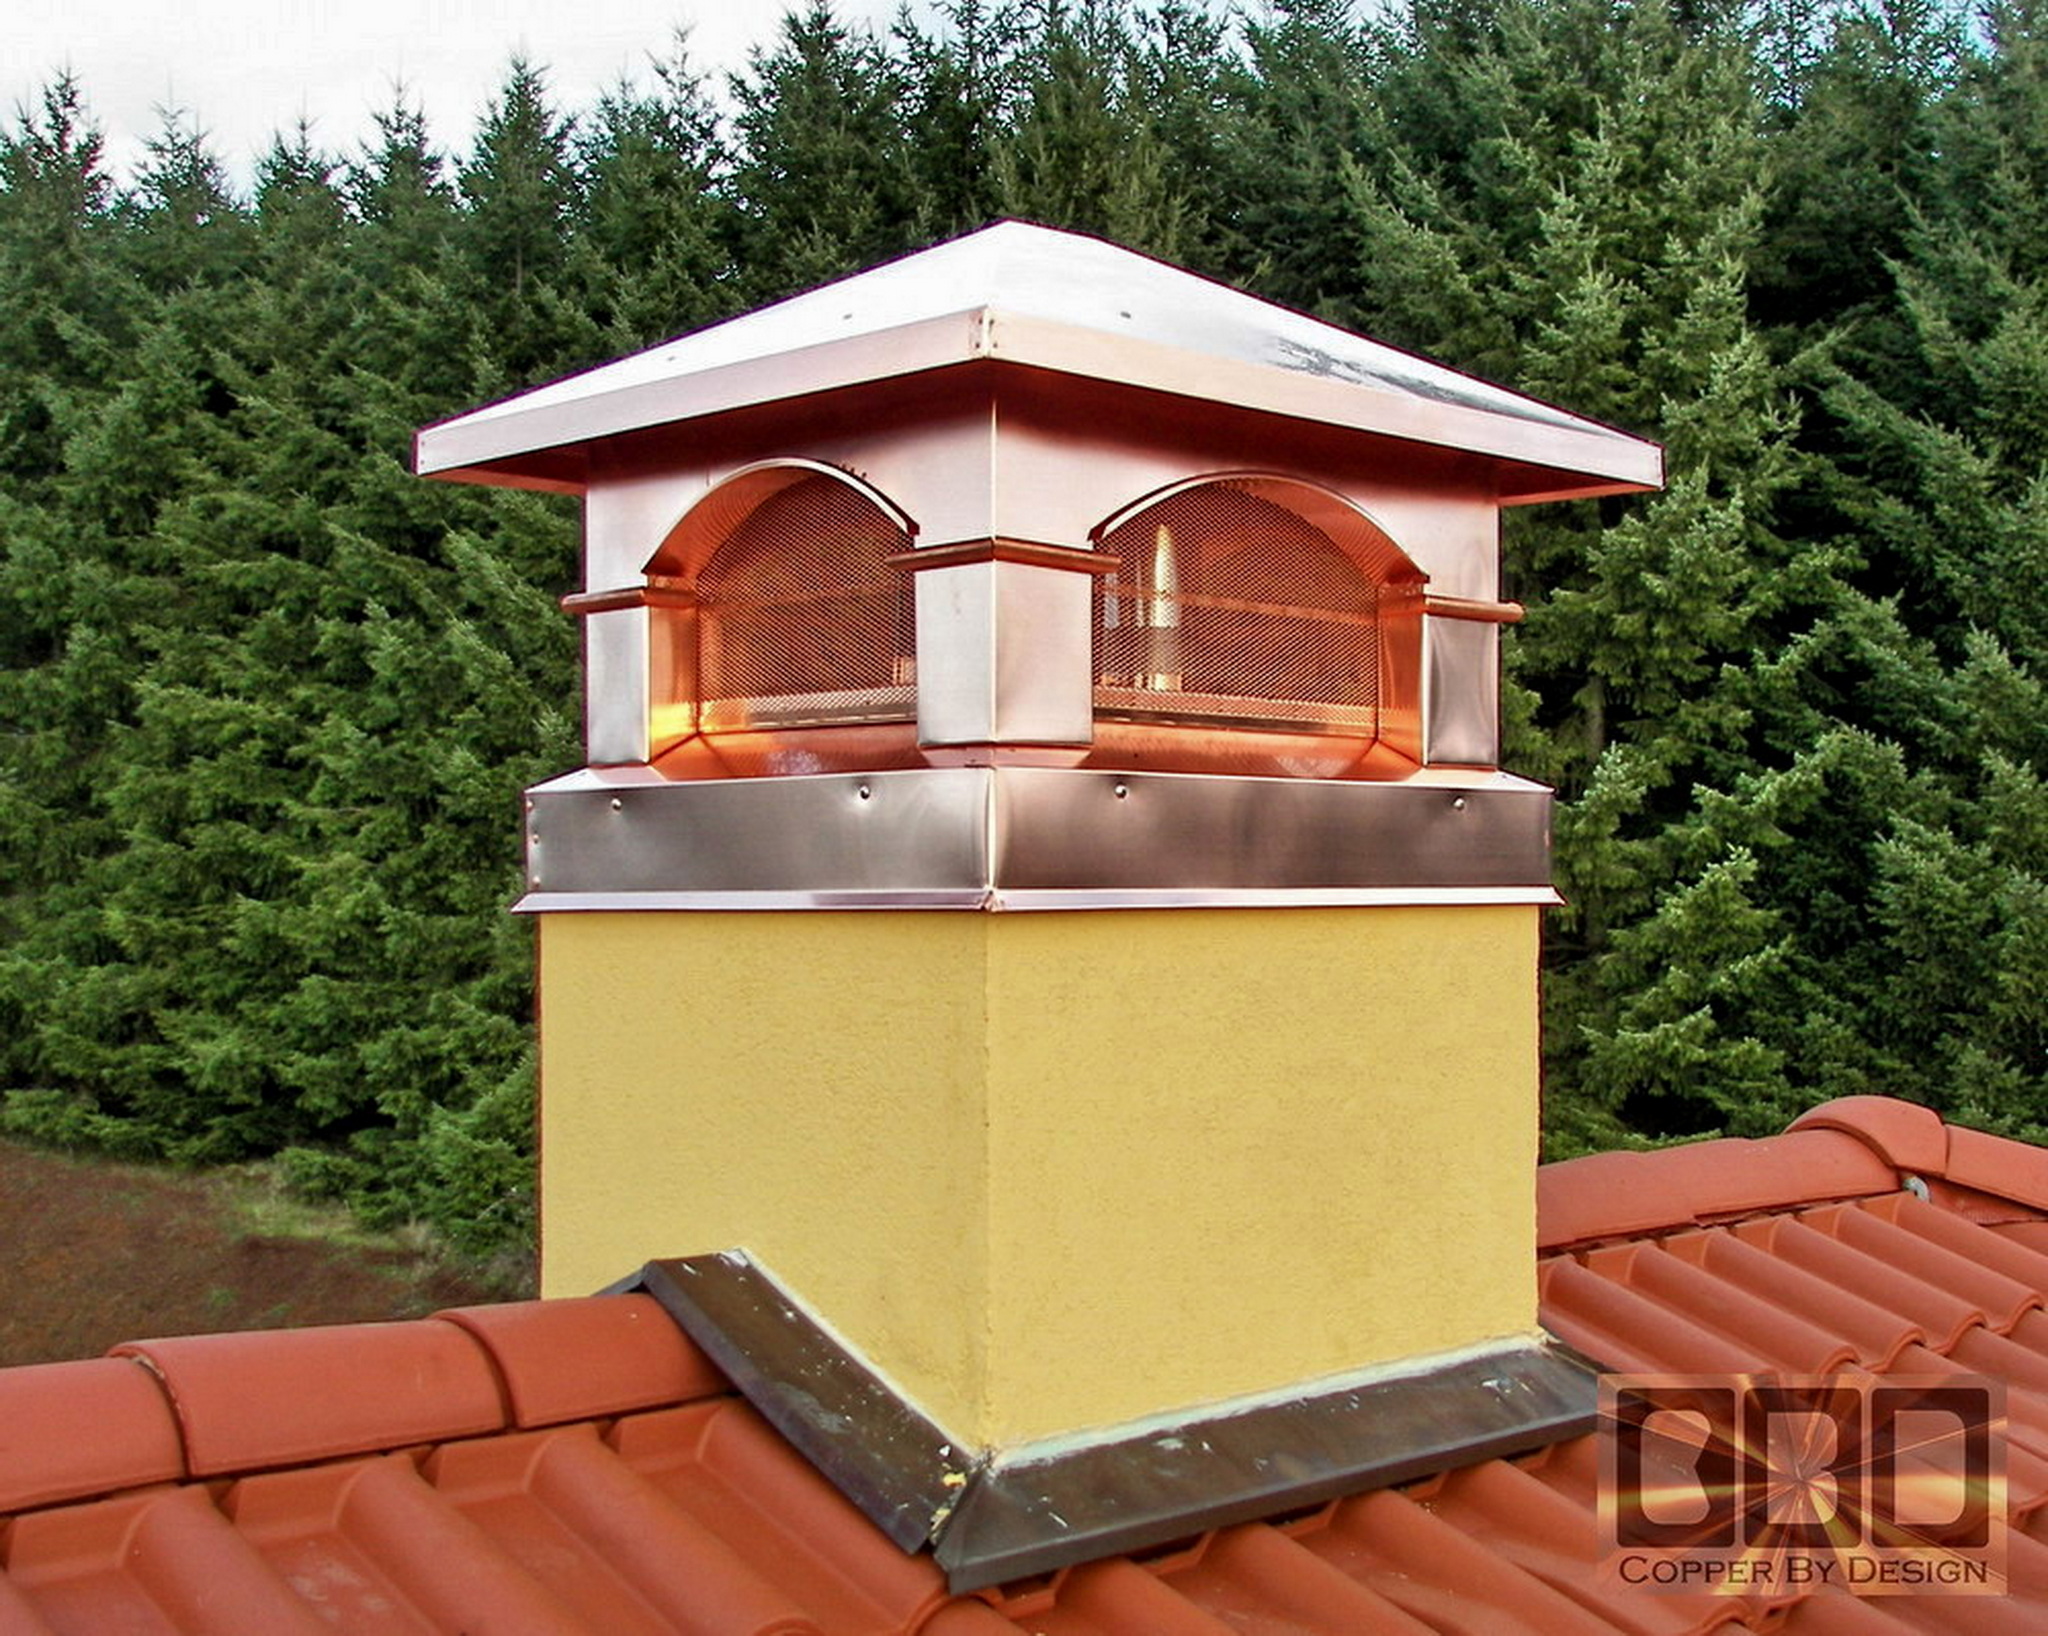
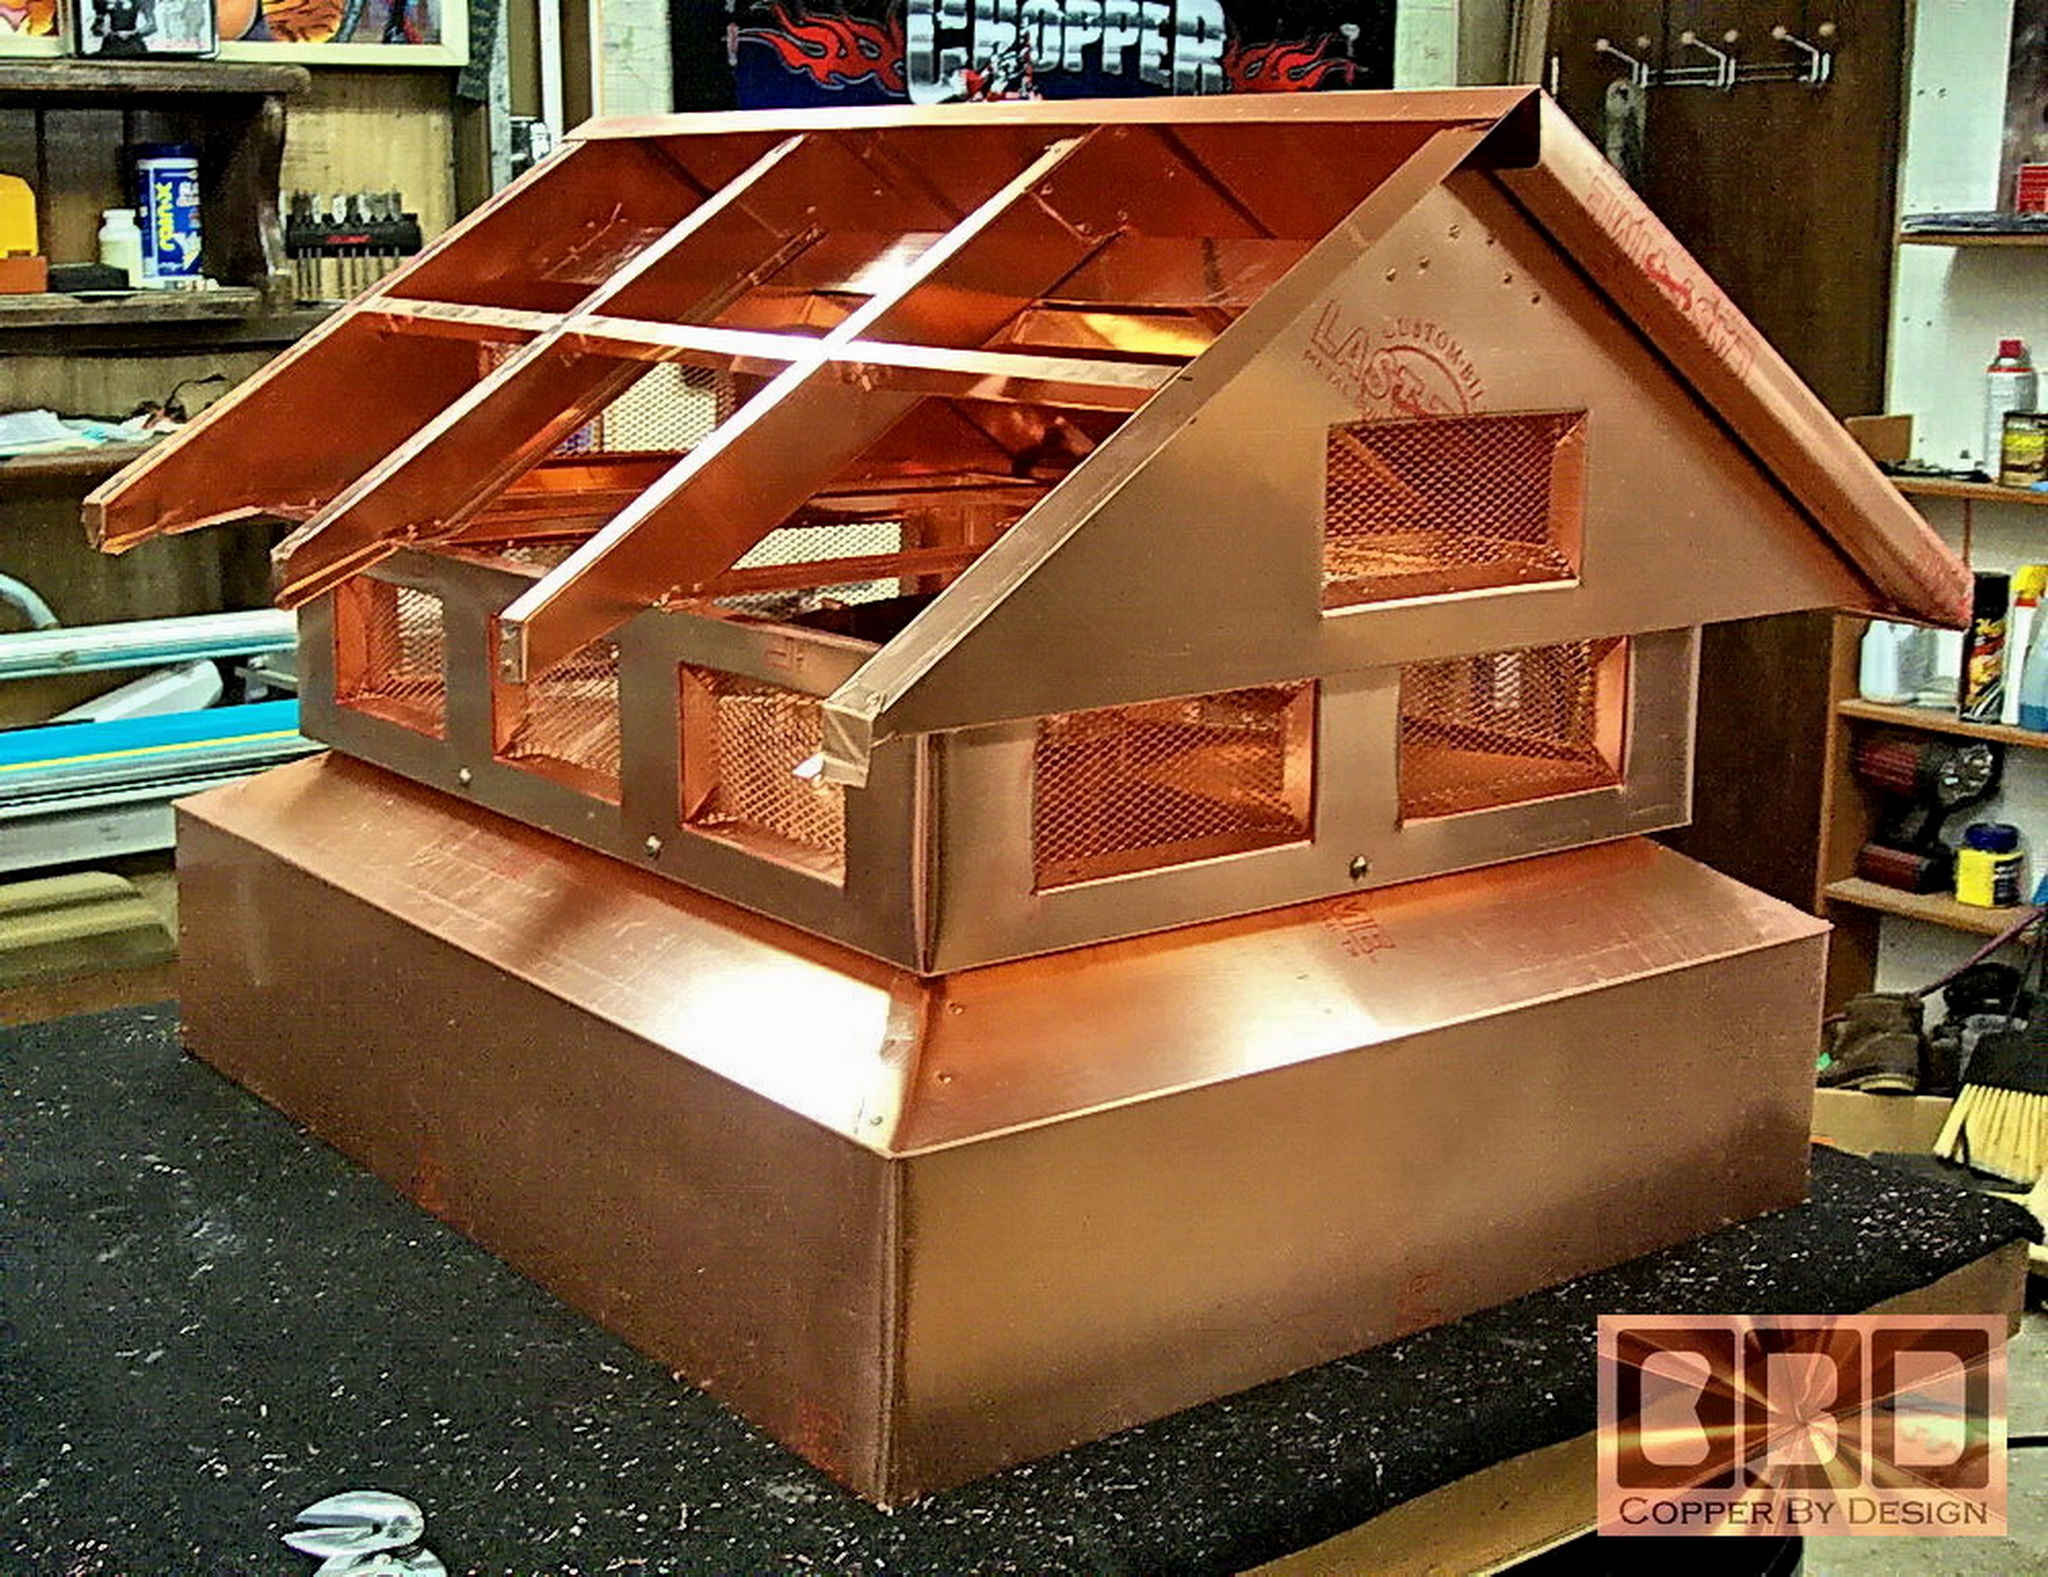
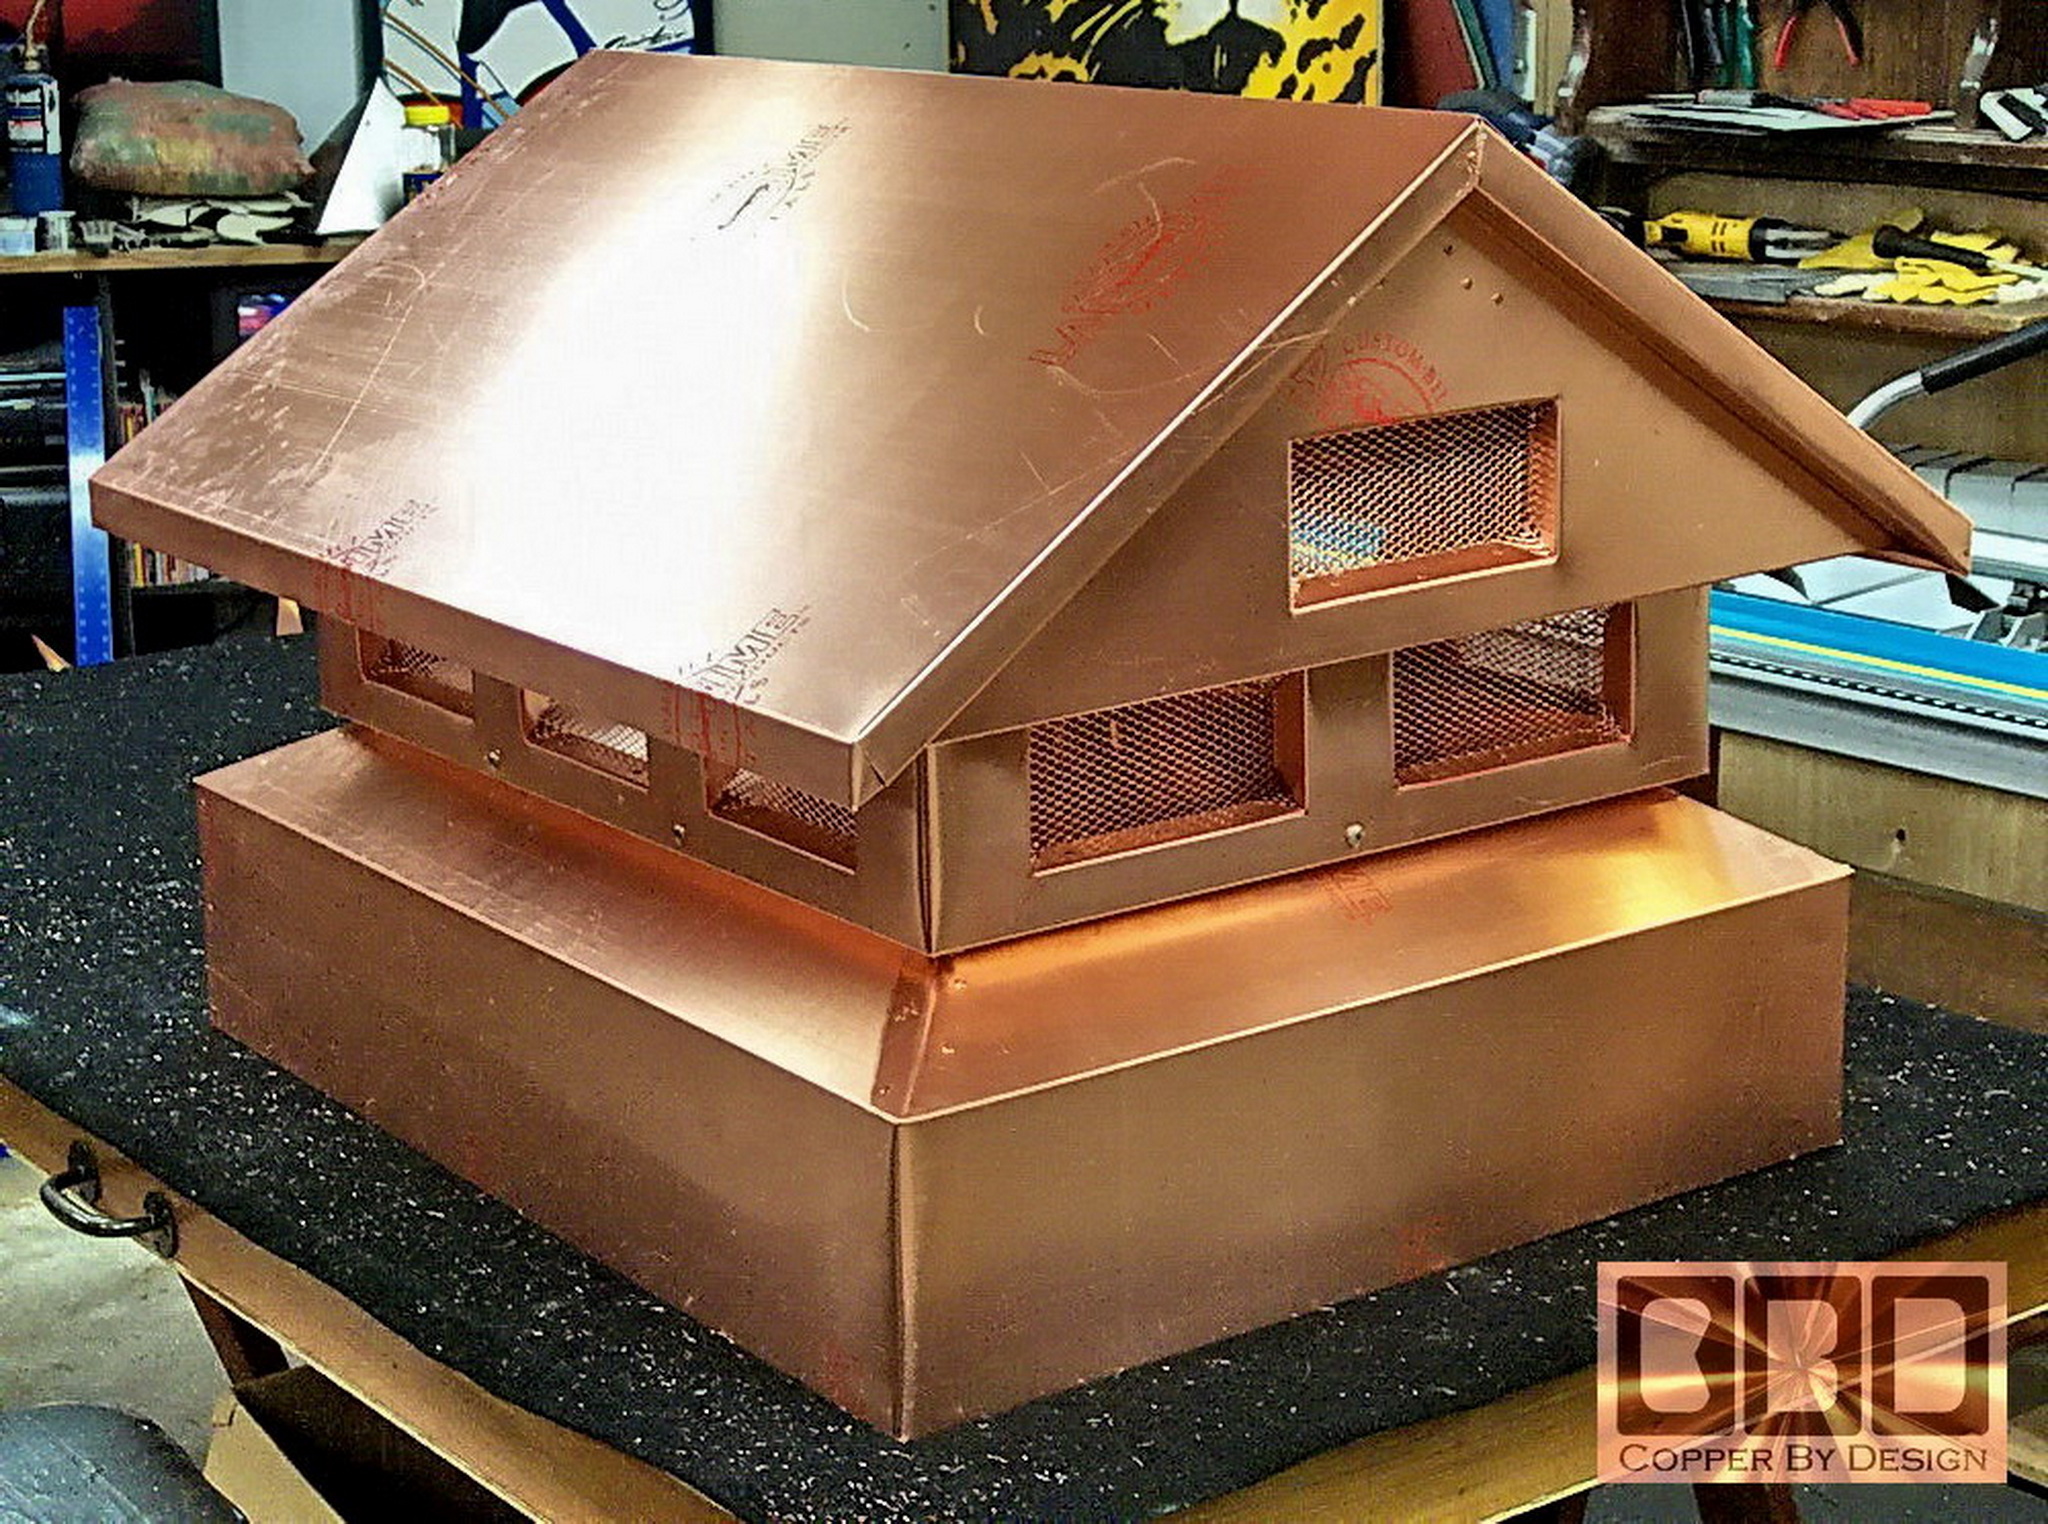
This chimney cap was built for a local client named Tom Silbernagel in Dundee, Oregon. It has a 6/12 pitch hipped roof to match the house. The base is 34" x 40". There is a 4" eave past the base. There is an inner pan to shed rain that might blow in through the copper screen.
I made this solid wooden saddle for the chimney cap to rest on. It was made of 8 overlapping pre-primed 5/4 x 6 boards. They are screwed and glued together with Gorilla Glue. The boards were angle cut at the top for a more gentle support under the copper base and to over hang the stucco.
I weighed the cap to see what the actual amount of copper used was. Without the wood it weighed 81.5lb. Which divided by 1.25 equaled 65.2 square feet of 20oz copper in this chimney cap. He got a good deal on the copper screening, since it does not weigh much, but takes special care to install. We multiplied this amount by our base rate of $25 which totaled $1,630 + $150 for the larger wood frame, and another $100 for the upper wood frame. Installation was an additional $150. I had also made some custom copper flashing for this client several months earlier. |
.
|
LEA Design's 20oz & 48oz Copper Chimney Caps |
|
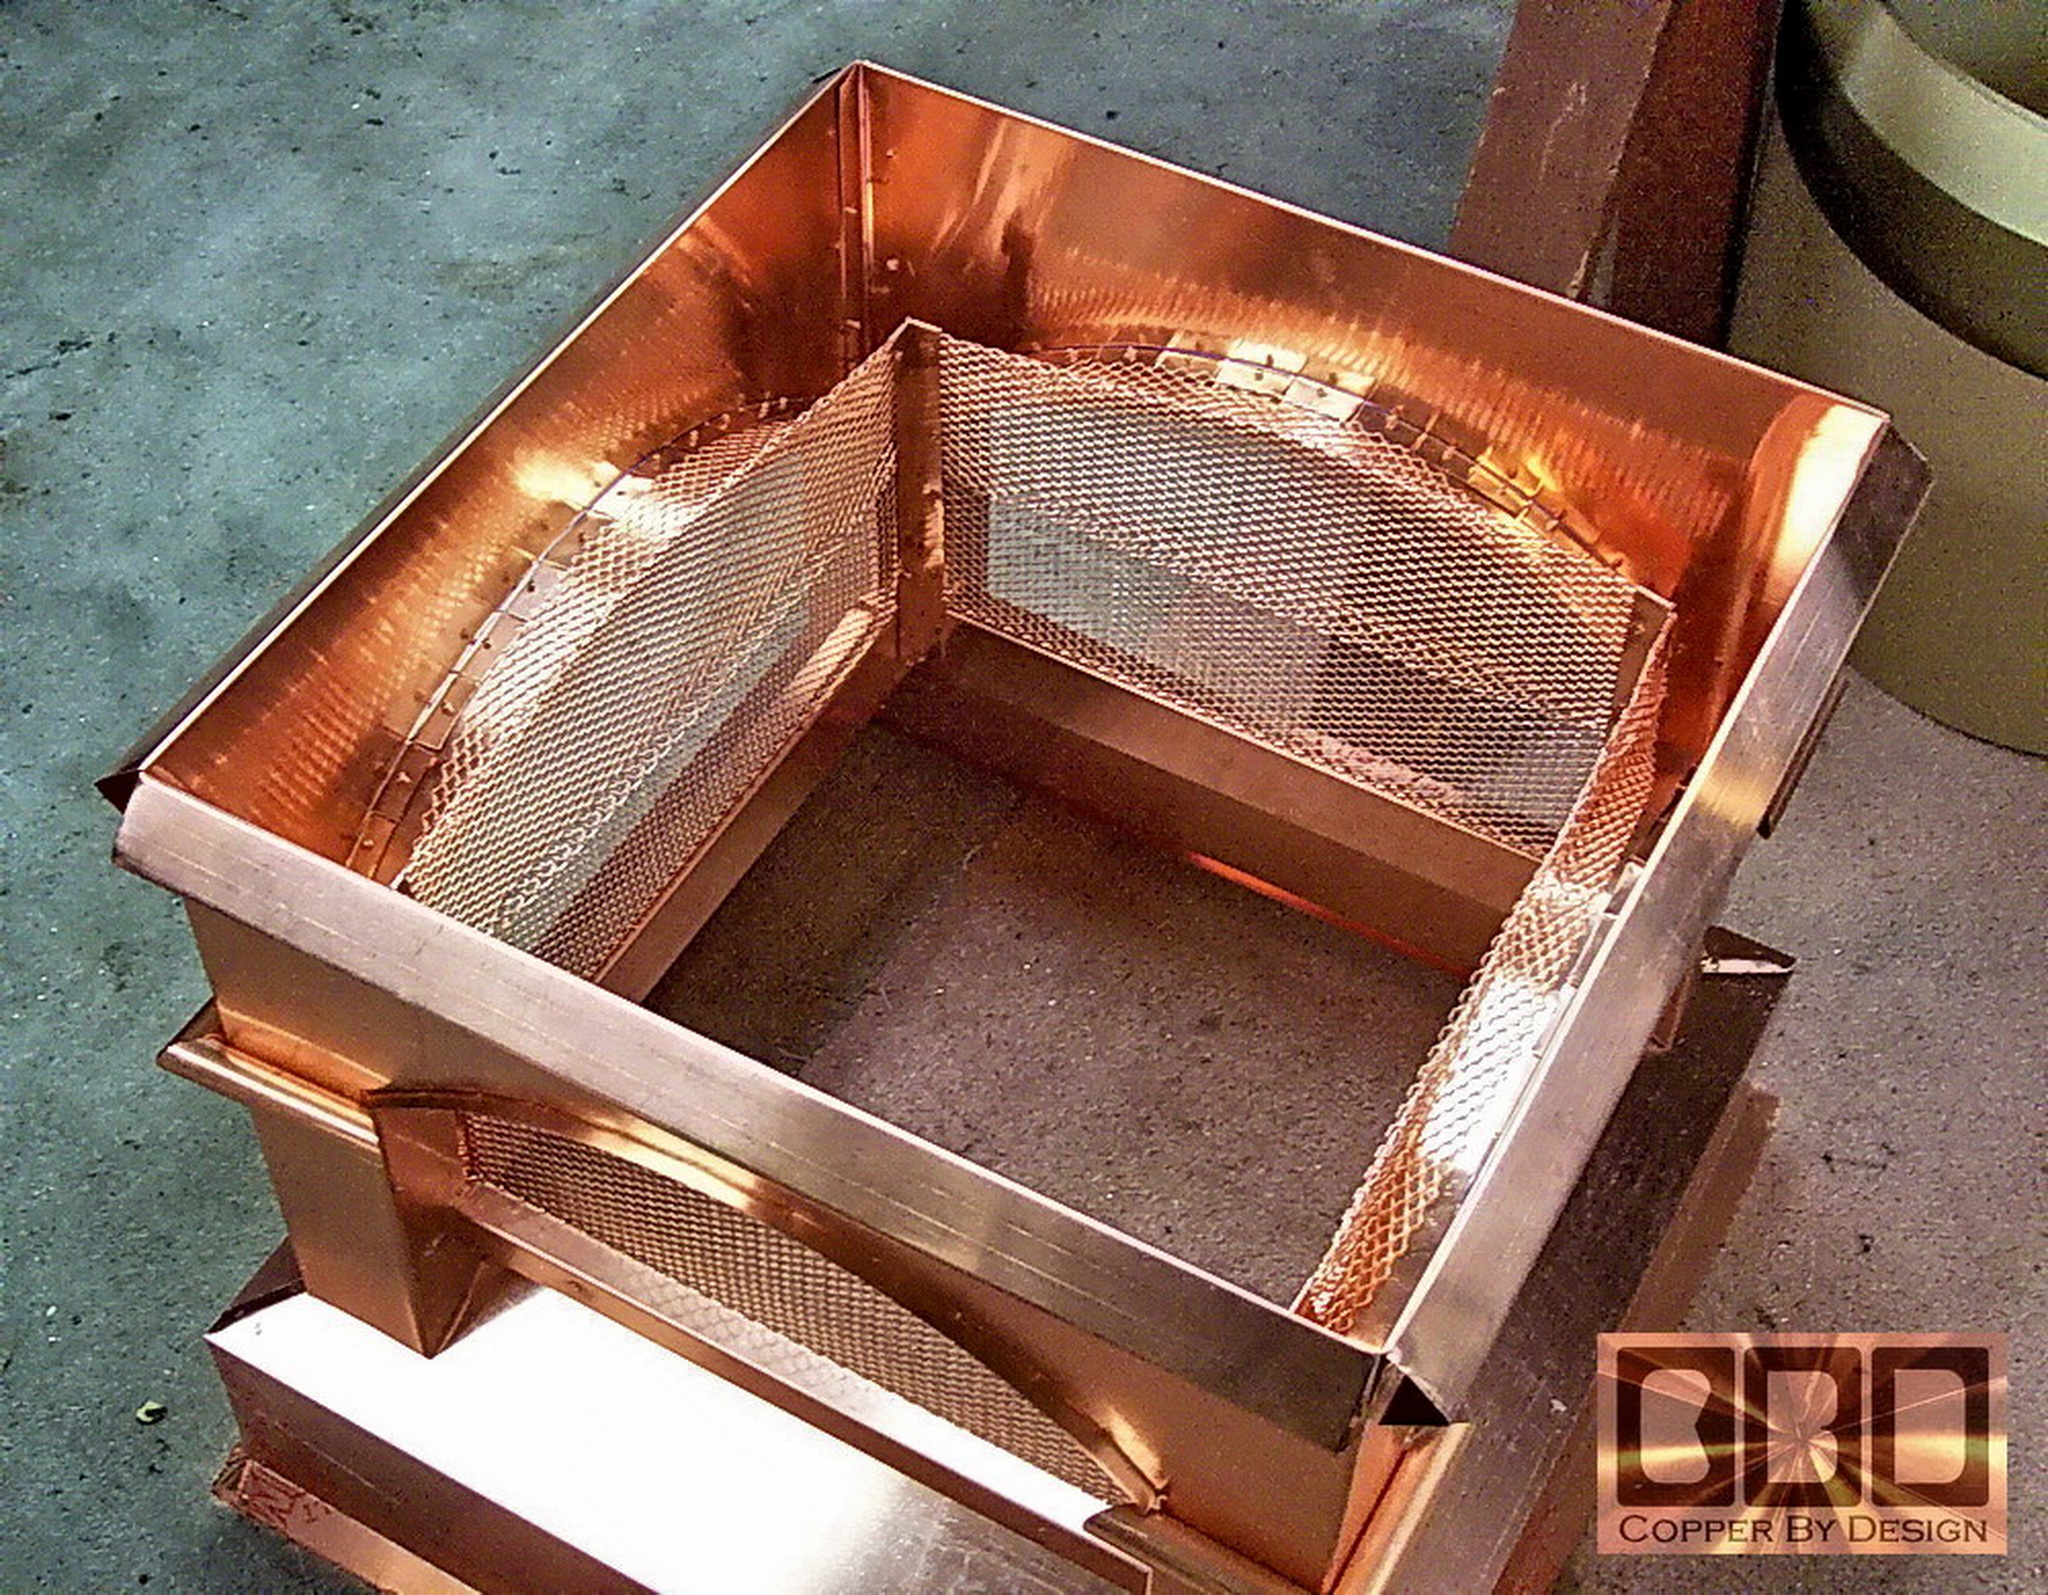
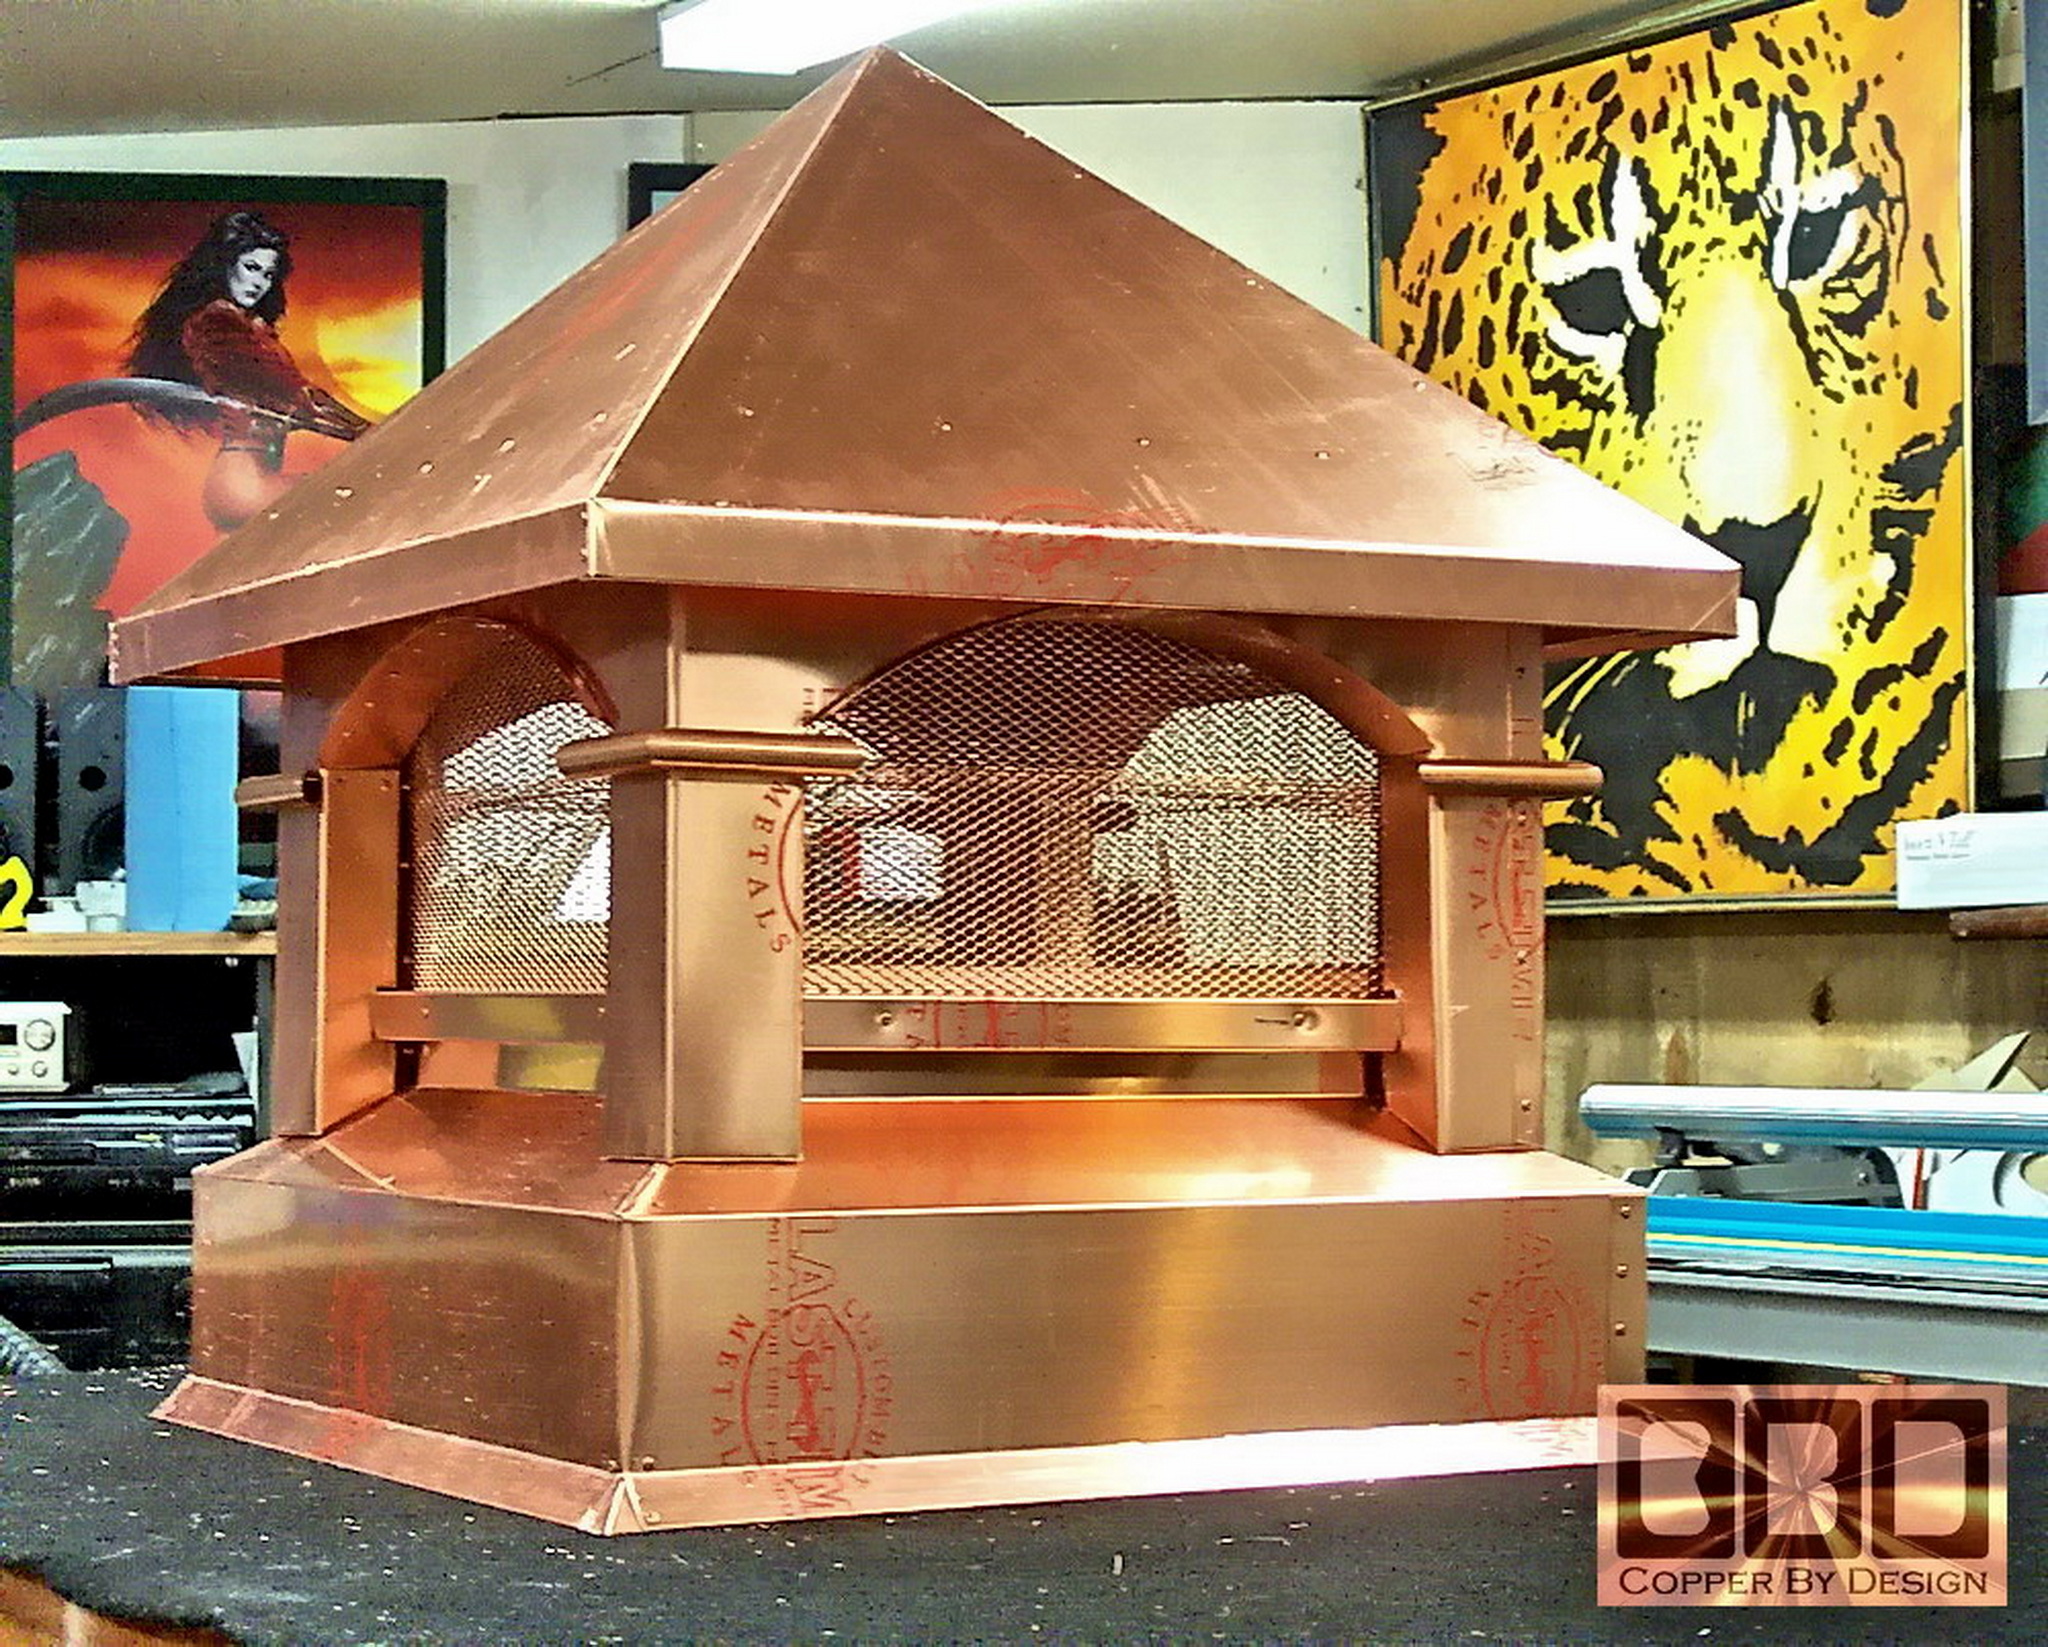
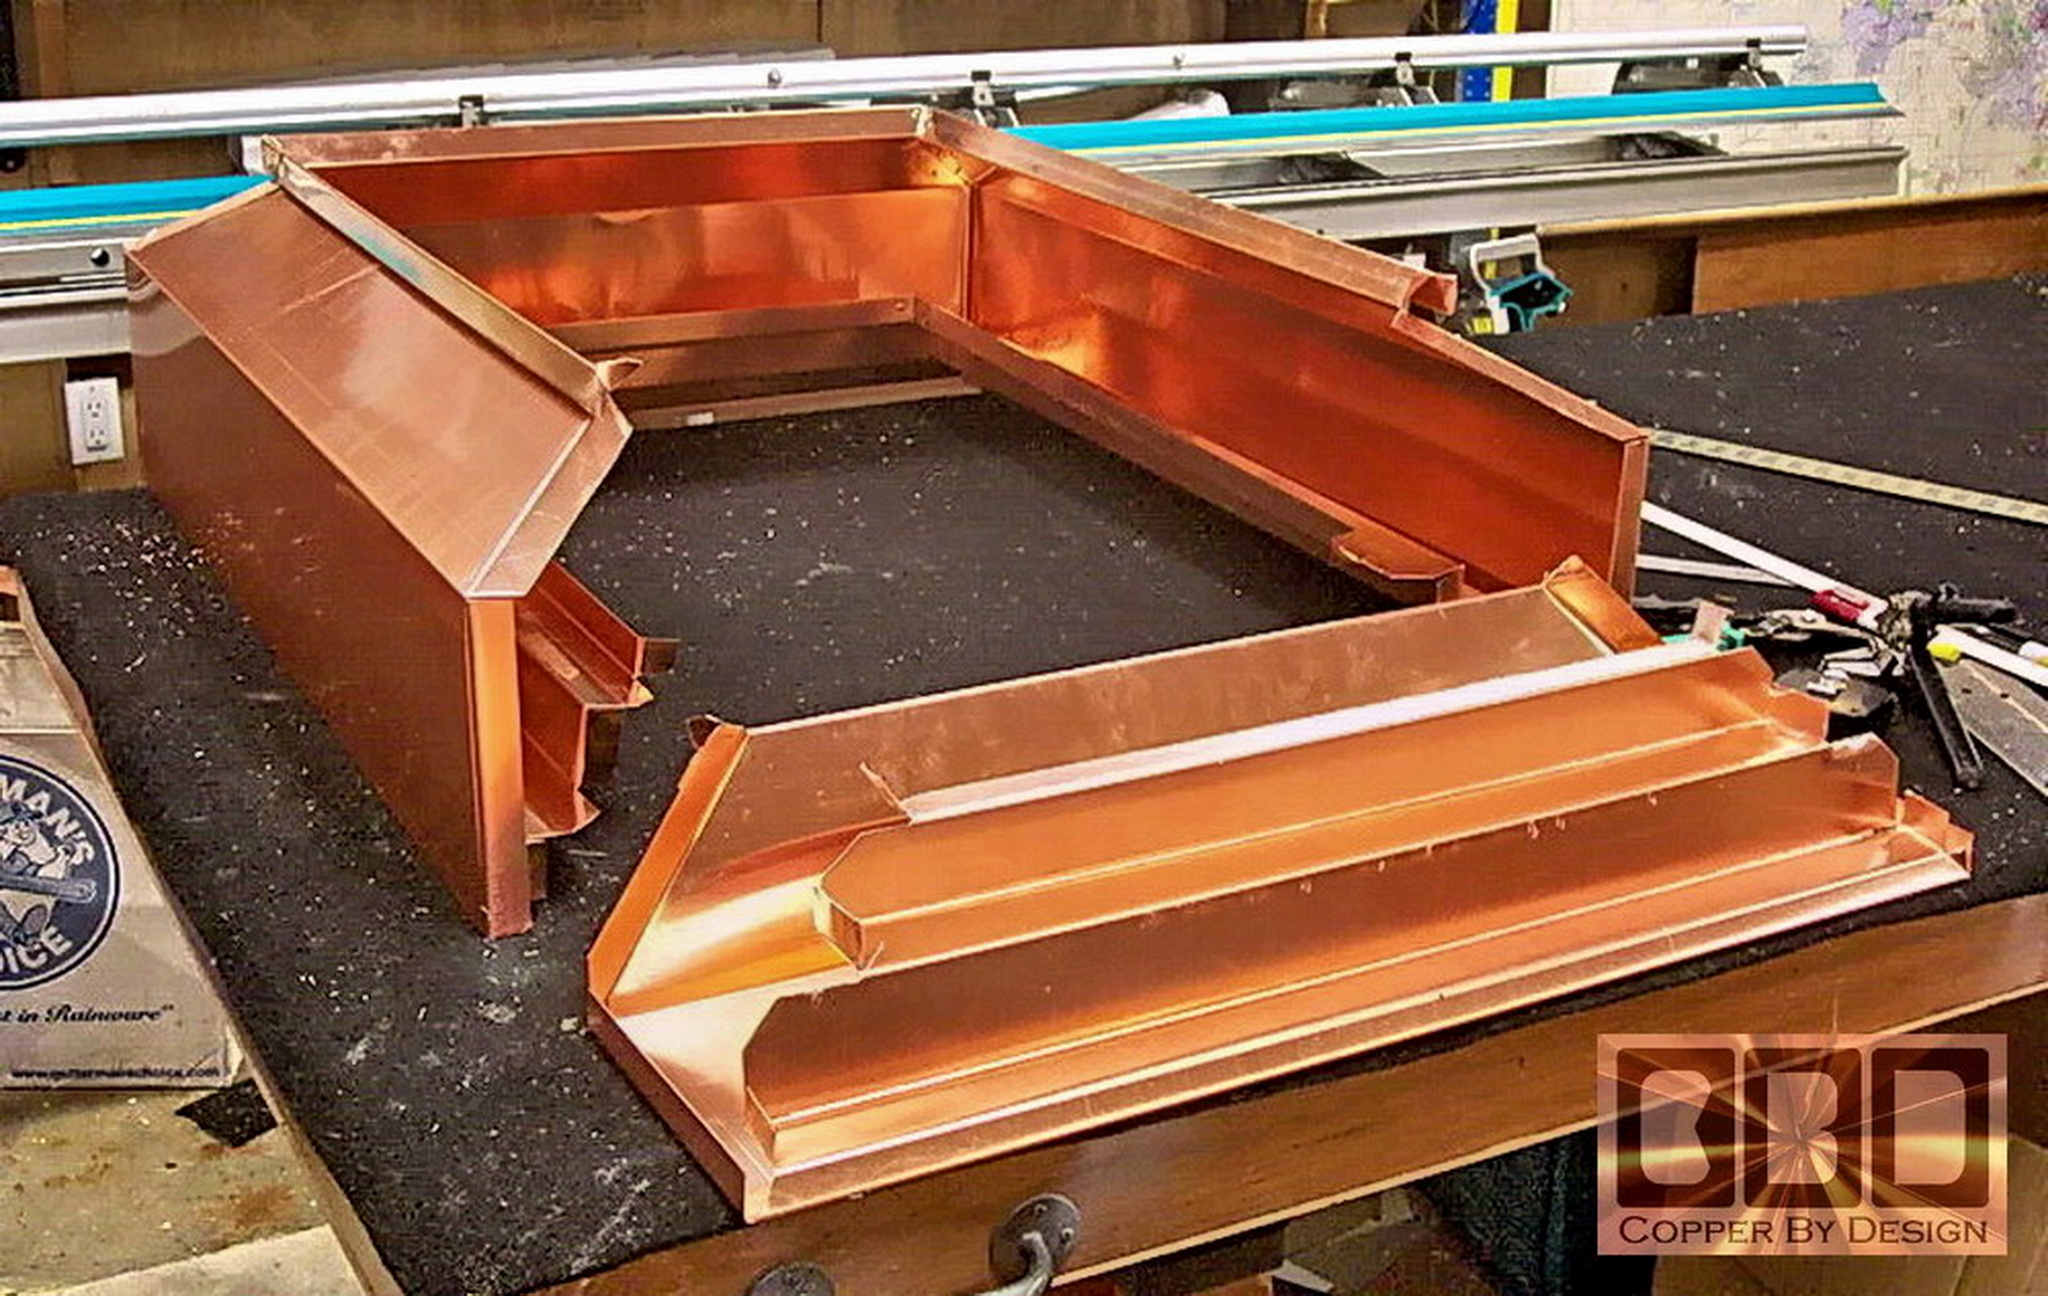
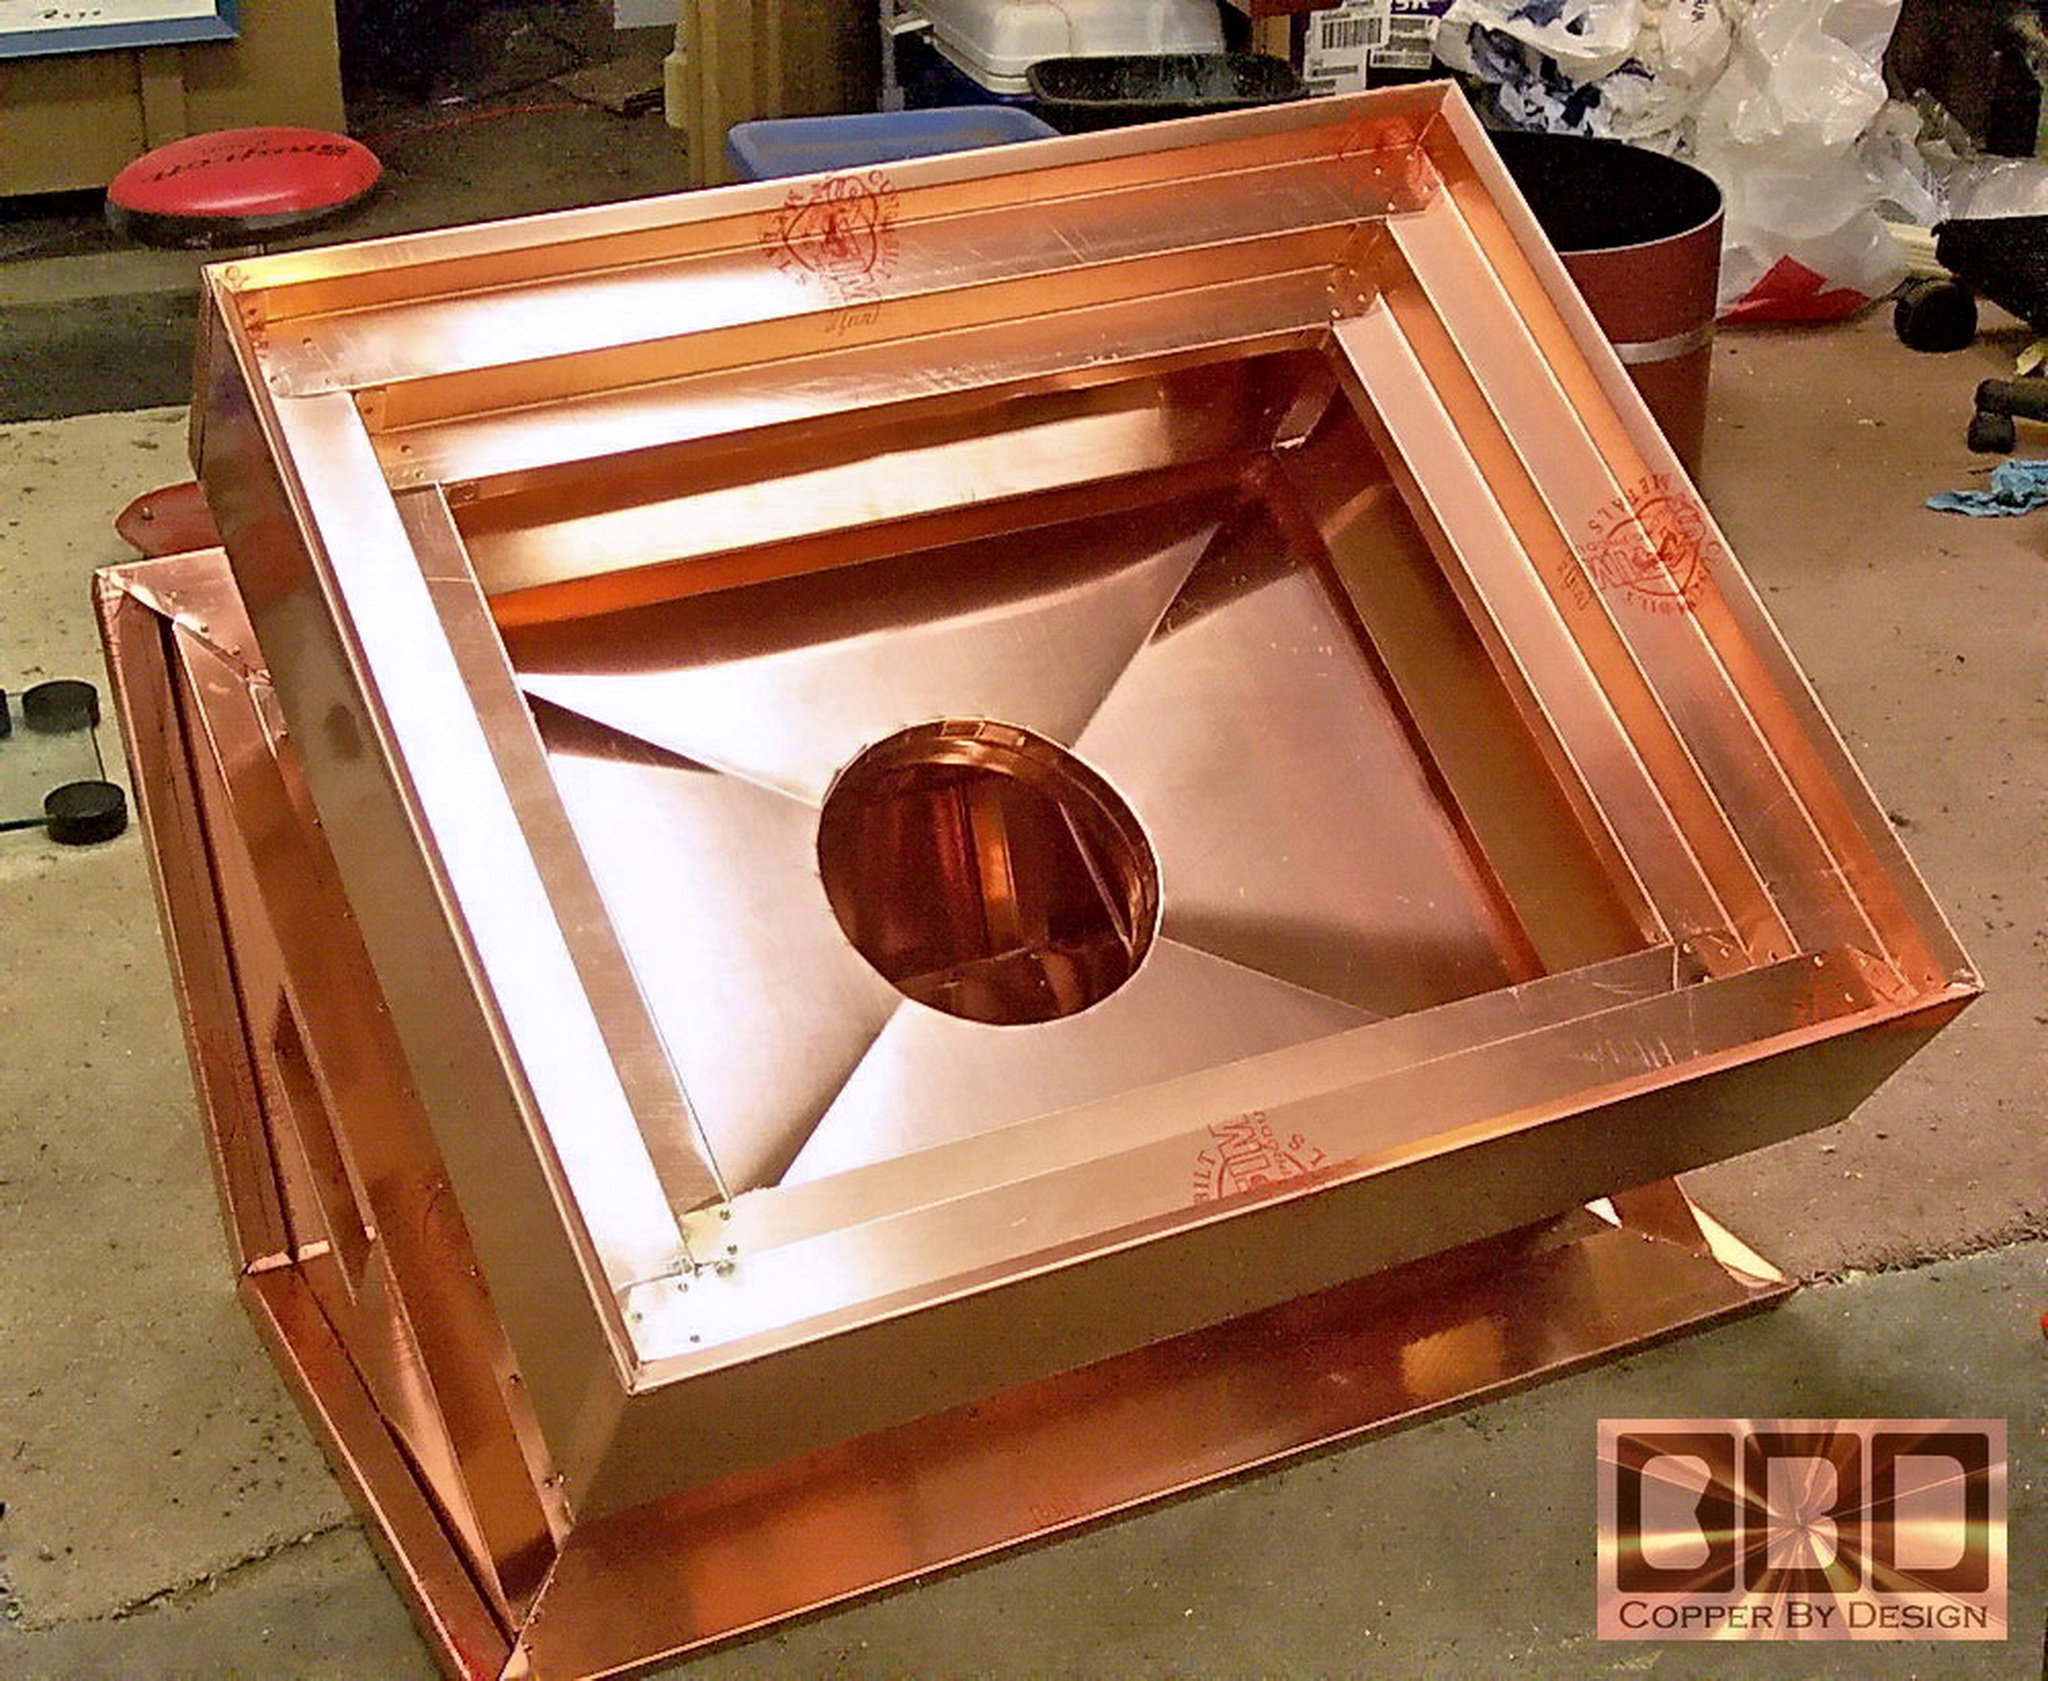
This was the first Tuscan archway style chimney cap I built for a non-local client Lea Pascoe of LEA Design in Santa Ana, California. This chimney cap is designed to go over a stucco chimney with a metal chimney flue pipe in the middle of a red tile roof. The base shown in the first photo is 25.25" x 26.25" wide not counting the bottom drip-edge flange. It is made with one piece of copper folded over at the corners with a single overlapping seam on the back corner. The corner roof support frame was also made from a single sheet of copper with only one seam for added strength and a smooth clean look. It weighed about 49lb with the screening installed. This had taken over 3 full days work, plus the time to build the custom crate and wrap it for shipping.
The roof for this cap is a 10/12 pitch pyramid style hipped roof is 28.5" x 30" wide. I had given Ms. Pascoe good deal on this set of chimney caps for helping me come up with such unique attractive designs. I had used a copper gutter screen to span across the exhause openings, but later found out there is a building code that states that a wood burning chimney need to have a spark arrest screen that has holes 1/2" wide and tall to allow small cinders and ash to escape. Fortunately this only had to exhaust natural gas, which has no ash or cinders. I would never use this kind of screen these days, since it is not strong enough. |
|
The LEA Design King's Crown Chimney Cap (1/06) |
|
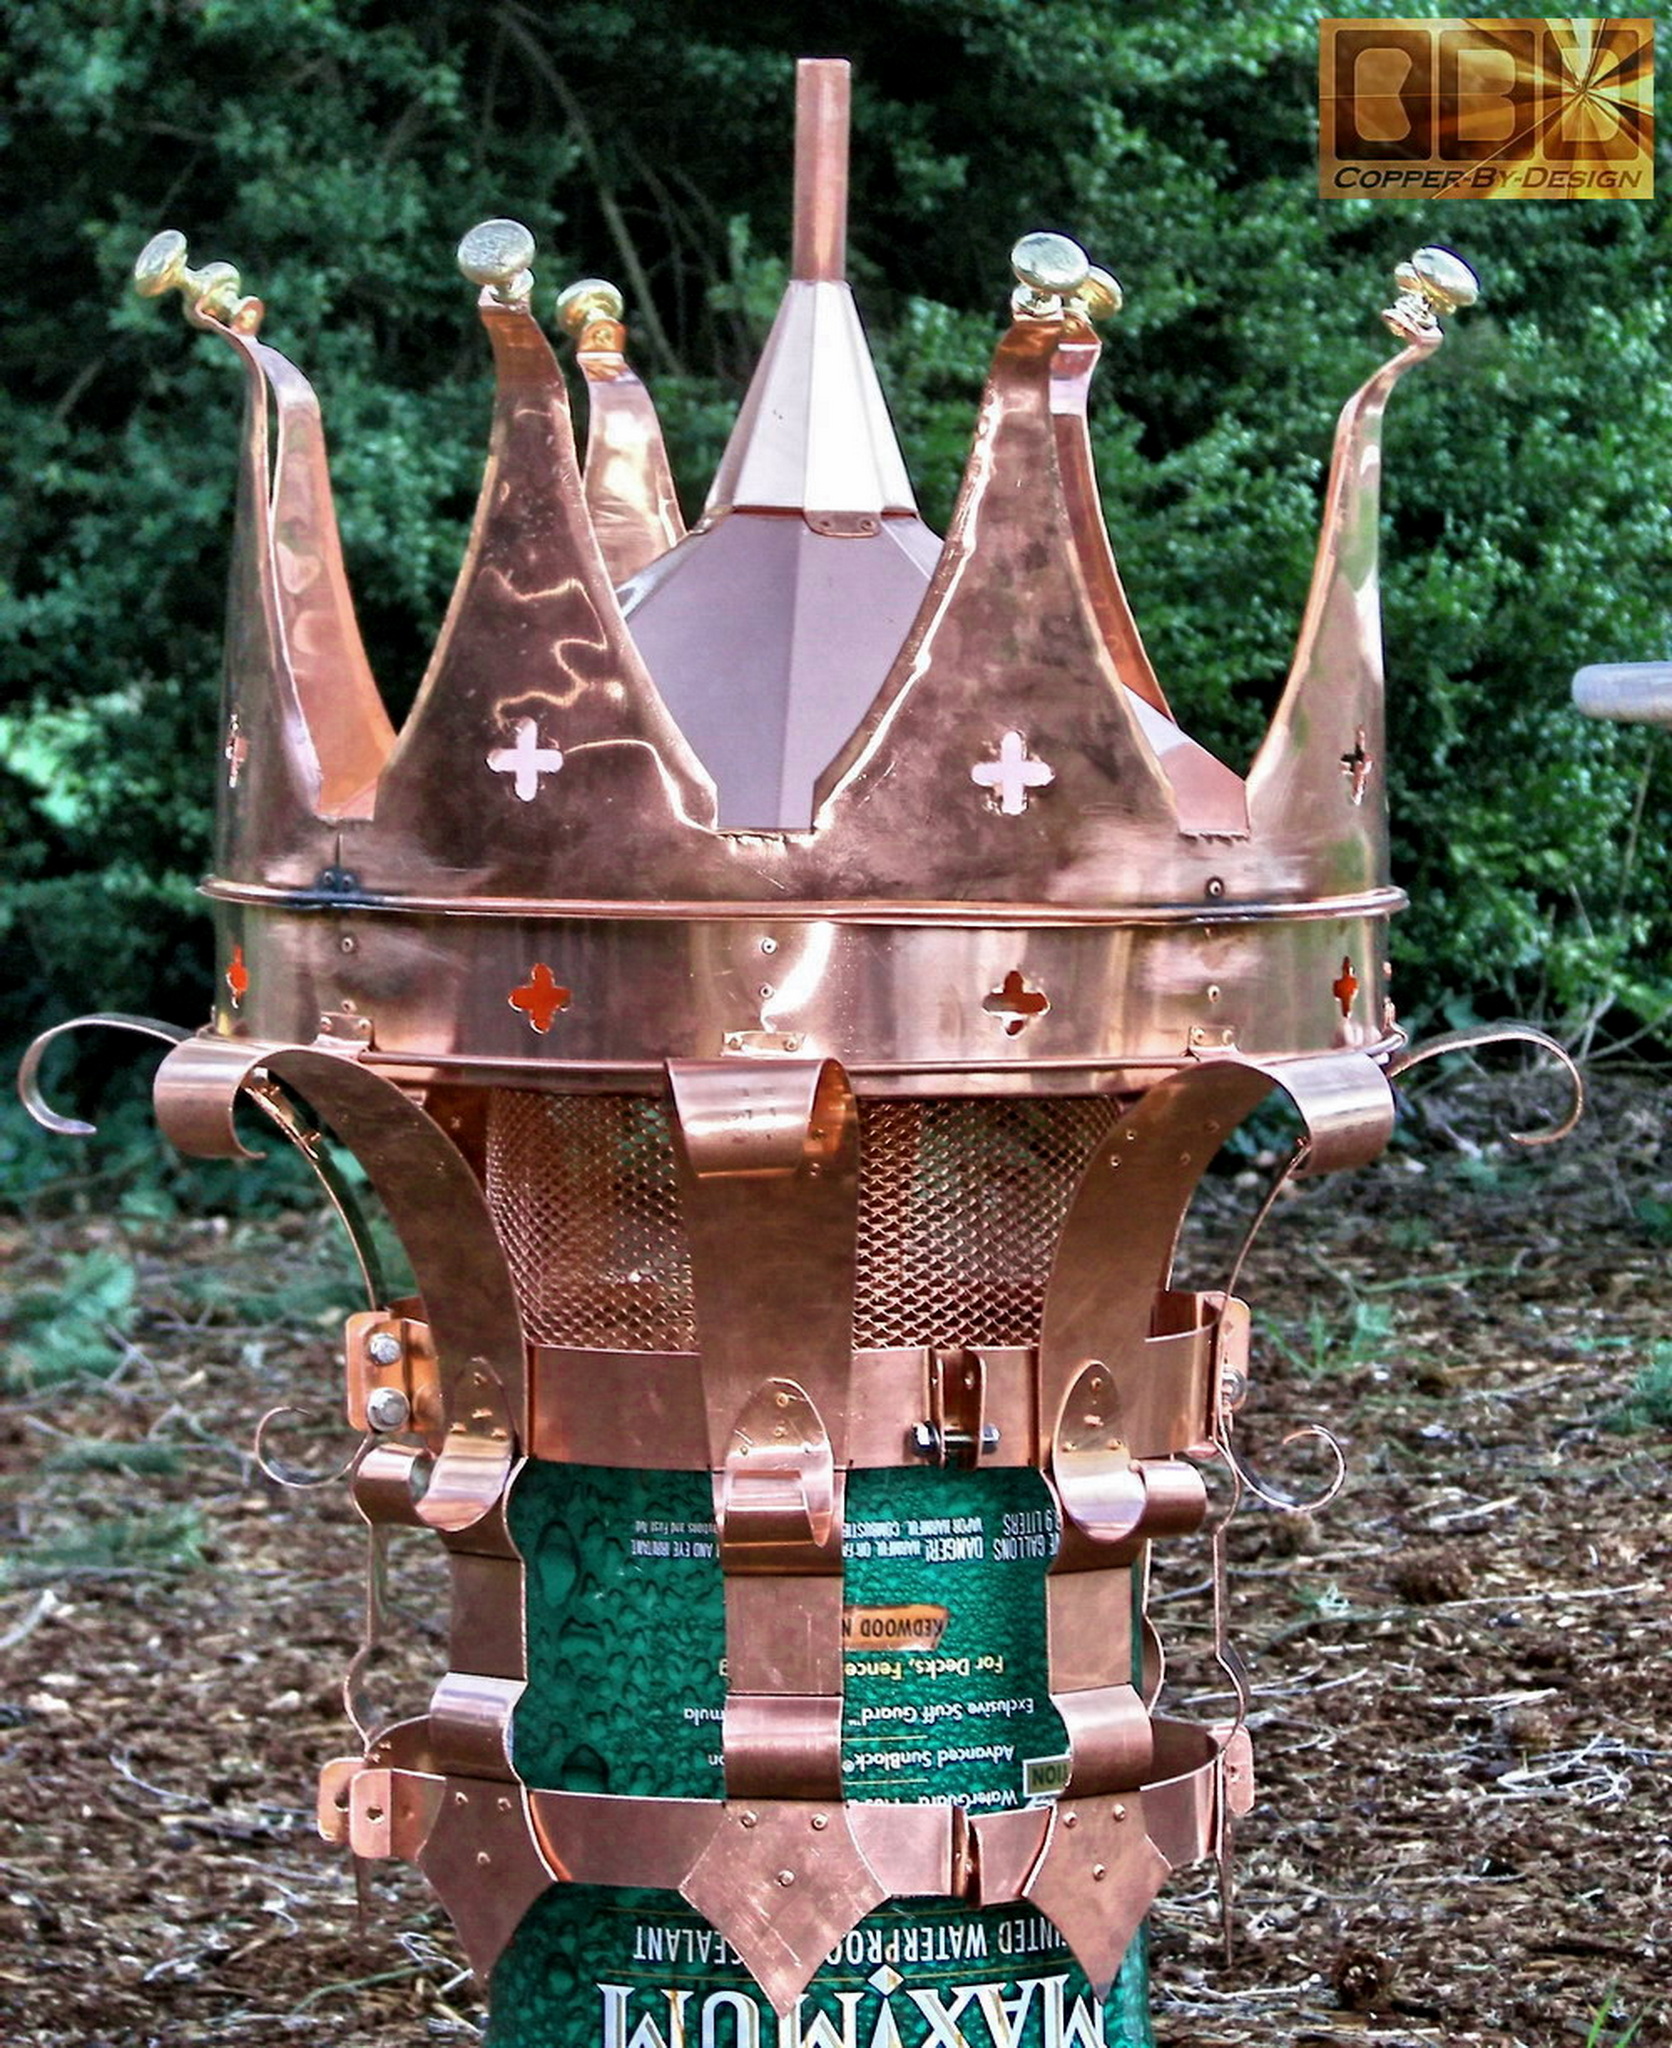
Here is the other chimney flue cap ordered along with the above mentioned cap. It was designed by LEA Designs to looks like this King's Crown style lamp photo above with a weathervane mast support pipe built in the center. This is the first Chimney cap I've been asked to make with a weathervane support in it.
I used 20oz copper for center section of this chimney cap, but I used a thicker 32oz copper for the outside circular crown points and the 8 support straps below for added strength. It has 6 rivets attaching each strap to the rim of the cap, but are hidden from view; hidden with another layer of 20oz copper over-lay on the upper half of the strap to make this curl out past the cap rim. There are oval solid brass knobs on the tips of the crown.
The screen is made with some thin copper expanded mesh, that was for a 6" gutter screens. This was before I started using the stainless steel spark arrest screens I use now that is stronger and has larger holes. |
.
|
Smith's
20oz Copper Chimney Cap |
|
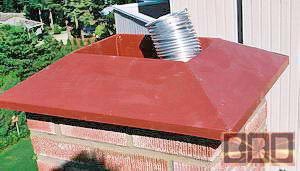
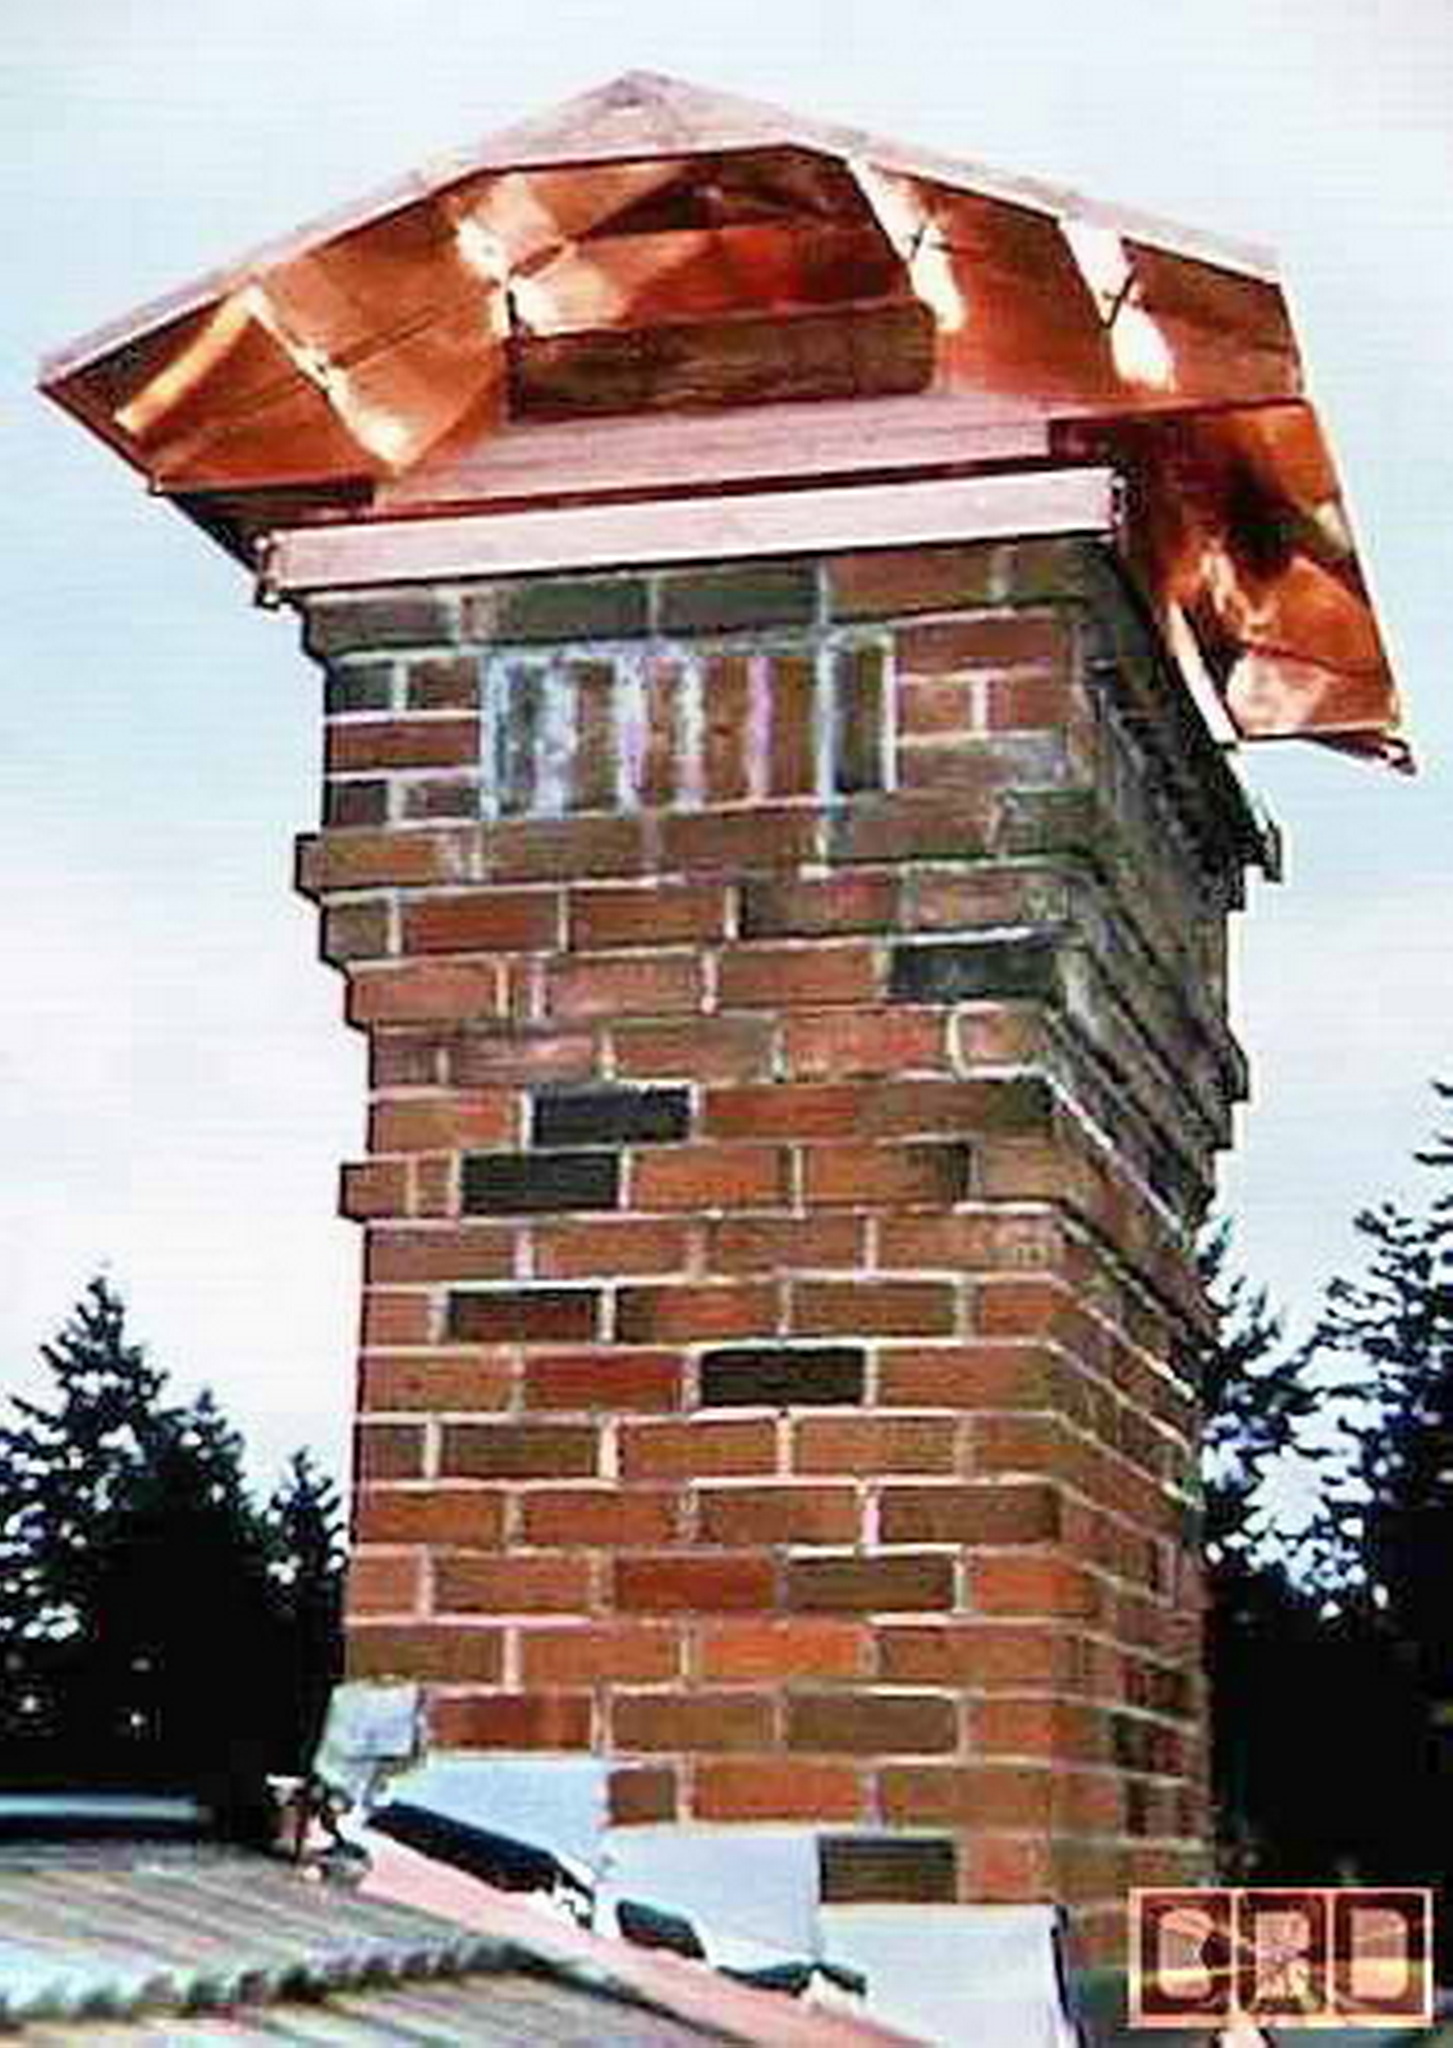
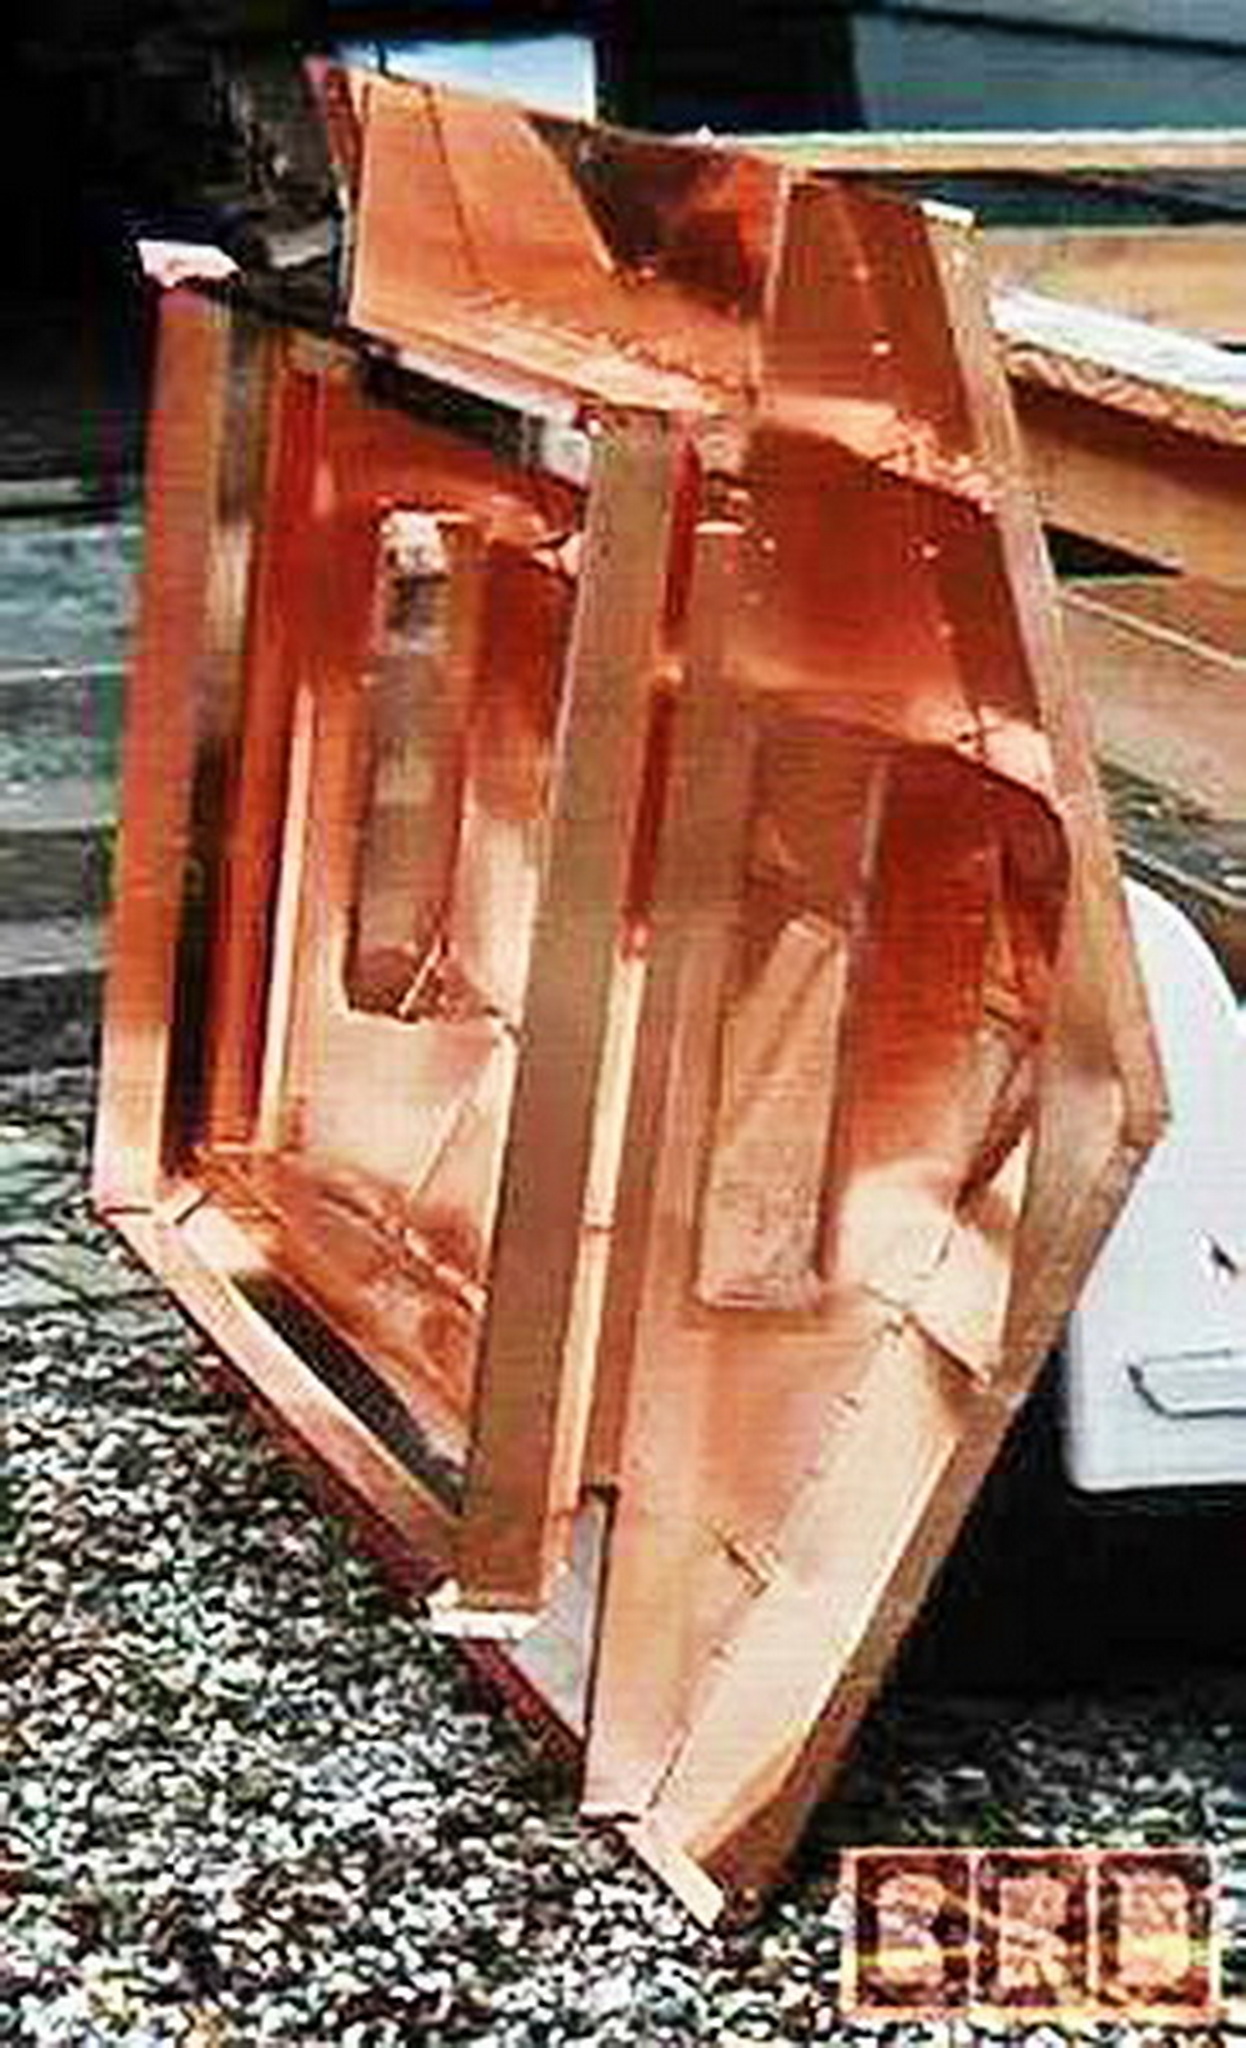
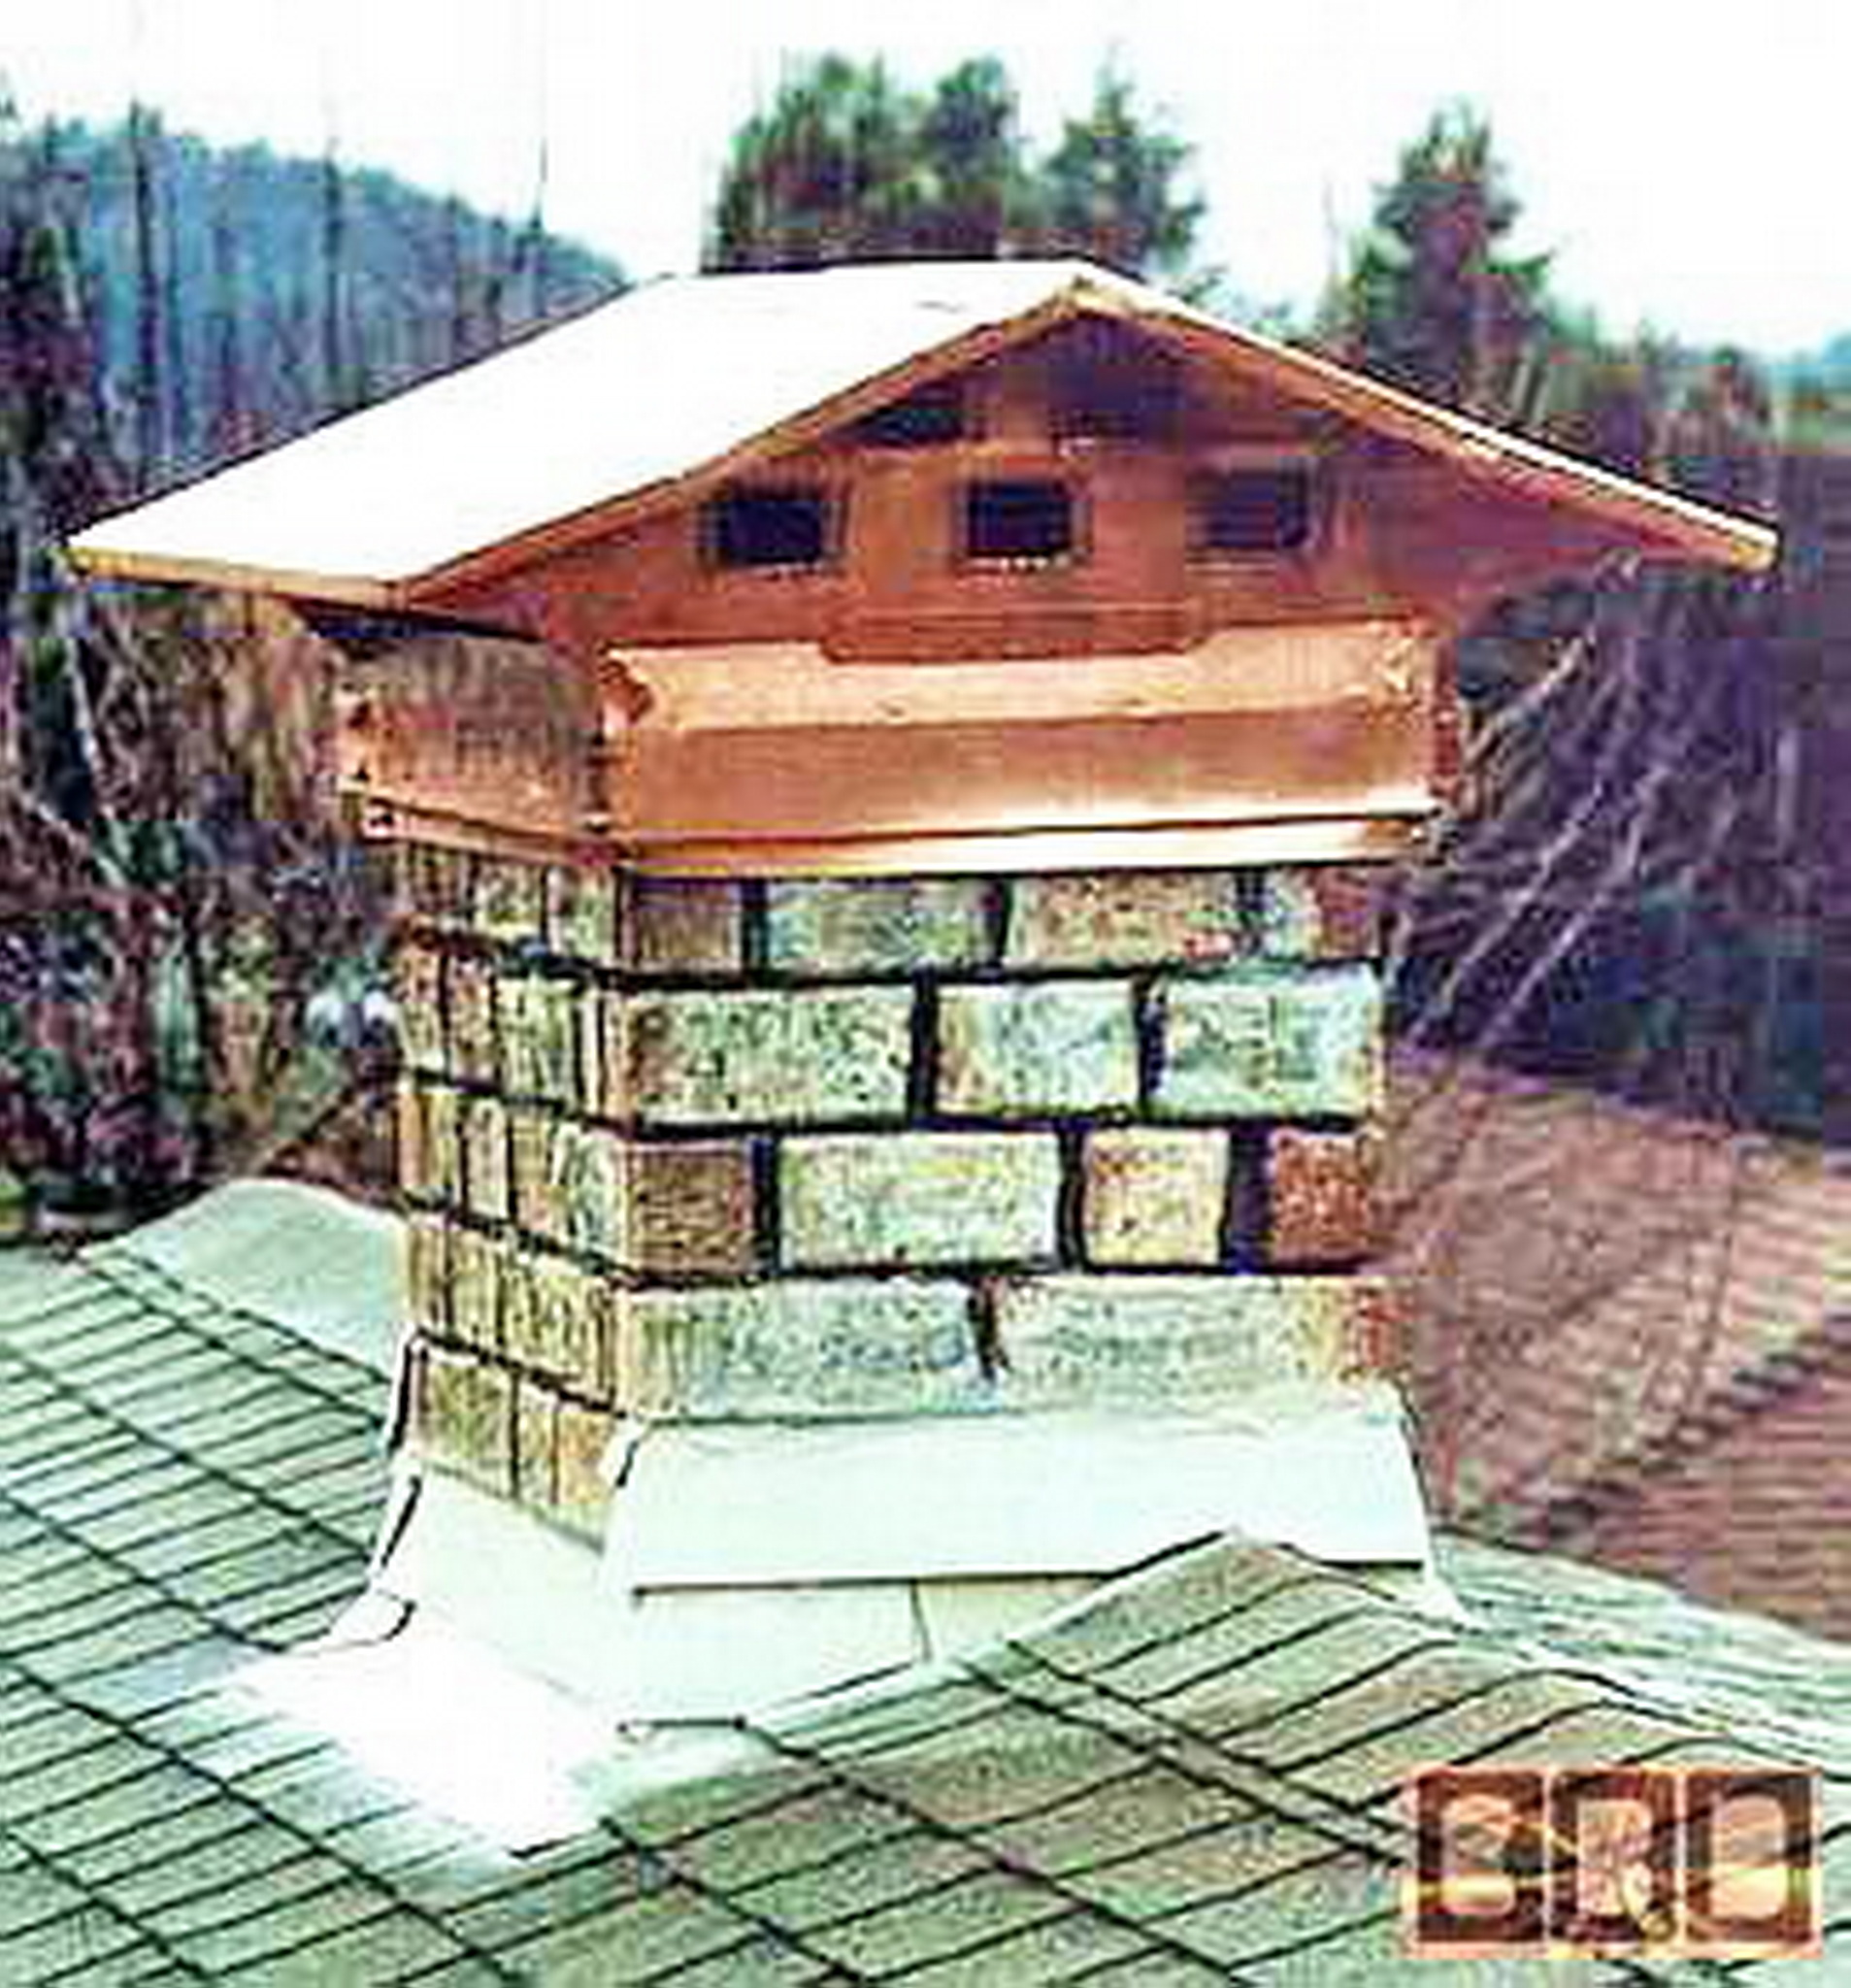
I made This chimney cap with the design help from the client: Van Smith in Yacolt Washington, just North of Portland. It was designed to cover a wood frame chimney case that is covered with a stone facing, and to support the stainless steel insolated exhaust flue.
It took about 74 square feet of copper to make this chimney cap, and weighs in at 93.5lb. Even though it has very few visible rivets it is so sturdy that when lifting it up on one corner it has no detectible flex to it. Made as seamless as possible. This chimney cap sits down to cover the top 2" of the wood frame and another 1.5" of a rock facing over the wood. It took 4 days to build this cap. Including the end caps for the roof, there are 4 cross-braces to support the roof of this chimney cap.
|
.
|
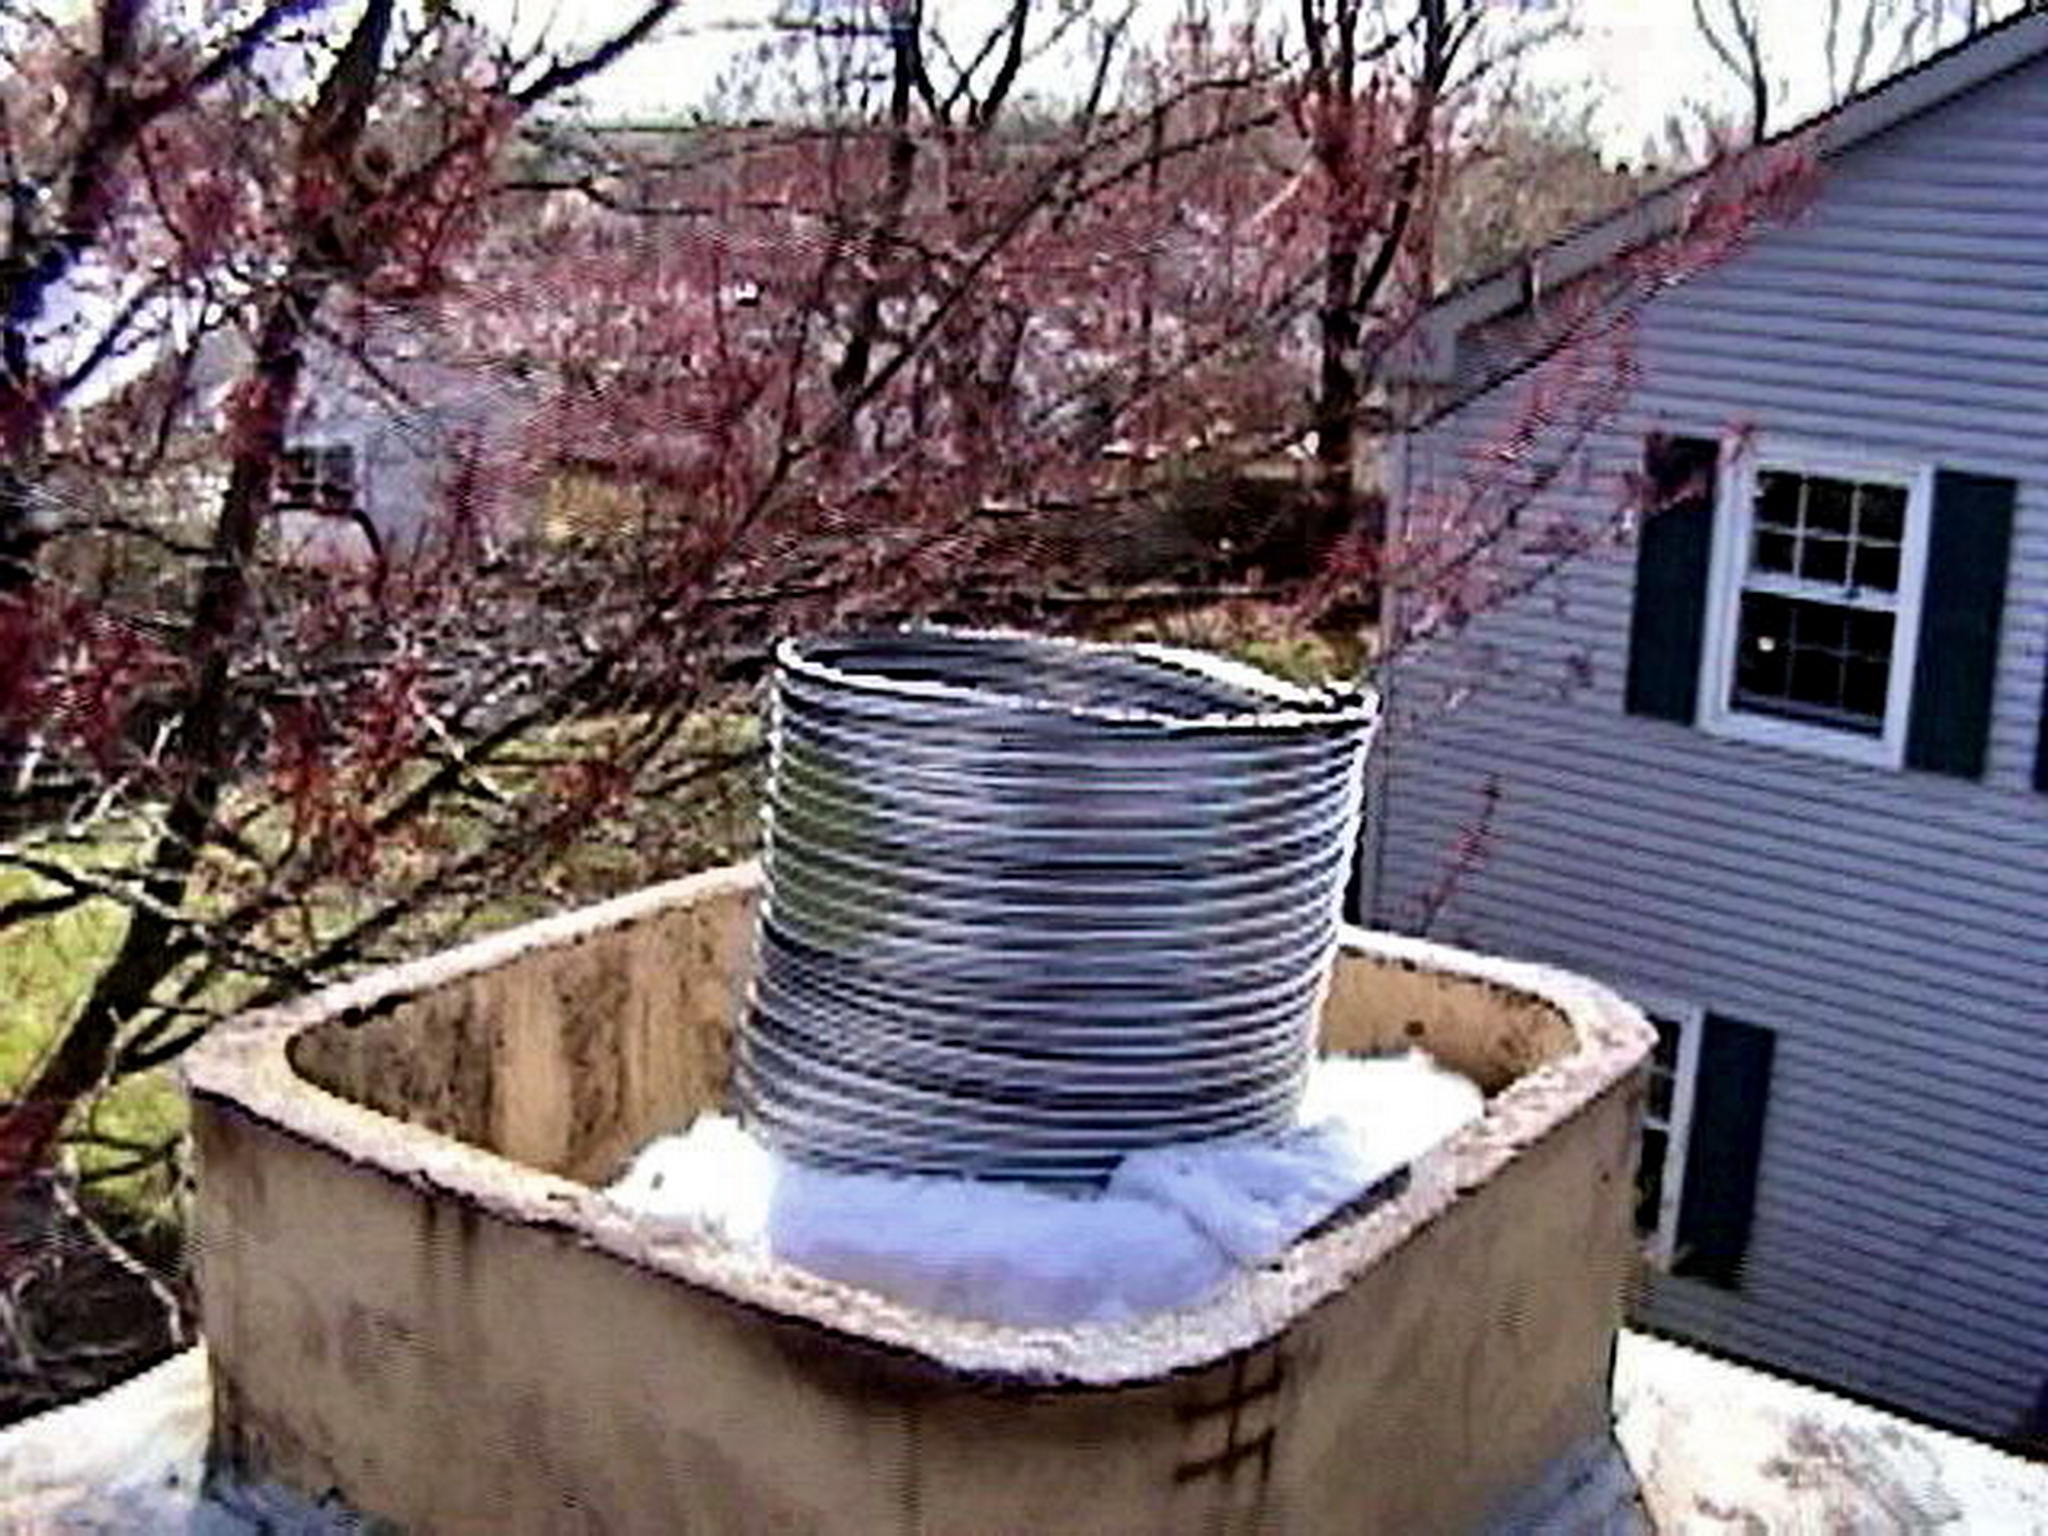
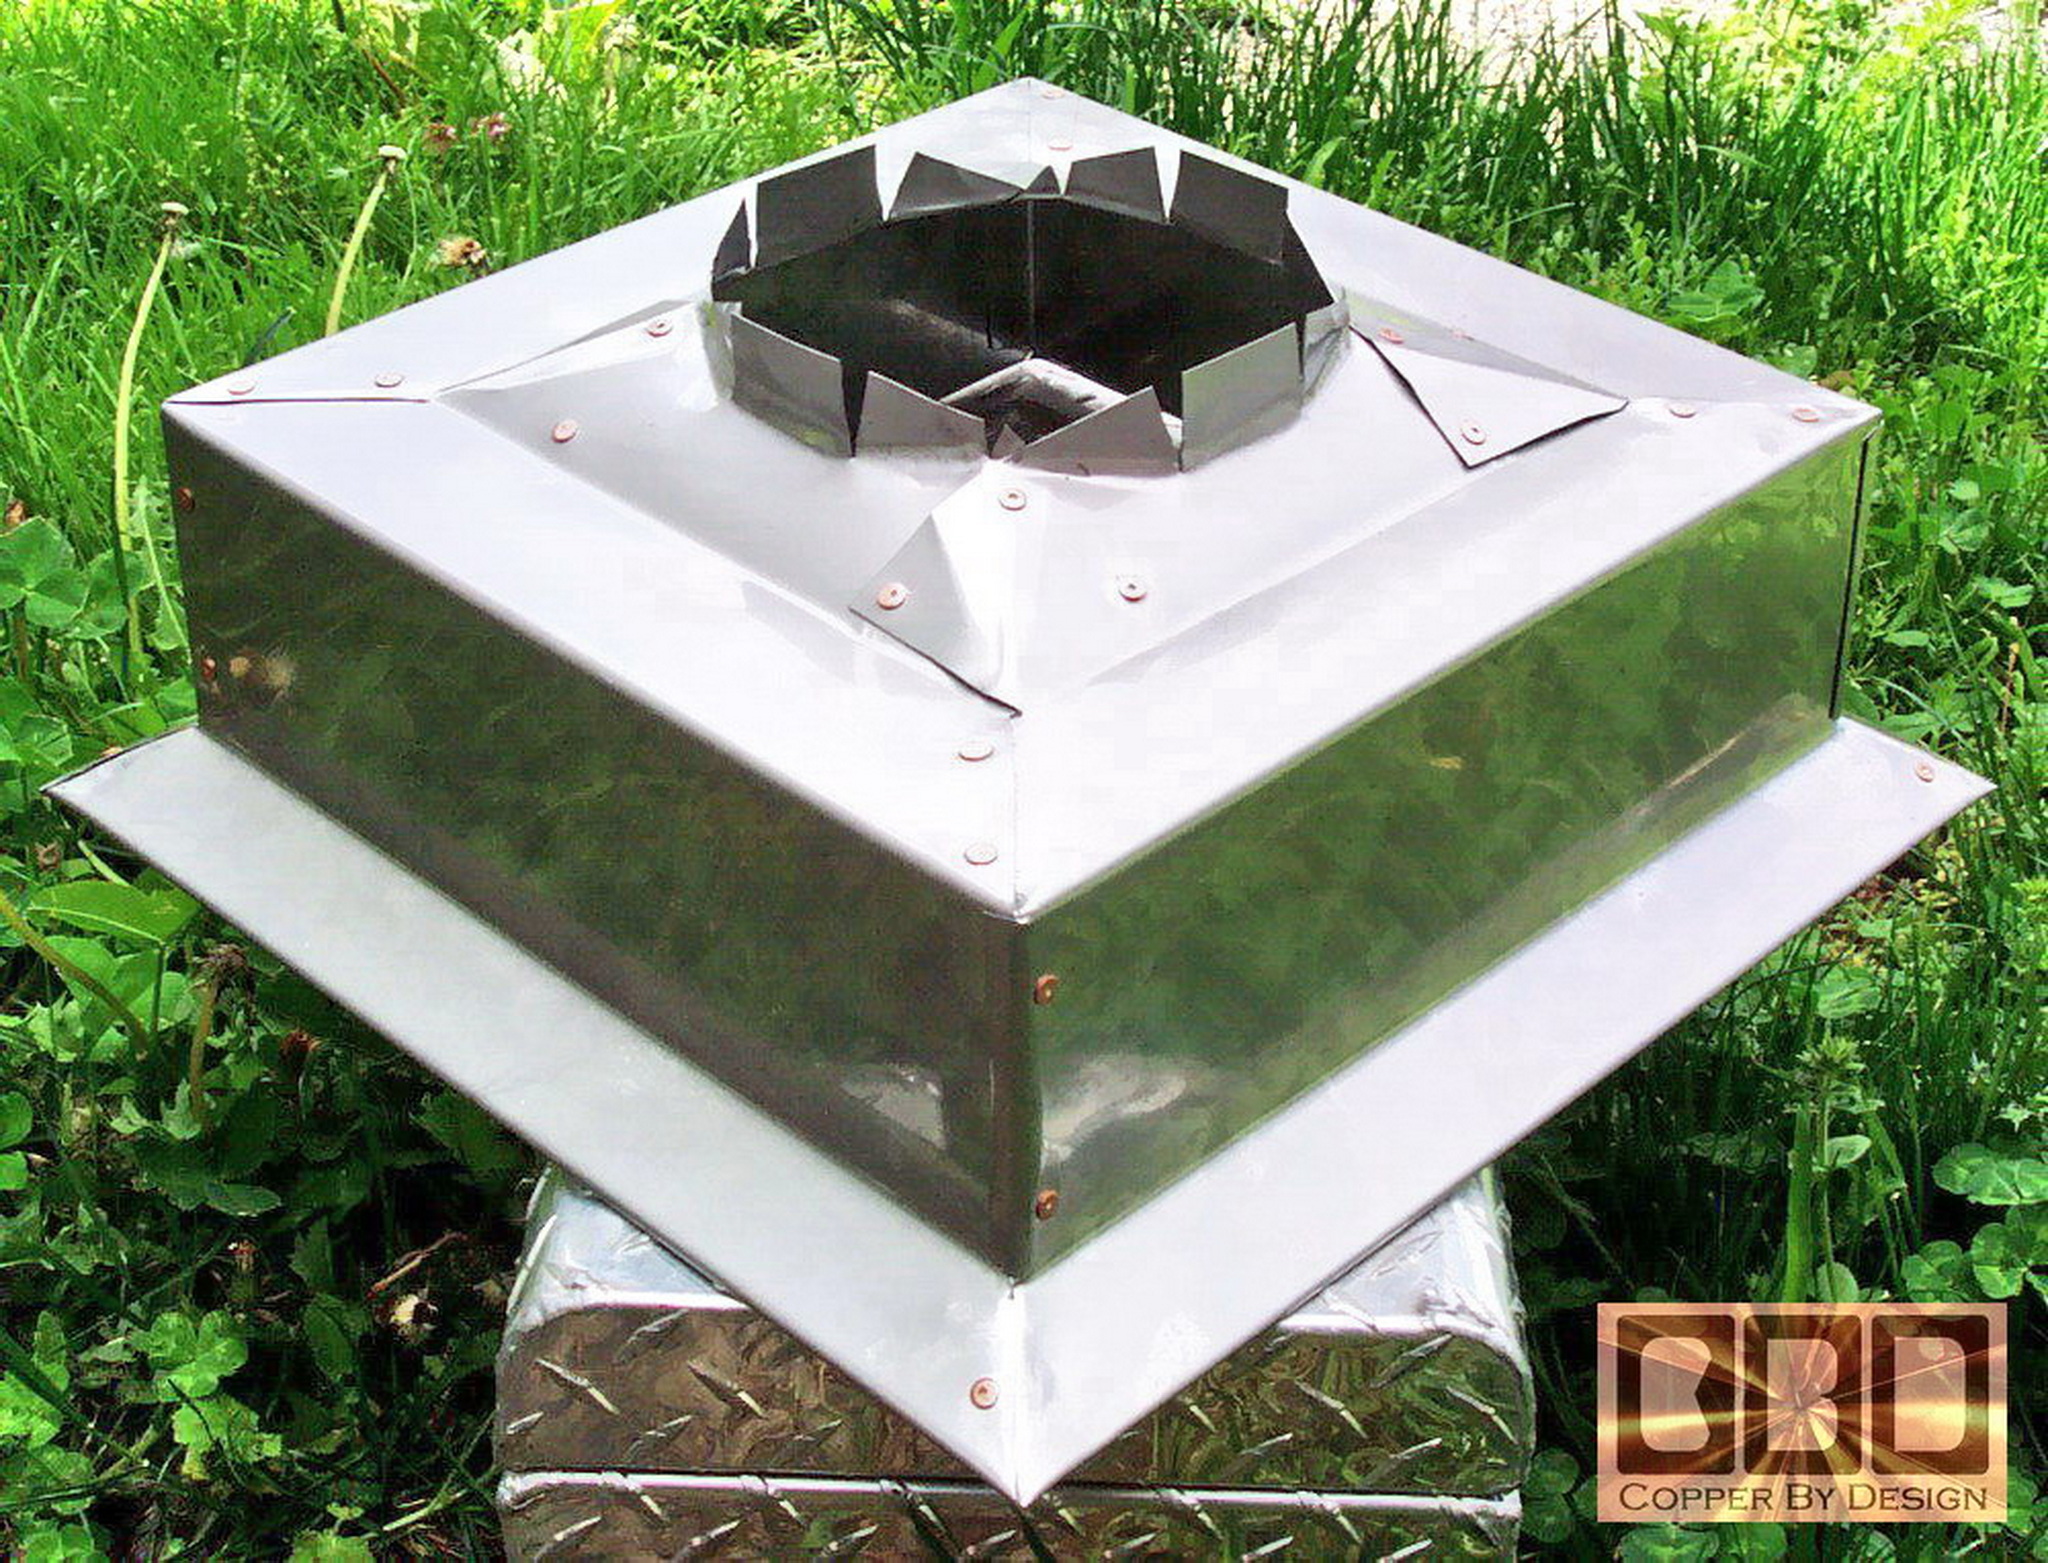
Gamenara's Small 20oz Copper Chimney Cap |
|
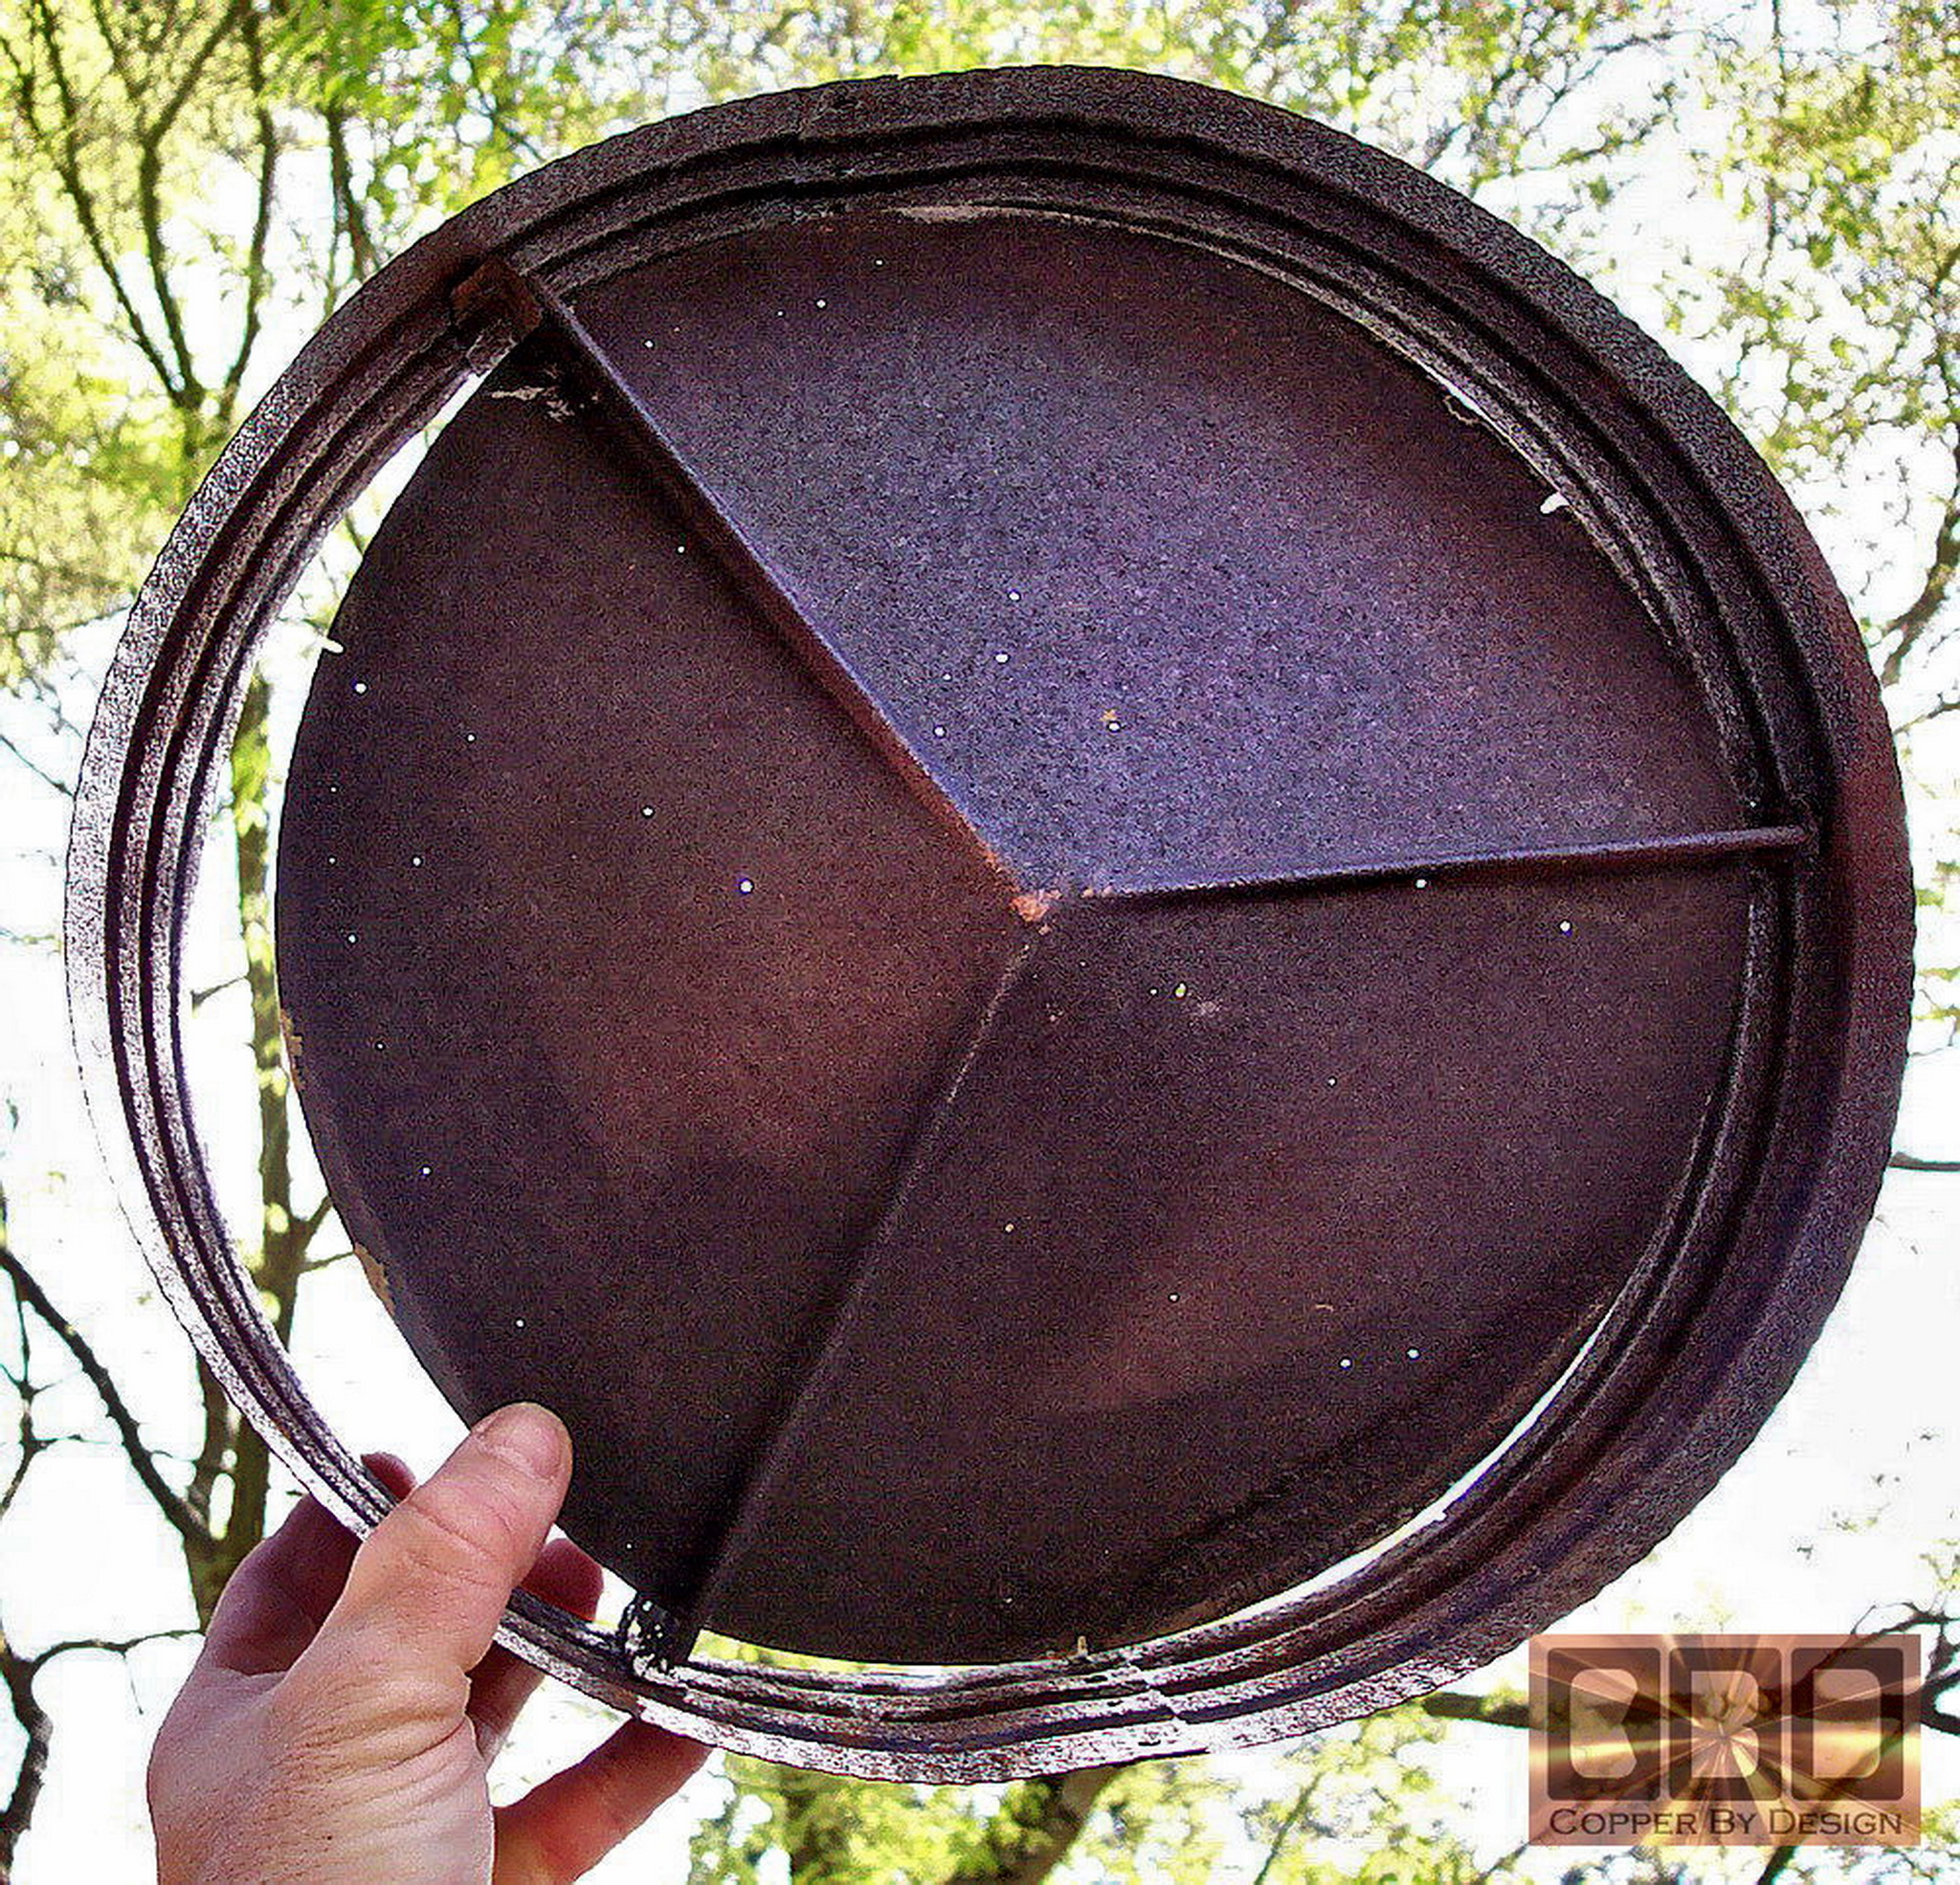
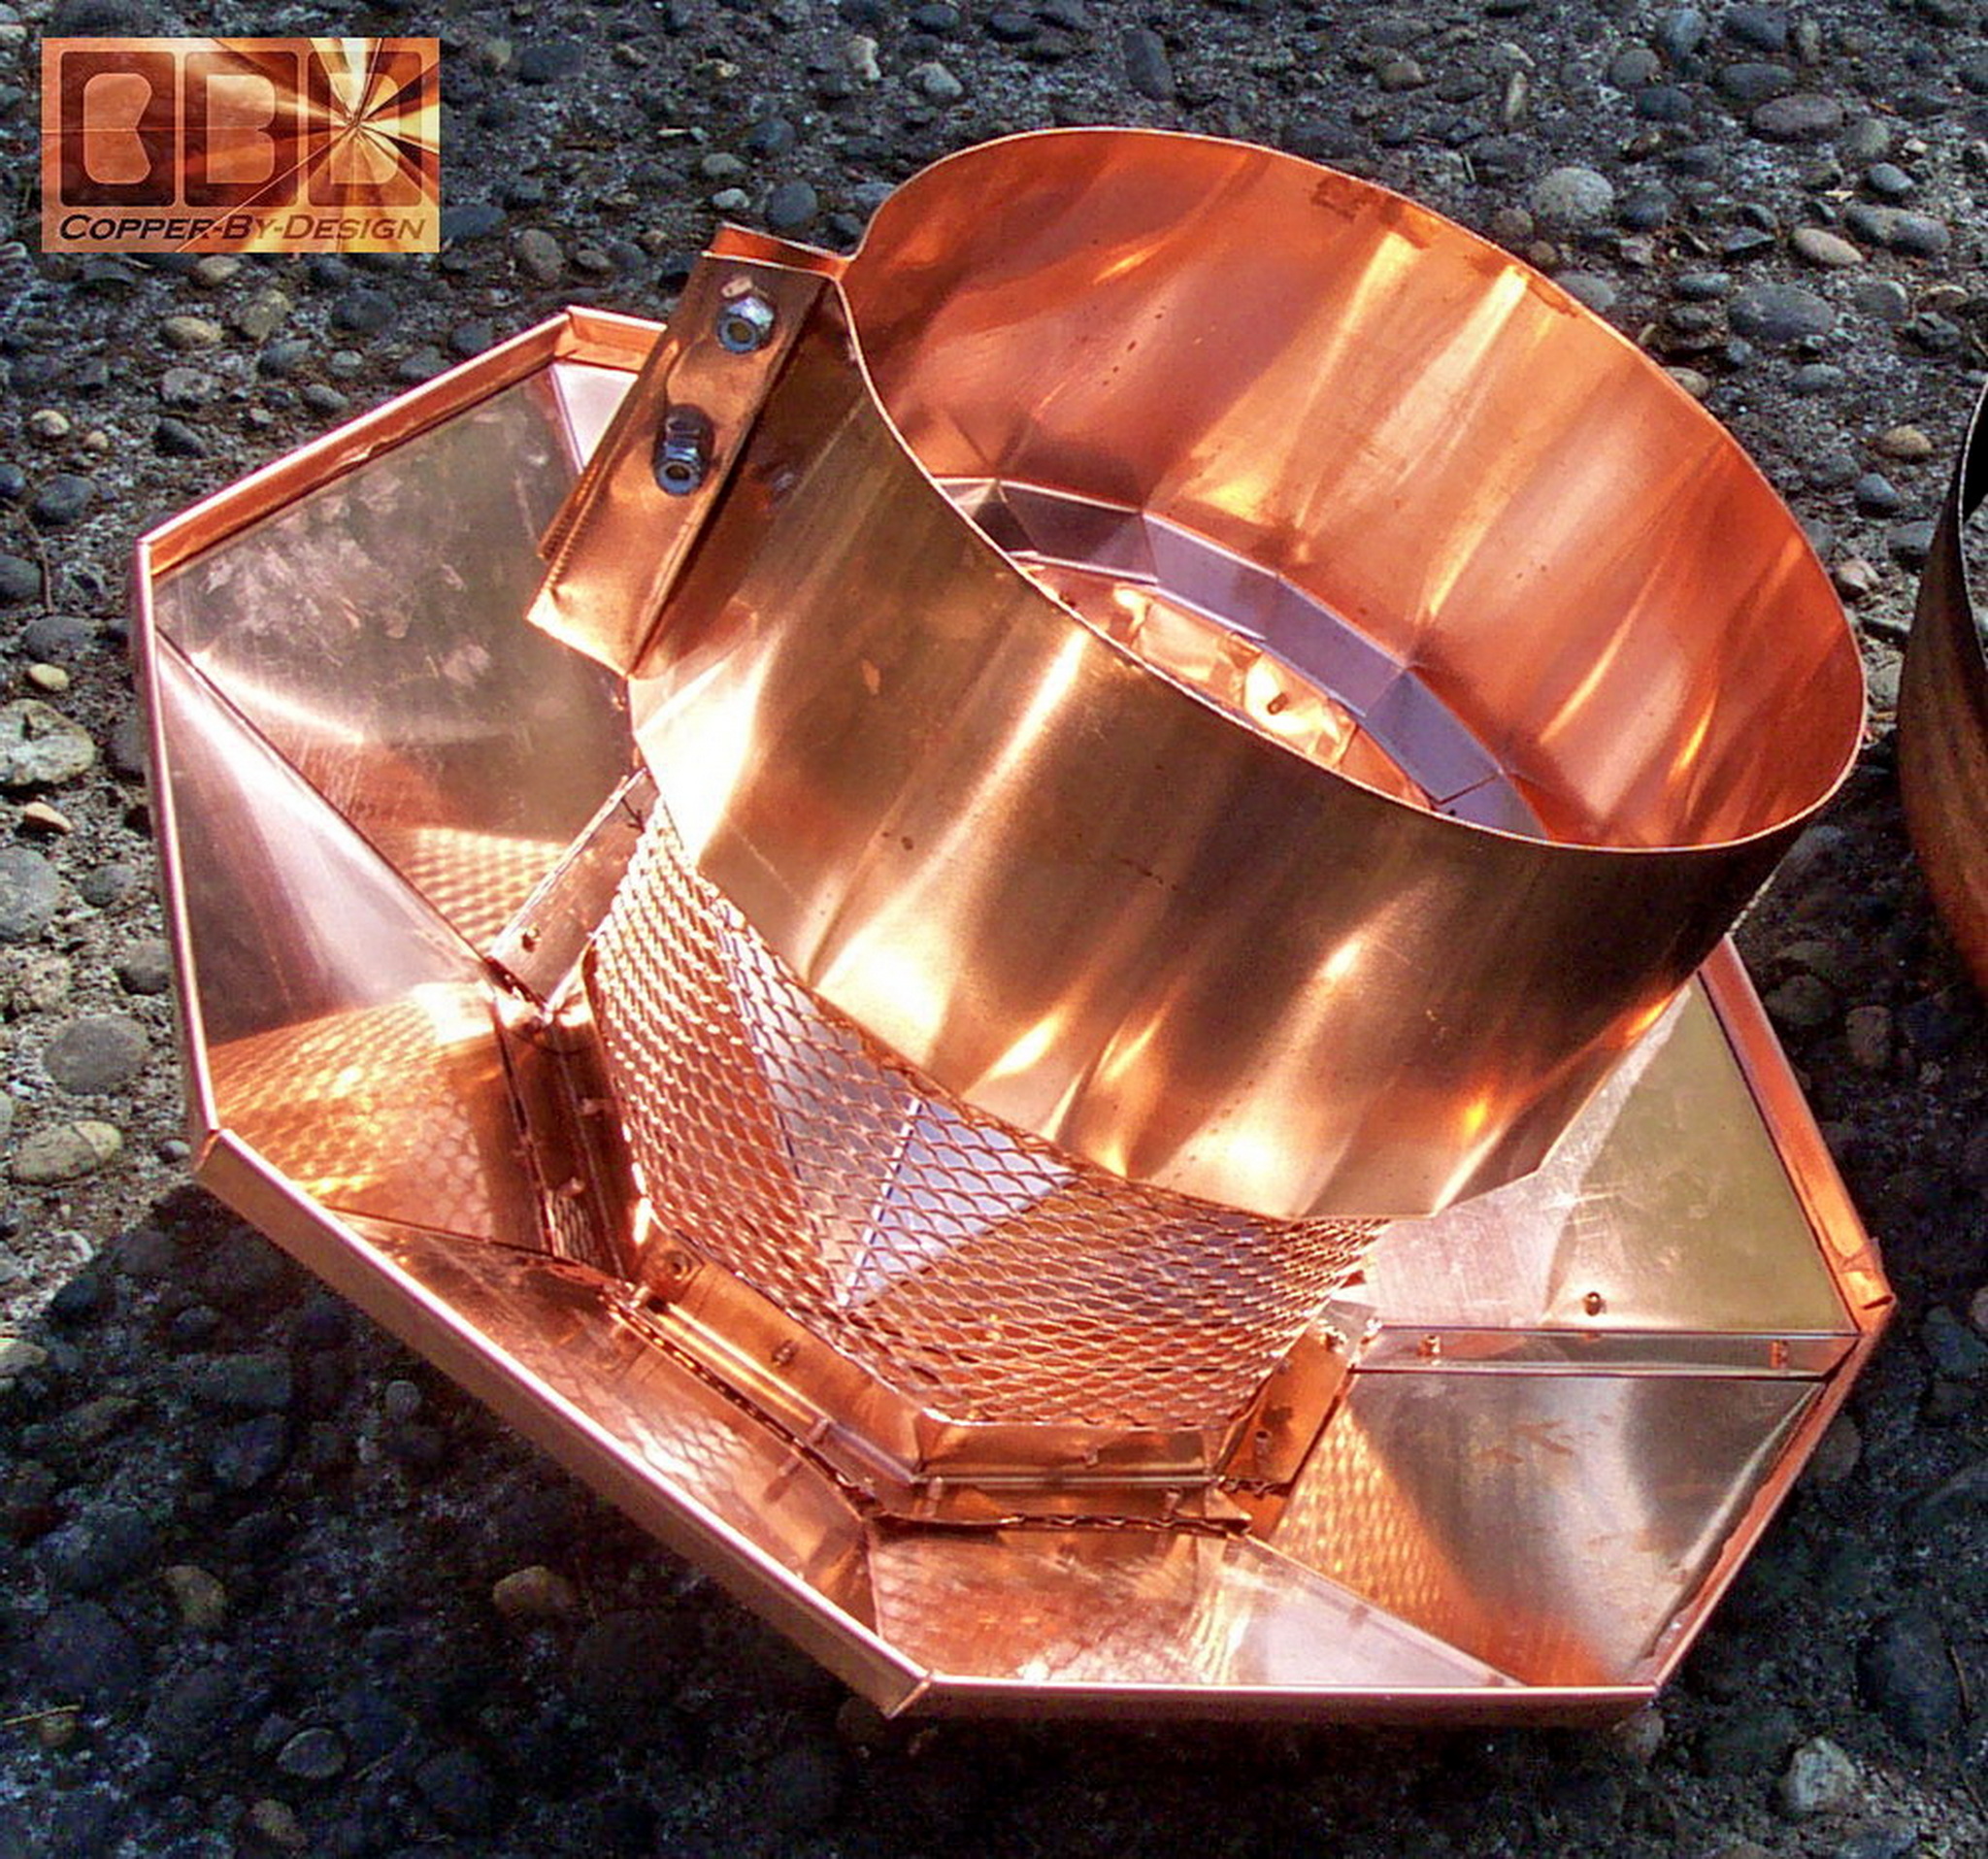
Here is one of the simplest copper chimney caps I had ever made, and is an embarrassment by today's standards. It was constructed to cover this 9" outside diameter stainless steel chimney pipe that was quite stained from the old rusty cap I had removed (shown above left). The octagon roof cover has a 6/12 pitch, which is 15" wide for a 3" eave, but in my experience this style does not vent well enough for a wood burning fireplace. This early design I made over a decade back was fitted with just a flimsy copper gutter screen that had less than 1/4" holes, which is fine for a clean burning natural gas exhaust. I would not use that type of screen ever again, as it is just not strong enough. I would use a high grade stainless steel screen that is substantially wider and taller.
This fabrication was only $200 installed, since that is our minimum charge for custom work like this. It is also screened and has a wider hood to be sure to keep out the rain in high winds. We now use a 16 gauge or 13 gauge stainless steel screen with 1/2" wide diamond shaped holes for our chimney caps to better match building code and more strength. Here is a link to our web page showing the other
custom gutter work we did for this client: |
|
Lucey's 20oz Copper Chimney Cap |
|
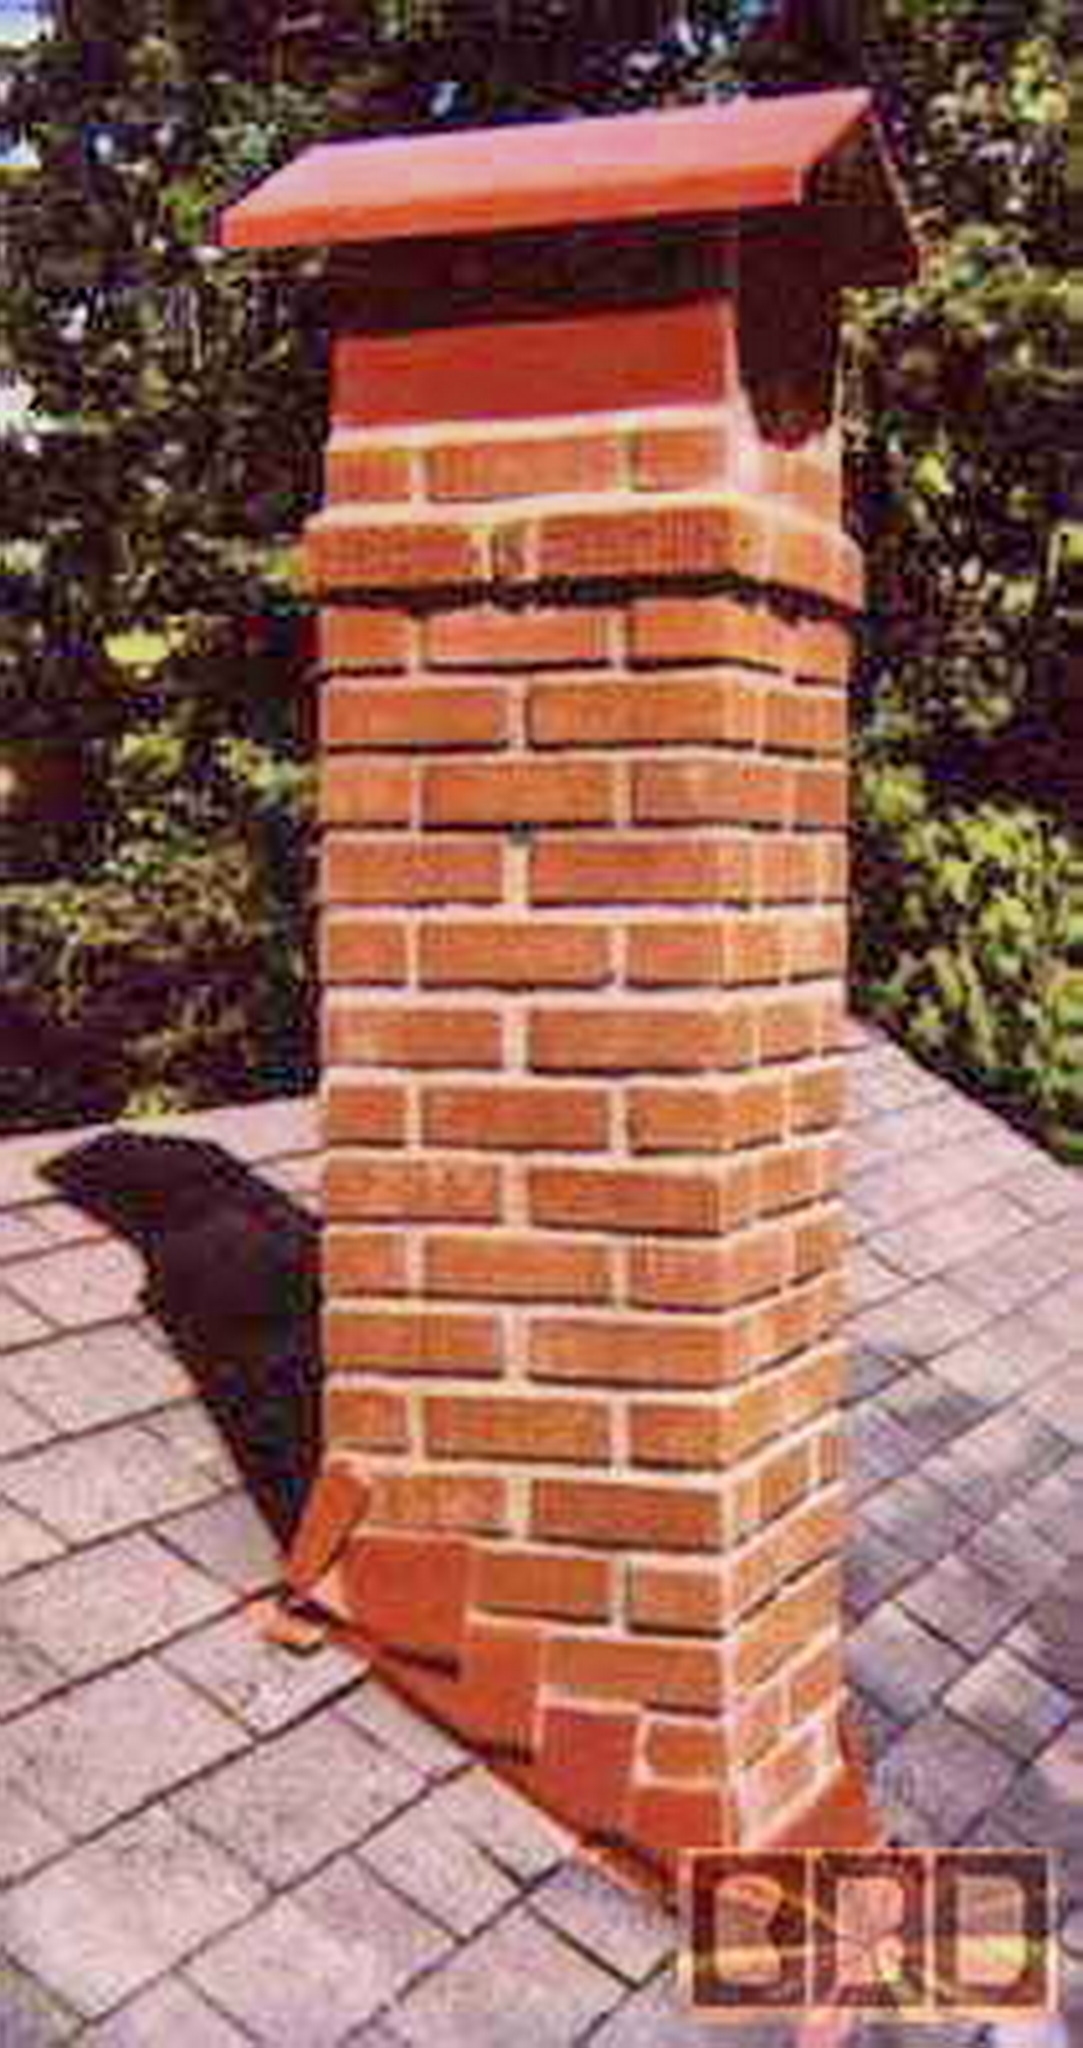
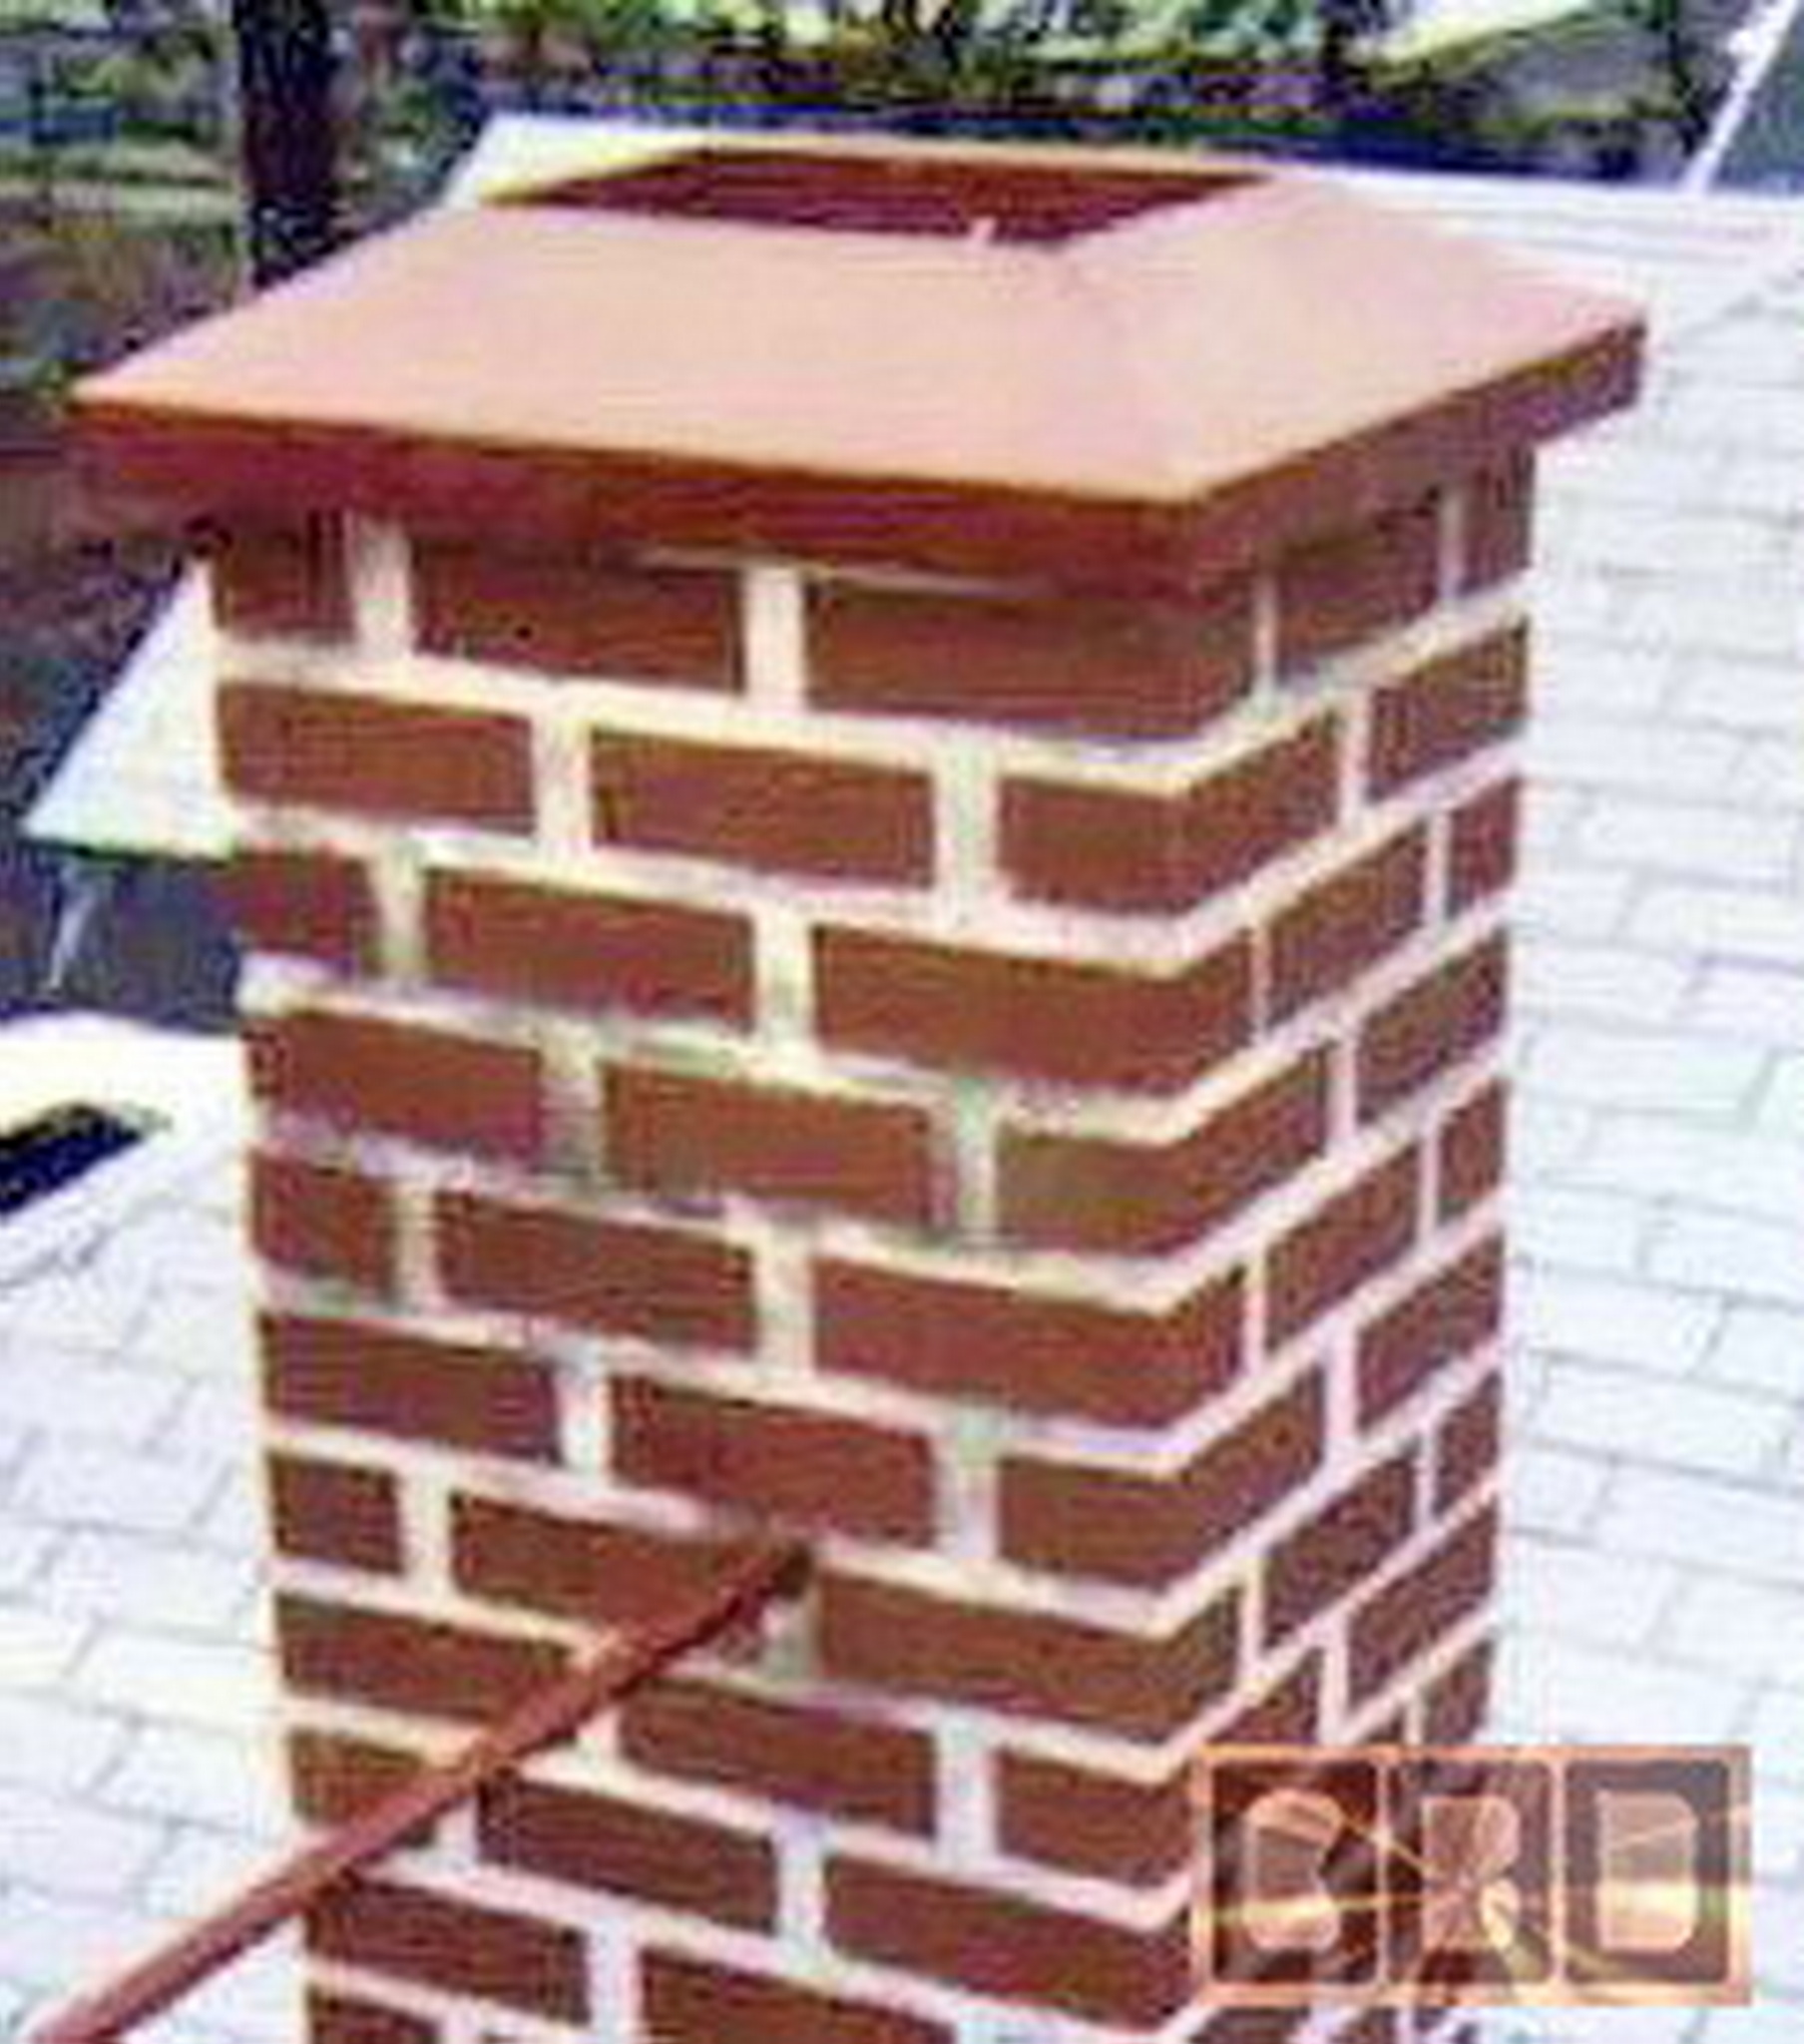
Here is what I created and installed with the design and some installation help from the client: Steve Lucey at 2895 N. W. Raleigh here in Portland, Oregon 97210. You can click on the link below to our fabrication web page to see all 36 photos I took of it's construction and installation.
This chimney cap weighed in at 58lb. It took about 45 square feet of copper not including the screening around the vent area. Even though it has very few visible rivets it is the sturdiest chimney cap I had built to date (2/05). It is also the most seamless chimney cap I had made. This chimney cap sits down to cover the top 2 courses of bricks. It took 3 days just to build this small cap in our shop. The roof of this chimney cap is set to be a 6/12 pitch to match the houses roof pitch. The bracing you see behind the screening is one piece that is over 9' long and 8.25" tall. The vents are cut out and the edges folded over for more strength. It was attached to the brick chimney with 4 stainless steel screws near the bottom edge. (click here to see all 39 photos and diagrams w/step-by-step details) |
.
|
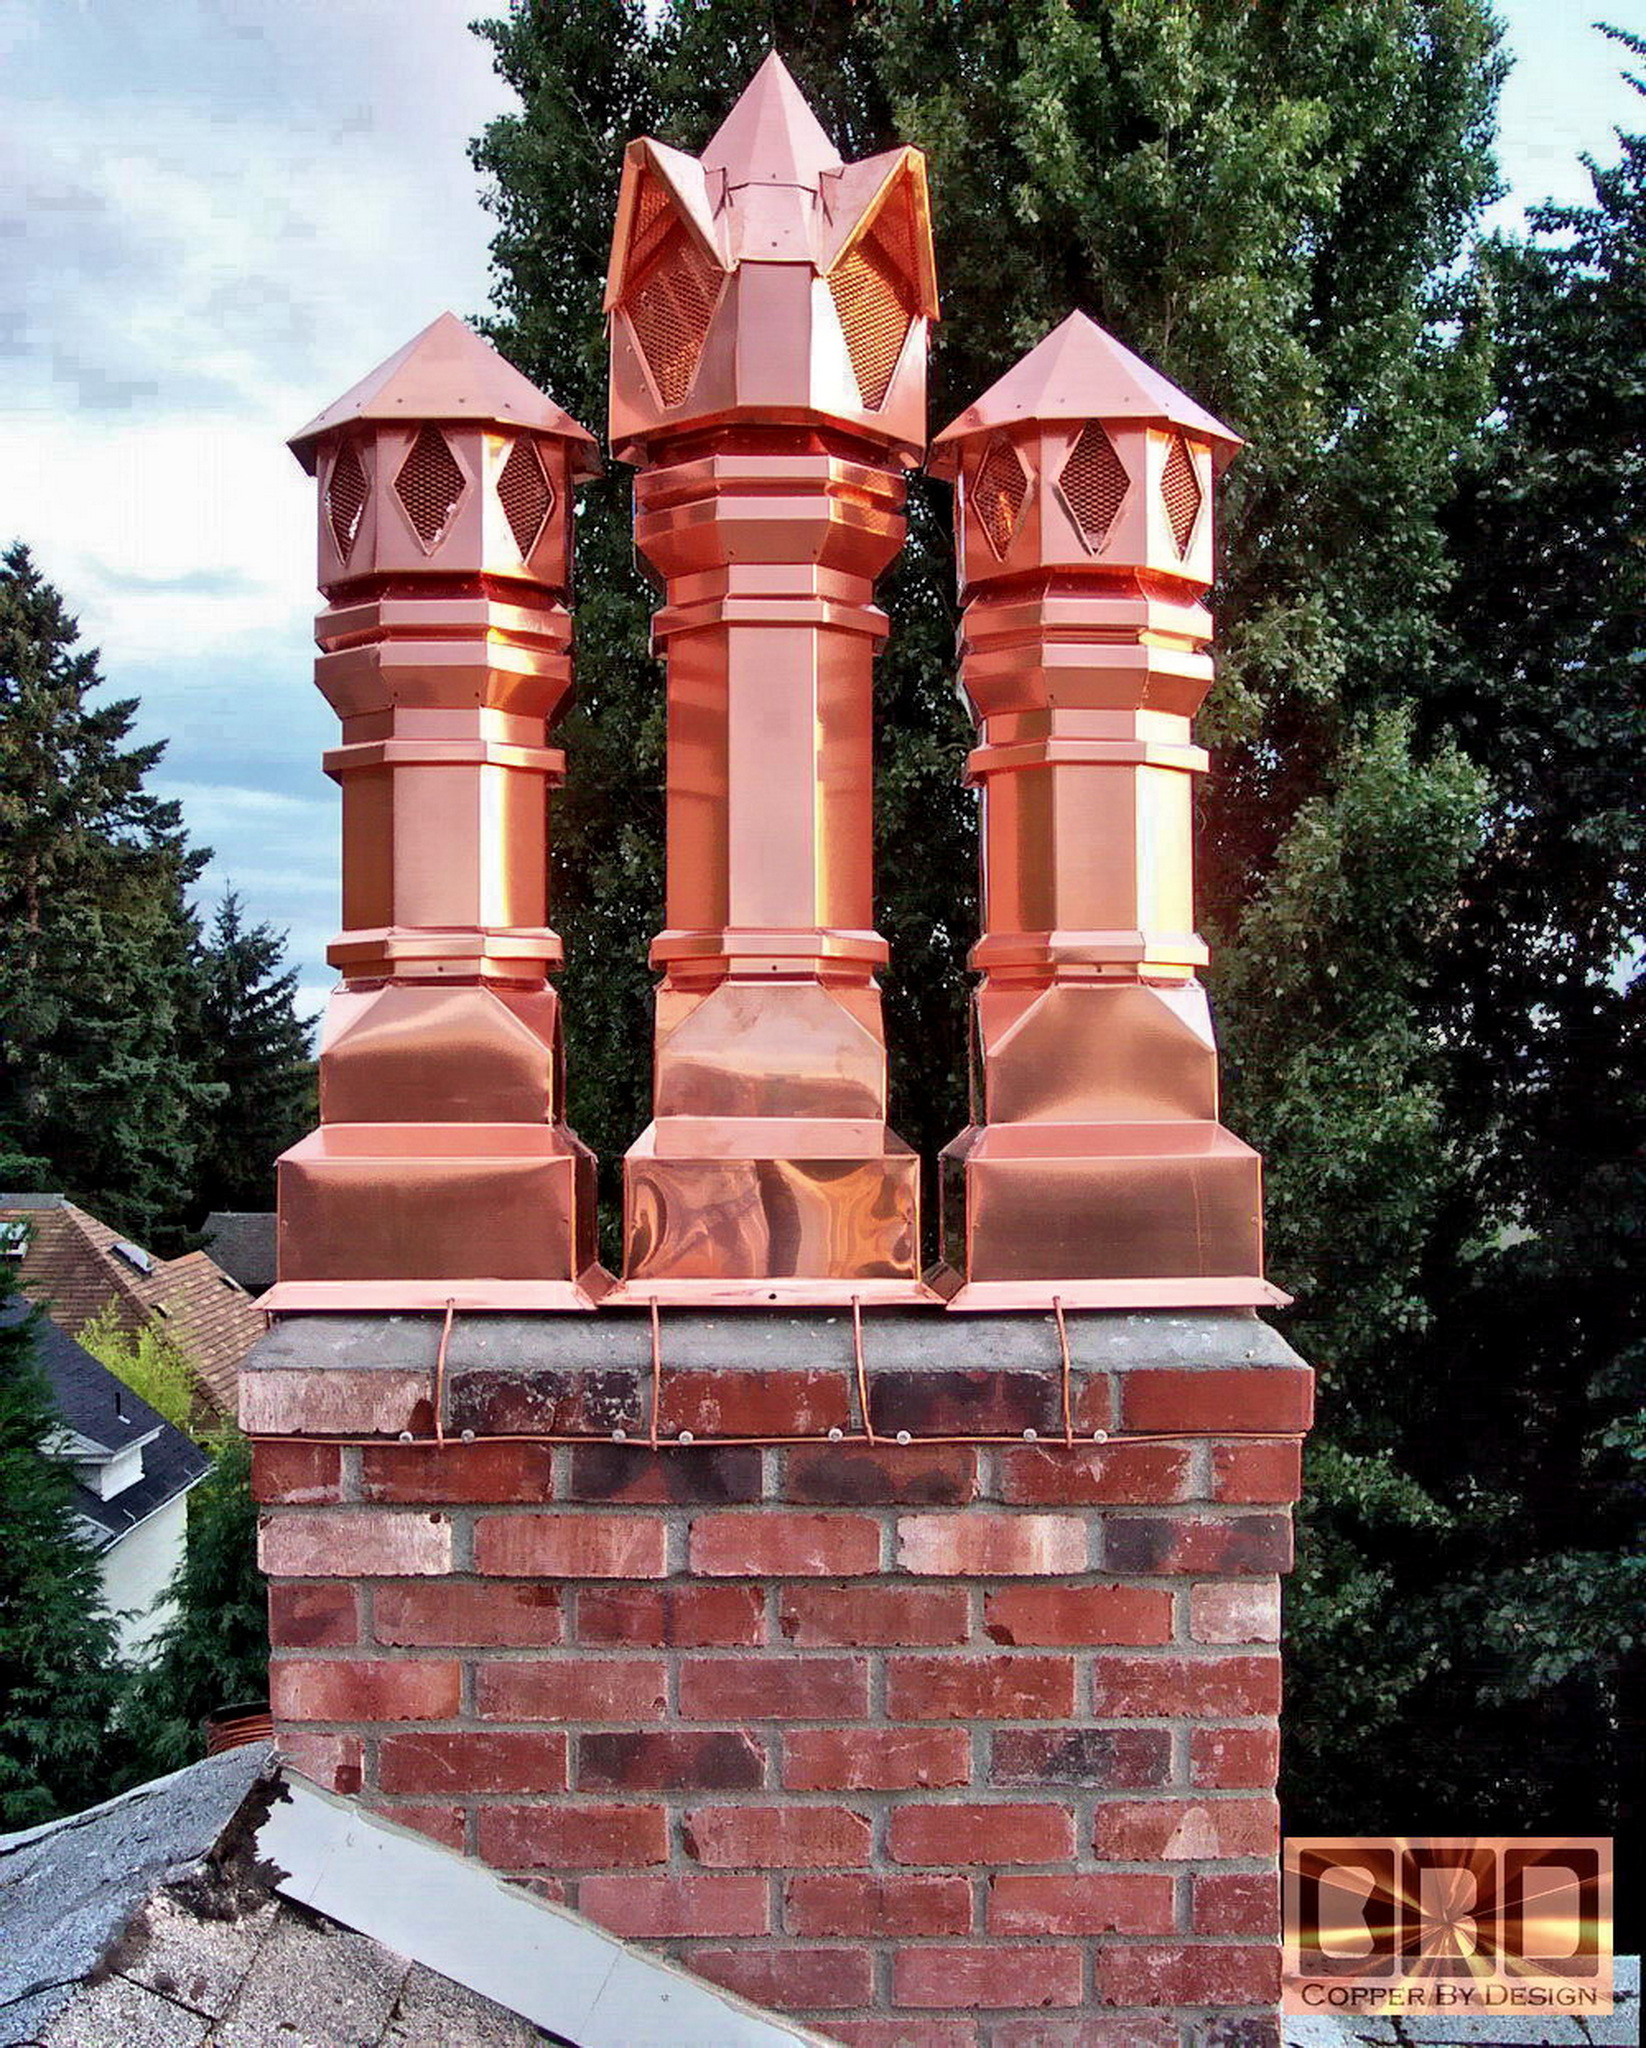
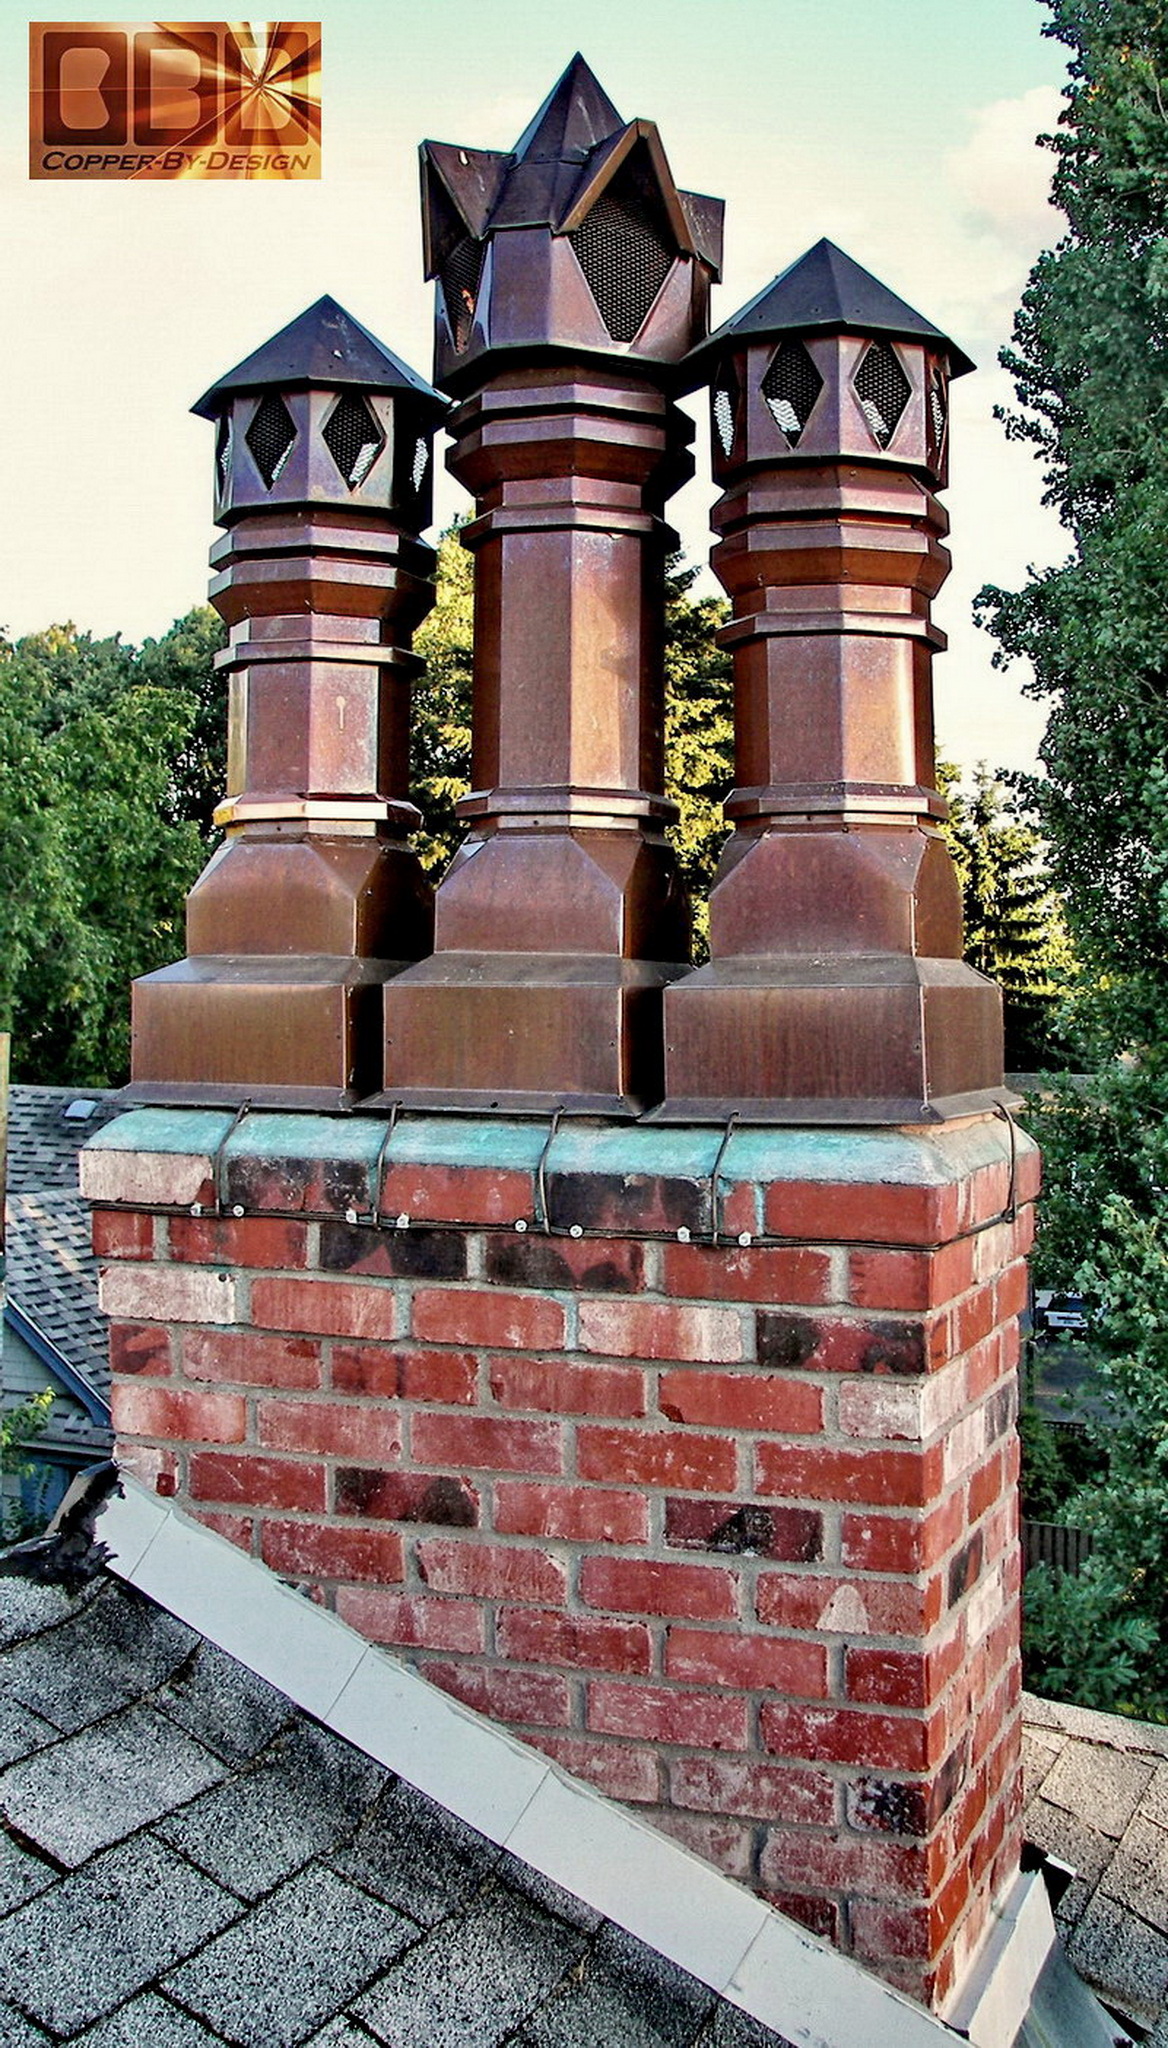
A Set of
Custom 20oz Copper Chimney Pots |
|
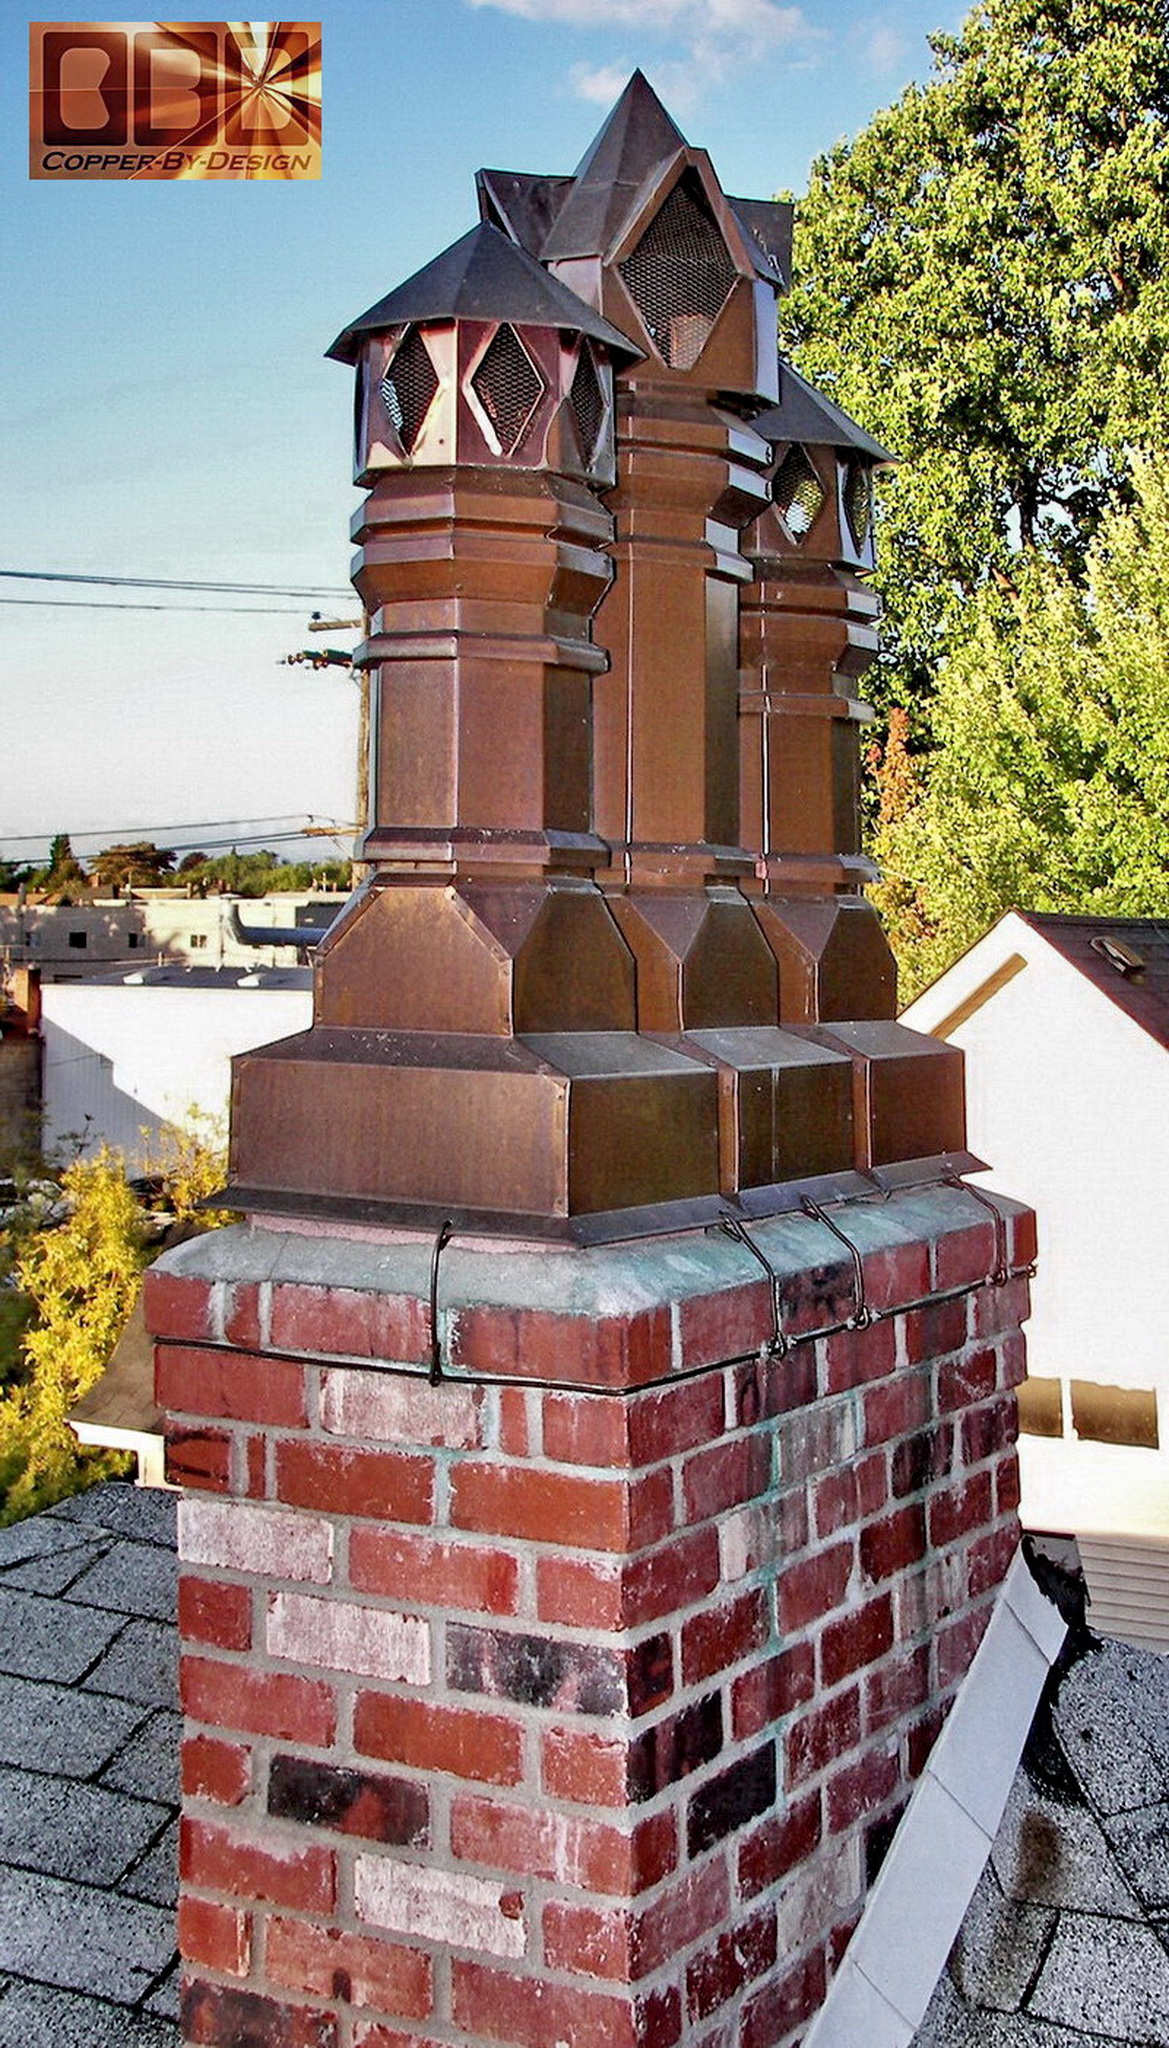
You can go to our fabrication web page to tour the 54 photos of the design and fabrication process for this set of chimney smoke stacks, or chimney pots as many call them. The two side stacks are 3' 6.5" tall. The center stack is 4' 6.5" tall. They are mounted on a 3 flue chimney over each flue liner side by side just as they are shown here, with only 2" between each flue liner. The center chimney stack in the picture was very tricky to design and fabricate and get all the angles just right for a 24/12 pitch. The side caps are at a 12/12 pitch. They turned out well and the client was quite pleased with the results. We even amaze ourselves some times with what we are able to design and create. They resemble chess pieces, but at $2k each, this would be a very pricy chess set to create. Although, we could mount small casters on the bottom for sideways movement. <LOL> |
|
The same chimney pipes just a couple years later (8-06). I was surprised to see where I had missed a few places with the plastic film removal, so those areas had not tarnished. I removed the rest of it while up there taking these photos.
|
.
|
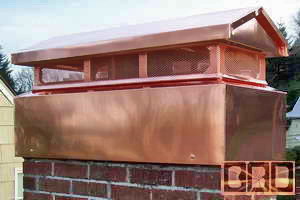
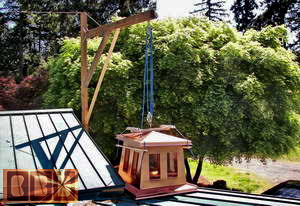
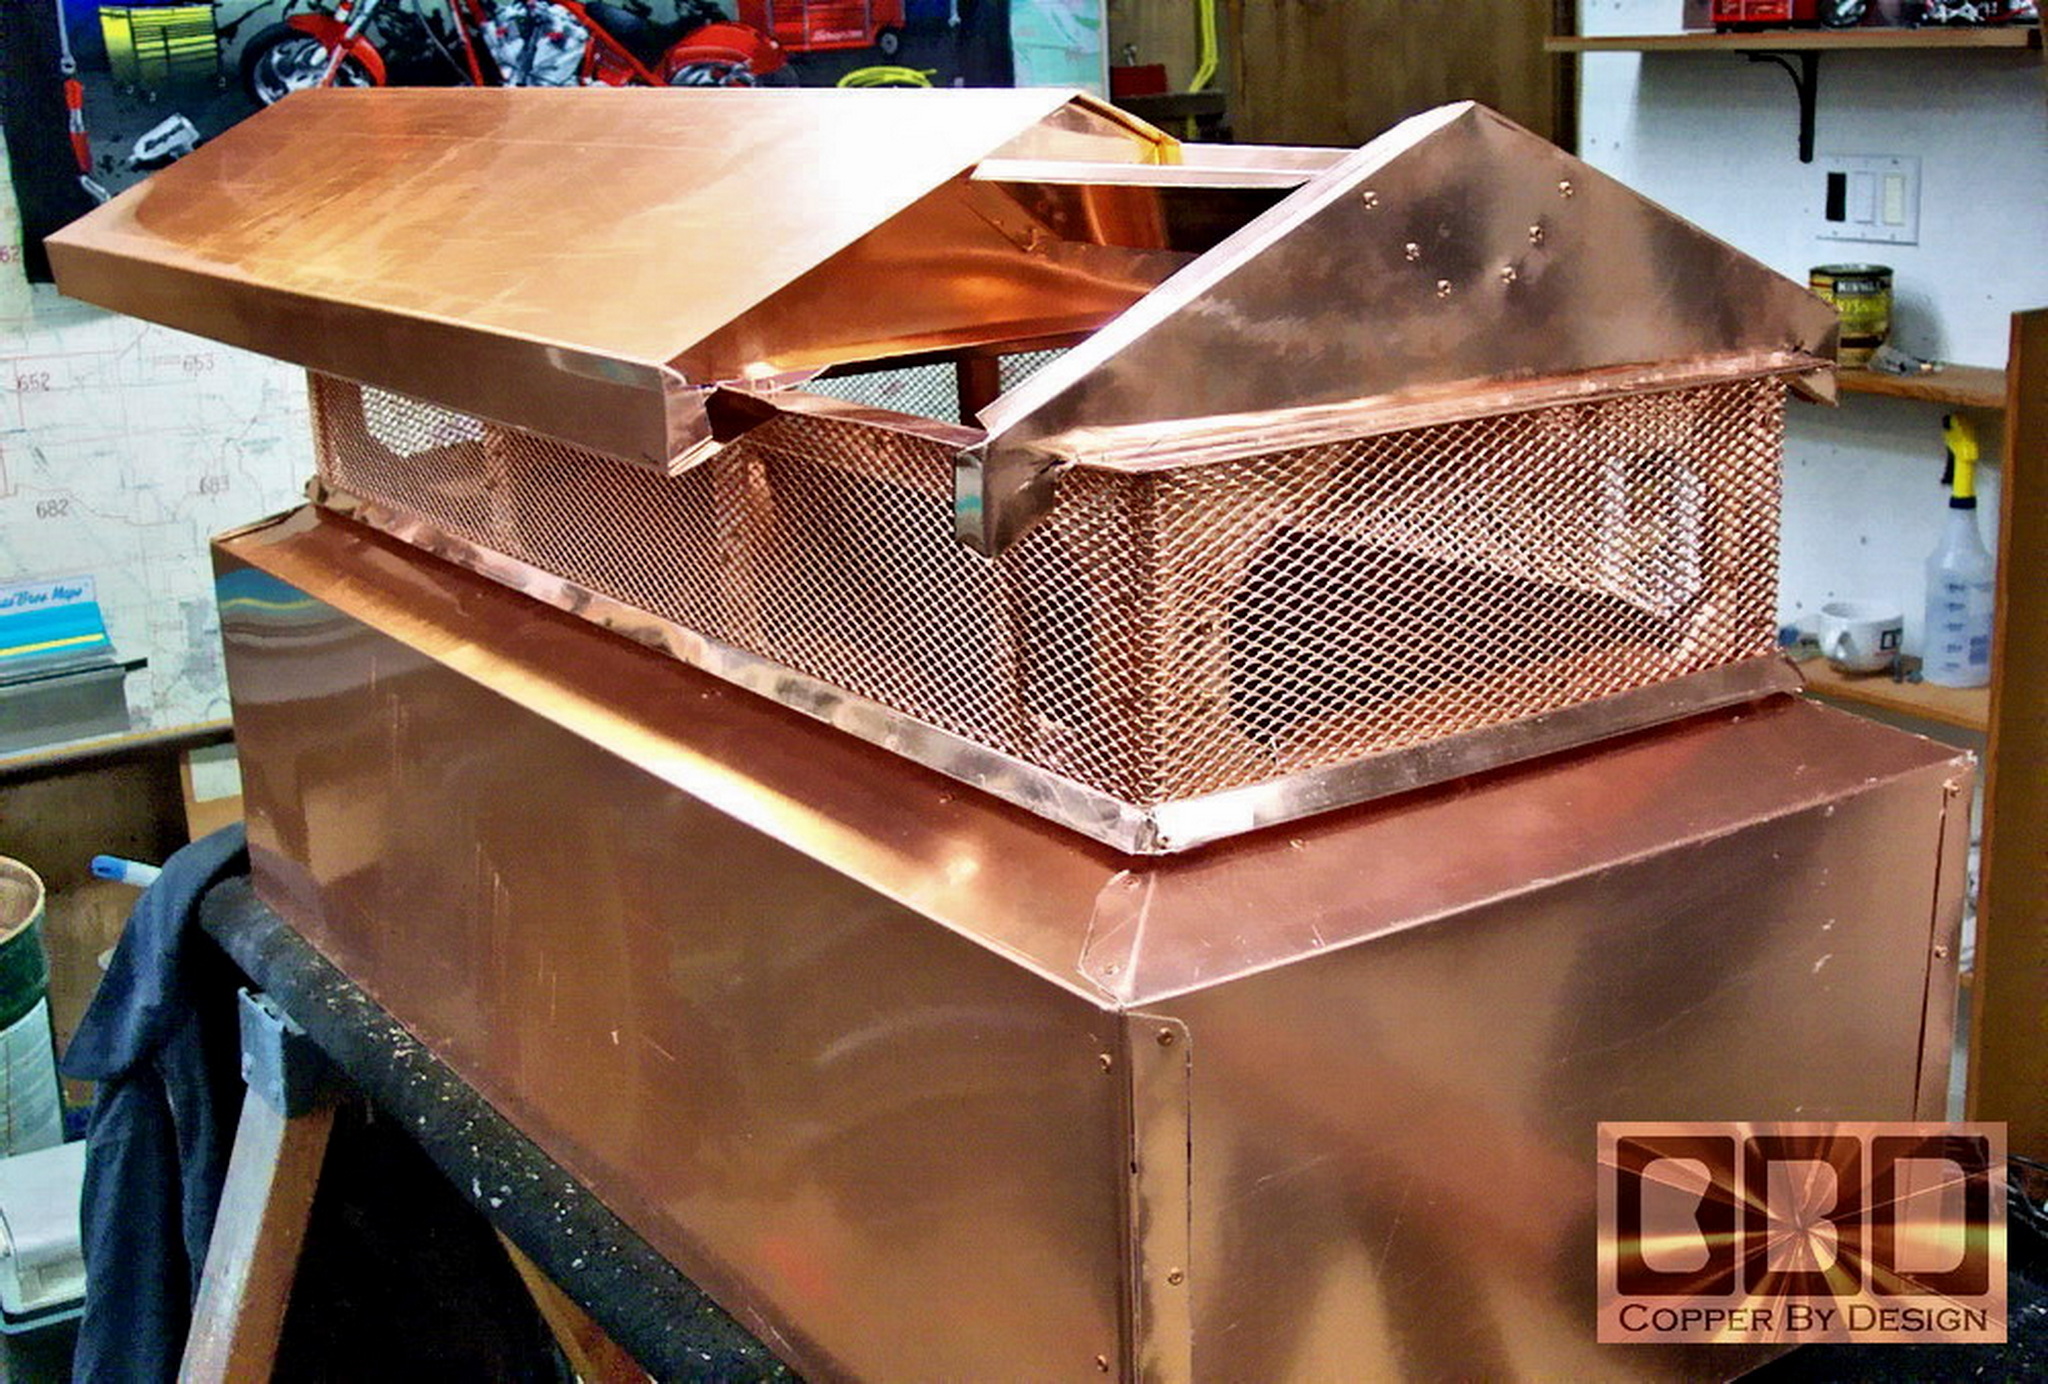
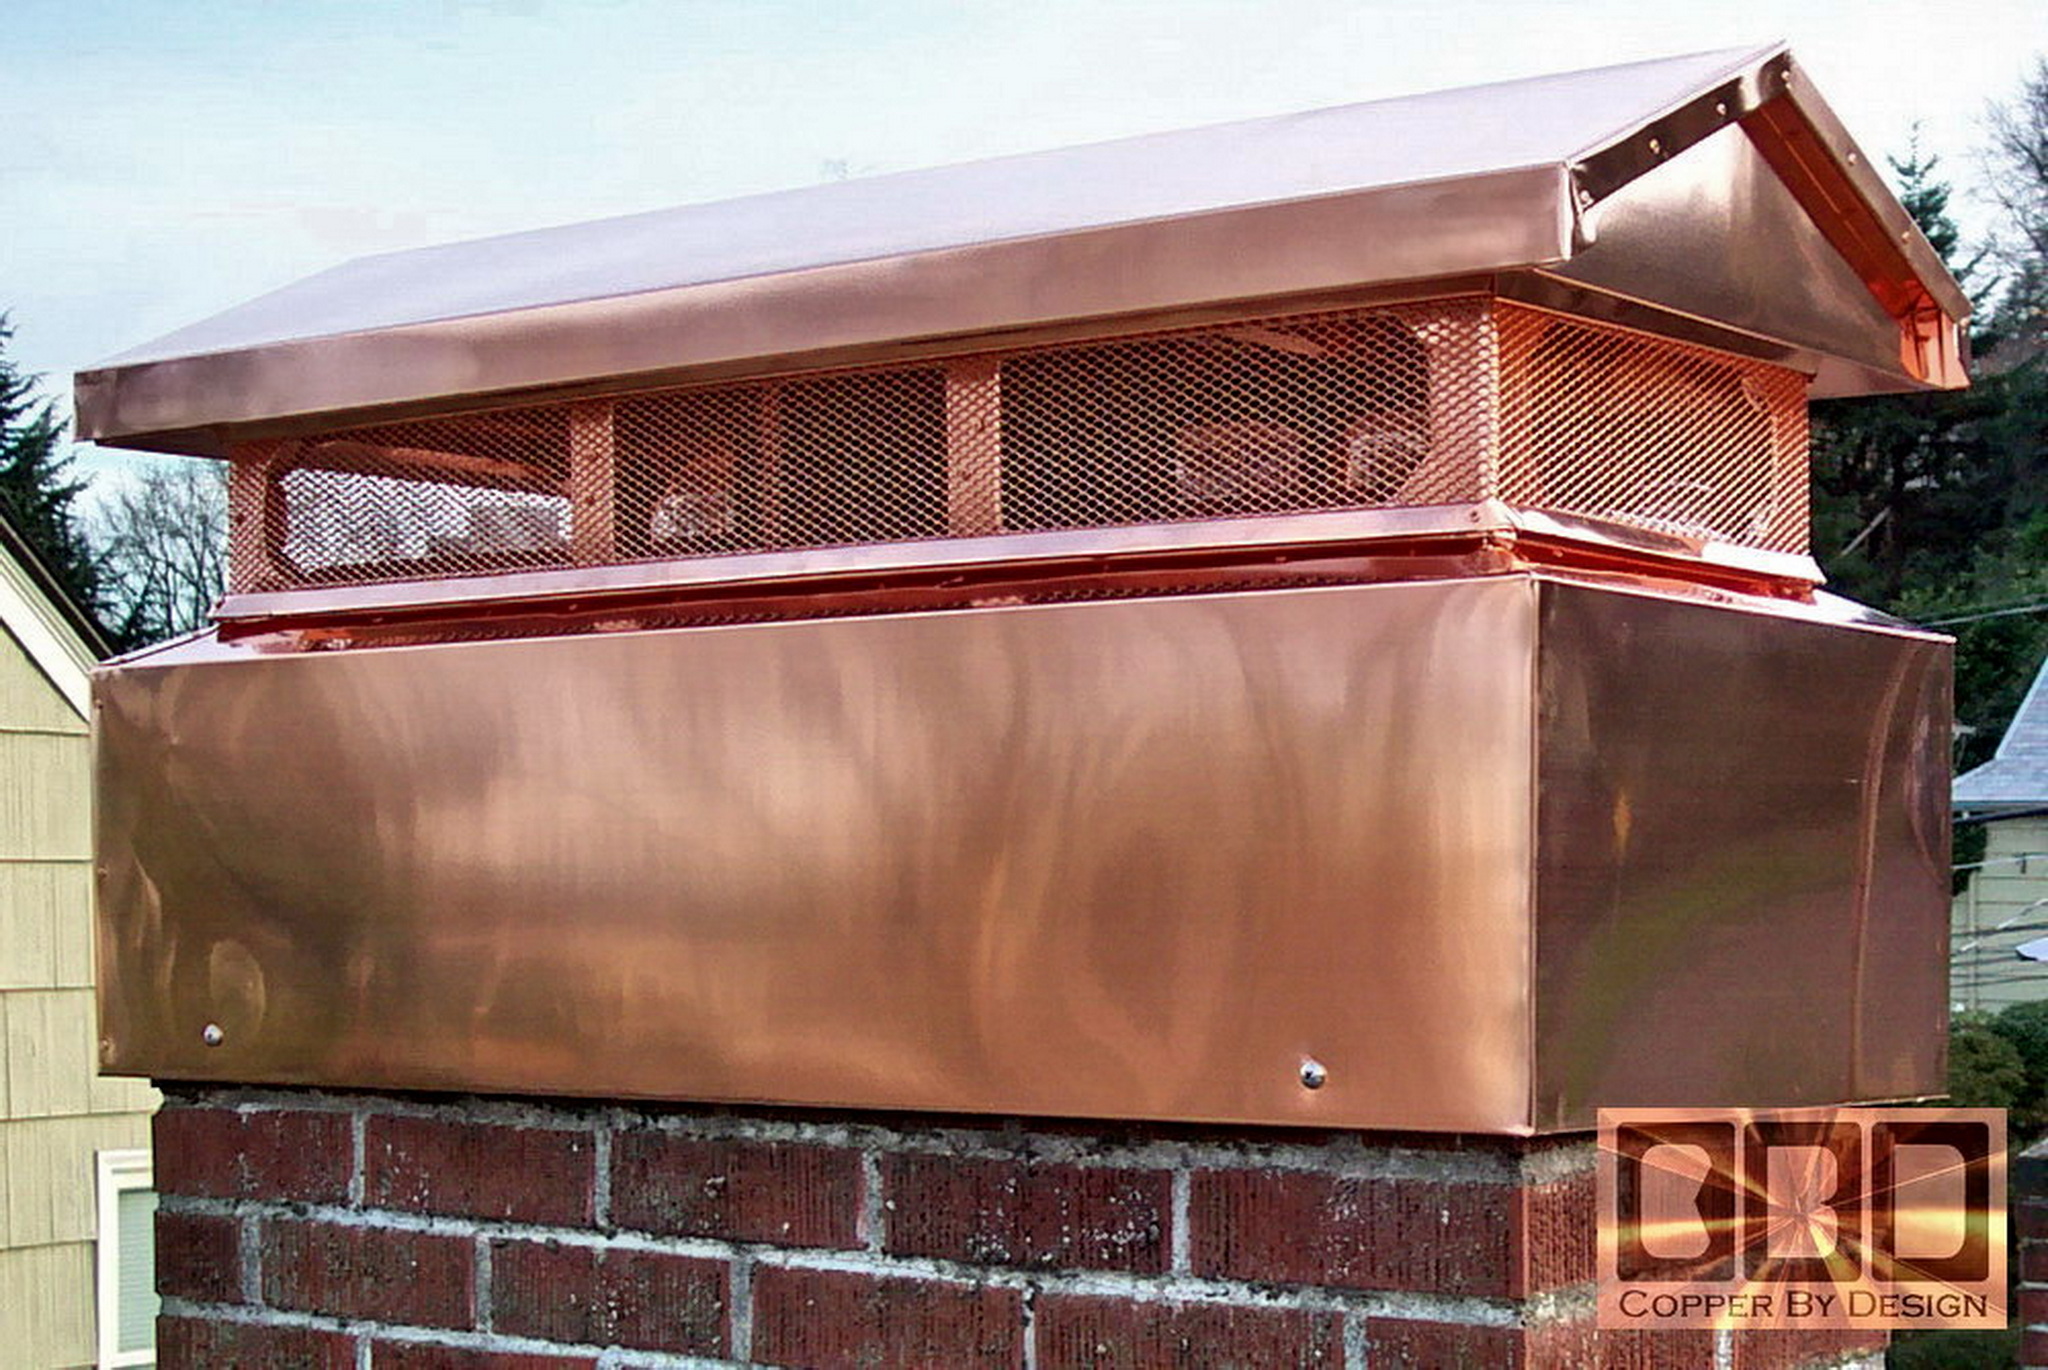
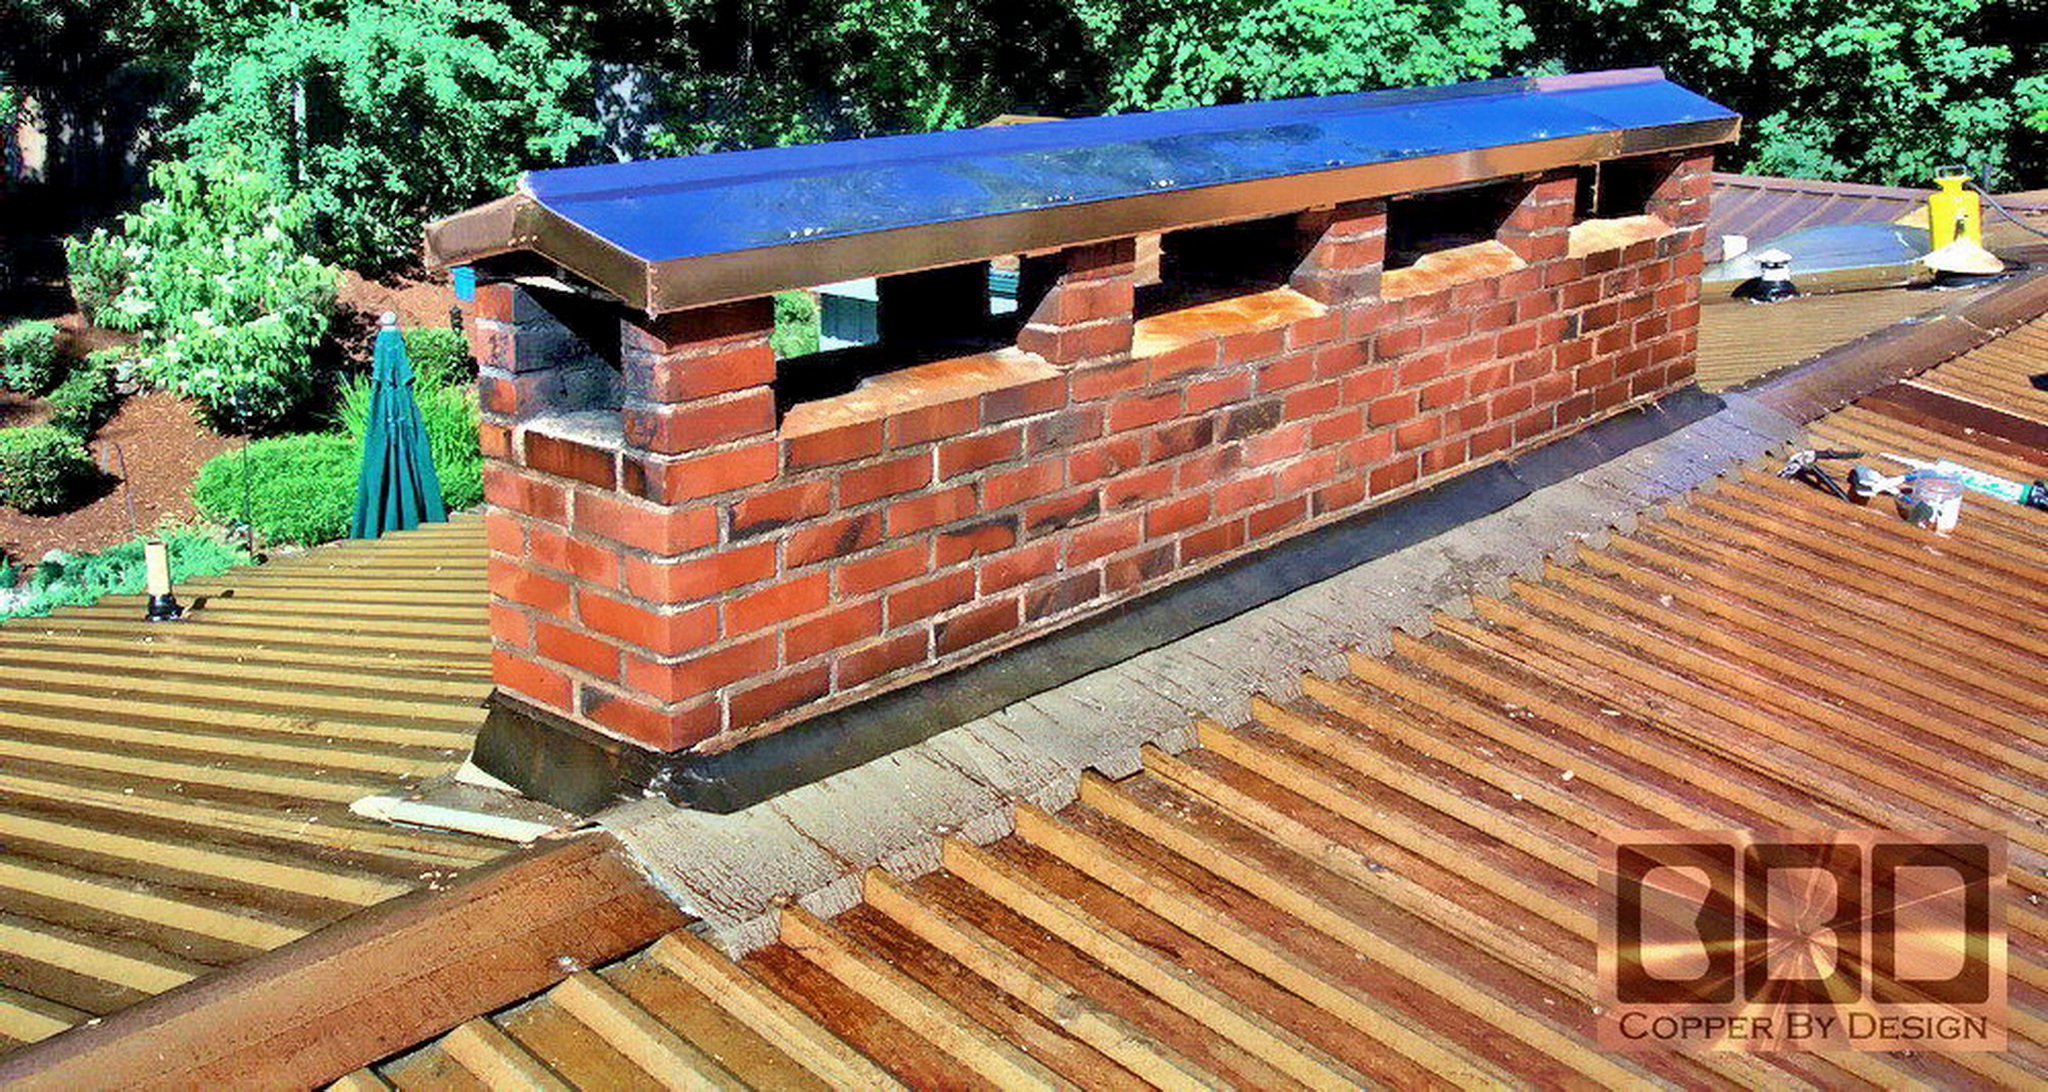
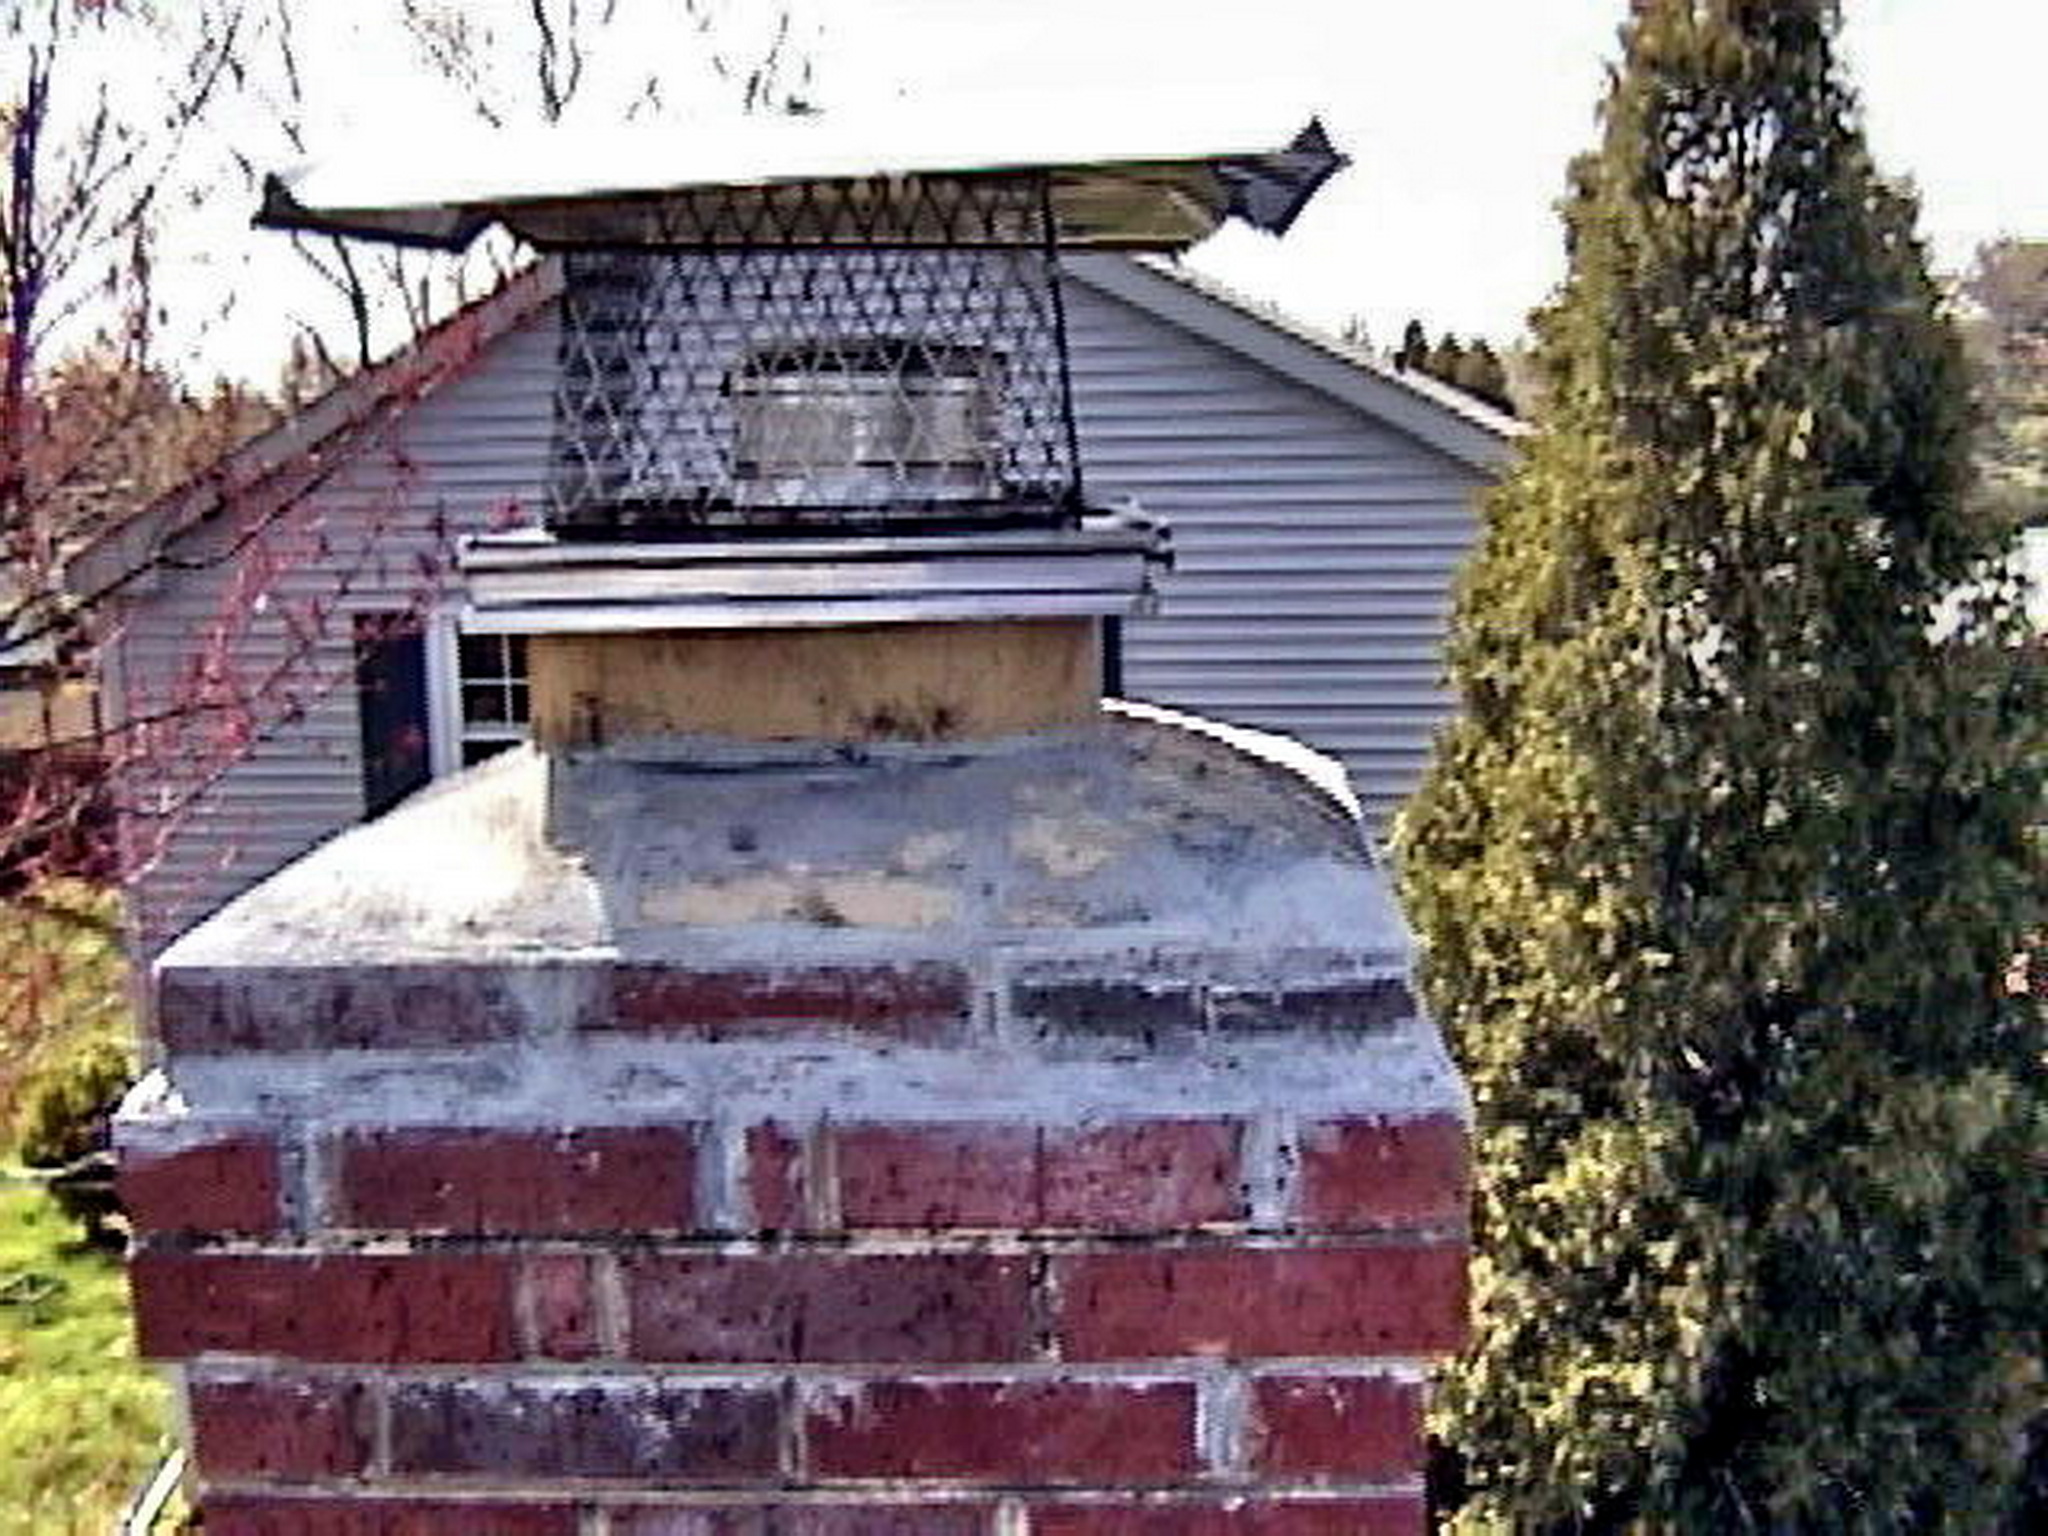
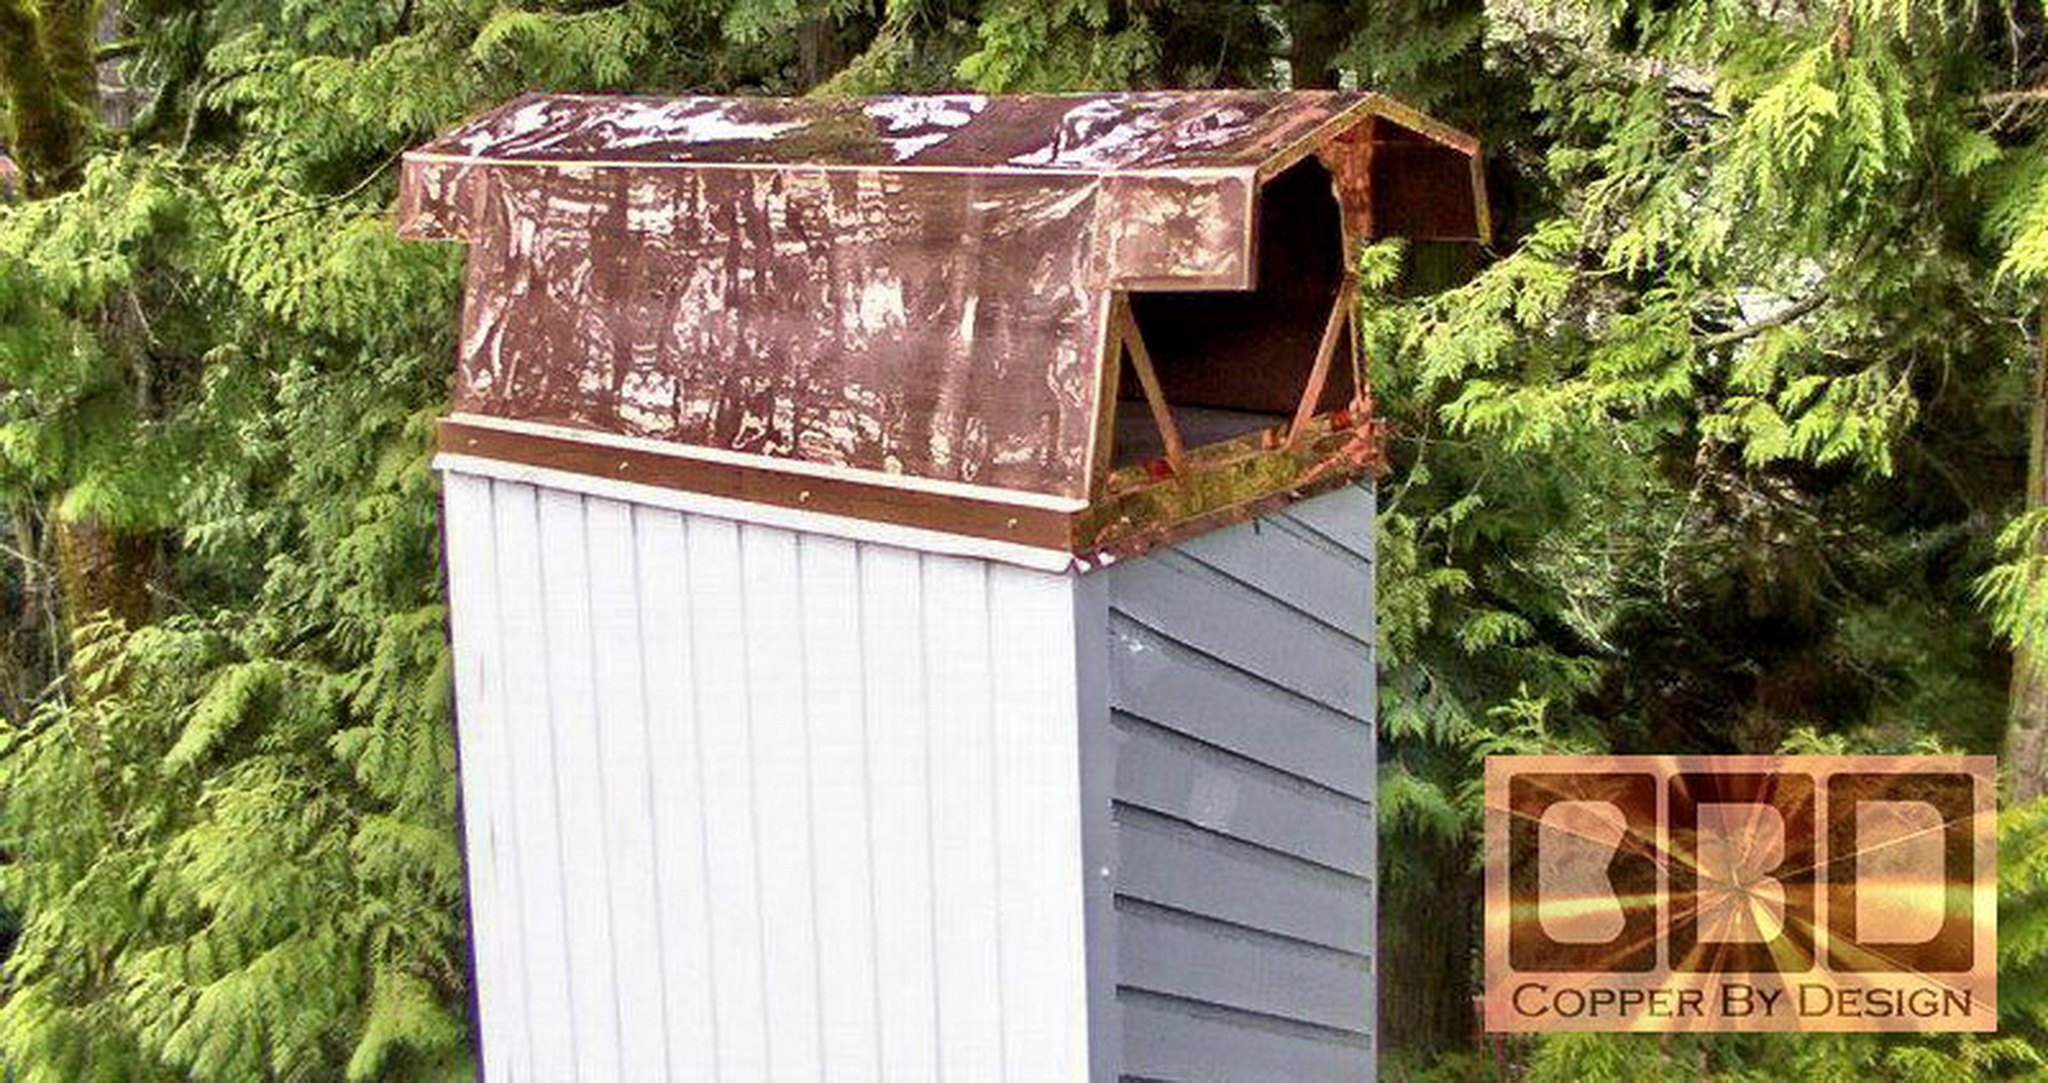
Szakacsy's 20oz Copper Chimney Cap |
  Above is the chimney box I was hired to make a cover for a High School Biology Science Teacher named Doug Szakacsy in Moorpark CA. this was the first chimney cap I was hired to build for and out of State client. He took this picture of these directional caps he had installed a few years ago. As you see they had already begun to rust. He had hired a chimney sweep company to help with the pan rust issue, so they installed this pair of "stainless steel" directional caps, that as you can see turned out not to be stainless steel at all. They clearly did nothing to help with the rust issue of the pan's exposure to the elements and it's staining of everything below it. He needed to remove the directional caps before installing the copper cap we made for him, but the rusty pan needed to stay, since it is supporting the top of the flues. I placed some heavy gaffer's tape inside the cap, so there is no direct contact with the steel pan cover. Doug said he will give the 'new' directional caps to his neighbor. <LOL> |
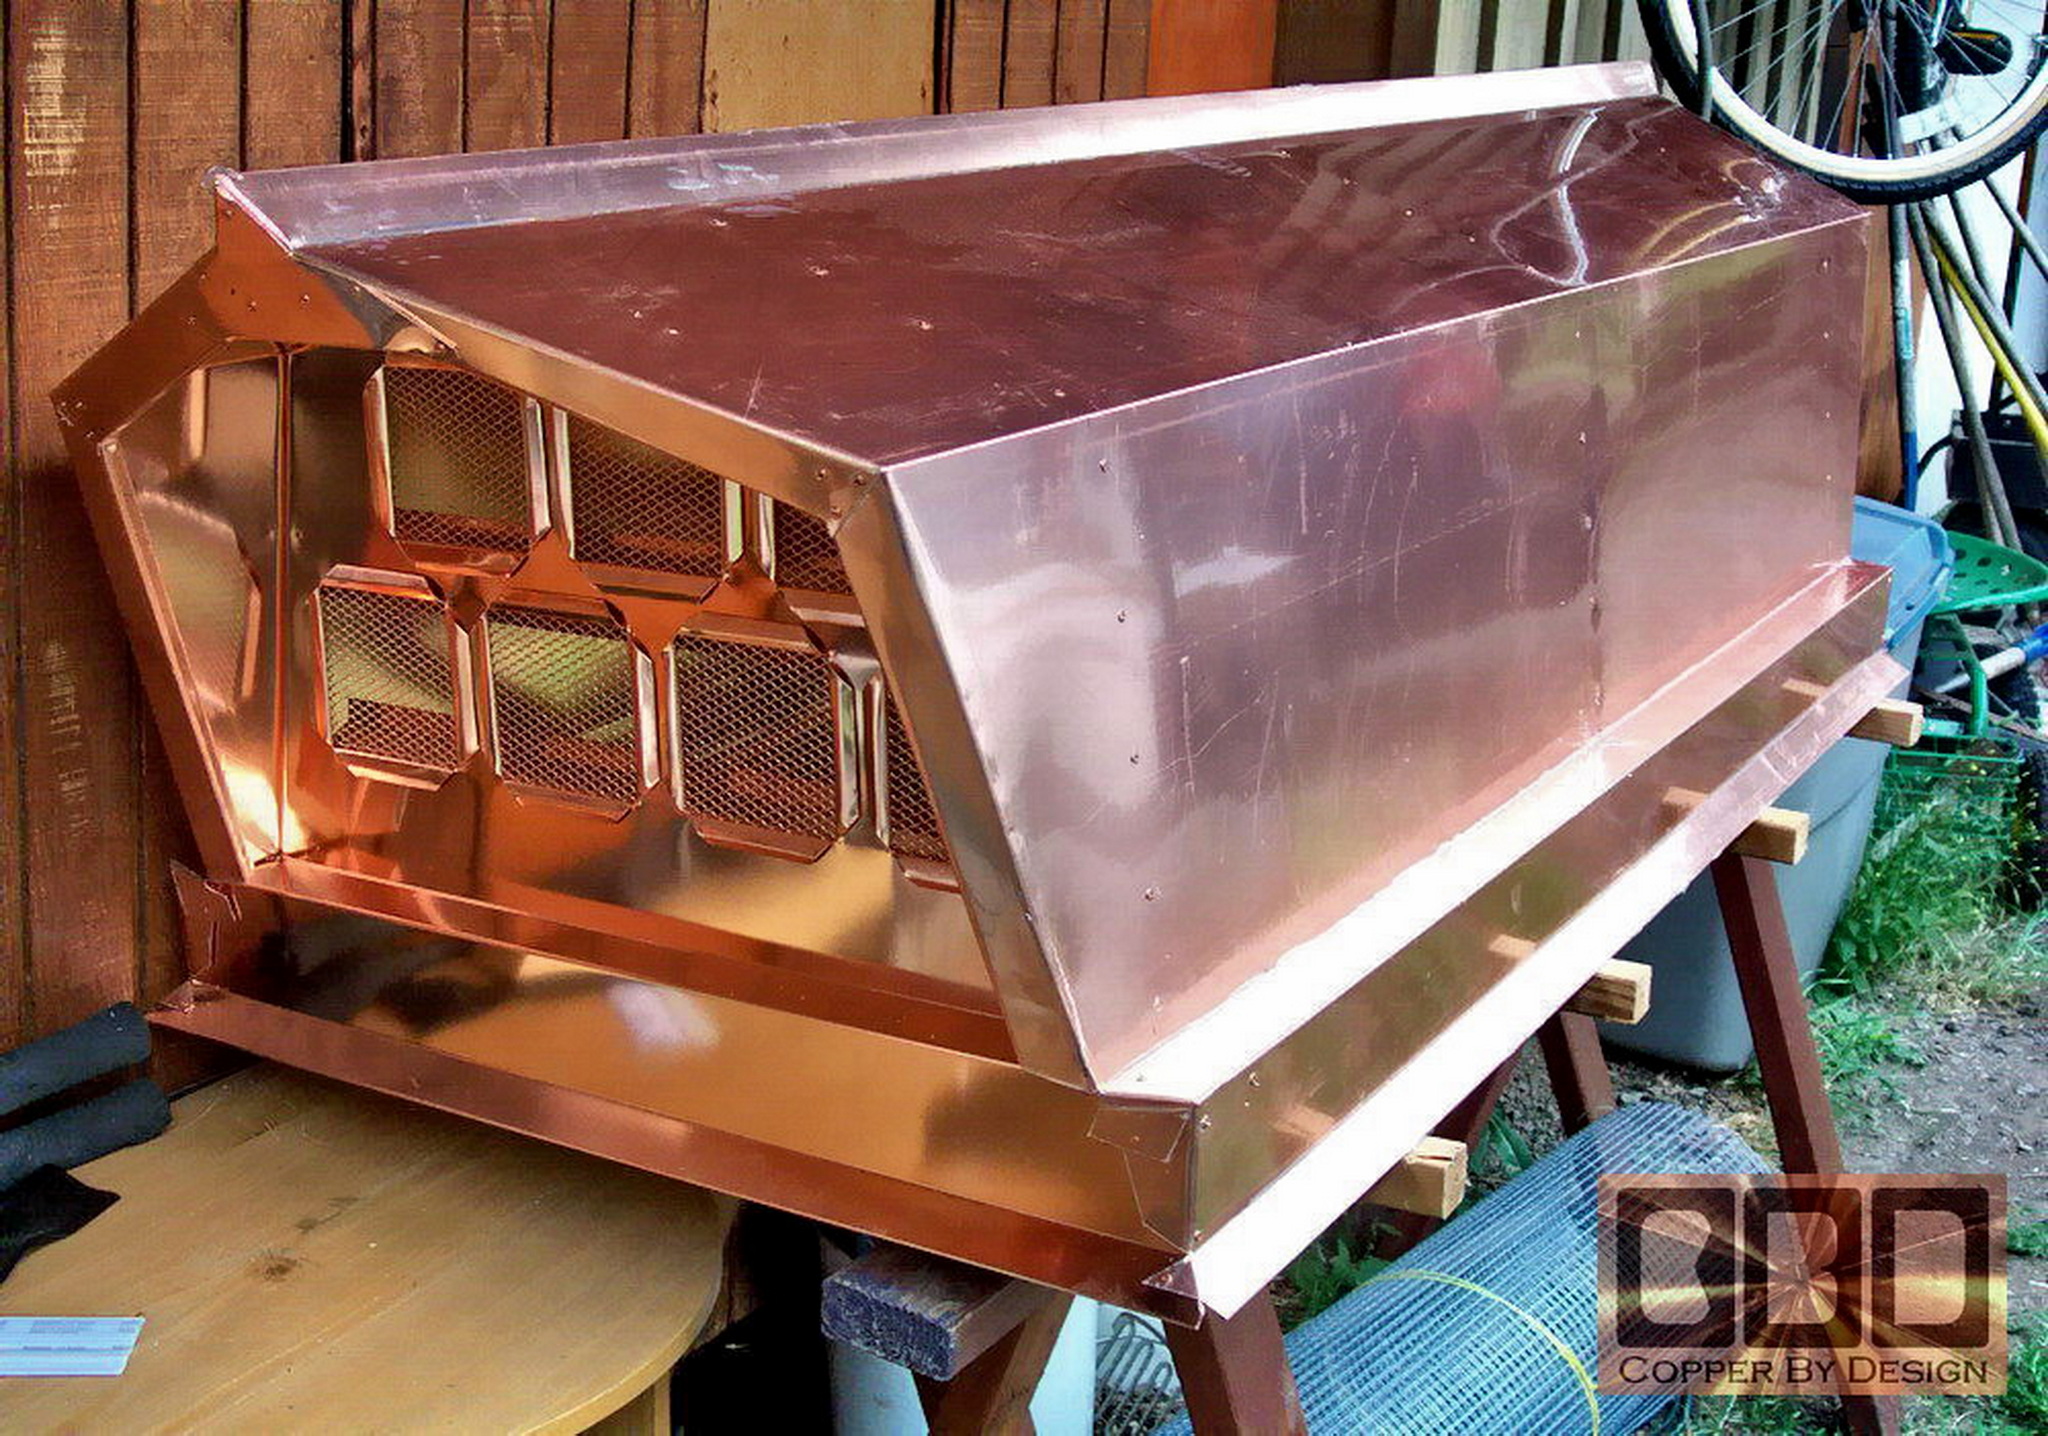 He wanted the ends to have these square screened vents on each end, instead of just being open-ended like the chimney cap shown above. I made 7 screened vents on each end that are 4.5" in diameter, so there is a combined vent area of 141.75 square inches on each end. There is a 2" wide sill all the way around the cap to sit on the steel cover shown above, and it hangs down 3.5" to extend below the steel pan lip. It then has a 1.5" flange drip edge bent at a 45 degree angle along the bottom that has a safety hem bent back inwards for strength and to leave no sharp edges. I also made a center brace to help it hold it's shape. It is very sturdy once fully constructed. It is designed with a 9" over-hang of the base on each end to keep from blowing rain to get inside. |
|
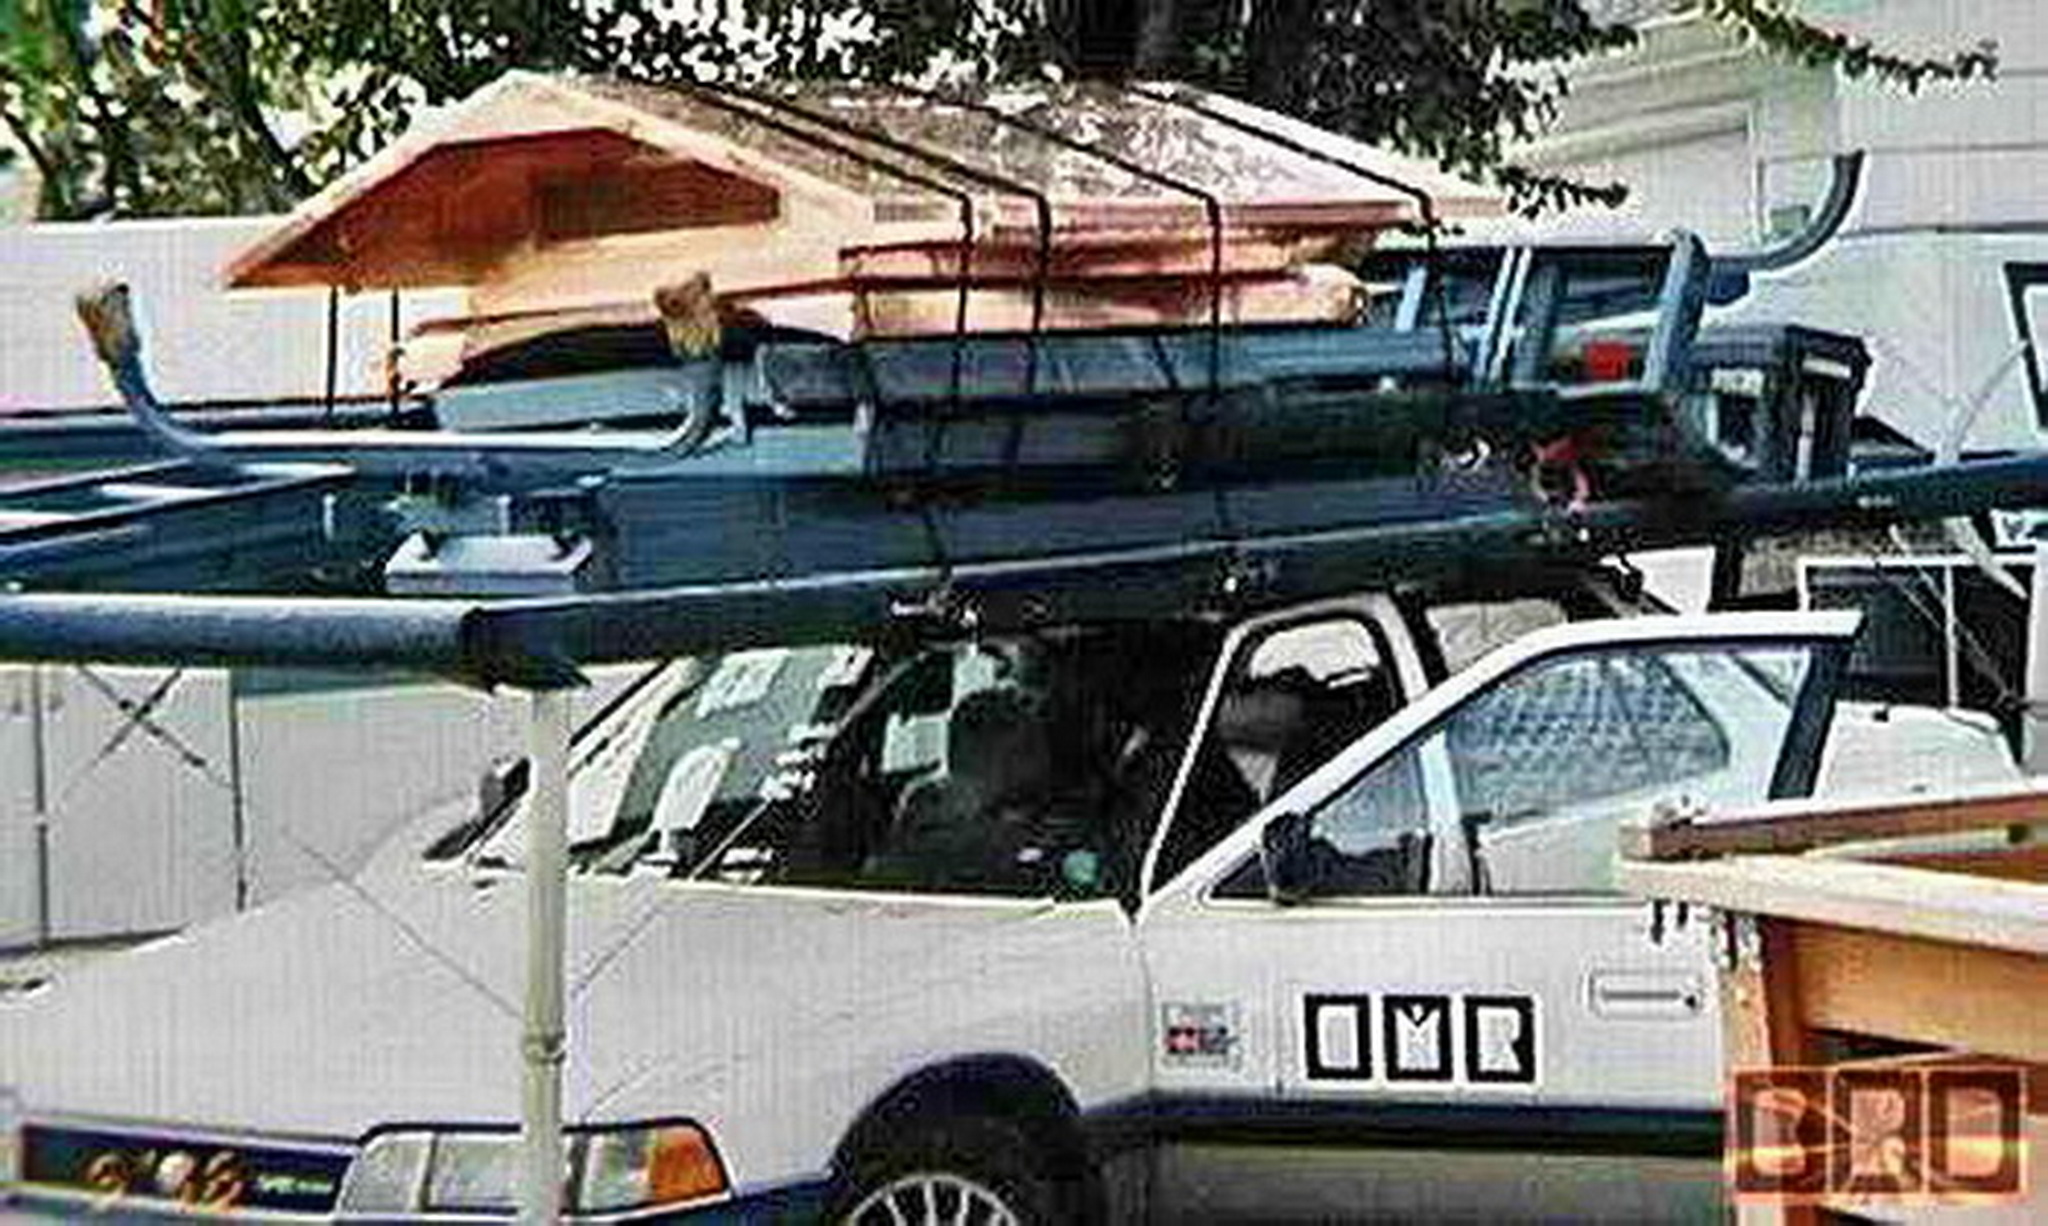
He just happened to have parents who live 100 miles south of us, so he coincided a visit with picking up this cap along with another $800 worth of copper flashing and a vented copper octagonal roof cap. This chimney cap took a good 55 square feet of the 20oz copper I now use, so at the base rate of $25 per square feet, since he is coming here to pick it up, the cost was $1,375 for this copper chimney cap. It weighs about 70lb in all. It still has the protective plastic cover on the long sides that the client will peal off after installation. (client picked it up at our shop) |
.
.
|
The
Tullier Custom 20oz Copper Chimney Cap |
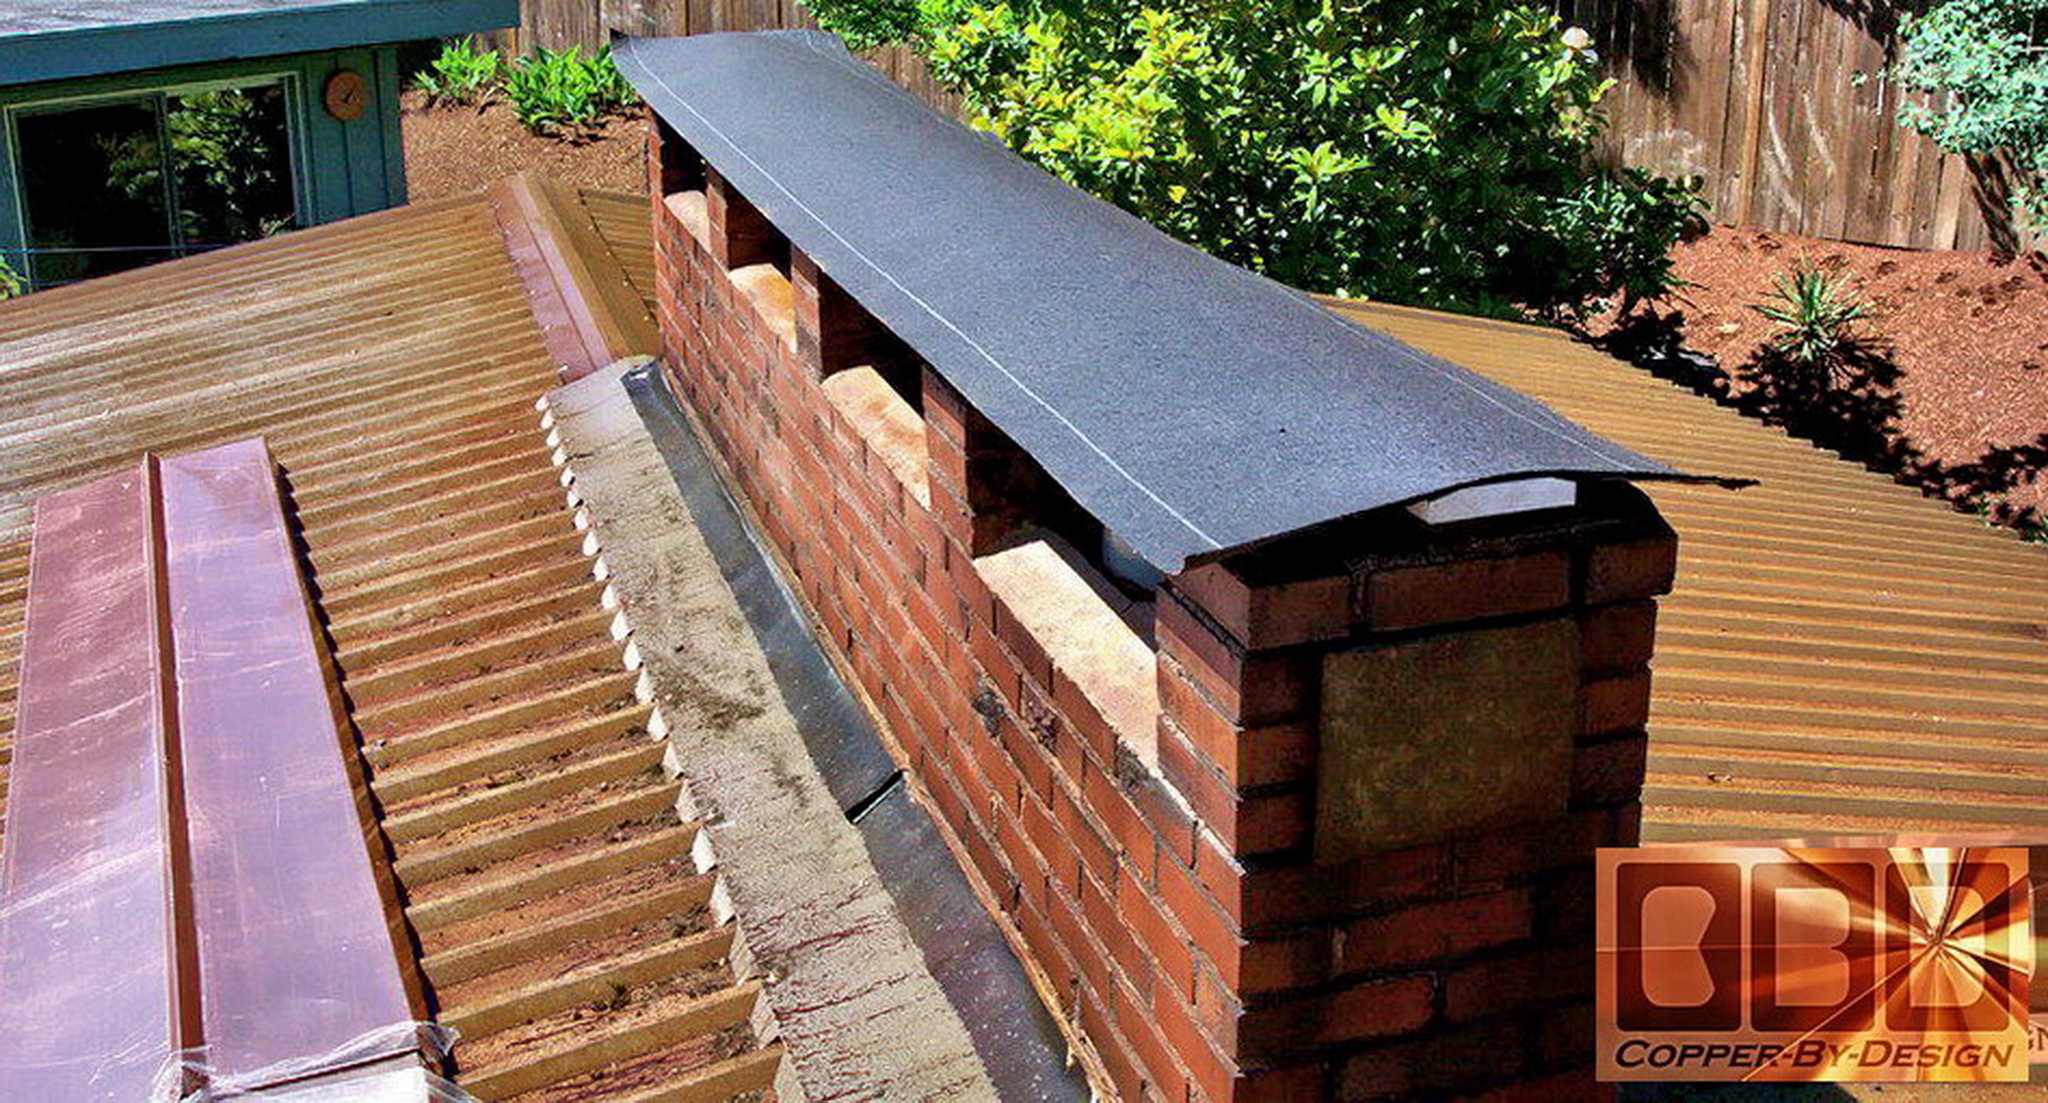
| Here is a copper chimney cap we custom fabricated for a local client: Paul and Sherri Tullier, 1160 N. W. 91, Portland, Oregon 97225. It was needed since the concrete on top was cracking and the steel plates that support the top layer of bricks was rusting and causing terrible rust streaks down the side of the chimney and on their metal roof |
 This
picture shows the preparation for the solid 20oz copper sheet metal
used to fabricate a cap for this this brick chimney cap. This chimney
measures 11' 9" long, and 1' 4.75" wide. This
picture shows the preparation for the solid 20oz copper sheet metal
used to fabricate a cap for this this brick chimney cap. This chimney
measures 11' 9" long, and 1' 4.75" wide.We used a wire brush to scrape off the moss over the chimney top and on the sides. We then treated it with a weather seal chemical. We bevel cut the top side of this pre-primed 12' long 5/4 x 6 spruce to conform to the angle of the copper chimney cap we made. This will support the center, to give the cap a bit of a pitch, so there is not any standing water, and even debris should shed off it. It will also better match the pitch of their metal roof. |
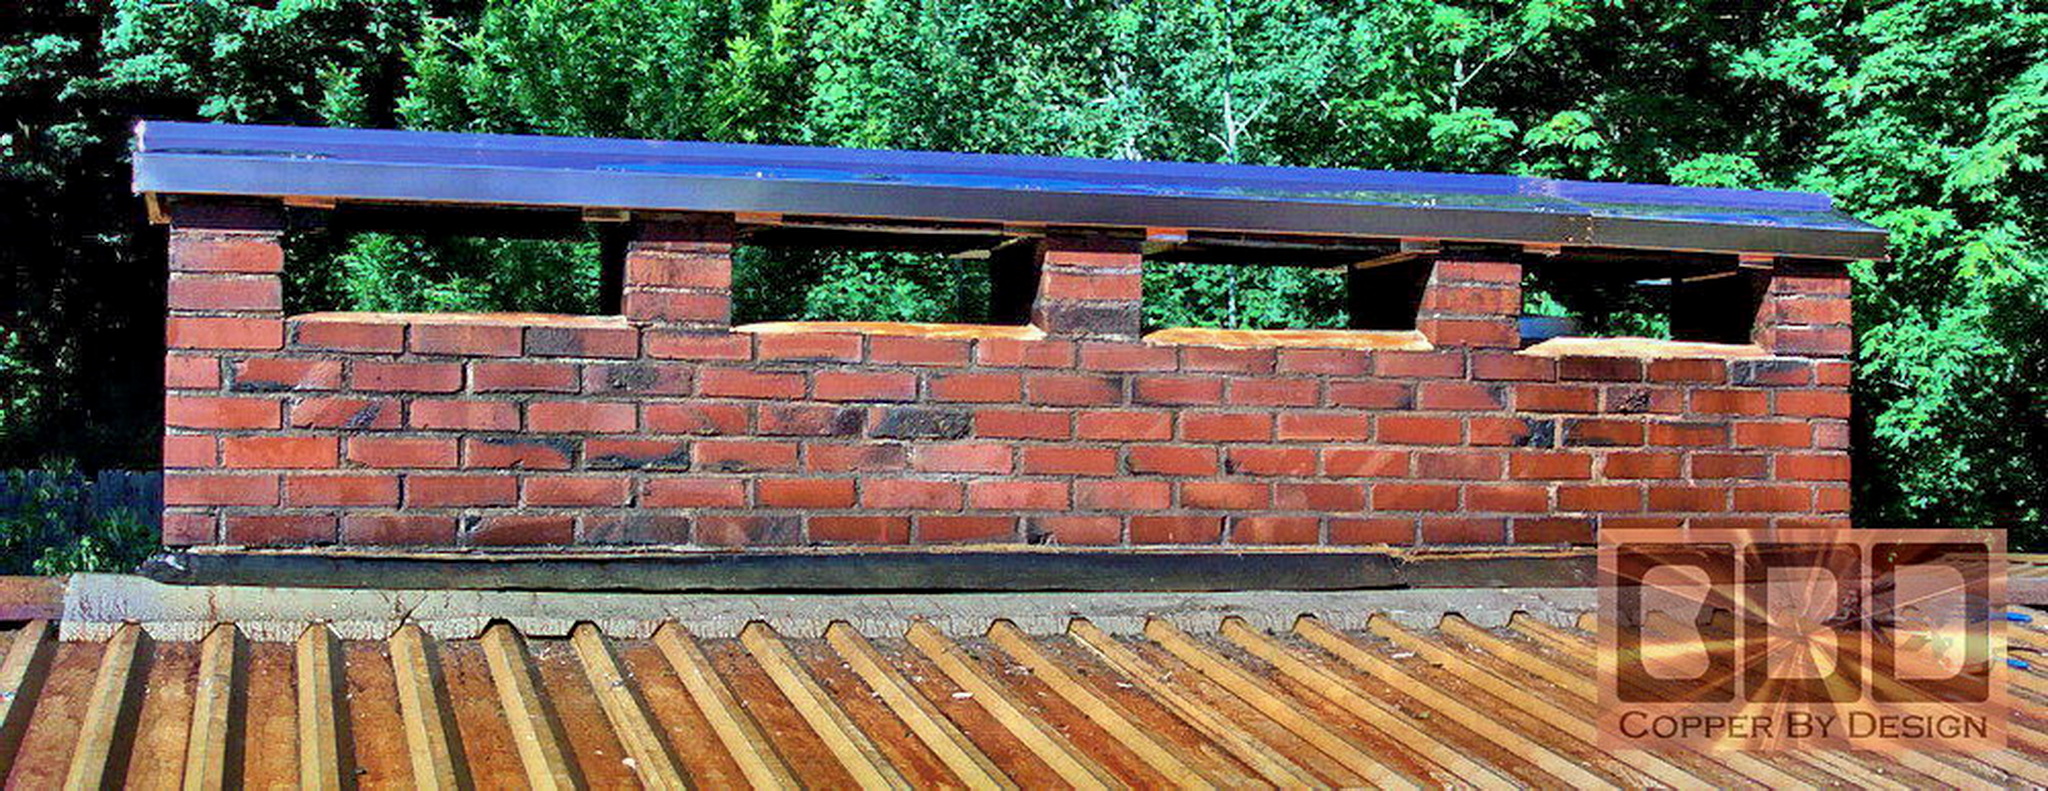
| We then covered the board
and cement with two layers of 30lb saturated roofing felt, to give a
gentle base for the copper to rest on, so there is no chance for the
concrete to chafe the copper from underneath. We stapled it in
place onto the board. We then placed the copper chimney cap on top.
|
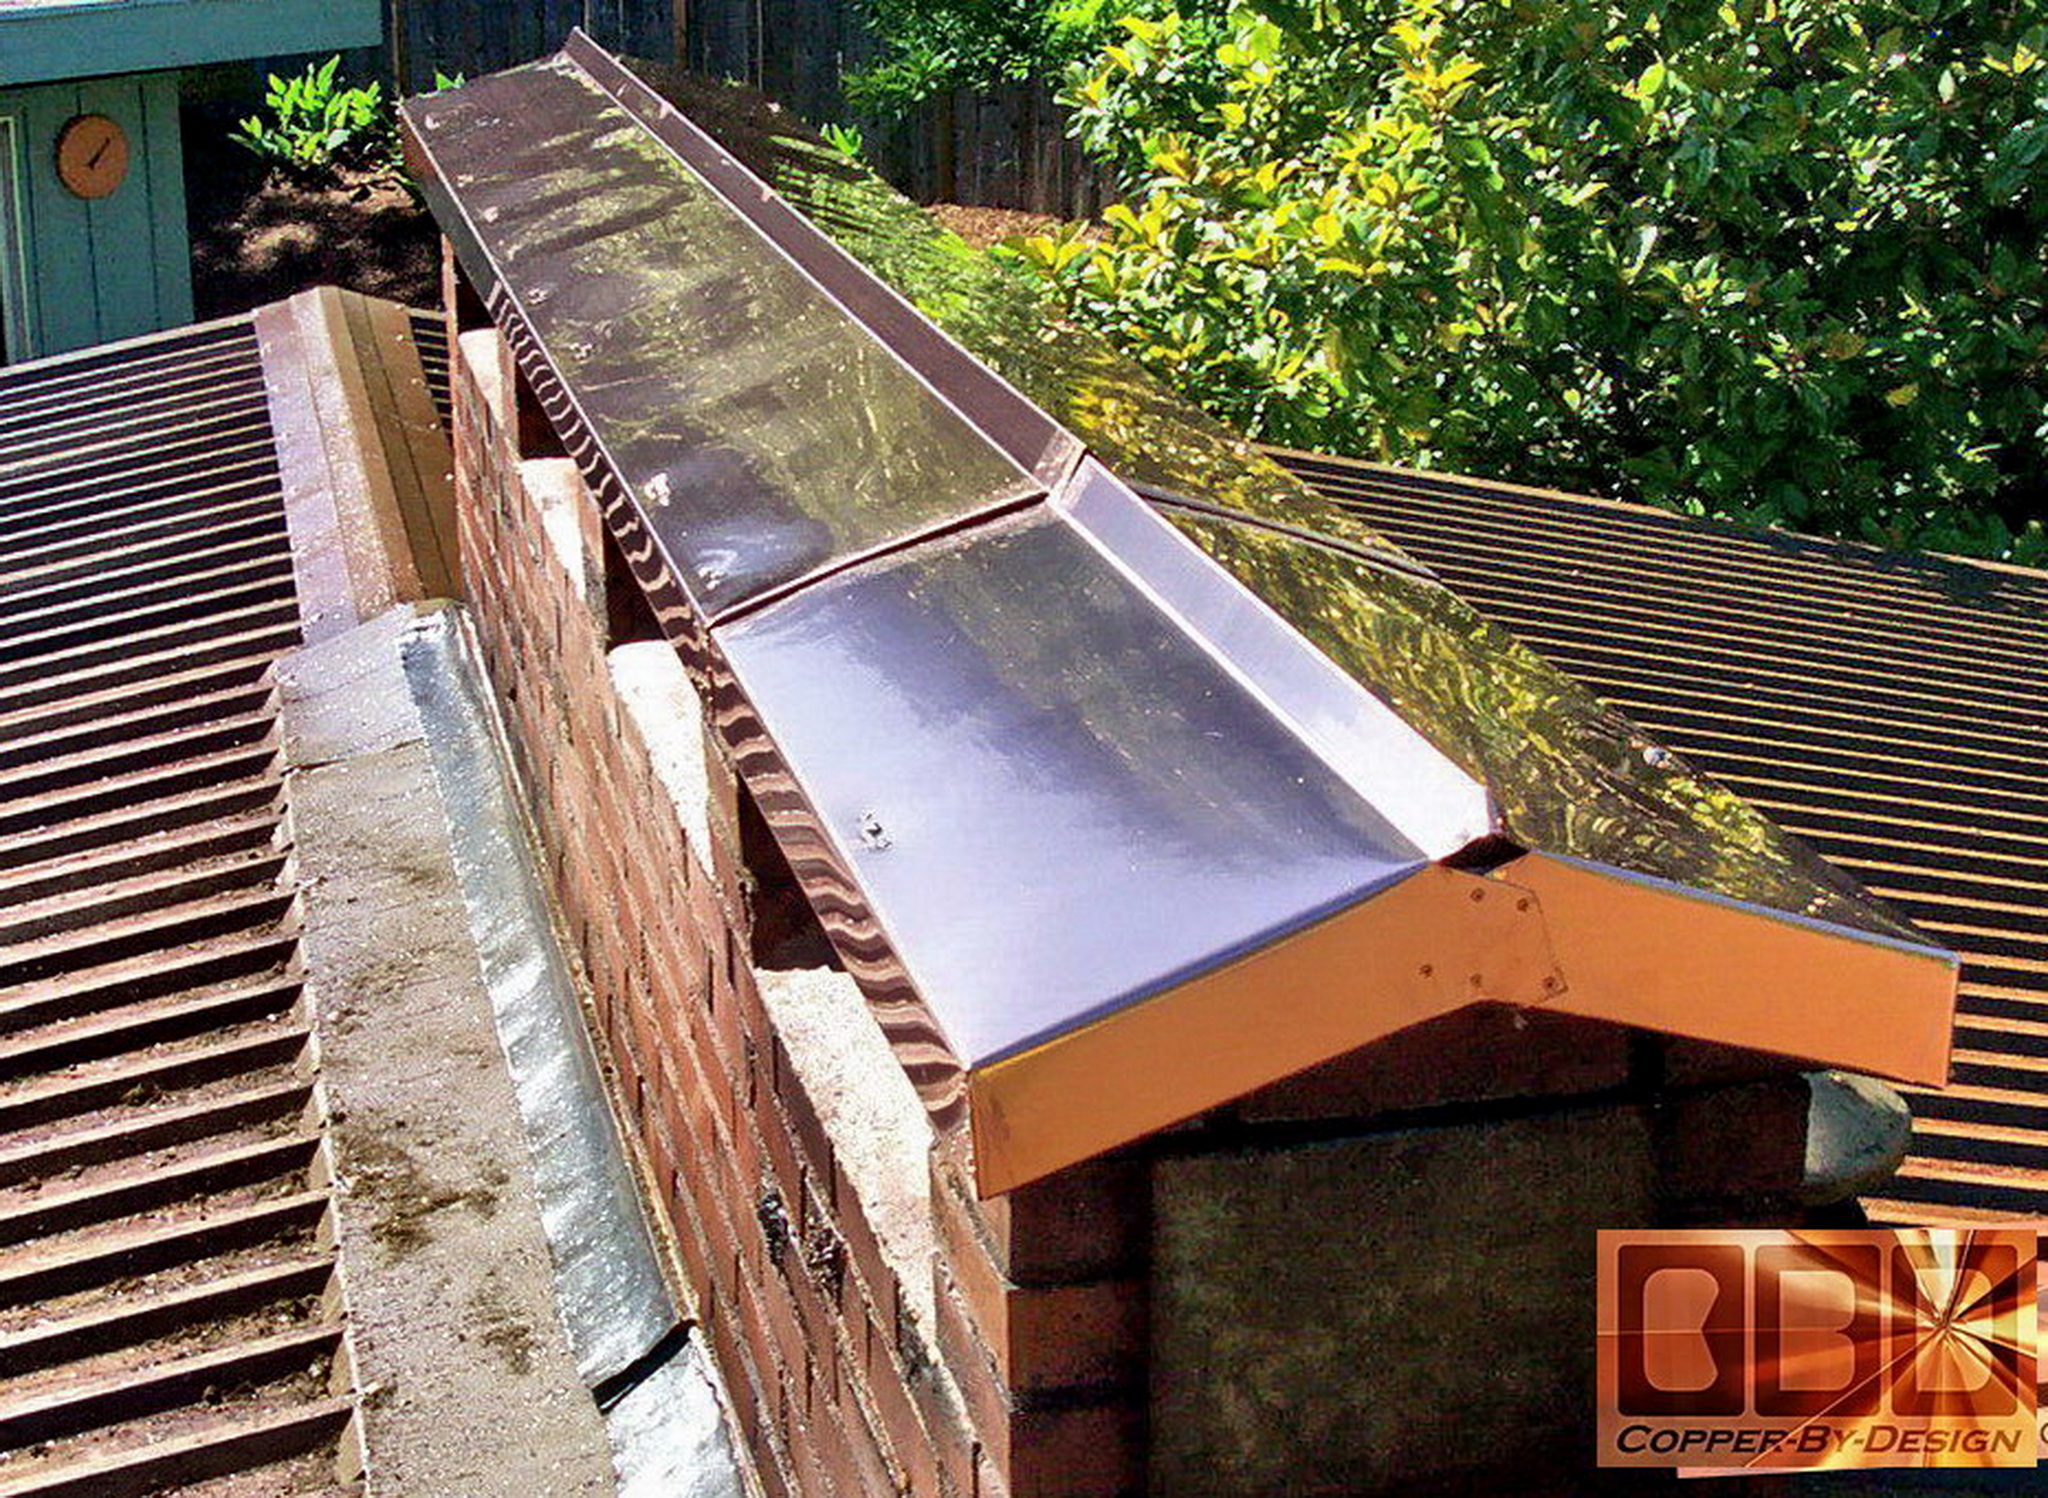
| It took a sheet of copper
that was 29" wide and 10' long, along with another 3' x 29" to finish
the whole length, as it needed to be 12' 3" long, in order to give it
a 3" overhang off each end. The width of the cap is 20.25" once
it was bent into shape for strength. We made 8 - 3.5" wide straps
(shown below)
to go inside each vent you see here to secure the copper cap to the
chimney top.
|
| Since most of the cost
is the fabrication, why not use a metal that will last? The older
caps shown here are made with 16oz copper, but we recently found a source
for solid 20oz copper sheets that are 3' x 10', so there is less need
for any seems and it will be more rigid, as well as heavier, so the
cap will be more stable in high winds. It will add to the cost
of course, but we feel it is well worth the added cost.
The total cost for this 20oz copper chimney cap was only $739.20 installed. The cost was calculated for the 36.96 square feet of 20oz copper to make this chimney cap at only $20 per square foot, since it was such a simple design and had no screened vents. Other than handling such a large sheet of copper to make this long chimney cap, it was not too tricky to make and install. |
.
|
The
Hubanks Custom 24 Gage Stainless Steel Chimney
Flue Cover |
|
To the left you will see the cap we designed and fabricated. We do not have a spot welder, since we rarely work in stainless steel. We had to design it to seal out the rain while just being riveted together, and it had to accommodate the other cap to go over it. The stainless steel is a lot harder to drill through, even though it is a much thinner sheet metal. Below is the 8 part sections that made up this one little cap. |
|
|
.
|
The
Wasserman Custom 16oz Copper Chimney Cap |
|
|
We custom built this simple designed chimney cap in solid 16oz copper and installed it (2-02) for a client: Gary Wasserman 6242 SW Burlingame Ave, Portland, OR 97201.
|
It is to cover their flat galvanized steel pan that covers the wood chimney enclosure shown below, to prevent further rust forming. This way there is not going to be any more standing water on the steel pan. We used copper rivets for assembly, and stainless steel screws to fasten it to the top of the chimney box.
|
.
|
Below are a few more examples of our earlier custom chimney cap work |
|
|
|
|
|
We custom built this chimney cap in solid 16oz copper and installed it in May of 1996. I used copper rivets and stainless steel bolts to fasten it to the top of the 2 flue brick chimney. It represents some of the most demanding work that we do. This went on a house that was built up on the West Hills in Portland Oregon. It is in a high wind area, so we had to make sure it was designed to withstand 100 mph winds, and yet be removable for cleaning the chimney flues. |
|
.
.
|
This was to test if the water was actually getting in from inside the chimney, before they had to go through the expense of getting a chimney cap. It proved to be the case, and it has solved their issue since 1996. Cost break down: Step-flashing: $150, counter-flashing: $475, leak test: $150, chimney cap: $900. $1,675 total. This is the same chimney from a lower side view. It is hard to see in these pictures, but there is a long screened area on each side, as well as the screened holes in the ends. The screens are solid copper as well. They are used to reduce any hot cinder risk and to keep any critters out, including bees. |
|
|
.
|
Here is a single flue chimney. I rebuilt this from the roof line up, as the old one was made out of large cinder blocks and was falling apart. I rebuilt it up about 5 feet high, along with the needed shingle repair, step-flashing, counter flashing, and a simple but cute cap I made. The flashing and cap were made with a clay red pre-painted aluminum. The chimney was only used now for natural gas, so the heat requirements are a lot less. It was out in Sandy, Oregon. |
|
.
|
This house is in Southeast Portland, Oregon.
This is a custom chimney cover I made, after I had rebuilt the chimney
from the roof line up, some 10+ feet. Because it was so tall and
narrow, I installed this galvanized pipe as a brace, mortared in through
the center of the chimney to the other side, with a flange screwed onto
the outside. It has a steep roof with it, and the basic rule is that
the top of the chimney needs to be 2 feet higher than any roof area
that is less than 10 feet away. I corrected this issue, as well as fixing the problem of it being ready to fall down. Instead of just mortaring the top, like all the other brick masons, we topped it off with this clay red painted aluminum sheet metal. It has cement filling it, and screws mortared in to keep it in place. We quickly installed it before the cement set. The cement is formed near the shape of the cap, and then the cap is pressed and tapped onto it for a tight fit, so the cement fills into each crevice of the cover. |
It also has the advantage of giving the chimney a real working drip edge. It has galvanized screws pressed into holes drilled into the center section, and driven into the cement. this way the cap cannot blow off in high wind.
This one to the right is on a house in West Linn. I can also make this cap in copper as well. This chimney is only used for this thin walled aluminum flex pipe for natural gas venting, so high heat is not an issue. |
.
.
|
On to Chimney Caps page 2 Or back
to |
.
|
Below is a
photo of our |
|
|
|
We were also a 1997 finalist for this same award. See our referral web page to see how we managed to be honored with this special award |
 Homepage |
.
|
|
Company Profile |
|
Roof Caps |
|
Chimney Caps |
|
Scuppers |
|
Gutters |
|
Shipping |
|
Contact Info |
.
.
.
.
.
.
..
.
.
.
.


 Here
is a 2 flue chimney in the windy city of
Here
is a 2 flue chimney in the windy city of